de gb es frullatore nutrition mixer snm 700 a1 · peligro para los niños ~el material de embalaje...
TRANSCRIPT

HOYE
R Ha
ndel
Gm
bHTa
sköp
rüstr
aße
3
DE-
2276
1 H
ambu
rg
DEU
TSC
HLA
ND
Esta
do d
e la
s in
form
acio
nes
· Sta
tus
of in
form
atio
n · S
tand
der
Info
rmat
ione
n:
IAN
307
629
IAN
307
629
10/2
018
I
D: S
NM
700
A1_
18_V
1.3
ESGB
DE
FRU
LLA
TORE
NU
TRIT
ION
MIX
ER S
NM
700
A1
BATI
DO
RA S
NM
700
A1
ES
NU
TRIT
ION
-MIX
ERBe
dien
ungs
anle
itung
DE
ATCH
BATI
DO
RAIn
struc
cion
es d
e se
rvic
io
ES
NU
TRIT
ION
MIX
ERO
pera
ting
instr
uctio
ns
GB

Español.................................................................................... 2
English ................................................................................... 14
Deutsch.................................................................................. 26

Vista general / Overview / Übersicht
8 9
71 2 5
10
4
B
5-7
8/9
1
10
5-7
13
A
C E
3
3 4
13
12
12
11
6
D
10
5-7
5-7

2 ES
Indice1. Vista general ..................................................................................22. Uso adecuado.................................................................................33. Indicaciones de seguridad...............................................................44. Volumen de suministro ...................................................................65. Puesta en servicio...........................................................................66. Uso.................................................................................................7
6.1 Accesorios ......................................................................................... 76.2 Preparación de los alimentos................................................................ 76.3 Mezclar/triturar.................................................................................. 76.4 Triturar cubitos de hielo ....................................................................... 86.5 Beberlos de inmediato......................................................................... 86.6 Conservación ..................................................................................... 86.7 Protección contra el sobrecalentamiento ................................................ 8
7. Limpieza.........................................................................................98. Conservación ..................................................................................99. Eliminación ...................................................................................1010. Solución de problemas..................................................................1011. Datos técnicos...............................................................................1112. Garantía de HOYER Handel GmbH................................................11
1. Vista general1 Unidad básica2 Soportes de ventosa3 Guardacable4 Cable de conexión con enchufe5 Vaso (grande, mín. 150 ml – máx. 800 ml)6 Vaso (mediano, mín. 150 ml – máx. 500 ml)7 Vaso (pequeño, mín. 150 ml – máx. 200 ml)8 Accesorio con cuchillas en forma de cruz9 Accesorio con cuchillas planas10 Tapa "to go" (2x) y tapa de conservación (1x)11 Abertura para beber12 Cierre para beber13 Saliente (3 en cada vaso)
sin ilustración: 14 Recetario

3ES
¡Muchas gracias por su confianza!Le felicitamos por haber adquirido esta ba-tidora nutricional.
Para un manejo seguro del aparato y para conocer todas sus prestaciones:
• Antes de poner en marcha el aparato por primera vez, lea este manual de instrucciones de-tenidamente.
• ¡Sobre todo, siga las indicacio-nes de seguridad!
• El aparato solo se debe emplear de la manera descrita en este manual de instrucciones.
• Conserve este manual de instruc-ciones.
• En caso de que entregue este aparato a otras personas, adjun-te el manual de instrucciones. El manual de instrucciones forma parte del producto.
¡Esperamos que disfrute de su nueva batido-ra nutricional!
Símbolo en el aparatoEste símbolo indica que los materia-les señalados de esta forma no alte-ran el sabor ni el olor de los alimentos.
2. Uso adecuadoLa batidora nutricional está …
… para mezclar bebidas de frutas ente-ras (batidos) y para triturar cubitos de hielo. Para ello utilice el accesorio con cuchillas en forma de cruz 8.
… para triturar alimentos sólidos (p. ej., nueces). Para ello utilice el accesorio con cuchillas planas 9.
El aparato está concebido para el uso do-méstico. El aparato solo deberá utilizarse en el interior.Este aparato no es apto para el uso indus-trial.
Posible uso indebido
¡ADVERTENCIA sobre daños mate-riales!
Antes del proceso de mezcla, deberán retirarse las pieles gruesas o duras (p. ej., de los cítricos o la piña) y los ta-llos y semillas de las frutas de hueso (p. ej., cerezas, melocotones, albarico-ques).El aparato no debe utilizarse para tritu-rar alimentos especialmente duros co-mo, p. ej., huesos o nueces moscadas.

4 ES
3. Indicaciones de seguridad
Indicaciones de advertenciaEn este manual de instrucciones encontrará las siguientes indicaciones de advertencia:
¡PELIGRO! Riesgo elevado: la no observación del aviso puede causar lesiones mortales.
¡ADVERTENCIA! Riesgo medio: la no ob-servación del aviso puede causar lesiones o daños materiales graves.PRECAUCIÓN: riesgo reducido: la no ob-servación del aviso puede causar lesiones o daños materiales leves.NOTA: circunstancias y particularidades que se deben tener en cuenta al usar el apa-rato.
Instrucciones para un manejo seguroLos niños no deben utilizar este aparato.Los niños no deben jugar con el aparato.El aparato y su cable de conexión deben mantenerse fuera del al-cance de los niños.Este aparato puede ser utilizado por personas con las capacida-des físicas, sensoriales o mentales disminuidas o que carezcan de la experiencia y/o los conocimientos necesarios, bajo supervisión o habiendo recibido las instrucciones oportunas para el uso seguro del aparato y siendo conscientes del peligro de un uso incorrecto.Si el cable de conexión de red del aparato presenta desperfectos, deberá ser sustituido únicamente por el fabricante, el servicio pos-venta u otras personas igualmente cualificadas, para evitar peli-gros.Este aparato no está concebido para funcionar con un temporiza-dor externo o con un sistema de control remoto separado.Saque el enchufe de la toma de corriente, …… si no hay supervisión,… antes de montar o desmontar el aparato y… antes de limpiarlo.Lave los insertos de cuchillas, los vasos y las tapas con agua tem-plada y detergente lavavajillas, o bien en el lavavajillas.Las cuchillas del accesorio están muy afiladas. Manéjelas con cui-dado. El uso indebido de este aparato puede provocar lesiones.

5ES
Las cuchillas del accesorio están muy afiladas. Manéjelas con cuidado. Si las lava a mano, deberá utilizar agua clara para poderlas ver fácilmente.
PELIGRO para los niñosEl material de embalaje no es ningún ju-guete. Los niños no deben jugar con las bolsas de plástico. Existe peligro de as-fixia.Asegúrese de que los niños no puedan sacar el aparato de la superficie de tra-bajo tirando el cable de conexión.Guarde el aparato fuera del alcance de los niños.
PELIGRO para y debido a los animales de compañía y de granja
Los aparatos eléctricos pueden presen-tar peligros para los animales de com-pañía y de granja. Además, los animales también pueden ocasionar daños en el aparato. Por ello, como re-gla general mantenga a los animales alejados de los aparatos eléctricos.
PELIGRO de descarga eléctrica debido a la humedad
No utilice nunca el aparato cerca de bañeras, duchas, lavabos llenos de agua o sitios similares.La unidad de motor, el cable de cone-xión y el enchufe no se pueden sumer-gir en agua ni en ningún otro líquido.Proteja la unidad de motor, el cable de conexión y el enchufe de la humedad y de las gotas o las salpicaduras de agua.Si penetra algún líquido en la unidad de motor, extraiga de inmediato el enchufe. Haga revisar el aparato antes de volver a utilizarlo de nuevo.No toque el aparato con las manos mo-jadas.
Si el aparato cae al agua, desenchúfelo inmediatamente. A continuación, saque el aparato del agua.
PELIGRO de descarga eléctrica
Introduzca el enchufe en la toma de co-rriente solo cuando el aparato esté com-pletamente montado.Conecte el enchufe sólo a una toma de corriente correctamente instalada y fá-cilmente accesible y cuya tensión co-rresponda a la especificación indicada en la placa de características. La toma de corriente debe seguir siendo fácil-mente accesible tras la conexión.Asegúrese de que el cable de conexión no resulte dañado por cantos vivos o su-perficies calientes. No enrolle el cable de conexión alrededor del aparato. Incluso una vez apagado, el aparato no está completamente desconectado de la red. Para ello, extraiga el enchufe de la toma de corriente.Durante el uso del aparato, vigile que no se presione ni se aplaste el cable de conexión.Para extraer el enchufe de la toma de corriente, tire siempre de la clavija, nun-ca del cable.Saque el enchufe de la toma de corrien-te, …… si se produce una avería,… cuando no utilice la batidora nutri-
cional,… en caso de tormenta.No utilice el aparato si éste o el cable de conexión presentan daños visibles.Para evitar peligros, no realice ninguna modificación en el aparto.

6 ES
PELIGRO de lesiones por cortes
Las cuchillas del accesorio con cuchillas siguen girando después de desconectar el aparato. Espere a que dejen de girar para quitar el vaso.El aparato no debe utilizarse nunca sin el vaso.
ADVERTENCIA sobre daños materiales
¡El accesorio con cuchillas planas no se puede utilizar para líquidos!Antes del proceso de mezcla, deberán reti-rarse las pieles gruesas o duras (p. ej., de los cítricos o la piña) y los tallos y semillas de las frutas de hueso (p. ej., cerezas, me-locotones, albaricoques).No introduzca ingredientes en el vaso que sobrepasen la temperatura de 85 °C.Para evitar daños en el aparato, inte-rrumpa inmediatamente el proceso de mezcla si las cuchillas del accesorio con cuchillas no giran o lo hacen con dificultad. Desenchufe el aparato y compruebe si hay algún obstáculo en el vaso o si los alimentos son demasiado duros. Compruebe también que el apa-rato esté correctamente montado.No utilice el aparato con los vasos va-cíos, porque el motor podría sobreca-lentarse y estropearse.Utilice el aparato solo si en el vaso se ha enroscado un accesorio con cuchillas.El aparato ha sido diseñado para un uso continuo sin interrupción máximo de 60 segundos. Seguidamente hay que desconectar el aparato hasta que se enfríe y alcance la temperatura am-biente.Utilice solo los accesorios originales.El aparato (unidad básica, cable de co-nexión con enchufe) no se puede lavar en el lavavajillas. No utilice detergentes abrasivos o que produzcan arañazos.
El aparato descansa sobre ventosas de plástico antideslizantes. Dado que los muebles están recubiertos con una gran variedad de lacas y plásticos, y que se tratan con diferentes productos de con-servación, puede que algunos de esos materiales contengan componentes que ataquen y reblandezcan los soportes de ventosa de plástico. En caso necesario, coloque debajo del aparato una base de apoyo antideslizante.
4. Volumen de suministro
1 unidad básica 11 vaso grande 5
(mín. 150 ml – máx. 800 ml)1 vaso mediano 6
(mín. 150 ml – máx. 500 ml)1 vaso pequeño 7
(mín. 150 ml – máx. 200 ml)1 accesorio con cuchillas 8 en forma de
cruz1 accesorio con cuchillas 9 (cuchillas
planas)2 tapas "to go", 1 tapa de conserva-
ción 101 recetario 141 manual de instrucciones
Desembalaje1. Saque todas las piezas del embalaje.2. Compruebe que estén todas las piezas
y que no estén dañadas.
5. Puesta en servicio• Retire todo el material de embalaje.• Compruebe que estén todas las piezas
y que no presenten daños.• ¡Limpie el aparato antes de utili-
zarlo por primera vez! (véase “Lim-pieza” en la página 9)
• Desenrolle la longitud de cable desea-da del guardacable 3 situado en la parte inferior del aparato.

7ES
• Coloque el aparato sobre una superfi-cie seca, lisa y antideslizante.
6. Uso
¡PELIGRO de descarga eléctrica!
Introduzca el enchufe 4 en una toma de corriente, solo cuando la batidora nutri-cional esté completamente montada.
¡PELIGRO de lesiones por cortes!
El aparato no debe utilizarse nunca sin el vaso 5 - 7.Las cuchillas de los accesorios con cuchi-llas 8/9 están muy afiladas. Manéjelas con cuidado.Las cuchillas del accesorio con cuchi-llas 8/9 siguen girando después de desconectar el aparato. Espere a que dejen de girar para dar la vuelta al va-so 5 - 7 y desenroscar el accesorio con cuchillas.
¡ADVERTENCIA sobre daños materiales!
Para evitar daños en el aparato, inte-rrumpa inmediatamente el proceso de mezcla si las cuchillas del accesorio con cuchillas 8/9 no giran o lo hacen con dificultad. En ese caso extraiga el enchufe 4 y compruebe si hay algún obstáculo en el vaso 5 - 7.
6.1 Accesorios
Accesorio con cuchillas en forma de cruz 8Utilice el accesorio con cuchillas en forma de cruz 8 para mezclar bebidas de frutas enteras (batidos) y para triturar cubitos de hielo.
Accesorio con cuchillas planas 9
¡ADVERTENCIA sobre daños materiales!
¡El accesorio con cuchillas planas 9 no se puede utilizar para líquidos!
Utilice el accesorio con cuchillas planas 9 para triturar alimentos sólidos (p. ej., nueces).
NOTA: a la hora de triturar nueces, utilice una cantidad máx. de 200 g durante un tiempo de funcionamiento de aprox. 10 segundos.
6.2 Preparación de los alimentos
¡ADVERTENCIA sobre daños mate-riales!
Antes del proceso de mezcla, deberán retirarse las pieles gruesas o duras (p. ej., de los cítricos o la piña) y los ta-llos y semillas de las frutas de hueso (p. ej., cerezas, melocotones, albarico-ques).
• Lave o limpie las frutas.• Corte las frutas en trozos grandes (3-4 cm
aprox.).• Para los batidos: utilice suficiente líqui-
do (agua mineral, zumo de frutas, leche o yogur). Recomendamos una relación de mezcla de 1:1.
6.3 Mezclar/triturar
PRECAUCIÓN: Tenga en cuenta la marca MAX para la cantidad de llenado máxima.En función de la dureza y la consistencia de los ingredientes, no llene el vaso 5 - 7 hasta el máximo, ya que de lo contrario

8 ES
el accesorio con cuchillas 8/9 se puede bloquear.Debido a su especial dureza, las nue-ces moscadas no deben triturarse.
NOTA: si el batido queda demasiado espe-so, añada un poco de agua mineral, zumo de frutas, leche o yogur, según sea necesario.
1. Introduzca los trozos de fruta y, dado el caso, los demás ingredientes que de-see en el vaso 5 - 7. Al hacerlo tenga en cuenta la marca MAX para la can-tidad de llenado máxima.
2. Ilustración A: enrosque el accesorio con cuchillas 8/9 que desee en el va-so 5 - 7. Preste atención a que el acce-sorio con cuchillas esté firmemente enroscado en el vaso.
3. Ilustración B: gire el vaso 5 - 7 y co-lóquelo en la unidad básica 1. Los pe-queños salientes 13 en el borde del vaso se sujetan en los huecos del cabe-zal de la unidad básica 1.
4. Inserte el enchufe 4 en una toma de co-rriente.
5. Un pequeño giro del vaso 5 - 7 en sen-tido horario hace que el aparato se co-necte.Deje funcionar el aparato como máxi-mo 60 segundos.
6. Un pequeño giro del vaso 5 - 7 en sen-tido antihorario hace que el aparato se desconecte.Espere hasta que las cuchillas del acce-sorio 8/9 se hayan parado.
7. Extraiga el vaso 5 - 7 de la unidad bá-sica 1 y gírelo.
8. Desenrosque el accesorio con cuchi-llas 8/9 y al hacerlo preste atención a que el líquido en el vaso 5 - 7 no go-tee.
9. Antes del siguiente uso, aclare un poco el accesorio con cuchillas 8/9 en agua corriente, si es necesario.
10. Saque el enchufe 4 de la toma de co-rriente.
11. Procure limpiar el aparato inmediata-mente después de cada uso.
6.4 Triturar cubitos de hieloParar triturar cubitos de hielo deberá encen-der y apagar el aparato pulsando el botón.• Encienda y apague el aparato un máx.
de 4 veces durante aprox. 10 segun-dos.
6.5 Beberlos de inmediato• Ilustración C: para beber el batido di-
rectamente del vaso 5 - 7, enrosque una tapa "to go" o la tapa de conserva-ción 10 en el vaso 5 - 7 lleno. Abra el cierre para beber 12 y beba de la aber-tura para beber 11. Tras cerrar el cierre para beber 12 la abertura para be-ber 11 y el vaso 5 - 7 quedan cerrados herméticamente. Así podrá consumir tam-bién el batido por el camino: "to go".
6.6 Conservación• Ilustración C: los batidos están pen-
sados para consumirse pronto. Lo mejor es que a continuación guarde el batido en el frigorífico. Utilice para ello la tapa de conservación 10.
6.7 Protección contra el sobrecalentamiento
El aparato dispone de una protección con-tra el sobrecalentamiento. En cuanto el apa-rato se encuentre demasiado tiempo en funcionamiento y eso haga que la tempera-tura sea demasiado elevada, el aparato se apagará automáticamente. • En ese caso, desenchufe el aparato de
la red eléctrica y deje que se enfríe.• Hecho esto, podrá poner de nuevo el
aparato en marcha.

9ES
7. Limpieza¡Limpie el aparato antes de utilizarlo por primera vez!
¡PELIGRO de descarga eléctrica!
Retire el enchufe 4 de la toma de co-rriente antes de limpiar la batidora nu-tricional.La unidad básica 1 y el cable de cone-xión con el enchufe 4 no se pueden su-mergir en agua ni en ningún otro líquido.
¡PELIGRO de lesiones por cortes!
Cuando friegue a mano, el agua debe ser tan clara que le permita ver bien las cuchillas del accesorio con cuchillas 8/9.
¡ADVERTENCIA sobre daños materiales!
No utilice detergentes abrasivos o que produzcan arañazos.
Después de cada uso• Después de cada uso limpie el aparato
y todas las piezas que haya utilizado y elimine todos los restos de alimentos.
• Antes de proceder a la limpieza se de-ben separar todas las piezas (p. ej., re-tirar la tapa "to go" o la tapa de conservación 10 del vaso 5 - 7).
Unidad básicaLimpie la unidad básica 1 y el cable de co-nexión 4 con un paño ligeramente humede-cido. Pase luego un paño seco.
Limpieza a mano1. Los accesorios (accesorios con cuchi-
llas 8/9, vasos 5 - 7 y la tapa "to go" o la tapa de conservación 10) se pue-den lavar con agua templada y un poco de detergente.
2. A continuación aclare todas las piezas con agua limpia.
3. Deje secar completamente todas las piezas antes de guardarlas o de volver a utilizar el aparato.
LavavajillasLas siguientes piezas también se pueden la-var en el lavavajillas:- los accesorios con cuchillas 8/9- los vasos 5 - 7- la tapa "to go" y la tapa de conserva-
ción 10
8. Conservación
¡PELIGRO para los niños! Guarde el aparato fuera del alcance de los niños.
¡PELIGRO! Para evitar accidentes, el enchufe 4 no puede estar conectado a una toma de corriente mientras el aparato está guar-dado.
• Ilustración D: enrolle el cable de co-nexión 4 alrededor del guardacable 3 en la parte inferior del aparato.
• Elija un lugar en el que el aparato no se vea expuesto ni a un gran calor ni a la humedad.

10 ES
9. EliminaciónEste producto está sujeto a la Directiva Europea 2012/19/UE. El símbolo del cubo de basura con rue-das tachado significa que en la Unión Europea el produc-to se debe llevar a un punto de recogida de residuos separado. Esto es válido para el producto y para todos los accesorios que es-tén marcados con este símbolo. Los produc-tos marcados no se deben eliminar con la basura doméstica normal, sino que deben llevarse a un punto de recogida para el re-ciclado de aparatos eléctricos y electróni-cos. El reciclado ayuda a reducir el consumo de materias primas y a proteger el medio ambiente.
EmbalajeCuando quiera eliminar el embalaje, siga las correspondientes normas de protección medioambiental vigentes en su país.
10. Solución de problemas
Si en algún momento el aparato no funciona como es debido, consulte en primer lugar la siguiente lista. Es posible que se trate de un problema sin importancia que usted mismo pueda solucionar.
¡PELIGRO de descarga eléctrica!
No intente reparar el aparato usted mis-mo en ningún caso.
Avería Posibles causas / medidas a adoptar
No funciona
• ¿Funciona el suminis-tro de corriente eléctri-ca?
• Compruebe la cone-xión.
• ¿Está correctamente co-locado el vaso 5 - 7?
• ¿Se ha desconectado por la protección con-tra el sobrecalenta-miento? (véase “Protección contra el sobrecalentamiento” en la página 8)
La cuchilla del accesorio con cuchillas 8/9 no gira o lo hace con difi-cultad
• Desconectar de inme-diato, extraer el enchu-fe 4 y comprobar:¿Hay un obstáculo en el vaso 5 - 7?
Se sale líquido• ¿La cantidad de ingre-
dientes añadida es de-masiado grande?

11ES
11. Datos técnicos
Símbolos empleados
Reserva de modificaciones técnicas.
12. Garantía de HOYER Handel GmbH
Estimado cliente,Este aparato tiene un plazo de garantía de 3 años desde la fecha de compra. Si el pro-ducto presenta algún problema, usted tiene unos derechos legales de garantía frente al vendedor. Estos derechos legales de garantía no quedan limitados por nuestra garantía.
Condiciones de garantíaEl periodo de garantía comienza con la fe-cha de compra. Por favor, conserve su recibo de compra original para futuras referencias. Este documento es necesario como prueba de compra. Si después de los tres primeros años desde la fecha de compra de este producto aparece un defecto del material o de fabricación, no-sotros lo repararemos o reemplazaremos (a nuestro criterio) de forma gratuita. Esta ga-rantía exige que en el plazo de tres años se presenten el producto defectuoso y el com-probante de compra (recibo), junto con una breve descripción por escrito de la deficien-cia y de cuándo ha ocurrido.Si el defecto está cubierto por nuestra garan-tía, usted recibirá el producto reparado o un nuevo producto. Con la reparación o sustitu-ción del producto no se iniciará un nuevo pe-riodo de garantía.
Periodo de garantía y reclama-ciones legalesLa garantía legal no extiende el periodo de garantía comercial. Esto también se aplica a las piezas sustituidas y reparadas. Los po-sibles daños o defectos que se observen al desempaquetar el producto, deben ser co-municados inmediatamente. Después de la expiración del período de garantía, habrán de abonarse las reparaciones que sea nece-sario realizar.
Modelo: SNM 700 A1Tensión de la red: 220–240 V ~
50/60 HzClase de protección: IPotencia: 700 WMáx. Funcionamiento continuo (KB) máx.: 1 minutoCantidad de llenado: 150 ml – 800 ml
Seguridad verificada (GS). Los aparatos deben satisfacer las normas técnicas reconocidas con carácter general y ser conformes a la Ley alemana de seguridad de productos (ProdSG).Mediante el marcado CE, HOYER Handel GmbH declara la conformidad de la UE.
Este símbolo recuerda que el em-balaje debe eliminarse de forma respetuosa con el medio ambien-te.Materiales reciclables: cartón (excepto cartón ondulado)
Este símbolo identifica las piezas que pueden lavarse en el lavava-jillas.

12 ES
Cobertura de la garantíaEl aparato ha sido fabricado conforme a unas directivas de calidad estrictas y ha sido com-probado y controlado antes de su entrega. La garantía cubre los defectos del material o de fabricación.
Quedan excluidas de la garantía las piezas de desgaste que están ex-puestas al desgaste normal y los da-ños en piezas frágiles, p. ej., interruptores, baterías, lámparas u otras piezas fabricadas en vidrio.
Esta garantía dejará de tener validez si se daña el producto por un uso indebido o in-adecuado o si el producto ha sido manipula-do. Para garantizar un uso adecuado del producto deben observarse estrictamente to-das las indicaciones que figuran en el manual de instrucciones. Deberá evitarse el uso inde-bido y deberán observarse las indicaciones de seguridad que figuran en el manual de ins-trucciones. El producto está concebido exclusivamente para el uso doméstico, no para el uso indus-trial. Si se realiza un uso indebido o inade-cuado, si se aplica violencia o si alguien distinto a nuestro servicio técnico autoriza-do repara el aparato, la garantía dejará de tener validez.
Tramitación de la garantíaPara garantizar la rapidez en la tramitación de su reclamación, por favor, siga las si-guientes instrucciones:• Indique en su solicitud el siguiente nú-
mero de artículo IAN: 307629 y ten-ga preparado el recibo como justificante de la compra.
• Encontrará el número de artículo graba-do en la placa de características, en la portada de las instrucciones (abajo a la izquierda) o en una etiqueta adhesiva en la parte posterior o inferior del apa-rato.
• Si aparece algún fallo en el funciona-miento o algún otro defecto, póngase en contacto por teléfono o por co-rreo electrónico con el servicio técni-co que figura más abajo.
• Puede enviar el producto defectuoso de forma gratuita a la dirección del servi-cio técnico proporcionada, adjuntando el comprobante de compra (recibo) y la descripción de la deficiencia, especifi-cando cuándo se ha producido.
En www.lidl-service.com puede us-ted descargar este manual y mu-chos otros, junto con vídeos y productos de software.
Servicio técnico
Servicio EspañaTel.: 902 59 99 22(0,08 EUR/Min. + 0,11 EUR/llamada (tarifa normal))(0,05 EUR/Min. + 0,11 EUR/llamada (tarifa reducida))E-Mail: [email protected]
IAN: 307629
DistribuidorTenga en cuenta que esta dirección no es la dirección del servicio técnico. Pón-gase en contacto primero con la dirección del servicio técnico arriba mencionada.
HOYER Handel GmbHTasköprüstraße 3DE-22761 HamburgALEMANIA
ES

13ES

14 GB
Contents1. Overview ...................................................................................... 142. Intended purpose .......................................................................... 153. Safety instructions ......................................................................... 154. Items supplied ............................................................................... 185. How to use .................................................................................... 186. Operation ...................................................................................... 19
6.1 Uses .................................................................................................. 196.2 Preparing food ................................................................................... 196.3 Mixing/Chopping............................................................................... 196.4 Chopping ice cubes ............................................................................ 206.5 Drink immediately ............................................................................... 206.6 Storage ............................................................................................. 206.7 Overheating protection........................................................................ 20
7. Cleaning ........................................................................................ 218. Storage ......................................................................................... 219. Disposal ........................................................................................ 2210. Troubleshooting ............................................................................. 2211. Technical specifications .................................................................. 2312. Warranty of the HOYER Handel GmbH ........................................... 23
1. Overview1 Base unit2 Suction feet3 Cable spool4 Power cable with mains plug5 Blender jug (large, min. 150 ml – max. 800 ml)6 Blender jug (medium, min. 150 ml – max. 500 ml)7 Blender jug (small, min. 150 ml – max. 200 ml)8 Blade attachment with a cross blade9 Blade attachment with a flat blade10 To Go lid (2x) and keep-fresh lid (1x)11 Opening for drinking12 Drinking closure13 Nose (3x at each blender jug)
not shown: 14 Recipe book

15GB
Thank you for your trust!Congratulations on your new nutrition mixer.
For a safe handling of the device and in or-der to get to know the entire scope of fea-tures:
• Thoroughly read these user in-structions prior to initial use.
• Above all, observe the safety in-structions!
• The device should only be used as described in these user in-structions.
• Keep these user instructions for reference.
• If you pass the device on to someone else, please include this copy of the user instructions. The user instructions are a part of the product.
We hope you enjoy your new nutrition mix-er!
Symbol on your deviceThe food-safe material of devices with this symbol will not change the taste or smell of food.
2. Intended purposeThe nutrition mixer is …
… for mixing whole-fruit beverages (smoothies) and chopping ice cubes. For this purpose, use the blade at-tachment with the cross blade 8.
… for chopping solid foods (e.g. nuts). For this purpose, use the blade at-tachment with the flat blade 9.
The device is designed for private, domestic use. The device must only be used indoors.This device must not be used for commercial purposes.
Foreseeable misuse
WARNING! Risk of material damage!Thick or firm peels, (e.g. of citrus fruits, pineapple), stems and pips of stone fruits (e.g. cherries, peaches, apricots) must be removed before blending.The device must not be used to chop es-pecially hard food such as e.g. bones or nutmegs.
3. Safety instructionsWarningsIf necessary, the following warnings will be used in these user instructions:
DANGER! High risk: failure to ob-serve this warning may result in inju-ry to life and limb.
WARNING! Moderate risk: failure to ob-serve this warning may result in injury or se-rious material damage.CAUTION: low risk: failure to observe this warning may result in minor injury or mate-rial damage.NOTE: circumstances and specifics that must be observed when handling the de-vice.

16 GB
Instructions for safe operationThis device must not be used by children.Children must not play with the device.The device and the power cable must be kept away from children.This device can be used by people with restricted physical, sensory or intellectual abilities or people without adequate experience and/or understanding if they are supervised or instructed on how to use this device safely and if they are aware of the resulting haz-ards.If the mains power cable of this device should become damaged, it must be replaced by the manufacturer, the manufacturer's customer service department or a similarly qualified specialist, in order to avoid any hazards.This device is not intended to be operated using an external timer clock or a separate remote control system.Disconnect the mains plug from the wall socket…… when it is not supervised,… before you assemble or disassemble the device, and… before you clean the device.Clean the blade attachments, the blender jugs and the lids with warm water and a bit of detergent or in the dish washer.The blades of the blade attachment are sharp. Please be very care-ful when handling them. Misuse of the device may result in injuries.
The blades of the blade attachment are sharp. Please be very careful when handling them. When washing manually, the water should be sufficiently clear that you can see the blades easily.

17GB
DANGER for childrenChildren must not play with packing mate-rial. Do not allow children to play with plastic bags. There is a risk of suffocation.Please ensure that children are not able to pull the device down from the work surface with the power cable.Keep the device out of the reach of chil-dren.
DANGER to and from pets and livestock
Electrical devices can represent a haz-ard to pets and livestock. In addition, animals can also cause damage to the device. For this reason you should keep animals away from electrical devices at all times.
DANGER! Risk of electric shock due to moisture
The device must never be operated in the vicinity of a bathtub, a shower, a filled hand basin or similar.The motor unit, the power cable and the mains plug must not be immersed in wa-ter or other liquids.Protect the motor unit, the power cable and the mains plug from dampness and dripping or splashing water.If liquid gets into the motor unit, remove the mains plug immediately. Have the de-vice checked before reusing.Never touch the device with wet hands.If the device falls into water, disconnect the mains plug immediately. Only then is it safe to retrieve the device.
DANGER! Risk of electric shock
Only plug the mains plug into the wall socket after the device has been com-pletely assembled.Only connect the mains plug to a prop-erly installed and easily accessible wall socket whose voltage corresponds to
the specifications on the rating plate. The wall socket must continue to be eas-ily accessible after the device is plugged in.Ensure that the power cable cannot be damaged by sharp edges or hot points. Do not wrap the power cable around the device. The device is not fully disconnected from the power supply, even after it is switched off. In order to fully disconnect it, pull out the mains plug.When using the device, ensure that the power cable cannot be trapped or crushed.When removing the mains plug from the wall socket, always pull the plug and never the cable.Disconnect the mains plug from the wall socket…… if there is a fault,… if you do not use the nutrition mixer,… during thunderstorms.Do not use the device if there is visible damage to the device or the power ca-ble.To avoid any risk, do not make modifi-cations to the device.
DANGER! Risk of injury from cutting
The blades of the blade attachment car-ry on rotating after the device has been switched off. Wait until the blades have come to a standstill before you remove the blender jug.Under no circumstances should the de-vice be operated without the blender jug.
WARNING! Risk of material damage
Do not use the blade attachment with a flat blade for liquids!Thick or firm peels, (e.g. of citrus fruits, pineapple), stems and pips of stone fruits (e.g. cherries, peaches, apricots) must be removed before blending.

18 GB
Do not put any ingredients with a tem-perature in excess of 85 °C into the blender jug.In order to prevent damage to the de-vice, interrupt the blending process im-mediately if the blades of the blade attachment rotate with difficulty or not at all. Pull out the mains plug and investi-gate whether there is an obstruction in the blender jug or whether the contents are too viscous. Also check whether the device is assembled correctly.Do not operate the device with empty blender jugs, as this causes the motor to overheat and may result in it being damaged.Only operate the device when a blade attachment is screwed onto the blender jug.The device is designed for a maximum operating time of 60 seconds without in-terruption. After this, the device must re-main switched off until it has cooled down to room temperature.Only use the original accessories.The device (base unit, power cable with mains plug) is not dishwasher-safe. Do not use any astringent or abrasive cleaning agents.The device is fitted with non-slip plastic suction feet. As furniture is coated with a wide array of varnishes and synthet-ics, and is also treated with different care products, it cannot be fully ruled out that some of these materials contain ingredients that could attack and soften the non-slip plastic suction feet. If neces-sary, place a non-slip mat under the de-vice.
4. Items supplied1 base unit 11 Blender jug large 5
(min. 150 ml – max. 800 ml)1 Blender jug medium 6
(min. 150 ml – max. 500 ml)1 Blender jug small 7
(min. 150 ml – max. 200 ml)1 blade attachment 8 (cross blade)1 blade attachment 9 (flat blade)2 To-Go lid, 1 keep-fresh lid 101 recipe book 141 copy of the user instructions
Unpacking1. Remove all parts from the packaging.2. Check that all parts are present and in-
tact.
5. How to use• Remove all packing material.• Check to ensure that all parts are pres-
ent and undamaged.• Clean the device prior to its first
use! (see “Cleaning” on page 21)• Unwind the desired length of cable from
the cable spool 3 on the underside of the device.
• Place the device on a dry, level, non-slip surface.

19GB
6. Operation
DANGER! Risk of electric shock!
Only plug the mains plug 4 into a wall socket, if the nutrition mixer is fully as-sembled.
DANGER! Risk of injury from cutting!
Under no circumstances should the de-vice be operated without the blender jug 5-7.The blades of the blade attachments 8/9 are sharp. Please be very careful when handling them.The blades of the blade attachment 8/9 carry on rotating after the device has been switched off. Wait until the blades have come to a standstill before you turn over the blender jug 5-7 and screw off the blade attachment.
WARNING! Risk of material damage! In order to prevent damage to the de-vice, interrupt the blending process im-mediately if the blades of the blade attachments 8/9 rotate with difficulty or not at all. In this case, pull out the mains plug 4 and check whether there is an ob-struction in the blender jug 5-7.
6.1 Uses
Blade attachment with a cross blade 8Use the blade attachment with the cross blade 8 for mixing whole-fruit beverages (smoothies) and chopping ice cubes.
Blade attachment with a flat blade 9
WARNING! Risk of material damage! Do not use the blade attachment with a flat blade 9 for liquids!
Use the blade attachment with a flat blade 9 for chopping solid food (e. g. nuts).
NOTE: with an operating time of approx. 10 seconds, use no more than 200 g when chopping nuts.
6.2 Preparing food
WARNING! Risk of material damage!Thick or firm peels, (e.g. of citrus fruits, pineapple), stems and pips of stone fruits (e.g. cherries, peaches, apricots) must be removed before blending.
• Rinse or wash the fruits.• Cut the fruit into rough pieces (approx.
3-4 cm edge length).• For smoothies: use a sufficient amount
of liquid (mineral water, juice, milk, yo-ghurt). We recommend a mixing ratio of 1:1.
6.3 Mixing/Chopping
CAUTION: Mind the marking MAX for the maxi-mum filling quantity. Depending on the hardness and consist-ency of the ingredients in the blender jug 5-7, do not fill it to the maximum; otherwise the blade attachment 8/9 could become clogged.Due to their exceptional hardness nut-megs may not be chopped.

20 GB
NOTE: if the smoothie is too thick, add a lit-tle mineral water, fruit juice, milk or yoghurt to suit your taste.
1. Place the fruit pieces and any other in-gredients into the blender jug 5-7 as desired. Mind the marking MAX for the maximum filling quantity.
2. Figure A: screw the required blade at-tachment 8/9 onto the blender jug 5-7. Ensure that the blade attachment is tightly screwed to the blender jug.
3. Figure B: turn the blender jug 5-7 around and place it on the base unit 1. The small noses 13 on the edge of the blender jug fit into the recesses at the head of the base unit 1.
4. Connect the mains plug 4 with the wall socket.
5. A slight clockwise turn of the blender jug 5-7 switches the device on.Let the device run for no more than 60 seconds.
6. A slight anticlockwise turn of the blender jug 5-7 switches the device off.Wait until the blades of the attachment 8/9 have come to a complete stop.
7. Remove the blender jug 5-7 from the base unit 1 and turn it around.
8. Unscrew the blade attachment 8/9 and ensure that the liquid drips into the blender jug 5-7.
9. Before using it again and if necessary, rinse the blade attachment 8/9 briefly under running water.
10. Disconnect the mains plug 4 from the wall socket.
11. Clean the device as soon as possible after use.
6.4 Chopping ice cubesFor chopping ice cubes the device should be switched on and off in a pulsating manner.• Switch the device on and off 4x for up
to 10 seconds each time.
6.5 Drink immediately• Figure C: in order to drink the fresh
smoothie directly from the blender jug 5-7, screw a To-Go lid or the keep-fresh lid 10 on the filled blender jug 5-7. If need open the drinking clo-sure 12 and drink from the opening for drinking 11. After you have closed the drinking closure 12 the opening for drinking 11 and blender jug 5-7 are tightly closed. You can also enjoy your smoothie “to go” when you are out and about.
6.6 Storage• Figure C: smoothies are intended to be
consumed as soon as possible. Then, it is best to put the smoothie in the refrig-erator. Use the keep-fresh lid 10 for this purpose.
6.7 Overheating protectionThe device has an overheating protection system. If the device has been in operation for too long thus causing the device to be-come too hot, it automatically switches off. • In this case, pull out the mains plug and
allow the device to cool.• You may then put the device back into
operation.

21GB
7. CleaningClean the device prior to its first use!
DANGER! Risk of electric shock!
Pull out the mains plug 4 from the wall socket before cleaning the Nutrition Mixer.The base unit 1 and the power cable with the mains plug 4 must not be im-mersed in water or other liquids.
DANGER! Risk of injury from cutting!
When washing by hand, the water should be clear enough for you to see the blades of the blade attachment 8/9 easily.
WARNING! Risk of material damage! Do not use any astringent or abrasive cleaning agents.
After every use• Clean the device and all individual
parts used after each use and remove all food residues.
• Prior to cleaning, all parts must be sepa-rated from one another (e.g. remove To-Go lid or keep-fresh lid 10 from blender jug 5-7).
Base unitWipe off the base unit 1 and the power ca-ble 4, using a lightly moistened cloth. Dry with a dry cloth.
Manual cleaning1. The accessories (blade attachments
8/9, blender jugs 5-7, and To-Go lids or keep-fresh lids 10) can be cleaned with warm water and a little detergent.
2. Afterwards, rinse all parts with clean water.
3. Allow all parts to dry completely before you put them away or use the device again.
DishwasherThe following parts can be cleaned in the dishwasher:- the blade attachments 8/9- the blender jugs 5-7 - the To-Go lids and keep-fresh lids 10
8. Storage
DANGER for children! Keep the device out of the reach of chil-dren.
DANGER! In order to avoid accidents, the mains plug 4 must never be connected to a wall socket while in storage.
• Figure D: wind the power cable 4 around the cable spool 3 at the under-side of the device.
• Select a location where neither high temperatures nor moisture can affect the device.

22 GB
9. DisposalThis product is subject to the provisions of European Direc-tive 2012/19/EC. The sym-bol showing a wheelie bin crossed through indicates that the product requires separate refuse collection in the European Union. This applies to the product and all accessories marked with this symbol. Products identified with this symbol may not be discarded with normal household waste, but must be taken to a collection point for recycling electric and electronic appliances. Recycling helps to re-duce the consumption of raw materials and protect the environment.
PackagingWhen disposing of the packaging, make sure you comply with the environmental reg-ulations applicable in your country.
10. TroubleshootingIf your device fails to function as required, please try this checklist first. Perhaps there is only a minor problem, and you can solve it yourself.
DANGER! Risk of electric shock!
Do not attempt to repair the device your-self under any circumstances.
Fault Possible causes / Action
No function
• Has the device been connected to the pow-er supply?
• Check the connection.• Has the blender jug 5-
7 been engaged prop-erly?
• Has the overheating protection switched off the device? (see “Overheating protec-tion” on page 20)
Blade of the blade attach-ment 8/9 not turning or turn-ing with diffi-culty
• Switch off immediate-ly, pull out mains plug 4 and check:Is there any obstacle in the blender jug 5-7?
Liquids are run-ning out
• Is the quantity of ingre-dients filled into the blender jug too large?
23GB
11. Technical specifications
Symbols used
Subject to technical modifications.
12. Warranty of the HOYER Handel GmbH
Dear Customer, your device is provided with a 3 year war-ranty starting with the purchase date. In the event of product defects, you are entitled to statutory rights against the vendor. These statutory rights are not restricted by our war-ranty presented in the following.
Warranty conditionsThe warranty period starts with the purchase date. Please keep the original purchase re-ceipt in a safe place. This document is re-quired to verify the purchase.If within three years from the purchase date of this product a material or factory defect occurs, the product will be repaired or re-placed by us – at our discretion – free of charge to you. This warranty implies that within the period of three years the defective device and the purchase receipt are present-ed, including a brief written description of the defect and the time it occurred.If the defect is covered by our warranty, the repaired or a new product will be returned to you. No new warranty period starts with a repair or replacement of the product.
Warranty period and statutory claims for defectsThe warranty period is not extended when the warranty has been claimed. This also ap-plies to replaced and repaired parts. Any damages and defects already existing at the time of purchase must be reported immedi-ately upon unpacking. Repairs arising after the expiration of the warranty period are subject to a charge.
Warranty coverageThe device was produced carefully according to strict quality guidelines and tested diligent-ly prior to delivery.The warranty applies to material or factory defects.
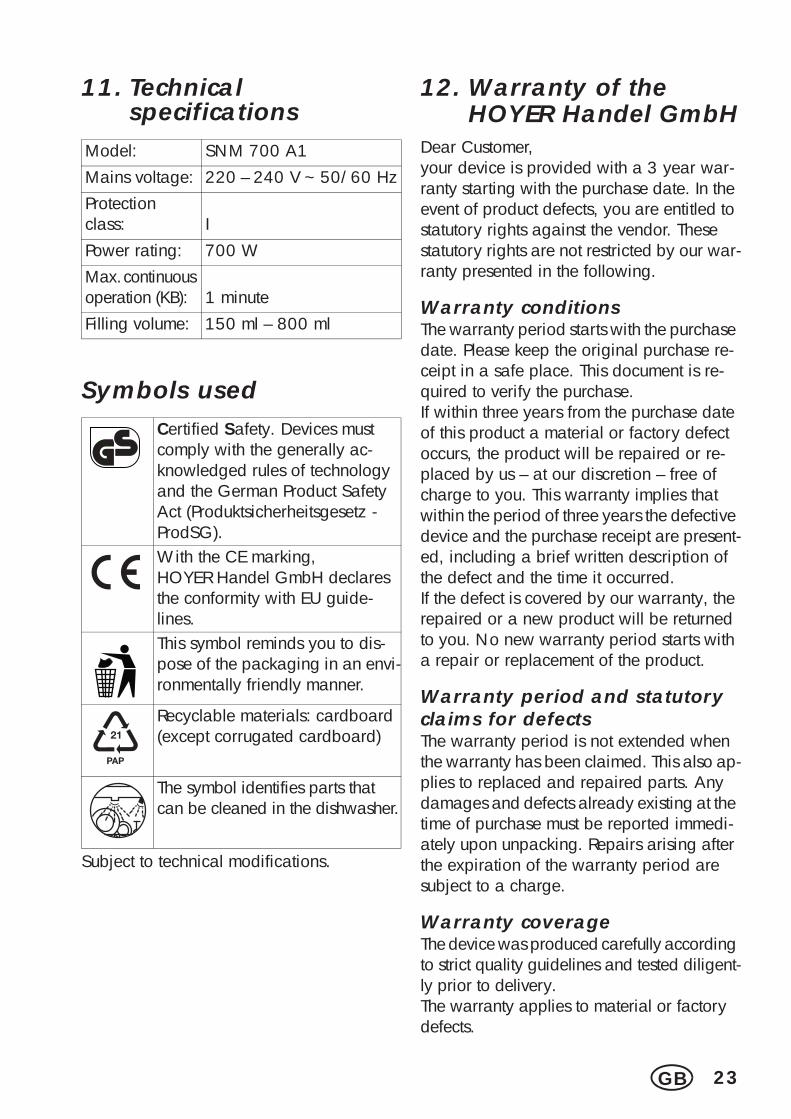
Model: SNM 700 A1Mains voltage: 220 – 240 V ~ 50/60 HzProtection class: IPower rating: 700 WMax. continuous operation (KB): 1 minuteFilling volume: 150 ml – 800 ml
Certified Safety. Devices must comply with the generally ac-knowledged rules of technology and the German Product Safety Act (Produktsicherheitsgesetz - ProdSG).With the CE marking, HOYER Handel GmbH declares the conformity with EU guide-lines.This symbol reminds you to dis-pose of the packaging in an envi-ronmentally friendly manner.
Recyclable materials: cardboard (except corrugated cardboard)
The symbol identifies parts that can be cleaned in the dishwasher.

24 GB
Excluded from the warranty are wear parts subject to normal wear and damages to fragile parts, e.g. switches, batteries, lamps or other parts manufactured from glass.
This warranty expires if the product is dam-aged, not used as intended or not serviced. For the proper operation of the product, all in-structions listed in the operating instructions must be observed carefully. Any form of use and handling that is advised against in the operating instructions or warned against must always be avoided.The product is only intended for private and not for commercial use. In the case of incor-rect and improper treatment, use of force and interventions not performed by our author-ised Service Centre, the warranty shall cease.
Handling in case of a warranty claimIn order to ensure prompt processing of your matter, please observe the following notes:• Please keep the article number
IAN: 307629 and the purchase receipt as a purchase verification for all inquiries.
• The article number can be found on the rating plate, an engraving, the title page of your instructions (in the bottom left), or as a label on the rear or under-side of the device.
• If faulty operation or other defects occur, first contact the Service Centre listed in the following by telephone or email.
• Then, you are able to send a product re-ported as defective free of charge to the service address specified to you, includ-ing the purchase receipt and the infor-mation on the defect and when it occurred.
Please visit www.lidl-service.com to download this and many other manuals, product videos and soft-ware.
Service Centre
Service Great BritainTel.: 0871 5000 720 (£ 0.10/Min.) E-Mail: [email protected]
Service IrelandTel.: 1890 930 034(0,08 EUR/Min., (peak)) (0,06 EUR/Min., (off peak))E-Mail: [email protected]
Service MaltaTel.: 80062230E-Mail: [email protected]
Service CyprusTel.: 8009 4409E-Mail: [email protected]
IAN: 307629
SupplierPlease note that the following address is no service address. First contact the afore-mentioned Service Centre.
HOYER Handel GmbHTasköprüstraße 3DE-22761 HamburgGERMANY
GB
IE
MT
CY

25GB

26 DE
Inhalt1. Übersicht ....................................................................................... 262. Bestimmungsgemäßer Gebrauch .................................................... 273. Sicherheitshinweise ....................................................................... 284. Lieferumfang ................................................................................. 305. Inbetriebnahme ............................................................................. 306. Bedienen ....................................................................................... 31
6.1 Einsatzbereiche .................................................................................. 316.2 Lebensmittel vorbereiten ....................................................................... 316.3 Mixen/Zerkleinern .............................................................................. 326.4 Eiswürfel zerkleinern ............................................................................ 326.5 Sofort trinken ...................................................................................... 326.6 Aufbewahren ..................................................................................... 326.7 Überhitzungsschutz ............................................................................. 33
7. Reinigen ........................................................................................ 338. Aufbewahren ................................................................................ 339. Entsorgen ...................................................................................... 3410. Problemlösung .............................................................................. 3411. Technische Daten ........................................................................... 3512. Garantie der HOYER Handel GmbH ................................................ 35
1. Übersicht1 Basiseinheit2 Saugfüße3 Kabelaufwicklung4 Anschlussleitung mit Netzstecker5 Becher (groß, min. 150 ml – max. 800 ml)6 Becher (mittel, min. 150 ml – max. 500 ml)7 Becher (klein, min. 150 ml – max. 200 ml)8 Messeraufsatz mit Kreuzklinge9 Messeraufsatz mit Flachklinge10 „to go“-Deckel (2x) und Frischhaltedeckel (1x)11 Trinköffnung12 Trinkverschluss13 Nase (3x an jedem Becher)
ohne Abbildung: 14 Rezeptheft

27DE
Herzlichen Dank für Ihr Vertrauen!Wir gratulieren Ihnen zu Ihrem neuen Nutri-tion Mixer.
Für einen sicheren Umgang mit dem Gerät und um den ganzen Leistungsumfang ken-nenzulernen:
• Lesen Sie vor der ersten Inbe-triebnahme diese Bedienungsan-leitung gründlich durch.
• Befolgen Sie vor allen Dingen die Sicherheitshinweise!
• Das Gerät darf nur so bedient werden, wie in dieser Bedie-nungsanleitung beschrieben.
• Bewahren Sie diese Bedienungs-anleitung auf.
• Falls Sie das Gerät einmal wei-tergeben, legen Sie bitte diese Bedienungsanleitung dazu. Die Bedienungsanleitung ist Be-standteil des Produktes.
Wir wünschen Ihnen viel Freude mit Ihrem neuen Nutrition Mixer!
Symbole am GerätDas Symbol gibt an, dass so ausge-zeichnete Materialien, Lebensmittel weder im Geschmack noch im Ge-ruch verändern.
2. Bestimmungsgemäßer Gebrauch
Der Nutrition Mixer ist …… zum Mixen von Ganzfruchtgetränken
(Smoothies) und dem Zerkleinern von Eiswürfeln vorgesehen. Verwenden Sie hierfür den Messeraufsatz mit der Kreuzklinge 8.
… zum Zerkleinern von festen Lebens-mitteln (z. B. Nüssen) vorgesehen. Verwenden Sie hierfür den Messerauf-satz mit der Flachklinge 9.
Das Gerät ist für den privaten Haushalt kon-zipiert. Das Gerät darf nur in Innenräumen benutzt werden.Dieses Gerät darf nicht für gewerbliche Zwecke eingesetzt werden.
Vorhersehbarer Missbrauch
WARNUNG vor Sachschäden!Dicke oder feste Schalen (z. B. von Zi-trusfrüchten, Ananas), Stiele und Kerne von Steinfrüchten (z. B. Kirschen, Pfirsi-che, Aprikosen) müssen vor dem Mixen entfernt werden.Das Gerät darf nicht benutzt werden, um besonders harte Lebensmittel wie z. B. Knochen oder Muskatnüsse zu zerkleinern.

28 DE
3. SicherheitshinweiseWarnhinweiseFalls erforderlich, werden folgende Warn-hinweise in dieser Bedienungsanleitung ver-wendet:
GEFAHR! Hohes Risiko: Missach-tung der Warnung kann Schaden für Leib und Leben verursachen.
WARNUNG! Mittleres Risiko: Missachtung der Warnung kann Verletzungen oder schwere Sachschäden verursachen.
VORSICHT: Geringes Risiko: Missachtung der Warnung kann leichte Verletzungen oder Sachschäden verursachen.HINWEIS: Sachverhalte und Besonderhei-ten, die im Umgang mit dem Gerät beachtet werden sollten.
Anweisungen für den sicheren BetriebDieses Gerät darf nicht durch Kinder benutzt werden.Kinder dürfen nicht mit dem Gerät spielen.Das Gerät und seine Anschlussleitung sind von Kindern fernzuhal-ten.Dieses Gerät kann von Personen mit reduzierten physischen, senso-rischen oder mentalen Fähigkeiten oder Mangel an Erfahrung und/oder Wissen benutzt werden, wenn sie beaufsichtigt oder bezüg-lich des sicheren Gebrauchs des Gerätes unterwiesen wurden und die daraus resultierenden Gefahren verstanden haben.Wenn die Netzanschlussleitung dieses Gerätes beschädigt wird, muss sie durch den Hersteller oder seinen Kundendienst oder eine ähnlich qualifizierte Person ersetzt werden, um Gefährdungen zu vermeiden.Dieses Gerät ist nicht dafür bestimmt, mit einer externen Zeitschaltuhr oder einem separaten Fernwirksystem betrieben zu werden.Ziehen Sie den Netzstecker aus der Steckdose, …… bei nicht vorhandener Aufsicht,… bevor Sie das Gerät zusammenbauen oder auseinander-
nehmen und… bevor Sie das Gerät reinigen.Reinigen Sie die Messeraufsätze, die Becher und die Deckel mit warmem Wasser und etwas Spülmittel oder in der Geschirrspülmaschine.Die Klingen des Messeraufsatzes sind scharf. Gehen Sie vorsichtig mit ihnen um.

29DE
Bei einem Missbrauch des Gerätes kann es zu Verletzungen kom-men.
Die Klingen des Messeraufsatzes sind scharf. Gehen Sie vor-sichtig mit ihnen um. Beim Spülen von Hand soll das Wasser so klar sein, dass Sie die Klingen gut sehen können.
GEFAHR für KinderVerpackungsmaterial ist kein Kinder-spielzeug. Kinder dürfen nicht mit den Kunststoffbeuteln spielen. Es besteht Er-stickungsgefahr.Achten Sie darauf, dass Kinder das Ge-rät nicht an der Anschlussleitung von der Arbeitsfläche ziehen können.Bewahren Sie das Gerät außerhalb der Reichweite von Kindern auf.
GEFAHR für und durch Haus- und Nutztiere
Von Elektrogeräten können Gefahren für Haus- und Nutztiere ausgehen. Des Weiteren können Tiere auch einen Schaden am Gerät verursachen. Halten Sie deshalb Tiere grundsätzlich von Elektrogeräten fern.
GEFAHR von Stromschlag durch Feuchtigkeit
Das Gerät darf niemals in der Nähe ei-ner Badewanne, einer Dusche, eines gefüllten Waschbeckens o. Ä. betrieben werden.Die Motoreinheit, die Anschlussleitung und der Netzstecker dürfen nicht in Wasser oder andere Flüssigkeiten ge-taucht werden.Schützen Sie die Motoreinheit, die An-schlussleitung und den Netzstecker vor Feuchtigkeit, Tropf- und Spritzwasser.Sollte Flüssigkeit in die Motoreinheit ge-langen, sofort den Netzstecker ziehen. Vor einer erneuten Inbetriebnahme das Gerät prüfen lassen.Bedienen Sie das Gerät nicht mit feuch-ten Händen.
Sollte das Gerät ins Wasser gefallen sein, sofort den Netzstecker ziehen. Erst danach das Gerät herausnehmen.
GEFAHR durchStromschlag
Stecken Sie den Netzstecker erst dann in eine Steckdose, wenn das Gerät kom-plett zusammengebaut ist.Schließen Sie den Netzstecker nur an eine ordnungsgemäß installierte, leicht zugängliche Steckdose an, deren Span-nung der Angabe auf dem Typenschild entspricht. Die Steckdose muss auch nach dem Anschließen weiterhin leicht zugänglich sein.Achten Sie darauf, dass die Anschluss-leitung nicht durch scharfe Kanten oder heiße Stellen beschädigt werden kann. Wickeln Sie die Anschlussleitung nicht um das Gerät. Das Gerät ist auch nach Ausschalten nicht vollständig vom Netz getrennt. Um dies zu tun, ziehen Sie den Netzstecker.Achten Sie beim Gebrauch des Gerätes darauf, dass die Anschlussleitung nicht eingeklemmt oder gequetscht wird.Um den Netzstecker aus der Steckdose zu ziehen, immer am Stecker, nie am Kabel ziehen.Ziehen Sie den Netzstecker aus der Steckdose, …… wenn eine Störung auftritt,… wenn Sie den Nutrition Mixer nicht
benutzen,… bei Gewitter.Benutzen Sie das Gerät nicht, wenn es sichtbare Beschädigungen am Gerät oder der Anschlussleitung aufweist.

30 DE
Um Gefährdungen zu vermeiden, neh-men Sie keine Veränderungen am Gerät vor.
GEFAHR von Verletzungen durch Schneiden
Die Klingen des Messeraufsatzes dre-hen nach dem Ausschalten nach. War-ten Sie den Stillstand ab, bevor Sie einen Becher abnehmen.Das Gerät darf unter keinen Umständen ohne Becher betrieben werden.
WARNUNG vor SachschädenDer Messeraufsatz mit Flachklinge darf nicht für Flüssigkeiten verwendet werden!Dicke oder feste Schalen (z. B. von Zi-trusfrüchten, Ananas), Stiele und Kerne von Steinfrüchten (z. B. Kirschen, Pfirsi-che, Aprikosen) müssen vor dem Mixen entfernt werden.Füllen Sie keine Zutaten in den Becher, die heißer sind als 85 °C.Um einen Geräteschaden zu vermei-den, unterbrechen Sie den Mixvorgang sofort, wenn die Klingen des Messerauf-satzes nicht oder nur schwer drehen. Ziehen Sie den Netzstecker und über-prüfen Sie, ob sich ein Hindernis im Be-cher befindet oder ob die Speise zu zäh ist. Überprüfen Sie auch, ob das Gerät richtig zusammengesetzt ist.Betreiben Sie das Gerät nicht mit leeren Bechern, da hierdurch der Motor heiß laufen und beschädigt werden kann.Betreiben Sie das Gerät nur, wenn auf dem Becher ein Messeraufsatz ver-schraubt ist.Das Gerät ist für eine Betriebsdauer von maximal 60 Sekunden ohne Unterbre-chung ausgelegt. Danach muss das Ge-rät ausgeschaltet bleiben, bis es auf Raumtemperatur abgekühlt ist.Verwenden Sie nur das Originalzubehör.Das Gerät (Basiseinheit, Anschlusslei-tung mit Netzstecker) ist nicht spülma-schinengeeignet.
Verwenden Sie keine scharfen oder scheuernden Reinigungsmittel.Das Gerät ist mit rutschfesten Kunststoff-Saugfüßen ausgestattet. Da Möbel mit einer Vielfalt von Lacken und Kunststof-fen beschichtet sind und mit unterschied-lichen Pflegemitteln behandelt werden, kann nicht völlig ausgeschlossen wer-den, dass manche dieser Stoffe Be-standteile enthalten, welche die Kunststoffsaugfüße angreifen und auf-weichen. Legen Sie ggf. eine rutschfeste Unterlage unter das Gerät.
4. Lieferumfang1 Basiseinheit 11 Becher groß 5 (min. 150 ml - max. 800 ml)1 Becher mittel 6 (min. 150 ml - max. 500 ml)1 Becher klein 7 (min. 150 ml - max. 200 ml)1 Messeraufsatz 8 (Kreuzklinge)1 Messeraufsatz 9 (Flachklinge)2 „to go“-Deckel, 1 Frischhaltedeckel 101 Rezeptheft 141 Bedienungsanleitung
Auspacken1. Entnehmen Sie alle Teile aus der Verpa-
ckung.2. Prüfen Sie die Teile auf Vollständigkeit
und darauf, ob alle Teile unversehrt sind.
5. Inbetriebnahme• Entfernen Sie sämtliches Verpackungs-
material.• Überprüfen Sie, ob alle Teile vorhanden
und unbeschädigt sind.• Reinigen Sie das Gerät vor der
ersten Benutzung! (siehe “Reinigen” auf Seite 33)
• Wickeln Sie die gewünschte Kabellän-ge von der Kabelaufwicklung 3 auf der Unterseite des Gerätes ab.
• Stellen Sie das Gerät auf eine trockene, ebene, rutschfeste Unterlage.

31DE
6. Bedienen
GEFAHR durch Stromschlag!Stecken Sie den Netzstecker 4 erst dann in eine Steckdose, wenn der Nutri-tion Mixer komplett montiert ist.
GEFAHR von Verletzungen durch Schneiden!
Das Gerät darf unter keinen Umständen ohne Becher 5 - 7 betrieben werden.Die Klingen der Messeraufsätze 8/9 sind scharf. Gehen Sie vorsichtig mit ihnen um.Die Klingen des Messeraufsatzes 8/9 drehen nach dem Ausschalten nach. Warten Sie den Stillstand ab, bevor Sie einen Becher 5 - 7 umdrehen und den Messeraufsatz abschrauben.
WARNUNG vor Sachschäden! Um einen Geräteschaden zu vermei-den, unterbrechen Sie den Mixvorgang sofort, wenn die Klingen der Messerauf-sätze 8/9 nicht oder nur schwer drehen. Ziehen Sie in diesem Fall den Netzste-cker 4 und überprüfen Sie, ob sich ein Hindernis im Becher 5 - 7 befindet.
6.1 Einsatzbereiche
Messeraufsatz mit Kreuzklinge 8Den Messeraufsatz mit der Kreuzklinge 8 verwenden Sie zum Mixen von Ganzfrucht-getränken (Smoothies) und dem Zerkleinern von Eiswürfeln.
Messeraufsatz mit Flachklinge 9
WARNUNG vor Sachschäden! Der Messeraufsatz mit Flachklinge 9 darf nicht für Flüssigkeiten verwendet werden!
Den Messeraufsatz mit der Flachklinge 9 ver-wenden Sie zum Zerkleinern von festen Le-bensmitteln (z. B. Nüssen).
HINWEIS: Verwenden Sie beim Zerkleinern von Nüssen eine Menge von max. 200 g bei einer Betriebsdauer von ca. 10 Sekunden.
6.2 Lebensmittel vorbereiten
WARNUNG vor Sachschäden!Dicke oder feste Schalen (z. B. von Zi-trusfrüchten, Ananas), Stiele und Kerne von Steinfrüchten (z. B. Kirschen, Pfirsi-che, Aprikosen) müssen vor dem Mixen entfernt werden.
• Waschen oder putzen Sie die Früchte.• Zerteilen Sie die Früchte in grobe Stücke
(ca. 3 - 4 cm Kantenlänge).• Für Smoothies: Verwenden Sie ausrei-
chend Flüssigkeit (Mineralwasser, Fruchtsaft, Milch, Joghurt). Wir empfeh-len ein Mischungsverhältnis von 1:1.

32 DE
6.3 Mixen/Zerkleinern
VORSICHT: Beachten Sie die Markierung MAX für die maximale Einfüllmenge. Füllen Sie je nach Härte und Konsistenz der Zutaten den Becher 5 - 7 nicht bis an das Maximum, da ansonsten der Messeraufsatz 8/9 blockieren kann.Muskatnüsse dürfen wegen ihrer beson-deren Härte nicht zerkleinert werden.
HINWEIS: Ist der Smoothie zu dickflüssig, füllen Sie nach Bedarf etwas Mineralwasser, Fruchtsaft, Milch oder Joghurt hinein.
1. Füllen Sie die Fruchtstücke und ggf. weitere Zutaten in den Becher 5 - 7 Ihrer Wahl. Beachten Sie dabei die Markierung MAX für die maximale Einfüllmenge.
2. Bild A: Schrauben Sie den gewünsch-ten Messeraufsatz 8/9 auf den Becher 5 - 7. Achten Sie darauf, dass der Messeraufsatz fest mit dem Becher verschraubt ist.
3. Bild B: Drehen Sie den Becher 5 - 7 um und setzen ihn auf die Basisein-heit 1. Die kleinen Nasen 13 am Be-cherrand greifen in die Aussparungen am Kopf der Basiseinheit 1.
4. Stecken Sie den Netzstecker 4 in die Steckdose.
5. Eine kleine Drehung des Bechers 5 - 7 im Uhrzeigersinn schaltet das Gerät ein.Lassen Sie das Gerät maximal 60 Se-kunden laufen.
6. Eine kleine Drehung des Bechers 5 - 7 gegen den Uhrzeigersinn schaltet das Gerät aus.Warten Sie, bis die Messer vom Auf-satz 8/9 zum Stillstand gekommen sind.
7. Nehmen Sie den Becher 5 - 7 von der Basiseinheit 1 und drehen ihn um.
8. Schrauben Sie den Messeraufsatz 8/9 ab und achten dabei darauf, dass die Flüssigkeit in den Becher 5 - 7 tropft.
9. Vor dem nächsten Einsatz spülen Sie ggf. den Messeraufsatz 8/9 kurz unter fließendem Wasser ab.
10. Ziehen Sie den Netzstecker 4 aus der Steckdose.
11. Reinigen Sie das Gerät möglichst sofort nach Gebrauch.
6.4 Eiswürfel zerkleinernUm Eiswürfel zu zerkleinern sollten Sie das Gerät pulsierend Ein- und Ausschalten.• Schalten Sie das Gerät bis zu 4 x für
ca. 10 Sekunden ein und aus.
6.5 Sofort trinken• Bild C: Um den frischen Smoothie di-
rekt aus dem Becher 5 - 7 zu trinken, schrauben Sie einen „to go“- Deckel 10 auf den gefüllten Becher 5 - 7. Öffnen Sie ggf. den Trinkverschluss 12 und trin-ken Sie aus der Trinköffnung 11. Nach dem Schließen des Trinkverschlusses 12 sind Trinköffnung 11 und Becher 5 - 7 dicht verschlossen. So können Sie den Smoothie auch unterwegs verzehren: „to go“.
6.6 Aufbewahren• Bild D: Smoothies sind zum baldigen
Verzehr gedacht. Am besten stellen Sie den Smoothie in den Kühlschrank. Ver-wenden Sie dazu den Frischhaltede-ckel 10.

33DE
6.7 ÜberhitzungsschutzDas Gerät besitzt einen Überhitzungsschutz. Sobald sich das Gerät zu lange in Betrieb befindet und dadurch die Temperatur zu hoch wird, schaltet es sich automatisch ab. • Ziehen Sie in diesem Falle den Netzste-
cker und lassen Sie das Gerät abkühlen.• Danach können Sie das Gerät wieder in
Betrieb nehmen.
7. ReinigenReinigen Sie das Gerät vor der ers-ten Benutzung!
GEFAHR durch Stromschlag!Ziehen Sie den Netzstecker 4 aus der Steckdose, bevor Sie den Nutrition Mi-xer reinigen.Die Basiseinheit 1 und die Anschlusslei-tung mit Netzstecker 4 dürfen nicht in Wasser oder andere Flüssigkeiten ge-taucht werden.
GEFAHR von Verletzungen durch Schneiden!
Beim Spülen von Hand soll das Wasser so klar sein, dass Sie die Messer vom Messeraufsatz 8/9 gut sehen können.
WARNUNG vor Sachschäden! Verwenden Sie keine scharfen oder scheuernden Reinigungsmittel.
Nach jedem Gebrauch• Reinigen Sie das Gerät und alle ver-
wendeten Einzelteile nach jedem Ge-brauch und entfernen Sie dabei alle Speisereste.
• Vor der Reinigung müssen alle Teile ge-trennt werden (z. B. „to go“- oder Frisch-haltedeckel 10 vom Becher 5 - 7 entfernen).
BasiseinheitWischen Sie die Basiseinheit 1 und die An-schlussleitung 4 mit einem leicht angefeuch-teten Tuch ab. Wischen Sie mit einem trockenen Tuch nach.
Reinigung per Hand1. Die Zubehörteile (Messeraufsätze 8/9,
Becher 5 - 7 und die „to go“- oder Frischhaltedeckel 10) können mit war-mem Wasser und etwas Spülmittel ge-reinigt werden.
2. Spülen Sie alle Teile anschließend mit klarem Wasser ab.
3. Lassen Sie alle Teile vollständig trock-nen, bevor Sie sie wegräumen oder Sie das Gerät erneut benutzen.
GeschirrspülmaschineFolgende Teile können auch in der Geschirrspülmaschine gereinigt werden:- die Messeraufsätze 8/9- die Becher 5 - 7- die „to go“- und Frischhaltedeckel 10
8. Aufbewahren
GEFAHR für Kinder! Bewahren Sie das Gerät außerhalb der Reichweite von Kindern auf.
GEFAHR! Um Unfälle zu vermeiden, darf der Netz-stecker 4 während der Lagerung nicht mit einer Steckdose verbunden sein.
• Bild E: Wickeln Sie die Anschlusslei-tung 4 um die Kabelaufwicklung 3 auf der Unterseite des Gerätes.
• Wählen Sie einen Platz, wo weder star-ke Hitze noch Feuchtigkeit auf das Ge-rät einwirken können.

34 DE
9. EntsorgenDieses Produkt unterliegt der europäischen Richtlinie 2012/19/EU. Das Symbol der durchgestrichenen Ab-falltonne auf Rädern bedeu-tet, dass das Produkt in der Europäischen Union einer getrennten Müll-sammlung zugeführt werden muss. Dies gilt für das Produkt und alle mit diesem Symbol gekennzeichneten Zubehörteile. Gekenn-zeichnete Produkte dürfen nicht über den normalen Hausmüll entsorgt werden, son-dern müssen an einer Annahmestelle für das Recycling von elektrischen und elektroni-schen Geräten abgegeben werden. Recy-cling hilft, den Verbrauch von Rohstoffen zu reduzieren und die Umwelt zu entlasten. In-formationen zur Entsorgung und der Lage des nächsten Recyclinghofes erhalten Sie z. B. bei Ihrer Stadtreinigung oder in den Gelben Seiten.VerpackungWenn Sie die Verpackung entsorgen möch-ten, achten Sie auf die entsprechenden Um-weltvorschriften in Ihrem Land.
10. ProblemlösungSollte Ihr Gerät einmal nicht wie gewünscht funktionieren, gehen Sie bitte erst diese Checkliste durch. Vielleicht ist es nur ein klei-nes Problem, das Sie selbst beheben können.
GEFAHR durch Stromschlag!Versuchen Sie auf keinen Fall, das Ge-rät selbstständig zu reparieren.
Fehler Mögliche Ursachen / Maßnahmen
Keine Funktion
• Ist die Stromversor-gung sichergestellt?
• Überprüfen Sie den Anschluss.
• Ist der Becher 5 - 7 richtig eingesetzt?
• Hat der Überhitzungs-schutz das Gerät aus-geschaltet? (siehe “Überhitzungsschutz” auf Seite 33)
Klinge des Messeraufsat-zes 8/9 dreht sich nicht oder nur sehr schwer
• Sofort ausschalten, Netzstecker 4 ziehen und überprüfen:Hindernis im Becher 5 - 7?
Flüssigkeit läuft aus
• Ist die eingefüllte Men-ge an Zutaten zu groß?

35DE
11. Technische Daten
Verwendete Symbole
Technische Änderungen vorbehalten.
12. Garantie der HOYER Handel GmbH
Sehr geehrte Kundin, sehr geehrter Kunde,Sie erhalten auf dieses Gerät 3 Jahre Ga-rantie ab Kaufdatum. Im Falle von Mängeln dieses Produkts stehen Ihnen gegen den Ver-käufer des Produkts gesetzliche Rechte zu. Diese gesetzlichen Rechte werden durch un-sere im Folgenden dargestellte Garantie nicht eingeschränkt.
GarantiebedingungenDie Garantiefrist beginnt mit dem Kaufda-tum. Bitte bewahren Sie den Original Kas-senbon gut auf. Diese Unterlage wird als Nachweis für den Kauf benötigt. Tritt innerhalb von drei Jahren ab dem Kauf-datum dieses Produkts ein Material- oder Fabrikationsfehler auf, wird das Produkt von uns – nach unserer Wahl – für Sie kostenlos repariert oder ersetzt. Diese Garantieleistung setzt voraus, dass innerhalb der Dreijahres-frist das defekte Gerät und der Kaufbeleg (Kassenbon) vorgelegt und schriftlich kurz be-schrieben wird, worin der Mangel besteht und wann er aufgetreten ist.Wenn der Defekt von unserer Garantie ge-deckt ist, erhalten Sie das reparierte oder ein neues Produkt zurück. Mit Reparatur oder Austausch des Produkts beginnt kein neuer Garantiezeitraum.
Garantiezeit und gesetzliche MängelansprücheDie Garantiezeit wird durch die Gewährleis-tung nicht verlängert. Dies gilt auch für ersetz-te und reparierte Teile. Eventuell schon beim Kauf vorhandene Schäden und Mängel müs-sen sofort nach dem Auspacken gemeldet werden. Nach Ablauf der Garantiezeit anfal-lende Reparaturen sind kostenp ichtig.
GarantieumfangDas Gerät wurde nach strengen Qualitäts-richtlinien sorgfältig produziert und vor Aus-lieferung gewissenhaft geprüft.
Modell: SNM 700 A1Netzspannung: 220 – 240 V ~ 50/60 HzSchutzklasse: ILeistung: 700 WMax. Dauer-betrieb (KB): 1 MinuteFüllmenge: 150 ml – 800 ml
Geprüfte Sicherheit. Geräte müs-sen den allgemein anerkannten Regeln der Technik genügen und gehen mit dem Produktsicher-heitsgesetz (ProdSG) konform.Mit der CE-Kennzeichnung erklärt die HOYER Handel GmbH die EU-Konformität.
Dieses Symbol erinnert daran, die Verpackung umweltfreundlich zu entsorgen.
Wiederverwertbare Materialien: Pappe (außer Wellpappe)
Das Symbol kennzeichnet Teile, die in der Spülmaschine gereinigt werden können.

36 DE
Die Garantieleistung gilt für Material- oder Fabrikationsfehler.
Von der Garantie ausgeschlossen sind Verschleißteile, die normaler Abnutzung ausgesetzt sind und Be-schädigungen an zerbrechlichen Teilen, z. B. Schalter, Akkus, Leuchtmittel oder andere Teile, die aus Glas gefertigt sind.
Diese Garantie verfällt, wenn das Produkt beschädigt, nicht sachgemäß benutzt oder gewartet wurde. Für eine sachgemäße Be-nutzung des Produkts sind alle in der Bedie-nungsanleitung aufgeführten Anweisungen genau einzuhalten. Verwendungszwecke und Handlungen, von denen in der Bedie-nungsanleitung abgeraten oder vor denen gewarnt wird, sind unbedingt zu vermeiden. Das Produkt ist lediglich für den privaten und nicht für den gewerblichen Gebrauch be-stimmt. Bei missbräuchlicher und unsachge-mäßer Behandlung, Gewaltanwendung und bei Eingriffen, die nicht von unserem autori-sierten Service-Center vorgenommen wur-den, erlischt die Garantie.
Abwicklung im GarantiefallUm eine schnelle Bearbeitung Ihres Anlie-gens zu gewährleisten, folgen Sie bitte den folgenden Hinweisen:• Bitte halten Sie für alle Anfragen die Ar-
tikelnummer IAN: 307629 und den Kassenbon als Nachweis für den Kauf bereit.
• Die Artikelnummer finden Sie auf dem Typenschild, einer Gravur, auf dem Ti-telblatt Ihrer Anleitung (unten links) oder als Aufkleber auf der Rück- oder Unter-seite des Gerätes.
• Sollten Funktionsfehler oder sonstige Män-gel auftreten, kontaktieren Sie zunächst das nachfolgend benannte Service-Center telefonisch oder per E-Mail.
• Ein als defekt erfasstes Produkt können Sie dann unter Beifügung des Kaufbe-legs (Kassenbon) und der Angabe, wor-in der Mangel besteht und wann er aufgetreten ist, für Sie portofrei an die Ihnen mitgeteilte Service Anschrift über-senden.
Auf www.lidl-service.com können Sie diese und viele weitere Handbü-cher, Produktvideos und Software herunterladen.
Service-Center
Service DeutschlandTel.: 0800 5435 111(kostenfrei)E-Mail: [email protected]
Service ÖsterreichTel.: 0820 201 222 (0,15 EUR/Min.) E-Mail: [email protected]
Service SchweizTel.: 0842 665566 (0,08 CHF/Min., Mobilfunk max. 0,40 CHF/Min.)E-Mail: [email protected]
IAN: 307629
LieferantBitte beachten Sie, dass die folgende An-schrift keine Serviceanschrift ist. Kontaktieren Sie zunächst das genannte Service-Center.
HOYER Handel GmbHTasköprüstraße 3DE-22761 HamburgDEUTSCHLAND
DE
AT
CH