Download - RJ PoE IP = 10.x.y - PROFIcomms
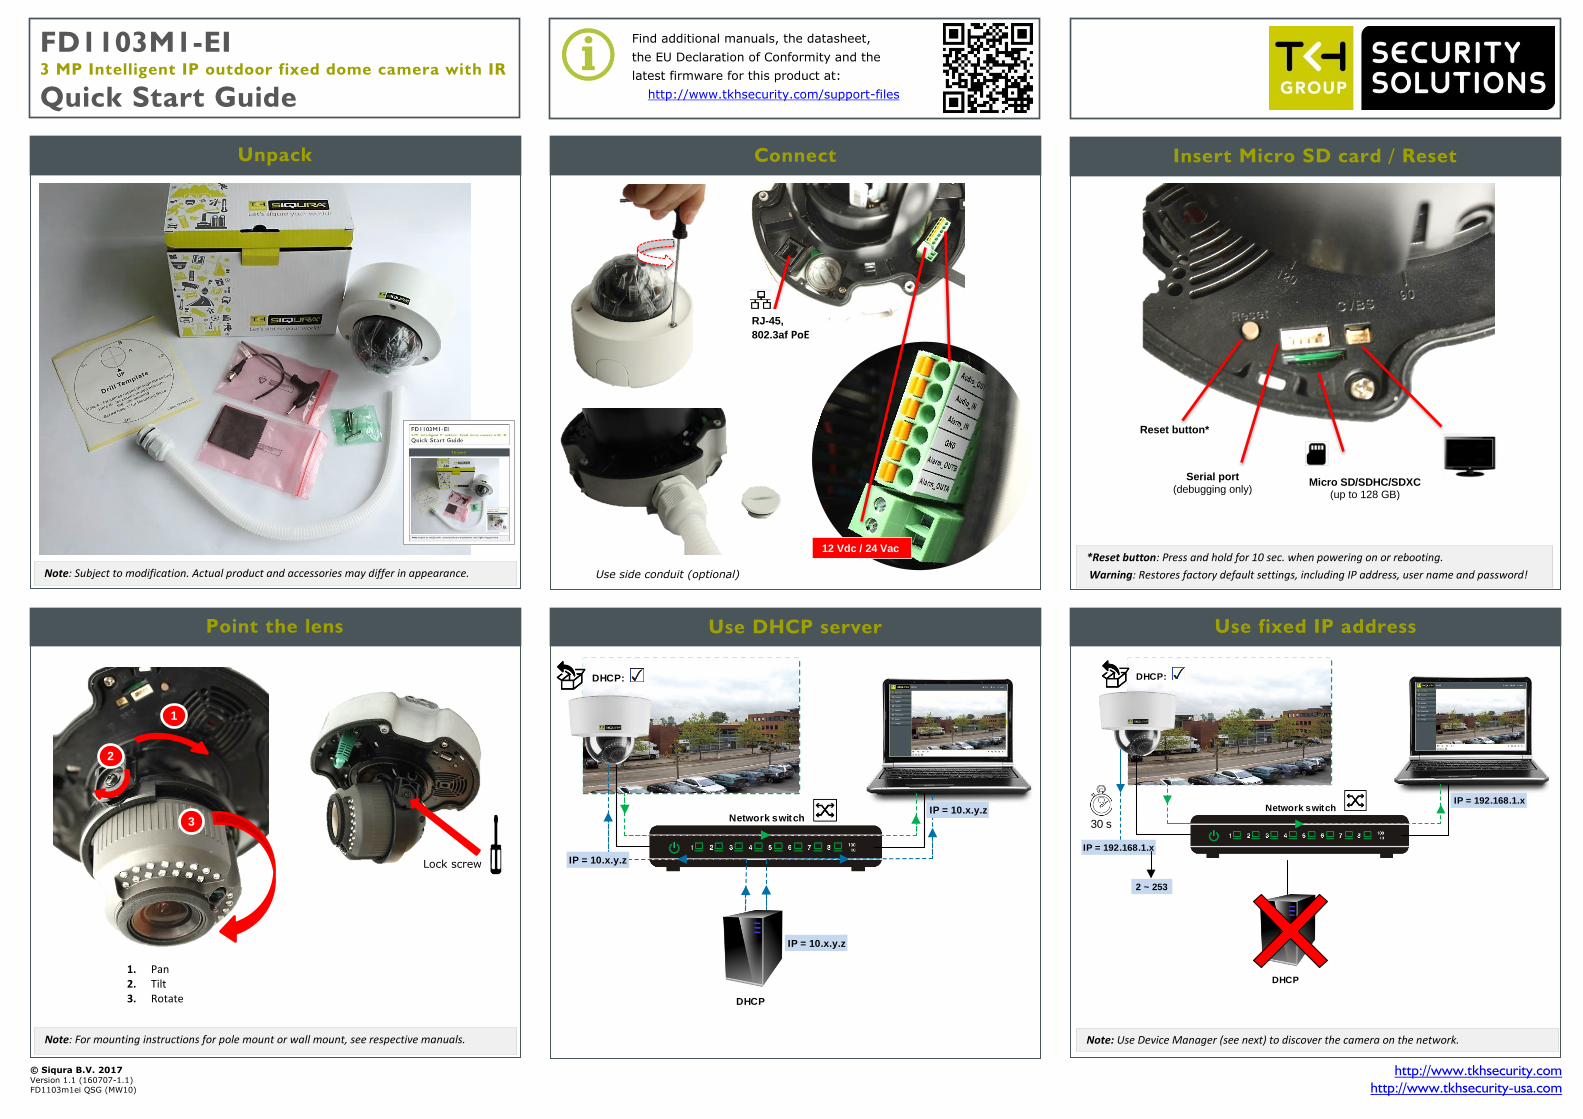
Use DHCP server
FD1103M1-EI
3 MP Intelligent IP outdoor fixed dome camera with IR
Quick Start Guide
© Siqura B.V. 2017 Version 1.1 (160707-1.1)
FD1103m1ei QSG (MW10)
Point the lens
Unpack Connect
Use fixed IP address
Insert Micro SD card / Reset
Note: Subject to modification. Actual product and accessories may differ in appearance.
*Reset button: Press and hold for 10 sec. when powering on or rebooting.
Warning: Restores factory default settings, including IP address, user name and password!
Note: Use Device Manager (see next) to discover the camera on the network. Note: For mounting instructions for pole mount or wall mount, see respective manuals.
1. Pan 2. Tilt 3. Rotate
RJ-45,
802.3af PoE
Use side conduit (optional)
1
2
3
Lock screw
12 Vdc / 24 Vac
DHCP
Network switchIP = 10.x.y.z
IP = 10.x.y.z
DHCP:
IP = 10.x.y.z
DHCP
Network switchIP = 192.168.1.x
IP = 192.168.1.x
DHCP:
30 s
2 ~ 253
Reset button*
Serial port
(debugging only) Micro SD/SDHC/SDXC
(up to 128 GB)
Find additional manuals, the datasheet,
the EU Declaration of Conformity and the
latest firmware for this product at:
http://www.tkhsecurity.com/support-files
http://www.tkhsecurity.com
http://www.tkhsecurity-usa.com
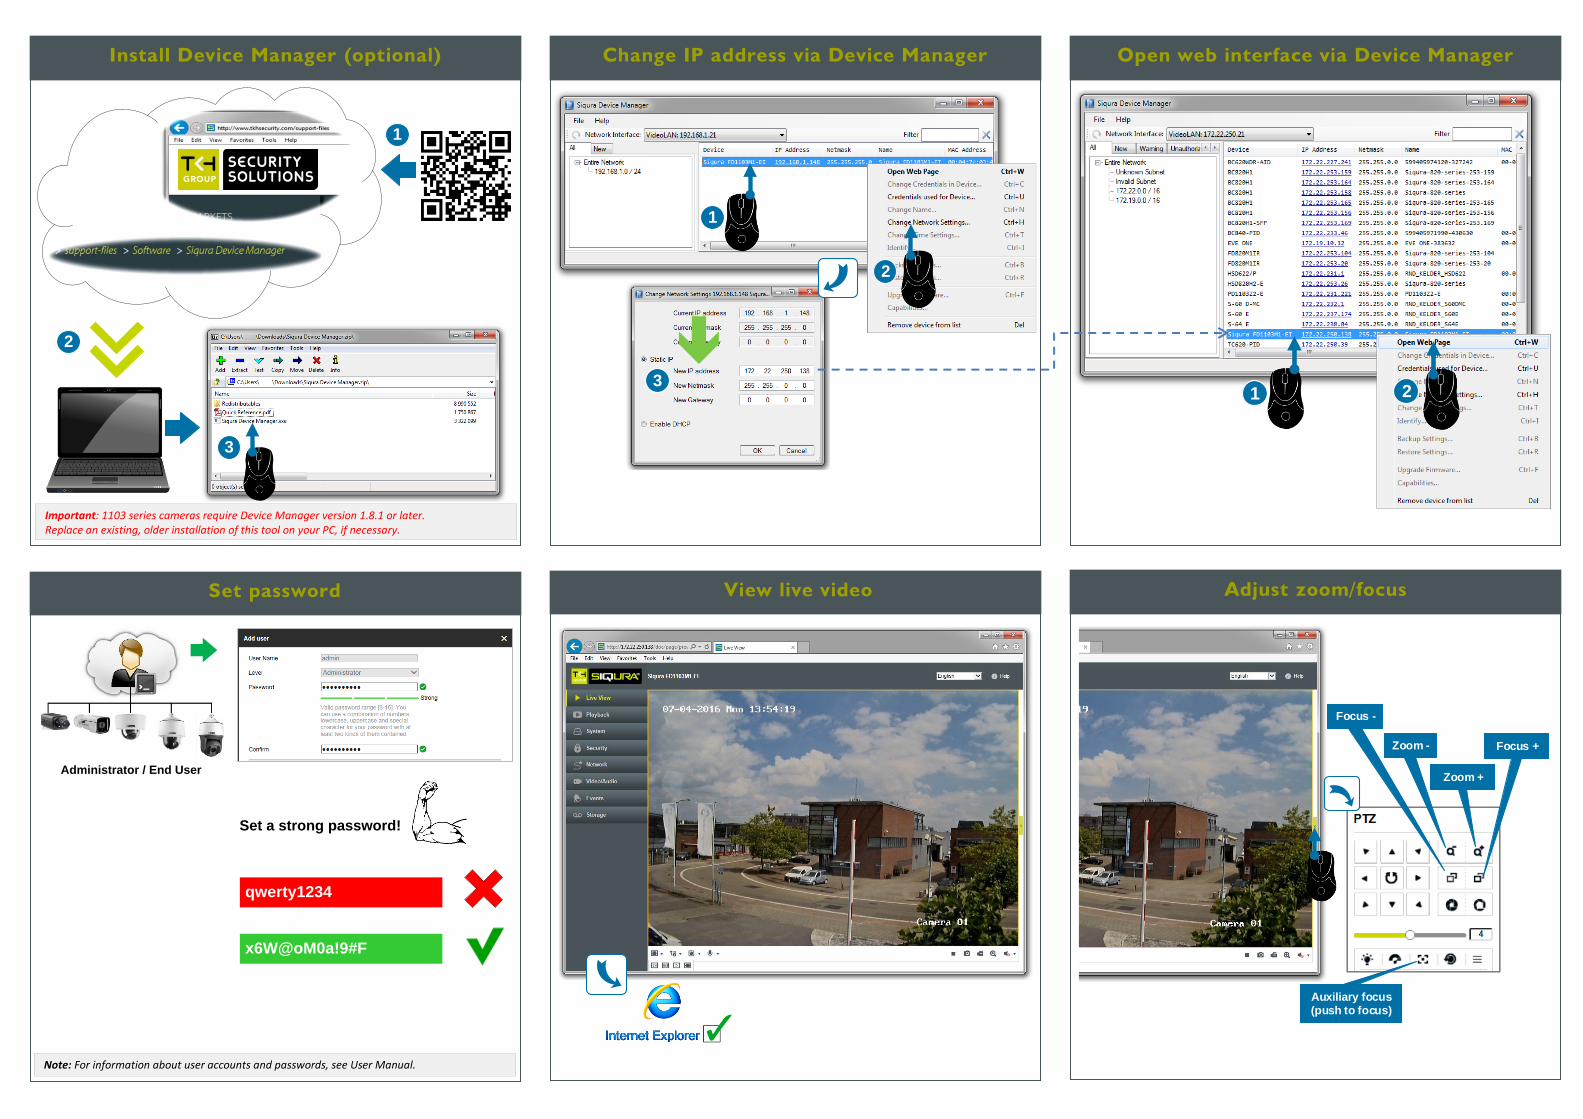
View live video
Adjust zoom/focus
Install Device Manager (optional)
Change IP address via Device Manager
Open web interface via Device Manager
Set password
3
2
1
1 2
Focus +
Focus -
Auxiliary focus (push to focus)
Zoom -
Zoom +
Important: 1103 series cameras require Device Manager version 1.8.1 or later. Replace an existing, older installation of this tool on your PC, if necessary.
1
2
3
Administrator / End User
Set a strong password!
qwerty1234
x6W@oM0a!9#F
Note: For information about user accounts and passwords, see User Manual.


