e help - englishcdn.cnetcontent.com/04/84/04844b16-1a11-4ec8-ba9b-a273450c388… · apps list...
TRANSCRIPT

TX-40AX630BTX-48AX630BTX-55AX630B
e HELP
English

my Home Screenmy Home Screen•Information 12
•How to use 13
•Settings 14
•OSD Colour 16
APPS List•Information 17
•How to use 17
•Settings 18
WatchingBasic•Basic connection 19
•Selecting channel 21
•Information banner 22
•Option Menu 24
•Subtitle 26
•Last view 26
•Off Timer 27
•Energy saving functions 27
•Adjusting time 29
•Language 29
4K resolution•4K compatible equipment 30
•HDCP Setting 30
•HDMI Auto Setting 30
•Valid 4K format 31
External equipment•External connection 32
•Watching external input 35
•Operating with TV’s remote control 36
•HDMI features 37

- 3 -
•Terminal information 39
•Valid input signals 40
For best picture•Viewing Mode 41
•Ambient Sensor 42
•Aspect 42
•Aspect Control Signal 43
•Basic settings 45
•Noise reduction settings 46
•Advanced Settings 47
•Option Settings 50
•Screen Settings 51
•Copy Adjustment 53
For best audio•Sound mode 54
•Basic settings 54
•Volume settings 55
•Voice Guidance Settings 56
•Audio Description 57
•Advanced settings 58
TV Guide•Using TV Guide 61
•Timer Programming 64
Teletext•Viewing Teletext 65
•Teletext mode 66
•Teletext Character Set 67
3D•Note 69
•Viewing 3D 69
•3D Mode Selection 70
•3D Settings 71
•Source image format 73

- 4 -
Tuning and editing channels•Setting menu 75
•Favourites Edit 75
•Channel List 77
•Auto Setup 78
•Manual Tuning 79
•Update Channel List 80
•New Channel Message 80
•Signal Condition 81
•Other settings 81
RecordingUSB HDD setup•Preparations 82
•Setting for USB HDD 83
Recording current programme•One Touch Recording 85
•REW LIVE TV 86
Timer Programming•Setting Timer Programming 88
•Editing Timer Programming 90
•Remote recording 90
•Note 91
Technical information•USB HDD 92
Media PlayerUsing Media Player•Information 93
•Selecting device / mode 95
•Network device 96
Photo mode•Selecting file 98

- 5 -
•Viewing photo 98
•Sorting photos 99
•Multi Shot 3D 99
•Using Slideshow 100
Video mode•Selecting file 104
•Watching video 104
•Video Setup 106
•Audio output settings 107
Recorded TV mode•Selecting content 108
•Watching recorded TV 109
•Grouping contents 110
•Deleting content 110
•Changing device 111
•Chapter List 111
•Audio output settings 111
Music mode•Selecting file 113
•Playing music 113
•Music Setup 114
Technical information•Device handling caution 115
•SD Card 115
•USB devices 116
•Photo format 116
•Video format 117
•Music format 120
NetworkInternet content•Information 121
•Selecting internet content 121
- 6 -
•Note 122
DLNA•Information 123
•Using DLNA 126
Network connections•Internet connection 127
•DLNA connection 128
•Note 130
Network settings•Network Connection 131
•Custom - Wireless 132
•Custom - Wired 134
•Custom - Wireless Access Point 135
•Network Status 136
•my Home Cloud Settings 137
•VIERA Name 137
•TV Remote App Settings 137
•Network Link Settings 139
•TV Anywhere Settings 140
•File Sharing Settings 140
•Software Update 140
•New Software Message 141
Photos•Selecting file 142
•Viewing photo 142
•Using Slideshow 143
Videos•Selecting file 145
•Watching video 145
•Video Setup 147
•Audio output settings 148
Music•Selecting file 149

- 7 -
•Playing music 149
•Music Setup 150
DIGA Recorder•Controlling DIGA Recorder 151
Technical information•Photo format 152
•Video format 152
•Music format 155
FunctionsUser profile•Information 156
•Settings 156
•my Stream 157
Voice Control•Preparations 159
•How to use 160
Touch Pad Controller•Information 161
•My button 161
•Settings 161
Multi Window•Picture in Picture 163
VIERA Link “HDAVI Control™”•Summary of VIERA Link 164
•Preparations 168
•Easy playback 168
•Power on Link 169
•Power off Link 169
•Standby Power Save 169
•Intelligent Auto Standby 169
•VIERA Link Control 170
•Speaker Selection 171

- 8 -
•Note 172
Child Lock•Using Child Lock 173
•PIN number 174
•Parental Rating 174
Data Service Application•Using Data Service Application 175
•Cookie 175
•Note 176
Common Interface•Caution 177
•Using Common Interface 177
Shipping Condition•Shipping Condition 179
Updating the TV Software•Information 180
•Auto update 180
•Manual update 181
Setting characters•Using Numeric buttons 182
Bluetooth devices•Bluetooth Setup 183
Keyboard•Keyboard 184
SettingsSetting menu•How to use 185
Picture•Viewing Mode 187
•Basic settings 187
•Ambient Sensor 188

- 9 -
•Noise reduction settings 188
•Advanced Settings 188
•Option Settings 189
•Screen Settings 190
•3D Settings 191
•Copy Adjustment 192
•Reset to Defaults 192
Sound•Mode 193
•Basic settings 193
•Volume settings 194
•Voice Guidance Settings 195
•Audio Description 196
•Advanced settings 196
•Reset to Defaults 197
Network•Network Connection 198
•Network Status 198
•my Home Cloud Settings 198
•VIERA Name 198
•TV Remote App Settings 198
•Network Link Settings 198
•TV Anywhere Settings 198
•File Sharing Settings 198
•Other settings 199
Timer•Off Timer 200
•Timer Programming 200
•Time Zone 200
•Auto Standby 200
•No signal Power off 200
Setup•Eco Navigation 201

- 10 -
•Voice Control Settings 201
•User Settings 201
•USB Device Setup 201
•Recording Setup 201
•VIERA Touch Pad Controller 201
•Bluetooth Setup 201
•Child Lock 202
•Tuning Menu 202
•Language 204
•Display Settings 204
•HDCP Setting 206
•HDMI Auto Setting 206
•Common Interface 206
•VIERA Link Settings 206
•Data Service Application 207
•System Menu 208
•Other Settings 208
SupportFAQs•Picture 209
•Digital TV 210
•Analogue TV 211
•Sound 211
•3D 212
•HDMI 213
•Network 214
•Other 215
Maintenance•Care and Cleaning 217
Information•Using Help menu 218

- 11 -
Optional accessories•3D Eyewear 219
•Communication Camera 219
•Wall-hanging bracket 219
Licence•Licence 221
OK Letters enclosed in a box indicate remote control buttons.Menu Letters in cyan indicate on-screen display items.
References in this eHELP
● The images shown in this eHELP are for illustrative purposes only.

- 12 -
my Home Screen
my Home ScreenInformation“my Home Screen” is a gateway to the TV, applications, and more.
It provides easy access to special features such as Media Player, videos, games, communication tools, etc. as shown below (example).
HOME
OK
OK HOME
Home Screen
Selected content screen (TV, application, etc.)
Home Screen Selection
– Your preferred Home Screen can be selected.

- 13 -
How to useHome Screen provides access to special features such as Media Player, TV, internet content, data services, communication tools, etc.
1. Display Home Screen with HOME.(Example)
● The last viewed Home Screen is displayed when the TV is turned on. ● Press again to select or add your preferred Home Screen layout.
my Home Screen > my Home Screen > Settings
2. Select a feature with / / / and press OK to access. ● To watch full-screen TV
1) Select the TV viewer with / / / .(Example)
2) Press OK to watch.(Example)
● Also refer to Tutorial from the tool guide.

- 14 -
SettingsSelect the setup menu from the tool guide on the top of the screen.(Example)
■ Home Screen Selection1. Display Home Screen Selection with HOME.
(Example)
2. Select the screen with / and press OK to set.
Full Screen TV:
Displays full-screen TV.
TV Home Screen:
To make your TV experience more convenient and comfortable
Lifestyle Screen:
Displays the TV with useful information and services for everyday life.
Info Screen:
Enjoy internet content while watching TV.
■ Face Recognition / Voice Print RecognitionBy using the Communication Camera and Voice Control function, this TV recognises your face / voice and displays the registered Home Screen.
● Say “my Home Screen” into the microphone of the Touch Pad Controller to use this function.
● To use this function, you need to set up a user profile and register face / voice data, preferred Home Screen, etc.
Functions > User profile > Settings

- 15 -
● Communication Camera is not included. Please purchase as necessary.
Support > Optional accessories > Communication Camera
● For details of Voice Control function
Functions > Voice Control
■ SettingsYou can customise any Home Screen. (For example, changing the wallpaper, renaming freely, editing applications, setting the screen launched when the TV is turned on, etc.)
1. Select Settings from the tool guide.
2. Follow the on-screen instructions.
■ SearchYou can search the content from various features.
1. Select Search from the tool guide.
2. Follow the on-screen instructions.
= Note = ● To change the colour type of on-screen displays, set OSD Colour.
my Home Screen > my Home Screen > OSD Colour
● To use this function fully, you need a broadband network environment. Ensure the network connections and network settings are completed.
Network > Network connections
Network > Network settings
● Be sure to update the software when a software update notice is displayed on the TV screen. If the software is not updated, you may not be able to use my Home Screen. You can update the software later manually.
Network > Network settings > Software Update

- 16 -
OSD Colour1. Display the menu with MENU.
2. Select Setup > Display Settings > OSD Colour with / and press OK to access.
3. Set with / and press OK to store.
OSD Colour
(Jet black / Pale grey / Organic brown / Sand beige)
Selects the preferred colour type of on-screen displays. ● This function is available for the information banner, menu screen, Home Screen, etc.

- 17 -
APPS ListInformationVarious applications (internet contents, network contents, Media Player, etc.) can be accessed easily from APPS List.
■ APPS List(Example)
= Note = ● APPS List is subject to change without notice.
How to useYou can access special features such as internet contents, network contents, Media Player, etc. from APPS List.
1. Display APPS List with APPS.(Example)
● To exit APPS List
EXIT
2. Select an icon of the features with / / / and press OK to access.
Internet contents
Network > Internet content
my Stream ● Provides recommended contents (TV programme, internet content, etc.).
● You need a broadband network environment to use this function fully. ● Follow the on-screen instructions to operate the application.
Functions > User profile > my Stream
- 18 -
Media Player
Media Player > Using Media Player > Selecting device / mode
Recorded TV
Media Player > Recorded TV mode
Media Server
Network > DLNA > Using DLNA
VIERA Link
Functions > VIERA Link “HDAVI Control™”
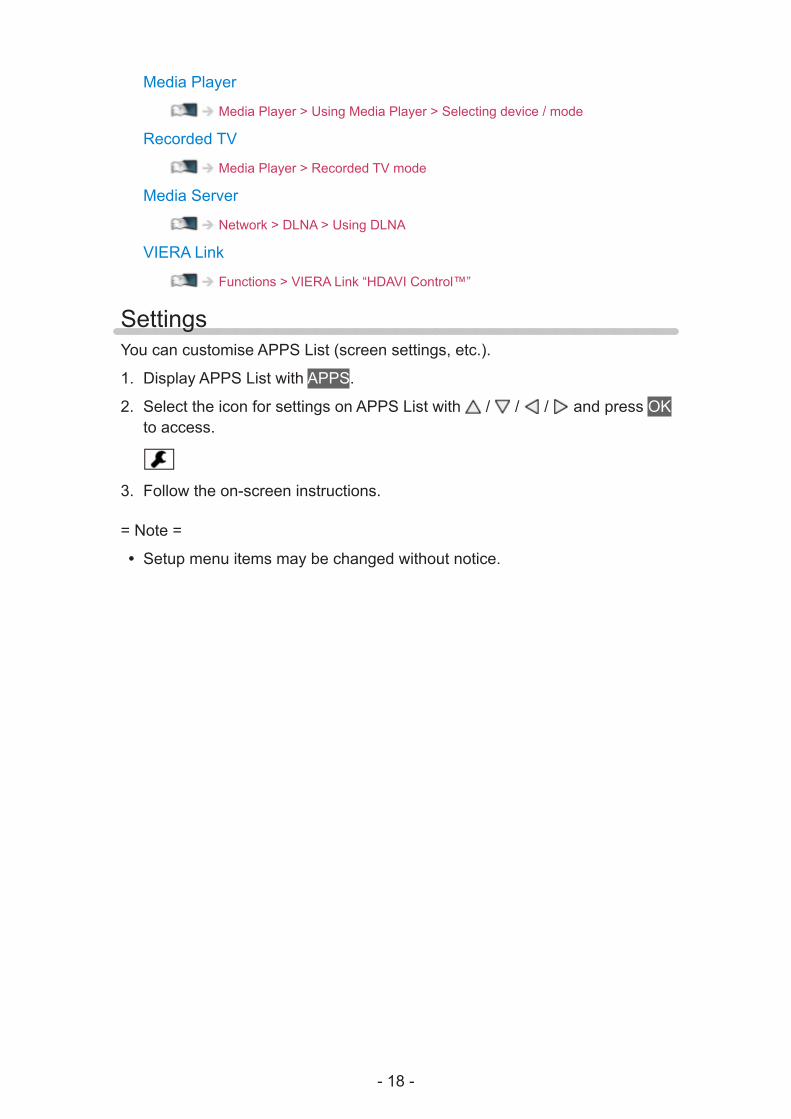
SettingsYou can customise APPS List (screen settings, etc.).
1. Display APPS List with APPS.
2. Select the icon for settings on APPS List with / / / and press OK to access.
3. Follow the on-screen instructions.
= Note = ● Setup menu items may be changed without notice.

- 19 -
Watching
BasicBasic connectionPlease ensure that the unit is disconnected from the mains socket before attaching or disconnecting any cables.
■ Aerial
Terrestrial / cable terminal
RF cable
Terrestrial aerial / Cable ● For DVB-C, DVB-T, Analogue
■ DVD Recorder / VCR
Terrestrial / cable terminal
RF cable
DVD Recorder / VCR
Terrestrial aerial / Cable

- 20 -
AV1 (SCART) terminal
SCART cable
■ DVD Recorder (VCR) / Set top box
HDMI terminal
HDMI cable
Set top box
Satellite dish
AV1 (SCART) terminal
SCART cable
Terrestrial / cable terminal
RF cable
DVD Recorder / VCR
Terrestrial aerial / Cable
= Note = ● For VIERA Link connections
Functions > VIERA Link “HDAVI Control™” > Summary of VIERA Link
● External equipment and cables shown are not supplied with this TV. ● Please also read the manual of the equipment being connected. ● Keep the TV away from electronic equipment (video equipment, etc.) or equipment with an infrared sensor, otherwise distortion of image / sound may occur or operation of other equipment may be affected.
● Use a fully wired HDMI compliant cable. ● Use a fully wired SCART cable.

- 21 -
● Check the terminal type and cable plugs are correct when connecting.
Selecting channel1. Display TV Selection with TV.
2. Select the mode with / and press OK to set.
DVB-C / DVB-T / Analogue ● The selectable modes vary depending on the channels stored. ● You can also select the mode pressing TV repeatedly. ● If TV Selection is not displayed, press TV to switch the mode.
3. Select a channel with Channel Up / Down or Numeric buttons.
● Press Numeric buttons to select a channel position with 2 or more-digit (e.g. 399, press ).
■ To select a channel from the channel list1. Display the channel list with OK.
2. Select a channel from the list with / and press OK to watch. ● To sort channel names in alphabetical order
(red) ● To change the category
(blue)
■ To select a channel using information banner1. Display information banner with if it is not displayed.
2. Select a channel with / and press OK to watch while the banner is displayed.
Watching > Basic > Information banner

- 22 -
■ To select a channel using TV Guide1. Display TV Guide with GUIDE.
2. Select the current programme with / / / and press OK to access.
– The current programme is displayed on the top left of the screen.
3. Select View with / and press OK to watch. (DVB)
Watching > TV Guide > Using TV Guide
● The postcode entry or update may be required depending on the country you select. Follow the on-screen instructions.
■ To watch pay-TV ● For information of the encrypted channels
Functions > Common Interface > Using Common Interface
● Consult the operator / broadcaster or CI module manufacturer for more information and conditions of the services.
Information bannerDisplay information banner with .
● Also appears when changing a channel.(Example)
Channel position and name
Channel type (Radio, HDTV, etc.) / Encrypted channel ( ) / TV mode ( , , )
Programme
Start time / End time (except Analogue)
Channel position, etc. (Analogue)
Progress time indicator of the selected programme (except Analogue)
Category ● To change the category (DVB)
1) Display the category list with (blue).

- 23 -
2) Select the category with / and press OK to change.
Current time
Features available / message meanings
Bad signal:
Poor quality TV signal
Dolby D+, Dolby D, HE-AAC:
Dolby Digital Plus, Dolby Digital or HE-AAC audio track
AD:
Audio Description service available ● This function can aid visually-impaired viewers by adding an
additional audio track to describe events on screen.
Watching > For best audio > Audio Description
:
Subtitle service available
:
Teletext service available
:
Multiple audio available
:
Multiple video available
:
Multiple audio and video available
Stereo, Mono:
Audio mode
:
Data service (Hybrid Broadcast Broadband TV application) available
Functions > Data Service Application > Using Data Service Application
1 – 90:
Off Timer remaining time
Watching > Basic > Off Timer
● To confirm another tuned channel
/ ● To watch the channel listed in the banner
OK

- 24 -
● Information on the next programme (DVB)
● Extra information (DVB)
– Press again to hide the banner. ● To hide the banner
EXIT ● To adjust banner timeout, set Banner Display Timeout.
1) Display the menu with MENU.
2) Select Setup > Display Settings > Banner Display Timeout with / and press OK to access.
3) Set with / and press OK to store. ● To change the colour type of on-screen displays, set OSD Colour.
my Home Screen > my Home Screen > OSD Colour
● To display the introduction banner for the internet service
1) Display the menu with MENU.
2) Select Setup > Display Settings > Smart Banner with / and press OK to access.
3) Select On / Off with / and press OK to set.
Option MenuConfirm or change the current status.
1. Display the option menu with OPTION.
2. Select one of the following items with / and press OK to access.
Voice Guidance Settings / Audio Type / Multi Video / Multi Audio / Dual Audio / Sub Channel / Subtitle Language / Teletext Character Set / Teletext Language / MPX / Volume Correction
● The function items vary depending on the TV mode and country you select.
3. Set with / / / and press OK to store.
Voice Guidance Settings
Guidance settings for visually impaired users
Watching > For best audio > Voice Guidance Settings

- 25 -
Audio Type
Set to Audio Description if the programme has Audio Description service, then you will hear an additional audio track to describe events on screen (if available).
● For DVB ● To adjust the volume for Audio Description
Watching > For best audio > Audio Description
Multi Video
Selects from a group of multiple videos (if available). ● This setting is not memorised and it will return to the default setting once you exit the current programme.
● For DVB
Multi Audio
Selects between alternative language or Audio Description for sound tracks (if available).
● This setting is not memorised and it will return to the default setting once you exit the current programme.
● For DVB
Dual Audio
Selects stereo / monaural (if available). ● For DVB
Sub Channel
Selects the multifeed programme - sub channel (if available). ● For DVB
Subtitle Language
Selects the language for subtitles (if available). ● For DVB
Teletext Character Set
Sets the teletext language font.
Watching > Teletext > Teletext Character Set

- 26 -
Teletext Language
Selects between alternative languages for teletext (if available). ● For DVB
MPX
Selects multiplex sound mode (if available). Watching > For best audio > Advanced settings
● For Analogue
Volume Correction
Adjusts the volume of each individual channel or input mode.
SubtitleDisplay / hide subtitles (if available) with STTL.
● To select the preferred language for DVB subtitles (if available), set Preferred Subtitles.
Watching > Basic > Language
● To select the preferred subtitle type
1) Display the menu with MENU.
2) Select Setup > Display Settings > Preferred Subtitle Type with / and press OK to access.
3) Select Standard / Hard of Hearing with / and press OK to set.
– Hard of Hearing provides aids in understanding and enjoyment with DVB subtitles (depending on the broadcaster).
● Preferred Subtitles 1 / 2 in Language are given priority.
Watching > Basic > Language
= Note = ● Subtitles may not be displayed properly in 3D images. ● If you press STTL in Analogue, the TV switches to teletext service and calls up a favourite page. Press EXIT to return to TV mode.
Last viewSwitch to a previously viewed channel or input mode easily with LAST VIEW.
● Press again to return to the current view.
= Note = ● Switching channel may not be available depending on the condition.

- 27 -
● Watching less than 10 seconds is not reflected in the previously viewed channel or input mode.
Off TimerTurn the TV Standby mode automatically after a fixed period.
1. Display the menu with MENU.
2. Select Timer > Off Timer with / and press OK to access.
3. Select the time in 15-minute increments with / and press OK to set.
90 / 75 / 60 / 45 / 30 / 15 / Off (minutes) ● To cancel, set to Off or turn the TV off. ● The remaining time displays on the information banner.
Watching > Basic > Information banner
● When the remaining time is less than 3 minutes, the remaining time will flash on the screen.
Energy saving functionsThe TV can be eco-friendly using energy-saving functions.
The TV will automatically go into Standby mode in the following conditions: ● Eco Navigation is set to Set to Eco. ● Off Timer is active.
Watching > Basic > Off Timer
● No operation is performed for 4 hours while Auto Standby is set to On. ● No signal is received and no operation is performed for 10 minutes while No signal Power off is set to On.
= Note = ● This function does not affect the recording.
■ Auto Standby1. Display the menu with MENU.
2. Select Timer > Auto Standby with / and press OK to access.
3. Select On / Off with / and press OK to set.
Auto Standby
(On / Off)
Automatically turns the TV to Standby mode for energy saving when no operation is performed for 4 hours.
- 28 -
● Automatic input switching with the connected equipment affects this function and time-count will be reset.
● The notification message will appear 3 minutes before going into Standby mode.
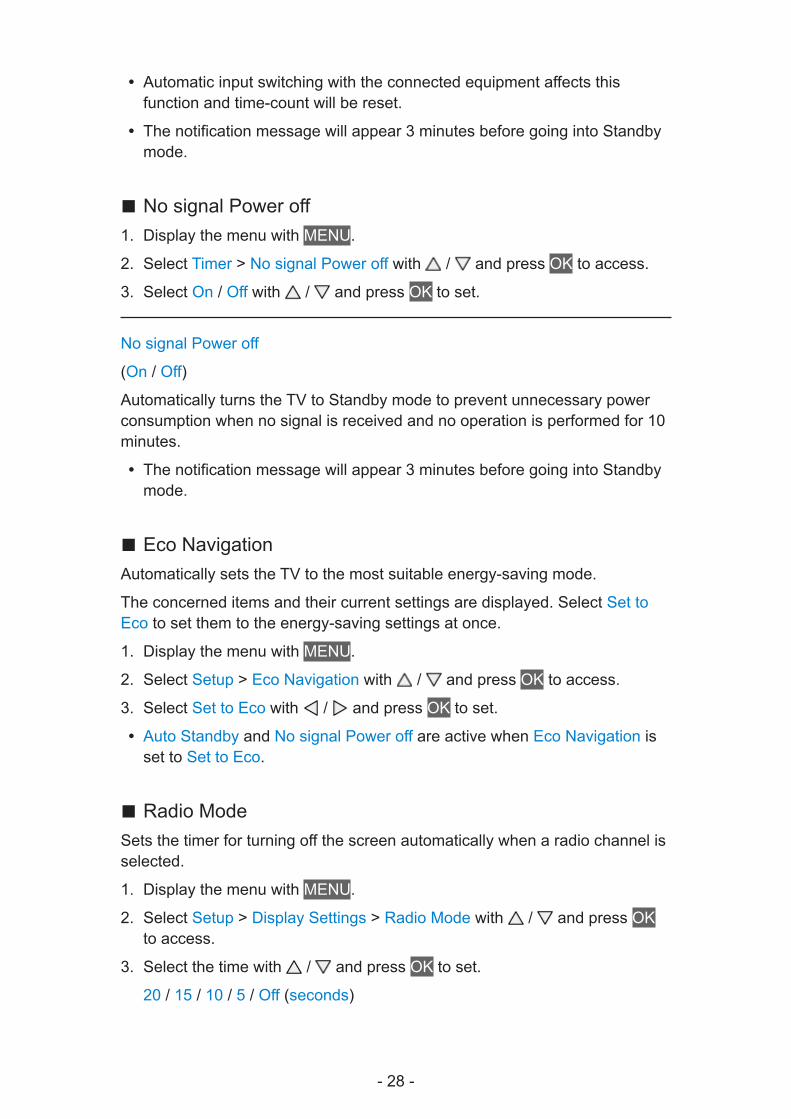
■ No signal Power off1. Display the menu with MENU.
2. Select Timer > No signal Power off with / and press OK to access.
3. Select On / Off with / and press OK to set.
No signal Power off
(On / Off)
Automatically turns the TV to Standby mode to prevent unnecessary power consumption when no signal is received and no operation is performed for 10 minutes.
● The notification message will appear 3 minutes before going into Standby mode.
■ Eco NavigationAutomatically sets the TV to the most suitable energy-saving mode.
The concerned items and their current settings are displayed. Select Set to Eco to set them to the energy-saving settings at once.
1. Display the menu with MENU.
2. Select Setup > Eco Navigation with / and press OK to access.
3. Select Set to Eco with / and press OK to set. ● Auto Standby and No signal Power off are active when Eco Navigation is set to Set to Eco.
■ Radio ModeSets the timer for turning off the screen automatically when a radio channel is selected.
1. Display the menu with MENU.
2. Select Setup > Display Settings > Radio Mode with / and press OK to access.
3. Select the time with / and press OK to set.
20 / 15 / 10 / 5 / Off (seconds)

- 29 -
● The sound is active even if the screen turns off. This function is effective in reducing power consumption when listening to a radio channel.
● Press any buttons except Standby On / Off switch, Volume Up / Down and MUTE to turn the screen on.
● Not valid in Analogue
Adjusting timeAdjusts the time data.
1. Display the menu with MENU.
2. Select Timer > Time Zone with / and press OK to access.
3. Set with / and press OK to store. ● The time data will be corrected based on GMT.
Language1. Display the menu with MENU.
2. Select Setup > Language with / and press OK to access.
3. Select one of the following items with / and press OK to access.
OSD Language / Preferred Audio 1 / 2 / Preferred Subtitles 1 / 2 / Preferred Teletext
4. Set with / / / and press OK to store.
OSD Language
Changes language for on-screen displays.
Preferred Audio 1 / 2
Selects the first and second preferred language for DVB multi audio (depending on the broadcaster).
Preferred Subtitles 1 / 2
Selects the first and second preferred language for DVB subtitles (depending on the broadcaster).
● To display subtitles
Watching > Basic > Subtitle
Preferred Teletext
Selects the preferred language for DVB teletext service (depending on the broadcaster).

- 30 -
4K resolution4K compatible equipmentYou can watch the contents of 4K format that have twice the horizontal and vertical resolution of the 1080p signal.
● For valid 4K format Watching > 4K resolution > Valid 4K format
● Connect the 4K compatible equipment to HDMI terminal using a 4K compatible cable and you can watch contents of 4K format.
■ 4K compatible equipment
HDMI terminal
HDMI cable
4K compatible equipment ● Check the terminal type and cable plugs are correct when connecting. ● Use a fully wired HDMI compliant cable. ● If 4K compatible equipment supports 4K (60p, 50p) 4:4:4 output, use HDMI1 for connecting.
HDCP Setting1. Display the menu with MENU.
2. Select Setup > HDCP Setting with / and press OK to access.
3. Set with / and press OK to store.
HDCP Setting
(Auto / 2.2 / 1.4)
Select a version of HDCP according to the content you watch. ● HDCP is a technology of copy protection for digital audio / video contents. ● For HDMI input
HDMI Auto Setting1. Display the menu with MENU.
2. Select Setup > HDMI Auto Setting with / and press OK to access.

- 31 -
3. Set with / and press OK to store.
HDMI Auto Setting
(Mode1 / Mode2)
Set to Mode1 when the image in HDMI input is not displayed properly. ● For HDMI input
Valid 4K format
■ Valid 4K format (HDMI)
● 4K UHD
3 840 × 2 160 (60p, 50p, 30p, 25p, 24p)
– Aspect is fixed to 16:9.
● DCI 4K
4 096 × 2 160 (60p, 50p, 30p, 25p, 24p)
– Actual resolution is 3 840 × 2 160p.
– Selectable aspect is 16:9, H Full or V Full.
= Note = ● Valid 4K format varies depending on HDMI terminals as following.
HDMI1:
30p, 25p, 24p / 4:4:4 (8 bit, 10 bit, 12 bit)
60p, 50p / 4:4:4 (8 bit)
HDMI2/3:
30p, 25p, 24p / 4:4:4 (8 bit)
60p, 50p / 4:2:0 (8 bit) ● The above signals are reformatted for optimal viewing on your display. ● 3D content of 4K format is not supported. ● The broadcast of 4K format is not supported. ● For details of aspect
Watching > For best picture > Aspect

- 32 -
External equipmentExternal connectionThese diagrams show our recommendations for connection of your TV to various pieces of equipment. For other connections, consult the instructions for each piece of equipment.
● For basic connection
Watching > Basic > Basic connection
● To use the specific devices supporting Bluetooth wireless technology Functions > Bluetooth devices
● Check the terminal type and cable plugs are correct when connecting.
■ HDMI equipment
HDMI terminal
HDMI cable
Recorder / Player / 3D compatible player / Set top box / Camcorder / Amplifier with speaker system
= Note = ● Use a fully wired HDMI compliant cable. ● For VIERA Link connections
Functions > VIERA Link “HDAVI Control™” > Summary of VIERA Link
● Use HDMI1 or HDMI2 for connecting an amplifier and match the output setting in ARC Output in the Sound menu. This connection is applicable when using an amplifier that has ARC (Audio Return Channel) function. If an amplifier supports 4K (60p, 50p) 4:4:4 output, use HDMI1 for connecting and set ARC Output to HDMI1.
Watching > For best audio > Advanced settings

- 33 -
■ AV devices
AV2 (COMPONENT) terminals
Component cables
DVD Player
AV2 (VIDEO) terminals
Composite cables
Camcorder / Game equipment
■ USB devices
USB port
USB cable
USB HDD / Communication Camera
= Note = ● It is recommended to connect the device to the TV’s USB port directly. ● You cannot use two or more of the same kind of USB devices simultaneously except USB Flash Memory or USB HDD.

- 34 -
● Use USB 2 port for connecting the USB HDD. ● Use USB 1 port for connecting the Communication Camera. ● Some USB devices or USB HUB may not be used with this TV. ● You cannot connect any devices by using USB card reader. ● Additional information for the devices may be on the following website.
http://panasonic.net/viera/support (English only)
■ To listen with speakers
DIGITAL AUDIO
Optical digital audio cable
Amplifier with speaker system ● To enjoy multi-channel sound from external equipment (e.g. Dolby Digital 5.1ch), connect the equipment to the amplifier. For the connections, read the manuals of the equipment and amplifier.
● To select the sound output to adjust volume, set Speaker Setting.
Watching > For best audio > Volume settings
■ Headphones
Headphone jack
M3 stereo mini plug
Headphones ● To adjust volume, set Headphone Volume.
Watching > For best audio > Advanced settings
● To select the sound output to adjust volume, set Speaker Setting.
Watching > For best audio > Volume settings

- 35 -
Watching external inputConnect the external equipment (VCR, DVD, etc.) and you can watch through the input.
1. Display the input selection menu with AV.
2. Select the input mode connected to the equipment with / and press OK to watch. (The selected mode is displayed on the top left of the screen.)
● TV receives input signals automatically connecting with SCART when playback starts.
– Input signals are automatically identified by the SCART (pin 8) terminal.
– This function is also available for HDMI connections when VIERA Link is set to On.
Functions > VIERA Link “HDAVI Control™” > Easy playback
– When input mode is not switched automatically, perform as above or check the setup of the equipment.
● You can also select the input pressing AV. Press repeatedly until the desired input is selected.
● To switch between COMPONENT and VIDEO in AV2, select with / . ● You can label or skip each input mode. Skipped inputs will not be displayed when AV is pressed. (Input Labels)
● The remote control is capable of operating the contents or external equipment.
Watching > External equipment > Operating with TV’s remote control
● To return to TV mode
TV
= Note = ● If the external equipment has an aspect adjustment function, set it to 16:9. ● For details, read the manual of the equipment or ask your local dealer.
■ Input LabelsAccesses the input labels list to select the label of each input mode or set to skip unconnected one for easier identification and selection in TV Selection, Input Selection or banner.
Watching > Basic > Information banner
1. Display the menu with MENU.
2. Select Setup > Display Settings > Input Labels with / and press OK to access.

- 36 -
3. Set with / / / and press OK to set. ● To name each input mode freely, select User input and set characters (maximum 10 characters).
● To skip the input mode, select Skip.
■ Playing Time DisplaySet to On to display a time period of continuous use in Game mode on the top right of the screen every 30 minutes.
1. Display the menu with MENU.
2. Select Setup > Display Settings > Playing Time Display with / and press OK to access.
3. Select On / Off with / and press OK to set. ● This function is available when Game Mode is set to On.
Operating with TV’s remote controlYou can operate the contents in Media Player / media server, recording functions or the connected equipment with the below buttons of this TV’s remote control.
:
Playback (VCR / DVD / video content)
:
Stop the operations
:
Rewind, view the picture rapidly in reverse (VCR)
Skip to the previous track, title or chapter (DVD / video content)
:
Rewind, view the picture rapidly in reverse (VCR)
Search backward (DVD / video content)
:
Fast-forward, view the picture rapidly forward (VCR)
Skip to the next track, title or chapter (DVD / video content)
:
Fast-forward, view the picture rapidly forward (VCR)
Search forward (DVD / video content)

- 37 -
:
Pause / Resume
Press and hold to play at slow speed (DVD)
:
One Touch Recording
Recording > Recording current programme > One Touch Recording
■ How to change the codeEach Panasonic product has its own remote control code. Change the code according to the product for operation.
1. Press and hold Standby On / Off switch during the following operations.
2. Enter the appropriate code as follows with Numeric buttons.
● Codes for each product and features
70: DVD Recorder, DVD Player, Blu-ray Disc Player
71: Player theatre, Blu-ray Disc theatre
72: VCR
73 (default):
Using in USB HDD recording, Media Player, DLNA features or VIERA Link
3. Press to change.
= Note = ● Confirm if the remote control works correctly after changing the code. ● The codes may be reset to defaults if batteries are replaced. ● Some operations may not be available depending on the equipment.
HDMI featuresHDMI (high-definition multimedia interface) is the world’s first complete digital consumer AV interface complying with a non-compression standard.
HDMI allows you to enjoy high-definition digital images and high-quality sound by connecting the TV and the equipment.

- 38 -
HDMI-compatible equipment with an HDMI or DVI output terminal, such as a DVD player, a set top box or game equipment, can be connected to the HDMI terminal using a fully wired HDMI compliant cable.
Watching > External equipment > External connection
: The HDMI logo is displayed on HDMI-compliant equipment.
■ Applicable HDMI features ● Input audio signal:
2ch Linear PCM (sampling frequencies - 48 kHz, 44.1 kHz, 32 kHz) ● Input video signal:
Matches the output setting of the digital equipment.
Watching > External equipment > Valid input signals
● VIERA Link (HDAVI Control 5)
Functions > VIERA Link “HDAVI Control™” > Summary of VIERA Link
● Content Type ● Deep Colour ● Audio Return Channel
– Audio Return Channel (ARC) is a function to send digital sound signals via an HDMI cable.
– For HDMI1 / HDMI2 terminals
– Match the output setting in ARC Output in the Sound menu.
Watching > For best audio > Advanced settings
● 3D ● 4K
Watching > 4K resolution > Valid 4K format
■ DVI connectionIf the external equipment has only a DVI output, connect to the HDMI terminal via a DVI to HDMI adaptor cable. When using the DVI to HDMI adaptor cable, connect the audio cable to the audio input terminal (use AV2 audio terminals).
● Enquire HDMI adaptor cable at your local digital equipment retailer shop.
= Note = ● Audio settings can be made on HDMI Input in the Sound Menu.
Watching > For best audio > Advanced settings

- 39 -
● If the connected equipment has an aspect adjustment function, set the aspect ratio to “16:9”.
● These HDMI connectors are “type A”. ● These HDMI connectors are compatible with HDCP (High-Bandwidth Digital Content Protection) copyright protection.
● Equipment having no digital output terminal may be connected to the input terminal of component or video to receive analogue signals.
● This TV incorporates HDMI™ technology.
Terminal information
■ AV1 (SCART) terminal (RGB, VIDEO)
1 : Audio out (R)2 : Audio in (R)3 : Audio out (L)4 : Audio earth5 : Blue earth6 : Audio in (L)7 : Blue in8 : Status CVBS9 : Green earth10: --11 : Green in
12: --13: Red earth14: Earth15: Red in16: Status RGB17: CVBS earth18: RGB status earth19: CVBS out (video)20: CVBS in (video)21: Socket Earth

- 40 -
■ HDMI terminal
1 : TMDS Data2+2 : TMDS Data2 Shield3 : TMDSData2−4 : TMDS Data1+5 : TMDS Data1 Shield6 : TMDSData1−7 : TMDS Data0+8 : TMDS Data0 Shield9 : TMDSData0−10: TMDS Clock+
11 : TMDS Clock Shield12: TMDSClock−13: CEC14: Utility15: SCL16: SDA17: DDC/CEC Ground18: +5V Power19: Hot Plug Detect
Valid input signals
■ COMPONENT, HDMISignal name COMPONENT HDMI
525 (480) / 60i, 60p ○ ○
625 (576) / 50i, 50p ○ ○
750 (720) / 60p, 50p ○ ○
1 125 (1 080) / 60i, 50i ○ ○
1 125 (1 080) / 60p, 50p, 24p ○
3 840 × 2 160 / 60p, 50p, 30p, 25p, 24p ○
4 096 × 2 160 / 60p, 50p, 30p, 25p, 24p ○
○:Applicableinputsignal
= Note = ● Signals other than above may not be displayed properly. ● The above signals are reformatted for optimal viewing on your display.
- 41 -
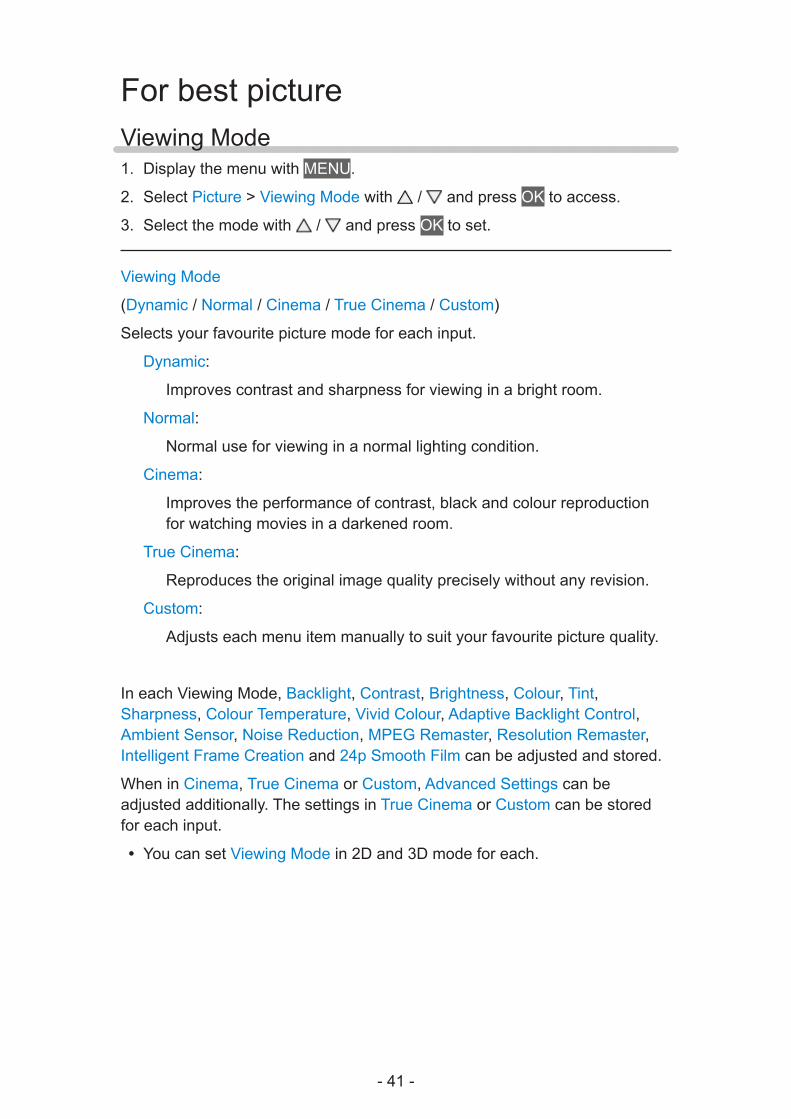
For best pictureViewing Mode1. Display the menu with MENU.
2. Select Picture > Viewing Mode with / and press OK to access.
3. Select the mode with / and press OK to set.
Viewing Mode
(Dynamic / Normal / Cinema / True Cinema / Custom)
Selects your favourite picture mode for each input.
Dynamic:
Improves contrast and sharpness for viewing in a bright room.
Normal:
Normal use for viewing in a normal lighting condition.
Cinema:
Improves the performance of contrast, black and colour reproduction for watching movies in a darkened room.
True Cinema:
Reproduces the original image quality precisely without any revision.
Custom:
Adjusts each menu item manually to suit your favourite picture quality.
In each Viewing Mode, Backlight, Contrast, Brightness, Colour, Tint, Sharpness, Colour Temperature, Vivid Colour, Adaptive Backlight Control, Ambient Sensor, Noise Reduction, MPEG Remaster, Resolution Remaster, Intelligent Frame Creation and 24p Smooth Film can be adjusted and stored.
When in Cinema, True Cinema or Custom, Advanced Settings can be adjusted additionally. The settings in True Cinema or Custom can be stored for each input.
● You can set Viewing Mode in 2D and 3D mode for each.

- 42 -
Ambient Sensor1. Display the menu with MENU.
2. Select Picture > Ambient Sensor with / and press OK to access.
3. Select On / Off with / and press OK to set.
Ambient Sensor
(On / Off) ● Automatic Brightness Control function
Adjusts picture settings automatically depending on ambient lighting conditions.
AspectChange the aspect ratio (image size) with ASPECT.
■ To change the aspect ratio manually1. Display Aspect Selection with ASPECT.
2. Select the mode with / and press OK to set. ● You can also change the mode pressing ASPECT.
(Press repeatedly until you reach the desired mode.)
Auto:
The best ratio is selected automatically according to the “Aspect Control Signal”.
Watching > For best picture > Aspect Control Signal
16:9:
Directly displays the image at 16:9 without distortion (anamorphic).
14:9:
Displays the image at the standard 14:9 without distortion.
Just:
Displays a 4:3 image full-screen. Stretching is only noticeable at the left and right edges.
4:3:
Displays the image at the standard 4:3 without distortion.
Zoom:
Displays a 16:9 letterbox or 4:3 image without distortion.

- 43 -
4:3 Full:
Displays a 4:3 image enlarged horizontally to fit the screen. ● For HD (High definition) signals
Sidecut Just:
Displays a 16:9 letterbox (anamorphic) image full-screen. Stretching is only noticeable at the left and right edges.
● For HD (High definition) signals
Sidecut Zoom:
Displays a 16:9 letterbox (anamorphic) image full-screen without distortion. ● For HD (High definition) signals
H Full:
Displays the image enlarged horizontally to fit the screen without distortion.
● For DCI 4K format
V Full:
Displays the image enlarged vertically to fit the screen without distortion. ● For DCI 4K format
= Note = ● Display the image (TV, external input, etc.) full-screen to use this function completely.
● Aspect mode can be memorised separately for SD (Standard definition) and HD (High definition) signals.
● Aspect cannot be changed in teletext service and 3D format signals. ● Aspect is fixed to 16:9 when watching the content of 4K format except DCI 4K.
Aspect Control SignalProgrammes usually contain an “Aspect Control Signal”. (Widescreen signal, Control signal through SCART / HDMI terminal)
In Auto mode, aspect mode will appear in the top left of the screen if a Widescreen signal (WSS) or a Control signal through SCART (pin8) / HDMI terminal is found. The aspect will switch to the appropriate ratio.
Watching > For best picture > Aspect

- 44 -
■ Available conditions
● Terrestrial / cable terminal (WSS only)
Valid input signal format:
DVB-C
DVB-T / DVB-T2
PAL B, G, H, I, D, K
SECAM B, G, L, L’, D, K
Invalid input signal format:
PAL 525/60 6.5 MHz
PAL 525/60 6.0 MHz
PAL 525/60 5.5 MHz
M.NTSC 6.5 MHz
M.NTSC 6.0 MHz
M.NTSC 5.5 MHz
● AV1 (SCART) terminal / AV2 (VIDEO) terminals
Valid input signal format:
PAL
SECAM
PAL 525/60
M.NTSC
NTSC: Control signal through SCART (pin 8) / HDMI terminal only
● AV2 (COMPONENT) terminals (WSS only)
Valid input signal format:
625 (576) / 50i, 50p
Invalid input signal format:
525 (480) / 60i, 60p
750 (720) / 60p, 50p
1 125 (1 080) / 60i, 50i

- 45 -
● HDMI terminal
Valid input signal format:
525 (480) / 60i, 60p
625 (576) / 50i, 50p
750 (720) / 60p, 50p
1 125 (1 080) / 60i, 50i
1 125 (1 080) / 60p, 50p, 24p
3 840 × 2 160 / 60p, 50p, 30p, 25p, 24p
4 096 × 2 160 / 60p, 50p, 30p, 25p, 24p ● HDMI terminal does not receive WSS signal.
= Note = ● If the screen size looks unusual when a widescreen-recorded programme is played back on a VCR, adjust the tracking of the VCR. Read the manual of the VCR.
Basic settings1. Display the menu with MENU.
2. Select Picture with / and press OK to access.
3. Select one of the following items with / and press OK to access.
Backlight / Contrast / Brightness / Colour / Tint / Sharpness / Colour Temperature / Vivid Colour / Adaptive Backlight Control / Resolution Remaster / Intelligent Frame Creation / 24p Smooth Film
4. Set with / / / and press OK to store.
Backlight, Contrast, Brightness, Colour, Tint, Sharpness
Adjusts the levels of these options according to your personal preference.
Colour Temperature
Sets the overall colour tone of the picture (bluer - redder).
Vivid Colour
(On / Off)
Automatically adjusts colours to vivid ones.

- 46 -
Adaptive Backlight Control
Automatically controls the level of backlight according to the images. ● Not valid in multi window mode
Resolution Remaster
(Auto / Max / Mid / Min / Off)
Enhances picture resolution to make the image sharper.
Intelligent Frame Creation
(Max / Mid / Min / Off)
Automatically compensates the picture frame rate and removes juddering movements to make the images smooth.
● Depending on the contents, images may be noisy. To prevent the noise, change the setting.
● Not valid in multi window mode, photo contents of Media Player / Network services or when Game Mode is set to On
24p Smooth Film
(Max / Mid / Min / Off)
Automatically compensates the picture frame rate to make the 24p source movie images smooth.
● This function is available only for 24p signal input and displayed instead of Intelligent Frame Creation.
● Not valid in multi window mode, photo contents of Media Player / Network services or when Game Mode is set to On
Noise reduction settings1. Display the menu with MENU.
2. Select Picture > Noise Reduction / MPEG Remaster with / and press OK to access.
3. Set with / and press OK to store.
Noise Reduction
(Auto / Max / Mid / Min / Off)
Reduces unwanted picture noise.

- 47 -
MPEG Remaster
(Auto / Max / Mid / Min / Off)
Reduces flicker noise in contoured parts of a picture and block noise.
Advanced SettingsYou can adjust and set up the detailed picture settings when Viewing Mode is set to Cinema, True Cinema or Custom. The settings in True Cinema or Custom can be stored for each input.
Watching > For best picture > Viewing Mode
1. Select the input mode with AV or TV.
2. Display the menu with MENU.
3. Select Picture > Viewing Mode with / and press OK to access.
4. Select the mode with / and press OK to set.
Cinema / True Cinema / Custom
■ Adjust the detailed picture settings1. Display the menu with MENU.
2. Select Picture > Advanced Settings with / and press OK to access.
3. Select one of the following items with / and press OK to access.
Contrast Control / White Balance / Colour Management / Gamma / Reset to Defaults
4. Set with / / / and press OK to store.
■ Contrast Control
Contrast Control
(Auto / Custom / Off)
Automatically adjusts the detailed contrast settings. Select Custom to set Contrast Control Setting manually.
Contrast Control Setting
Adaptive Gamma Control:
Adjusts the gamma curve to make the image brighter.
Black Expander:
Gradually adjusts the shades of black.

- 48 -
Reset to Defaults:
Resets items of Contrast Control Setting.
■ White Balance
R-Gain / G-Gain / B-Gain
Adjusts the white balance of bright red / green / blue areas.
R-Cutoff / G-Cutoff / B-Cutoff
Adjusts the white balance of dark red / green / blue areas.
More Detailed Adjustment
Adjusts more detailed items of White Balance.
Input Signal Level:
Adjusts the input signal level.
R-Gain / G-Gain / B-Gain:
Adjusts the detailed white balance of bright red / green / blue areas.
Reset to Defaults:
Resets items of More Detailed Adjustment.
Reset to Defaults
Resets White Balance to the default settings.
■ Colour Management
R-Hue / R-Saturation / R-Luminance
Adjusts the picture hue / saturation / luminance of red areas.
G-Hue / G-Saturation / G-Luminance
Adjusts the picture hue / saturation / luminance of green areas.
B-Hue / B-Saturation / B-Luminance
Adjusts the picture hue / saturation / luminance of blue areas.
More Detailed Adjustment
Adjusts more detailed items of Colour Management.
- 49 -
Y-Hue / C-Hue / M-Hue:
Adjusts the picture hue of yellow / cyan / magenta areas.
Y-Saturation / C-Saturation / M-Saturation:
Adjusts the saturation of yellow / cyan / magenta areas.
Y-Luminance / C-Luminance / M-Luminance:
Adjusts the luminance of yellow / cyan / magenta areas.
Reset to Defaults:
Resets items of More Detailed Adjustment.
Reset to Defaults
Resets Colour Management to the default settings.
■ Gamma
Gamma
Switches the gamma curve. ● Please note the numerical values are reference for the adjustment.
More Detailed Adjustment
Adjusts more detailed items of Gamma.
Input Signal Level:
Adjusts the input signal level.
Gain:
Adjusts the gain of gamma for selected signal level.
Reset to Defaults:
Resets items of More Detailed Adjustment.
Reset to Defaults
Resets Gamma to the default settings.
■ Reset to Defaults
Reset to Defaults
Resets Advanced Settings to the default settings.

- 50 -
Option Settings1. Display the menu with MENU.
2. Select Picture > Option Settings with / and press OK to access.
3. Select one of the following items with / and press OK to access.
Game Mode / Film Cadence Mode / 1080p Pure Direct / 4K Pure Direct / HDMI Content Type / HDMI RGB Range / AV Colour System / 3D-COMB
4. Set with / and press OK to store.
Game Mode
(On / Off)
Provides suitable images for fast response signals when playing games. ● Not valid in TV mode ● To display a continuous record of time spent using Game mode, set Playing Time Display.
Film Cadence Mode
(On / Off)
Improves vertical resolution for movie images. ● This function is available for interlaced signals (except in the mode of multi window, Network services or when Game Mode is set to On).
1080p Pure Direct
(On / Off)
Reproduces the original image quality in detail for 1080p (HDMI) input signal. ● Not valid in 3D or multi window mode
4K Pure Direct
(On / Off)
Reproduces the original image quality in detail for 4K (HDMI) input signal. ● Not valid in 3D or multi window mode
HDMI Content Type
(Graphics / Photos / Auto / Off)
Adjusts the picture settings of each HDMI input according to the selected content type.
- 51 -
Auto:
Automatically adjusts the picture settings according to the received HDMI content if the connected equipment supports HDMI Content Type.
● To set the availability of each content type for Auto mode, select Auto Detail Setting.
● For HDMI input
HDMI RGB Range
(Auto / Full / Normal)
Adjusts the black level of the image for each HDMI input. ● When the black level is not suitable, select Full. ● For HDMI input
AV Colour System
(Auto / PAL / SECAM / M.NTSC / NTSC)
Selects optional colour system based on video signals. ● For AV input
3D-COMB
(On / Off)
Makes still or slow moving pictures more vivid. ● Occasionally, while viewing still or slow moving pictures, colour patterning may be seen. Set to On to display sharper and more accurate colours.
● For PAL / NTSC signal reception in TV mode or from composite connection
Screen Settings1. Display the menu with MENU.
2. Select Picture > Screen Settings with / and press OK to access.
3. Select one of the following items with / and press OK to access.
16:9 Overscan / H-Size / Zoom Adjustments / Picture in Picture / Screen Display
4. Set with / and press OK to store.

- 52 -
16:9 Overscan
(On / Off)
Selects the screen area displaying the image for 16:9 aspect.
On:
Enlarges the image to hide the edge of the image.
Off:
Displays the image in the original size. ● Set to On if noise occurs on the edge of the screen. ● This function can be memorised for SD (Standard definition) and HD (High definition) signals respectively.
● Not valid for 4K contents or Network services
H-Size
(H-Size1 / H-Size2)
Switches the horizontal display range to reduce noise on the side edge of the image.
● For TV mode, AV and HDMI input ● Not valid for 4K contents or 3D mode
Zoom Adjustments
Adjusts the vertical position and size when aspect is set to Just, Sidecut Just, Zoom or Sidecut Zoom.
● Not valid for 4K contents
Picture in Picture
Displays two windows at once.
Functions > Multi Window > Picture in Picture
Screen Display
(On / Off)
Turns the screen off when you select Off. ● This function is effective in reducing power consumption when listening to the sound without watching the TV screen.
● Press any buttons (except Standby On / Off switch) to turn the screen on.

- 53 -
Copy AdjustmentCopies the picture settings of True Cinema or Custom to those of another input or another Viewing Mode.
1. Display the menu with MENU.
2. Select Picture > Copy Adjustment > Destination Viewing Mode / Destination Input with / and press OK to access.
3. Select the destination to copy to with / and press OK to set.
4. Select Copy Start with / and press OK to copy.
5. When the confirmation screen is displayed, select Yes with / and press OK to set.
= Note = ● Option Settings, Screen Settings and 3D Settings will not be copied.

- 54 -
For best audioSound mode1. Display the menu with MENU.
2. Select Sound > Mode with / and press OK to access.
3. Select the mode with / and press OK to set.
Mode
(Standard / Music / Ambience / User)
Selects your favourite sound mode for each input.
Standard:
Provides the suitable sound quality for all types of scenes.
Music:
Improves sound quality for watching music videos, etc.
Ambience:
Improves spatial effects and provides clear sounds.
User:
Adjusts the sounds manually using the equaliser to suit your favourite sound quality.
● In each mode, Bass, Treble, Surround and Bass Boost can be adjusted and stored.
● For the User mode, Equaliser will be available in the Sound Menu instead of Bass and Treble. Select Equaliser and adjust the frequency.
Watching > For best audio > Basic settings
● This function is effective only for the sound from TV speakers.
Basic settings1. Display the menu with MENU.
2. Select Sound with / and press OK to access.
3. Select one of the following items with / and press OK to access.
Bass / Treble / Equaliser / Balance / Surround / Bass Boost
4. Set with / / / and press OK to store.
Bass
Adjusts level to enhance or minimise lower, deeper sound output.
- 55 -
Treble
Adjusts level to enhance or minimise sharper, higher sound output.
Equaliser
Adjusts the frequency level to suit your favourite sound quality. ● This function is available when Mode is set to User. ● Select the frequency and change the frequency level using / . ● To enhance the bass sound, raise the level of the lower frequency. To enhance the treble sound, raise the level of the higher frequency.
● To reset the levels of each frequency to the default settings, select Reset to Defaults with / and press OK.
● This function is effective only for the sound from TV speakers.
Balance
Adjusts volume level of right and left speakers.
Surround
(Virtual Surround / Off)
Selects surround sound settings.
Virtual Surround:
Provides a dynamic enhancer of width and depth to simulate improved spatial effects.
● This function is effective only for the sound from TV speakers.
Bass Boost
(On / Off)
Enhances the effect of bass sounds. ● This function is effective only for the sound from TV speakers.
Volume settings1. Display the menu with MENU.
2. Select Sound with / and press OK to access.
3. Select one of the following items with / and press OK to access.
Speaker Setting / Headphone Volume / Auto Gain Control / Volume Correction / Speaker Distance to Wall
4. Set with / / / and press OK to store.
- 56 -
Speaker Setting
(TV Speaker / Headphones / Off)
Selects the sound output to adjust volume. Set to Off when using the external speakers.
● Sound from TV speaker turns off when Headphone or Off is selected.
Headphone Volume
Adjusts the volume of headphones.
Auto Gain Control
(On / Off)
Automatically regulates large sound level differences between channels and inputs.
Volume Correction
Adjusts the volume of each individual channel or input mode.
Speaker Distance to Wall
(Up to 30cm / Over 30cm)
Compensates for the low frequency sound due to the distance between the speakers and the wall.
● If the back space between the TV and wall is within 30 cm, Up to 30cm is recommended.
● If the back space between the TV and wall is over 30 cm, Over 30cm is recommended.
● This function is effective only for the sound from TV speakers.
Voice Guidance Settings1. Display the menu with MENU.
2. Select Sound > Voice Guidance Settings with / and press OK to access.
3. Select one of the following items with / and press OK to access.
Voice Guidance / Speed / Volume / Language / User Level / Web Browser
4. Set with / / / and press OK to store.

- 57 -
Voice Guidance
(On / Off)
Set to On to enable voice guidance of the basic features (on-screen messages, etc.) for visually impaired users.
Speed
(Fast / Normal / Slow)
Selects the readout speed for the voice guidance.
Volume
(Max / Mid / Min)
Selects the volume for the voice guidance.
Language
Changes language for the voice guidance. ● All languages may not be available. When the selected language is not supported, Language is set to English automatically.
User Level
(Beginner / Expert)
Selects the level of verbosity for the voice guidance.
Web Browser
(On / Off)
Set to On to enable voice guidance of the network contents in web browser function.
Audio Description1. Display the menu with MENU.
2. Select Sound > Audio Description with / and press OK to access.
3. Select one of the following items with / and press OK to access.
Preferred Audio Type / Volume / Speakers / Headphones
4. Set with / / / and press OK to store.

- 58 -
Preferred Audio Type
(Standard / Audio Description)
Narration settings for visually impaired users
Set to Audio Description to activate the narration sound track when available on the broadcast.
● The availability of audio description sound track is indicated by AD in the information banner.
● For DVB
Volume
Adjusts the volume for Audio Description. ● For DVB
Speakers
(Mix / Standard)
Set to Mix to activate the description sound track from TV speakers. ● For DVB
Headphones
(Mix / Standard)
Set to Mix to activate the description sound track from headphones. ● For DVB
Advanced settings1. Display the menu with MENU.
2. Select Sound with / and press OK to access.
3. Select one of the following items with / and press OK to access.
MPX / Audio Preference / SPDIF Selection / SPDIF Delay / HDMI Input / ARC Output
4. Set with / and press OK to store.
MPX
Selects multiplex sound mode (if available).
Stereo:
Use this normally.
- 59 -
Mono:
When stereo signal cannot be received
M1 / M2:
Available while mono signal is transmitted ● For Analogue
Audio Preference
(Auto / Multichannel / Stereo / MPEG) ● Selectable options vary depending on the country you select.
Selects the initial setting for audio tracks.
Auto:
Automatically selects the audio tracks if a programme has more than two tracks. The priority is given in the following order - Dolby Digital Plus, HE-AAC, Dolby Digital, MPEG.
Multichannel:
The priority is given to multi-channel audio track.
Stereo:
The priority is given to stereo (2ch) audio track.
MPEG:
The priority is given to MPEG. ● Dolby Digital Plus and Dolby Digital are the methods of coding digital signals developed by Dolby Laboratories. Apart from stereo (2ch) audio, these signals can be multi-channel audio.
● HE-AAC is a perceptual coding method used to compress digital audio for efficient storage and transmission.
● MPEG is an audio compression method that compresses audio to the smaller size without any considerable loss of audio quality.
● Dolby Digital Plus and HE-AAC are the technologies for HD (High definition) programmes.
● For DVB
SPDIF Selection
(Auto / PCM)
Selects the initial setting for digital audio output signal from DIGITAL AUDIO and HDMI1 / HDMI2 (ARC function) terminals.
● SPDIF is a standard audio transfer file format.

- 60 -
Auto:
Dolby Digital Plus, Dolby Digital and HE-AAC multi-channel are output as Dolby Digital Bitstream. MPEG is output as PCM. DTS is output as DTS for video contents of Media Player / Network services.
PCM:
Digital output signal is fixed to PCM. ● ARC (Audio Return Channel) is a function of digital audio output using HDMI cable.
● For DVB or video contents of Media Player / Network services
Media Player > Video mode > Audio output settings
Network > Videos > Audio output settings
SPDIF Delay
Adjusts the delay time of the sound output from DIGITAL AUDIO and HDMI1 / HDMI2 (ARC function) terminals if the sound does not synchronise the image.
● For DVB
HDMI Input
(Digital / Analogue)
Selects to fit the input signal.
Watching > External equipment > HDMI features
Digital:
When sound is carried via the HDMI cable connection
Analogue:
When sound is not carried via the HDMI-DVI adaptor cable connection ● For HDMI input
ARC Output
(HDMI1 / HDMI2)
Selects ARC output terminal settings. ● To use an amplifier supporting 4K (60p, 50p) 4:4:4 output, connect an amplifier to HDMI1 and select HDMI1.

- 61 -
TV GuideUsing TV GuideTV Guide - Electronic Programme Guide (EPG) provides an on-screen listing of the programmes currently broadcast and the forthcoming broadcasts over the next seven days (depending on the broadcasters).
1. Display TV Selection with TV.
2. Select the mode with / and press OK to set.
DVB-C / DVB-T / Analogue
3. Display TV Guide with GUIDE. ● Press again to change the layout. (Landscape / Portrait)
– View Landscape to see several channels.
– View Portrait to see one channel by time. ● Depending on the country you select, you can select the type of TV Guide. (Default Guide)
1) Display the menu with MENU.
2) Select Setup > Display Settings > Default Guide with / and press OK to access.
3) Select Channel List / TV Guide with / and press OK to set.
TV Guide:
Electronic Programme Guide (EPG) is available.
Channel List:
The channel list will appear instead of EPG.(Example)
TV screen

- 62 -
Date
Time
Programme
D (DVB-T) / A (Analogue)
Channel position and name ● To watch the programme
1) Select the current programme with / / / and press OK to access.
– The current programme is displayed on the top left of the screen.
2) Select View with / and press OK to watch. (DVB)
– To use Timer Programming
Watching > TV Guide > Timer Programming
● To the previous day (DVB)
(red) ● To the next day (DVB)
(green) ● To view a channel list of the selected type
1) Display the type list with (yellow).
2) Select the type with / and press OK to view. ● To search programme titles and view a list of the searched programmes (DVB) (if available)
1) Display the search list with (yellow).
2) Select Search with / and press OK to access.
3) Enter characters with / / / and press OK to set.
– You can set characters using Numeric buttons.
Functions > Setting characters > Using Numeric buttons
4) Press (green) to start searching.
– All the programme titles including the word you set will be listed.
– Searching without any characters will list all programmes including current programmes.
● To view a channel list of the selected category
1) Display the category list with (blue).
2) Select the category with / and press OK to view.
– To list favourite channels, set Favourites Edit.
Watching > Tuning and editing channels > Favourites Edit
- 63 -
● To view more details of the programme (DVB)
1) Select the programme with / / / .
2) Press to view.
– Press again to return to TV Guide. ● To exit TV Guide
EXIT
= Note = ● When this TV is turned on for the first time, or the TV is switched off for more than a week, it may take some time before TV Guide is completely shown.
● This function varies depending on the country you select. ● The postcode entry or update may be required to use the GUIDE Plus+ system depending on the country you select.
1) Display the menu with MENU.
2) Select Setup > Other Settings > GUIDE Plus+ Settings with / and press OK to access.
3) Follow the on-screen instructions.
Update:
Performs the update of the GUIDE Plus+ schedule for the GUIDE Plus+ system (only available in some countries).
Postcode:
Sets your postcode to receive local information in the GUIDE Plus+ system (only available in some countries).
System Information:
Displays the system information of the GUIDE Plus+ system (only available in some countries).
● DVB-T and Analogue channels are displayed on the same TV Guide screen. D and A may be displayed to distinguish DVB-T and Analogue channels. There will be no programme listings for Analogue channels.

- 64 -
Timer ProgrammingThis function allows you to select programmes that you want to be reminded to watch or record to the USB HDD.
1. Select the forthcoming programme with / / / and press OK to access.
2. Select USB HDD Rec. / Reminder with / and press OK to set. ● To check / change / cancel a timer event
Recording > Timer Programming > Editing Timer Programming
● LED will turn to orange in Standby mode if Timer Programming is set. ● To return to TV Guide
BACK/RETURN ● If you select the current programme, a confirmation screen asking whether you want to watch or record the programme appears. Select Timer Programming with / and press OK to set USB HDD Rec. to record from the time you finish the timer event setting.
= Note = ● Not valid in Analogue ● Timer Programming only works reliably if correct time information is received via the signal from the broadcaster or service provider.
● No other channels can be selected while the recording of Timer Programming is in progress.
● When recording programmes to the USB HDD, be sure to format the USB HDD and enable it to record in USB Device Setup.
Recording > USB HDD setup
● To set timer programming events of this TV on the network equipment (smartphone, etc.) from outside the home network
Recording > Timer Programming > Remote recording

- 65 -
TeletextViewing Teletext1. Switch to teletext with TEXT.
● Displays the index page (content varies depending on the broadcasters). ● Current / sub page numbers are displayed on the top left of the screen. ● Time / date is displayed on the top right of the screen. ● Colour bar is displayed on the bottom of the screen.
2. Select the page with Numeric buttons, / or (coloured buttons).
● To adjust contrast
1) Press MENU three times to display Contrast.
2) Adjust with / and press OK to set. ● To exit teletext
EXIT
■ Reveal hidden data1. Press MENU.
2. Reveal with (red). ● Press again to rehide.
■ To view a favourite page storedPress STTL to view a favourite page.
● Call up the page stored on (blue). (List mode) ● Factory setting is “P103”.
■ FULL / TOP / BOTTOM1. Press MENU.
2. Press (green) to change the layout.

- 66 -
■ Watch TV and teletext in two windows at once1. Press MENU twice.
2. Set Picture and text to On / Off with / . ● Operations can be made only in teletext screen.
■ Store frequently viewed pages in the colour bar (List mode)1. Press (coloured buttons) while the page is displayed.
2. Press and hold OK. ● The stored page number changes to white. ● To change stored pages
1) Press (coloured buttons) to change.
2) Enter a new page number with Numeric buttons.
3) Press and hold OK.
■ View sub pageThe number of sub pages is displayed on the top of the screen. Press / to view sub page. (Only when teletext has more than one page.)
● The number of sub pages varies depending on the broadcasters (up to 79 pages).
● Searching may take time while you are watching TV. ● To view a specific sub page
1) Press MENU.
2) Press (blue).
3) Enter the 4-digit number (e.g. P6, press ).
Teletext modeTeletext services are the text information provided by the broadcasters.
● The features may vary depending on the broadcasters.
1. Display the menu with MENU.
2. Select Setup > Display Settings > Teletext with / and press OK to access.
3. Select TOP (FLOF) / List with / and press OK to set.
- 67 -
■ FLOF (FASTEXT) mode (in case of FLOF (FASTEXT) broadcasting)
In FLOF mode, four differently coloured subjects are situated on the bottom of the screen.
To access more information about one of these subjects, press the appropriate coloured button.
This facility enables fast access to information on the subjects shown.
■ TOP mode (in case of TOP text broadcasting)TOP is a particular improvement of the standard teletext service that results in an easier search and effective guide.
● Fast overview of the teletext information available ● Easy to use step-by-step selection of the topical subject ● Page status information on the bottom of the screen ● Available page up / down
(red) / (green) ● To select among subject blocks
(blue) ● To select next subject within the subject block
(yellow)
(After the last subject, it moves to the next subject block.)
■ List modeIn List mode, four differently coloured page numbers are situated on the bottom of the screen. Each of these numbers can be changed and stored in the TV’s memory.
Watching > Teletext > Viewing Teletext
Teletext Character SetSelects teletext language font.
1. Display the menu with MENU.
2. Select Setup > Display Settings > Teletext Character Set with / and press OK to access.
3. Select the font with / and press OK to set.

- 68 -
West:
English, French, German, Greek, Italian, Spanish, Swedish, Turkish, etc.
East1:
Czech, English, Estonian, Lettish, Rumanian, Russian, Ukrainian, etc.
East2:
Czech, Hungarian, Lettish, Polish, Rumanian, etc.

- 69 -
3DNote
● Display the image (TV, external input, etc.) full-screen for viewing 3D. ● If light appears to flicker under fluorescents or dimmers when using the 3D Eyewear, change the setting of 3D Refresh Rate.
Watching > 3D > 3D Settings
● Do not exert pressure on or scratch the lens of the 3D Eyewear. ● 3D content will not be correctly visible if the 3D Eyewear is worn upside down or back-to-front.
● When viewing 3D images, make sure your eyes are at an approximately horizontal level and keep a position where you do not see double images.
● Do not wear the 3D Eyewear when watching something other than 3D images. Liquid crystal displays (such as computer screens, digital clocks or calculators, etc.) may be difficult to see while wearing the 3D Eyewear.
● Do not use the 3D Eyewear as sunglasses. ● 3D effects may be perceived differently depending on the person.
Viewing 3DYou can enjoy viewing 3D images with contents or programmes corresponding to the 3D effect by wearing the 3D Eyewear.
● This TV supports Frame Sequential, Side by Side and Top and Bottom 3D formats.
– Frame Sequential is the 3D format that the images for the left and right eyes are recorded with the high definition quality and alternately played back.
● 3D content of 4K format is not supported.
1. Turn the 3D Eyewear on and put it on. ● Connection status and battery status are displayed on the bottom right of the screen.
2. View the 3D images. ● Safety precautions will be displayed when you first watch the 3D image. Select Yes or No to continue to view 3D images.
If you select Yes, this message will be displayed again in the same condition after Mains Power On / Off switch is next turned on. Select No if you do not want to display this message again.
● Turn off the 3D Eyewear after using it.
- 70 -
■ Playing back 3D-compatible Blu-ray disc (Frame Sequential) ● Connect the 3D-compatible player via a fully wired HDMI compliant cable. (If you use the non 3D-compatible player, the images will be displayed in 2D mode.)
● If the input mode is not switched automatically, select the input mode connected to the player.
Watching > External equipment > Watching external input
■ 3D-supported broadcast ● Please consult the suppliers of contents or programmes for availability of this service.
■ 3D photos and 3D videos taken by 3D-compatible Panasonic products
● Available in Media Player and Network services
Media Player
Network
■ 2D images converted to 3D ● Set to 2D→3D mode in 3D Mode Selection.
Watching > 3D > 3D Mode Selection
● Contents of 4K format cannot be changed to 3D mode.
3D Mode SelectionYou can easily change the viewing mode between 2D and 3D with 3D.
1. Display 3D Mode Selection with 3D.
2. Select the mode with / and press OK to set. ● Items of 3D Mode Selection vary depending on the condition.
3D / 2D:
Displays the appropriate image as you desire without selecting 3D format. ● This mode may not work properly depending on the source image format. In this case, select the appropriate 3D format manually.

- 71 -
■ To change 3D format manuallyWhen the image is not changed properly using 3D / 2D mode, use this manual setting.
1. Display 3D Mode Selection (Manual) with (red) during above operation.
2. Select the mode with / and press OK to set.
Original:
Displays the source image as it is. ● Use to identify the format type of the source image.
Watching > 3D > Source image format
Side by Side - 3D / Side by Side - 2D / Top and Bottom - 3D / Top and Bottom - 2D:
Displays the mode you select. ● Not valid in Analogue and AV mode
2D→3D:
Converts 2D images into 3D. ● Please note the 3D images appear slightly different from the
originals. ● Using this function for profit-making purposes, or publically showing
images converted from 2D to 3D in places such as shops or hotels, etc. may infringe on the rights of the copyright holder protected under copyright law.
3D Settings1. Display the menu with MENU.
2. Select Picture > 3D Settings with / and press OK to access.
3. Select one of the following items with / and press OK to access.
3D Detection / 3D Signal Message / 3D Refresh Rate / 2D→3DDepth / 3D Adjustment / L/R Picture Swap / Edge Smoother / Safety Precautions
4. Set with / and press OK to store. ● To exit the menu screen
EXIT
3D Detection
(On (Advance) / On / Off)
Selects whether to switch to the 3D mode automatically or not.

- 72 -
On (Advance):
Detects all the 3D format signals and displays the 3D image automatically.
On:
Detects the particular 3D format signals (Frame Sequential, etc.) and displays the 3D image automatically.
● To view 3D images without any notifications and operations, set to On (Advance).
3D Signal Message
(On / Off)
Selects whether to give a notification message when a signal of 3D format is found or not.
● Not valid when 3D Detection is set to On (Advance) ● For DVB, Component and HDMI input
3D Refresh Rate
(Auto / 100Hz / 120Hz)
Reduces juddering and flicker noises of the 3D images when using the 3D Eyewear.
100Hz:
If light appears to flicker under fluorescents (or dimmers) of 50 Hz.
120Hz:
If light appears to flicker under fluorescents (or dimmers) of 60 Hz.
2D→3DDepth
(Max / Mid / Min)
Selects a level of 3D-image depth for viewing converted 2D images.
3D Adjustment
(On / Off)
Adjustment of the 3D effect (except in 2D→3D mode)
Set to On to enable Effect setting. ● When setting to On, a safety precaution message will appear. Read it carefully and press BACK/RETURN to go to Effect setting.
● When adjusting, take into account that the vision of 3D images varies among different individuals.

- 73 -
Effect:
Adjusts the 3D depth according to the contents or to your preference. (This setting will not be memorised when changing the input mode or channel.)
L/R Picture Swap
(L/R (Normal) / R/L (Reversed))
Swaps pictures for left eye and right eye (except in 2D→3D mode).
Select R/L (Reversed) if you feel that the sense of depth is unusual. ● This setting will not be memorised when changing the input mode or channel.
Edge Smoother
(On / Off)
Set to On if you feel the contoured parts of an image are not smooth enough (except in 2D→3D mode).
Safety Precautions
Displays the precautions for viewing 3D images.
= Note = ● Display the image (TV, external input, etc.) full-screen to use this function completely.
Source image formatIf the picture appears to be abnormal, refer to the table of images that can be seen for each 3D Mode Selection (Manual) and the source image format, and select the correct 3D mode.
● 3D images are displayed correctly with appropriate 3D format as following yellow boxes.

- 74 -
Source image format
Side by Side
Top and Bottom
Normal format (2D)
3D Mode Selection
Original
Side by Side - 3D
Top and Bottom - 3D
2D→3D: When selecting Side by Side - 2D or Top and Bottom - 2D, the images will
be displayed without 3D effect.
● Depending on the player or broadcasts, the image may be different from the above illustrations.

- 75 -
Tuning and editing channelsSetting menuYou can retune channels, create your favourite channel lists, skip unwanted channels, etc.
1. Display TV Selection with TV.
2. Select the mode with / and press OK to set.
DVB-C / DVB-T / Analogue
3. Display the menu with MENU.
4. Select Setup > Tuning Menu with / and press OK to access.
DVB-C Tuning Menu / DVB-T Tuning Menu / Analogue Tuning Menu ● The menu name varies depending on the TV mode.
5. Select one of the functions with / and press OK to access.
Favourites Edit / Channel List / Auto Setup / Manual Tuning / Update Channel List / Favourite Network / New Channel Message / Service Replacement / Signal Condition / Attenuator / Add TV Signal
● The function items vary depending on the TV mode and country you select.
Favourites Edit
■ List favourite DVB channelsCreate your favourite channel lists from various broadcasters (up to 4: Favourites 1 to 4).
The favourites lists are available from Category in the information banner and the TV Guide screen.
Watching > Basic > Information banner
Watching > TV Guide > Using TV Guide
1. Select Favourites Edit with / and press OK to access.
2. Select a channel to list from all DVB channels with / . ● appears when the channel is encrypted. ● To display other favourites
(green) ● To sort channel names in alphabetical order
(red)

- 76 -
● To change the category
(blue)
3. Press OK to add it to favourites list. ● To add all channels to the list
1) Press (yellow).
2) Press (green) to add all. ● To add consecutive channels to the list at once
1) Press (yellow).
2) Make the channel block with / and press OK to add.
4. Press BACK/RETURN and OK to store.
■ Edit DVB favourites listYou can edit the favourites list while the cursor is on the channel in the favourites list.
● To move the channel
1) Select the channel with / .
2) Press (green).
3) Select the new position with / or Numeric buttons.
4) Press (green) to store. ● To delete the channel
1) Select the channel with / .
2) Press OK to delete.
– Press (yellow) to delete all channels. ● To name the favourites
1) Press (red).
2) Enter characters (maximum 10 characters) with / / / or Numeric buttons, and press OK to set.
3) Press BACK/RETURN to store.

- 77 -
Channel List
■ Skip unwanted DVB / Analogue channelsYou can hide (skip) unwanted channels. The hidden channels cannot be displayed except in this function.
1. Select Channel List with / and press OK to access.
2. Select a channel with / .
3. Press OK to set Reveal / Hide (skip).: Reveal
: Hide (skip)
● To reveal all channels (DVB / Analogue)
(yellow) ● To sort channel names in alphabetical order (DVB)
(red) ● To change the category (DVB)
(blue)
■ Edit DVB / Analogue Channels ● To swap / move the channel position (if available)
1) Press (green) to edit.
2) Set the new position with Numeric buttons or / , and press (green) to store.
● To retune each channel (Manual Tuning)
(red)
– For Analogue
Watching > Tuning and editing channels > Manual Tuning
– Only for the revealed channels

- 78 -
● To rename the channel name (Analogue)
1) Press (blue) to edit.
2) Enter characters (maximum 5 characters) with / / / or Numeric buttons, and press OK to set.
3) Press BACK/RETURN to store.
= Note = ● If a VCR is connected only with the RF cable in Analogue, edit VCR.
Auto SetupAutomatically retunes the channels received in the area.
● This function is available if channel tuning is already performed. ● Only the selected mode is retuned. All the previous tuning settings are erased.
● Child Lock PIN number is required to retune locked channels.
Functions > Child Lock > PIN number
● If tuning has not been done completely, set Manual Tuning.
Watching > Tuning and editing channels > Manual Tuning
■ DVB-C, DVB-T, Analogue1. Select Auto Setup with / and press OK to access.
2. Set DVB-C Auto Setup Settings with / / / and press OK to store. (DVB-C)
● Scan Mode
Full:
Scans the whole frequency range.
Quick:
Scans the suitable frequency in your country. ● Normally set Frequency, Symbol Rate and Network ID to Auto. If Auto is not displayed or if necessary, enter each value specified by your cable provider with Numeric buttons.
● After settings, select Start scan with / and press OK to search.

- 79 -
3. The confirmation screen is displayed and press OK to start Auto Setup. (Settings are made automatically.)
● When the operation is completed, the channel at the lowest position will be displayed.
■ Auto Setup using the buttons on the TV1. Press and hold INPUT/OK/HOLD for MENU button for 3 seconds to
display the menu.
2. Set Auto Setup with following control panel buttons. ● Move the cursor / select from a range of options / select the menu item (up and down only)
● Access the menu / store settings after adjustments have been made or options have been set with INPUT/OK/HOLD for MENU button
Manual Tuning ● Normally use Auto Setup or Update Channel List to retune DVB channels. ● If tuning has not been done completely or for adjusting the direction of the aerial, use this function. (DVB)
● All DVB channels found will be added to Channel List.
■ DVB-C1. Enter the frequency with Numeric buttons.
● Normally set Symbol Rate and Service ID to Auto.
2. Select Start scan with / and press OK to search.
■ DVB-T1. Select a channel with / and adjust frequency with / for each
channel. ● Set where the level of Signal Quality becomes the maximum.
2. Press OK to search.

- 80 -
■ AnalogueSet Analogue channel manually after Auto Setup.
● Set Sound System and Colour System, and then perform this function. Normally set Colour System to Auto.
– SC1: PAL B, G, H / SECAM B, G
– SC2: PAL I
– SC3: PAL D, K / SECAM D, K
– F: SECAM L, L’
1. Select the channel position with Numeric buttons.
2. Select the channel with Channel Up / Down.
3. Search with / .
4. Select Store with / and press OK to set. ● Use Fine Tuning to make small adjustments to the tuning of an individual programme (affected by weather conditions, etc.).
● If a VCR is connected only with the RF cable, select channel position 0.
Update Channel ListBy updating the DVB channel list, you can add new channels, delete removed channels or change channel names and positions automatically.
● The channel list is updated while keeping your settings in Favourites Edit, Channel List, Child Lock, etc.
● Depending on the signal condition, the update may not work properly.
New Channel MessageSelects whether to give a notification message when a new DVB channel is found or not.
● When a notification message appears, you can perform Update Channel List pressing OK.

- 81 -
Signal ConditionSelects a channel and checks the signal condition with indicators.
● A good Signal Strength is not an indication of suitable signal for DVB reception.
● Vertical lines show the maximum signal value of the selected channel. ● To change the channel
● For DVB
Other settingsFavourite Network
Selects your favourite network for each broadcaster (only available in some countries).
● For DVB-C, DVB-T
Service Replacement
(On / Off)
Set to On to display a message to switch to the available service (only available in some countries).
● For DVB-C
Attenuator
(On / Off)
Sets the antenna system to use plural LNBs for receiving several satellites. ● If the DVB-C signal is too strong, the interference may occur. In this case, set to On to weaken the signal automatically.
Add TV Signal
Adds the TV mode. ● This function is available if you skip any modes to tune in Auto Setup for first using the TV.

- 82 -
Recording
USB HDD setupPreparationsYou can record the digital TV programmes to the connected USB HDD and enjoy playing back in various ways.
● Prepare the USB HDD for the exclusive use of recording with this TV. ● Connect the USB HDD to the USB 2 port with the USB cable. ● Be sure to connect the USB HDD to the socket outlet. ● To remove the USB HDD safely from the TV, perform Safely remove USB in USB Device Setup.
Recording > USB HDD setup > Setting for USB HDD
● Check the terminal type and cable plugs are correct when connecting.
USB port
USB cable
USB HDD
Socket outlet
= Caution = ● All data in the USB HDD will be erased in the following cases:
– When formatting the USB HDD with this TV
Recording > USB HDD setup > Setting for USB HDD
– When formatting the USB HDD to use on PC, etc. ● When the TV is repaired due to a malfunction, you may have to format the USB HDD again with this TV to use it. (All data will be erased after formatting.)
● To use the USB HDD with your PC after recording with this TV, format it again on your PC. (Special operations or tools may be necessary to format on your PC. For details, read the manual of the USB HDD.)

- 83 -
● The data recorded on the USB HDD with this TV can only be played back on this TV. You cannot play back its contents with another TV (including the TV of the same model number) or any equipment.
● Do not turn the TV off, pull out the mains plug or remove the USB HDD during operation (formatting, recording, etc.). Doing so may cause malfunction of the device or damage the recorded data. (An electric outage may also be a cause of malfunction.)
= Note = ● Analogue TV programme cannot be recorded on the USB HDD. ● The data broadcasting (MHEG, etc.), radio broadcasting will not be recorded, and also the recording function will not work during the period without any signal.
● Not all the programmes can be recorded depending on the broadcaster and service provider.
● You cannot copy the recorded TV programmes of the USB HDD. ● For more information of the USB HDD
Recording > Technical information > USB HDD
Setting for USB HDDFormat and set up the USB HDD with this TV in order to use it for recording.
All the USB devices recognised as a mass storage device will be listed. ● Please note that USB HDD will be formatted and all data in it will be erased after this setup.
● Before setting, connect the USB HDD and be sure to turn on the USB HDD.
Recording > USB HDD setup > Preparations
1. Display the menu with MENU.
2. Select Setup > USB Device Setup with / and press OK to access.
3. Select the USB HDD for recording with / and press OK to start setup. ● Some USB HDD may not be displayed. ● To display information of the highlighted device
4. When the caution and confirmation screen for using USB HDD is displayed, select Yes with / and press OK to proceed.
5. When the confirmation screen of USB HDD name is displayed, select Yes with / and press OK to set.
- 84 -
● The name for the USB HDD is created automatically. If you want to edit the name, select Yes.
1) Enter characters with / / / or Numeric buttons, and press OK to set.
2) Press BACK/RETURN to store.
6. When the confirmation screen to enable USB HDD for recording is displayed, select Yes with / and press OK to set.
● If another formatted USB HDD for recording already exists, this confirmation screen will be displayed to switch to enable this USB HDD for recording.
● Mode of the USB HDD: The USB HDD is available for recording / playing back.
Only one USB HDD on the list is available for recording.: The USB HDD is available for playing back.
● To change the mode
OK ● To edit USB HDD name
(green) ● To format
(red) ● To remove the USB HDD safely from the TV
(yellow)
= Note = ● You can only select one USB HDD for recording at a time. ● You cannot change the settings for the USB HDD while recording is in progress.

- 85 -
Recording current programmeOne Touch RecordingRecords the current programme to the USB HDD immediately.
● Confirm the remote control code is “73”.
Watching > External equipment > Operating with TV’s remote control
1. Display the menu with MENU.
2. Select Setup > Recording Setup > One Touch Recording with / and press OK to access.
3. Select the maximum recording time 30 / 60 / 90 / 120 / 180 (minutes) with / and press OK to set.
■ To start One Touch RecordingPress to start.
● Other channels cannot be selected while recording is in progress.
■ To stop recording in progressPress to stop.
■ To play back or delete the recorded contentsRecorded TV programmes can be played back in Media Player.
1. Display icons of the feature with APPS.
2. Select Recorded TV with / / / and press OK to access.
Media Player > Recorded TV mode
● Even if One Touch Recording is in progress, you can play back all the contents. (Depending on the USB HDD, playback may not be possible or the recording may not work properly during playback.)

- 86 -
REW LIVE TVRecords the current programme to the USB HDD constantly within the maximum recordable time.
● Confirm the remote control code is “73”.
Watching > External equipment > Operating with TV’s remote control
1. Display the menu with MENU.
2. Select Setup > Recording Setup > REW LIVE TV with / and press OK to access.
3. Select Auto with / to start REW LIVE TV. ● When you select Auto, recording will start automatically. ● This recording may not start if another recording is in progress, TV signal condition is bad or there are no images displayed.
■ To operate REW LIVE TV ● To pause
● To search backward (up to 90 minutes)
● After pausing or searching backward, the following buttons are available for operation.
: Search backward
: Search forward
: Return to the current programme
OK : Playback / Pause
: Search backward / Search forward
: Pause / Resume
: Playback
: Return to the current programme

- 87 -
■ To stop REW LIVE TV1. Display the menu with MENU.
2. Select Setup > Recording Setup > REW LIVE TV with / and press OK to access.
3. Select Off with / to stop REW LIVE TV. ● If you stop REW LIVE TV, the recorded content for REW LIVE TV will be deleted.
● REW LIVE TV will be stopped and the recorded content will be deleted automatically in the following conditions: (Even if REW LIVE TV stops for the following conditions, as long as the setting is Auto, a new recording will start automatically in a condition that makes the recording available.)
– Other channels selected
– Locked channel selected
– Invalid channel selected
– No TV signal
– External input selected
– When the full-screen application (TV Guide, Media Player, eHELP, etc.) is launched
– When the TV enters Standby or is turned off
– When another recording starts

- 88 -
Timer ProgrammingSetting Timer ProgrammingThis function allows you to select programmes that you want to be reminded to watch or record to the USB HDD.
● Not valid in Analogue
1. Display TV Selection with TV.
2. Select the mode with / and press OK to set.
DVB-C / DVB-T
3. Display the menu with MENU.
4. Select Timer > Timer Programming with / and press OK to access.
■ Set timer event details1. Press OK to start making the settings.
2. Select USB HDD Rec. / Reminder with / .
USB HDD Rec.:
Records the programme to the USB HDD.
When the start time comes, the channel will be switched automatically and the video and audio signals will be output. 2 minutes before the start time, a reminder message appears if you are watching TV.
Reminder:
Reminds you to watch the programme.
When you are watching TV, a reminder message appears 2 minutes before the start time. Press OK to switch to the programmed channel.
3. Select the item (channel, date, start time, end time) with / and set / / with / .
● and can also be entered with Numeric buttons.

- 89 -
(Example)
!: Overlapped timer events
Function
(USB HDD Rec. / Reminder)
TV mode
: DVB-C
: DVB-T
– You cannot change the mode within the menu.
Channel position, channel name, etc.
STTL: Displays subtitles (if available)
– Press (yellow) to indicate subtitles and press again to remove them.
– For Reminder
Date (You can set one day ahead with , select daily or weekly with .)
– Daily Sun-Sat: Sunday to Saturday
– Daily Mon-Sat: Monday to Saturday
– Daily Mon-Fri: Monday to Friday
– Weekly Sat / Fri / Thu / Wed / Tue / Mon / Sun: Same time on the same day every week
Start time / End time / Duration (automatic display)
4. Store with OK.

- 90 -
Editing Timer Programming1. Display the menu with MENU.
2. Select Timer > Timer Programming with / and press OK to access.
3. Select the event with / . ● To change a timer event
OK
– Correct as necessary.
Recording > Timer Programming > Setting Timer Programming
● To delete a timer event
1) Press (red).
2) Press OK to delete. ● To display subtitles (if available)
(yellow)
– Press again to remove subtitles.
– For Reminder ● To cancel a timer event temporarily
(blue)
– Press again to stop cancelling.
■ To play back or delete the recorded contentsRecorded TV programmes can be played back in Media Player.
1. Display icons of the feature with APPS.
2. Select Recorded TV with / / / and press OK to access.
Media Player > Recorded TV mode
Remote recordingYou can set timer programming events of this TV on the network equipment (smartphone, etc.) from outside the home network.
● Ensure the network connections and network settings are completed.
Network > Network connections
Network > Network settings
● Set TV Anywhere to On.
Network > Network settings > TV Anywhere Settings
● Additional information for the services may be found on the following website.

- 91 -
http://panasonic.net/viera/support (English only)
= Note = ● This function is not available when the TV is turned off with Mains Power On / Off switch.
● Depending on the network condition, this function may not be available.
Note ● TV Guide may also be used to set timer event.
Watching > TV Guide > Timer Programming
● Timer Programming can store up to 15 events. ● Timer Programming only works reliably if correct time information is received via the signal from the broadcaster or service provider.
● For recording using Timer Programming, the TV must be either on or in Standby. For reminders to be displayed, the TV must be on.
● No other channels can be selected while the recording of Timer Programming is in progress.
● Recording an encrypted (copy-protected) programme may not be possible. ● 2 minutes before the start time, a reminder message appears if you are watching TV.
– To remove the message and start the programming, press OK.
– To cancel the programming, press EXIT. ● LED will turn to orange in Standby mode if Timer Programming is set. ● Reminder messages will remain displayed until one of the following occurs:
– You press OK to view the programme or EXIT to cancel the reminder.
– The timer event that the reminder is set for ends. ● “!” identifies that two or more timer events are overlapped. USB HDD Rec. is given priority over Reminder. As for the overlapped recording events, the first event starts and finishes as programmed. The next event can then start.
● The recording of Timer Programming will automatically change the channel to the programmed channel a few seconds before the start time.
● The recording of Timer Programming will be performed even if the TV is in REW LIVE TV recording. In this case, REW LIVE TV recording will be cancelled.
Recording > Recording current programme > REW LIVE TV
● For more information of the USB HDD
Recording > Technical information
- 92 -
Technical informationUSB HDD
■ USB HDD(for recording the digital TV programmes with this TV)
● The capacity of USB HDD that works with this TV is from 160 GB to 3 TB. ● Connect the USB HDD to the socket outlet to record and play back properly with this TV.
● Use the USB HDD formatted with this TV. Recording > USB HDD setup > Setting for USB HDD
● Regarding performance, not all USB HDDs are guaranteed. Check the USB HDDs that have been tested for compatibility with this TV at the following website.
http://panasonic.net/viera/support (English only)
= Note = ● Data modified with a PC may not be displayed. ● Do not remove the device while the TV is accessing data. Otherwise this can damage the device or TV.
● Do not touch the pins on the device. ● Do not subject the device to a high pressure or impact. ● Insert the device in the correct direction. Otherwise this can damage the device or TV.
● Electrical interference, static electricity, or erroneous operation may damage the data or device.

- 93 -
Media Player
Using Media PlayerInformationMedia Player allows you to enjoy photo, video or music recorded on the SD Card / USB Flash Memory / network device, and contents recorded with this TV to the formatted USB HDD.(Example)
Photo mode:
Still pictures recorded with digital cameras will be displayed.
Video mode:
Moving pictures recorded with digital video cameras and digital video data will be played back.
Recorded TV mode:
(For exclusive USB HDD) TV programmes recorded on the USB HDD with this TV will be played back.
Music mode:
Digital music data will be played back. ● During the operation, audio signal is output from DIGITAL AUDIO and HDMI1 / HDMI2 (ARC function) terminals. But no video signals are output. To use HDMI1 / HDMI2 with ARC function, connect an amplifier that has ARC function, set to use theatre speakers and match the output setting in ARC Output in the Sound menu.
Functions > VIERA Link “HDAVI Control™”
● Date shows the date on which the recording was made by the recording equipment. For a file without a valid record date “ ” is shown.
● Pictures may not appear correctly on this TV depending on the recording equipment used.
● Displaying may take some time when there are many files and folders. ● Partially degraded files may be displayed with reduced resolution. ● Picture setting may not work depending on the conditions.

- 94 -
● Folder and file names may be different from those on the digital camera or digital video camera used.
■ To insert or remove the SD CardGently insert the SD Card with the label surface facing front. Push the centre of the card until a click is heard. (To remove, push it again.)
Label surface
Cutout
■ To insert or remove the USB Flash MemoryEnsure alignment is straight and complete when inserting or removing.
● To remove the USB Flash Memory safely from the TV, perform Safely remove USB in USB Device Setup.
1) Display the menu with MENU.
2) Select Setup > USB Device Setup with / and press OK to access.
3) Select the device with / and press (yellow) to set. ● Connect the USB Flash Memory to the USB 1 or 2 port.
= Note = ● To connect the USB HDD
Recording > USB HDD setup
● Check the terminal type and devices are correct when connecting. ● For the information of the devices
Media Player > Technical information

- 95 -
● For supported file formats
Media Player > Technical information
Selecting device / mode1. Insert the SD Card or USB Flash Memory to the TV.
● When you insert the SD Card, Media Player will start automatically.
Media Player > Using Media Player > Information
● To play back contents in the USB HDD, ensure the connection and settings are completed.
Recording > USB HDD setup
● To play back contents in the network device, ensure the connection and settings are completed.
Media Player > Using Media Player > Network device
2. Display APPS List with APPS.
3. Select Media Player with / / / and press OK to access.
4. Select the device with / and press OK to access. ● If only one device is connected, this step will be skipped. ● The network device already connected to the TV is also displayed.
: Enter User / Password to access.
: User / Password are already entered.
5. Select Photo / Video / Music / Recorded TV with / and press OK to access.
Photo
Media Player > Photo mode
Video
Media Player > Video mode
Music
Media Player > Music mode
Recorded TV
Media Player > Recorded TV mode
6. The thumbnail view will be displayed.(Example)

- 96 -
● To display / hide information of the highlighted content
= Note = ● You may also access each mode directly from APPS List.
my Home Screen > APPS List > How to use
● Recorded TV is available for contents recorded on the USB HDD with this TV.
● Select the appropriate device and content for playing back each file. ● You can use the following buttons during playback. Confirm the remote control code is “73”.
Watching > External equipment > Operating with TV’s remote control
■ To change the deviceYou can change the current device to another device directly in the same mode when two or more available devices are connected.
1. Display the device selection screen with (yellow) while the thumbnail is displayed.
2. Select the device with / and press OK to access. ● Not valid in Recorded TV mode
– To change the device in Recorded TV mode
Media Player > Recorded TV mode > Changing device
■ To change the modeYou can switch to another mode of Media Player from the thumbnail view.
1. Display the contents selection screen with (blue) while the thumbnail is displayed.
2. Select the contents with / and press OK to access. ● The mode can be switched in the current device.
Network deviceYou can enjoy photo, video or music stored in the network devices.
● To enable this function, connect this TV to your home network.
Network > Network connections
Network > Network settings

- 97 -
■ How to set User / Password1. Display the menu with MENU.
2. Select Network > File Sharing Settings > Network Device List with / and press OK to access.
3. Select the network device with / and press OK to access.
4. Enter User / Password with / / / or Numeric buttons and press OK to set.
● Press BACK/RETURN to store. ● To register the new network device, set Server Name / Shared Folder. For details, read the manual of the equipment.
5. Select Register with / and press OK to set. ● To delete the registered device, select Delete with / and press OK to set.
= Note = ● Regarding performance, not all servers are guaranteed. PCs with Windows 7 / Windows 8 / Windows 8.1 have been tested for compatibility with this TV (as of December, 2013). Additional information for the servers may be found on the following website.
http://panasonic.net/viera/support (English only)

- 98 -
Photo modeSelecting fileSelect the file in the thumbnail view with / / / and press OK to start playback.
: Error display ● To change the size of photos in the thumbnail view
1) Display the option menu with OPTION.
2) Select Change Size with / and press OK to change. ● For supported file formats
Media Player > Technical information > Photo format
■ Thumbnail view ● To display / hide information of the highlighted content
● To display Slideshow Settings
(red)
Media Player > Photo mode > Using Slideshow
● To sort
(green) ● To change the device
(yellow) ● To change the contents
(blue)
Viewing photo
■ Playback ● To operate Single view
: To the previous photo
: To the next photo
: Stop (return to thumbnail)
OK : Slideshow ● To display / hide the operation guide

- 99 -
● To rotate 90°
(blue) ● To return to thumbnail
BACK/RETURN
Sorting photos
■ To sort by folder, recorded date or recorded month1. Display the view selection in the thumbnail view with (green).
2. Select Folder view / Sort by Date / Sort by Month with / and press OK to set.
Folder view:
Displays the thumbnail grouped by folder. ● Files which are in the root folder will be collected to the folder
named “/”.
Sort by Date / Sort by Month:
Displays the thumbnail grouped by the same date or month. ● The group of the photos without recorded dates is shown as
Unknown. ● To return to the thumbnail of all photos
1) Display the view selection in the thumbnail view with (green).
2) Select All photos with / and press OK to set.
Multi Shot 3DThis TV can create a 3D photo using a pair of photos and save it.
● You can only save the image into the SD card. ● This function is available with photos recorded on digital cameras. ● Depending on the photos you select, they may not be suitable for creating 3D photos, or creating 3D photos may not be possible. In this case, it is recommended to take a photo (for L) and then move your camera to the right approx. 5 cm and take another photo (for R).
● To view the created 3D photo with 3D effect, you need the 3D Eyewear.
1. Display the option menu in the thumbnail view with OPTION.
2. Select Multi Shot 3D with / and press OK to access.
3. Select two photos for L (left) and R (right) with / / / and (red).

- 100 -
● You can only select photos of the same recorded date and the same pixels.
● You may not be able to view the created 3D photo properly if you transpose the left and right photos.
4. Create the 3D photo with OK. ● If your selected photos are not suitable for the 3D photo, the error message will be displayed and you will return to the photo selection screen (step 3).
● To save the 3D photo in the SD Card, press OK and follow the on-screen instructions.
● After the photo is saved, the photo selection screen will be displayed (step 3). Select photos again to create another 3D photo or exit from Multi Shot 3D.
■ To enjoy the saved 3D photosSaved 3D photos are displayed in the thumbnail view. Wear the 3D Eyewear and enjoy the 3D photos.
Using SlideshowSlideshow ends when all photos within the current thumbnail are viewed.
1. Select the file from the thumbnail of photos for the first view with / / / .
2. Start Slideshow with (red) and OK. ● To display / hide the operation guide
● To pause (return to Single view)
OK ● To return to thumbnail
BACK/RETURN ● You can change the back ground music by setting Back Ground Music in Slideshow Settings (see below).
■ Slideshow SettingsSet up the settings for Photo mode.
1. Display the option menu with OPTION.
2. Select Slideshow Settings with OK.
3. Select one of the following items with / and press OK to access.

- 101 -
Frame / Colour Effect / Transition Effect / Auto Makeup / Screen Mode / Burst Playback / Interval / Repeat / Back Ground Music
4. Set with / and press OK to store.
Frame
(Off / Multi / Collage / Drift (+ calendar) / Drift / Gallery (+ calendar) / Gallery / Cinema)
Selects the frame type of the slideshow.
Multi:
9 photos are displayed orderly at once.
Collage:
Each photo is displayed at a random position and random scale.
Drift (+ calendar) / Drift:
Photos are displayed with flow images. ● You can select whether to display the calendar or not. The month of
calendar is changed with / .
Gallery (+ calendar) / Gallery:
Various sizes of photos in the frames are displayed. ● You can select whether to display the calendar or not. The month of
calendar is changed with / .
Cinema:
Photos are displayed as old films (sepia tone).
Colour Effect
(Off / Sepia / Gray scale)
Selects the colour effect of photos. ● Not valid when Frame is set to Drift, Gallery or Cinema
Transition Effect
(Off / Fade / Dissolve / Motion / Random)
Selects the transition effect for switching photos during the slideshow.
Fade:
The next photo fades in gradually.
Dissolve:
Each photo is dissolved when switching to the next photo.

- 102 -
Motion:
Each photo is displayed with an effect of enlarging, reducing, moving up or moving down.
Random:
The transition effect is selected at random. ● This function is available when Frame is set to Off.
Auto Makeup
(On / Off)
Automatically detects the face in the photo and improves luminance and contrast.
Screen Mode
(Normal / Zoom)
Selects enlarged or normal viewing. ● Not valid when Frame is set to Collage, Drift, Gallery, Cinema or when Transition Effect is set to Motion
● Depending on the photo size, the photo may not be fully enlarged to fill the screen (e.g. portrait style picture).
Burst Playback
(On / Off)
Selects whether to display burst photos in a fast-paced slideshow mode or not.
● Not valid when Frame is set to Drift, Gallery, Cinema or when Transition Effect is set to Motion
Interval
(Long / Normal / Short)
Selects slideshow interval. ● Not valid when Frame is set to Drift, Gallery, Cinema or when Transition Effect is set to Motion
Repeat
(On / Off)
Slideshow repeat

- 103 -
Back Ground Music
(Off / Type1 / Type2 / Type3 / Type4 / Type5 / User / Auto)
Selects the background music during Photo mode.
Type1 - 5:
Music files installed on this TV at the factory settings will be played back.
Auto:
Music files stored in the current device will be played back. ● If there is no available music data, no sound will be played back.
User:
Music files in the device registered by yourself will be played back. ● If no music files have been registered or the device which had registered music files is removed, no sound will be played back.
● To register music
1) Select the music file with / and press OK to access. ● Depending on the condition of the device, select folders until you
reach the desired music file.
2) Select File / Folder with / and press OK to set.
File:
The selected music file will be registered.
Folder:
All the music files in the folder which contains the selected music file will be registered.
= Note = ● Picture quality may be degraded depending on the slideshow settings. ● Picture setting may not work depending on the slideshow settings.

- 104 -
Video modeSelecting file1. Select the title in the thumbnail view with / / / .
: Error display
: The file does not support thumbnail view. ● The preview will start when the title / scene is highlighted in the thumbnail view if it supports a preview. To turn off the preview, set Video Preview to Off.
Media Player > Video mode > Video Setup
2. Start playback with (red). ● If you have stopped the last playback halfway, the confirmation screen is displayed to select whether to start from where you stopped last time or from the beginning.
● For supported file formats
Media Player > Technical information > Video format
■ Thumbnail view ● To display / hide information of the highlighted content
● To start playback
(red) ● To change the device
(yellow) ● To change the contents
(blue)
Watching video
■ Playback from the selected scene in the titlePlayback of the selected scene will start and continue until the end of the title.
1. Select the title with / / / and press OK to access.
2. Select the scene with / / / .
3. Start playback with (red). ● The structure of titles and scenes may vary depending on the digital video camera used.

- 105 -
● Playback may not continue depending on the condition. ● To repeat playback
Media Player > Video mode > Video Setup
■ Playback ● To operate playback
: Rewind
: Fast forward
: Stop
OK : Pause (displays the time seek bar) / Playback ● To jump to the specified time point
1) Display the time seek bar with OK.
2) While the time seek bar is displayed
Press / :
Search approx. 10 seconds
Press and hold / :
Search rapidly
3) Jump to the specified time point with OK. ● To display / hide the operation guide and information banner
● To the previous title / scene
(red) ● To the next title / scene
(green) ● To change aspect
1) Display Aspect Selection with ASPECT.
2) Select the mode with / and press OK to set.
Aspect1:
Displays the content enlarged without distortion.
Aspect2:
Displays the content full-screen.
Original:
Displays the content original size.
– You can also change the mode pressing ASPECT. (Press repeatedly until you reach the desired mode.)

- 106 -
– Aspect cannot be changed depending on the content. ● To return to thumbnail
BACK/RETURN
Video SetupSet up the settings for Video mode.
1. Display the option menu with OPTION.
2. Select Video Setup with OK.
3. Select one of the following items with / and press OK to access.
Video Preview / Multi Audio / Dual Mono Audio / Subtitle / Subtitle Text / Repeat
● Menu items and selectable options vary depending on the content.
4. Set with / and press OK to store.
Video Preview
(On / Off)
Sets to start the preview of the title or scene in the thumbnail view. ● Images may not be displayed for an instant in the thumbnail view. Set the preview Off to solve this.
● This function is available in the thumbnail view.
Multi Audio, Dual Mono Audio
Selects for selectable sound tracks (if available). ● It may take several seconds to change the sound. ● This function is available during playback.
Subtitle
Display / hide subtitles (if available). ● This function is available during playback.
Subtitle Text
Selects the font type to display subtitles correctly (if available). ● This function is available during playback.

- 107 -
Repeat
(On / Off)
Playback repeat within the title or selected file (depending on the content)
Audio output settingsYou can enjoy the multi-channel sound via an amplifier connected to DIGITAL AUDIO or HDMI1 / HDMI2 (ARC function) terminal.
● To confirm or change the current sound status
Media Player > Video mode > Video Setup
1. Display the menu with MENU.
2. Select Sound > SPDIF Selection with / and press OK to access.
3. Select Auto / PCM with / and press OK to set.
SPDIF Selection
(Auto / PCM)
Selects the initial setting for digital audio output signal from DIGITAL AUDIO and HDMI1 / HDMI2 (ARC function) terminals.
● SPDIF is a standard audio transfer file format.
Auto:
Dolby Digital Plus, Dolby Digital and HE-AAC multi-channel are output as Dolby Digital Bitstream. MPEG is output as PCM. DTS is output as DTS.
PCM:
Digital output signal is fixed to PCM. ● ARC (Audio Return Channel) is a function of digital audio output using HDMI cable.
- 108 -
Recorded TV modeSelecting content
● For exclusive USB HDD ● To play back contents in the USB HDD, ensure the connection and settings are completed.
Recording > USB HDD setup
1. Contents list of the selected device is displayed in Recorded TV mode. ● Remaining capacity of the selected device is displayed on the top right. (This value may not be accurate depending on the condition.)
● Contents list is displayed as All or Not Viewed.
All:
All the recorded TV programmes are listed.
Not Viewed:
Contents not played back yet are listed. ● Icons are displayed.
: Content not played back yet (Once you play back the content, this icon will disappear.)
: Protected content cannot be deleted.
: Content under recording (You can play back this content even if under recording.)
: Two or more contents are grouped.
2. Select the content with / and press OK to start playback. ● If you have stopped the last playback halfway, the confirmation screen is displayed to select whether to start from where you stopped last time or from the beginning.
● If the content has multiple programmes with different parental ratings, the highest restriction is applied to the content. Once you unlock the restriction, all the programmes in the content can be played back.
● For supported file formats
Media Player > Technical information > Video format

- 109 -
Watching recorded TV
■ Playback ● To operate playback
: Manual skip
– Press to skip forward approx. 30 seconds.
– Press and hold to skip backward approx. 15 seconds.
: Rewind
: Fast forward
: Stop
OK : Pause (displays the time seek bar) / Playback ● To jump to the specified time point
1) Display the time seek bar with OK.
2) While the time seek bar is displayed
Press / :
Search approx. 10 seconds
Press and hold / :
Search rapidly
3) Jump to the specified time point with OK. ● To display / hide the operation guide and information banner
● To repeat between the starting point “A” and finishing point “B”
(blue)
(Set “A” and “B” in order.)
– The points will be reset by pressing again or by other operations. ● To the previous / next chapter
(red) / (green)
– A recorded content is automatically divided into chapters (approx. 5 minutes for each).
● To change aspect
ASPECT
Watching > For best picture > Aspect
● To display the subtitle (if available)
STTL

- 110 -
● To confirm or change the current status (if available)
Watching > Basic > Option Menu
● To return to list
BACK/RETURN
Grouping contents1. Select the content to edit with / and press (blue) to tick in the
contents list.
2. Display the option menu with OPTION.
3. Select Create Group / Release Group / Exclude from Group / Change Protect Status with / and press OK to set.
Create Group:
Two or more contents can be grouped. Select and tick all the desired contents, and then select Create Group.
Release Group:
Select the created group to release, and then select Release Group. (To release several groups at once, tick all the desired groups.)
Exclude from Group:
Select the group and press OK to display the grouped contents. To exclude one specific content from the group, tick it and then select Exclude from Group. (To exclude several contents at once, tick all the desired contents.)
Change Protect Status:
Select the content to protect from deletion, and then select Change Protect Status. Perform the same way to cancel the protection. (To change the status of several contents at once, tick all the desired contents.)
Deleting content1. Select the content to edit with / and press (blue) to tick in the
contents list.
2. Delete the content with (red).
3. When the confirmation screen is displayed, select Yes with / and press OK to set.

- 111 -
Changing deviceYou can change the current device to another device directly in the same mode when two or more available devices are connected.
1. Display the option menu with OPTION.
2. Select Drive Select with / and press OK to access.
3. Select the device with / and press OK to access. ● If you select the device to play back photos, videos or music, change to the appropriate content.
1) Display the option menu with OPTION.
2) Select Contents Select with / and press OK to access.
Chapter ListYou can start playback from the chapter list you select.
1. Display the chapter list with (yellow).
2. Select the chapter with / and press OK to start playback.
= Note = ● The chapter list is not displayed while the selected content is being recorded.
● Depending on the recorded programmes, some playback operations may not work properly.
Audio output settingsYou can enjoy the multi-channel sound via an amplifier connected to DIGITAL AUDIO or HDMI1 / HDMI2 (ARC function) terminal.
● To confirm or change the current sound status
Media Player > Video mode > Video Setup
1. Display the menu with MENU.
2. Select Sound > SPDIF Selection with / and press OK to access.
3. Select Auto / PCM with / and press OK to set.
SPDIF Selection
(Auto / PCM)
Selects the initial setting for digital audio output signal from DIGITAL AUDIO and HDMI1 / HDMI2 (ARC function) terminals.
● SPDIF is a standard audio transfer file format.

- 112 -
Auto:
Dolby Digital Plus, Dolby Digital and HE-AAC multi-channel are output as Dolby Digital Bitstream. MPEG is output as PCM. DTS is output as DTS.
PCM:
Digital output signal is fixed to PCM. ● ARC (Audio Return Channel) is a function of digital audio output using HDMI cable.

- 113 -
Music modeSelecting file1. Select the folder in the thumbnail view with / / / .
2. Start playback with (red). ● For supported file formats
Media Player > Technical information > Music format
■ Thumbnail view ● To display / hide information of the highlighted content
● To start playback
(red) ● To change the device
(yellow) ● To change the contents
(blue)
Playing music
■ Playback of the selected file in the folder1. Select the folder with / / / and press OK to access.
2. Select the file with / / / .
3. Start playback with (red).
■ Playback ● To operate playback
: Rewind
: Fast forward
: Stop
OK : Pause (displays the time seek bar) / Playback

- 114 -
● To jump to the specified time point
1) Display the time seek bar with OK.
2) While the time seek bar is displayed
Press / :
Search approx. 10 seconds
Press and hold / :
Search rapidly
3) Jump to the specified time point with OK. ● To display / hide the operation guide
● To the previous track
(red) ● To the next track
(green) ● To return to thumbnail
BACK/RETURN
Music SetupSet up the setting for Music mode.
● This function is available in the thumbnail view.
1. Display the option menu with OPTION.
2. Select Music Setup > Repeat with OK.
3. Select Off / Folder / One with / and press OK to set.
Folder:
Playback repeat within the selected folder
One:
Playback repeat of the selected one file

- 115 -
Technical informationDevice handling caution
● Data modified with a PC may not be displayed. ● Do not remove the device while the TV is accessing data. Otherwise this can damage the device or TV.
● Do not touch the pins on the device. ● Do not subject the device to a high pressure or impact. ● Insert the device in the correct direction. Otherwise this can damage the device or TV.
● Electrical interference, static electricity, or erroneous operation may damage the data or device.
● Back up the recorded data at regular intervals to prevent data deterioration, data damage or erratic operation of the TV. Panasonic is not liable for any deterioration or damage of recorded data.
SD Card
■ SD CardUse an SD Card which meets SD standards. Failure to do so may cause the TV to malfunction.
2.1 mm
32 mm
24 mm
Card format:
SDXC Card - exFAT
SDHC Card / SD Card - FAT16 or FAT32
Compliant card type (maximum capacity):
SDXC Card (64 GB), SDHC Card (32 GB), SD Card (2 GB), miniSD Card (2 GB) (miniSD adaptor required)
● When using a miniSD Card, insert / remove it together with the adaptor.

- 116 -
USB devices ● It is recommended to connect the device to the TV’s USB port directly. ● Some USB devices or USB HUB may not be used with this TV. ● You cannot connect any devices using a USB card reader. ● Additional information for the devices may be found on the following website.
http://panasonic.net/viera/support (English only)
■ USB Flash MemoryUSB Flash Memory format:
FAT16, FAT32 or exFAT ● USB HDDs formatted on a PC are not guaranteed to work in Media Player.
■ USB HDD ● The capacity of USB HDD that works with this TV is from 160 GB to 3 TB. ● Connect the USB HDD to the socket outlet to record and play back properly with this TV.
● Use the USB HDD formatted with this TV.
Recording > USB HDD setup > Setting for USB HDD
● Regarding performance, not all USB HDDs are guaranteed. Check the USB HDDs that have been tested for compatibility with this TV at the following website.
http://panasonic.net/viera/support (English only)
Photo format
■ Supported Photo formats
● JPEG (.jpg, .jpeg, .mpo)
Sub-sampling:
4:4:4, 4:2:2, 4:2:0
Image resolution (pixel):
8 × 8 to 30 719 × 17 279 ● DCF and EXIF standards ● Progressive JPEG is not supported.

- 117 -
= Note = ● Some files may not be played back even if they fulfil these conditions. ● Do not use multi-byte characters or other special codes for file names. ● Connected devices may become unusable with this TV if the file or folder names are changed.
Video format
■ Supported Video formats
● SD-Video (.mod)
Video codec:
MPEG1, MPEG2
Audio codec:
Dolby Digital, MPEG Audio ● SD-Video Standard Ver. 1.31 (Entertainment Video Profile) ● The data may not be available if a folder structure on the device is modified.
● AVCHD (.mts)
Video codec:
H.264 BP/MP/HP
Audio codec:
Dolby Digital ● AVCHD Standard Ver. 2.0 (AVCHD 3D, AVCHD Progressive) ● The data may not be available if a folder structure on the device is modified.
● AVI (.avi)
Video codec:
H.264 BP/MP/HP, MPEG1, MPEG2, MPEG4 SP/ASP, VC-1, Windows Media Video Ver. 9
Audio codec:
AAC, ADPCM, Dolby Digital, Dolby Digital Plus, DTS core, HE-AAC, LPCM, MPEG Audio, MP3, WMA, WMA Pro
● Some subtitles or chapter functions may not be available.

- 118 -
● MP4 (.f4v, .m4v, .mp4)
Video codec:
H.264 BP/MP/HP, MPEG1, MPEG2, MPEG4 SP/ASP
Audio codec:
AAC, Dolby Digital, Dolby Digital Plus, HE-AAC, MPEG Audio, MP3 ● This TV supports this container recorded with Panasonic products. For details, read the manual of the products.
● MKV (.mkv)
Video codec:
H.264 BP/MP/HP, MPEG1, MPEG2, MPEG4 SP/ASP
Audio codec:
AAC, Dolby Digital, Dolby Digital Plus, DTS core, HE-AAC, MPEG Audio, MP3, Vorbis
● Some subtitles or chapter functions may not be available.
● ASF (.asf, .wmv)
Video codec:
MPEG4 SP/ASP, VC-1, Windows Media Video Ver. 9
Audio codec:
AAC, Dolby Digital, Dolby Digital Plus, HE-AAC, LPCM, MP3, WMA, WMA Pro
● Copy-protected files cannot be played back.
● FLV (.flv)
Video codec:
H.264 BP/MP/HP
Audio codec:
AAC, MP3
● 3GPP (.3gp, .3g2)
Video codec:
H.264 BP/MP/HP, MPEG4 SP/ASP
Audio codec:
AAC, HE-AAC

- 119 -
● PS (.mod, .mpg, .mpeg, .vob, .vro)
Video codec:
H.264 BP/MP/HP, MPEG1, MPEG2, VC-1
Audio codec:
AAC, Dolby Digital, Dolby Digital Plus, HE-AAC, LPCM, MPEG Audio, MP3
● TS (.mts, .m2ts, .tp, .trp, .ts, .tts)
Video codec:
H.264 BP/MP/HP, MPEG1, MPEG2, VC-1
Audio codec:
AAC, Dolby Digital, Dolby Digital Plus, DTS core, HE-AAC, MPEG Audio, MP3
■ Supported Subtitles formats
● MicroDVD, SubRip, TMPlayer (.srt, .sub, .txt) ● The video file and subtitles text file are inside the same folder, and the file names are the same except for the file extensions.
● If there are more than one subtitles text files inside the same folder, they are displayed in the following order of priority: “.srt”, “.sub”, “.txt”.
= Note = ● Some files may not be played back even if they fulfil these conditions. ● Do not use multi-byte characters or other special codes for file names. ● Connected devices may become unusable with this TV if the file or folder names are changed.
● Supported formats are different in Media Player and media server.

- 120 -
Music format
■ Supported Music formats
● MP3 (.mp3)
● AAC / Apple Lossless (.m4a) ● Copy-protected files cannot be played back.
● FLAC (.flac)
● WMA / WMA Pro (.wma) ● Copy-protected files cannot be played back. ● WMA Lossless is not supported.
● LPCM (.wav)
= Note = ● Some files may not be played back even if they fulfil these conditions. ● Do not use multi-byte characters or other special codes for file names. ● Connected devices may become unusable with this TV if the file or folder names are changed.

- 121 -
Network
Internet contentInformationYou can access some specific websites supported by Panasonic, and enjoy internet contents such as videos, games, communication tools, etc. from APPS List.(Example)
● To enable this function, you need a broadband network environment. Ensure the network connections and network settings are completed.
Network > Network connections
Network > Network settings
Selecting internet content1. Display APPS List with APPS.
● For details of APPS List
my Home Screen > APPS List
● Depending on the usage conditions, it may take a while to read all the data.
2. Select the desired item with / / / and press OK to access.(Example)
● To return to APPS List
APPS ● To exit APPS List
EXIT

- 122 -
● You may operate the internet contents with the free cursor and Voice Control function of Touch Pad Controller (supplied).
Functions > Voice Control
● You can connect a keyboard for character input in the applications. You can also use the keyboard for TV operation as well as for APPS List.
Functions > Bluetooth devices
Functions > Keyboard
● Video communication (for example Skype™) requires an exclusive Communication Camera TY-CC20W. For details, read the manual of the Communication Camera.
Support > Optional accessories > Communication Camera
Note ● If you cannot access the internet contents, check the network connections and settings.
Network > Network connections
Network > Network settings
● APPS List is subject to change without notice. ● Not all the features of the websites are available. ● Be sure to update the software when a software update notice is displayed on the TV screen. If the software is not updated, you may not be able to use APPS List. You can update the software later manually.
Network > Network settings > Software Update
● The services through APPS List are operated by their respective service providers and such service may be discontinued either temporarily or permanently without notice. Therefore, Panasonic will make no warranty for the contents or the continuity of the services.
● Some contents may be inappropriate for some viewers. ● Some contents may only be available for specific countries and may be presented in specific languages.
● Depending on the connection environment, the internet connection may be slow or may not be successful.

- 123 -
DLNAInformationThis TV is a DLNA Certified™ product.
DLNA® (Digital Living Network Alliance) is a standard that makes DLNA Certified digital electronics easier and more convenient to use on a home network. To learn more, visit www.dlna.org.
● To enable this function, connect this TV to your home network.
Network > Network connections
Network > Network settings
■ Playback of sharing contents stored in the media serverStore photos, videos or music contents into the DLNA Certified media server (for example, PC with Windows 7 / Windows 8 installed, DIGA Recorder, etc.) connected to your home network. And then you can enjoy these contents on this TV.(Example)
● For watching and operating contents on this TV
Network > DLNA > Using DLNA
● For supported file formats
Network > Technical information
● To use a PC as a media server
Prepare the PC with Windows 7 / Windows 8 or ensure the server software is installed on the PC. “Windows 7 / Windows 8” and “Twonky 7 (installed on the PC with Windows XP or Mac)” are the server software that has been tested for compatibility with this TV (as of December, 2013). Any other server software has not been tested with this TV, therefore compatibility and performance cannot be assured.
● Windows 7 / Windows 8
The setup for homegroup settings of Windows 7 / Windows 8 is required. For details, refer to the help functions of Windows 7 / Windows 8.

- 124 -
● Twonky
“Twonky” is the product of PacketVideo Corporation.
To obtain the Installation Guides for installing and setting “Twonky”, visit the website of TwonkyMedia.
Additional fees may be charged to obtain server software.
= Note = ● For more information about the server software, please consult each software company.
● When server software for the media server is installed on the PC, the data on the PC may be at risk of being accessed by other people. Please take care of the settings and connections under the network circumstances in office, hotel or even at home when not using a router.
● To use a DLNA compatible DIGA Recorder as a media server
By connecting a DLNA compatible DIGA Recorder to your home network, you can control it as one of the media servers.
● Please read the manual of your DIGA Recorder to check if the recorder is compatible with DLNA.
■ Playback of sharing contents on this TV with the DMC (Digital Media Controller) network equipment
You can enjoy contents stored in the media server by controlling with the DMC network equipment (smartphone, PC with Windows 7 / Windows 8 installed, etc.) connected to your home network.
● To use this function with your smartphone or Windows 7 / Windows 8, set TV Remote App Settings of this TV.
Network > Network settings > TV Remote App Settings
And you need to install the application for controlling VIERA on your smartphone. For information of the application:
http://panasonic.net/viera/support (English only)
For the operations, refer to the support information of the application. ● “Windows 7 / Windows 8” are the OS that have been tested for compatibility of this TV (as of December, 2013). For the operations, refer to the help functions of Windows 7 / Windows 8.

- 125 -
■ Sharing the TV programme or contents of this TV with another piece of network equipment
You can enjoy the current digital TV programme or the contents of this TV on the other DLNA Certified VIERA, your smartphone, etc. connected to your home network. You can also select the channel and watch TV on your smartphone .
For example, watching the TV programme on your smartphone in the other room, etc.
: Available contents: ● Contents that can be played back in Media Player of this TV and another piece of network equipment
● TV programmes recorded on USB HDDs with this TV: To use this function with your smartphone, you need to install the
application for controlling VIERA in your smartphone. For information of the application:
http://panasonic.net/viera/support (English only)
For the operations, refer to the support information of the application.
● To use this function with another DLNA Certified VIERA, set Network Link Settings of this TV.
Network > Network settings > Network Link Settings
● Sharing the current programme may not be available when selecting radio channels, encrypted (copy-protected) programmes or when the broadcast prohibits the output of video and audio.
= Note = ● To use this function, turn this TV on. ● This function is available only with 1 piece of other equipment. ● You may be able to control this TV using your smartphone. For details, refer to the support information of the application.
● Display the TV full-screen for sharing the TV programme with another piece of network equipment.
● This function may not be available in the following conditions of this TV:
– While the recording is in progress
– 3D
– When watching the content of 4K format

- 126 -
Using DLNATo use DLNA® features, ensure the preparations of the media server, network connections and network settings are completed.
Network > DLNA > Information
Network > Network connections
Network > Network settings
1. Display APPS List with APPS.
2. Select Media Server with / / / and press OK to access.
3. Select one of the media servers with / and press OK to access. ● For the operations to access another TV, select the name of another TV from the displayed media server list.
● To display / hide information of the highlighted media server
4. Select the file with / and press OK to access.(Example)
● Depending on the condition of media server, you may need to select the folder before selecting the file.
● To display / hide information of the highlighted file
= Note = ● Non-playable files are also listed but cannot be selected. ● You can use the following buttons during playback. Confirm the remote control code is “73”.
Watching > External equipment > Operating with TV’s remote control

- 127 -
Network connectionsInternet connectionTo use internet service, you need a broadband network environment.
● If you do not have any broadband network services, please consult your retailer for assistance.
● Dial-up internet connections cannot be used. ● Required speed (effective): at least 1.5 Mbps for SD (Standard Definition) and 6 Mbps for HD (High Definition) picture quality, respectively. If the transfer speed is not enough, contents may not be played back properly.
■ Wireless connection
Built-in wireless LAN (Rear of the TV)
Access point
Internet environment
■ Wired connection
ETHERNET terminal
LAN cable (Shielded) ● Use the Shielded Twist Pair (STP) LAN cable.
Internet environment

- 128 -
DLNA connectionTo use DLNA features, you need a home network environment and you can operate the features without a broadband network environment.
● To use internet service, you need a broadband network environment.
Network > Network connections > Internet connection
■ Wireless connection (For DLNA and internet service)
Built-in wireless LAN (Rear of the TV)
Access point
Hub or Router
Internet environment
Smartphone
DLNA Certified media server (PC, etc.)

- 129 -
■ Wired connection (For DLNA and internet service)
ETHERNET terminal
LAN cable (Shielded) ● Use the Shielded Twist Pair (STP) LAN cable.
Hub or Router
Internet environment
DLNA Certified media server (PC, etc.)
■ Wireless connection (For DLNA)
TV ● To use the TV as a wireless access point
Network > Network settings > Custom - Wireless Access Point
DLNA Certified media server (PC, etc.)
Smartphone
- 130 -
Note ● Ensure to use a LAN straight cable. ● Set up and connect equipment required for the network environment. You cannot make such settings on this TV. Read the manual of the equipment.
● If your modem has no broadband router functions, use a broadband router. ● If your modem has broadband router functions but there are no vacant ports, use a hub.
● Ensure that the broadband routers and hubs are compatible with 10BASE-T / 100BASE-TX.
● If you use the equipment compatible only with 100BASE-TX, category 5 or later LAN cables are required.
● Contact your Internet Service Provider (ISP) or telecommunications company for further assistance regarding the network equipment.
● Confirm the terms and conditions of the contracts with your Internet Service Provider (ISP) or telecommunications company. Depending on the contracts, additional fees may be charged or multiple connections to the internet may be impossible.
● Turn the TV off with Mains Power On / Off switch, and then on again when changing or making the network connection again.
● Depending on the network condition, the content may not be played back properly.

- 131 -
Network settingsNetwork ConnectionEnsure the connections are completed before starting network setup.
Network > Network connections
■ Quick setup - Wireless1. Display the menu with MENU.
2. Select Network > Network Connection with / and press OK to access.
● Confirm the encryption key, settings and position of your access point before starting setup. For details, read the manual of the access point.
3. Select Quick setup with / and press OK to access. ● When the LAN cable is connected, wired setup will be done automatically.
4. Select your desired access point with / and press OK to access. ● Available Wireless Networks are displayed automatically.
: Encrypted access point ● For WPS(Push button)
1) Select Easy setup with Push button with / and press OK to access.
2) Press the WPS button on the access point until the light flashes.
3) Connect the TV with the access point with OK.
– WPS: Wi-Fi Protected Setup™
– If the connection has failed, check the settings and positions of your access point. And then, follow the on-screen instructions.
● It is recommended to select the encrypted access point.
5. Enter the encryption key of the access point with / / / and press OK to set.
● You can set characters using Numeric buttons.
● Press BACK/RETURN to store.
6. Automatically setup is done and Network Status is displayed.
Network > Network settings > Network Status
7. Select Exit with / and press OK to set.

- 132 -
● To set manually
Network > Network settings > Custom - Wireless
■ Quick setup - Wired1. Display the menu with MENU.
2. Select Network > Network Connection with / and press OK to access.
3. Select Quick setup with / and press OK to access.
4. Automatically setup is done and Network Status is displayed.
Network > Network settings > Network Status
5. Select Exit with / and press OK to set. ● To set manually
Network > Network settings > Custom - Wired
= Note = ● When the network connection type is set to Wired, Wireless is deactivated.
Custom - WirelessEnsure the connections are completed before starting network setup.
Network > Network connections
1. Display the menu with MENU.
2. Select Network > Network Connection > Custom > Wireless with / / / and press OK to access. ● Confirm the encryption key, settings and position of your access point before starting setup. For details, read the manual of the access point.
3. Select your desired access point with / and press OK to access. ● Available Wireless Networks are displayed automatically.
: Encrypted access point ● For WPS(Push button)
1) Press (red).
2) Press the WPS button on the access point until the light flashes.
3) Connect the TV with the access point with OK.
– WPS: Wi-Fi Protected Setup™
– If the connection has failed, check the settings and positions of your access point. And then, follow the on-screen instructions.
- 133 -
● For WPS(PIN)
1) Press (green).
2) Enter the PIN code to the access point.
3) Connect the TV with the access point with OK. ● For Manual
1) Press (yellow).
2) You can set up SSID, security type, encryption type, and encryption key manually.
3) Follow the on-screen instructions and set manually.
– When you use 11n (5 GHz) for the wireless system between the built-in wireless LAN and access point, select AES for the encryption type.
● To search access points again
(blue) ● To display / hide information of the highlighted access point
● It is recommended to select the encrypted access point.
4. Enter the encryption key of the access point with / / / and press OK to set.
● You can set characters using Numeric buttons.
● Press BACK/RETURN to store.
5. IP/DNS Settings is displayed.
Acquire IP Address / Acquire DNS Address ● Auto is recommended. ● Available settings are displayed automatically. ● To set manually, select and set IP Address / Subnet Mask / Default Gateway / DNS Address.
Proxy Settings ● It is not required for normal household use. ● Some internet services may not be available depending on the proxy settings.

- 134 -
Proxy:
This is the address of the relay server which is connected between the browser and the target server to send data to the browser.
1) Select Proxy with / and press OK to access.
2) Enter the address with / / / or Numeric buttons, and press OK to set.
3) Press BACK/RETURN to store.
Proxy Port:
This number is also specified by the provider with the proxy address.
1) Select Proxy Port with / .
2) Enter the number with Numeric buttons.
3) Press BACK/RETURN to store.
6. Select Network Status with / and press OK to access.
Network > Network settings > Network Status
7. Select Exit with / and press OK to set.
Custom - WiredEnsure the connections are completed before starting network setup.
Network > Network connections
1. Display the menu with MENU.
2. Select Network > Network Connection > Custom > Wired with / / / and press OK to access.
3. IP/DNS Settings is displayed.
Acquire IP Address / Acquire DNS Address ● Auto is recommended. ● Available settings are displayed automatically. ● To set manually, select and set IP Address / Subnet Mask / Default Gateway / DNS Address.

- 135 -
Proxy Settings ● It is not required for normal household use. ● Some internet services may not be available depending on the proxy settings.
Proxy:
This is the address of the relay server which is connected between the browser and the target server to send data to the browser.
1) Select Proxy with / and press OK to access.
2) Enter the address with / / / or Numeric buttons, and press OK to set.
3) Press BACK/RETURN to store.
Proxy Port:
This number is also specified by the provider with the proxy address.
1) Select Proxy Port with / .
2) Enter the number with Numeric buttons.
3) Press BACK/RETURN to store.
4. Select Network Status with / and press OK to access.
Network > Network settings > Network Status
5. Select Exit with / and press OK to set.
= Note = ● When the network connection type is set to Wired, Wireless is deactivated.
Custom - Wireless Access PointYou can use the TV as a wireless access point and connect the network equipment without an access point.
● Confirm the PIN code, network settings of the equipment before starting setup. For details, read the manual of the equipment.
1. Display the menu with MENU.
2. Select Network > Network Connection > Custom > Wireless Access Point with / / / and press OK to access.
3. Select Connect to device in WPS with / and press OK to access.

- 136 -
● To set manually, select Change settings (see below).
4. Select and set WPS(Push button) / WPS(PIN) with / and press OK to access.
WPS(Push button):
Set up the equipment for WPS(Push button). For details, read the manual of the equipment.
WPS(PIN):
Enter the PIN code of the equipment. ● If the connection has failed, check the settings and positions of the equipment. And then, follow the on-screen instructions.
■ Change settingsYou can set up Network name(SSID), Encryption key, Wireless type and Channel setting method manually.
Follow the on-screen instructions and set manually. ● Set Reset settings to reset the items of Change settings.
= Note = ● You cannot connect the internet service while the TV is set to Wireless Access Point.
● You can connect up to 7 devices. But the transfer rate will vary according to communication environment or the numbers of connected equipment.
● To confirm the current network settings
Network > Network settings > Network Status
● Ensure the equipment to connect supports WPS for this setup. ● WPS: Wi-Fi Protected Setup™
Network StatusDisplays and checks the network status (MAC Address, current network settings, etc.).
1. Display the menu with MENU.
2. Select Network > Network Status with / and press OK to access.
3. Automatically testing is done and Network Status is displayed.
Try Again:
Performs automatic testing of the network connection for the TV and displays the current status again.

- 137 -
Status Details:
Displays the detailed network status (SSID, security type, encryption type, etc.).
● For more information of the network connection, select Help.
my Home Cloud SettingsDisplays the terms of service for the cloud services.
1. Display the menu with MENU.
2. Select Network > my Home Cloud Settings > Notices with / and press OK to access.
3. Follow the on-screen instructions. ● To set up an account for the cloud services
Functions > User profile > Settings
VIERA NameSets your favourite name for this TV.
● This name will be used as the name of this TV on the screen of the other network equipment.
● When you use two or more TVs in your network environment, set the names of the TVs for each.
TV Remote App SettingsSets to control the TV with the equipment (smartphone, etc.) connected to your network.
1. Display the menu with MENU.
2. Select Network > TV Remote App Settings with / and press OK to access.
3. Select one of the following items with / and press OK to access.
TV Remote
(On / Off)
Enables to control the TV from the network equipment (smartphone, etc.).
Networked Standby
(On / Off)
Enables to turn the TV on via the LAN cable or wireless LAN using a wake-up message sent from the network equipment in the home network.

- 138 -
● Changing the default configuration may increase Standby Power Consumption.
Powered On by Apps
(On / Off)
Enables to turn the TV on from the network equipment (smartphone, etc.). ● Depending on the network condition, you may have to turn the TV on with Standby On / Off switch of the TV’s remote control.
● Changing the default configuration may increase Standby Power Consumption.
● LED will turn to orange in Standby mode if Powered On by Apps is set to On.
Home Streaming
(Always / Only when powered on)
Enables to share the TV programme and contents of this TV with the network equipment (smartphone, etc.) in the home network.
● Changing the default configuration may increase Standby Power Consumption.
● LED will turn to orange in Standby mode if Home Streaming is set to Always.
Device to upload contents
Selects device to upload contents from the network equipment (smartphone, etc.).
= Note = ● This function is not available when the TV is turned off with Mains Power On / Off switch.
● You need to install the application for controlling VIERA on your smartphone. For information of the application:
http://panasonic.net/viera/support (English only)
For the operations, refer to the support information of the application. ● Depending on the network condition, this function may not be available. ● Depending on the area, this function may not be available. For details, consult your local Panasonic dealer.

- 139 -
Network Link SettingsSets to control the TV with devices connected to the network.
1. Display the menu with MENU.
2. Select Network > Network Link Settings with / and press OK to access.
3. Select one of the following items with / and press OK to access.
DLNA Server / Registration Type / Remote Device List
4. Set with / and press OK to store.
DLNA Server
(On / Off)
Enables to share the TV programme and contents of this TV with the network equipment (DLNA Certified VIERA, etc.).
● To use this function with another VIERA, select the name of this TV from the DLNA server list of another VIERA, and then select the content to share. Also read the manual of another VIERA.
● To use this function with your smartphone, you need to install the application for controlling VIERA on your smartphone. For information of the application:
http://panasonic.net/viera/support (English only)
For the operations, refer to the support information of the application. ● Changing the default configuration may increase Standby Power Consumption.
● LED will turn to orange in Standby mode if DLNA Server is set to On.
Registration Type
(Auto / Manual)
Selects the type to restrict the access to this TV for each piece of equipment on the home network.
Auto:
All available equipment on the home network is accessible (maximum 16 pieces of equipment).
Manual:
Sets the restrictions for each piece of equipment in Remote Device List.

- 140 -
Remote Device List
Lists the equipment accessible to this TV on the home network.
= Note = ● Depending on the area, this function may not be available. For details, consult your local Panasonic dealer.
TV Anywhere SettingsTV Anywhere
(On / Off)
Enables to watch TV and set timer programming events of this TV on the network equipment (smartphone, etc.) from outside the home network.
● Set DLNA Server to On to watch TV from outside the home network. ● Additional information for the services may be found on the following website.
http://panasonic.net/viera/support (English only) ● Changing the default configuration may increase Standby Power Consumption.
● LED will turn to orange in Standby mode if TV Anywhere is set to On.
= Note = ● This function is not available when the TV is turned off with Mains Power On / Off switch.
● Depending on the network condition and broadcasts, this function may not be available.
File Sharing SettingsNetwork Device List
Lists the accessible network devices to play back the contents in Media Player.
Media Player > Using Media Player > Network device
Software UpdateAccesses the specific website to update the TV’s software if any updates are available.
1. Display the menu with MENU.
2. Select Network > Software Update with / and press OK to access.
3. Follow the on-screen instructions.

- 141 -
New Software MessageSelects whether to give a notification message when new software is found via network or not.
1. Display the menu with MENU.
2. Select Network > New Software Message with / and press OK to access.
3. Select On / Off with / and press OK to set.

- 142 -
PhotosSelecting fileEnsure the preparations of the media server, network connections and network settings are completed.
Network > DLNA > Information
Network > Network connections
Network > Network settings
1. Display APPS List with APPS.
2. Select Media Server with / / / and press OK to access.
3. Select one of the media servers with / and press OK to access. ● For the operations to access another TV, select the name of another TV from the displayed media server list.
● To display / hide information of the highlighted media server
4. Select the file with / and press OK to access. ● Depending on the condition of media server, you may need to select the folder before selecting the file.
● To display / hide information of the highlighted file
= Note = ● Non-playable files are also listed but cannot be selected.
Viewing photo
■ Playback ● To operate Single view
: To the previous photo
: To the next photo
: Stop (return to list)
OK : Slideshow ● To display / hide the operation guide
● To rotate 90°
(blue)
- 143 -
● To return to list
BACK/RETURN
Using SlideshowSlideshow ends when all photos within the list are viewed.
1. Select the file from the thumbnail of photos for the first view with / .
2. Start Slideshow with (red) and OK. ● To display / hide the operation guide
● To pause (return to Single view)
OK ● To return to list
BACK/RETURN
■ Slideshow SettingsSet up the settings for photo file operations on this TV.
1. Display the option menu with OPTION.
2. Select Slideshow Settings with / and press OK to access.
3. Select one of the following items with / and press OK to access.
Transition Effect / Auto Makeup / Interval / Repeat / Back Ground Music
4. Set with / and press OK to store.
Transition Effect
(Off / Fade / Dissolve / Motion / Random)
Selects the transition effect for switching photos during the slideshow.
Fade:
The next photo fades in gradually.
Dissolve:
Each photo is dissolved when switching to the next photo.
Motion:
Each photo is displayed with an effect of enlarging, reducing, moving up or moving down.
Random:
The transition effect is selected at random.

- 144 -
Auto Makeup
(On / Off)
Automatically detects the face in the photo and improves luminance and contrast.
Interval
(Long / Normal / Short)
Selects slideshow interval. ● Not valid when Transition Effect is set to Motion
Repeat
(On / Off)
Slideshow repeat
Back Ground Music
(Off / Type1 / Type2 / Type3 / Type4 / Type5)
Selects the background music during Photo mode.

- 145 -
VideosSelecting fileEnsure the preparations of the media server, network connections and network settings are completed.
Network > DLNA > Information
Network > Network connections
Network > Network settings
1. Display APPS List with APPS.
2. Select Media Server with / / / and press OK to access.
3. Select one of the media servers with / and press OK to access. ● For the operations to access another TV, select the name of another TV from the displayed media server list.
● To display / hide information of the highlighted media server
4. Select the file with / and press OK to access. ● Depending on the condition of media server, you may need to select the folder before selecting the file.
● To display / hide information of the highlighted file
= Note = ● Non-playable files are also listed but cannot be selected.
Watching video
■ PlaybackIf you have stopped the last playback halfway, the confirmation screen is displayed to select whether to start from where you stopped last time or from the beginning.
● To operate playback
: Manual skip (if available)
– Press to skip forward approx. 30 seconds.
: Rewind
: Fast forward
: Stop
OK : Pause (displays the time seek bar / slow playback) / Playback

- 146 -
● To jump to the specified time point
1) Display the time seek bar with OK.
2) While the time seek bar is displayed
Press / :
Search approx. 10 seconds
Press and hold / :
Search rapidly
3) Jump to the specified time point with OK. ● To play back slowly
1) Press and hold OK for 5 seconds.
Press / :
Search slowly
2) Return to the normal playback with OK. ● To display / hide the operation guide and information banner
● To the previous content
(red) ● To the next content
(green) ● To change aspect
1) Display Aspect Selection with ASPECT.
2) Select the mode with / and press OK to set.
Aspect1:
Displays the content enlarged without distortion.
Aspect2:
Displays the content full-screen.
Original:
Displays the content original size.
– You can also change the mode pressing ASPECT. (Press repeatedly until you reach the desired mode.)
– Aspect cannot be changed depending on the content. ● To return to list
BACK/RETURN

- 147 -
Video SetupSet up the settings for video file operations on this TV.
1. Display the option menu with OPTION.
2. Select Video Setup with / and press OK to access.
3. Select one of the following items with / and press OK to access.
Video Preview / Multi Audio / Dual Audio / Dual Mono Audio / Subtitle / Subtitle Text / Subtitle Language / Repeat
● Menu items and selectable options vary depending on the content.
4. Set with / and press OK to store.
Video Preview
(On / Off)
Sets to start the preview of the title or scene in the thumbnail view. ● Images may not be displayed for an instant in the thumbnail view. Set the preview Off to solve this.
Multi Audio, Dual Audio, Dual Mono Audio
Selects for selectable sound tracks (if available). ● It may take several seconds to change the sound. ● This function is available during playback.
Subtitle
Display / hide subtitles (if available). ● This function is available during playback.
Subtitle Text
Selects the font type to display subtitles correctly (if available). ● This function is available during playback.
Subtitle Language
Selects the language for subtitles (if available). ● This function is available during playback.
Repeat
(On / Off)
Playback repeat within the selected file

- 148 -
Audio output settingsYou can enjoy the multi-channel sound via an amplifier connected to DIGITAL AUDIO or HDMI1 / HDMI2 (ARC function) terminal.
● To confirm or change the current sound status
Network > Videos > Video Setup
1. Display the menu with MENU.
2. Select Sound > SPDIF Selection with / and press OK to access.
3. Select Auto / PCM with / and press OK to set.
SPDIF Selection
(Auto / PCM)
Selects the initial setting for digital audio output signal from DIGITAL AUDIO and HDMI1 / HDMI2 (ARC function) terminals.
● SPDIF is a standard audio transfer file format.
Auto:
Dolby Digital Plus, Dolby Digital and HE-AAC multi-channel are output as Dolby Digital Bitstream. MPEG is output as PCM. DTS is output as DTS.
PCM:
Digital output signal is fixed to PCM. ● ARC (Audio Return Channel) is a function of digital audio output using HDMI cable.
= Note = ● During the operation, audio signal is output from DIGITAL AUDIO and HDMI1 / HDMI2 (ARC function) terminals. But no video signals are output. To use HDMI1 / HDMI2 with ARC function, connect an amplifier that has ARC function, set to use theatre speakers and match the output setting in ARC Output in the Sound menu.
Functions > VIERA Link “HDAVI Control™”

- 149 -
MusicSelecting fileEnsure the preparations of the media server, network connections and network settings are completed.
Network > DLNA > Information
Network > Network connections
Network > Network settings
1. Display APPS List with APPS.
2. Select Media Server with / / / and press OK to access.
3. Select one of the media servers with / and press OK to access. ● For the operations to access another TV, select the name of another TV from the displayed media server list.
● To display / hide information of the highlighted media server
4. Select the file with / and press OK to access. ● Depending on the condition of media server, you may need to select the folder before selecting the file.
● To display / hide information of the highlighted file
= Note = ● Non-playable files are also listed but cannot be selected.
Playing music
■ Playback ● To operate playback
: Rewind
: Fast forward
: Stop
OK : Pause (displays the time seek bar) / Playback

- 150 -
● To jump to the specified time point
1) Display the time seek bar with OK.
2) While the time seek bar is displayed
Press / :
Search approx. 10 seconds
Press and hold / :
Search rapidly
3) Jump to the specified time point with OK. ● To display / hide the operation guide
● To the previous track
(red) ● To the next track
(green) ● To return to list
BACK/RETURN
Music SetupSet up the settings for music file operations on this TV.
1. Display the option menu with OPTION.
2. Select Music Setup > Repeat with OK.
3. Select Off / Folder / One with / and press OK to set.
Folder:
Playback repeat within the selected folder
One:
Playback repeat of the selected one file

- 151 -
DIGA RecorderControlling DIGA RecorderEnsure the preparations of the media server, network connections and network settings are completed.
Network > DLNA > Information
Network > Network connections
Network > Network settings
1. Display APPS List with APPS.
2. Select Media Server with / / / and press OK to access.
3. Select DIGA with / and press OK to access.
4. The screen of the DIGA Recorder will be displayed. You can control the functions of the DIGA Recorder with this TV’s remote control according to the operation guide.(Example)
● Before operating, register this TV on the DIGA Recorder. ● For details, read the manual of the DIGA Recorder.

- 152 -
Technical informationPhoto format
■ Supported Photo formats
● JPEG (.jpg, .jpeg, .mpo)
Sub-sampling:
4:4:4, 4:2:2, 4:2:0
Image resolution (pixel):
8 × 8 to 30 719 × 17 279 ● DCF and EXIF standards ● Progressive JPEG is not supported.
= Note = ● Some files may not be played back even if they fulfil these conditions. ● Do not use multi-byte characters or other special codes for file names. ● Connected devices may become unusable with this TV if the file or folder names are changed.
Video format
■ Supported Video formats
● SD-Video (.mod)
Video codec:
MPEG1, MPEG2
Audio codec:
Dolby Digital, MPEG Audio ● SD-Video Standard Ver. 1.31 (Entertainment Video Profile) ● The data may not be available if a folder structure on the device is modified.
- 153 -
● AVCHD (.mts)
Video codec:
H.264 BP/MP/HP
Audio codec:
Dolby Digital ● AVCHD Standard Ver. 2.0 (AVCHD 3D, AVCHD Progressive) ● The data may not be available if a folder structure on the device is modified.
● AVI (.avi)
Video codec:
H.264 BP/MP/HP, MPEG1, MPEG2, MPEG4 SP/ASP, VC-1, Windows Media Video Ver. 9
Audio codec:
AAC, ADPCM, Dolby Digital, Dolby Digital Plus, DTS core, HE-AAC, LPCM, MPEG Audio, MP3, WMA, WMA Pro
● Some subtitles or chapter functions may not be available.
● MP4 (.f4v, .m4v, .mp4)
Video codec:
H.264 BP/MP/HP, MPEG1, MPEG2, MPEG4 SP/ASP
Audio codec:
AAC, Dolby Digital, Dolby Digital Plus, HE-AAC, MPEG Audio, MP3 ● This TV supports this container recorded with Panasonic products. For details, read the manual of the products.
● MKV (.mkv)
Video codec:
H.264 BP/MP/HP, MPEG1, MPEG2, MPEG4 SP/ASP
Audio codec:
AAC, Dolby Digital, Dolby Digital Plus, DTS core, HE-AAC, MPEG Audio, MP3, Vorbis
● Some subtitles or chapter functions may not be available.
- 154 -
● ASF (.asf, .wmv)
Video codec:
MPEG4 SP/ASP, VC-1, Windows Media Video Ver. 9
Audio codec:
AAC, Dolby Digital, Dolby Digital Plus, HE-AAC, LPCM, MP3, WMA, WMA Pro
● Copy-protected files cannot be played back.
● FLV (.flv)
Video codec:
H.264 BP/MP/HP
Audio codec:
AAC, MP3
● 3GPP (.3gp, .3g2)
Video codec:
H.264 BP/MP/HP, MPEG4 SP/ASP
Audio codec:
AAC, HE-AAC
● PS (.mod, .mpg, .mpeg, .vob, .vro)
Video codec:
MPEG1, MPEG2
Audio codec:
Dolby Digital, LPCM, MPEG Audio
● TS (.mts, .m2ts, .tp, .trp, .ts, .tts)
Video codec:
H.264 BP/MP/HP, MPEG1, MPEG2
Audio codec:
AAC, Dolby Digital, Dolby Digital Plus, HE-AAC, MPEG Audio

- 155 -
■ Supported Subtitles formats
● MicroDVD, SubRip, TMPlayer (.srt, .sub, .txt) ● The video file and subtitles text file are inside the same folder, and the file names are the same except for the file extensions.
● If there are more than one subtitles text files inside the same folder, they are displayed in the following order of priority: “.srt”, “.sub”, “.txt”.
= Note = ● Some files may not be played back even if they fulfil these conditions. ● Do not use multi-byte characters or other special codes for file names. ● Connected devices may become unusable with this TV if the file or folder names are changed.
● Supported formats are different in Media Player and media server.
Music format
■ Supported Music formats
● MP3 (.mp3)
● AAC / Apple Lossless (.m4a) ● Copy-protected files cannot be played back.
● FLAC (.flac)
● WMA / WMA Pro (.wma) ● Copy-protected files cannot be played back. ● WMA Lossless is not supported.
● LPCM (.wav)
= Note = ● Some files may not be played back even if they fulfil these conditions. ● Do not use multi-byte characters or other special codes for file names. ● Connected devices may become unusable with this TV if the file or folder names are changed.

- 156 -
Functions
User profileInformationSetting user profile allows you to enjoy the recommended contents, your favourite Home Screen, cloud services, etc.
● To use my Stream
Functions > User profile > my Stream
= Note = ● You need a broadband network environment to use this function fully.
SettingsYou can create and edit a user profile.
■ To edit a user profile1. Display the main menu with MENU.
2. Select Setup > User Settings with / and press OK to access.
3. Select a user with / and press OK to access. ● To create a new user, select Create new user.
4. Select one of the following items with / and press OK to access.
(Your icon / Your name / Your voice / Your face / Main Home Screen / my Home Cloud account)
5. Follow the on-screen instructions.
Your icon
Sets your favourite user icon.
Your name
Sets the name of the user.
Your voice
Registers the voice data of the user for Voice Print Recognition.

- 157 -
Your face
Registers the face data of the user for Face Recognition.
Main Home Screen
Selects Home Screen to be displayed when using Voice Control function. To use this function, you need to register your voice data or face data.
my Home Cloud account
Sets up an account for the cloud services.
■ To delete a user profile1. Display the main menu with MENU.
2. Select Setup > User Settings with / and press OK to access.
3. Select a user with / and press OK to access.
4. Select Remove this user with / and press OK to access.
5. When the confirmation screen is displayed, select Yes with / and press OK to set.
= Note = ● You need a broadband network environment to use this function fully.
Network > Network connections
Network > Network settings
my StreamAutomatically provides the recommended contents (TV programmes, internet content, etc.).
1. Display APPS List with APPS.
2. Select my Stream with / / / and press OK to access.
3. Follow the on-screen instructions. ● To register a content as your favourite
Functions > Touch Pad Controller > My button
= Note = ● You need a broadband network environment to use this function fully.

- 158 -
■ Face Recognition / Voice Print RecognitionBy using the Communication Camera and Voice Control function, this TV recognises your face / voice and provides the recommended contents.
● Say “my Stream” into the microphone of the Touch Pad Controller to use this function.
● To use this function, you need to set up a user profile and register face / voice data, etc.
Functions > User profile > Settings
● Communication Camera is not included. Please purchase as necessary.
Support > Optional accessories > Communication Camera
● For details of Voice Control function
Functions > Voice Control

- 159 -
Voice ControlPreparationsVoice Control function allows you to operate the TV (e.g. selecting a channel), search the content from various features, etc. with your speech.
● To use this function fully, you need a broadband network environment. Ensure the network connections and network settings are completed.
Network > Network connections
Network > Network settings
● Ensure the pairing of Touch Pad Controller is completed.
Functions > Touch Pad Controller > Settings
■ Voice Control Settings1. Display the menu with MENU.
2. Select Setup > Voice Control Settings > Language / Speech Detection Level / Terms of Service with / and press OK to access.
3. Set with / / / and press OK to store.
Language
Select the language for Voice Control function. ● All languages may not be available. When the selected language is not supported, Language is set to English automatically.
Speech Detection Level
(High / Standard)
Adjusts the sensitivity to recognise your speech.
Terms of Service
Displays the terms of service.

- 160 -
= Note = ● To use Voice Control function fully, you need a broadband network environment, because this function accesses the speech recognition server with the internet connection. Even if you have the internet environment, this function may not be available depending on the proxy settings. Please connect the internet without proxy settings. (Proxy settings are not required for normal household use. For details of internet environment, consult your Internet Service Provider (ISP) or telecommunications company.)
How to use1. Press of Touch Pad Controller.
● When the confirmation screen is displayed, read carefully and start Voice Control function.
2. The operation guide is displayed and follow the on-screen instructions. ● To display voice command list
OPTION ● To exit Voice Control function
BACK/RETURN
= Note = ● When you start Voice Control function, sound level of the TV becomes low. ● Voice Control function may not work properly in the following conditions.
– Not pronounce clearly and correctly
– Volume level of your voice is too loud or too low.
– Surrounded by the noise ● Phrases other than Voice Command may not be recognised. ● It is recommended to speak within about 15 cm from the integrated microphone of Touch Pad Controller when using Voice Control function.
● Voice Control function is subject to change without notice.

- 161 -
Touch Pad ControllerInformationTouch Pad Controller is designed for the convenient operations, especially, on Home Screen or internet contents. You can operate the TV intuitively with this controller.
● Touch Pad Controller can be used by registering to this TV with Bluetooth wireless technology.
● After registering, you can operate the TV without pointing this controller at the TV (except Standby On / Off switch).
● To use Standby On / Off switch, point the controller directly at the TV’s remote control signal receiver because it works with the infrared. (You can operate the switch without registration.)
● It is recommended to speak within about 15 cm from microphone of Touch Pad Controller when using Voice Control function.
My buttonPress (my button) of Touch Pad Controller while watching media content in my Stream and you can register the content as your favourite.
● (my button) may be used while watching media content in other applications as well as my Stream.
● Your registered favourites are reflected on my Stream.
Functions > User profile > my Stream
● To select the user, set User Settings.
Functions > User profile > Settings
Settings1. Display the menu with MENU.
2. Select Setup > VIERA Touch Pad Controller with / and press OK to access.
3. Select one of the following items with / and press OK to access.
Pairing / Cursor Settings / Operation Guide
4. Follow the on-screen instructions.
Pairing
Registers Touch Pad Controller (supplied) to this TV. ● Only 1 Touch Pad Controller can be registered.

- 162 -
Cursor Settings
Sets for the cursor of Touch Pad Controller.
Operation Guide
Displays the operation guide of Touch Pad Controller.
- 163 -
Multi WindowPicture in PictureDisplays the digital TV programme and external input (AV, Component or HDMI) at once.
1. Display the menu with MENU.
2. Select Picture > Screen Settings > Picture in Picture with / and press OK to access.
PandP:
Press (yellow) to switch to Picture-and-Picture mode.
PinP:
Press (green) to switch to Picture-in-Picture mode. The main screen is displayed on full-screen and the sub screen is displayed at the right bottom of the main screen.
● You can swap the main and sub screen with (blue). ● Press to display / hide the operation guide.
= Note = ● Each input mode can only be displayed either on the main screen or sub screen.
● The sound comes only from the main screen in multi window. ● Some settings in Picture Menu may not be available in multi window. ● You cannot change the aspect ratio in multi window. ● HDMI is available for the main screen. ● Some signals are reformatted for suitable viewing on your display.

- 164 -
VIERA Link “HDAVI Control™”Summary of VIERA LinkEnjoy additional HDMI Inter-Operability with Panasonic products which have “HDAVI Control™” function.
VIERA Link (HDAVI Control) connects the TV and the equipment with VIERA Link function, and enables easy control, playback, energy saving, creating home theatre, etc. without complicated settings. Connections to the equipment (DIGA Recorder, HD Video Camera, Player theatre, Amplifier, etc.) with HDMI and SCART cables allow you to interface them automatically. These features are limited to models incorporating “HDAVI Control” and “VIERA Link”.
● This TV supports “HDAVI Control 5” function. ● Some functions are not available depending on the equipment’s version of HDAVI Control. Confirm the connected equipment’s version of HDAVI Control.
● VIERA Link “HDAVI Control” is a unique function that we have developed and added based on the control functions provided by HDMI which is an industry standard known as HDMI CEC (Consumer Electronics Control). As such, its operation with other manufacturers’ product that supports HDMI CEC cannot be guaranteed.
● VIERA Link features may be available even with other manufacturers’ equipment supporting HDMI CEC.
● Please refer to individual manuals for other manufacturers’ product supporting VIERA Link function.
● About applicable Panasonic product, consult your local Panasonic dealer.

- 165 -
■ VIERA Link (HDMI connection) ● Use a fully wired HDMI compliant cable. ● Connect the equipment supporting VIERA Link to the TV’s HDMI terminal via an HDMI cable.
About HDMI cable for connecting Panasonic HD Video Camera or LUMIX Camera, read the manual of the equipment.
HDMI terminal
HDMI cable
Equipment with VIERA Link function (DIGA Recorder / DVD Player / Blu-ray Disc Player / HD Video Camera / LUMIX Camera)
■ Available features (HDMI connection)
DIGA Recorder / DVD Player / Blu-ray Disc Player ● Easy playback ● Power on Link ● Power off Link ● Standby Power Save ● Intelligent Auto Standby ● VIERA Link Control
HD Video Camera / LUMIX Camera ● Easy playback ● Power on Link ● Power off Link ● VIERA Link Control
: For equipment which has “HDAVI Control 2 or later” function.
: For equipment which has “HDAVI Control 4 or later” function.

- 166 -
■ VIERA Link (HDMI and Audio out connections) ● Use a fully wired HDMI compliant cable. ● Connect the equipment supporting VIERA Link to the TV’s HDMI terminal via an HDMI cable.
● Use a fully wired SCART cable. ● Use the optical digital audio cable or SCART cable for audio output from the TV.
HDMI terminal / DIGITAL AUDIO / AV1 (SCART) terminal
SCART cable
DIGA Recorder with VIERA Link function
HDMI cable (Optical digital audio cable / SCART cable )
HDMI cable
Amplifier with VIERA Link function
Speaker system
Player theatre / Blu-ray Disc theatre with VIERA Link function
HD Video Camera / LUMIX Camera with VIERA Link function
- 167 -
: If the connected equipment has “HDAVI Control 5” function, you do not have to use this audio cable (Optical digital audio cable / SCART cable). In this case, connect the equipment to the TV’s HDMI1 / HDMI2 terminal via an HDMI cable and match the output setting in ARC Output in the Sound menu.
■ Available features (HDMI and Audio out connections)
Player theatre ● Easy playback ● Power on Link ● Power off Link ● Intelligent Auto Standby ● VIERA Link Control ● Speaker Selection
Blu-ray Disc theatre ● Easy playback ● Power on Link ● Power off Link ● Standby Power Save ● Intelligent Auto Standby ● VIERA Link Control ● Speaker Selection
Amplifier ● Power off Link ● Intelligent Auto Standby ● Speaker Selection
: For equipment which has “HDAVI Control 2 or later” function.
: For equipment which has “HDAVI Control 4 or later” function.
: While playing a disc
: Except for watching a disc

- 168 -
■ VIERA Link Control of compatible equipmentThe following is the maximum number of compatible equipment that can be controlled by VIERA Link Control. This includes connections to equipment already connected to the TV.
For example, DIGA Recorder connected to Amplifier which is connected to the TV via an HDMI cable.
Functions > VIERA Link “HDAVI Control™” > VIERA Link Control
● Recorder:
Maximum 3 (DIGA Recorder, etc.) ● Player:
Maximum 3 (DVD Player, Blu-ray Disc Player, HD Video Camera, LUMIX Camera, Digital Camera, Player theatre, Blu-ray Disc theatre, etc.)
● Audio system:
Maximum 1 (Player theatre, Blu-ray Disc theatre, Amplifier, etc.) ● Tuner:
Maximum 4 (Set top box, etc.)
Preparations ● Connect the equipment supporting VIERA Link. ● For VIERA Link connections
Functions > VIERA Link “HDAVI Control™” > Summary of VIERA Link
● Use a fully wired HDMI compliant cable. ● Use a fully wired SCART cable. ● Set up the connected equipment. Read the manual of the equipment. ● Set VIERA Link to On in the Setup Menu. ● Set up the TV. After connection, turn the equipment on and then switch the TV on. Select the HDMI input from Input Selection with AV and make sure that an image is displayed correctly. (This setup should be done each time the following conditions occur.)
– First time operation
– Adding or reconnecting equipment
– Changing setup
Easy playbackAutomatic input switching - When the connected equipment is operating, the input mode is switched automatically.

- 169 -
Power on LinkSet Power on Link to On in VIERA Link Settings to use this function.
When the connected equipment starts playback or direct navigator / function menu for the equipment is activated, the TV is automatically turned on. (Only when the TV is in Standby mode.)
Power off LinkSet Power off Link to On in VIERA Link Settings to use this function.
When the TV is set to Standby mode, the connected equipment is also automatically set to Standby.
● This function will work even if the TV enters Standby mode automatically by auto power standby function.
Standby Power SaveSet Standby Power Save to On in VIERA Link Settings to use this function.
The power consumption of the connected equipment in Standby mode is controlled higher or lower in synchronisation with the TV on / off state to reduce the consumption.
When the TV is set to Standby mode, the connected equipment is automatically set to Standby and the power consumption of the connected equipment is automatically minimised.
When the TV is turned on, the connected equipment is still in Standby mode, but the power consumption is increased to start the connected equipment fast.
● This function is effective if the connected equipment can change the power consumption in Standby mode and is set to higher consumption.
● This function works when Power off Link is set to On.
Intelligent Auto StandbySet Intelligent Auto Standby to On in VIERA Link Settings to use this function.
When the TV is on, non-used connected equipment goes into Standby mode automatically to reduce the power consumption. For example, when the input mode is switched from HDMI or when Speaker Selection is changed to TV (except for watching a disc).
● This function may not work properly depending on the connected equipment. In this case, set to Off.

- 170 -
VIERA Link ControlYou can control some functions of the connected equipment with this TV’s remote control by pointing at the TV’s signal receiver.
1. Display APPS List with APPS.
2. Select VIERA Link with / / / and press OK to access.
3. Select VIERA Link Control with / and press OK to access.
4. Select one of the following items with / and press OK to access.
Recorder / Player / Home Cinema / Video Camera / LUMIX / Digital Camera / Other
(The menu of the accessed equipment will be displayed. The input mode will be changed automatically.)
● The displayed item may vary depending on the connected equipment. ● Home Cinema means Player theatre, Blu-ray Disc theatre or Recorder theatre.
● Other means Tuner set top box.
5. Follow the on-screen instructions to operate the menu of the equipment. ● Confirm the remote control code is “73”.
Watching > External equipment > Operating with TV’s remote control
● To display the operation guide
OPTION
(If other manufacturers’ product is accessed, Setup / Contents Selection menu may be displayed.)
● Available TV’s remote control buttons depend on the connected equipment.
■ If multiple recorders or players are connectedEach recorder / player is numbered. The number is given from the TV’s lower number of HDMI terminal connected to the same type of equipment. For example, when two recorders are connected to HDMI2 and HDMI3, the recorder connected to HDMI2 is displayed as Recorder1, and the recorder connected to HDMI3 is displayed as Recorder2.
■ If you access non-VIERA Link equipmentThe type of the connected equipment is displayed. Although you can access the connected equipment, you cannot operate it. Use the remote control of the connected equipment.

- 171 -
= Note = ● If you cannot operate the equipment, check the settings and the equipment.
Functions > VIERA Link “HDAVI Control™” > Summary of VIERA Link
● Some operations may not be available depending on the equipment. In this case, use the remote control of the connected equipment.
● For details of the operations for the connected equipment, read the manual of the equipment.
Speaker SelectionYou can control the theatre speaker with this TV’s remote control by pointing at the TV’s signal receiver.
1. Display APPS List with APPS.
2. Select VIERA Link with / / / and press OK to access.
3. Select Speaker Selection with / and press OK to access.
4. Select Home Cinema / TV with / and press OK to set.
Home Cinema:
The sound is delivered from theatre speakers. Player theatre, Blu-ray Disc theatre or Amplifier will be automatically turned on if it is in Standby mode.
● The sound of TV speakers is mute. When the equipment is turned off, TV speakers will be activated.
● You can use Volume Up / Down and MUTE.
TV:
TV speakers are active.
■ Multi-channel soundIf you want to enjoy the multi-channel sound (e.g. Dolby Digital 5.1ch) via an Amplifier, connect it with an HDMI cable and Optical digital audio cable, and then select Home Cinema. If your Amplifier has the “HDAVI Control 5” function, you only need to connect it with an HDMI cable to the TV’s HDMI1 / HDMI2 terminal and match the output setting in ARC Output in the Sound menu.
To enjoy multi-channel sound from DIGA Recorder, connect an HDMI cable from the DIGA Recorder to the Amplifier.

- 172 -
= Note = ● If you cannot operate the equipment, check the settings and the equipment.
Functions > VIERA Link “HDAVI Control™” > Summary of VIERA Link
Note ● These functions may not work properly depending on the connected equipment.
● Image or sound may not be delivered for the first few seconds when the input mode is switched.
● “HDAVI Control 5” is the newest standard for HDAVI Control compatible equipment. This standard is compatible with conventional HDAVI equipment.
● To confirm the HDAVI Control version of this TV
Support > Information > Using Help menu

- 173 -
Child LockUsing Child LockYou can lock specific channels / AV input terminals to restrict access to them. When the locked channel / input is selected, a message appears. Enter the PIN number to watch.
1. Display the menu with MENU.
2. Select Setup > Child Lock with / and press OK to access.
3. Enter the PIN number (4 digits) with Numeric buttons.
● Enter the PIN number twice at first setting. ● Make a note of the PIN number in case you forget it. ● “0000” may be stored as the default PIN number depending on the country you select.
4. Select Child Lock List with / and press OK to access.
5. Select the channel / input with / and press OK to lock. ● appears when the channel / input is locked. ● To cancel
1) Select the locked channel / input with / .
2) Press OK. ● To sort channel names in alphabetical order
(red) ● To lock all
(green) ● To cancel all locks
(yellow) ● To jump to the head of the next channel / input group
(blue)

- 174 -
PIN numberYou can change the PIN number.
1. Select Change PIN with / and press OK to access.
2. Enter a new PIN number twice with Numeric buttons.
= Note = ● Setting Shipping Condition erases the PIN number and all settings.
Parental RatingTo watch the DVB programme that has rating information on the selected age, enter the PIN number (depending on the broadcaster).
1. Select Parental Rating with / and press OK to access.
2. Select an age for the restriction of programmes with / and press OK to set.
● The availability of this function depends on the country you select.
= Note = ● Setting Shipping Condition erases the PIN number and all settings.

- 175 -
Data Service ApplicationUsing Data Service ApplicationYou can enjoy Hybrid Broadcast Broadband TV application that is one of the interactive data services for digital broadcasting.
1. Display TV Selection with TV.
2. Select the mode with / and press OK to set.
DVB-C / DVB-T
3. Display the menu with MENU.
4. Select Setup > Data Service Application > Service with / and press OK to access.
5. Select Auto Start On with / and press OK to set. ● A notification message will appear when the application is available. Follow the on-screen instructions.
● is displayed on the information banner if the programme has Hybrid Broadcast Broadband TV application.
Watching > Basic > Information banner
● To stop the application
EXIT
Cookie1. Display the menu with MENU.
2. Select Setup > Data Service Application > Store Cookie / Delete Cookie with / and press OK to access.
Store Cookie
(On / Off)
Enables to store the technical information that a data service application leaves into the TV in order to recognise to use it again.
Delete Cookie
Deletes all of technical information left by a data service application.

- 176 -
Note ● To use Hybrid Broadcast Broadband TV application fully, you need a broadband network environment. Ensure the network connections and network settings are completed.
Network > Network connections
Network > Network settings
● Not all the data services are available depending on the country, area and broadcaster.
● Not valid in multi window mode ● Depending on the connection environment, the internet connection may be slow or may not be successful.
● Operations may vary depending on the broadcaster. Follow the on-screen instructions.
● On-screen instructions may not correspond to the remote control buttons.

- 177 -
Common InterfaceCautionIf the encrypted message is displayed on the screen, the correct Common Interface (CI) Module and smart card that are required for this service are not inserted.
■ How to insert CI module and smart card ● Turn the TV off with Mains Power On / Off switch whenever inserting or removing the CI module.
● If a smart card and a CI module come as a set, first insert the CI module, then insert the smart card into the CI module.
● Insert or remove the CI module completely in the correct direction as shown.
● Remove the CI module from the TV when placing the TV facing upward. This may cause damages to the CI module and CI slot.
= Note = ● There might be some CI modules in the market with older firmware versions that do not work fully interoperable with this new CI+ v1.3 TV. In this case, please contact your content provider.
Using Common InterfaceThe Common Interface Module menu provides access to software contained in Common Interface (CI) Modules.
● This function may not be available in some countries or regions. ● Video and audio signals may not be output depending on broadcasts or services.
Although CI module may enable you to view some services, this TV does not guarantee all services (e.g. encrypted pay-TV channels). Please use only the broadcaster-approved CI module. Consult the operator / broadcaster or CI module manufacturer for more information and conditions of the services.

- 178 -
■ Insert the CI module (optional) ● Normally encrypted channels will appear. (The viewable channels and its features depend on the CI module.) If encrypted channels do not appear, take the following steps.
● For more details, read the manual of the CI module, or check with the content provider.
1. Display TV Selection with TV.
2. Select the mode with / and press OK to set.
DVB-C / DVB-T
3. Display the menu with MENU.
4. Select Setup > Common Interface with / and press OK to access.
5. Select Slot 1: with / , press OK and follow the on-screen instructions. ● On-screen instructions may not correspond to the remote control buttons.

- 179 -
Shipping ConditionShipping ConditionResets the TV to its original condition (i.e. no channels tuned in).
All settings other than USB Device Setup are reset (channels, picture, sound settings, etc.).
1. Display the menu with MENU.
2. Select Setup > System Menu > Shipping Condition with / and press OK to access.
● Child Lock PIN number is required depending on the country. If you have forgotten your changed PIN, input “6969” as the PIN number.
Functions > Child Lock > PIN number
3. When the confirmation screen is displayed, select Yes with / and press OK to set.
4. Follow the on-screen instructions. ● Auto Setup will automatically start.
= Note = ● To retune TV channels only (e.g. after moving house), set Auto Setup.
Watching > Tuning and editing channels > Auto Setup
- 180 -
Updating the TV SoftwareInformationA new version of software may be released for download to enhance the performance or operations of the TV.
If there is an update available and the channel has the update information, a notification message is displayed.
● To install new software, select Standby / Now with / and press OK to set.
Standby:
Installs new software in standby condition.
Now:
Installs new software now.
Auto updateYou can update new software automatically.
1. Display the menu with MENU.
2. Select Setup > System Menu > System Update > Auto Update Search in Standby with / and press OK to access.
3. Select the time with / and press OK to set. ● If any software updates are available, the notification message will appear. To install new software, select Standby / Now with / and press OK to set.
Standby:
Installs new software in standby condition.
Now:
Installs new software now. ● If System Update is performed, the software will be updated (TV functions may be changed). If you do not want to do so, set Auto Update Search in Standby to Off.
● The automatic updating cannot be performed under the following conditions:
– TV turned off with Mains Power On / Off switch
– Recording is in progress.
= Note = ● Download may take a few hours. ● During software download and update, DO NOT switch off the TV.

- 181 -
● A notification message may be a reminder. In this case, schedule information (the date when the new version can be used) will appear. You can set the reservation for update. The update will not start when the TV is off.
Manual updateYou can update new software manually.
1. Display the menu with MENU.
2. Select Setup > System Menu > System Update > System Update Search Now with / and press OK to access.
3. Searches for an update (for several minutes) and displays a corresponding message if any.
4. Download with OK.
= Note = ● Download may take a few hours. ● During software download and update, DO NOT switch off the TV.
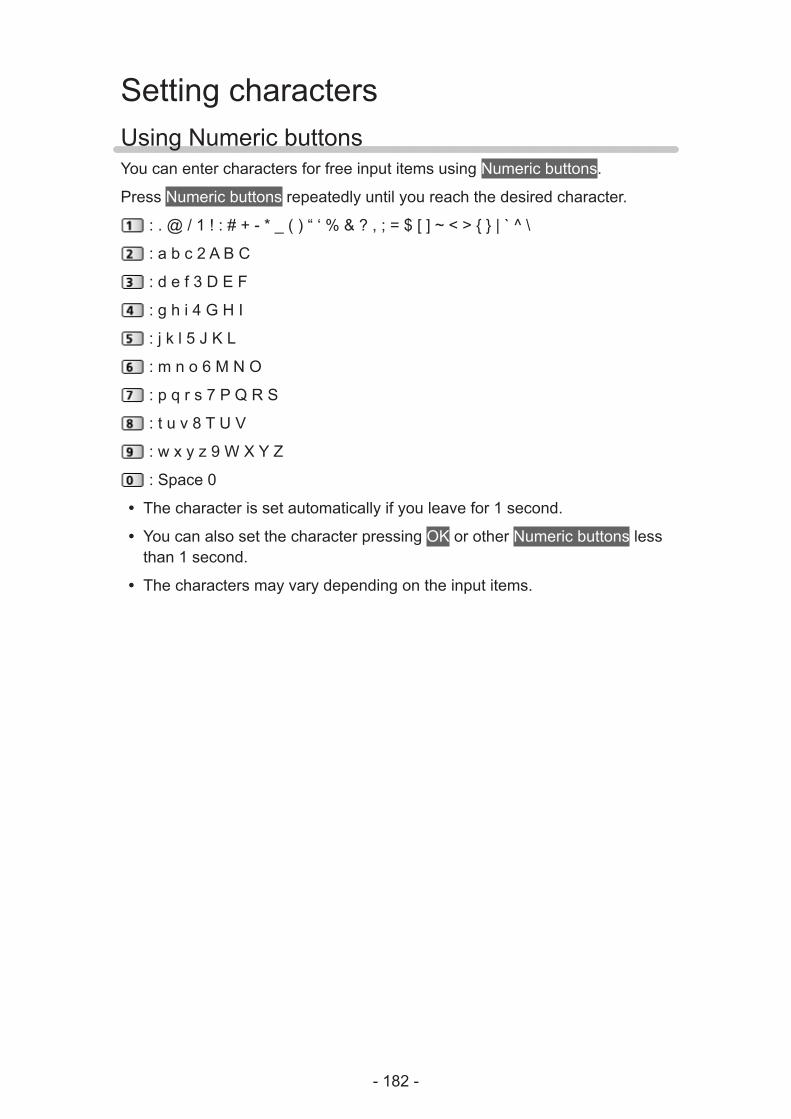
- 182 -
Setting charactersUsing Numeric buttonsYou can enter characters for free input items using Numeric buttons.
Press Numeric buttons repeatedly until you reach the desired character.
: . @ / 1 ! : # + - * _ ( ) “ ‘ % & ? , ; = $ [ ] ~ < > { } | ` ^ \
: a b c 2 A B C
: d e f 3 D E F
: g h i 4 G H I
: j k l 5 J K L
: m n o 6 M N O
: p q r s 7 P Q R S
: t u v 8 T U V
: w x y z 9 W X Y Z
: Space 0 ● The character is set automatically if you leave for 1 second. ● You can also set the character pressing OK or other Numeric buttons less than 1 second.
● The characters may vary depending on the input items.
- 183 -
Bluetooth devicesBluetooth SetupYou can use Bluetooth keyboards / mouse with this TV by setting Bluetooth Setup in the Setup Menu.
: HID (Human Interface Device Profile) compliant keyboards / mouse can be used.
● Additional information for the devices may be found on the following website.
http://panasonic.net/viera/support (English only)
1. Display the menu with MENU.
2. Select Setup > Bluetooth Setup > Devices with / and press OK to access.
Devices
Searches the available device and displays the status.
Not paired:
The device is not registered. Register the device by following the on-screen instructions to use with this TV.
Connected:
The device is registered and you can use with this TV.
Not connected:
The device is already registered, but not connected to this TV. Check the device is turned on and set within the available range.
● This setup has not been designed for the 3D Eyewear and Touch Pad Controller supporting Bluetooth wireless technology.

- 184 -
KeyboardKeyboard
● Keyboards requiring the drivers are not supported. ● To change the language type, set Keyboard Layout.
1) Display the menu with MENU.
2) Select Setup > System Menu > Keyboard Layout with / and press OK to access.
3) Select the language with / and press OK to set. ● Characters may not be displayed correctly on the TV screen depending on the connected keyboard or the keyboard layout setting.
● Some of the keys of keyboards may correspond to the operation of the remote control.
Keyboard Remote Control
↑/↓/←/→ / / /
Enter OK
Backspace BACK/RETURN
Esc EXIT
0 - 9 / Character Numeric buttons
F1 HOME
F2 APPS
F3 MENU
F4 AV
F5 / F6 Channel Down / Up
F7 / F8 Volume Down / Up
F9 / F10 / F11 / F12 Coloured buttons

- 185 -
Settings
Setting menuHow to useVarious menus allow you to make settings for the picture, sound, and other functions.
1. Display the menu with MENU. ● Displayed items vary depending on the input signal.
2. Select the menu with / and press OK to access.
3. Select the items with / and press OK to access. ● Only available items can be selected. ● You can also access from eHELP pressing (red) at each item (if available).
● You can select from among alternatives with / and press OK to set. ● You can adjust using the slide bar with / and press OK to set. ● You can go to the next screen with OK. ● You can enter names or numbers freely for some items.
1) Enter characters one by one with / / / and press OK to set.
– You can set characters using Numeric buttons.
Functions > Setting characters > Using Numeric buttons
2) Press BACK/RETURN to store. ● To reset the settings
– To initialise picture or sound settings only, select Reset to Defaults in the Picture Menu or Sound Menu.
– To initialise all settings, select Shipping Condition.
Functions > Shipping Condition
● To exit the menu screen
EXIT ● To return to the previous screen
BACK/RETURN ● To change menu pages

- 186 -
● To change the colour type of on-screen displays, set OSD Colour.
my Home Screen > my Home Screen > OSD Colour
= Note = ● Menu items and selectable options vary depending on the mode (TV mode, Media Player, Network services, etc.).
● Some settings in Picture menu may also affect the menu screen when watching the content of 4K format.
■ Using control panel buttons1. Press and hold INPUT/OK/HOLD for MENU button for 3 seconds to
display the menu.
2. Select and set with following control panel buttons. ● Move the cursor / select from a range of options / select the menu item (up and down only) / adjust levels (left and right only)
● Access the menu / store settings after adjustments have been made or options have been set with INPUT/OK/HOLD for MENU button

- 187 -
PictureViewing ModeSelects your favourite picture mode for each input.
(Dynamic / Normal / Cinema / True Cinema / Custom)
Watching > For best picture > Viewing Mode
Basic settingsBacklight, Contrast, Brightness, Colour, Tint, Sharpness
Adjusts the levels of these options according to your personal preference.
Watching > For best picture > Basic settings
Colour Temperature
Sets the overall colour tone of the picture (bluer - redder).
Watching > For best picture > Basic settings
Vivid Colour
(On / Off)
Automatically adjusts colours to vivid ones.
Watching > For best picture > Basic settings
Adaptive Backlight Control
Automatically controls the level of backlight according to the images.
Watching > For best picture > Basic settings
● Not valid in multi window mode
Resolution Remaster
(Auto / Max / Mid / Min / Off)
Enhances picture resolution to make the image sharper.
Watching > For best picture > Basic settings
Intelligent Frame Creation
(Max / Mid / Min / Off)
Automatically compensates the picture frame rate and removes juddering movements to make the images smooth.
Watching > For best picture > Basic settings

- 188 -
● Depending on the contents, images may be noisy. To prevent the noise, change the setting.
● Not valid in multi window mode, photo contents of Media Player / Network services or when Game Mode is set to On
24p Smooth Film
(Max / Mid / Min / Off)
Automatically compensates the picture frame rate to make the 24p source movie images smooth.
Watching > For best picture > Basic settings
● This function is available only for 24p signal input and displayed instead of Intelligent Frame Creation.
● Not valid in multi window mode, photo contents of Media Player / Network services or when Game Mode is set to On
Ambient SensorAutomatic Brightness Control function
Adjusts picture settings automatically depending on ambient lighting conditions.
(On / Off)
Watching > For best picture > Ambient Sensor
Noise reduction settingsNoise Reduction
(Auto / Max / Mid / Min / Off)
Reduces unwanted picture noise.
Watching > For best picture > Noise reduction settings
MPEG Remaster
(Auto / Max / Mid / Min / Off)
Reduces flicker noise in contoured parts of a picture and block noise.
Watching > For best picture > Noise reduction settings
Advanced SettingsYou can adjust and set up the detailed picture settings.
Watching > For best picture > Advanced Settings
This function is available when Viewing Mode is set to Cinema, True Cinema or Custom.

- 189 -
Option SettingsGame Mode
(On / Off)
Provides suitable images for fast response signals when playing games.
Watching > For best picture > Option Settings
● Not valid in TV mode
Film Cadence Mode
(On / Off)
Improves vertical resolution for movie images.
Watching > For best picture > Option Settings
● This function is available for interlaced signals (except in the mode of multi window, Network services or when Game Mode is set to On).
1080p Pure Direct
(On / Off)
Reproduces the original image quality in detail for 1080p (HDMI) input signal.
Watching > For best picture > Option Settings
● Not valid in 3D or multi window mode
4K Pure Direct
(On / Off)
Reproduces the original image quality in detail for 4K (HDMI) input signal.
Watching > For best picture > Option Settings
● Not valid in 3D or multi window mode
HDMI Content Type
(Graphics / Photos / Auto / Off)
Adjusts the picture settings of each HDMI input according to the selected content type.
Watching > For best picture > Option Settings
● For HDMI input
- 190 -
HDMI RGB Range
(Auto / Full / Normal)
Adjusts the black level of the image for each HDMI input.
Watching > For best picture > Option Settings
● For HDMI input
AV Colour System
(Auto / PAL / SECAM / M.NTSC / NTSC)
Selects optional colour system based on video signals.
Watching > For best picture > Option Settings
● For AV input
3D-COMB
(On / Off)
Makes still or slow moving pictures more vivid.
Watching > For best picture > Option Settings
● For PAL / NTSC signal reception in TV mode or from composite connection
Screen Settings16:9 Overscan
(On / Off)
Selects the screen area displaying the image for 16:9 aspect.
Watching > For best picture > Screen Settings
● Not valid for 4K contents or Network services
H-Size
(H-Size1 / H-Size2)
Switches the horizontal display range to reduce noise on the side edge of the image.
Watching > For best picture > Screen Settings
● For TV mode, AV and HDMI input ● Not valid for 4K contents or 3D mode

- 191 -
Zoom Adjustments
Adjusts the vertical position and size when aspect is set to Just, Sidecut Just, Zoom or Sidecut Zoom.
Watching > For best picture > Screen Settings
● Not valid for 4K contents
Picture in Picture
Displays two windows at once.
Functions > Multi Window > Picture in Picture
Screen Display
(On / Off)
Turns the screen off when you select Off.
Watching > For best picture > Screen Settings
3D Settings3D Detection
(On (Advance) / On / Off)
Selects whether to switch to the 3D mode automatically or not.
Watching > 3D > 3D Settings
3D Signal Message
(On / Off)
Selects whether to give a notification message when a signal of 3D format is found or not.
Watching > 3D > 3D Settings
● Not valid when 3D Detection is set to On (Advance) ● For DVB, Component and HDMI input
3D Refresh Rate
(Auto / 100Hz / 120Hz)
Reduces juddering and flicker noises of the 3D images when using the 3D Eyewear.
Watching > 3D > 3D Settings

- 192 -
2D→3DDepth
(Max / Mid / Min)
Selects a level of 3D-image depth for viewing converted 2D images.
Watching > 3D > 3D Settings
3D Adjustment
(On / Off)
Adjustment of the 3D effect (except in 2D→3D mode)
Watching > 3D > 3D Settings
L/R Picture Swap
(L/R (Normal) / R/L (Reversed))
Swaps pictures for left eye and right eye (except in 2D→3D mode).
Watching > 3D > 3D Settings
Edge Smoother
(On / Off)
Set to On if you feel the contoured parts of an image are not smooth enough (except in 2D→3D mode).
Watching > 3D > 3D Settings
Safety Precautions
Displays the precautions for viewing 3D images.
Watching > 3D > 3D Settings
Copy AdjustmentCopies the selected True Cinema or Custom settings to those of the other input.
Watching > For best picture > Copy Adjustment
Reset to DefaultsResets the current Picture Viewing Mode to the default settings.

- 193 -
SoundModeSelects your favourite sound mode for each input.
(Standard / Music / Ambience / User)
Watching > For best audio > Sound mode
Basic settingsBass
Adjusts level to enhance or minimise lower, deeper sound output.
Watching > For best audio > Basic settings
Treble
Adjusts level to enhance or minimise sharper, higher sound output.
Watching > For best audio > Basic settings
Equaliser
Adjusts the frequency level to suit your favourite sound quality.
Watching > For best audio > Basic settings
Balance
Adjusts volume level of right and left speakers.
Watching > For best audio > Basic settings
Surround
(Virtual Surround / Off)
Selects surround sound settings.
Watching > For best audio > Basic settings
Bass Boost
(On / Off)
Enhances the effect of bass sounds.
Watching > For best audio > Basic settings

- 194 -
Volume settingsSpeaker Setting
(TV Speaker / Headphones / Off)
Selects the sound output to adjust volume. Set to Off when using the external speakers.
Watching > For best audio > Volume settings
Headphone Volume
Adjusts the volume of headphones.
Watching > For best audio > Volume settings
Auto Gain Control
(On / Off)
Automatically regulates large sound level differences between channels and inputs.
Watching > For best audio > Volume settings
Volume Correction
Adjusts the volume of each individual channel or input mode.
Watching > For best audio > Volume settings
Speaker Distance to Wall
(Up to 30cm / Over 30cm)
Compensates for the low frequency sound due to the distance between the speakers and the wall.
Watching > For best audio > Volume settings
- 195 -
Voice Guidance SettingsVoice Guidance
(On / Off)
Set to On to enable voice guidance of the basic features (on-screen messages, etc.) for visually impaired users.
Watching > For best audio > Voice Guidance Settings
Speed
(Fast / Normal / Slow)
Selects the readout speed for the voice guidance.
Watching > For best audio > Voice Guidance Settings
Volume
(Max / Mid / Min)
Selects the volume for the voice guidance.
Watching > For best audio > Voice Guidance Settings
Language
Changes language for the voice guidance.
Watching > For best audio > Voice Guidance Settings
User Level
(Beginner / Expert)
Selects the level of verbosity for the voice guidance.
Watching > For best audio > Voice Guidance Settings
Web Browser
(On / Off)
Set to On to enable voice guidance of the network contents in web browser function.
Watching > For best audio > Voice Guidance Settings
- 196 -
Audio DescriptionPreferred Audio Type
(Standard / Audio Description)
Narration settings for visually impaired users
Watching > For best audio > Audio Description
● For DVB
Volume
Adjusts the volume for Audio Description.
Watching > For best audio > Audio Description
● For DVB
Speakers
(Mix / Standard)
Set to Mix to activate the description sound track from TV speakers.
Watching > For best audio > Audio Description
● For DVB
Headphones
(Mix / Standard)
Set to Mix to activate the description sound track from headphones.
Watching > For best audio > Audio Description
● For DVB
Advanced settingsMPX
Selects multiplex sound mode (if available).
Watching > For best audio > Advanced settings
● For Analogue
Audio Preference
(Auto / Multichannel / Stereo / MPEG)
Selects the initial setting for audio tracks.
Watching > For best audio > Advanced settings
● For DVB

- 197 -
SPDIF Selection
(Auto / PCM)
Selects the initial setting for digital audio output signal from DIGITAL AUDIO and HDMI1 / HDMI2 (ARC function) terminals.
Watching > For best audio > Advanced settings
● For DVB or video contents of Media Player / Network services
SPDIF Delay
Adjusts the delay time of the sound output from DIGITAL AUDIO and HDMI1 / HDMI2 (ARC function) terminals if the sound does not synchronise the image.
Watching > For best audio > Advanced settings
● For DVB
HDMI Input
(Digital / Analogue)
Selects to fit the input signal.
Watching > For best audio > Advanced settings
● For HDMI input
ARC Output
(HDMI1 / HDMI2)
Selects ARC output terminal settings.
Watching > For best audio > Advanced settings
Reset to DefaultsResets the current Sound Mode to the default settings.

- 198 -
NetworkNetwork ConnectionSets the network setting to use this TV in your network environment.
Network > Network settings > Network Connection
Network StatusDisplays and checks the network status (MAC Address, current network settings, etc.).
Network > Network settings > Network Status
my Home Cloud SettingsNotices
Displays the terms of service.
Network > Network settings > my Home Cloud Settings
VIERA NameSets your favourite name for this TV.
Network > Network settings > VIERA Name
TV Remote App SettingsSets to control the TV from network equipment (smartphone, etc.).
Network > Network settings > TV Remote App Settings
Network Link SettingsSets to control the TV with devices connected to the network.
Network > Network settings > Network Link Settings
TV Anywhere SettingsEnables to watch TV and set timer programming events of this TV on the network equipment (smartphone, etc.) from outside the home network.
Network > Network settings > TV Anywhere Settings
File Sharing SettingsNetwork Device List
Lists the accessible network devices to play back the contents in Media Player.
Media Player > Using Media Player > Network device

- 199 -
Other settingsSoftware Update
Checks for available software updates from the Panasonic website.
Network > Network settings > Software Update
New Software Message
(On / Off)
Selects whether to give a notification message when new software is found via network or not.
Network > Network settings > New Software Message

- 200 -
TimerOff TimerSets the duration of time until the TV automatically goes into Standby mode.
(90 / 75 / 60 / 45 / 30 / 15 / Off (minutes))
Watching > Basic > Off Timer
Timer ProgrammingSets a timer to record or remind forthcoming programmes.
Recording > Timer Programming > Setting Timer Programming
● For DVB
Time ZoneAdjusts the time data.
Watching > Basic > Adjusting time
Auto StandbyAutomatically turns the TV to Standby mode for energy saving when no operation is performed for 4 hours.
(On / Off)
Watching > Basic > Energy saving functions
No signal Power offAutomatically turns the TV to Standby mode to prevent unnecessary power consumption when no signal is received and no operation is performed for 10 minutes.
(On / Off)
Watching > Basic > Energy saving functions

- 201 -
SetupEco NavigationAutomatically sets the TV to the most suitable energy-saving mode.
Watching > Basic > Energy saving functions
Voice Control SettingsSettings for Voice Control function
Functions > Voice Control > Preparations
User SettingsSettings for user profile.
Functions > User profile > Settings
USB Device SetupFormats the USB HDD or safely removes USB device.
Recording > USB HDD setup > Setting for USB HDD
Recording SetupSettings for the recording feature of the USB HDD
Recording > USB HDD setup > Setting for USB HDD
VIERA Touch Pad ControllerPairing
Registers Touch Pad Controller (supplied) to this TV.
Functions > Touch Pad Controller > Settings
Cursor Settings
Sets for the cursor of Touch Pad Controller.
Functions > Touch Pad Controller > Settings
Operation Guide
Displays the operation guide of Touch Pad Controller.
Functions > Touch Pad Controller > Settings
Bluetooth SetupSettings for the specific devices supporting Bluetooth wireless technology
Functions > Bluetooth devices > Bluetooth Setup

- 202 -
Child LockApplies access control for channels or inputs to prevent unwanted access.
Functions > Child Lock > Using Child Lock
Tuning MenuFavourites Edit
Creates a list of favourite channels.
Watching > Tuning and editing channels > Favourites Edit
● Not valid in Analogue
Channel List
Skips unwanted channels or edits channels.
Watching > Tuning and editing channels > Channel List
Auto Setup
Automatically searches for receivable channels.
Watching > Tuning and editing channels > Auto Setup
Manual Tuning
Searches for channels manually.
Watching > Tuning and editing channels > Manual Tuning
Update Channel List
Updates the channel list while keeping your settings.
Watching > Tuning and editing channels > Update Channel List
● For DVB
Favourite Network
Selects your favourite network for each broadcaster (only available in some countries).
Watching > Tuning and editing channels > Other settings
● For DVB-C, DVB-T

- 203 -
New Channel Message
(On / Off)
Selects whether to give a notification message when a new channel is found or not.
Watching > Tuning and editing channels > New Channel Message
● For DVB
Service Replacement
(On / Off)
Set to On to display a message to switch to the available service (only available in some countries).
Watching > Tuning and editing channels > Other settings
● For DVB-C
Signal Condition
Checks the signal condition.
Watching > Tuning and editing channels > Signal Condition
● Not valid in Analogue
Attenuator
(On / Off)
Automatically reduces the DVB-C signal to avoid the interference.
Watching > Tuning and editing channels > Other settings
Add TV Signal
Adds the TV mode.
Watching > Tuning and editing channels > Other settings
= Note = ● The settings in Tuning Menu are applicable only for the selected TV mode. The menu name varies depending on the TV mode. (DVB-C Tuning Menu / DVB-T Tuning Menu / Analogue Tuning Menu)

- 204 -
LanguageOSD Language
Changes language for on-screen displays.
Watching > Basic > Language
Preferred Audio 1 / 2
Selects the first and second preferred language for DVB multi audio (depending on the broadcaster).
Watching > Basic > Language
Preferred Subtitles 1 / 2
Selects the first and second preferred language for DVB subtitles (depending on the broadcaster).
Watching > Basic > Language
Preferred Teletext
Selects the preferred language for DVB teletext service (depending on the broadcaster).
Watching > Basic > Language
Display SettingsOSD Colour
(Jet black / Pale grey / Organic brown / Sand beige)
Selects the preferred colour type of on-screen displays.
my Home Screen > my Home Screen > OSD Colour
Preferred Subtitle Type
(Standard / Hard of Hearing)
Selects the preferred subtitle type.
Watching > Basic > Subtitle
Teletext
(TOP (FLOF) / List)
Selects teletext display mode.
Watching > Teletext > Teletext mode

- 205 -
Teletext Character Set
(West / East1 / East2)
Selects teletext language font.
Watching > Teletext > Teletext Character Set
Default Guide
(Channel List / TV Guide)
Selects the default screen when pressing GUIDE.
Watching > TV Guide > Using TV Guide
● This function may not be available in some countries or regions.
Input Labels
Accesses the input labels list to select the label of each input mode or set to skip unconnected one for easier identification and selection in TV Selection, Input Selection or banner.
Watching > External equipment > Watching external input
Banner Display Timeout
(10 / 9 / 8 / 7 / 6 / 5 / 4 / 3 / 2 / 1 / 0 (No display) (seconds))
Sets how long the information banner stays on screen.
Watching > Basic > Information banner
Smart Banner
(On / Off)
Displays the introduction banner for the internet service.
Watching > Basic > Information banner
Playing Time Display
(On / Off)
Set to On to display a time period of continuous use in Game mode on the top right of the screen every 30 minutes.
Watching > External equipment > Watching external input
● This function is available when Game Mode is set to On.
- 206 -
Radio Mode
(20 / 15 / 10 / 5 / Off (seconds))
Sets the timer for turning off the screen automatically when a radio channel is selected.
Watching > External equipment > Energy saving functions
HDCP SettingSelect a version of HDCP according to the content you watch.
(Auto / 2.2 / 1.4)
Watching > 4K resolution > HDCP Setting
● For HDMI input
HDMI Auto SettingSet to Mode1 when the image in HDMI input is not displayed properly.
(Mode1 / Mode2)
Watching > 4K resolution > HDMI Auto Setting
● For HDMI input
Common InterfaceSets to watch encrypted channels, etc.
Functions > Common Interface > Using Common Interface
VIERA Link SettingsVIERA Link
(On / Off)
Sets to use VIERA Link functions.
Functions > VIERA Link “HDAVI Control™” > Preparations
Power on Link
(On / Off)
Sets to use Power on Link functions.
Functions > VIERA Link “HDAVI Control™” > Power on Link
Power off Link
(On / Off)
Sets to use Power off Link functions.
Functions > VIERA Link “HDAVI Control™” > Power off Link
- 207 -
Standby Power Save
(On / Off)
Controls the connected equipment to reduce power consumption in Standby.
Functions > VIERA Link “HDAVI Control™” > Standby Power Save
● This function is available when VIERA Link is set to On and Power off Link is set to On.
Intelligent Auto Standby
(On / Off)
Makes non-watched or non-used connected equipment go into Standby mode to reduce the power consumption.
Functions > VIERA Link “HDAVI Control™” > Intelligent Auto Standby
● This function is available when VIERA Link is set to On.
Data Service ApplicationService
(Auto Start On / Auto Start Off / Off)
Sets to use Hybrid Broadcast Broadband TV application. ● Not all the data services are available depending on the country, area and broadcaster.
Functions > Data Service Application > Using Data Service Application
● For DVB
Store Cookie
(On / Off)
Sets to store the information from a data service to the TV in order to access again quickly.
Functions > Data Service Application > Cookie
Delete Cookie
Deletes all the information from a data service.
Functions > Data Service Application > Cookie

- 208 -
System MenuKeyboard Layout
Selects the language that your USB or Bluetooth Keyboard supports.
Functions > Keyboard > Keyboard
Shipping Condition
Resets all settings to the original condition.
Functions > Shipping Condition > Shipping Condition
System Update
Downloads new software to this TV.
Functions > Updating the TV Software > Auto update
Licence Menu
Displays the software licence information.
Other SettingsGUIDE Plus+ Settings
Settings for the GUIDE Plus+ system
Watching > TV Guide > Using TV Guide
USB Charge in Standby
(On / Off)
Enables charging from the USB port in Standby mode.
Watching > 3D > Viewing 3D
● Available for charging the rechargeable 3D Eyewear (optional accessory) ● This function is available when in Standby mode.
Power Save
(On / Off)
Reduces brightness of the picture to economise on power consumption.

- 209 -
Support
FAQsPictureBefore requesting service or assistance, please follow these simple guides to solve the problem.
If the problem still persists, please contact your local Panasonic dealer for assistance.
Auto aspect
● Auto aspect is designed to provide you with the best ratio to fill the screen.
Watching > For best picture > Aspect Control Signal
● Press ASPECT if you want to change the aspect ratio manually.
Watching > For best picture > Aspect
Black and white picture
● Check that the output of the external equipment matches the input of the TV. When connecting with SCART, ensure the output setting of the external equipment is not S-Video.
Chaotic image, noisy
● Set Noise Reduction and MPEG Remaster in the Picture Menu to remove noise.
Watching > For best picture > Noise reduction settings
● Check nearby electrical equipment (car, motorcycle, fluorescent lamp).
No image can be displayed
● Check the correct input mode is selected. ● Check the setting of AV2 (COMPONENT / VIDEO) in Input Selection to match the output of the external equipment.
Watching > External equipment

- 210 -
● Is Contrast, Brightness or Colour in the Picture Menu set to the minimum?
Watching > For best picture > Basic settings
● Check all required cables and connections are firmly in place.
Blurry or distorted image (no sound or low volume)
● Reset channels.
Watching > Tuning and editing channels > Auto Setup
There may be red, blue, green and black spots on the screen
● This is a characteristic of liquid crystal panels and is not a problem. The liquid crystal panel is built with very high precision technology giving you fine picture details. Occasionally, a few non-active pixels may appear on the screen as a fixed point of red, green, blue or black. Please note this does not affect the performance of the panel.
Digital TVBefore requesting service or assistance, please follow these simple guides to solve the problem.
If the problem still persists, please contact your local Panasonic dealer for assistance.
Block noise, frozen or disappearing image occurs / Some channels cannot be tuned
● Check the position, direction and connection of the aerial. ● Check Signal Condition. If the level of Signal Quality is low, the DVB signal is weak. Connecting the aerial to the TV directly may improve signal quality than connecting the aerial through the equipment (Set top box, DVD, etc.).
Watching > Tuning and editing channels > Signal Condition
Watching > Basic > Basic connection
● Weather conditions will affect signal reception (heavy rain, snow, etc.), in particular in poor reception areas. Even during good weather, the high pressure can cause poor reception of some channels.
● Due to the digital reception technologies involved, quality of the digital signals may be relatively low in some cases, despite good reception of analogue channels.
- 211 -
● Turn the TV off with Mains Power On / Off switch, then turn it on again.
No programmes shown on TV Guide
● Adjust the direction of the aerial to another transmitter installed nearby.
Analogue TVBefore requesting service or assistance, please follow these simple guides to solve the problem.
If the problem still persists, please contact your local Panasonic dealer for assistance.
White spots or shadow image (ghosting) occurs / Some channels cannot be tuned
● Check the position, direction and connection of the aerial. ● Weather conditions will affect signal reception (heavy rain, snow, etc.), in particular in poor reception areas. Even during good weather, the high pressure can cause poor reception of some channels.
● Turn the TV off with Mains Power On / Off switch, and then on again. ● If the problem persists, consult your local dealer or service provider for the availability of services.
No programmes shown on TV Guide
● Adjust the direction of the aerial to another transmitter installed nearby. ● Check the analogue broadcast. If the image quality is poor, check the aerial and consult your local dealer.
SoundBefore requesting service or assistance, please follow these simple guides to solve the problem.
If the problem still persists, please contact your local Panasonic dealer for assistance.
No sound is produced
● Is “Sound mute” active? Press MUTE to switch sound mute on or off. ● Is the volume set to the minimum?

- 212 -
● Check connections and setting of external equipment.
Watching > External equipment
● Ensure that Speaker Selection is set to TV.
Functions > VIERA Link “HDAVI Control™” > Speaker Selection
● Ensure that Speaker Setting is set to TV Speaker.
Watching > For best audio > Volume settings
Sound level is low or sound is distorted
● Sound signal reception may be poor. ● Set MPX in the Sound Menu to Mono. (Analogue)
Watching > For best audio > Advanced settings
3DBefore requesting service or assistance, please follow these simple guides to solve the problem.
If the problem still persists, please contact your local Panasonic dealer for assistance.
Cannot view 3D images
Cannot register a 3D Eyewear to the TV
● Has the 3D Eyewear been switched on and set to 3D mode? ● Check the remaining battery level of the 3D Eyewear. (Battery status is displayed on the screen when the 3D Eyewear is turned on.) When the battery is running low, replace it with a new one.
● Use the 3D Eyewear within approx. 3.2 m from the TV. (The range may be shortened depending on the obstacles between the TV and the eyewear, or the surrounding environment.)
● Does the 3D Eyewear support Bluetooth wireless technology? ● Ensure that 3D Mode Selection is set to 3D.
Watching > 3D > 3D Mode Selection
● Some 3D image signals may not be automatically recognised as 3D images. Set 3D Mode Selection (Manual) to match the picture format.
Watching > 3D > Viewing 3D

- 213 -
● For some people, the 3D images may be difficult to see, or cannot be seen, especially among users who have a different level of eyesight between the left and right eyes. Take necessary measures (wearing glasses, etc.) to correct your eyesight before use.
3D Eyewear is turned off automatically
● Check that there are no obstacles between the TV and the 3D Eyewear.
There is something wrong with the 3D images
● Check the setting of L/R Picture Swap or Edge Smoother.
Watching > 3D > 3D Settings
HDMIBefore requesting service or assistance, please follow these simple guides to solve the problem.
If the problem still persists, please contact your local Panasonic dealer for assistance.
Sound is unusual
● Set the sound setting of the connected equipment to “2ch L.PCM”. ● Check the HDMI Input setting in the Sound Menu.
Watching > For best audio > Advanced settings
● If digital sound connection has a problem, select analogue sound connection.
Watching > External equipment > HDMI features
Pictures from external equipment are unusual when the equipment is connected via HDMI
● Check the HDMI cable is connected properly.
Watching > External equipment > External connection
● Turn the TV and equipment off, then turn them on again. ● Check an input signal from the equipment.
Watching > External equipment > Valid input signals
● Use equipment compliant with EIA/CEA-861/861D.

- 214 -
● Set HDMI Auto Setting in the Setup Menu to Mode1.
Watching > 4K resolution > HDMI Auto Setting
NetworkBefore requesting service or assistance, please follow these simple guides to solve the problem.
If the problem still persists, please contact your local Panasonic dealer for assistance.
Cannot connect to the network
● Check the LAN cable or wireless LAN is connected properly.
Network > Network connections
● Check the connections and settings.
Network > Network connections
Network > Network settings
● Check the network equipment and network environment. ● The router may not be set to issue IP address automatically. If the network administrator prefers to allocate an IP address, set an IP address manually.
Network > Network settings
● The router may be using MAC address filtering (security setting). Confirm the MAC Address of this TV and set the router to use it.
Network > Network settings > Network Status
● If the problem persists, consult your Internet Service Provider or telecommunications company.
Cannot select the file during DLNA operations
● Is media server of the connected equipment prepared?
Network > DLNA > Information
● Check applicable data format.
Network > Technical information
● Check the settings of Network Link Settings.
Network > Network settings > Network Link Settings
- 215 -
Cannot operate internet content
● Check the connections and settings.
Network > Network connections > Internet connection
Network > Network settings
● The server or connected line may be busy now.
OtherBefore requesting service or assistance, please follow these simple guides to solve the problem.
If the problem still persists, please contact your local Panasonic dealer for assistance.
VIERA Link function does not work and an error message appears
● Check the connections.
Functions > VIERA Link “HDAVI Control™” > Summary of VIERA Link
● Turn the connected equipment on and then switch the TV on.
Functions > VIERA Link “HDAVI Control™”
Parts of the TV become hot
● Even if the temperature of parts of the front, top and rear panels has risen, these temperature rises do not cause any problems in terms of performance or quality.
Overcurrent error message appears
● The connected USB device may cause this error. Remove the device and turn the TV off with Mains Power On / Off switch, then turn it on again.
● Check foreign objects are not inside the USB port.
An error message appears
● Follow the message’s instructions. ● If the problem persists, contact your local Panasonic dealer or the authorised service centre.

- 216 -
Touch Pad Controller does not work or cannot be registered
● Are the batteries installed correctly? ● The batteries may be running low. Replace them with new ones. ● Register again.
Functions > Touch Pad Controller > Settings
● Use Touch Pad Controller within approx. 3.2 m from the TV. (The range may be shortened depending on the obstacles between the TV and the controller, or the surrounding environment.)
Voice Control function does not work
● Voice Control function may not work properly depending on the pronunciation, noise and network environment.
● For details
Functions > Voice Control
LED does not turn to red in Standby mode
● LED will turn to orange in Standby mode under the following conditions:
– While the recording is in progress
– Timer Programming is set.
– DLNA Server is set to On.
– Powered On by Apps is set to On.
– Home Streaming is set to Always.
– TV Anywhere is set to On.
The display panel moves slightly and clattered sound is heard when it is pushed with a finger
● There is a little gap around the panel to prevent damage to the panel. This is not a malfunction.

- 217 -
MaintenanceCare and CleaningFirst, remove the mains plug from the socket outlet.
■ Display panel, Cabinet, PedestalRegular care:
Gently wipe the surfaces of the display panel, cabinet, or pedestal using a soft cloth to clean the dirt or fingerprints.
For stubborn dirt:
(1) First clean the dust on the surface.
(2) Dampen a soft cloth with clean water or diluted neutral detergent (1 part detergent to 100 parts water).
(3) Wring the cloth firmly. (Please note liquids do not enter the TV inside. May lead to product failure.)
(4) Finally, wipe away all the moisture.
= Caution = ● Do not use a hard cloth or rub the surface too hard, otherwise this may cause scratches on the surface.
● Take care not to subject the surfaces to insect repellent, solvent, thinner or other volatile substances. This may degrade surface quality or cause peeling of the paint.
● The surface of the display panel is specially treated and may be easily damaged. Take care not to tap or scratch the surface with your fingernail or other hard objects.
● Do not allow the cabinet and pedestal to make contact with a rubber or PVC substance for a long time. This may degrade surface quality.
■ Mains plug ● Wipe the mains plug with a dry cloth at regular intervals. Moisture and dust may lead to fire or electrical shock.

- 218 -
InformationUsing Help menu1. Display the menu with MENU.
2. Select Help with / and press OK to access.
3. Select TV Self Test / System Information / Device Information with / and press OK to access.
TV Self Test
Makes a diagnosis of picture or sound problems.
Follow the on-screen instructions.
System Information
Displays the system information of this TV.
Device Information
Displays the device information of this TV.

- 219 -
Optional accessories3D Eyewear
■ 3D Eyewear ● If you need 3D Eyewear, please purchase Panasonic optional accessory. ● Use Panasonic 3D Eyewear supporting Bluetooth wireless technology for active 3D.
● For more information:
http://panasonic.net/viera/support (English only)
Communication Camera
■ Communication Camera
● TY-CC20W
– This camera can be used for video communication and face recognition.
Network > Internet content > Selecting internet content
my Home Screen > my Home Screen > Settings
– Depending on the area, this optional accessory may not be available. For details, consult your local Panasonic dealer.
Wall-hanging bracket
■ Wall-hanging bracket ● Please contact your local Panasonic dealer to purchase the recommended wall-hanging bracket.
= Warning = ● Using other wall-hanging brackets, or installing a wall-hanging bracket by yourself have the risk of personal injury and product damage. In order to maintain the unit’s performance and safety, be absolutely sure to ask your dealer or a licensed contractor to secure the wall-hanging brackets. Any damage caused by installing without a qualified installer will void your warranty.
● Carefully read the instructions accompanying optional accessories, and be

- 220 -
absolutely sure to take steps to prevent the TV from falling off. ● Handle the TV carefully during installation since subjecting it to impact or other forces may cause product damage.
● Take care when fixing wall brackets to the wall. Always ensure that there are no electrical cables or pipes in the wall before hanging bracket.
● To prevent fall and injury, remove the TV from its fixed wall position when it is no longer in use.

- 221 -
LicenceLicenceEven if no special notation has been made of company or product trademarks, these trademarks have been fully respected.
DVB and the DVB logos are trademarks of the DVB Project.
“RealD 3D” is a trademark of RealD.
The Bluetooth® word mark and logos are registered trademarks owned by Bluetooth SIG, Inc. and any use of such marks by Panasonic Corporation is under license. Other trademarks and trade names are those of their respective owners.
SDXC Logo is a trademark of SD-3C, LLC.
“AVCHD”, “AVCHD 3D” and “AVCHD Progressive” are trademarks of Panasonic Corporation and Sony Corporation.
Skype is a trade mark of Skype Limited.
DLNA®, the DLNA Logo and DLNA CERTIFIED™ are trademarks, service marks, or certification marks of the Digital Living Network Alliance.
Windows is a registered trademark of Microsoft Corporation in the United States and other countries.
Mac is a trademark of Apple Inc.
HDMI, the HDMI Logo, and High-Definition Multimedia Interface are trademarks or registered trademarks of HDMI Licensing LLC in the United States and other countries.
HDAVI Control™ is a trademark of Panasonic Corporation.
Manufactured under license from Dolby Laboratories.
Dolby and the double-D symbol are trademarks of Dolby Laboratories.

- 222 -
For DTS patents, see http://patents.dts.com. Manufactured under license from DTS Licensing Limited. DTS, the Symbol, & DTS and the Symbol together are registered trademarks, and DTS 2.0+Digital Out is a trademark of DTS, Inc. © DTS, Inc. All Rights Reserved.
Speech Powered by Dragon
2002-2014 Nuance Communications, Inc. All rights reserved.
GUIDE Plus+, Rovi and Rovi Guide are trademarks of Rovi Corporation and/or its subsidiaries.
The GUIDE Plus+ and the Rovi Guide system are manufactured under license from Rovi Corporation and/or its subsidiaries.
The Rovi Guide system is protected by patents and patent applications filed in the US, Europe, and other countries including one or more of the United States patents 6,396,546; 5,940,073; 6,239,794 issued to Rovi Corporation and/or its subsidiaries.
“PlayReady” is a trademark registered by Microsoft. Please be aware of the following.
(a) This product contains technology subject to certain intellectual property rights of Microsoft. Use or distribution of this technology outside of this product is prohibited without the appropriate license(s) from Microsoft.
(b) Content owners use Microsoft PlayReady™ content access technology to protect their intellectual property, including copyrighted content. This device uses PlayReady technology to access PlayReady-protected content and/or WMDRM-protected content. If the device fails to properly enforce restrictions on content usage, content owners may require Microsoft to revoke the device’s ability to consume PlayReady-protected content. Revocation should not affect unprotected content or content protected by other content access technologies.
Content owners may require you to upgrade PlayReady to access their content.
If you decline an upgrade, you will not be able to access content that requires the upgrade.
This product incorporates the following software:
(1) the software developed independently by or for Panasonic Corporation,
(2) the software owned by third party and licensed to Panasonic Corporation,
(3) the software licensed under the GNU LESSER GENERAL PUBLIC LICENSE Version 2.1 (LGPL V2.1) and/or,
- 223 -
(4) open sourced software other than the software licensed under the LGPL V2.1.
The software categorized as (3) and (4) are distributed in the hope that it will be useful, but WITHOUT ANY WARRANTY, without even the implied warranty of MERCHANTABILITY or FITNESS FOR A PARTICULAR PURPOSE. Please refer to the detailed terms and conditions thereof shown in the “Software License” menu on this product.
At least three (3) years from delivery of this product, Panasonic will give to any third party who contacts us at the contact information provided below, for a charge no more than our cost of physically performing source code distribution, a complete machine-readable copy of the corresponding source code covered under LGPL V2.1 or the other licenses with the obligation to do so, as well as the respective copyright notice thereof.
Contact Information: [email protected]
The source code and the copyright notice are also available for free in our website below.
http://www.unipf.jp/dl/EUIDTV14/

Ver.2.01