ec93-445-a hems for garments
TRANSCRIPT
University of Nebraska - LincolnDigitalCommons@University of Nebraska - LincolnHistorical Materials from University of Nebraska-Lincoln Extension Extension
1993
EC93-445-A Hems for GarmentsRose Marie Tondl
Kathleen Tolman
Follow this and additional works at: http://digitalcommons.unl.edu/extensionhist
This Article is brought to you for free and open access by the Extension at DigitalCommons@University of Nebraska - Lincoln. It has been accepted forinclusion in Historical Materials from University of Nebraska-Lincoln Extension by an authorized administrator of DigitalCommons@University ofNebraska - Lincoln.
Tondl, Rose Marie and Tolman, Kathleen, "EC93-445-A Hems for Garments" (1993). Historical Materials from University of Nebraska-Lincoln Extension. 4695.http://digitalcommons.unl.edu/extensionhist/4695
'CYT __ _
s 85 E7 no. 445 Copy 2
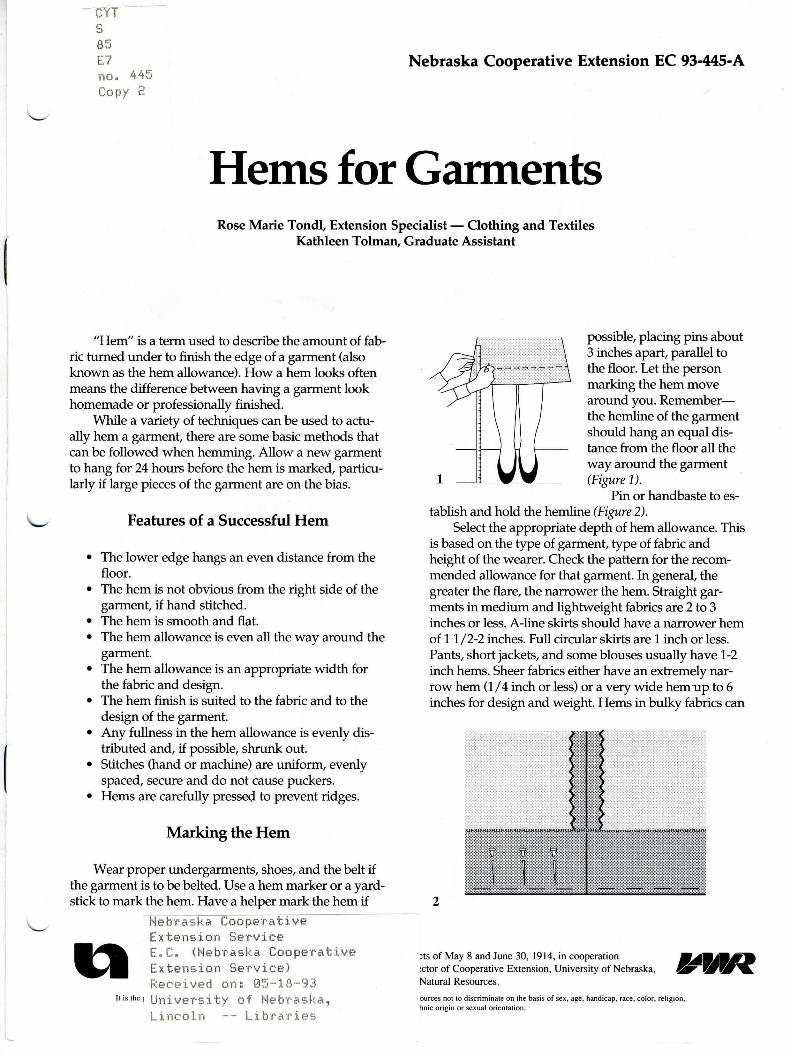
Nebraska Cooperative Extension EC 93-445-A
Hems for Garments Rose Marie Tondl, Extension Specialist- Clothing and Textiles
Kathleen Tolman, Graduate Assistant
"Hem" is a term used to describe the amount of fabric turned under to finish the edge of a garment (also known as the hem allowance). How a hem looks often means the difference between having a garment look homemade or professionally finished.
While a variety of techniques can be used to actually hem a garment, there are some basic methods that can be followed when hemming. Allow a new garment to hang for 24 hours before the hem is marked, particularly if large pieces of the garment are on the bias.
Features of a Successful Hem
• The lower edge hangs an even distance from the floor.
• The hem is not obvious from the right side of the garment, if hand stitched.
• The hem is smooth and flat. • The hem allowance is even all the way around the
garment. • The hem allowance is an appropriate width for
the fabric and design. • The hem finish is suited to the fabric and to the
design of the garment. • Any fullness in the hem allowance is evenly dis
tributed and, if possible, shrunk out. • Stitches (hand or machine) are uniform, evenly
spaced, secure and do not cause puckers. • Hems are carefully pressed to prevent ridges.
Marking the Hem
Wear proper undergarments, shoes, and the belt if the garment is to be belted. Use a hem marker or a yard-
possible, placing pins about 3 inches apart, parallel to the floor. Let the person marking the hem move around you. Rememberthe hemline of the garment should hang an equal distance from the floor all the way around the garment (Figure 1).
Pin or handbaste to establish and hold the hemline (Figure 2).
Select the appropriate depth of hem allowance. This is based on the type of garment, type of fabric and height of the wearer. Check the pattern for the recommended allowance for that garment. In general, the greater the flare, the narrower the hem. Straight garments in medium and lightweight fabrics are 2 to 3 inches or less. A-line skirts should have a narrower hem of 1 1/2-2 inches. Full circular skirts are 1 inch or less. Pants, short jackets, and some blouses usually have 1-2 inch hems. Sheer fabrics either have an extremely narrow hem (1 I 4 inch or less) or a very wide hem up to 6 inches for design and weight. Hems in bulky fabrics can
stick to mark the hem. Have a helper mark the hem if 2
Nebraska Cooperative Extension Service E. C. <Nebraska Coope·rative Extension Service) Received on: 05-18-93
It isthe1 UniveT·sity of Neb·paska, Lincoln Libraries
;ts of May 8 and June 30, 1914, in cooperation 'ctor of Cooperative Extension, University of Nebraska, Natural Resources.
ources not to discriminate on the basis of sex., age, handicap, race, color, religion, ~nic origin or sexual orien tation.
3
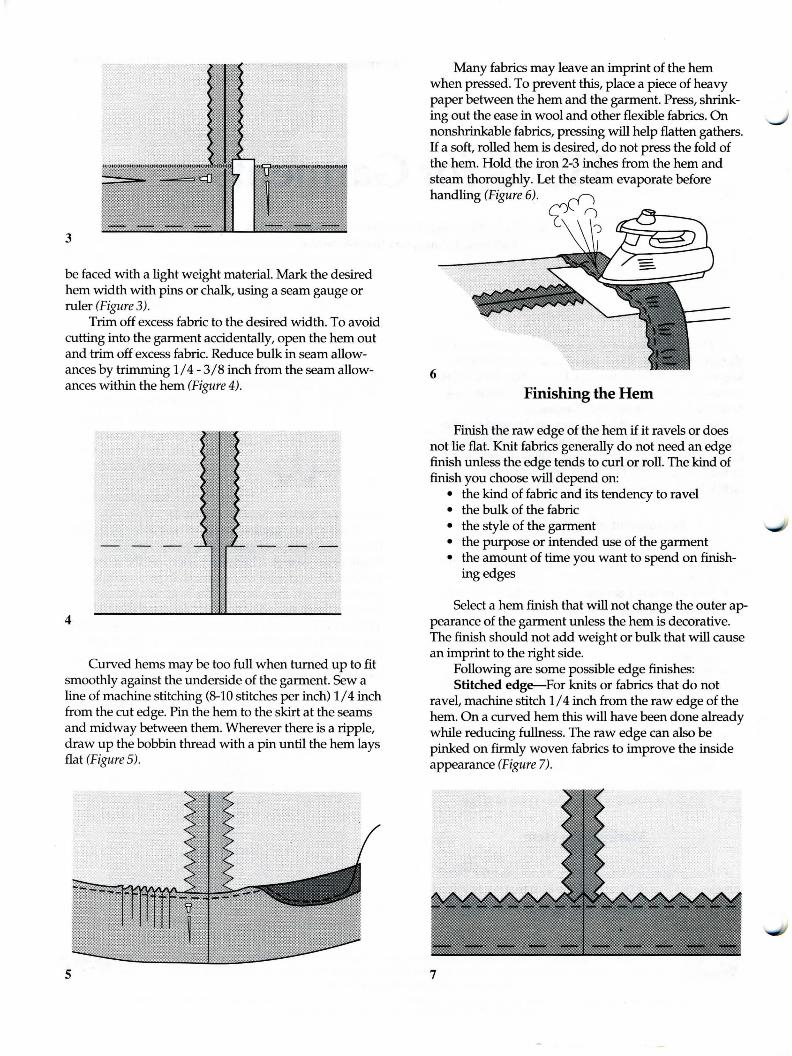
be faced with a light weight material. Mark the desired hem width with pins or chalk, using a seam gauge or ruler (Figure 3).
Trim off excess fabric to the desired width. To avoid cutting into the garment accidentally, open the hem out and trim off excess fabric. Reduce bulk in seam allowances by trimming 1 I 4 - 3 I 8 inch from the seam allowances within the hem (Figure 4).
4
Curved hems may be too full when turned up to fit smoothly against the underside of the garment. Sew a line of machine stitching (8-10 stitches per inch) 1 I 4 inch from the cut edge. Pin the hem to the skirt at the seams and midway between them. Wherever there is a ripple, draw up the bobbin thread with a pin until the hem lays flat (Figure 5).
5
Many fabrics may leave an imprint of the hem when pressed. To prevent this, place a piece of heavy paper between the hem and the garment. Press, shrinking out the ease in wool and other flexible fabrics. On nonshrinkable fabrics, pressing will help flatten gathers. If a soft, rolled hem is desired, do not press the fold of the hem. Hold the iron 2-3 inches from the hem and steam thoroughly. Let the steam evaporate before handling (Figure 6). c!J
~ f) ')
6
Finishing the Hem
Finish the raw edge of the hem if it ravels or does not lie flat. Knit fabrics generally do not need an edge finish unless the edge tends to curl or roll. The kind of finish you choose will depend on:
• the kind of fabric and its tendency to ravel • the bulk of the fabric • the style of the garment • the purpose or intended use of the garment • the amount of time you want to spend on finish
ing edges
Select a hem finish that will not change the outer appearance of the garment unless the hem is decorative. The finish should not add weight or bulk that will cause an imprint to the right side.
Following are some possible edge finishes: Stitched edge-For knits or fabrics that do not
ravel, machine stitch 1 I 4 inch from the raw edge of the hem. On a curved hem this will have been done already while reducing fullness. The raw edge can also be pinked on firmly woven fabrics to improve the inside appearance (Figure 7).
7
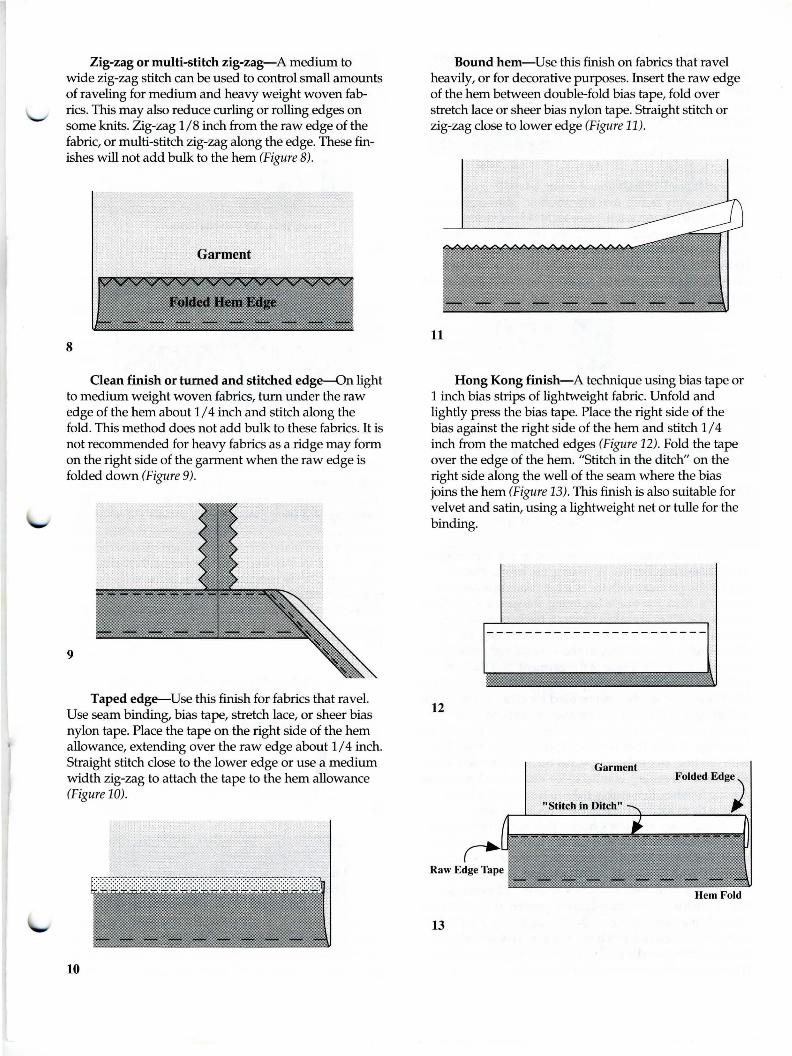
Zig-zag or multi-stitch zig-zag-A medium to wide zig-zag stitch can be used to control small amounts of raveling for medium and heavy weight woven fabrics. This may also reduce curling or rolling edges on some knits. Zig-zag 118 inch from the raw edge of the fabric, or multi-stitch zig-zag along the edge. These finishes will not add bulk to the hem (Figure 8).
Garment
8
Clean finish or turned and stitched edge-On light to medium weight woven fabrics, tum under the raw edge of the hem about 1 I 4 inch and stitch along the fold. This method does not add bulk to these fabrics. It is not recommended for heavy fabrics as a ridge may form on the right side of the garment when the raw edge is folded down (Figure 9).
9
Taped edge--Use this finish for fabrics that ravel. Use seam binding, bias tape, stretch lace, or sheer bias nylon tape. Place the tape on the right side of the hem allowance, extending over the raw edge about 1 I 4 inch. Straight stitch close to the lower edge or use a medium width zig-zag to attach the tape to the hem allowance (Figure 10).
10
Bound hem-Use this finish on fabrics that ravel heavily, or for decorative purposes. Insert the raw edge of the hem between double-fold bias tape, fold over stretch lace or sheer bias nylon tape. Straight stitch or zig-zag close to lower edge (Figure 11).
11
Hong Kong finish-A technique using bias tape or 1 inch bias strips of lightweight fabric. Unfold and lightly press the bias tape. Place the right side of the bias against the right side of the hem and stitch 1 I 4 inch from the matched edges (Figure 12). Fold the tape over the edge of the hem. "Stitch in the ditch" on the right side along the well of the seam where the bias joins the hem (Figure 13). This finish is also suitable for velvet and satin, using a lightweight net or tulle for the binding.
12
Garment
"Stitch in Ditch"
Hem Fold
13
Faced hems--Use this type of hem when hem width is too narrow, when fabric is too bulky to turn up, or if style of garment is very full or circular. Use purchased bias hem facing
Right side of fabric
or bias strips of underlining or lining fabric 2 - 3 inches wide. To apply facing, first trim the hem allowance to 518 inch. Beginning at a seam, place right side of facing to the right side of hem edge. Pin in place. For a neat finish, turn one end of the facing back and overlap the other end (Figure 14). Stitch on the crease of the facing or 1 I 4 inch from the edge. Tum the facing to the inside on the marked hemline (Figure 15).
Hemline 15
Hand Hemming Techniques
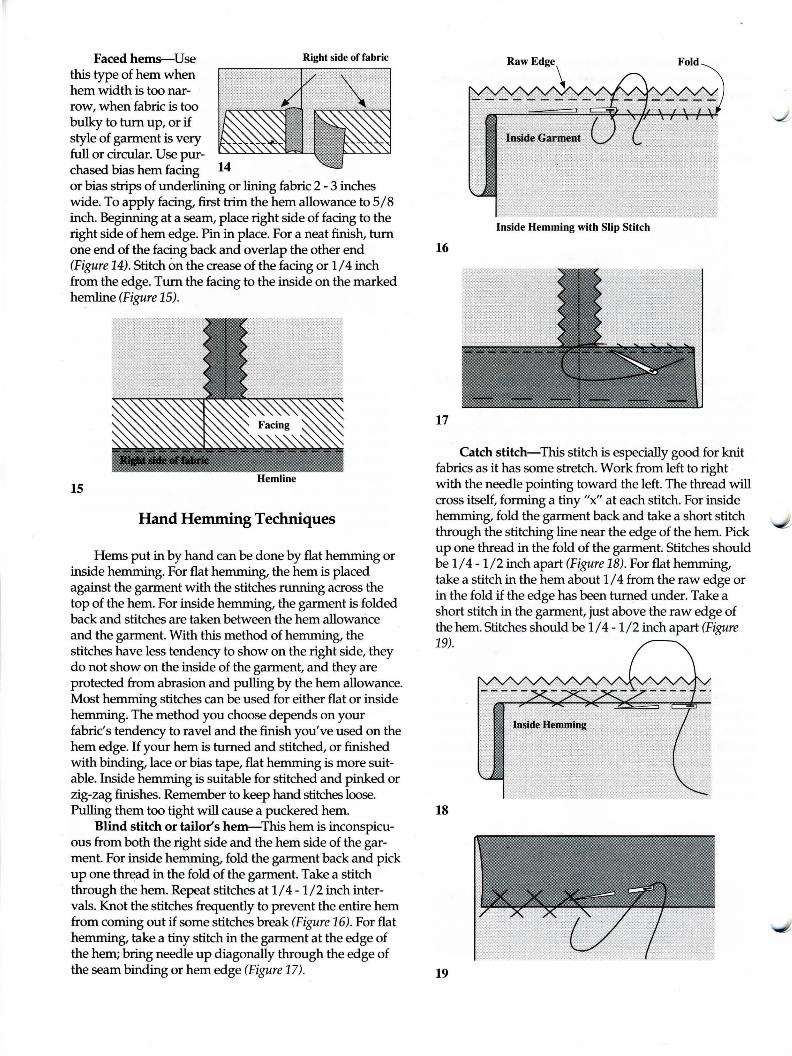
Hems put in by hand can be done by flat hemming or inside hemming. For flat hemming, the hem is placed against the garment with the stitches running across the top of the hem. For inside hemming, the garment is folded back and stitches are taken between the hem allowance and the garment. With this method of hemming, the stitches have less tendency to show on the right side, they do not show on the inside of the garment, and they are protected from abrasion and pulling by the hem allowance. Most hemming stitches can be used for either flat or inside hemming. The method you choose depends on your fabric's tendency to ravel and the finish you've used on the hem edge. If your hem is turned and stitched, or finished with binding, lace or bias tape, flat hemming is more suitable. Inside hemming is suitable for stitched and pinked or zig-zag finishes. Remember to keep hand stitches loose. Pulling them too tight will cause a puckered hem.
Blind stitch or tailor's hem-This hem is inconspicuous from both the right side and the hem side of the garment. For inside hemming, fold the garment back and pick up one thread in the fold of the garment. Take a stitch through the hem. Repeat stitches at 114-112 inch intervals. Knot the stitches frequently to prevent the entire hem from coming out if some stitches break (Figure 16). For flat hemming, take a tiny stitch in the garment at the edge of the hem; bring needle up diagonally through the edge of the seam binding or hem edge (Figure 17).
Inside Hemming with Slip Stitch
16
17
Catch stitch-This stitch is especially good for knit fabrics as it has some stretch. Work from left to right with the needle pointing toward the left. The thread will cross itself, forming a tiny "x" at each stitch. For inside hemming, fold the garment back and take a short stitch through the stitching line near the edge of the hem. Pick up one thread in the fold of the garment. Stitches should be 1 I 4- 112 inch apart (Figure 18). For flat hemming, take a stitch in the hem about 1 I 4 from the raw edge or in the fold if the edge has been turned under. Take a short stitch in the garment, just above the raw edge of the hem. Stitches should be 1 I 4 - 112 inch apart (Figure 19).
18
19
20
Slip stitch-This is used only for flat hemming where there is a turned edge. The stitches should be about 1/2 inch apart, depending on the weight of fabric and amount of strain placed on the garment. On the garment side, pick up one thread next to edge of hem, then pass needle through fold at top of hem (Figure 20).
Machine-Stitched Hems
In addition to hand-sewn hems, there are certain instances where a machine-sewn hem is actually preferable.
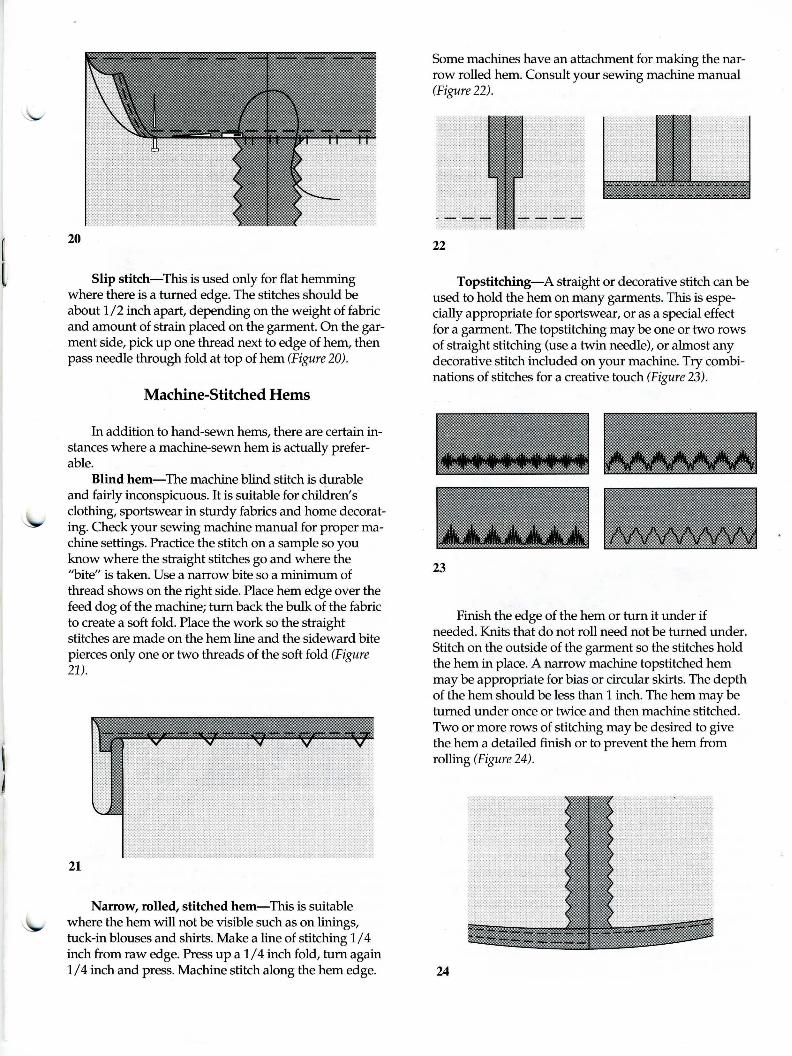
Blind hem-The machine blind stitch is durable and fairly inconspicuous. It is suitable for children's clothing, sportswear in sturdy fabrics and horne decorating. Check your sewing machine manual for proper rnachine settings. Practice the stitch on a sample so you know where the straight stitches go and where the ''bite" is taken. Use a narrow bite so a minimum of thread shows on the right side. Place hem edge over the feed dog of the machine; turn back the bulk of the fabric to create a soft fold. Place the work so the straight stitches are made on the hem line and the sideward bite pierces only one or two threads of the soft fold (Figure 21).
21
Narrow, rolled, stitched hem-This is suitable where the hem will not be visible such as on linings, tuck-in blouses and shirts. Make a line of stitching 114 inch from raw edge. Press up a 1 I 4 inch fold, turn again
Some machines have an attachment for making the narrow rolled hem. Consult your sewing machine manual (Figure 22).
22
Topstitching-A straight or decorative stitch can be used to hold the hem on many garments. This is especially appropriate for sportswear, or as a special effect for a garment. The topstitching may be one or two rows of straight stitching (use a twin needle), or almost any decorative stitch included on your machine. Try combinations of stitches for a creative touch (Figure 23).
23
Finish the edge of the hem or tum it under if needed. Knits that do not roll need not be turned under. Stitch on the outside of the garment so the stitches hold the hem in place. A narrow machine topstitched hem may be appropriate for bias or circular skirts. The depth of the hem should be less than 1 inch. The hem may be turned under once or twice and then machine stitched. Two or more rows of stitching may be desired to give the hem a detailed finish or to prevent the hem from rolling (Figure 24).
1 I 4 inch and press. Machine stitch along the hem edge. 24
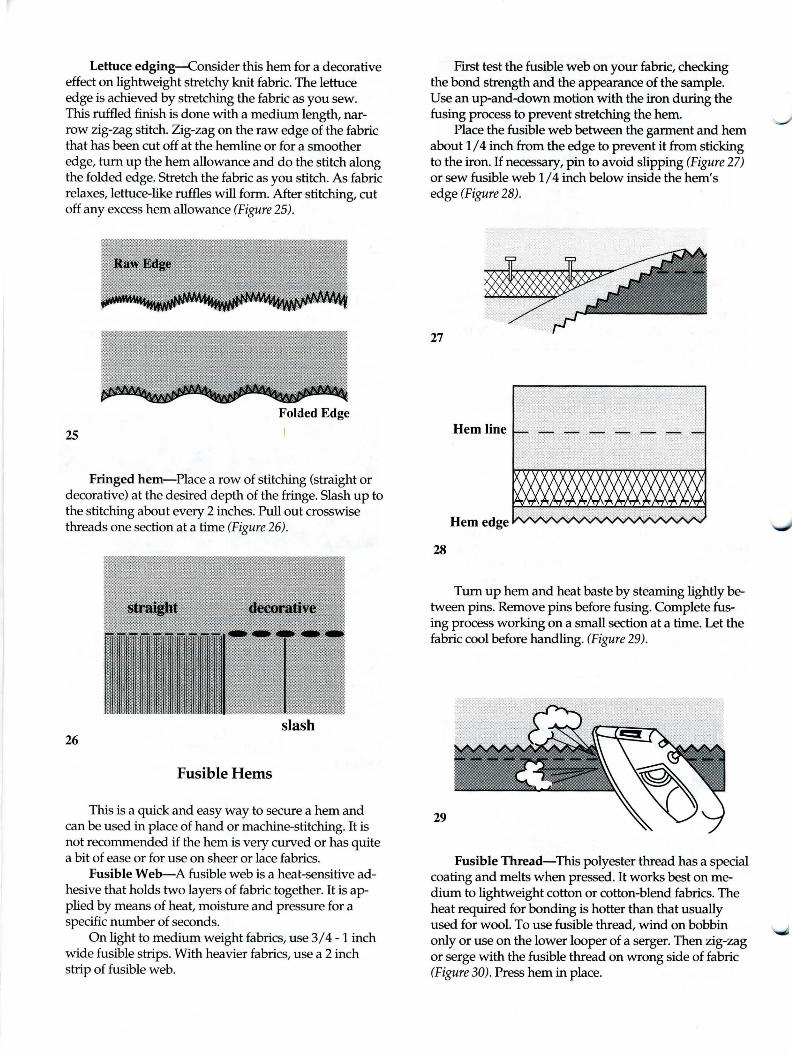
Lettuce edging-Consider this hem for a decorative effect on lightweight stretchy knit fabric. The lettuce edge is achieved by stretching the fabric as you sew. This ruffled finish is done with a medium length, narrow zig-zag stitch. Zig-zag on the raw edge of the fabric that has been cut off at the hemline or for a smoother edge, turn up the hem allowance and do the stitch along the folded edge. Stretch the fabric as you stitch. As fabric relaxes, lettuce-like ruffles will form. After stitching, cut off any excess hem allowance (Figure 25).
Folded Edge
25
Fringed hem-Place a row of stitching (straight or decorative) at the desired depth of the fringe. Slash up to the stitching about every 2 inches. Pull out crosswise threads one section at a time (Figure 26).
slash 26
Fusible Hems
This is a quick and easy way to secure a hem and can be used in place of hand or machine-stitching. It is not recommended if the hem is very curved or has quite a bit of ease or for use on sheer or lace fabrics.
Fusible Web-A fusible web is a heat-sensitive adhesive that holds two layers of fabric together. It is applied by means of heat, moisture and pressure for a specific number of seconds.
On light to medium weight fabrics, use 314-1 inch wide fusible strips. With heavier fabrics, use a 2 inch strip of fusible web.
First test the fusible web on your fabric, checking the bond strength and the appearance of the sample. Use an up-and-down motion with the iron during the fusing process to prevent stretching the hem.
Place the fusible web between the garment and hem about 1 I 4 inch from the edge to prevent it from sticking to the iron. If necessary, pin to avoid slipping (Figure 27) or sew fusible web 1 I 4 inch below inside the hem's edge (Figure 28).
27
Hem line
Hem edge
28
Tum up hem and heat baste by steaming lightly between pins. Remove pins before fusing. Complete fusing process working on a small section at a time. Let the fabric cool before handling. (Figure 29).
29
Fusible Thread-This polyester thread has a special coating and melts when pressed. It works best on medium to lightweight cotton or cotton-blend fabrics. The heat required for bonding is hotter than that usually used for wool. To use fusible thread, wind on bobbin only or use on the lower looper of a serger. Then zig-zag or serge with the fusible thread on wrong side of fabric (Figure 30). Press hem in place.
Hem line
Fusible thread 30
SergedHems
Serged hems eliminate the need for using tape, bindings, lace, and turning under the edge. A serger produces a stitch that overlocks the edge and prevents raveling.
Shirttail-Serge the hem trimming to 1 I 4 inch. Fold on hemline (1 I 4 inch) and straight stitch with machine (Figure 31).
31
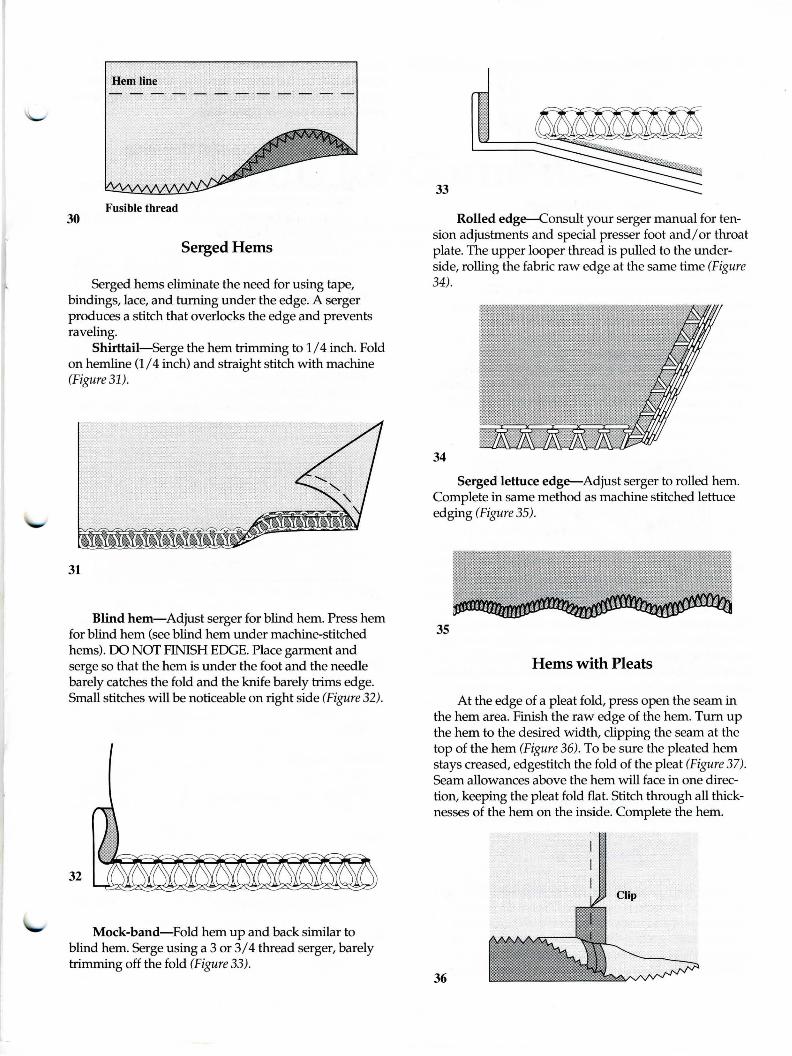
Blind hem-Adjust serger for blind hem. Press hem for blind hem (see blind hem under machine-stitched hems). DO NOT FINISH EDGE. Place garment and serge so that the hem is under the foot and the needle barely catches the fold and the knife barely trims edge. Small stitches will be noticeable on right side (Figure 32).
32
Mock-band-Fold hem up and back similar to blind hem. Serge using a 3 or 3/4 thread serger, barely trimming off the fold (Figure 33).
33
Rolled edge--Consult your serger manual for tension adjustments and special presser foot and/ or throat plate. The upper looper thread is pulled to the underside, rolling the fabric raw edge at the same time (Figure 34).
34
Serged lettuce edge-Adjust serger to rolled hem. Complete in same method as machine stitched lettuce edging (Figure 35).
35
Hems with Pleats
At the edge of a pleat fold, press open the seam in the hem area. Finish the raw edge of the hem. Turn up the hem to the desired width, clipping the seam at the top of the hem (Figure 36). To be sure the pleated hem stays creased, edgestitch the fold of the pleat (Figure 37). Seam allowances above the hem will face in one direction, keeping the pleat fold flat. Stitch through all thicknesses of the hem on the inside. Complete the hem.
36
37
Hems with Linings
An important consideration for a lining hem is that it covers the raw edge of the garment without showing below the edge of the garment.
There are two types of hems for linings. The attached hem used for jackets and pants, and the free hanging hem used for skirts, dresses and coats.
Attached-Mark and tum up garment hem. Cut lining 5/8 inch below garment hemline. Tum edge of lining under 5/8 inch. Pin lining to garment matching hem top edges of both hems. Slipstitch lining to garment hem. An ease tuck will form. This helps prevent strain on garment hem (Figure 38).
Lining
38
Freehanging-Mark and tum up garment hem. Tum up lining hem 1/ 2 inch shorter than garment. Trim lining hem to 2 inches and apply a hem finish. Hem lining with appropriate stitch (using hand or machine hemming). Attach lining to garment with French tacks at seams (Figure 39).
39
Pressing Hems
After the hem is stitched by hand or machine, a final and careful pressing is necessary. Use a well-padded ironing board and press on the inside of the garment. Remove basting along the fold . Use a pounding block on woolens. For an unpressed or rolled hem edge, do not touch the fold edge with the iron. Instead, hold the
iron 2 or 3 inches above the fold and steam the edge thoroughly. Let the steam evaporate, and the garment cool completely before handling. For top pressing, use a press cloth to prevent fabric shine.
Tips for Successful Hemming
• Keep hand hemming stitches fairly loose. Pulling them too tight will cause a puckered hem.
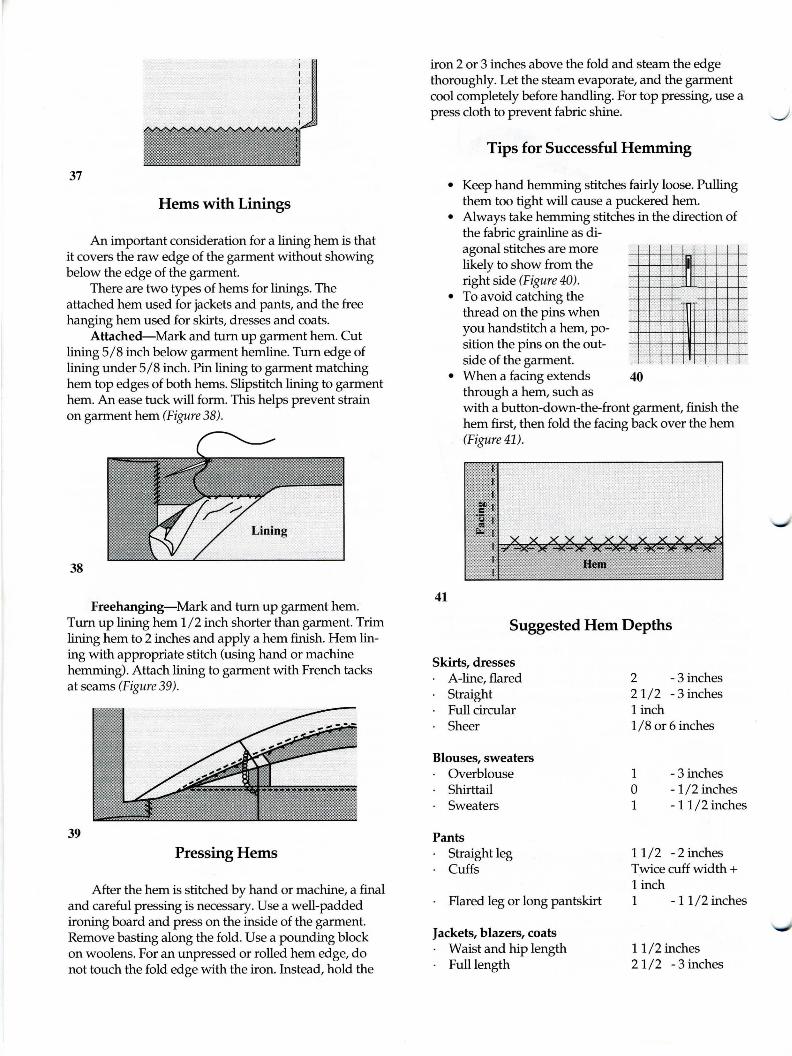
• Always take hemming stitches in the direction of the fabric grainline as di-agonal stitches are more likely to show from the right side (Figure 40).
• To avoid catching the thread on the pins when you handstitch a hem, po-sition the pins on the out-side of the garment.
r ., u
• When a facing extends 40 through a hem, such as with a button-down-the-front garment, finish the hem first, then fold the facing back over the hem (Figure 41).
41
Suggested Hem Depths
Skirts, dresses A-line, flared Straight Full circular Sheer
Blouses, sweaters Overblouse Shirttail Sweaters
Pants Straight leg Cuffs
Flared leg or long pantskirt
Jackets, blazers, coats Waist and hip length
· Fulllength
2 -3 inches 2 1/2 -3 inches 1 inch 1/8 or 6 inches
1 0 1
-3 inches -1/2 inches - 1 1/2 inches
1 1/2 - 2 inches Twice cuff width + 1 inch 1 -11/2 inches
11/2 inches 21/2 -3 inches