f5u508 - belkincache- · • one ieee 1394 host controller ... insert the f5u508 installation cd...
TRANSCRIPT
En
P73954ec-A F5U508
Fr
De
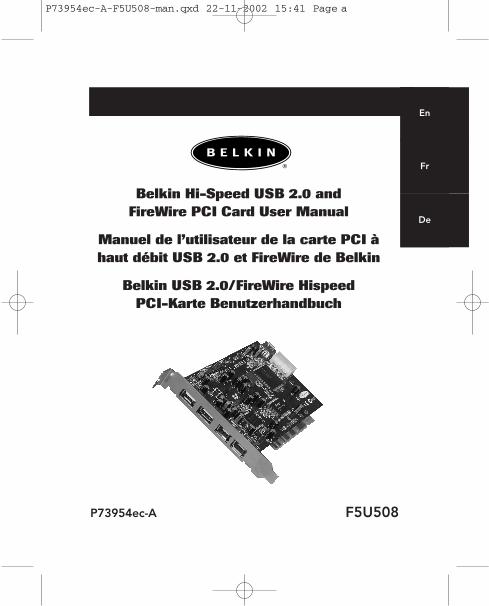
Belkin Hi-Speed USB 2.0 andFireWire PCI Card User Manual
Manuel de l’utilisateur de la carte PCI àhaut débit USB 2.0 et FireWire de Belkin
Belkin USB 2.0/FireWire HispeedPCI-Karte Benutzerhandbuch
P73954ec-A-F5U508-man.qxd 22-11-2002 15:41 Page a

P73954ec-A-F5U508-man.qxd 22-11-2002 15:41 Page b
Table of Contents
Introduction . . . . . . . . . . . . . . . . . . . . . . . . . . . . . . . . . . . . . . . . . . .1
Features . . . . . . . . . . . . . . . . . . . . . . . . . . . . . . . . . . . . . . . . . . . . . .2
Technical Specifications . . . . . . . . . . . . . . . . . . . . . . . . . . . . . . . . . .3
Installation . . . . . . . . . . . . . . . . . . . . . . . . . . . . . . . . . . . . . . . . . . . .5
Installing a Hi-Speed USB 2.0 Hub . . . . . . . . . . . . . . . . . . . . . . . . .21
Value-Added Software Bundle . . . . . . . . . . . . . . . . . . . . . . . . . . . .22
FCC Statement/Warranty . . . . . . . . . . . . . . . . . . . . . . . . . . . . . . . .23
En
P73954ec-A-F5U508-man.qxd 22-11-2002 15:41 Page c

P73954ec-A-F5U508-man.qxd 22-11-2002 15:41 Page d

Welcome to Belkin Hi-Speed Connectivity!Thank you for purchasing the Belkin Hi-Speed USB 2.0 and FireWirePCI Card (the PCI Card).
Now you can upgrade your computer to the latest USB and FireWiretechnology. You will be able to take advantage of a host of new Hi-Speed USB 2.0 and FireWire products!
Your USB 2.0 and FireWire products including hard drives, scanners,printers, video cameras, and more will all work much faster than everbefore. Your current USB devices will continue to work as they alwayshave and, in some cases, even better with this PCI Card. Follow thesimple installation instructions in this manual to get your PCI Card upand working—then enjoy the speed and convenience of Belkin!
Introduction
1
En
P73954ec-A-F5U508-man.qxd 22-11-2002 15:41 Page 1

Features
2
• Three USB host controllers integrated into a single PCI Card
• 3 Hi-Speed USB 2.0 ports
• One IEEE 1394 host controller
• 2 high-speed FireWire ports
• Simultaneous connection capability for Low-, Full-, andHi-speed devices
• Auto-detection of new devices as they are connected, alongwith the speed of each device
• Backward-compatibility with USB 1.1 devices
• Full compliance with USB specifications
• Full compatibility with OHCI compliant FireWire peripherals
• Plug-and-Play technology
• Internal power connector
Package Contents(1) Belkin Hi-Speed USB 2.0 and FireWire PCI Card
(1) FireWire Cable (6-pin to 4-pin)
(1) User Manual
(1) Installation CD
P73954ec-A-F5U508-man.qxd 22-11-2002 15:41 Page 2

Technical Specifications
3
USB Specifications• Open Host Controller Interface- (OHCI-) compliant (USB 1.1
Host Controller)
• EHCI-compliant (USB 2.0 Host Controller)
• PCI revision 2.1-compliant
• Current: 500mA per port
• USB revision 2.0-compliant
FireWire Specifications• Two external 400Mbps IEEE 1394 ports
• OHCI 1.0 Compliant
• PCI 2.1 & 2.2 Compliant
• IEEE 1394a Rev 5 Compliant
• Internal Auxiliary power connector
• IT/AT FIFO Buffers—4k/2k
• IR/AR FIFO Buffers—4k/2k
En
P73954ec-A-F5U508-man.qxd 22-11-2002 15:41 Page 3

Technical Specifications (continued)
4
System Requirements• 266MHz Pentium® II processor
• 32MB RAM
• One available PCI 2.1-compliant PCI slot
• Windows® 98 SE, 2000, Me, or XP operating system
Operating System Compatibility
Operating System USB 1.x USB 2.0 FireWireSupport Support Support
Windows 98 SE Yes Yes Yes
Windows 2000 Yes Yes Yes
Windows Me Yes Yes Yes
Windows XP Yes Yes Yes
P73954ec-A-F5U508-man.qxd 22-11-2002 15:41 Page 4

5
Installation
Please refer to the section that corresponds to your versionof the Windows operating system.
Installation Procedure for Windows 98 SE This installation procedure will successfully install two USB 1.1OHCI controllers, one USB 2.0 EHCI host controller, and oneIEEE 1394 host controller.
1. Insert the F5U508 installation CD into your CD-ROM drive.After a few moments the main menu will auto-start anddisplay each of the available installation options.
2. Select “Install USB 2.0 Driver”. After the driver is installedselect “No, I will restart my computer later”. Select “Close”.Then select “Exit”.
3. Open the Start menu in the lower left hand corner of yourWindows display, then select “Shut Down” and click “OK”.
4. Once the computer has completely shut down, remove thecomputer’s cover and locate an empty PCI slot.
5. Remove the port cover that corresponds with the PCI slotyou wish to use. (The cover is usually held in place with asingle screw).
6. Insert the PCI Card into the slot. Apply pressure as neededuntil the card is fully seated. Secure the PCI card with thescrew removed in step #5, above.
7. After installing the PCI Card, replace the outer cover andturn on the computer.
En
P73954ec-A-F5U508-man.qxd 22-11-2002 15:41 Page 5

6
Installation (continued)
8. When Windows restarts, the PCI card will be detected andinstallation of the required drivers will begin.
Note: Depending on the speed of your computer, it may take up to 30 seconds for the PCI card to be detected.
9. Windows will detect the “PCI Standard PCI to PCI Bridge”and the “Add New Hardware Wizard” dialog box will open.Click “Next”.
10. Select “Search for the best driver for your device” andclick “Next”.
11. Uncheck all the boxes and click “Next”.
12. Windows will locate the drivers for “PCI Standard PCI toPCI Bridge”. Click “Next”.
(Windows may prompt you to insert the Windows OSinstallation CD. If so, insert the CD into the CD-ROM driveand continue the installation procedure).
13. Installation of the “PCI Standard PCI to PCI Bridge” will nowcomplete. Click “Finish”.
14. Windows will detect the “NEC Firewarden OHCI CompliantIEEE 1394 Host Controller”. Click “Next”.
15. Select “Search for the best driver for your device” andclick “Next”.
16. Uncheck all the boxes and click “Next”.
17. Windows will now search its driver database for the requireddriver. Click “Next”.
18. Installation of the “NEC Firewarden OHCI Compliant IEEE1394 Host Controller” is now complete. Click “Finish”.
P73954ec-A-F5U508-man.qxd 22-11-2002 15:41 Page 6

7
Installation (continued)
19. Windows will detect the “NEC USB Open Host Controller”.Click “Next”.
20. Select “Search for the best driver for your device” and click “Next”.
21. Uncheck all the boxes and click “Next”.
22. The Windows OS will locate the drivers for “NEC USB OpenHost Controller”. Click “Next”.
23. After the Windows OS installs the required drivers,installation of the first host controller is complete. Click “Finish”.
24. The “Add New Hardware” wizard will repeat the installationprocess for the second OHCI host controller.
25. Repeat steps 20-23.
26. Windows will now detect “Belkin USB 2.0 High Speed HostController”. Click “Next”.
27. Windows will locate the required drivers and completeinstallation of the “Belkin USB 2.0 High Speed HostController” and “USB 2.0 Root Hub Device”.
Installation of the PCI Card is now complete.
Verifying Proper Installation (Windows 98 SE)Check the “Windows Device Manager” to confirm thatyour PCI Card has been properly installed.
En
P73954ec-A-F5U508-man.qxd 22-11-2002 15:41 Page 7
8
Installation (continued)
1. Right-click on “My Computer” and select “Properties”.
2. Select the “Device Manager” tab.
3. Click on the plus sign (+) next to “Universal SerialBus Controllers”.
The “Universal Serial Bus Controllers” list will now include two“NEC USB Open Host Controller” entries, one “Belkin USB 2.0Hi-Speed Host Controller” entry, one “USB 2.0 Root HubDevice” entry and two “USB Root Hub” entries.
Note: If your computer features built-in USB ports, or if youhave other USB PCI controller cards installed, you will seeadditional USB Controller and root hub entries.
4. Click the plus sign (+) next to “IEEE 1394 Bus Controller”.
The “IEEE 1394 Bus Controller” list will now include one “NECFirewarden OHCI Compliant IEEE 1394 Host Controller” entry.
Note: If your computer features built-in IEEE 1394 ports, or ifyou have other IEEE 1394 PCI host controller cards installed,you will see additional “IEEE 1394 Host Controller” entries.
Installation Procedure for Windows 2000This installation procedure will successfully install two USB 1.1OHCI controllers, one USB 2.0 EHCI host controller, and oneIEEE 1394 host controller.
1. Insert the F5U508 installation CD into your CD-ROM drive.After a few moments the main menu will auto-start anddisplay each of the available installation options.
2. Select “Install USB 2.0 Driver”. After the driver is installed
P73954ec-A-F5U508-man.qxd 22-11-2002 15:41 Page 8

9
Installation (continued)
select “No, I will restart my computer later”. Select “Close”.Then select “Exit”.
3. Open the Start menu in the lower left-hand corner of yourWindows display, then select “Shut Down” and click “OK”.
4. Once the computer has completely shut down, remove thecomputer’s cover and locate an empty PCI slot.
5. Remove the port cover that corresponds with the PCI slotyou wish to use. (The cover is usually held in place with asingle screw).
6. Insert the PCI Card into the slot. Apply pressure as neededuntil the card is fully seated. Secure the PCI card with thescrew removed in step #5, above.
7. After installing the PCI Card, replace the outer cover andturn on the computer.
8. When Windows restarts the PCI card will be detected andall required drivers will be automatically installed. After theinstall is complete, you may be prompted to click finish andto restart.
Note: Depending on the speed of your computer, it may takeup to 30 seconds for the PCI card to be detected.
Verifying Proper Installation (Windows 2000)After installation is complete, check the Windows DeviceManager to confirm that all components of the PCI Card havebeen properly installed.
En
P73954ec-A-F5U508-man.qxd 22-11-2002 15:41 Page 9
10
Installation (continued)
1. Right-click on “My Computer”.
2. Select “Properties”.
3. Select the “Hardware” tab and click on the “DeviceManager” button.
4. Click the plus sign (+) next to “Universal Serial BusControllers”.
The “Universal Serial Bus Controllers” list will now include two“NEC USB Open Host Controller” entries, one “Belkin USB 2.0Hi-Speed Host Controller” entry, one “USB 2.0 Root HubDevice” entry and two “USB Root Hub” entries.
Note: If your computer features built-in USB ports, or if youhave other USB PCI controllers installed, you will see additional“root hub” entries.
5. Click the plus sign (+) next to “IEEE 1394 Bus Controller”.The “IEEE 1394 Bus Controller” list will now include one“NEC Firewarden OHCI Compliant IEEE 1394 HostController” entry.
Note: If your computer features built-in IEEE 1394 ports, or ifyou have other IEEE 1394 host controllers installed, you will seeadditional “IEEE 1394 Host Controller” entries.
P73954ec-A-F5U508-man.qxd 22-11-2002 15:41 Page 10

11
Installation (continued)
Installation Procedure for Windows MeThis installation procedure will successfully install two USB 1.1OHCI controllers, one USB 2.0 EHCI host controller, and oneIEEE 1394 host controller.
1. Insert the F5U508 installation CD into your CD-ROM drive.After a few moments the main menu will auto-start anddisplay each of the available installation options.
2. Select “Install USB 2.0 Driver”. After the driver is installedselect “No, I will restart my computer later”. Select “Close”.Then select “Exit”.
3. Open the Start menu in the lower left hand corner of yourWindows display, then select “Shut Down” and click “OK”.
En
P73954ec-A-F5U508-man.qxd 22-11-2002 15:41 Page 11

12
Installation (continued)
4. Once the computer has completely shut down, remove thecomputer’s cover and locate an empty PCI slot.
5. Remove the port cover that corresponds with the PCI slotyou wish to use. (The cover is usually held in place with asingle screw.)
6. Insert the PCI Card into the slot. Apply pressure as neededuntil the card is fully seated. Secure the PCI card with thescrew removed in step #5, above.
7. After installing the PCI Card, replace the outer cover andturn on the computer.
8. When Windows restarts the PCI card will be detected andinstallation of the required drivers will begin.
Note: Depending on the speed of your computer, it may takeup to 30 seconds for the PCI card to be detected.
9. Windows will detect the “PCI Standard PCI to PCI Bridge”and the “Add New Hardware Wizard” dialog box will open.Select “Automatic Search for the best driver for your device(Recommended)” and click “Next”.
10. Windows will locate the drivers for “PCI Standard PCI to PCIBridge”. (Windows may prompt you to insert the WindowsOS installation CD. If so, insert the CD into the CD-ROMdrive and continue the installation procedure).
11. Installation of the “PCI Standard PCI to PCI Bridge” will nowcomplete. Click “Finish”.
12. Windows will detect the “NEC Firewarden OHCI CompliantIEEE 1394 Host Controller”. Click “Next”.
P73954ec-A-F5U508-man.qxd 22-11-2002 15:41 Page 12

13
Installation (continued)
13. Select “Automatic Search for the best driver for your device(Recommended)” and click “Next”.
14. Windows will now search its driver database for therequired driver.
15. Installation of the “NEC Firewarden OHCI Compliant IEEE1394 Host Controller” is now complete. Click “Finish”.
16. Windows will detect “NEC USB Open Host Controller(E13+)” and “Belkin USB 2.0 High Speed Host controller”.The required driver support will be automatically installed.No user input is required.
17. After installation of the USB host controllers, the WindowsOS will detect “USB Root Hub” and automatically install therequired driver support. This will repeat one more time.
18. Restart your computer to complete the installation procedure.
En
P73954ec-A-F5U508-man.qxd 22-11-2002 15:41 Page 13

14
Installation (continued)
Verifying Proper Installation (Windows Me)After installation, check the Windows Device Manager toconfirm that the PCI Card has been properly installed.
1. Right-click on “My Computer” and select “Properties”.
2. Select the “Device Manager” tab.
3. Click on the plus sign (+) next to “Universal Serial Bus Controllers”.
The “Universal Serial Bus Controllers” list will now include two“NEC USB Open Host Controller” entries, one “Belkin USB 2.0Hi-Speed Host Controller” entry, one “USB 2.0 Root HubDevice” entry and two “USB Root Hub” entries.
Note: If your computer features built-in USB ports, or if youhave other USB PCI controller cards installed, you will seeadditional USB Controller and root hub entries.
4. Click the plus sign (+) next to “IEEE 1394 Bus Controller”.
The “IEEE 1394 Bus Controller” list will now include one “NECFirewarden OHCI Compliant IEEE 1394 Host Controller” entry.
5. Click the plus sign (+) next to “Network Adapters”.
6. The “Network Adapters” list will now include one “NDIS 1394 Net Adapter” entry.
Note: If your computer features built-in IEEE 1394 ports, or ifyou have other IEEE 1394 PCI host controller cards installed,you will see additional “IEEE 1394 Host Controller” and “NDIS1394 Net Adapter” entries.
P73954ec-A-F5U508-man.qxd 22-11-2002 15:41 Page 14

15
Installation (continued)
Installation Procedure for Windows XPThis installation procedure will successfully install two USB 1.1OHCI controllers, one USB 2.0 EHCI host controller, and oneIEEE 1394 host controller.
Important Note: There are two methods of installing therequired USB 2.0 drivers in Windows XP.
If you have an Internet connection: Windows XP checks the Windows update website anddownloads the most recent version of Microsoft USB 2.0support drivers. Please proceed to the “With InternetConnection” section.
a. If you do not have a connection to the Internet: USB 2.0 drivers will be installed from the Belkin F5U508installation CD. Please proceed to the “Without InternetConnection” section.
En
P73954ec-A-F5U508-man.qxd 22-11-2002 15:41 Page 15
16
Installation (continued)
With Internet Connection
1. Make sure your computer is completely powered down.
2. Remove the computer’s cover and locate an empty PCI slot.
3. Remove the port cover that corresponds with the PCI slotyou wish to use. (The cover is usually held in place with asingle screw.)
4. Insert the PCI Card into the slot. Apply pressure as neededuntil the card is fully seated. Secure the PCI card with thescrew removed in step #3, above.
5. After installing the PCI Card, replace the outer cover andturn on the computer.
6. When Windows restarts the PCI card will be detected anddrivers for the IEEE 1394 host controller, and the two USBOHCI host controllers will be automatically installed.
Note: Depending on the speed of your computer, it may takeup to 45 seconds for the PCI card to be detected, and thedownload from Windows update to be completed.
7. Windows will now search for drivers for the “NEC PCI toUSB Enhanced Host Controller B1”, and the “NewHardware Wizard” will start. Select “Install the softwareautomatically (Recommended)”. Click “Next”. Windows XPwill check the Windows update website and download themost recent version of Microsoft’s USB 2.0 support drivers.
P73954ec-A-F5U508-man.qxd 22-11-2002 15:41 Page 16

17
Installation (continued)
8. The IEEE 1394 Network Device is now detected andinstalled. Windows will present you with the option ofsetting up a Network. If you do not want to set up an IEEE1394 network, ignore this option. (Please check yourWindows XP help file for more information on setting upand using an IEEE 1394 network).
The Installation procedure is now complete.
Without Internet Connection
1. Insert the F5U508 installation CD into your CD-ROM drive.After a few moments the main menu will auto-start anddisplay each of the available installation options.
2. Select “Install USB 2.0 Driver”.
3. Windows will now display the following message: “Thesoftware you are installing has not passed Windowslogo testing”. Ignore this message and select“Continue Anyway”.
4. Windows will now prompt you to restart your computer.Select “No, I will restart my computer later”. Click “Close”.
5. Open the Start menu in the lower left-hand corner of yourWindows display, then select “Shut Down” and click “OK”.
6. Once the computer is completely shut down, remove thecomputer’s cover and locate an empty PCI slot.
7. Remove the port cover that corresponds with the PCI slotyou wish to use. (The cover is usually held in place with asingle screw).
8. Insert the PCI Card into the slot. Apply pressure as needed
En
P73954ec-A-F5U508-man.qxd 22-11-2002 15:41 Page 17
Installation (continued)
until the card is fully seated. Secure the PCI card with thescrew removed in step #7, above.
9. After installing the PCI Card, replace the outer cover andturn on the computer.
10. When Windows restarts, the PCI card will be detected anddrivers for both the IEEE 1394 host controller and the twoUSB OHCI host controllers will be automatically installed.
Note: Depending on the speed of your computer, it may takeup to 30 seconds for the PCI card to be detected.
11. Windows will now search for drivers for the “Belkin USB 2.0High Speed Host Controller” and the “New HardwareWizard” will start. Select “Install the software automatically(Recommended)”. Click “Next”.
12. Drivers for the “Belkin USB 2.0 High Speed Host Controller”will now be located. Windows will display the followingmessage: “The software you are installing has not passedWindows logo testing”. Ignore this message and select“Continue Anyway”.
13. Installation of the “Belkin USB 2.0 High Speed HostController” will now be completed. Click “Finish”.
14. Windows will now detect the “USB 2.0 Root Hub Device”.Click “Next”.
15. Drivers for the “USB 2.0 Root Hub Device” will now belocated. Windows will display the following message.“The software you are installing has not passed Windows logo testing”. Ignore this message and select “Continue Anyway”.
18
P73954ec-A-F5U508-man.qxd 22-11-2002 15:41 Page 18

19
Installation (continued)
16. Installation of the “USB 2.0 Root Hub Device” is nowcomplete. Click “Finish”.
17. The “IEEE 1394 Network Device” is now detected andinstalled. Windows will present you with the option ofsetting up a network. If you do not wish to set up an IEEE1394 network, ignore this option. (Please check yourWindows XP help file for more information on setting upand using an IEEE 1394 network).
The installation procedure is now complete.
Verifying Proper Installation (Windows XP)
After installation, check the Device Manager to confirm that thePCI Card has been properly installed.
1. Right-click on “My Computer”.
2. Select “Properties”.
3. Select the “Hardware” tab and click on the “DeviceManager” button.
4. Click the plus sign (+) next to “Universal Serial BusControllers”.
The “Universal Serial Bus Controllers” list will now include two“NEC USB Open Host Controller” entries, one “Belkin USB 2.0Hi-Speed Host Controller” entry, one “USB 2.0 Root HubDevice” entry and two “USB Root Hub” entries.
Note: If your computer features built-in USB ports, or if youhave other USB PCI controllers installed, you will see additional“root hub” entries.
En
P73954ec-A-F5U508-man.qxd 22-11-2002 15:41 Page 19

Installation (continued)
5. Click the plus sign (+) next to “IEEE 1394 Bus Controller”.
The “IEEE 1394 Bus Controller” list will now include one “NECFirewarden OHCI Compliant IEEE 1394 Host Controller” entry.
6. Click the plus sign (+) next to “Network Adapters”.
The “Network Adapters” list will now include one “NDIS 1394Net Adapter” entry.
Note: If your computer features built-in IEEE 1394 ports, or ifyou have other IEEE 1394 PCI host controller cards installed,you will see additional “IEEE 1394 Host Controller” and “NDIS1394 Net Adapter” entries.
20
P73954ec-A-F5U508-man.qxd 22-11-2002 15:41 Page 20
21
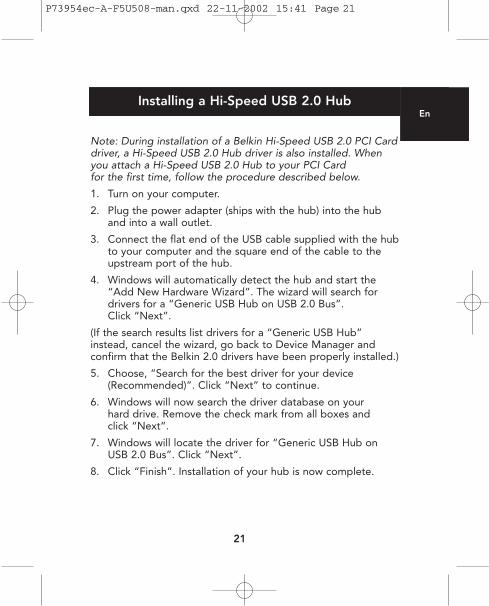
Installing a Hi-Speed USB 2.0 Hub
Note: During installation of a Belkin Hi-Speed USB 2.0 PCI Carddriver, a Hi-Speed USB 2.0 Hub driver is also installed. Whenyou attach a Hi-Speed USB 2.0 Hub to your PCI Card for the first time, follow the procedure described below.
1. Turn on your computer.
2. Plug the power adapter (ships with the hub) into the huband into a wall outlet.
3. Connect the flat end of the USB cable supplied with the hubto your computer and the square end of the cable to theupstream port of the hub.
4. Windows will automatically detect the hub and start the“Add New Hardware Wizard”. The wizard will search fordrivers for a “Generic USB Hub on USB 2.0 Bus”. Click “Next”.
(If the search results list drivers for a “Generic USB Hub”instead, cancel the wizard, go back to Device Manager andconfirm that the Belkin 2.0 drivers have been properly installed.)
5. Choose, “Search for the best driver for your device(Recommended)”. Click “Next” to continue.
6. Windows will now search the driver database on yourhard drive. Remove the check mark from all boxes andclick “Next”.
7. Windows will locate the driver for “Generic USB Hub onUSB 2.0 Bus”. Click “Next”.
8. Click “Finish”. Installation of your hub is now complete.
En
P73954ec-A-F5U508-man.qxd 22-11-2002 15:41 Page 21

Value-Added Software Bundle
The Belkin Hi-Speed USB 2.0 and FireWire PCI CardInstallation CD includes groundbreaking photo-editingsoftware applications from Ulead®:
Ulead VideoStudio® 5.0Ulead VideoStudio 5.0 is one of the most complete consumervideo editing applications available, allowing you to captureand edit high-quality DV images and export them in any wayyou choose. VideoStudio lets you add striking titles, 3-Dtransitions, video filter effects, video/graphic overlays, andmusic or voiceover. You can also share your video on tape, CD,and through the Web.
Ulead Photo Express™ 4.0 My Custom EditionThis package supplies everything you need to get started withphoto editing and sharing! It enables you to get photos fromalmost anywhere, then sort them in seconds with a visualthumbnail browse mode. You can also retouch problem photoswith quick and easy enhancement tools.
Ulead COOL 360™
This application lets you quickly and easily transform a series ofphotos into 360° or wide-angle panoramas. With COOL 360,you can save panoramas in popular file formats including MOV,e-mail executable panorama files, and output HTML files forposting panoramas to the Web. The software lets you easilycreate personalized screen savers, print panoramas on single ormultiple pages, and copy panoramas to presentations andoffice documents.
22
P73954ec-A-F5U508-man.qxd 22-11-2002 15:41 Page 22
23
Information
FCC Statement
DECLARATION OF CONFORMITY WITH FCC RULES FOR ELECTROMAGNETIC COMPATIBILITY
We, Belkin Components, of 501 West Walnut Street, Compton, CA 90220,declare under our sole responsibility that the product:
F5U508to which this declaration relates:Complies with Part 15 of the FCC Rules. Operation is subject to the followingtwo conditions: (1) this device may not cause harmful interference, and (2) thisdevice must accept any interference received, including interference that maycause undesired operation.
CE Declaration of ConformityWe, Belkin Components, declare under our sole responsibility that the F5U508, to which thisdeclaration relates, is in conformity with Generic Emissions Standard EN550022 1998 andwith Generic Immunity Standard EN550024 1998, EN61000-3-2, and EN61000-3-3.
Belkin Components Limited Lifetime Product WarrantyBelkin Components warrants this product against defects in materials and workmanship forits lifetime. If a defect is discovered, Belkin will, at its option, repair or replace the product atno charge provided it is returned during the warranty period, with transportation chargesprepaid, to the authorized Belkin dealer from whom you purchased the product. Proof ofpurchase may be required.
This warranty does not apply if the product has been damaged by accident, abuse, misuse,or misapplication; if the product has been modified without the written permission of Belkin;or if any Belkin serial number has been removed or defaced.
THE WARRANTY AND REMEDIES SET FORTH ABOVE ARE EXCLUSIVE IN LIEU OF ALL OTHERS,WHETHER ORAL OR WRITTEN, EXPRESSED OR IMPLIED. BELKIN SPECIFICALLY DISCLAIMSANY AND ALL IMPLIED WARRANTIES, INCLUDING, WITHOUT LIMITATION, WARRANTIES OFMERCHANTABILITY AND FITNESS FOR A PARTICULAR PURPOSE.
No Belkin dealer, agent, or employee is authorized to make any modification, extension, oraddition to this warranty.
BELKIN IS NOT RESPONSIBLE FOR SPECIAL, INCIDENTAL, OR CONSEQUENTIALDAMAGES RESULTING FROM ANY BREACH OF WARRANTY, OR UNDER ANY OTHERLEGAL THEORY, INCLUDING BUT NOT LIMITED TO, LOST PROFITS, DOWNTIME,GOODWILL, DAMAGE TO OR REPROGRAMMING, OR REPRODUCING ANY PROGRAMOR DATA STORED IN OR USED WITH BELKIN PRODUCTS.
En
P73954ec-A-F5U508-man.qxd 22-11-2002 15:41 Page 23

P73954ec-A-F5U508-man.qxd 22-11-2002 15:41 Page 24

Fr
Table des matières
Introduction ....................................................................................1
Caractéristiques ..............................................................................2
Spécifications techniques ...............................................................3
Installation.......................................................................................5
Installation d’un concentrateur à haut débit USB 2.0..................21
Offre logicielle à valeur ajoutée ...................................................22
Déclaration FCC/Garantie ............................................................23
P73954ec-A-F5U508-man.qxd 22-11-2002 15:41 Page 25

P73954ec-A-F5U508-man.qxd 22-11-2002 15:41 Page 26

Fr
Bienvenue dans le monde des connexions à haut débit de Belkin !Merci d’avoir choisi la carte PCI à haut débit USB 2.0 et FireWirede Belkin (la carte PCI).
Vous pouvez maintenant mettre votre ordinateur au niveau de latechnologie USB et FireWire la plus récente et profiter d’un vastechoix de nouveaux produits USB 2.0 et FireWire à haut débit !
Les produits USB 2.0 et FireWire, tels que disques durs, scanners,imprimantes, caméras vidéo et autres, fonctionneront plus viteque jamais. Grâce à cette carte PCI, vos périphériques USBactuels fonctionneront comme par le passé et, parfois, mieuxqu’avant. Suivez les instructions d’installation simples fourniesdans ce manuel pour que votre carte PCI soit prête à fonctionner,puis laissez-vous griser par la vitesse et la facilité d’emploi deBelkin !
Introduction
1
P73954ec-A-F5U508-man.qxd 22-11-2002 15:41 Page 1

2
Caractéristiques
• Trois contrôleurs d’hôte USB intégrés dans une seule carte PCI
• 3 ports USB 2.0 à haut débit
• Un contrôleur d’hôte IEEE 1394
• 2 ports FireWire à haut débit
• Possibilité de connexion simultanée de périphériques lents,rapides et haut débit
• Détection automatique de nouveaux périphériques et de leurvitesse au fur et à mesure de leur branchement
• Rétrocompatible avec les périphériques USB 1.1
• Entièrement conforme aux spécifications USB
• Compatibilité totale avec les périphériques FireWire OHCI
• Technologie Plug-and-Play
• Connecteur interne d’alimentation
Contenu de la boîte(1) Carte PCI à haut débit USB 2.0 et FireWire de Belkin
(1) Câble FireWire (6 broches vers 4 broches)
(1) Manuel de l’utilisateur
(1) CD d’installation
P73954ec-A-F5U508-man.qxd 22-11-2002 15:41 Page 2

Spécifications techniques
3
Spécifications USB• Conforme à la norme OHCI (contrôleur d’hôte USB 1.1)
• Conforme à la norme EHCI (contrôleur d’hôte USB 2.0)
• Conforme à la révision PCI 2.1
• Courant : 500 mA par port
• Conforme à la révision USB 2.0
Spécifications FireWire• Deux ports IEEE 1394 à 400 Mbps externes
• Compatible OHCI 1.0
• Compatible avec les spécifications PCI 2.1 et 2.2
• Compatible IEEE 1394a Rév. 5
• Connecteur d’alimentation auxiliaire interne
• Tampons FIFO IT/AT 4k/2k
• Tampons FIFO IR/AR 4k/2k
Fr
P73954ec-A-F5U508-man.qxd 22-11-2002 15:41 Page 3

Spécifications techniques (suite)
4
Configuration requise• Processeur Pentium® II à 266 MHz
• 32 Mo de RAM
• Un emplacement PCI compatible PCI 2.1 libre
• Systèmes d’exploitation Windows® 98 SE, 2000, Me ou XP
Systèmes d’exploitation compatibles
Système Prise en charge Prise en charge Prise end’exploitation de l’USB 1.x de l’USB 2.0 charge FireWire
Windows 98 SE Oui Oui Oui
Windows 2000 Oui Oui Oui
Windows Me Oui Oui Oui
Windows XP Oui Oui Oui
P73954ec-A-F5U508-man.qxd 22-11-2002 15:41 Page 4
Fr
5
Installation
Reportez-vous à la section correspondant à la version de votresystème d’exploitation Windows.
Procédure d’installation sous Windows 98 SECette procédure permet d’installer deux contrôleurs OHCI USB 1.1,un contrôleur d’hôte EHCI USB 2.0 et un contrôleur d’hôteIEEE 1394.
1. Insérez le CD d’installation F5U508 dans le lecteur de CD-ROM.Après quelques instants, le menu principal démarreautomatiquement et affiche les options d’installationsdisponibles.
2. Sélectionnez « Install USB 2.0 Driver » (Installer le pilote USB 2.0).Une fois le pilote installé, sélectionnez « No, I will restart mycomputer later » (Non, je redémarrerai mon ordinateur plustard). Sélectionnez « Close » (Fermer). Ensuite, sélectionnez« Exit » (Quitter).
3. Ouvrez le menu « Start » (Démarrer) dans l’angle inférieur gauchede l’écran de Windows, puis sélectionnez « Shut Down »(Arrêter) et cliquez sur « OK ».
4. Une fois l’ordinateur complètement éteint, retirez son carter etrecherchez un emplacement PCI libre.
5. Retirez la protection du port correspondant à l’emplacement PCIque vous souhaitez utiliser. (Le carter est généralement maintenuen place par une seule vis.)
6. Insérez la carte PCI dans son emplacement. Appuyezsuffisamment afin qu’elle soit bien en place. Fixez la carte PCIavec la vis retirée au cours de l’étape N° 5 ci-dessus.
7. Après avoir installé la carte PCI, remettez le carter en place etallumez l’ordinateur.
P73954ec-A-F5U508-man.qxd 22-11-2002 15:41 Page 5

6
Installation (suite)
8. Une fois que Windows a redémarré, la carte PCI est détectée.L’installation des pilotes requis commence alors.
Remarque : Selon la vitesse de votre ordinateur, 30 secondespeuvent être nécessaires pour la détection de la carte PCI.
9. Windows détecte la carte PCI en tant que « PCI Standard PCI toPCI Bridge ». La boîte de dialogue « Add New HardwareWizard » (Assistant Ajout de nouveau matériel) apparaît. Cliquezsur « Next » (Suivant).
10. Sélectionnez l’option « Search for the best driver for yourdevice » (Rechercher le meilleur pilote pour votre périphérique),puis cliquez sur « Next » (Suivant).
11. Désélectionnez toutes les cases, puis cliquez sur « Next » (Suivant).
12. Windows trouve les pilotes correspondant à « PCI Standard PCIto PCI Bridge ». Cliquez sur « Next » (Suivant).
(Il se peut qu’un message de Windows vous demande le CDd’installation de Windows. Si tel est le cas, insérez-le dans le lecteurde CD-ROM et continuez la procédure d’installation.)
13. L’installation de la carte « PCI Standard PCI to PCI Bridge » estmaintenant terminée. Cliquez sur « Finish » (Terminer).
14. Windows détecte « NEC Firewarden OHCI Compliant IEEE 1394Host Controller ». Cliquez sur « Next » (Suivant).
15. Sélectionnez l’option « Search for the best driver for yourdevice » (Rechercher le meilleur pilote pour votre périphérique),puis cliquez sur « Next » (Suivant).
16. Désélectionnez toutes les cases, puis cliquez sur « Next » (Suivant).
17. Windows recherche maintenant le pilote requis dans sa base dedonnées. Cliquez sur « Next » (Suivant).
18. L’installation du contrôleur d’hôte « NEC Firewarden OHCICompliant IEEE 1394 Host Controller » est maintenant terminée.Cliquez sur « Finish » (Terminer).
P73954ec-A-F5U508-man.qxd 22-11-2002 15:41 Page 6
Fr
7
Installation (suite)
19. Windows détecte le contrôleur « NEC USB Open HostController ». Cliquez sur « Next » (Suivant).
20. Sélectionnez l’option « Search for the best driver for yourdevice » (Rechercher le meilleur pilote pour votre périphérique),puis cliquez sur « Next » (Suivant).
21. Désélectionnez toutes les cases, puis cliquez sur « Next »(Suivant).
22. Windows trouve les pilotes correspondant à « NEC USB OpenHost Controller ». Cliquez sur « Next » (Suivant).
23. Une fois les pilotes requis installés, l’installation du premiercontrôleur d’hôte est terminée.
Cliquez sur « Finish » (Terminer).
24. L’assistant « Add New Hardware Wizard » (Assistant Ajout denouveau matériel) répète le processus d’installation pour ledeuxième contrôleur d’hôte OHCI.
25. Répétez les étapes 20 à 23.
26. Windows détecte le contrôleur « Belkin USB 2.0 High SpeedHost Controller ». Cliquez sur « Next » (Suivant).
27. Windows recherche les pilotes requis et termine l’installation ducontrôleur « Belkin USB 2.0 High Speed Host Controller » et duconcentrateur USB racine « USB 2.0 Root Hub Device ».
L’installation de la carte PCI est maintenant terminée.
Vérification de l’installation (Windows 98 SE)Ouvrez le Gestionnaire de périphériques de Windows afin de vousassurer que votre carte PCI a été correctement installée.
P73954ec-A-F5U508-man.qxd 22-11-2002 15:41 Page 7

8
Installation (suite)
1. Cliquez avec le bouton droit de la souris sur « My computer »(Poste de travail) et sélectionnez « Properties » (Propriétés).
2. Sélectionnez l’onglet « Device Manager » (Gestionnaire depériphériques).
3. Cliquez sur le signe plus (+) à côté de « Universal Serial Buscontrollers » (Contrôleur de bus USB).
La liste « Universal Serial Bus Controllers » comprend maintenantdeux entrées « NEC USB Open Host Controller », une entrée« Belkin USB 2.0 Hi-Speed Host Controller », une entrée « USB 2.0Root Hub Device » et deux entrées « USB Root Hub »(Concentrateur USB racine).
Remarque : Si votre ordinateur est équipé de ports USB intégrés ou sid’autres cartes contrôleur PCI USB sont installées, vous verrez desentrées de contrôleur USB et de concentrateur racine supplémentaires.
4. Cliquez sur le signe plus (+) à côté de « IEEE 1394 BusController » (Contrôleur de bus IEEE 1394).
La liste « IEEE 1394 Bus Controller » comporte maintenant une entrée« NEC Firewarden OHCI Compliant IEEE 1394 Host Controller ».
Remarque : Si votre ordinateur est équipé de ports IEEE 1394 intégrésou si d’autres cartes contrôleur PCI IEEE 1394 sont installées, vousverrez des entrées « IEEE 1394 Host Controller » supplémentaires.
Procédure d’installation sous Windows 2000Cette procédure permet d’installer deux contrôleurs OHCI USB 1.1,un contrôleur d’hôte EHCI USB 2.0 et un contrôleur d’hôteIEEE 1394.
1. Insérez le CD d’installation F5U508 dans le lecteur de CD-ROM.Après quelques instants, le menu principal démarreautomatiquement et affiche les options d’installationsdisponibles.
P73954ec-A-F5U508-man.qxd 22-11-2002 15:41 Page 8

Fr
9
Installation (suite)
2. Sélectionnez « Install USB 2.0 Driver » (Installer le piloteUSB 2.0). Une fois le pilote installé, sélectionnez « No, I willrestart my computer later » (Non, je redémarrerai monordinateur plus tard). Sélectionnez « Close » (Fermer). Ensuite,sélectionnez « Exit » (Quitter).
3. Ouvrez le menu « Start » (Démarrer) dans l’angle inférieurgauche de l’écran de Windows, puis sélectionnez « Shut Down »(Arrêter) et cliquez sur « OK ».
4. Une fois l’ordinateur complètement éteint, retirez son carter etrecherchez un emplacement PCI libre.
5. Retirez la protection du port correspondant à l’emplacement PCIque vous souhaitez utiliser. (Le carter est généralementmaintenu en place par une seule vis).
6. Insérez la carte PCI dans son emplacement. Appuyezsuffisamment afin qu’elle soit bien en place. Fixez la carte PCIavec la vis retirée au cours de l’étape N° 5 ci-dessus.
7. Après avoir installé la carte PCI, remettez le carter en place etallumez l’ordinateur.
8. Lorsque Windows redémarre, la carte PCI est détectée. Tous lespilotes requis sont automatiquement installés. Une foisl’installation terminée, il se peut qu’un message vous demandede cliquer sur « Finish » (Terminer) et de redémarrer.
Remarque : Selon la vitesse de votre ordinateur, 30 secondespeuvent être nécessaires pour la détection de la carte PCI.
Vérification de l’installation (Windows 2000)Après l’installation, ouvrez le Gestionnaire de périphériques deWindows afin de vous assurer que tous les composants de la cartePCI on été correctement installés.
P73954ec-A-F5U508-man.qxd 22-11-2002 15:41 Page 9

10
Installation (suite)
1. Cliquez avec le bouton droit de la souris sur « My Computer »(Poste de travail).
2. Sélectionnez l’option « Properties » (Propriétés).
3. Sélectionnez l’onglet « Hardware » (Matériel), puis cliquez sur lebouton « Device Manager » (Gestionnaire de périphériques).
4. Cliquez sur le signe plus (+) à côté de « Universal Serial Buscontrollers » (Contrôleur de bus USB).
La liste « Universal Serial Bus Controllers » comprend maintenantdeux entrées « NEC USB Open Host Controller », une entrée« Belkin USB 2.0 Hi-Speed Host Controller », une entrée « USB 2.0Root Hub Device » et deux entrées « USB Root Hub »(Concentrateur USB racine).
Remarque : Si votre ordinateur est équipé de ports USB intégrés ousi d’autres cartes contrôleur PCI USB sont installées, vous verrez desentrées de contrôleur racine supplémentaires.
5. Cliquez sur le signe plus (+) à côté de « IEEE 1394 BusController » (Contrôleur de bus IEEE 1394). La liste « IEEE 1394Bus Controller » comporte maintenant une entrée « NECFirewarden OHCI Compliant IEEE 1394 Host Controller ».
Remarque : Si votre ordinateur est équipé de ports IEEE 1394intégrés ou si d’autres cartes contrôleur d’hôte IEEE 1394 sontinstallées, vous verrez des entrées « IEEE 1394 Host Controller »supplémentaires.
P73954ec-A-F5U508-man.qxd 22-11-2002 15:41 Page 10
Fr
11
Installation (suite)
Procédure d’installation sous Windows MeCette procédure permet d’installer deux contrôleurs OHCI USB 1.1,un contrôleur d’hôte EHCI USB 2.0 et un contrôleur d’hôteIEEE 1394.
1. Insérez le CD d’installation F5U508 dans le lecteur de CD-ROM.Après quelques instants, le menu principal démarreautomatiquement et affiche les options d’installationsdisponibles.
2. Sélectionnez « Install USB 2.0 Driver » (Installer le piloteUSB 2.0). Une fois le pilote installé, sélectionnez « No, I willrestart my computer later » (Non, je redémarrerai monordinateur plus tard). Sélectionnez « Close » (Fermer). Ensuite,sélectionnez « Exit » (Quitter).
3. Ouvrez le menu « Start » (Démarrer) dans l’angle inférieurgauche de l’écran de Windows, puis sélectionnez « Shut Down »(Arrêter) et cliquez sur « OK ».
P73954ec-A-F5U508-man.qxd 22-11-2002 15:41 Page 11
12
Installation (suite)
4. Une fois l’ordinateur complètement éteint, retirez son carter etrecherchez un emplacement PCI libre.
5. Retirez la protection du port correspondant à l’emplacement PCIque vous souhaitez utiliser. (Le carter est généralementmaintenu en place par une seule vis.)
6. Insérez la carte PCI dans son emplacement. Appuyezsuffisamment afin qu’elle soit bien en place. Fixez la carte PCIavec la vis retirée au cours de l’étape N° 5 ci-dessus.
7. Après avoir installé la carte PCI, remettez le carter en place etallumez l’ordinateur.
8. Une fois que Windows a redémarré, la carte PCI est détectée.L’installation des pilotes requis commence alors.
Remarque : Selon la vitesse de votre ordinateur, 30 secondespeuvent être nécessaires pour la détection de la carte PCI.
9. Windows détecte la carte PCI en tant que « PCI Standard PCI toPCI Bridge ». La boîte de dialogue « Add New HardwareWizard » (Assistant Ajout de nouveau matériel) apparaît.Sélectionnez l’option « Automatic Search for the best driver foryour device (Recommended) » (Rechercher automatiquement lemeilleur pilote pour votre périphérique (Recommandé), puiscliquez sur « Next » (Suivant).
10. Windows trouve les pilotes correspondant à « PCI Standard PCIto PCI Bridge ». (Il se peut qu’un message de Windows vousdemande le CD d’installation de Windows. Si tel est le cas,insérez-le dans le lecteur de CD-ROM et continuez la procédured’installation.)
11. L’installation de la carte « PCI Standard PCI to PCI Bridge » estmaintenant terminée. Cliquez sur « Finish » (Terminer).
12. Windows détecte « NEC Firewarden OHCI Compliant IEEE 1394Host Controller ». Cliquez sur « Next » (Suivant).
P73954ec-A-F5U508-man.qxd 22-11-2002 15:41 Page 12
Fr
13
Installation (suite)
13. Sélectionnez l’option « Automatic Search for the best driver foryour device (Recommended) » (Rechercher automatiquement lemeilleur pilote pour votre périphérique (Recommandé), puiscliquez sur « Next » (Suivant).
14. Windows recherche maintenant le pilote requis dans sa base dedonnées.
15. L’installation du contrôleur d’hôte « NEC Firewarden OHCICompliant IEEE 1394 Host Controller » est maintenant terminée.Cliquez sur « Finish » (Terminer).
16. Windows détecte « NEC USB Open Host Controller (E13+) » et« Belkin USB 2.0 High Speed Host controller ». Le pilote requisest automatiquement installé. Vous n’avez aucune manipulationà effectuer.
17. Après l’installation des contrôleurs d’hôtes USB, Windowsdétecte « USB Root Hub » (Concentrateur USB racine) et installeautomatiquement le pilote de prise en charge requis. Cetteopération est effectuée une fois de plus.
18. Redémarrez votre ordinateur pour terminer l’installation.
P73954ec-A-F5U508-man.qxd 22-11-2002 15:41 Page 13
14
Installation (suite)
Vérification de l’installation (Windows Me)Une fois l’installation terminée, ouvrez le Gestionnaire depériphériques de Windows afin de vous assurer que la carte PCI aété correctement installée.
1. Cliquez avec le bouton droit de la souris sur « My computer »(Poste de travail) et sélectionnez « Properties » (Propriétés).
2. Sélectionnez l’onglet « Device Manager » (Gestionnaire depériphériques).
3. Cliquez sur le signe plus (+) à côté de « Universal Serial Buscontrollers » (Contrôleur de bus USB).
La liste « Universal Serial Bus Controllers » comprend maintenant deuxentrées « NEC USB Open Host Controller », une entrée « Belkin USB2.0 Hi-Speed Host Controller », une entrée « USB 2.0 Root HubDevice » et deux entrées « USB Root Hub » (Concentrateur USB racine).
Remarque : Si votre ordinateur est équipé de ports USB intégrés ousi d’autres cartes contrôleur PCI USB sont installées, vous verrez desentrées de contrôleur USB et de concentrateur racinesupplémentaires.
4. Cliquez sur le signe plus (+) à côté de « IEEE 1394 BusController » (Contrôleur de bus IEEE 1394).
La liste « IEEE 1394 Bus Controller » comporte maintenant une entrée« NEC Firewarden OHCI Compliant IEEE 1394 Host Controller ».
5. Cliquez sur le signe plus (+) à côté de « Network Adapters »(Cartes réseau).
6. La liste « Network Adapters » (Cartes réseau) comportemaintenant une entrée « NDIS 1394 Net Adapter ».
Remarque : Si votre ordinateur est équipé de ports IEEE 1394intégrés ou si d’autres cartes contrôleur PCI IEEE 1394 sontinstallées, vous verrez des entrées « IEEE 1394 Host Controller » et« NDIS 1394 Net Adapter » supplémentaires.
P73954ec-A-F5U508-man.qxd 22-11-2002 15:41 Page 14

Fr
15
Installation (suite)
Procédure d’installation sous Windows XPCette procédure permet d’installer deux contrôleurs OHCI USB 1.1,un contrôleur d’hôte EHCI USB 2.0 et un contrôleur d’hôteIEEE 1394.
Remarque importante : Il existe deux méthodes d’installation despilotes USB 2.0 requis sous Windows XP.
Si vous disposez d’une connexion à Internet : Windows XP vérifie lesite Web de mise à jour de Windows et télécharge la version la plusactuelle des pilotes de prise en charge USB 2.0 de Microsoft.Veuillez passer à la section « Avec une connexion à Internet ».
a. Si vous n’avez pas de connexion à Internet : Les pilotes USB 2.0sont installés à partir du CD d’installation F5U508 de Belkin.Veuillez passer à la section « Sans connexion à Internet ».
P73954ec-A-F5U508-man.qxd 22-11-2002 15:41 Page 15
16
Installation (suite)
Avec une connexion à Internet1. Assurez-vous que votre ordinateur est tout à fait éteint.
2. Retirez le carter de l’ordinateur et recherchez un emplacementPCI libre.
3. Retirez la protection du port correspondant à l’emplacement PCIque vous souhaitez utiliser. (Le carter est généralementmaintenu en place par une seule vis.)
4. Insérez la carte PCI dans son emplacement. Appuyezsuffisamment afin qu’elle soit bien en place. Fixez la carte PCIavec la vis retirée au cours de l’étape N° 3 ci-dessus.
5. Après avoir installé la carte PCI, remettez le carter en place etallumez l’ordinateur.
6. Lorsque Windows redémarre, la carte PCI est détectée. Lespilotes du contrôleur d’hôte IEEE 1394 et des deux contrôleursd’hôte USB OHCI sont automatiquement installés.
Remarque : Selon la vitesse de votre ordinateur, 45 secondespeuvent être nécessaires pour la détection de la carte PCI et letéléchargement de la mise à jour de Windows.
7. Windows recherche maintenant les pilotes « NEC PCI to USBEnhanced Host Controller B1 ». La fenêtre « Add New HardwareWizard » (Assistant Ajout de nouveau matériel) s’ouvre.Choisissez l’option « Install the software automatically(recommended) » (Installer le logiciel automatiquement(recommandé). Cliquez sur « Next » (Suivant). Windows XPvérifie le site Web de mise à jour de Windows et télécharge laversion la plus actuelle des pilotes de prise en charge USB 2.0de Microsoft.
P73954ec-A-F5U508-man.qxd 22-11-2002 15:41 Page 16

Fr
17
Installation (suite)
8. Le périphérique réseau IEEE 1394 est détecté et installé. Unmessage de Windows vous donne la possibilité de configurer unréseau. Si vous ne souhaitez pas configurer de réseau IEEE 1394,ignorez cette option. (Veuillez consulter vos fichiers d’aideWindows XP pour obtenir plus d’informations sur laconfiguration et l’utilisation d’un réseau IEEE 1394).
L’installation est terminée.
Sans connexion à Internet1. Insérez le CD d’installation F5U508 dans le lecteur de CD-ROM.
Après quelques instants, le menu principal démarreautomatiquement et affiche les options d’installationsdisponibles.
2. Sélectionnez « Install USB 2.0 Driver » (Installer le piloteUSB 2.0).
3. Windows affiche maintenant le message suivant : « The softwareyou are installing has not passed Windows logo testing » (Lelogiciel que vous installez n’a pas passé le test du logoWindows). Ignorez ce message et choisissez « ContinueAnyway » (Poursuivre).
4. Un message de Windows vous demande maintenant deredémarrer votre ordinateur. Sélectionnez « No, I will restart mycomputer later » (Non, je redémarrerai mon ordinateur plustard). Cliquez sur « Close » (Fermer).
5. Ouvrez le menu « Start » (Démarrer) dans l’angle inférieurgauche de l’écran de Windows, puis sélectionnez « Shut Down »(Arrêter) et cliquez sur « OK ».
6. Une fois l’ordinateur complètement éteint, retirez son carter etrecherchez un emplacement PCI libre.
P73954ec-A-F5U508-man.qxd 22-11-2002 15:41 Page 17
18
Installation (suite)
7. Retirez la protection du port correspondant à l’emplacement PCIque vous souhaitez utiliser. (Le carter est généralementmaintenu en place par une seule vis).
8. Insérez la carte PCI dans son emplacement. Appuyezsuffisamment afin qu’elle soit bien en place. Fixez la carte PCIavec la vis retirée au cours de l’étape N° 7 ci-dessus.
9. Après avoir installé la carte PCI, remettez le carter en place etallumez l’ordinateur.
10. Lorsque Windows redémarre, la carte PCI est détectée. Lespilotes du contrôleur d’hôte IEEE 1394 et des deux contrôleursd’hôte USB OHCI sont automatiquement installés.
Remarque : Selon la vitesse de votre ordinateur, 30 secondespeuvent être nécessaires pour la détection de la carte PCI.
11. Windows recherche maintenant les pilotes « Belkin USB 2.0 HighSpeed Host Controller ». La fenêtre « Add New HardwareWizard » (Assistant Ajout de nouveau matériel) s’ouvre.Choisissez l’option « Install the software automatically(recommended) » (Installer le logiciel automatiquement(recommandé). Cliquez sur « Next » (Suivant).
12. Les pilotes du contrôleur d’hôte « Belkin USB 2.0 High SpeedHost Controller » sont recherchés. Windows affiche le messagesuivant : « The software you are installing has not passedWindows logo testing » (Le logiciel que vous installez n’a paspassé le test du logo Windows). Ignorez ce message etchoisissez « Continue Anyway » (Poursuivre).
13.L’installation des pilotes « Belkin USB 2.0 High Speed Host Controller »est maintenant terminée. Cliquez sur « Finish » (Terminer).
14. Windows détecte le concentrateur racine « USB 2.0 Root HubDevice ». Cliquez sur « Next » (Suivant).
P73954ec-A-F5U508-man.qxd 22-11-2002 15:41 Page 18

Fr
19
Installation (suite)
15. Les pilotes du concentrateur racine « USB 2.0 Root HubDevice » sont recherchés. Windows affiche le message suivant :« The software you are installing has not passed Windows logotesting » (Le logiciel que vous installez n’a pas passé le test dulogo Windows). Ignorez ce message et choisissez « ContinueAnyway » (Poursuivre).
16. L’installation du concentrateur racine « USB 2.0 Root HubDevice » est maintenant terminée. Cliquez sur « Finish »(Terminer).
17. Le périphérique réseau IEEE 1394 est détecté et installé. Unmessage de Windows vous donne la possibilité de configurer unréseau. Si vous ne souhaitez pas configurer de réseau IEEE 1394,ignorez cette option. (Veuillez consulter vos fichiers d’aideWindows XP pour obtenir plus d’informations sur laconfiguration et l’utilisation d’un réseau IEEE 1394.)
L’installation est terminée.
Vérification de l’installation (Windows XP)Une fois l’installation terminée, ouvrez le Gestionnaire depériphériques afin de vous assurer que la carte PCI a étécorrectement installée.
1. Cliquez avec le bouton droit de la souris sur « My Computer »(Poste de travail).
2. Sélectionnez l’option « Properties » (Propriétés).
3. Sélectionnez l’onglet « Hardware » (Matériel), puis cliquez sur lebouton « Device Manager » (Gestionnaire de périphériques).
4. Cliquez sur le signe plus (+) à côté de « Universal Serial Buscontrollers » (Contrôleur de bus USB).
P73954ec-A-F5U508-man.qxd 22-11-2002 15:41 Page 19

20
Installation (suite)
La liste « Universal Serial Bus Controllers » comprend maintenantdeux entrées « NEC USB Open Host Controller », une entrée« Belkin USB 2.0 Hi-Speed Host Controller », une entrée « USB 2.0Root Hub Device » et deux entrées « USB Root Hub »(Concentrateur USB racine).
Remarque : Si votre ordinateur est équipé de ports USB intégrés ousi d’autres cartes contrôleur PCI USB sont installées, vous verrez desentrées de contrôleur racine supplémentaires.
5. Cliquez sur le signe plus (+) à côté de « IEEE 1394 BusController » (Contrôleur de bus IEEE 1394).
La liste « IEEE 1394 Bus Controller » comporte maintenant uneentrée « NEC Firewarden OHCI Compliant IEEE 1394 HostController ».
6. Cliquez sur le signe plus (+) à côté de « Network Adapters »(Cartes réseau).
La liste « Network Adapters » (Cartes réseau) comporte maintenantune entrée « NDIS 1394 Net Adapter ».
Remarque : Si votre ordinateur est équipé de ports IEEE 1394intégrés ou si d’autres cartes contrôleur PCI IEEE 1394 sontinstallées, vous verrez des entrées « IEEE 1394 Host Controller » et« NDIS 1394 Net Adapter » supplémentaires.
P73954ec-A-F5U508-man.qxd 22-11-2002 15:41 Page 20

Fr
21
Installation d’un concentrateur à haut débit USB 2.0
Remarque : Lors de l’installation d’un pilote de carte PCI à hautdébit USB 2.0 de Belkin, un pilote de concentrateur à haut débitUSB 2.0 est également installé. Lorsque vous reliez pour la premièrefois un concentrateur à haut débit USB 2.0 à votre carte PCI, suivezla procédure ci-dessous.
1. Allumez l’ordinateur.
2. Branchez l’adaptateur de courant (livré avec le concentrateur) surle concentrateur et sur une prise électrique.
3. Branchez l’extrémité plate du câble USB fourni avec leconcentrateur sur votre ordinateur et l’extrémité carrée du câbleau port en voie ascendante du concentrateur.
4. Windows détecte automatiquement le concentrateur et lance lafenêtre « Add New Hardware Wizard » (Assistant Ajout denouveau matériel). L’assistant recherche les pilote pour« Generic USB Hub on USB 2.0 Bus » (Concentrateur USBgénérique sur le bus USB 2.0). Cliquez sur « Next » (Suivant).
(Si les résultats affichent des pilotes pour « Generic USB Hub »(Concentrateur USB générique) à la place, annulez l’assistant,revenez dans le Gestionnaire de périphériques et confirmez que lespilotes Belkin 2.0 ont été correctement installés.)
5. Choisissez l’option « Search for the best driver for your device(Recommended) » (Rechercher le meilleur pilote pour votrepériphérique (Recommandé). Cliquez sur « Next » (Suivant) pourcontinuer.
6. Windows effectue maintenant une recherche dans la base dedonnées de pilotes de votre disque dur. Désélectionnez toutesles cases, puis cliquez sur « Next ».
7. Windows recherche le pilote pour « Generic USB Hub on USB2.0 Bus » (Concentrateur USB générique sur le bus USB 2.0).Cliquez sur « Next » (Suivant).
8. Cliquez sur « Finish » (Terminer). L’installation de votreconcentrateur est maintenant terminée.
P73954ec-A-F5U508-man.qxd 22-11-2002 15:41 Page 21

22
Offre logicielle à valeur ajoutée
Le CD d’installation de la carte PCI à haut débit USB 2.0 etFireWire de Belkin contient des logiciels de retouche photoétonnants de Ulead® :
Ulead VideoStudio® 5.0Ulead VideoStudio 5.0 est l’une des applications de montage vidéogrand public les plus complètes sur le marché. Elle vous permet decapturer des images DV haute qualité, de les modifier et de lesexporter selon le moyen qui vous convient. VideoStudio vous permetd’ajouter des titres accrocheurs, des transitions 3D, des effets de filtrevidéo, des superpositions graphiques/vidéo ainsi que des séquencesmusicales ou de commentaires hors champ. Vous pouvez égalementpartager vos séquences vidéo sur cassette, CD et sur le Web.
Ulead Photo Express™ 4.0 My Custom EditionCe logiciel vous apporte tout ce dont vous avez besoin pour vouslancer dans la retouche photo et le partage de vos photos ! Il vouspermet d’utiliser des photos de toutes sortes, puis de les trier enquelques secondes à l’aide d’un mode d’affichage visuel miniature.Vous avez également la possibilité de retoucher vos photos grâce àdes outils rapides et simples d’emploi.
Ulead Cool 360™
Cette application vous permet de transformer rapidement etfacilement une série de photos en panorama à 360° ou grand angle.Grâce à Cool 360, vous pouvez enregistrer vos panoramas dans desformats de fichiers courants dont le format MOV, des fichiers depanorama exécutables par courrier électronique ainsi que desfichiers HTML pour l’envoi de panoramas sur le Web. Ce logicielvous permet de créer en toute facilité des économiseurs d’écranpersonnalisés, d’imprimer des panoramas sur une ou plusieurspages et de copier ces panoramas dans des documents deprésentation et de bureau.
P73954ec-A-F5U508-man.qxd 22-11-2002 15:41 Page 22
Fr
Information
Réglementation FCC
Déclaration de conformité CENous, Belkin Components, déclarons sous notre seule responsabilité que le produit F5U508,auquel se réfère la présente déclaration, est conforme à la norme sur les émissions EN5500221998 et aux normes sur l'immunité EN550024 1998, EN61000-3-2 et EN61000-3-3.
Garantie limitée à vie du produit de Belkin ComponentsBelkin Components garantit ce produit contre tout défaut matériel ou de fabrication pendanttoute sa durée de vie. Si l’appareil s’avère défectueux, Belkin Components le réparera ou leremplacera gratuitement, à sa convenance, à condition que le produit soit retourné, port payé,pendant la durée de la garantie, au distributeur Belkin agréé auquel le produit a été acheté. Unepreuve d’achat peut être exigée.
La présente garantie est caduque si le produit a été endommagé par accident, abus, usageimpropre ou mauvaise application, si le produit a été modifié sans autorisation écrite de Belkin, ousi un numéro de série Belkin a été supprimé ou rendu illisible.
LA GARANTIE ET LES VOIES DE RECOURS SUSMENTIONNÉES FONT FOI EXCLUSIVEMENT ETREMPLACENT TOUTES LES AUTRES, ORALES OU ÉCRITES, EXPLICITES OU IMPLICITES. BELKINREJETTE EXPRESSÉMENT TOUTES LES GARANTIES IMPLICITES, Y COMPRIS MAIS SANSRESTRICTION, LES GARANTIES AFFÉRENTES À LA QUALITÉ LOYALE ET MARCHANDE ET À LAPOSSIBILITÉ D’UTILISATION À UNE FIN DONNÉE.
Aucun dépositaire, représentant ou employé de Belkin n’est habilité à apporter des modificationsou adjonctions à la présente garantie, ni à la proroger.
BELKIN N’EST PAS RESPONSABLE DES DOMMAGES SPÉCIAUX, DIRECTS OU INDIRECTS,DÉCOULANT D’UNE RUPTURE DE GARANTIE, OU EN VERTU DE TOUTE AUTRE THÉORIEJURIDIQUE, Y COMPRIS MAIS SANS RESTRICTION LES PERTES DE BÉNÉFICES, TEMPSD’ARRÊT, FONDS DE COMMERCE, REPROGRAMMATION OU REPRODUCTION DEPROGRAMMES OU DE DONNÉES MÉMORISÉS OU UTILISÉS AVEC DES PRODUITS BELKIN OUDOMMAGES CAUSÉS À CES PROGRAMMES OU À CES DONNÉES.
DECLARATION DE CONFORMITE AVEC LES REGLES FCCPOUR LA COMPATIBILITE ELECTROMAGNETIQUE
Nous, Belkin Components, sis au 501 West Walnut Street, Compton CA 90220, déclaronssous notre seule responsabilité que le produit
F5U508auquel se réfère la présente déclaration, est conforme à la partie XV des règles FCC. Lefonctionnement doit remplir les deux conditions suivantes : (1) ce périphérique ne doitpas causer d’interférences nuisibles et (2) ce périphérique doit accepter toute interférencereçue, y compris les interférences pouvant entraîner un fonctionnement non désiré.
23
P73954ec-A-F5U508-man.qxd 22-11-2002 15:41 Page 23

P73954ec-A-F5U508-man.qxd 22-11-2002 15:41 Page 24

Inhaltsverzeichnis
Einführung ......................................................................................1
Merkmale........................................................................................2
Technische Daten............................................................................3
Installation.......................................................................................5
Installieren eines Hispeed USB 2.0 Hubs .....................................21
Software Mehrwert-Bundle ..........................................................22
FCC-Erklärung / Garantie .............................................................23
De
P73954ec-A-F5U508-man.qxd 22-11-2002 15:41 Page 25

P73954ec-A-F5U508-man.qxd 22-11-2002 15:41 Page 26

Willkommen bei der Hispeed-Konnektivität von Belkin!Wir beglückwünschen Sie zum Kauf der Belkin USB 2.0/FireWireHispeed PCI-Karte.
Mit dieser Karte bringen Sie Ihren Computer auf den letztenStand der USB- und FireWire-Technologie. Ihnen steht eine ganzeReihe von Hochgeschwindigkeitsprodukten mit USB 2.0 oderFireWire zur Verfügung.
USB 2.0- und FireWire-Geräte, z.B. Festplatten, Scanner, Drucker,Videokameras usw., arbeiten wesentlich schneller als bisherigeSysteme. Bestehende USB-Geräte können Sie wie gewohntweiter verwenden. Bestimmte Altgeräte arbeiten mit dieser PCI-Karte sogar etwas besser. Folgen Sie den einfachenInstallationsanweisungen in diesem Handbuch, um Ihre PCI-Kartezum Laufen zu bringen, und genießen Sie die Schnelligkeit undBenutzerfreundlichkeit von Belkin!
Einführung
1
De
P73954ec-A-F5U508-man.qxd 22-11-2002 15:41 Page 1
2
Merkmale
• Drei USB Host-Controller auf derselben PCI-Karte
• 3 USB 2.0 Hispeed-Schnittstellen
• Ein IEEE 1394 Host-Controller
• 2 FireWire Hispeed-Schnittstellen
• Gleichzeitiger Anschluss von Geräten mit niedriger, voller undhoher Geschwindigkeit möglich
• Automatische Erkennung neuer Geräte und derGerätegeschwindigkeit noch während des Anschließens
• Abwärtskompatibel zu USB 1.1-Geräten
• Entspricht allen geltenden USB-Spezifikationen
• Volle Kompatibilität zu OHCI-kompatiblen FireWire-Peripheriegeräten
• Plug-and-Play-fähig
• Interner Stromanschluss
Packungsinhalt1 x Belkin USB 2.0 und FireWire Hispeed PCI-Karte
1 x FireWire-Kabel (6/4-polig)
1 x Benutzerhandbuch
1 x Installations-CD
P73954ec-A-F5U508-man.qxd 22-11-2002 15:41 Page 2

3
De
Technische Daten
USB-Spezifikationen• OHCI-kompatibel (USB 1.1 Host-Controller)
• EHCI-kompatibel (USB 2.0 Host-Controller)
• Entspricht PCI 2.1
• Strom: 500 mA pro Anschluss
• Entspricht USB 2.0
FireWire-Spezifikationen• Zwei externe IEEE 1394-Schnittstellen mit 400 Mbit/s
• OHCI 1.0-kompatibel
• PCI 2.1- und 2.2-kompatibel
• IEEE 1394a Rev 5-kompatibel
• Anschluss für interne Zusatzversorgung
• IT/AT FIFO-Puffer – 4k/2k
• IR/AR FIFO-Puffer – 4k/2k
P73954ec-A-F5U508-man.qxd 22-11-2002 15:41 Page 3
Technische Daten (Forts.)
4
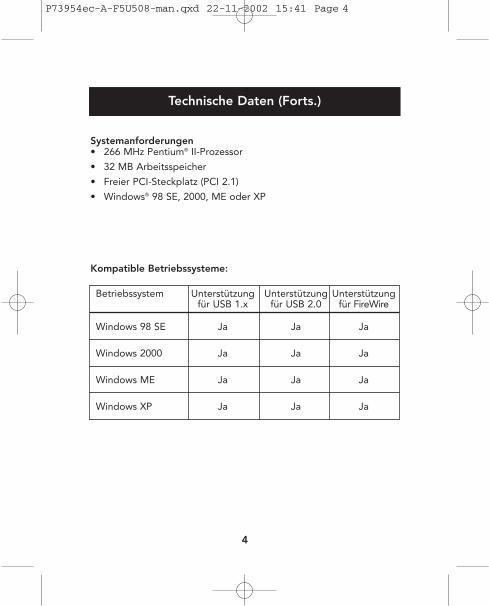
Systemanforderungen• 266 MHz Pentium® II-Prozessor
• 32 MB Arbeitsspeicher
• Freier PCI-Steckplatz (PCI 2.1)
• Windows® 98 SE, 2000, ME oder XP
Kompatible Betriebssysteme:
Betriebssystem Unterstützung Unterstützung Unterstützungfür USB 1.x für USB 2.0 für FireWire
Windows 98 SE Ja Ja Ja
Windows 2000 Ja Ja Ja
Windows ME Ja Ja Ja
Windows XP Ja Ja Ja
P73954ec-A-F5U508-man.qxd 22-11-2002 15:41 Page 4

De
5
Installation
Bitte folgen Sie dem Abschnitt, der Ihrem Windows Betriebssystementspricht.
Installation unter Windows 98 SEMit den folgenden Installationsschritten installieren Sie zwei USB 1.1OHCI-Controller, einen USB 2.0 EHCI Host-Controller und einenIEEE 1394 Host-Controller.
1. Legen Sie die F5U508 Installations-CD in das CD-ROM-Laufwerkein. Nach einigen Sekunden wird automatisch das Hauptmenügeöffnet. Es enthält die verfügbaren Installationsoptionen.
2. Wählen Sie Install USB 2.0 Driver” (USB 2.0-Treiber installieren).Wählen Sie nach der Treiberinstallation die Option “No, I willrestart my computer later” (Computer erst später neu starten).Wählen Sie “Schließen”. Wählen Sie dann “Beenden”.
3. Öffnen Sie das Start-Menü unten links auf dem Windows-Bildschirm, und wählen Sie “Beenden” und “OK”.
4. Wenn der Computer vollständig heruntergefahren ist, schaltenSie ihn ab und trennen Sie ihn vom Netz (Netzkabel ziehen!).Öffnen Sie dann die Computerabdeckung, und suchen Sie einenfreien PCI-Steckplatz.
5. Nehmen Sie die Schnittstellenabdeckung des gewünschten PCI-Steckplatzes ab. (Die Abdeckung ist normalerweise mit einereinzelnen Schraube befestigt.)
6. Stecken Sie die PCI-Karte in den Steckplatz ein. Die Karte mussfest im Steckplatz sitzen. Schieben Sie die Karte nötigenfalls mitleichtem Druck in den Steckplatz. Befestigen Sie die PCI-Kartemit der Schraube, die Sie in Schritt 5 gelöst haben.
7. Befestigen Sie die Computerabdeckung nach dem Einbau derPCI-Karte, verbinden Sie den Computer wieder mit dem Netz,und schalten Sie ihn ein.
P73954ec-A-F5U508-man.qxd 22-11-2002 15:41 Page 5

6
Installation (Fortsetzung)
8. Nach dem Neustart von Windows wird die PCI-Karte erkannt,und die erforderlichen Treiber werden installiert.
Hinweis: Je nach Computergeschwindigkeit kann es bis zu 30Sekunden dauern, bis die PCI-Karte erkannt wird.
9. Windows erkennt die PCI-Karte als “PCI Standard PCI to PCIBridge” (PCI-Standard PCI/PCI-Brücke). Das Dialogfeld“Hardware-Assistent” wird geöffnet. Klicken Sie auf “Weiter”.
10. Wählen Sie die Option “Nach dem besten Treiber für das Gerätsuchen”, und klicken Sie auf “Weiter”.
11. Heben Sie die Markierung aller Kontrollkästchen auf, und klickenSie auf “Weiter”.
12. Windows sucht die Treiber für die Karte “PCI Standard PCI toPCI Bridge”. Klicken Sie auf “Weiter”.
Windows fordert Sie möglicherweise auf, die Windows CDeinzulegen. Ist dies der Fall, legen Sie die CD-ROM ein, und setzenSie die Installation fort.
13. Die Installation der Karte “PCI Standard PCI to PCI Bridge” wirdjetzt abgeschlossen. Klicken Sie auf “Fertigstellen”.
14. Windows erkennt den FireWire Host-Controller als “NECFirewarden OHCI Compliant IEEE 1394 Host Controller”. KlickenSie auf “Weiter”.
15. Wählen Sie die Option “Nach dem besten Treiber für das Gerätsuchen”, und klicken Sie auf “Weiter”.
16. Heben Sie die Markierung aller Kontrollkästchen auf, und klickenSie auf “Weiter”.
17. Windows sucht jetzt in der Treiberdatenbank nach dembenötigten Treiber. Klicken Sie auf “Weiter”.
18. Die Installation des IEEE 1394 Host-Controllers ist jetztabgeschlossen. Klicken Sie auf “Fertigstellen”.
P73954ec-A-F5U508-man.qxd 22-11-2002 15:41 Page 6

De
7
Installation (Fortsetzung)
19. Windows erkennt den USB-Controller als “NEC USB Open HostController”. Klicken Sie auf “Weiter”.
20. Wählen Sie die Option “Nach dem besten Treiber für das Gerätsuchen”, und klicken Sie auf “Weiter”.
21. Heben Sie die Markierung aller Kontrollkästchen auf, und klickenSie auf “Weiter”.
22. Windows sucht die Treiber für den “NEC USB Open HostController”. Klicken Sie auf “Weiter”.
23. Nachdem Windows die Treiber installiert hat, ist der erste Host-Controller eingerichtet. Klicken Sie auf “Fertigstellen”.
24. Der Hardware-Assistent wiederholt den Installationsvorgang fürden zweiten OHCI-Host-Controller.
25. Wiederholen Sie die Schritte 20-23 .
26. Windows erkennt den USB 2.0-Controller als “Belkin USB 2.0High Speed Host Controller”. Klicken Sie auf “Weiter”.
27. Windows sucht die erforderlichen Treiber und schließt dieInstallation des Belkin USB 2.0 Controllers und der USB 2.0 Hub-Einheit ab.
Die Installation des PCI-Karte ist jetzt abgeschlossen.
Überprüfen der Installation (Windows 98 SE)Überprüfen Sie im Windows Geräte-Manager, ob die PCI-Karteordnungsgemäß installiert worden ist.
P73954ec-A-F5U508-man.qxd 22-11-2002 15:41 Page 7
8
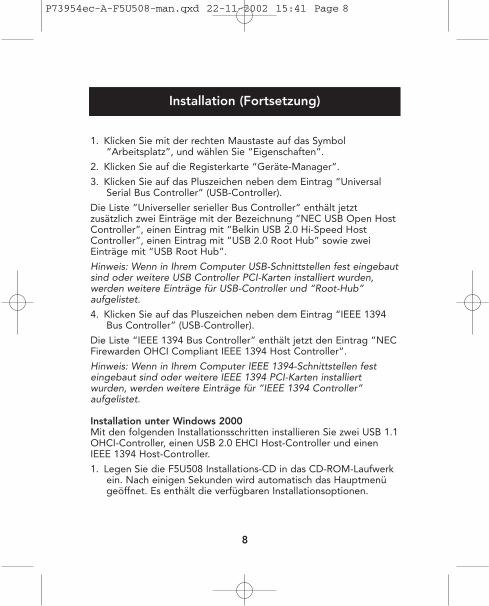
Installation (Fortsetzung)
1. Klicken Sie mit der rechten Maustaste auf das Symbol“Arbeitsplatz”, und wählen Sie “Eigenschaften”.
2. Klicken Sie auf die Registerkarte “Geräte-Manager”.
3. Klicken Sie auf das Pluszeichen neben dem Eintrag “UniversalSerial Bus Controller” (USB-Controller).
Die Liste “Universeller serieller Bus Controller” enthält jetztzusätzlich zwei Einträge mit der Bezeichnung “NEC USB Open HostController”, einen Eintrag mit “Belkin USB 2.0 Hi-Speed HostController”, einen Eintrag mit “USB 2.0 Root Hub” sowie zweiEinträge mit “USB Root Hub”.
Hinweis: Wenn in Ihrem Computer USB-Schnittstellen fest eingebautsind oder weitere USB Controller PCI-Karten installiert wurden,werden weitere Einträge für USB-Controller und “Root-Hub”aufgelistet.
4. Klicken Sie auf das Pluszeichen neben dem Eintrag “IEEE 1394Bus Controller” (USB-Controller).
Die Liste “IEEE 1394 Bus Controller” enthält jetzt den Eintrag “NECFirewarden OHCI Compliant IEEE 1394 Host Controller”.
Hinweis: Wenn in Ihrem Computer IEEE 1394-Schnittstellen festeingebaut sind oder weitere IEEE 1394 PCI-Karten installiertwurden, werden weitere Einträge für “IEEE 1394 Controller”aufgelistet.
Installation unter Windows 2000Mit den folgenden Installationsschritten installieren Sie zwei USB 1.1OHCI-Controller, einen USB 2.0 EHCI Host-Controller und einenIEEE 1394 Host-Controller.
1. Legen Sie die F5U508 Installations-CD in das CD-ROM-Laufwerkein. Nach einigen Sekunden wird automatisch das Hauptmenügeöffnet. Es enthält die verfügbaren Installationsoptionen.
P73954ec-A-F5U508-man.qxd 22-11-2002 15:41 Page 8

De
9
Installation (Fortsetzung)
2. Wählen Sie “Install USB 2.0 Driver” (USB 2.0-Treiber installieren).Wählen Sie nach der Treiberinstallation die Option “No, I willrestart my computer later” (Computer erst später neu starten).Wählen Sie “Schließen”. Wählen Sie dann “Beenden”.
3. Öffnen Sie das Start-Menü unten links auf dem Windows-Bildschirm, und wählen Sie “Beenden” und “OK”.
4. Wenn der Computer vollständig heruntergefahren ist, schaltenSie ihn ab und trennen Sie ihn vom Netz (Netzkabel ziehen!).Öffnen Sie dann die Computerabdeckung, und suchen Sie einenfreien PCI-Steckplatz.
5. Nehmen Sie die Schnittstellenabdeckung des gewünschten PCI-Steckplatzes ab. (Die Abdeckung ist normalerweise mit einereinzelnen Schraube befestigt.)
6. Stecken Sie die PCI-Karte in den Steckplatz ein. Die Karte mussfest im Steckplatz sitzen. Schieben Sie die Karte nötigenfalls mitleichtem Druck in den Steckplatz. Befestigen Sie die PCI-Kartemit der Schraube, die Sie in Schritt 5 gelöst haben.
7. Befestigen Sie die Computerabdeckung nach dem Einbau derPCI-Karte, verbinden Sie den Computer wieder mit dem Netz,und schalten Sie ihn ein.
8. Beim Neustart von Windows wird die PCI-Karte erkannt. Alleerforderlichen Treiber werden automatisch installiert. Nach derInstallation werden Sie möglicherweise aufgefordert, auf“Fertigstellen” zu klicken und den Computer neu zu starten.
Hinweis: Je nach Computergeschwindigkeit kann es bis zu 30Sekunden dauern, bis die PCI-Karte erkannt wird.
Überprüfen der Installation (Windows 2000)Überprüfen Sie nach der Installation im Windows Geräte-Manager,ob alle Komponenten der PCI-Karte ordnungsgemäß installiertworden ist.
P73954ec-A-F5U508-man.qxd 22-11-2002 15:41 Page 9

10
Installation (Fortsetzung)
1. Klicken Sie mit der rechten Maustaste auf das Symbol“Arbeitsplatz”.
2. Wählen Sie “Eigenschaften”.
3. Wählen Sie die Registerkarte “Hardware” aus, und klicken Sie aufdie Schaltfläche “Geräte-Manager”.
4. Klicken Sie auf das Pluszeichen neben dem Eintrag “UniversalSerial Bus Controller” (USB-Controller).
Die Liste “Universeller serieller Bus Controller” enthält jetztzusätzlich zwei Einträge mit der Bezeichnung “NEC USB Open HostController”, einen Eintrag mit “Belkin USB 2.0 Hi-Speed HostController” einen Eintrag mit “USB 2.0 Root Hub” sowie zweiEinträge mit “USB Root Hub”.
Hinweis: Wenn in Ihrem Computer USB-Schnittstellen fest eingebautsind oder weitere USB PCI Controller installiert wurden, werdenweitere Einträge für den “Root-Hub” aufgelistet.
5. Klicken Sie auf das Pluszeichen neben dem Eintrag “IEEE 1394Bus Controller” (USB-Controller). Die Liste “IEEE 1394 BusController” enthält jetzt den Eintrag “NEC Firewarden OHCICompliant IEEE 1394 Host Controller”.
Hinweis: Wenn in Ihrem Computer IEEE 1394-Schnittstellen festeingebaut sind oder weitere IEEE 1394 Host-Controller installiertwurden, werden weitere Einträge unter “IEEE 1394 Host Controller”aufgelistet.
P73954ec-A-F5U508-man.qxd 22-11-2002 15:41 Page 10

De
11
Installation (Fortsetzung)
Installation unter Windows MEMit den folgenden Installationsschritten installieren Sie zwei USB 1.1OHCI-Controller, einen USB 2.0 EHCI Host-Controller und einenIEEE 1394 Host-Controller.
1. Legen Sie die F5U508 Installations-CD in das CD-ROM-Laufwerkein. Nach einigen Sekunden wird automatisch das Hauptmenügeöffnet. Es enthält die verfügbaren Installationsoptionen.
2. Wählen Sie “Install USB 2.0 Driver” (USB 2.0-Treiber installieren).Wählen Sie nach der Treiberinstallation die Option “No, I willrestart my computer later” (Computer erst später neu starten).Wählen Sie “Schließen”. Wählen Sie dann “Beenden”.
3. Öffnen Sie das Start-Menü unten links auf dem Windows-Bildschirm, und wählen Sie “Beenden” und “OK”.
4. Wenn der Computer vollständig heruntergefahren ist, schaltenSie ihn ab und trennen Sie ihn vom Netz (Netzkabel ziehen!).Öffnen Sie dann die Computerabdeckung, und suchen Sie einenfreien PCI-Steckplatz.
P73954ec-A-F5U508-man.qxd 22-11-2002 15:41 Page 11
12
Installation (Fortsetzung)
5. Nehmen Sie die Schnittstellenabdeckung des gewünschten PCI-Steckplatzes ab. (Die Abdeckung ist normalerweise mit einereinzelnen Schraube befestigt.)
6. Stecken Sie die PCI-Karte in den Steckplatz ein. Die Karte mussfest im Steckplatz sitzen. Schieben Sie die Karte nötigenfalls mitleichtem Druck in den Steckplatz. Befestigen Sie die PCI-Kartemit der Schraube, die Sie in Schritt 5 gelöst haben.
7. Befestigen Sie die Computerabdeckung nach dem Einbau derPCI-Karte, verbinden Sie den Computer wieder mit dem Netz,und schalten Sie ihn ein.
8. Nach dem Neustart von Windows wird die PCI-Karte erkannt,und die erforderlichen Treiber werden installiert.
Hinweis: Je nach Computergeschwindigkeit kann es bis zu 30Sekunden dauern, bis die PCI-Karte erkannt wird.
9. Windows erkennt die PCI-Karte als “PCI Standard PCI to PCIBridge” (PCI-Standard PCI/PCI-Brücke). Das Dialogfeld“Hardware-Assistent” wird geöffnet. Wählen Sie die Option“Automatic Search for the best driver for your device[Recommended]” (“Nach dem besten Treiber für das Gerätsuchen [empfohlen]”), und klicken Sie auf “Weiter”.
10. Windows sucht die Treiber für die Karte “PCI Standard PCI toPCI Bridge”. Windows fordert Sie möglicherweise auf, dieWindows CD einzulegen. Ist dies der Fall, legen Sie die CD-ROM ein, und setzen Sie die Installation fort.
11. Die Installation der Karte “PCI Standard PCI to PCI Bridge” wirdjetzt abgeschlossen. Klicken Sie auf “Fertigstellen”.
12. Windows erkennt den FireWire Host-Controller als “NECFirewarden OHCI Compliant IEEE 1394 Host Controller”. KlickenSie auf “Weiter”.
P73954ec-A-F5U508-man.qxd 22-11-2002 15:41 Page 12
De
13
Installation (Fortsetzung)
13. Wählen Sie die Option “Automatic Search for the best driver foryour device [Recommended]” (“Nach dem besten Treiber fürdas Gerät suchen [empfohlen]”), und klicken Sie auf “Weiter”.
14. Windows sucht jetzt in der Treiberdatenbank nach dembenötigten Treiber.
15. Die Installation des IEEE 1394 Host-Controllers ist jetztabgeschlossen. Klicken Sie auf “Fertigstellen”.
16. Windows erkennt den USB-Controller als “NEC USB Open HostController (E13+)” und den USB 2.0-Controller als “Belkin USB2.0 High Speed Host controller”. Die erforderlicheTreiberunterstützung wird automatisch installiert.Benutzereingaben sind nicht erforderlich.
17. Nach der Installation der beiden USB Host-Controller findetWindows den “USB Root Hub” und installiert automatisch diebenötigte Treiberunterstützung. Dieser Vorgang wird nochmalswiederholt.
18. Führen Sie einen Neustart durch, um die Installationabzuschließen.
P73954ec-A-F5U508-man.qxd 22-11-2002 15:41 Page 13
14
Installation (Fortsetzung)
Überprüfen der Installation (Windows ME)Überprüfen Sie nach der Installation im Windows Geräte-Manager,ob die PCI-Karte ordnungsgemäß installiert worden ist.
1. Klicken Sie mit der rechten Maustaste auf das Symbol“Arbeitsplatz”, und wählen Sie “Eigenschaften”.
2. Klicken Sie auf die Registerkarte “Geräte-Manager”.
3. Klicken Sie auf das Pluszeichen neben dem Eintrag “UniversalSerial Bus Controller” (USB-Controller).
Die Liste “Universeller serieller Bus Controller” enthält jetztzusätzlich zwei Einträge mit der Bezeichnung “NEC USB Open HostController”, einen Eintrag mit “Belkin USB 2.0 Hi-Speed HostController”, einen Eintrag mit “USB 2.0 Root Hub” sowie zweiEinträge mit “USB Root Hub”.
Hinweis: Wenn in Ihrem Computer USB-Schnittstellen fest eingebautsind oder weitere USB Controller PCI-Karten installiert wurden,werden weitere Einträge für USB-Controller und “Root-Hub”aufgelistet.
4. Klicken Sie auf das Pluszeichen neben dem Eintrag “IEEE 1394Bus Controller” (USB-Controller).
Die Liste “IEEE 1394 Bus Controller” enthält jetzt den Eintrag “NECFirewarden OHCI Compliant IEEE 1394 Host Controller”.
5. Klicken Sie auf das Pluszeichen neben dem Eintrag“Netzwerkadapter”.
6. Die Liste “Netzwerkadapter” enthält jetzt den Eintrag “NDIS1394 Net Adapter”.
Hinweis: Wenn in Ihrem Computer IEEE 1394-Schnittstellen festeingebaut sind oder weitere IEEE 1394 Host-Controller PCI-Karteninstalliert wurden, werden weitere Einträge (“IEEE 1394 HostController” und “NDIS 1394 Net Adapter”) aufgelistet.
P73954ec-A-F5U508-man.qxd 22-11-2002 15:41 Page 14
De
15
Installation (Fortsetzung)
Installation unter Windows XPMit den folgenden Installationsschritten installieren Sie zwei USB 1.1OHCI-Controller, einen USB 2.0 EHCI Host-Controller und einenIEEE 1394 Host-Controller.
Wichtiger Hinweis: Für die Installation der erforderlichen USB 2.0Treiber unter Windows XP gibt es zwei Möglichkeiten.
Bei vorhandenem Internet-Zugang: Windows XP prüft dieAktualisierungs-Website für Windows und lädt die jeweils aktuelleVersion der Microsoft USB 2.0 Treiber herunter. Bitte fahren Sie mitdem Abschnitt “Installation per Internet” fort.
a) Wenn Sie keinen Zugang zum Internet besitzen: Die USB 2.0Treiber werden von der Belkin F5U508 Installations-CD ausinstalliert. Bitte fahren Sie mit dem Abschnitt “Installation ohneInternet-Anbindung” fort.
P73954ec-A-F5U508-man.qxd 22-11-2002 15:41 Page 15
16
Installation (Fortsetzung)
Installation per Internet1. Stellen Sie sicher, dass der Computer heruntergefahren und vom
Stromnetz getrennt ist.
2. Nehmen Sie die Computerabdeckung ab, und suchen Sie einenfreien PCI-Steckplatz für die Karte.
3. Nehmen Sie die Schnittstellenabdeckung des gewünschten PCI-Steckplatzes ab. (Die Abdeckung ist normalerweise mit einereinzelnen Schraube befestigt.)
4. Stecken Sie die PCI-Karte in den Steckplatz ein. Die Karte mussfest im Steckplatz sitzen. Schieben Sie die Karte nötigenfalls mitleichtem Druck in den Steckplatz. Befestigen Sie die PCI-Kartemit der Schraube, die Sie in Schritt 3 gelöst haben.
5. Befestigen Sie die Computerabdeckung nach dem Einbau derPCI-Karte, verbinden Sie den Computer wieder mit dem Netz,und schalten Sie ihn ein.
6. Beim Neustart erkennt Windows die PCI-Karte. Die Treiber fürden IEEE 1394 Host-Controller und die beiden USB OHCI Host-Controller werden automatisch installiert.
Hinweis: Je nach Computergeschwindigkeit kann es bis zu 45Sekunden dauern, bis die PCI-Karte erkannt und das Herunterladender Windows-Aktualisierung abgeschlossen wird.
7. Windows sucht jetzt nach den Treibern für den Host-Controller“NEC PCI to USB Enhanced Host Controller B1”. Der Hardware-Assistent wird geöffnet. Wählen Sie “Software automatischinstallieren (empfohlen)”. Klicken Sie auf “Weiter”. Windows XPprüft die Aktualisierungs-Website für Windows und lädt diejeweils aktuelle Version der Microsoft USB 2.0 Treiber herunter.
P73954ec-A-F5U508-man.qxd 22-11-2002 15:41 Page 16

De
17
Installation (Fortsetzung)
8. Die IEEE 1394 Netzwerkschnittstelle wird erkannt und installiert.Windows bietet Ihnen an, ein Netzwerk einzurichten. Wenn Siekein IEEE 1394 Netzwerk einrichten möchten, ignorieren Siediese Option. (In der Windows XP Hilfe-Datei finden Sie weitereInformationen zur Einrichtung und Verwendung eines IEEE 1394-Netzwerks.)
Die Installation ist damit abgeschlossen.
Installation ohne Internet-Anbindung1. Legen Sie die F5U508 Installations-CD in das CD-ROM-Laufwerk
ein. Nach einigen Sekunden wird automatisch das Hauptmenügeöffnet. Es enthält die verfügbaren Installationsoptionen.
2. Wählen Sie “Install USB 2.0 Driver” (USB 2.0-Treiber installieren).
3. Windows meldet jetzt, dass die zu installierende Software denWindows Logo-Test nicht bestanden hat. Ignorieren Sie dieMeldung und klicken Sie auf “Fortsetzen”.
4. Windows fordert Sie auf, den PC neu zu starten. Wählen Sie“Nein, ich führe den Neustart später durch”. Klicken Sie auf“Schließen”.
5. Öffnen Sie das Start-Menü unten links auf dem Windows-Bildschirm, und wählen Sie “Beenden” und “OK”.
6. Wenn der Computer vollständig heruntergefahren ist, schaltenSie ihn ab und trennen Sie ihn vom Netz (Netzkabel ziehen!).Öffnen Sie dann die Computerabdeckung, und suchen Sie einenfreien PCI-Steckplatz.
P73954ec-A-F5U508-man.qxd 22-11-2002 15:41 Page 17
18
Installation (Fortsetzung)
7. Nehmen Sie die Schnittstellenabdeckung des gewünschten PCI-Steckplatzes ab. (Die Abdeckung ist normalerweise mit einereinzelnen Schraube befestigt.)
8. Stecken Sie die PCI-Karte in den Steckplatz ein. Die Karte mussfest im Steckplatz sitzen. Schieben Sie die Karte nötigenfalls mitleichtem Druck in den Steckplatz. Befestigen Sie die PCI-Kartemit der Schraube, die Sie in Schritt 7 gelöst haben.
9. Befestigen Sie die Computerabdeckung nach dem Einbau derPCI-Karte, verbinden Sie den Computer wieder mit dem Netz,und schalten Sie ihn ein.
10. Beim Neustart erkennt Windows die PCI-Karte. Die Treiber fürden IEEE 1394 Host-Controller und die beiden USB OHCI Host-Controller werden automatisch installiert.
Hinweis: Je nach Computergeschwindigkeit kann es bis zu 30Sekunden dauern, bis die PCI-Karte erkannt wird.
11. Windows sucht jetzt nach den Treibern für den Host-Controller“Belkin USB 2.0 High Speed Host Controller”. Der Hardware-Assistent wird geöffnet. Wählen Sie “Software automatischinstallieren (empfohlen)”. Klicken Sie auf “Weiter”.
12. Jetzt werden die Treiber für den “Belkin USB 2.0 High SpeedHost Controller” gesucht. Windows meldet, dass die zuinstallierende Software den Windows Logo-Test nicht bestandenhat. Ignorieren Sie die Meldung und klicken Sie auf“Fortsetzen”.
13. Jetzt wird die Installation des “Belkin USB 2.0 High Speed HostControllers” abgeschlossen. Klicken Sie auf “Fertigstellen”.
14. Windows erkennt jetzt die Schnittstelle “USB 2.0 Root HubDevice”. Klicken Sie auf “Weiter”.
P73954ec-A-F5U508-man.qxd 22-11-2002 15:41 Page 18
De
19
Installation (Fortsetzung)
15. Jetzt werden die Treiber für die Schnittstelle “USB 2.0 RootHub” gesucht. Windows meldet, dass die zu installierendeSoftware den Windows Logo-Test nicht bestanden hat.Ignorieren Sie die Meldung und klicken Sie auf “Fortsetzen”.
16. Die Installation der Schnittstelle “USB 2.0 Root Hub Device” istjetzt abgeschlossen. Klicken Sie auf “Fertigstellen”.
17. Die IEEE 1394 Netzwerkschnittstelle wird erkannt und installiert.Windows bietet Ihnen an, ein Netzwerk einzurichten. Wenn Siekein IEEE 1394 Netzwerk einrichten möchten, ignorieren Siediese Option. (In der Windows XP Hilfe-Datei finden Sie weitereInformationen zur Einrichtung und Verwendung eines IEEE 1394-Netzwerks.)
Die Installation ist damit abgeschlossen.
Überprüfen der Installation (Windows XP)Überprüfen Sie nach der Installation im Geräte-Manager, ob diePCI-Karte ordnungsgemäß installiert worden ist.
1. Klicken Sie mit der rechten Maustaste auf das Symbol“Arbeitsplatz”.
2. Wählen Sie “Eigenschaften”.
3. Wählen Sie die Registerkarte “Hardware” aus, und klicken Sie aufdie Schaltfläche “Geräte-Manager”.
4. Klicken Sie auf das Pluszeichen neben dem Eintrag “UniversalSerial Bus Controller” (USB-Controller).
P73954ec-A-F5U508-man.qxd 22-11-2002 15:42 Page 19

20
Installation (Fortsetzung)
Die Liste “Universeller serieller Bus Controller” enthält jetztzusätzlich zwei Einträge mit der Bezeichnung “NEC USB Open HostController”, einen Eintrag mit “Belkin USB 2.0 Hi-Speed HostController”, einen Eintrag mit “USB 2.0 Root Hub Device” sowiezwei Einträge mit “USB Root Hub”.
Hinweis: Wenn in Ihrem Computer USB-Schnittstellen fest eingebautsind oder weitere USB PCI Controller installiert wurden, werdenweitere Einträge den für “Root-Hub” aufgelistet.
5. Klicken Sie auf das Pluszeichen neben dem Eintrag “IEEE 1394Bus Controller” (USB-Controller).
Die Liste “IEEE 1394 Bus Controller” enthält jetzt den Eintrag “NECFirewarden OHCI Compliant IEEE 1394 Host Controller”.
6. Klicken Sie auf das Pluszeichen neben dem Eintrag“Netzwerkadapter”.
Die Liste “Netzwerkadapter” enthält jetzt den Eintrag “NDIS 1394Net Adapter”.
Hinweis: Wenn in Ihrem Computer IEEE 1394-Schnittstellen festeingebaut sind oder weitere IEEE 1394 PCI-Karten installiertwurden, werden weitere Einträge (“IEEE 1394 Host Controller” und“NDIS 1394 Net Adapter”) aufgelistet.
P73954ec-A-F5U508-man.qxd 22-11-2002 15:42 Page 20
De
Installieren eines Hispeed USB 2.0 Hubs
Hinweis: Bei der Installation eines Belkin USB 2.0 Hispeed PCI-Kartentreibers wird auch ein Hispeed-Treiber für einen USB 2.0 Hubinstalliert. Wenn Sie zum ersten Mal einen USB 2.0 Hispeed-Hub andie PCI-Karte anschließen, befolgen Sie die nachstehendenAnweisungen.
1. Schalten Sie den Computer ein.
2. Schließen Sie das Original-Netzteil des Hubs an den Hub an, undverbinden Sie es mit einer Netzsteckdose.
3. Schließen Sie den Flachstecker des Hub USB-Kabels an denComputer an. Schließen Sie den quadratischen Kabelstecker andie vorgeschaltete Hub-Schnittstelle an.
4. Windows erkennt den Hub automatisch und öffnet denHardware-Assistenten. Der Assistent sucht nach den Treibern füreinen generischen USB-Hub am USB 2.0 Bus. Klicken Sie auf“Weiter”.
(Wenn bei der Suche stattdessen Treiber für einen generischen USB-Hub angezeigt werden, brechen Sie den Assistenten ab, gehen Siezurück zum Geräte-Manager, und vergewissern Sie sich, dass dieBelkin 2.0-Treiber ordnungsgemäß installiert wurden.)
5. Wählen Sie die Option “Nach dem besten Treiber für das Gerätsuchen (empfohlen)”. Klicken Sie auf “Weiter”, um fortzufahren.
6. Windows durchsucht jetzt die Treiberdatenbank auf IhrerFestplatte. Heben Sie die Markierung aller Kontrollkästchen auf,und klicken Sie auf “Weiter”.
7. Windows sucht den Treiber für den “Generic USB Hub on USB2.0 Bus” (generische Hub-Schnittstelle auf dem USB 2.0 Bus).Klicken Sie auf “Weiter”.
8. Klicken Sie auf “Fertigstellen”. Die Installation des Hubs ist jetztabgeschlossen.
21
P73954ec-A-F5U508-man.qxd 22-11-2002 15:42 Page 21

22
Software Mehrwert-Bundle
Die Belkin Installations-CD für die USB 2.0/FireWire Hispeed PCI-Karte enthält ein zukunftsweisendes Fotobearbeitungsprogrammvon Ulead®:
Ulead VideoStudio® 5.0Ulead VideoStudio 5.0 ist ein besonders vielseitigesVideobearbeitungsprogramm für Endbenutzer, mit dem Siehochwertige Digitalaufnahmen erfassen und bearbeiten und auf diegewünschte Weise exportieren können. Mit VideoStudio können SieUntertitel, 3D-Übergänge, Videofiltereffekte, Video-/Grafikeinblendungen, Hintergrundmusik und -kommentareeinfügen. Sie können Ihre Videos auf Band, CD und im Internetausgeben und so an Freunde und Verwandte weitergeben.
Ulead Photo Express™ 4.0 My Custom EditionDieses Paket enthält alles, was Sie zum Bearbeiten und Austauschenvon Fotos brauchen! Sie können Fotos aus fast allen denkbarenQuellen erfassen und sie dann in einer Miniaturübersicht inSekundenschnelle sortieren. Fehler zaubern Sie mit einfachen,benutzerfreundlichen Funktionen aus Ihren Fotos weg.
Ulead Cool 360™
Mit dieser Anwendung können Sie eine Fotoserie imHandumdrehen zu Weitwinkel- oder Rundumpanoramas (360°)umwandeln. Cool 360 speichert Panoramas in gängigenDateiformaten wie MOV, ausführbaren E-Mail Panoramadateienoder als HTML-Seiten, die Ihre Panoramas ins Internet stellen. Mitdem Programm erstellen Sie Ihren persönlichen Bildschirmschoner,drucken Panoramas auf Einzelseiten oder im Mehrseitenformat undkopieren sie in Präsentationen oder Office-Dokumente.
P73954ec-A-F5U508-man.qxd 22-11-2002 15:42 Page 22

De
Hinweis
FCC-Erklärung
CE-KonformitätserklärungWir, Belkin Components, erklären hiermit in alleiniger Verantwortung, daß der Artikel F5U508, aufden sich diese Erklärung bezieht, in Einklang mit der Fachgrundnorm Störaussendung EN5500221998 und der Fachgrundnorm Störfestigkeit EN550024 1998, EN61000-3-2 und EN61000-3-3.
Belkin Components Eingeschränkte Produktgarantie auf LebenszeitBelkin Components gewährleistet hiermit, dass dieses Produkt während seiner gesamtenLebensdauer keine Verarbeitungs- und Materialfehler aufweisen wird. Bei Feststellung einesFehlers wird Belkin das Produkt nach eigenem Ermessen entweder kostenlos reparieren oderaustauschen, sofern es während des Garantiezeitraums an den autorisierten Belkin-Händlerzurückgegeben wurde, bei dem es gekauft wurde. Die Kosten für den Rücktransport zum Belkin-Händler sind vom Kunden zu tragen. Ein Kaufnachweis kann verlangt werden.
Diese Gewährleistung erstreckt sich nicht auf die Beschädigung des Produkts durch Unfall,mißbräuchliche, unsachgemäße oder fehlerhafte Verwendung oder Anwendung. Ebenso ist dieGewährleistung unwirksam, wenn das Produkt ohne schriftliche Genehmigung durch Belkinverändert wurde oder wenn eine Belkin-Seriennummer entfernt oder unkenntlich gemacht wurde.
DIE VORSTEHENDEN GEWÄHRLEISTUNGEN UND RECHTSBEHELFE SCHLIEßEN ALLE ANDERENGEWÄHRLEISTUNGEN UND RECHTSBEHELFE - OB MÜNDLICH ODER SCHRIFTLICH, AUSDRÜCKLICHODER KONKLUDENT - AUS UND TRETEN AN DEREN STELLE. BELKIN ÜBERNIMMT INSBESONDEREKEINERLEI KONKLUDENTE GEWÄHRLEISTUNGEN, U.A. AUCH KEINE GEWÄHRLEISTUNG DEREIGNUNG FÜR EINEN BESTIMMTEN ZWECK UND DER HANDELSÜBLICHEN QUALITÄT.
Kein Händler, Bevollmächtigter bzw. Vertreter oder Mitarbeiter von Belkin ist befugt, dieseGewährleistungsregelung in irgendeiner Weise abzuändern oder zu ergänzen.
BELKIN HAFTET NICHT FÜR BESONDERE, DURCH ZUFALL EINGETRETENE ODERFOLGESCHÄDEN AUFGRUND DER VERLETZUNG EINER GEWÄHRLEISTUNG ODER NACHMAßGABE EINER ANDEREN RECHTSLEHRE (U.A. FÜR ENTGANGENE GEWINNE, AUSFALLZEITEN,GESCHÄFTS- ODER FIRMENWERTEINBUßEN BZW. DIE BESCHÄDIGUNG,NEUPROGRAMMIERUNG ODER WIEDERHERSTELLUNG VON PROGRAMMEN ODER DATENNACH SPEICHERUNG IN ODER NUTZUNG IN VERBINDUNG MIT BELKIN-PRODUKTEN).
ERKLÄRUNG DER KONFORMITÄT MIT DEN FCC-VORSCHRIFTEN ZUR ELEKTROMAGNETISCHEN
VERTRÄGLICHKEITWir, Belkin Components, 501 West Walnut Street, Compton CA 90220, USA, erklären hiermitin alleiniger Verantwortung, daß der Artikel
F5U508auf den sich diese Erklärung bezieht, in Einklang mit Teil 15 der FCC-Vorschriften steht. Der Betrieb unterliegt den folgenden beiden Bedingungen: 1.) Dieses Gerät darf keineStörbeeinflussung verursachen. 2.) Dieses Gerät muß empfangene Störbeeinflussungakzeptieren, auch Störbeeinflussung, die unerwünschten Betrieb verursachen kann.
23
P73954ec-A-F5U508-man.qxd 22-11-2002 15:42 Page 23

© 2002 Belkin Components. All rights reserved.All trade names are registered trademarks of respective manufacturers listed.
P73954ec-A
For technical support, call
USA 800.223.5546 x2263
Europe 00 800 223 55 460
Belkin Components B.V.Starparc Building • Boeing Avenue 333
1119 PH Schiphol-Rijk • The NetherlandsTel: +31 (0) 20 654 7300Fax: +31 (0) 20 654 7349
Belkin Components, Ltd.Shipton Way • Rushden • NN10 6GL
United KingdomTel: +44 (0) 1933 35 2000Fax: +44 (0) 1933 31 2000
Belkin Corporation501 West Walnut Street
Compton • CA • 90220 • USATel: 310.898.1100Fax: 310.898.1111
Belkin Components Ltd.7 Bowen Cresent • West Gosford
NSW 2250 • AustraliaTel: +61 (2) 4372 8600Fax: +61 (2) 4372 8603
P73954ec-A-F5U508-man.qxd 22-11-2002 15:42 Page 24