ford ranger t6 d/cab installation...
TRANSCRIPT
INSTALLATION G3E FORD RANGER T6 D/CAB
1-4
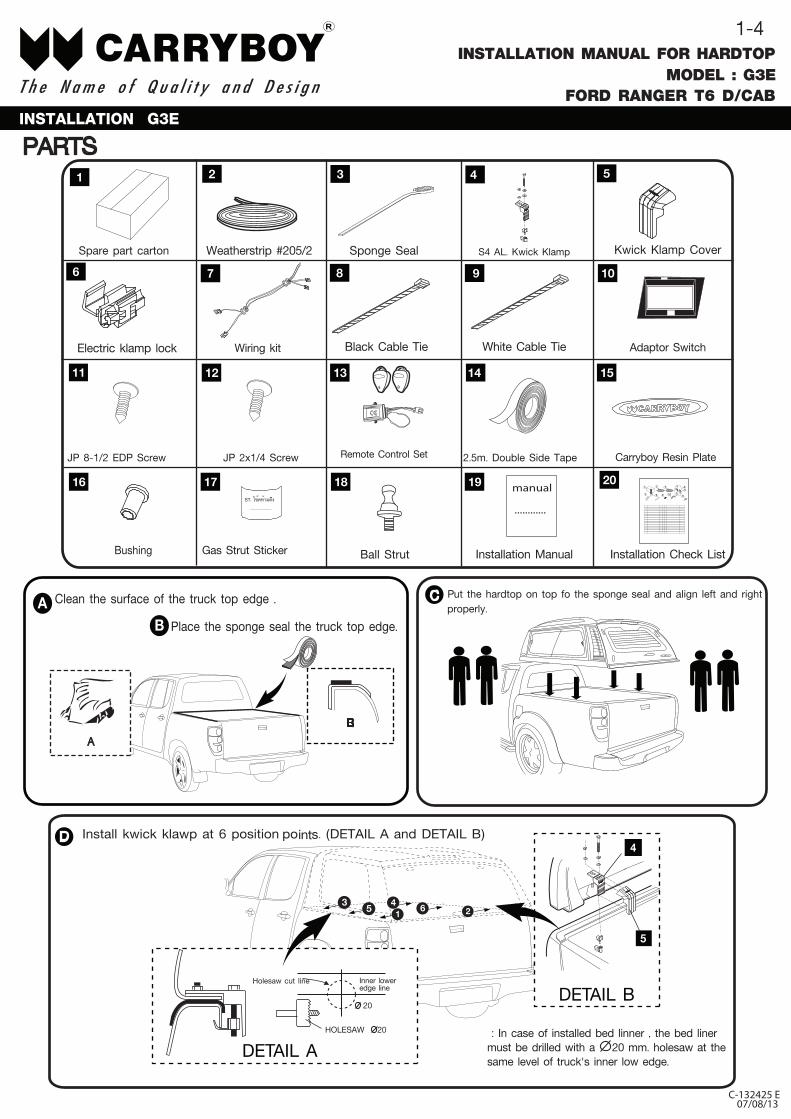
1 23 4 65
è
20
HOLESAW 20
DETAIL A
DETAIL B 7
4
5
3
21 4 5
8
14
17 18 19 20
6
11
13
10 11
1 2 3
7 8
45
9
manual
............
12
15
109
ST. โช๊คห้ามดึง
.....................
7
16
Ball Strut
JP 8-1/2 EDP Screw
Clean the surface of the truck top edge . AB
B
Place the sponge seal the truck top edge.
A
JP 2x1/4 Screw
Spare part carton
2.5m. Double Side Tape
Bushing
Put the hardtop on top fo the sponge seal and align left and right
properly.
.
07/08/13
2-4
INSTALLATION G3E FORD RANGER T6 D/CAB
E
4-5 NM.
F
+
-
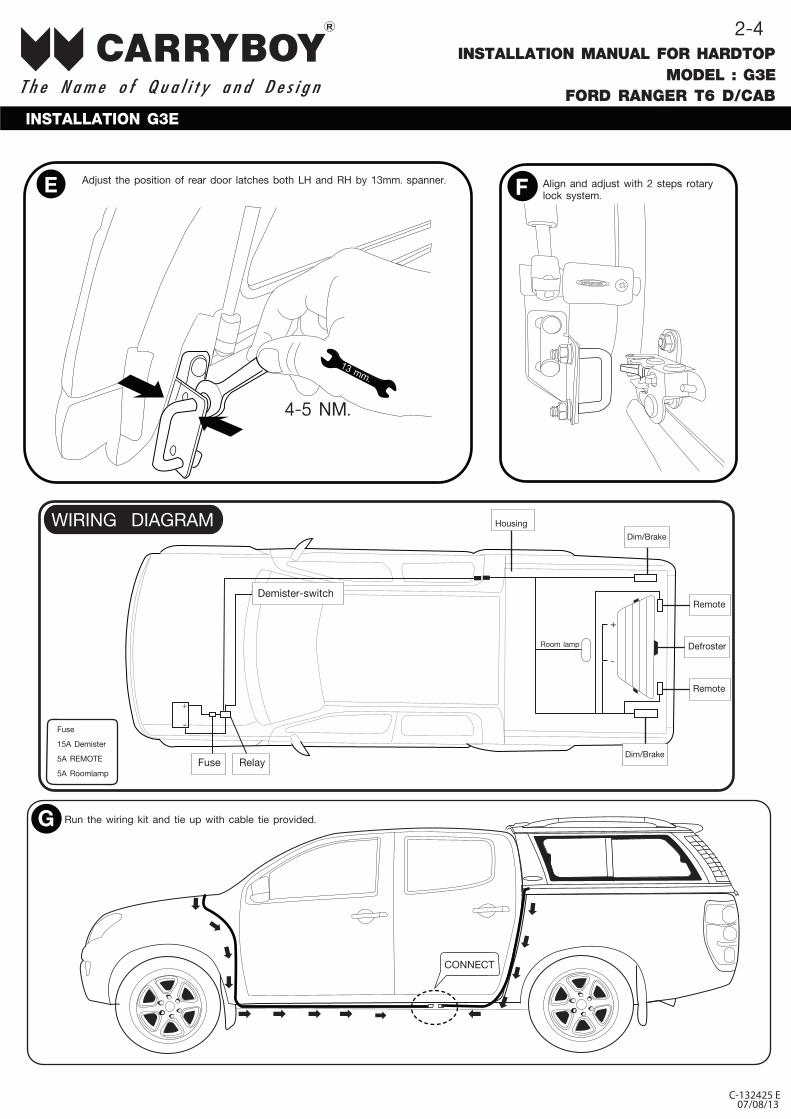
Demister-switch
Fuse Relay
Housing
Room lamp
+
-
Dim/Brake
Defroster
Remote
Remote
Dim/BrakeWIRING DIAGRAM
Align and adjust with 2 steps rotarylock system.
CONNECT
Run the wiring kit and tie up with cable tie provided.G
Fuse
15A Demister
5A REMOTE
5A Roomlamp
Adjust the position of rear door latches both LH and RH by 13mm. spanner.
07/08/13
3-4
INSTALLATION G3E
. FORD RANGER T6 D/CAB
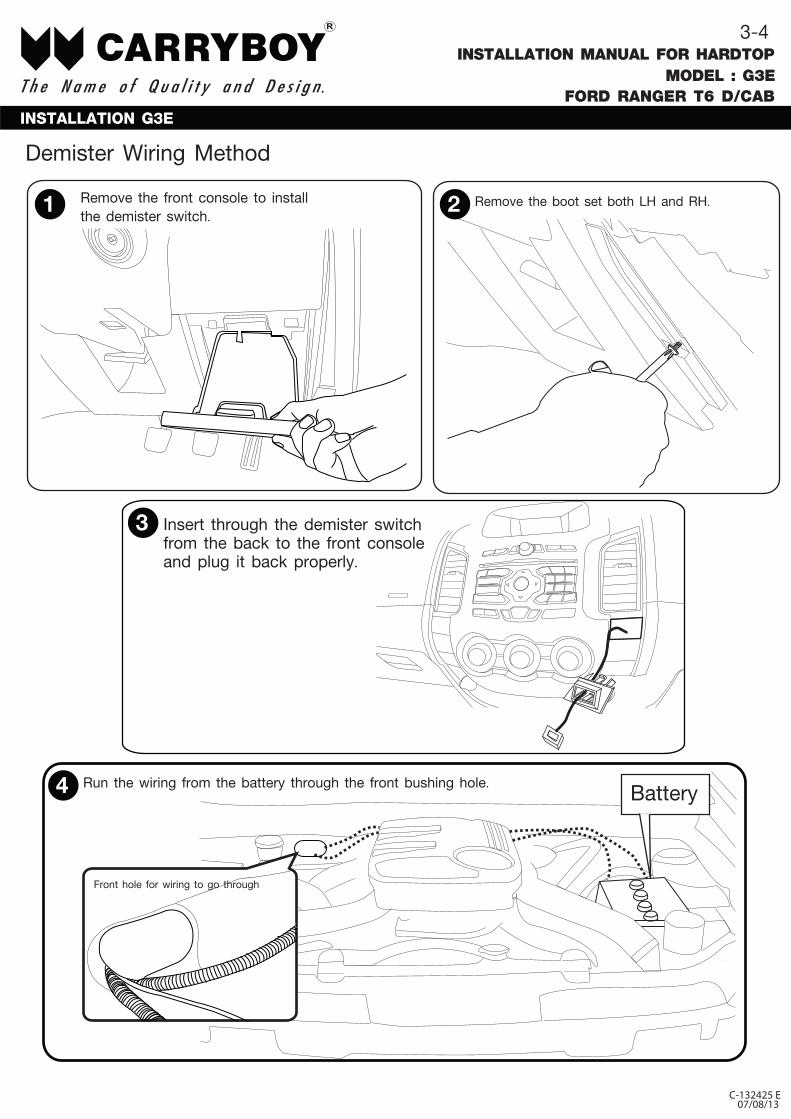
Demister Wiring Method
Remove the boot set both LH and RH.
Insert through the demister switch from the back to the front console and plug it back properly.
Run the wiring from the battery through the front bushing hole.
Front hole for wiring to go through
Battery
Remove the front console to install the demister switch.1 2
3
4
07/08/13
INSTALLATION G3E
4-4
FF
DETAIL B
DETAIL F
3 cm.
DETAIL A
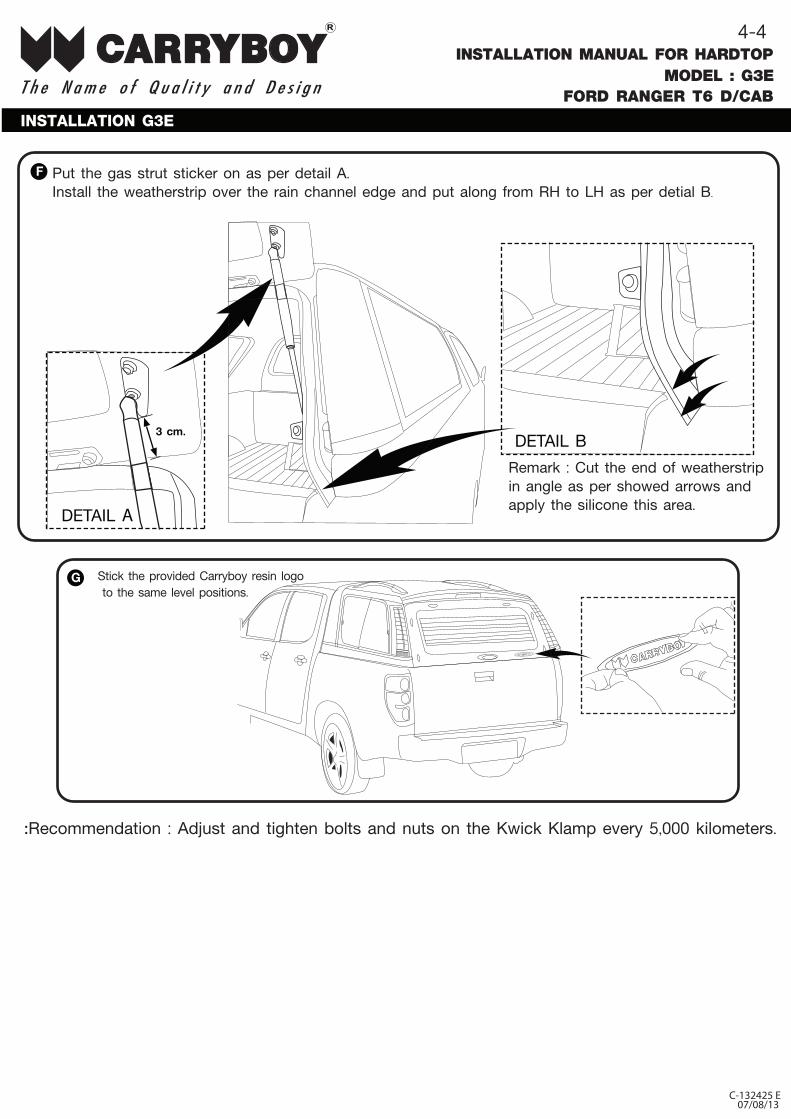
Recommendation : Adjust and tighten bolts and nuts on the Kwick Klamp every 5,000 kilometers.
FORD RANGER T6 D/CAB
Put the gas strut sticker on as per detail A. Install the weatherstrip over the rain channel edge and put along from RH to LH as per detial B.
Remark : Cut the end of weatherstrip in angle as per showed arrows and apply the silicone this area.
FG
07/08/13