getting the most out of your camera
TRANSCRIPT

GETTING THE MOST OUT OF YOUR CAMERA
Mary Fiore
WanderplexWanderplex.com
Cruising and Photography Contributor
Fioreart.com

This version is a follow up to a live presentation. The voice narration is not included.
“Beginners worry about equipment.Professionals worry about money.Masters worry about the light.I just take pictures.”
Vernon Trent

Important Camera Features
Aperture
Shutter speed
ISO
Light Controls
File formats and size
Flash
Focus

Reflected Light


A camera balances these three controls to set exposureWhen one changes the other two adjust.

Aperture
- Hole through which light enters the lens and projects an image onto the light sensor
- Determines depth of field - Large opening: more light and
shallower focus
mode Set a high number (F22) for
landscapes Low number for portraits (F2.8)
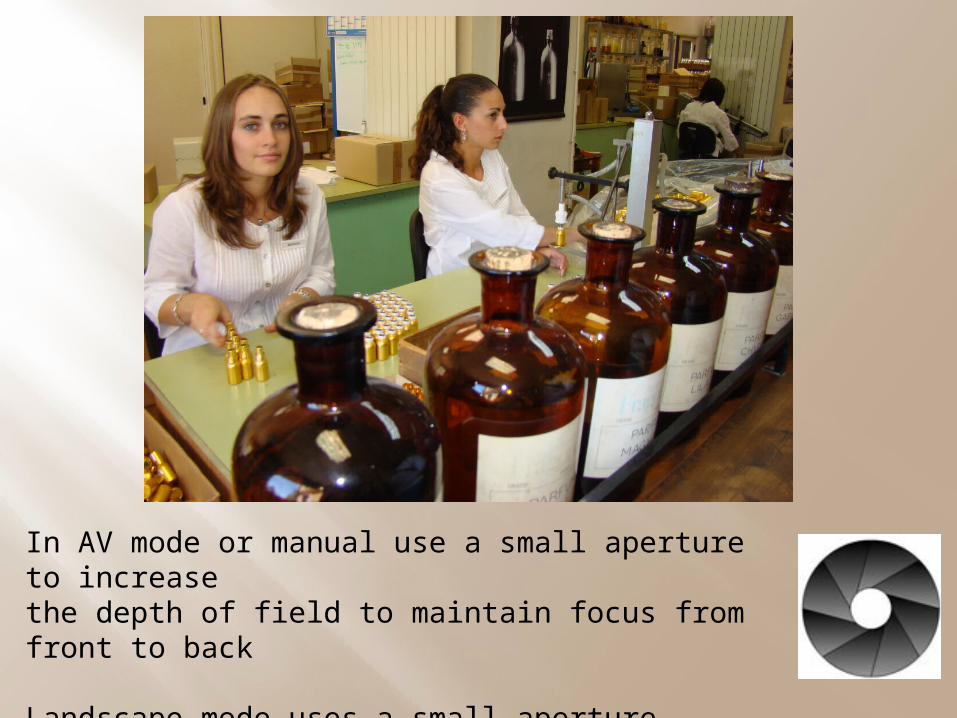
In AV mode or manual use a small aperture to increase the depth of field to maintain focus from front to back
Landscape mode uses a small aperture (large number 16, 22)

In AV (aperture preferred) mode or manualuse a large aperture to decrease the depth of field in order to blur the background.
Portrait mode uses a large aperture (low number 2.8, 3.5)


Shutter SpeedHow long the aperture stays open
In shutter preferred mode or manual Use a fast shutter speeds to freeze the action.
Sports and kid mode use a fast shutter speed.
1/60 of a second or faster

In shutter preferred mode or manual use a slow shutter speed to blur the action to show motion.
1/15 of a second or slower

Panning or following the subject with your camera with a slow shutter speed, blurs the background, capturing motion.


A slow shutter speed allows more light to enter the lens through the apertureNight mode uses a slow shutter speed.

Film Speed or ISO (formerly ASA)
- Speed at which a given film can capture a picture or the sensor can absorb the light
- Fast film speed for fast moving subjects so the shutter speed can increase
- Lowers the quality - Low speed (100) for stationary and well lit
objects - High speed (600) for fast moving subjects
or in low light


A fast shutter speed froze the action.
The small aperture maintained good focus.
The fast film speed and good natural light enabled those settings.
A slow shutter speed blurred the motion.
The small aperture maintained good focus.
The slow film speed enabled those settings.

The best exposure combination (below right) used a slow shutter speed, large aperture and fast ISO.
Use of flash corrected the white balance.

Shooting using Jpeg and/or Raw Format
Jpeg files are processed in the camera and compressed.
Raw files are processed by the user in software and are larger.

Jpeg
White balance, contrast, saturation and sharpness adjusted in the camera
Raw unprocessed
Processed raw
White balance, contrast and light levels adjusted in software by the user.


Size
Consider how the photos will be used.
Shoot photos in a large size if you are going to make large prints or do extensive cropping.
Use a smaller size setting if you will make only small prints or for the web. More photos will fit on your memory card.


Use large file sizes if you may want to crop out a small part and use it in a large print.
See the presentation on Managing and Sharing your Travel Photos for more information on print and file sizes and file formats.

Available Light
Natural light is best
Avoid direct sun due to glare and contrast
Avoid midday
Shade or an overcast sky can provide even light

Mid day, too much glare

Direct Sun
Turn the flash on
Use longer shutter speeds
Block direct light from the camera

Indoors
Shoot near a window to maximize use of natural light
Turn lamps on
Raise the ISO
Use large aperture
Decrease shutter speed
Use flash to supplement
Consider white balance

Flash
Flash tends to flatten an image unless the flash is bounced of a light surface.
Flash can help correct white balance Fill flash can help backlit subjects

Fill Flash
Fill flash worked well above as there was light in the background so that the photo was not flattened; it maintained a more 3D appearance.

Fill flash added light, separating the subject from the background, enhancing dominance.
It enabled a small aperture so that the background would not be blurry.
It corrected the white balance.

Walk around the subject and find a perspective where the back ground has light and you are close enough for the flash to light the subject.

Bracketing creates 3 versions: slightly over exposed, averaged and under exposed versions.

HDR Back Light Control Mode
•Takes three consecutive shots with different exposures
•Combines them to maintain detail in shadows and highlights
•Works well when there is no movement.

Backlit or High Contrast Light
Either the subject or the background will be exposed correctly
Use:-Bracketing-Shutter button half press to lock in the settings
on your subject-Flash-HDR mode
Combine photos later in software
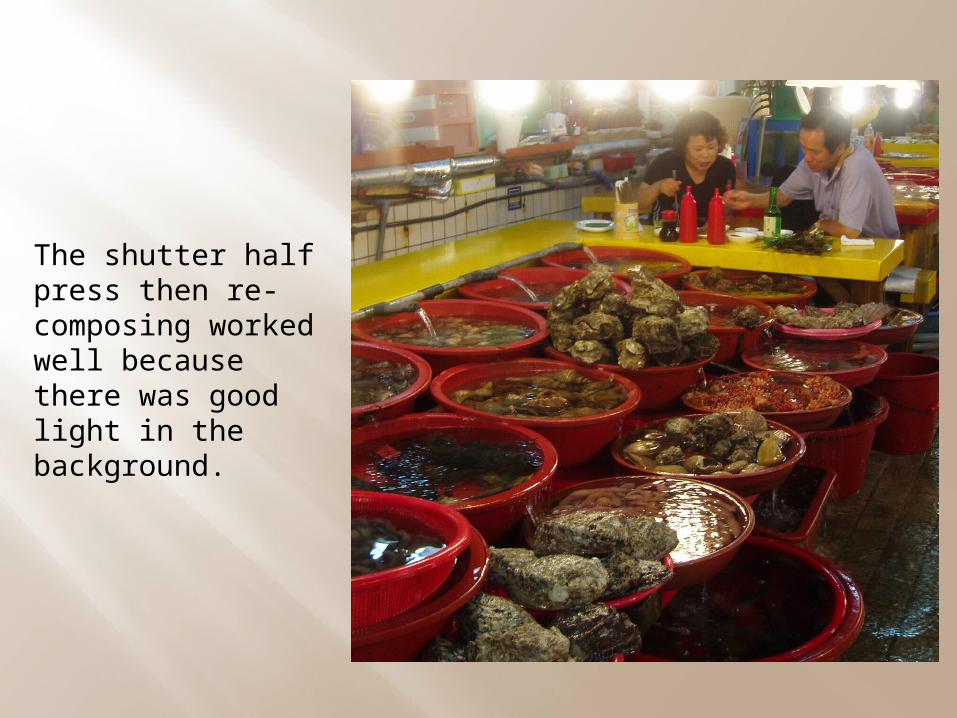
The shutter half press then re-composing worked well because there was good light in the background.

Shot using shutter half press then combined later in software

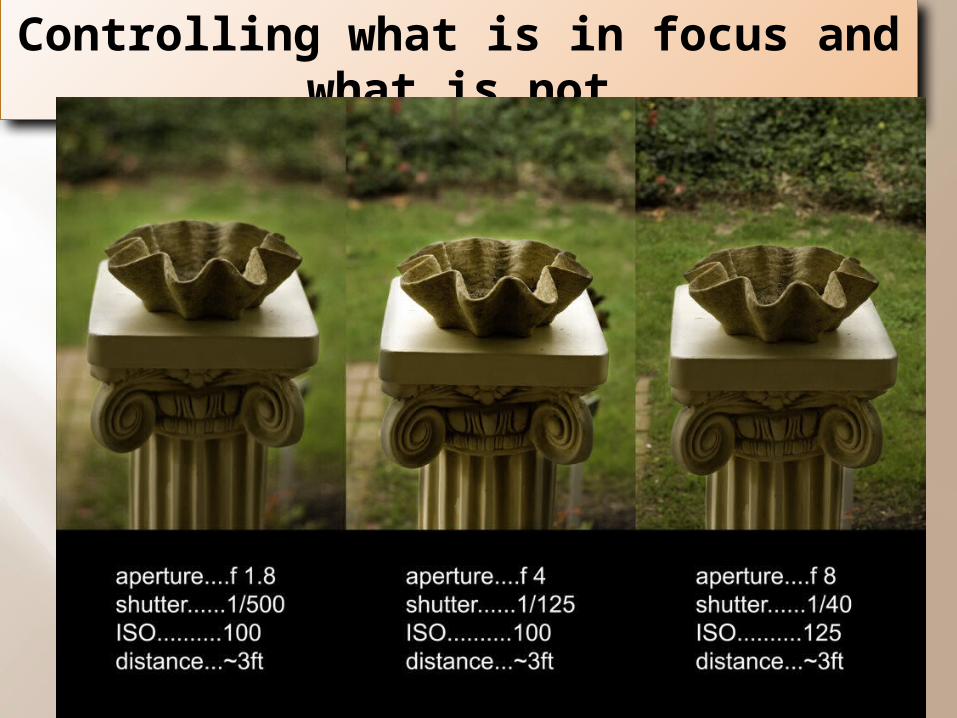
Controlling what is in focus and what is not

Auto Focus
Most of the time your camera does a good job of choosing what to focus on. It often chooses what is in the middle of the image however.

Focusing Grid


Face Detection AF
It works by recognizing face shapes in the scene and then prioritizing the focus towards them.

This is especially useful when your subjects are at different distances away.
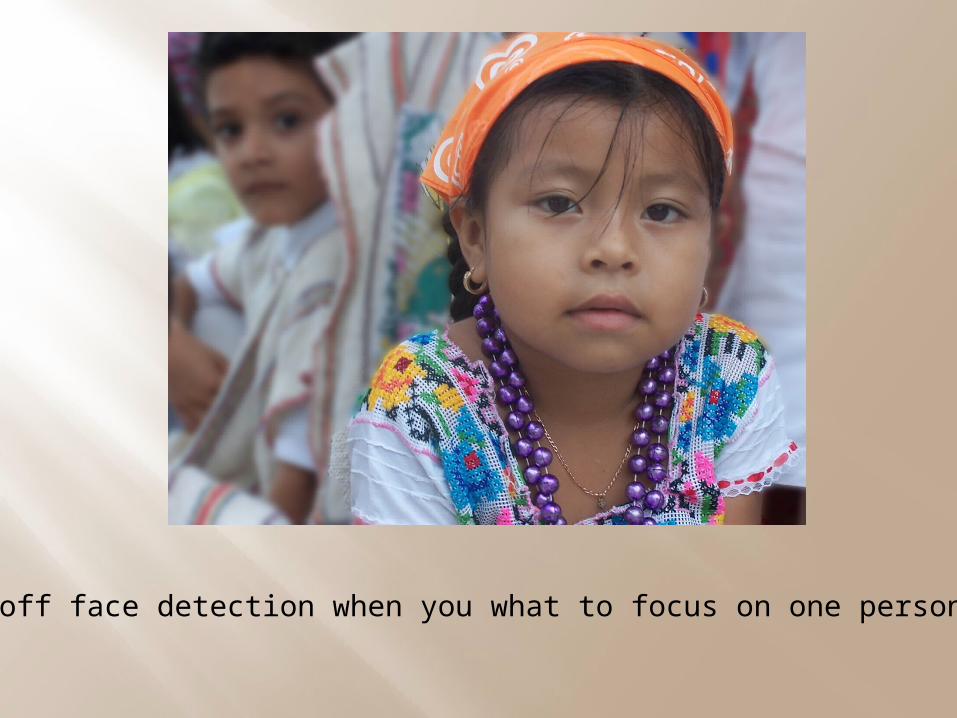
Turn off face detection when you what to focus on one person only.

Fast shutter speed to stop actionBig aperture to blur the background

Small aperture for large depth of field
Landscape mode would work

Keep in mind these important features
Aperture
Shutter speed
ISO
File formats and size
Ways to manage light
Working with flash
Focusing techniques
Modes

References
http://photo.net/learn/basic-photo-tips/aperture-shutterspeed-iso/
http://www.digitalcameraworld.com/2012/10/01/best-camera-focus-techniques-10-surefire-ways-to-get-sharp-photos/
http://www.digital-photo-secrets.com/tip/445/photography-basics-aperture/
http://photo.net/learn/raw/ http://www.ehow.com/how_2125320_photos-
direct-sunlight.html