hobby horse supplies & tools
TRANSCRIPT

HOBBY HORSE
SUPPLIES & TOOLS:
• Foamies® craft foam sheets:1 large or 2 small for the head 1 small for the mane 1 small self-adhesive for harnessScraps for rosette
• 2 yds suede cording or cotton braiding cord • Wood dowel • 2 gems• Wood doll pin stands• 2 wiggly eyes• Acrylic paint • Paintbrush • Batting or fiberfill • Fiskars® hammer punch, protective mat, scissors, scallop-edge or pinking shears• Templates: circle, star• Tacky glue• Stylus or pencil
DIRECTIONS:
1. Paint dowel and 2 wood doll pin stands for the horse eyes. Allow to dry.
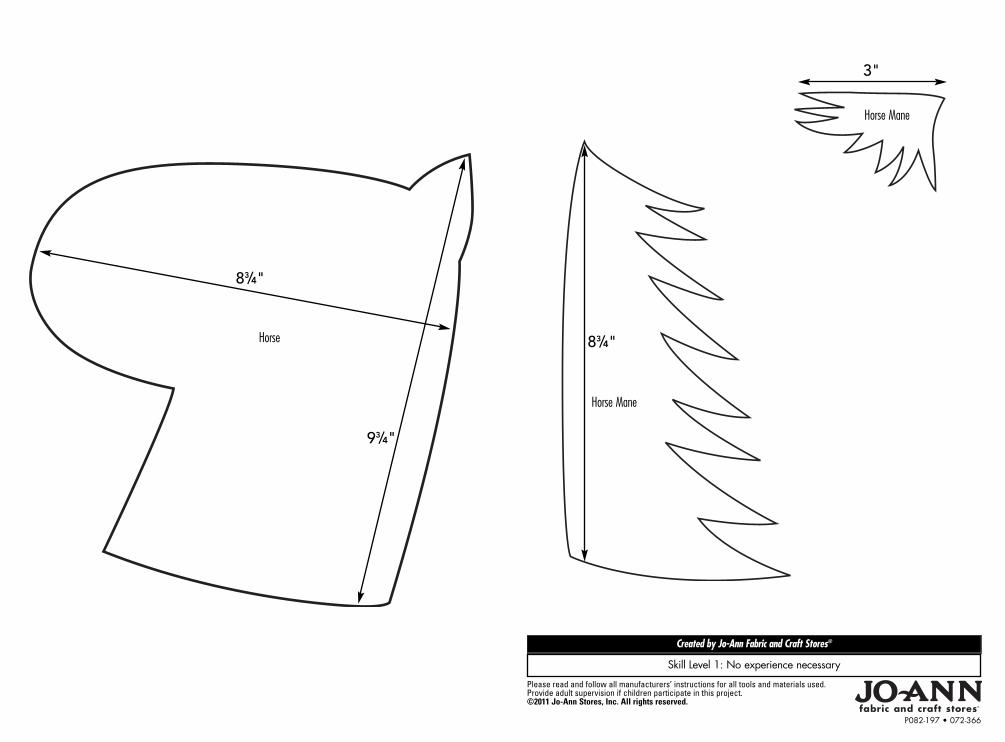
2. Trace horse head on craft foam. Cut out 2 layers simultaneously. Trace mane & forelock. Cut one set for each side ofhorse head. On protective mat, punch holes in 1 layer of the head to use as a template for aligning punched holes inhead pieces, manes & forelocks. Lace layers, beginning with the 2 front neck pieces; proceed around 4 layers of thehead. Knot lacing ends; secure with a drop of glue; trim ends.
3. Cut strips of self-adhesive craft foam for harness. Make 2 of everything. Peel off paper & attach to head, endingstrips under mane & forelock. Make 2 layered rosettes for the harness with craft foam circles, stars & shapes. Attach a gem to the center; glue to the horse when harness strips meet.
4. Attach wiggly eyes to wood doll pin stands; glue to horse. Cut small curved piece of craft foam for horse’s smile.Allow glue to dry on 1 side; flip head over and repeat.
5. Stuff batting or fiberfill in nose area; insert painted dowel.
free
cow
boy
& c
owgi
rl ac
cess
orie
s1
skill
leve
l
more projects, tips & techniques at Joann.com®

HANDCUFFSSUPPLIES & TOOLS:
• 2 small Foamies® craft foam sheets • Fiskars® hammer punch, scissors, pinking shears scallop-edge shears• Large eyelet, eyelet setter• Tacky glue
DIRECTIONS:
1. Cut two 1"x8-10" strips of craft foam, large enough for a child’s hand to slip in and out of easily.
2. Using scallop-edge or pinking shears, cut small cow spots and glue to strips. Allow glue to dry completely. Curl each strip into a ring that overlaps itself 1". Punch 2 holes through the layers and secure with eyelets.
3. Cut seven 4½"x1/2" strips of craft foam with the scallop-edge or pinking shears. Curl one into a ring that overlapsitself 1/2". Punch a hole through the layers and secure with an eyelet. Loop another strip through the 1st loop &secure with an eyelet. Continue with the last 2 strips to connect the handcuffs to the chain.
HATS & BADGESSUPPLIES & TOOLS:
• Foamies® craft foam:Cowboy hatLarge self-adhesive sheet for hat band Shapes
• Fiskars® hammer punch, scissors, pinking shears scallop-edge shears• Beads• Needle and thread • Feathers • Glitter glue • Star template• Eyelets, eyelet setter, protective mat• Lacing, suede cording, cotton braiding cord or jute• Pin backs• Craft knife• Tacky glue
CHAPSSUPPLIES & TOOLS:
• Foamies® craft foam:1 roll white 2 large sheets, black1 small sheet, brown 1 sheet self-adhesive glitter
• Silver buckle• 2 pkgs red suede cording • Fiskars® hammer punch, scissors, pinking shears scallop-edge shears• Craft knife• Tacky glue
DIRECTIONS:
1. Measure length of child’s pants. Cut 2 strips to length x 8½" wide. Cut 3" notch on each piece at the crotch.
2. Cut a curved yoke with scissors and pinking shears. Glue to the top of each chap leg.
3. Cut black cow spots and glue to the chap legs. Measure child’s waist, add 6; scallop-cut a 1¼" wide white craftfoam belt. Glue on small black cow spots; attach buckle, belt loop & belt holes. Slit the yoke to accommodate thebelt. Slip the belt through the loops.
4. Cut 6 black craft foam circles with pinking shears for the tassels. Punch 2 holes, like a button, in each. Cut lengthsof red suede and tie through the holes with the knot in the front.
5. Cut 6 larger self-adhesive glitter circles with pinking shears. Punch holes through circles, like a button; adhere toouter edge 6", 12" & 18" from top of chaps.
6. Cut twelve 14" lengths of red suede. Thread 1 length through holes from the underside of the chaps, glitter circle,tassel circle & back through. Tie off, leaving 12" suede tail at the side. Repeat for 6 outer-edge tassels.
7. Create the other end of the ties on the inside edges of the chaps. Punch 2 holes, like a button, on the inside edgesof the chaps, opposite the tassels. Some will be 2 layers because of cow spots; other will be 1 layer. Reinforcesingle layer with circle of craft foam on the inner edge. Use silver brads to anchor the 2 layers together & reinforcethe craft foam. Tie remaining strips of suede lacing through these holes and tie off.
8. Trim or fringe the bottom edge of chaps.
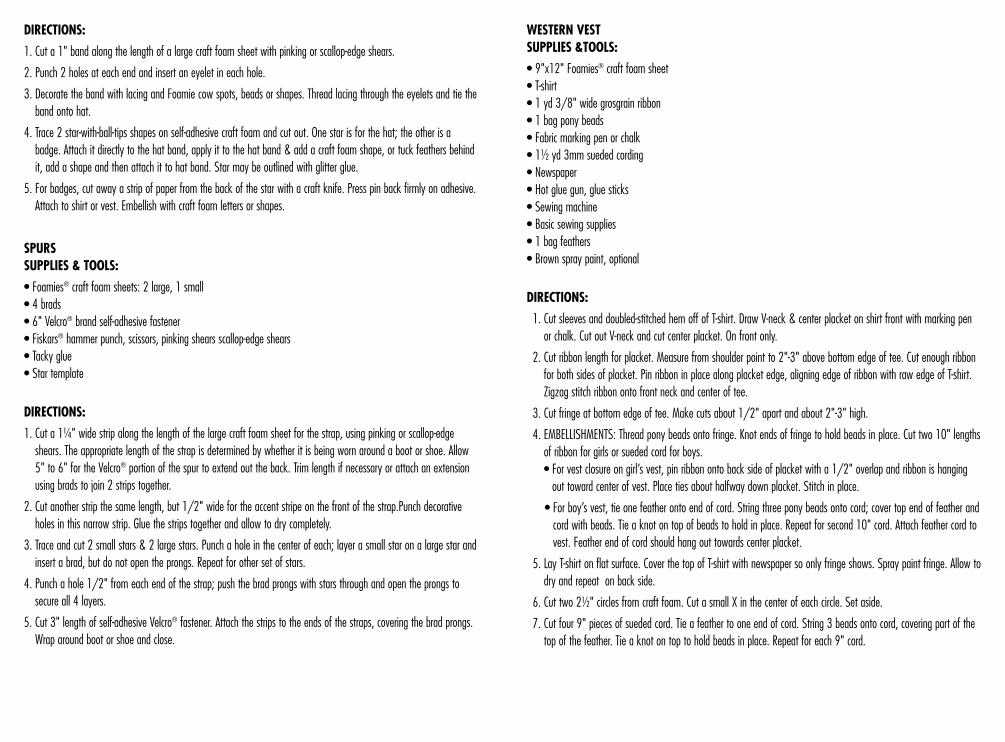
WESTERN VESTSUPPLIES &TOOLS:
• 9"x12" Foamies® craft foam sheet• T-shirt• 1 yd 3/8" wide grosgrain ribbon • 1 bag pony beads • Fabric marking pen or chalk• 1½ yd 3mm sueded cording • Newspaper• Hot glue gun, glue sticks• Sewing machine• Basic sewing supplies• 1 bag feathers • Brown spray paint, optional
DIRECTIONS:
1. Cut sleeves and doubled-stitched hem off of T-shirt. Draw V-neck & center placket on shirt front with marking penor chalk. Cut out V-neck and cut center placket. On front only.
2. Cut ribbon length for placket. Measure from shoulder point to 2"-3" above bottom edge of tee. Cut enough ribbonfor both sides of placket. Pin ribbon in place along placket edge, aligning edge of ribbon with raw edge of T-shirt.Zigzag stitch ribbon onto front neck and center of tee.
3. Cut fringe at bottom edge of tee. Make cuts about 1/2" apart and about 2"-3" high.
4. EMBELLISHMENTS: Thread pony beads onto fringe. Knot ends of fringe to hold beads in place. Cut two 10" lengthsof ribbon for girls or sueded cord for boys. • For vest closure on girl’s vest, pin ribbon onto back side of placket with a 1/2" overlap and ribbon is hangingout toward center of vest. Place ties about halfway down placket. Stitch in place.
• For boy’s vest, tie one feather onto end of cord. String three pony beads onto cord; cover top end of feather andcord with beads. Tie a knot on top of beads to hold in place. Repeat for second 10" cord. Attach feather cord tovest. Feather end of cord should hang out towards center placket.
5. Lay T-shirt on flat surface. Cover the top of T-shirt with newspaper so only fringe shows. Spray paint fringe. Allow todry and repeat on back side.
6. Cut two 2½" circles from craft foam. Cut a small X in the center of each circle. Set aside.
7. Cut four 9" pieces of sueded cord. Tie a feather to one end of cord. String 3 beads onto cord, covering part of thetop of the feather. Tie a knot on top to hold beads in place. Repeat for each 9" cord.
DIRECTIONS:
1. Cut a 1" band along the length of a large craft foam sheet with pinking or scallop-edge shears.
2. Punch 2 holes at each end and insert an eyelet in each hole.
3. Decorate the band with lacing and Foamie cow spots, beads or shapes. Thread lacing through the eyelets and tie theband onto hat.
4. Trace 2 star-with-ball-tips shapes on self-adhesive craft foam and cut out. One star is for the hat; the other is abadge. Attach it directly to the hat band, apply it to the hat band & add a craft foam shape, or tuck feathers behindit, add a shape and then attach it to hat band. Star may be outlined with glitter glue.
5. For badges, cut away a strip of paper from the back of the star with a craft knife. Press pin back firmly on adhesive.Attach to shirt or vest. Embellish with craft foam letters or shapes.
SPURS SUPPLIES & TOOLS:
• Foamies® craft foam sheets: 2 large, 1 small• 4 brads • 6" Velcro® brand self-adhesive fastener • Fiskars® hammer punch, scissors, pinking shears scallop-edge shears• Tacky glue• Star template
DIRECTIONS:
1. Cut a 1¼" wide strip along the length of the large craft foam sheet for the strap, using pinking or scallop-edgeshears. The appropriate length of the strap is determined by whether it is being worn around a boot or shoe. Allow5" to 6" for the Velcro® portion of the spur to extend out the back. Trim length if necessary or attach an extensionusing brads to join 2 strips together.
2. Cut another strip the same length, but 1/2" wide for the accent stripe on the front of the strap.Punch decorativeholes in this narrow strip. Glue the strips together and allow to dry completely.
3. Trace and cut 2 small stars & 2 large stars. Punch a hole in the center of each; layer a small star on a large star andinsert a brad, but do not open the prongs. Repeat for other set of stars.
4. Punch a hole 1/2" from each end of the strap; push the brad prongs with stars through and open the prongs tosecure all 4 layers.
5. Cut 3" length of self-adhesive Velcro® fastener. Attach the strips to the ends of the straps, covering the brad prongs.Wrap around boot or shoe and close.

8. Thread 2 cords with feathers through one X on circle. Stagger feathers slightly; tie a knot at backside of circle.Repeat for 2nd circle and remaining cords.
9. Place circle 4" to 5" down from shoulder. Glue in place. Repeat for opposite side.
10. Cut two 12" lengths of cord. Tie a knot at one end & thread beads. Make a knot above beads to secure.
11. For vest closure, pin cord on back of placket with a 1/2" overlap and the cord and beads hanging toward center ofvest. Place ties halfway down placket. Stitch in place.
Badge, Hat
Center of Spurs
Center ofSpurs
3"
2½"
13/4"
Skill Level 1: No experience necessary
Please read and follow all manufacturers’ instructions for all tools and materials used.Provide adult supervision if children participate in this project.©2011 Jo-Ann Stores, Inc. All rights reserved.
Created by Jo-Ann Fabric and Craft Stores®
P082-197 • 072-366
Horse
Horse Mane
Horse Mane
3"
93/4"
83/4"
83/4"