how are soils different? - scholastic canada
TRANSCRIPT
Focus: Students will begin to explore soil and use scientific terminology when communicating their understanding.
How Are Soils Different?
Specific Curriculum OutcomesStudents will be expected to:
• 1.0 pose questions that lead to exploration and investigation [GCO 2]
• 2.0 communicate using scientific terminology [GCO 2]
• 3.0 investigate a variety of soils and find similarities and differences among them [GCO 1/3]
• 4.0 communicate while exploring and investigating [GCO 2]
Performance IndicatorsStudents who achieve these outcomes will be able to:
• pose and post “I Wonder” questions to the classroom I Wonder Wall
• use scientific terminology to communicate their observations
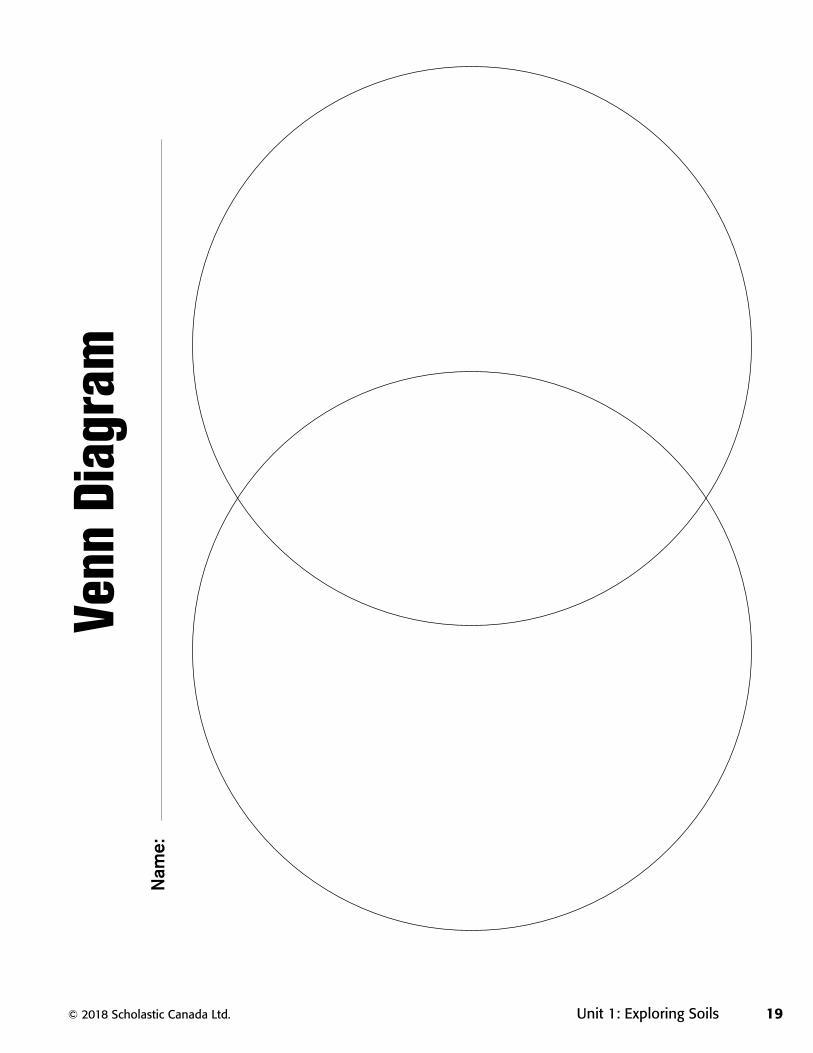
• contribute to the completion of a Venn diagram comparing two different soil samples
NOTES:
Unit 1: Exploring Soils 11

Attitude Outcome StatementsEncourage students to:
• show interest in and curiosity about objects and events within their immediate environment [GCO 4]
Cross-Curricular ConnectionsSocial StudiesStudents will be expected to:
• locate and describe major landforms and bodies of water [2.2.1]
MathIt is expected that students will:
• collect first-hand data and organize it using charts [3SP1]
English Language ArtsStudents will be expected to:
• communicate information and ideas effectively and clearly, and to respond personally and critically [GCO 2]
• select, read, and view with understanding a range of literature, information, media, and visual text [GCO 4]
• Have students wash their hands thoroughly with soap and water after handling soil.
• Soil is a non-renewable natural resource.
• Soil is composed of rock that is breaking down. Weather events, such as rain, thunderstorms, tornadoes, floods, and erosion all help create soil.
• Most soil is a mixture of sand, silt, and clay.
Getting OrganizedComponents Materials Before You Begin Vocabulary• Student Magazine,
pages 2–7• Anchor Video:
Exploring Soils• BLM Venn
Diagram• IWB Activity 1
• students’ Science Journals• variety of soil samples• sealable plastic bags • small digging tool, such as a
trowel or spade, small shovel, an old spoon, or a measuring cup
• variety of tools, such as magnifying glasses, tweezers, and small paintbrushes
• egg cartons
• Display a KWLM chart in the classroom.
• Create a Wordle or another word-cloud puzzle using unit terminology.
• Collect soil samples from a variety of locations.
• clay• particles• pebbles• rock• sand• silt
Safety
Science Background
12
• Soil also contains organic matter, such as bits of twigs, decaying leaves, grass, bark, fungi, dead insects, and so on.
• Different types of soils have different colours. Soil is often brown, black, or grey, but it can be yellow, red, or white.
• Newfoundland and Labrador has two distinct types of beach soils: 1) rocky (cobbles and boulders) and 2) sandy.
• Typically, most soils are composed of mainly mineral particles. Below are some useful definitions of soil-related terms as reference for exploring soils:
− sand = small rock fragments; much coarser than silt and clay− silt = very fine rock fragments, much smaller than grains of sand; 50x
magnification or higher required to see them− clay = extremely fine rock fragments that can only be viewed at 200x
magnification− boulders = large rocks that are larger than cobbles− cobbles = fist-sized rocks that are larger than pebbles yet smaller
than boulders− pebbles = tiny rocks that are larger than grains of sand yet smaller
than boulders− gravel = a mixture of sand, silt, and pebbles− humus [hyoo-muhs] = thick black or brown living material from plants
or animals that is partially decayed; makes up the nutrient-rich, organic matter part of soil; often forms the top layer of soil, especially in forests; humus can be created by composting food scraps and garden waste
− loam = a fertile soil composed of varying amounts of clay, silt, sand, and humus—ideal for growing plants
− marsh or fen = a low-lying, flooded area− organic matter = living organisms and dead or decaying organisms
(e.g., insects, leaves, bark, twigs, feathers, fungi, etc.)
• Students often think that all soil must be fine textured, like potting soil. Help students understand that a rocky beach that has large-sized rocks is still considered soil. By sharing many examples of soil, looking at photos, and exploring outdoors, student will adjust their understanding of soil.
• Some students may equate the term “soil” with “dirt.” Direct students to see that soil is a nutrient-rich mixture of living material that will clump together in your hand. Soil is an excellent medium in which to grow plants. Dirt, on the other hand, doesn’t contain nutrients. It’s considered dead and doesn’t have a useful purpose.
Introducing Soils
Introduce the Student Magazine to students. Discuss the features of the magazine including the Contents page and the Glossary and explain the purpose of each feature. Point out the note on the Contents page that informs students that words in a bold, red font can be found in the Glossary.
Possible Misconceptions
ACTIVATE
Unit 1: Exploring Soils 13

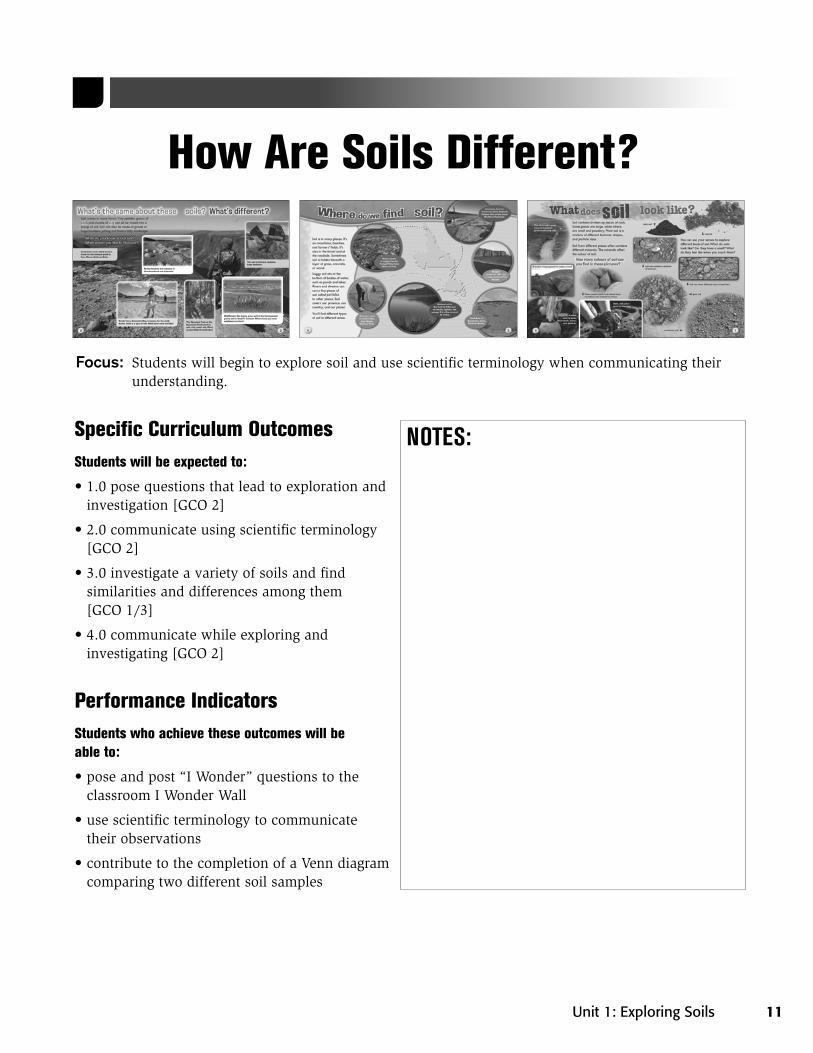
Have the students examine pages 2–3 of the Student Magazine. Give students time to look at the pictures of different settings in Newfoundland and Labrador and read the text. Then ask:
• Where do you see soil in these images?
• What do you notice about the soil?
• Are all soils the same?
• How are they the same?
• How are they different?
• Newfoundland and Labrador is sometimes referred to as “The Rock.” Do you think that is a good nickname? Why or why not?
After students have pointed out the different types of soil pictured (sand, rock, pebbles, etc.), have them describe the soil in other places they know. As they consider this, jot down any questions students ask and post them on the I Wonder Wall. For example, students may ask:
• I wonder where can soil be found?
• I wonder what soil is made of?
• I wonder how soil is formed?
• I wonder how deep soil is?
• I wonder if we need soil?
You might create a KWLM (Information we know/What we want to know/What we learned/More questions we have) chart for recording the class’ exploration of soil. Place the chart in an accessible place so it can be added to and revised to reflect learning throughout the unit. As terms such as “clay,” “sand,” “silt,” “rock,” “pebbles,” and “particles” arise, add them to the Word Wall.
Anchor Video
Play the Anchor Video: Exploring Soils, which is located on the Teacher’s Website. Set a focus for viewing by asking students to look for differences and similarities in soils. You may choose to pause the video to allow students to answer questions or to discuss any questions which students may have.
Soil Words
Create a Wordle using unit terminology that came up during discussion, or any of the unit-related terms, such as: rock, pebbles, silt, sand, clay, humus, loam, organic matter, particles, compost, composter, decompose, decay, soil erosion, moisture, absorption, living, non-living, question, explore, investigate, observe, predict, measure, record, sequence, group, conclude, and communicate.
Make copies of the Wordle and share it with the students. Have students circle any words they don’t know, and let them know they will have the opportunity to learn these words as they progress through this unit. Have students keep the Wordle to refer back to throughout the unit.
If you have used all of the terms in the unit, ask students to try to guess (predict) what topics they will explore in this unit. Alternatively, have
Word
14

students suggest categories they could use to sort the terms on the Wordle (e.g., soil components, composting soil, soil erosion, wet, dry, living and non-living, and science inquiry words, such as question, investigate, and observe).
Places With Soil
Share pages 4–5 of the Student Magazine with the class. Give students time to examine this spread and read the question: Where do we find soil? Read the text with the students, then ask students if they are familiar with any of the places pictured. Invite students to share what they know about these locations.
Encourage students to observe and then describe what they see. Point to specific visuals in the magazine and ask:
• What do you observe about the soil?
• How would you describe it?
Ask students to help you create a list of describing words (adjectives) that can be used to describe soil. For example:
crumbly firm silky spongy
dry gritty smooth squishy
earthy loose soft sticky
Post the list of words in a prominent position where students can refer to it easily. Continue to add to this list as you work through the teaching plan. Alternatively, students can add these terms to personal dictionaries or their Science Journals.
What Do You See?
Introduce pages 6–7 of the Student Magazine to the class. Read the title question aloud: What does soil look like? Give students time to examine this spread by reading the text and looking at the wide variety of soils pictured. Draw their attention to the close-ups of different types of soil and have students discuss similarities and differences they see with a partner. Invite a few students to share their observations with the class. Add any new words to the list of words used to describe soil.
Exploring Soils
Show students a few different soil samples that you have collected. The samples could be from a gully, a flower or vegetable garden, the roadside, a bog, a forest, a beach, a compost bin, or the bottom of a small river or stream.
Divide the class into small groups and create stations where each group can work to investigate the samples. Provide tools such as magnifying glasses, tweezers, and small paintbrushes at each station. Ask students to use the appropriate senses to describe the samples at their station and to record their observations using BLM Venn Diagram or a T-chart, Kidspiration, etc. Next, have students sketch their samples in their Science Journals and label any
© 2018 Scholastic C
anada Ltd. Unit 1: Exploring Soils 19
Venn Diagram
Name:
Unit 1: Exploring Soils 15
materials they observed in the samples, such as a twig, an insect, or a blade of grass. Prompts for discussion might include:
• How do these soils look different?
• Do you think these soils came from the same place? Why do you think that?
To support collaboration among students and sharing of information, have a spokesperson from each group present the samples to the class. You might use a document camera to share an example of a student’s sketch with the whole class.
Encourage students to ask questions and make comparisons about the soil samples. Add any new questions to the I Wonder Wall.
The Big DigOrganize a big dig in the school grounds and area near your school. Explain that the students’ task is to collect their own soil sample. Supply each student with a sealable plastic bag and have them label the bag with their name. Students will also need a small digging tool such as a trowel or spade, a small shovel, an old spoon, or a measuring cup. Tell students that the soil samples can come from a field, a ditch, a path, a stream, a puddle—or any number of locations. (Remind students to ask permission if they are taking a sample from private property.) They are not restricted to obtaining soil from a potted plant or flower garden. In fact, the more diverse the location and the type of soil, the better. Have students record both the location and the depth of their sample. Provide a few examples to make this task more tangible and easy to understand. The location and depth information should be recorded in students’ Science Journals for later use in future investigations.
Encourage students to dig for soil samples deeper under the ground (up to 30 cm) as well as near the surface (i.e., ground level). Having samples from both near the ground and far below will ensure that a full range of soil types are captured for exploration in the classroom. Be sure to collect a few deep samples yourself to ensure students have some to investigate. Remind students to wash their hands with soap and water after touching soil.
Alternatively, to get a larger variety of samples, students can collect a soil sample with a parent or guardian and bring these into the classroom for further investigations. Ensure students label their sample with their name and record the location and depth from which the sample was taken.
Comparing Samples
Step 1: Have students display their soil samples around the classroom in five designated stations. Encourage students to walk slowly around the room, observing the samples. Tell students they can touch the bags, but they shouldn’t open the bags at this point.
Step 2: Ask students to choose a sample from each station, describe it, and predict where the sample may have come from. Have students create a
CONNECT
IWB Activity:
Challenge students to identify types of soil using Activity 1: What is it? (see the Teacher’s Website).
16

chart in their Science Journals to record their descriptions and predictions. Encourage them to provide the reasoning or justification for their prediction. (Make sure all students’ samples are considered.)
Step 3: Then have each student add a label to his or her sample describing where the sample was found (e.g., in a flower garden) and at what depth (e.g., at the surface).
Step 4: Next, have each student check the five samples they chose to see if their predictions were close.
Step 5: Invite some students to share what they discovered with the whole class. Prompt by asking questions such as:
• How do the soils look different?
• What clues told you where the soil samples may have come from?
• What do you think the soils are made of?
Soil Scientists
Using egg cartons, have students carefully spoon some soil from different samples into five egg compartments. Ask them to label the compartments by number and then create a three- or four-column chart that describes the sample in each compartment. Encourage students to add other observations about the soil in the other columns. For example, they might include headings for colour, texture, and dryness/moisture content. Students should compare similarities and differences of the soil samples and communicate their findings with a partner.
Touch and Feel Soil
Divide the class into three large groups. Tell the class each group will investigate three different samples of soil, collected from different places. If you have soil samples containing sand, silt, or clay, include these in the investigation. Students may work independently, in pairs, or in small groups within each large group. If possible, have samples of each material in a basin for students to feel. Have clean water and paper towels close by, and have students wash their hands thoroughly with soap and water after investigating the soil.
Draw a mural-sized Venn diagram with three circles on the board. You may wish to use a different colour for each circle. In a full-class discussion, have students contribute ideas about the soils and fill out the Venn diagram together. Ask:
• What is in the soil?
• What size are the different pieces?
• What makes one soil different from another?
• Why are the samples different colours?
CONSOLIDATE
Unit 1: Exploring Soils 17
• What are the main differences between these samples of soil?
• What are their similarities?
Students should determine that soil is made up of different materials and different types of soil.
Rainbow of Soil
Have students investigate how many different colours of soil exist. They can research using books, magazines, and online sources. Students may also glean information from photos in the Student Magazine and from examining soil samples in the classroom. Have students report back to the class with their findings.
EXPLORE MORE
18
© 2018 Scholastic Canada Ltd. Unit 1: Exploring Soils 19
Venn
Dia
gram
Nam
e: