how do they do that?! this month we are proud to … december 2014.pdf · how do they do that?!...
TRANSCRIPT
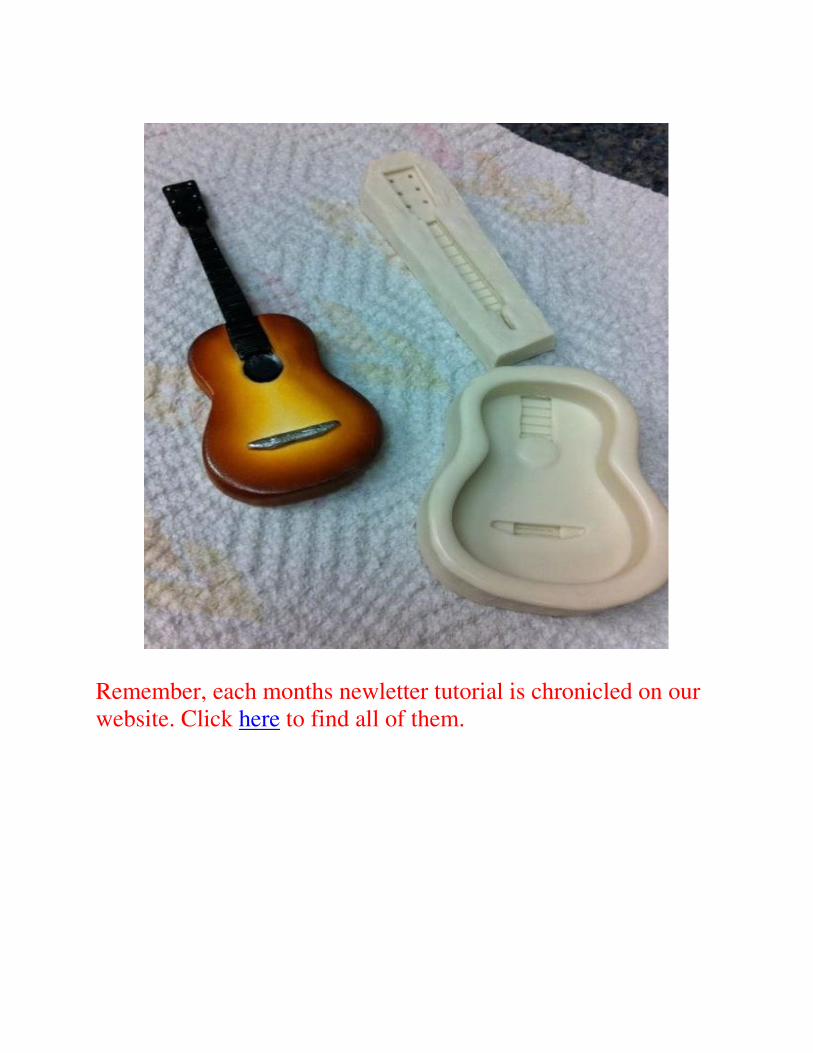
HOW DO THEY DO THAT?!
This month we are proud to bring you our BRAND NEW
Country guitar mold! I'll show you how to make and color
it. Let's get started:
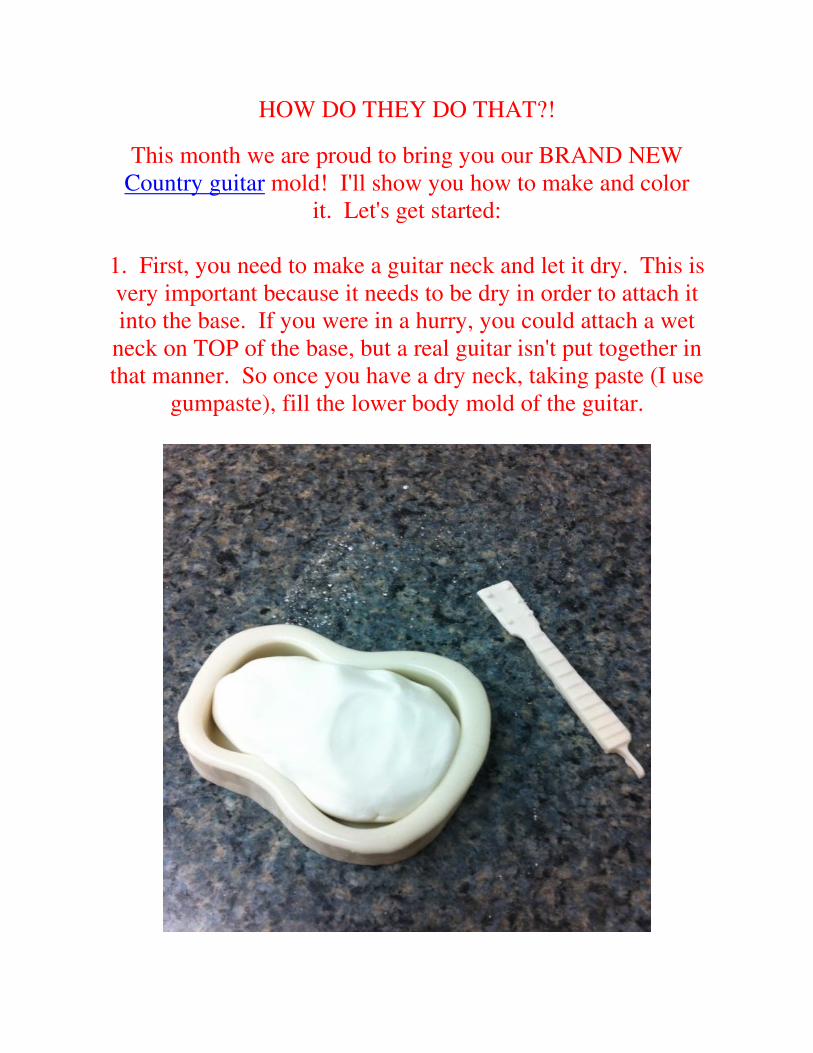
1. First, you need to make a guitar neck and let it dry. This is
very important because it needs to be dry in order to attach it
into the base. If you were in a hurry, you could attach a wet
neck on TOP of the base, but a real guitar isn't put together in
that manner. So once you have a dry neck, taking paste (I use
gumpaste), fill the lower body mold of the guitar.
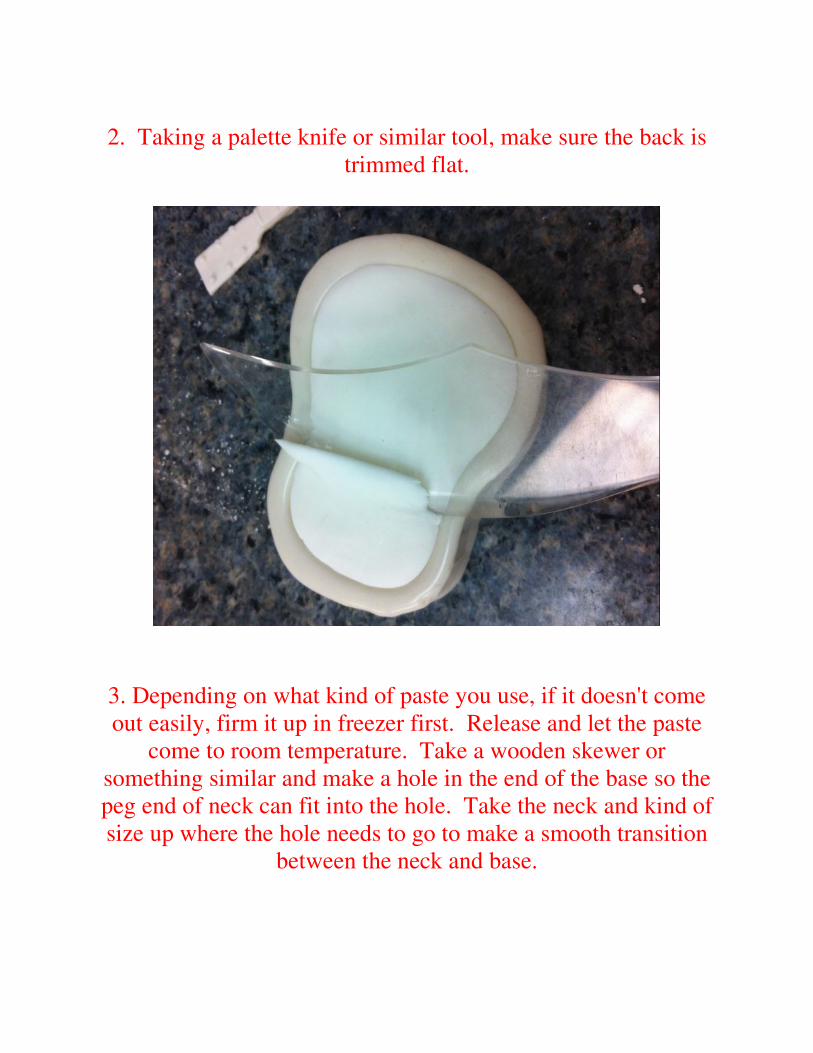
2. Taking a palette knife or similar tool, make sure the back is
trimmed flat.
3. Depending on what kind of paste you use, if it doesn't come
out easily, firm it up in freezer first. Release and let the paste
come to room temperature. Take a wooden skewer or
something similar and make a hole in the end of the base so the
peg end of neck can fit into the hole. Take the neck and kind of
size up where the hole needs to go to make a smooth transition
between the neck and base.
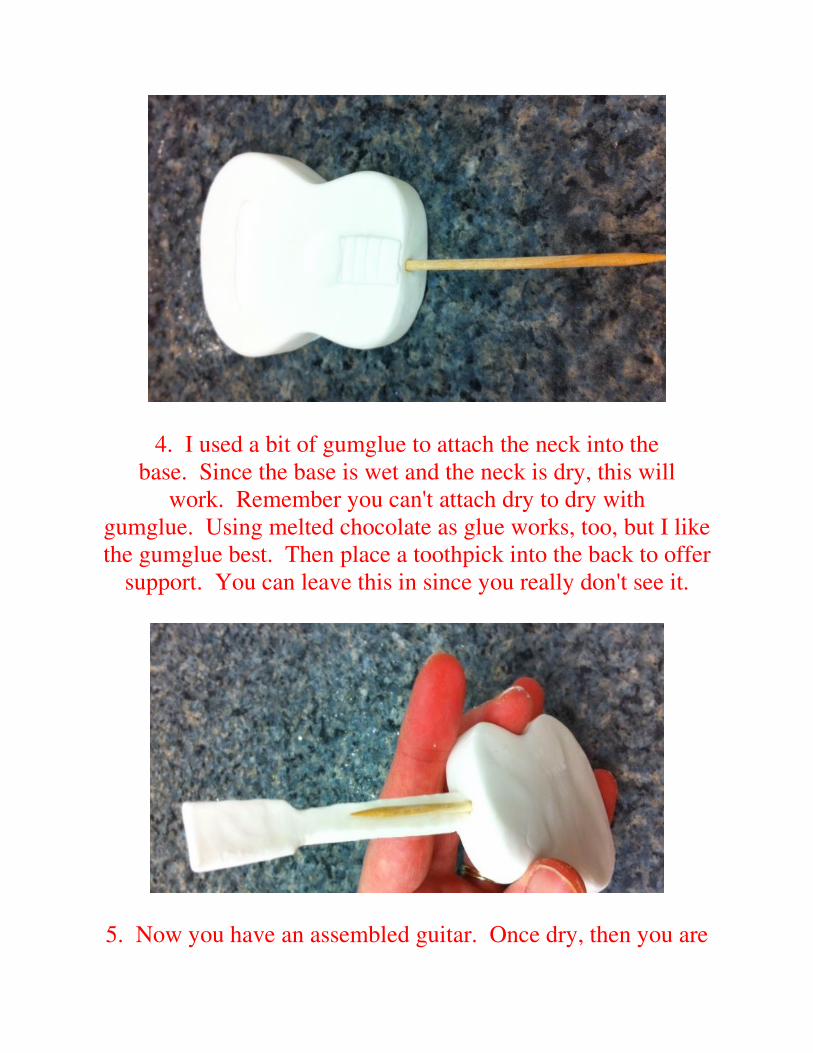
4. I used a bit of gumglue to attach the neck into the
base. Since the base is wet and the neck is dry, this will
work. Remember you can't attach dry to dry with
gumglue. Using melted chocolate as glue works, too, but I like
the gumglue best. Then place a toothpick into the back to offer
support. You can leave this in since you really don't see it.
5. Now you have an assembled guitar. Once dry, then you are

ready for color.
6. I'm painting the neck and front hole with Americolor super
black gel coloring mixed with a little vodka to thin it a bit.


7. Next, I used my airbrush to add more color. If you don't own
an airbrush, you can use dusts or paint it all with Americolor
gels. I started with egg yellow.
8. Then added brown around the sides and edges.

9. I added silver tones to the little buttons on top of the neck and
to the part at the base of the guitar.

10. I wanted to kind of highlight the edges a bit, so I took a little
of the silver on my finger and just gently wiped it on the edge of
the guitar. It gave it a very nice look :-)
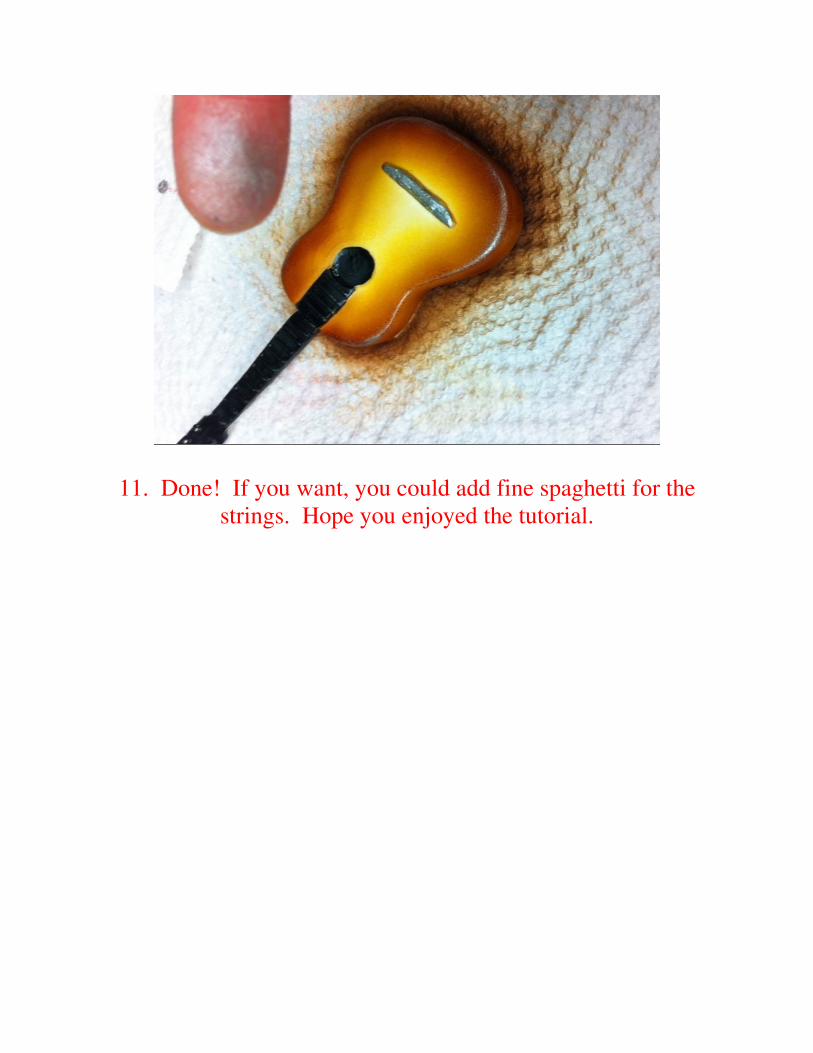
11. Done! If you want, you could add fine spaghetti for the
strings. Hope you enjoyed the tutorial.
Remember, each months newletter tutorial is chronicled on our
website. Click here to find all of them.