how to: billing with dispatch
TRANSCRIPT
Billing How to Bill and Invoice Customers with
Dispatch
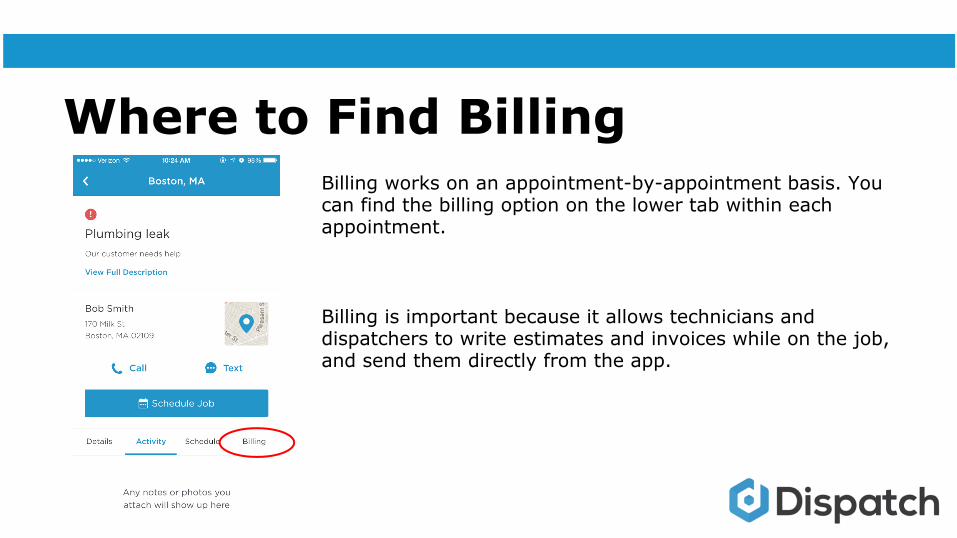
Where to Find BillingBilling works on an appointment-by-appointment basis. You can find the billing option on the lower tab within each appointment.
Billing is important because it allows technicians and dispatchers to write estimates and invoices while on the job, and send them directly from the app.
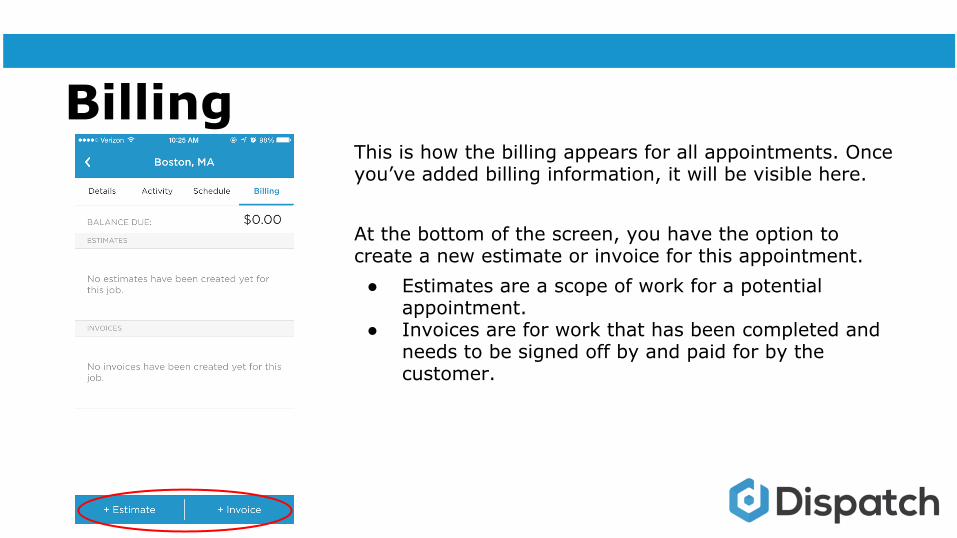
BillingThis is how the billing appears for all appointments. Once you’ve added billing information, it will be visible here.
At the bottom of the screen, you have the option to create a new estimate or invoice for this appointment. ● Estimates are a scope of work for a potential
appointment.● Invoices are for work that has been completed and
needs to be signed off by and paid for by the customer.
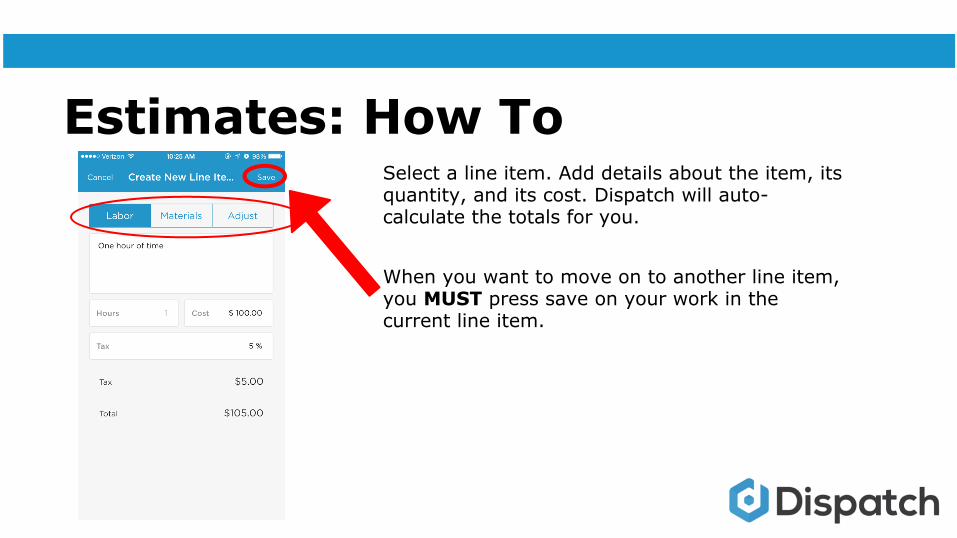
Estimates: How ToSelect a line item. Add details about the item, its quantity, and its cost. Dispatch will auto-calculate the totals for you.
When you want to move on to another line item, you MUST press save on your work in the current line item.
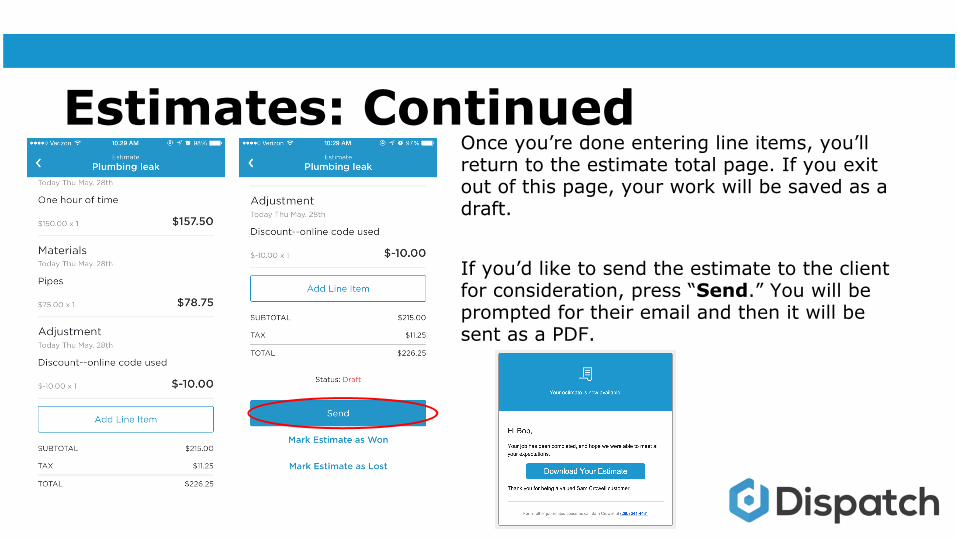
Estimates: ContinuedOnce you’re done entering line items, you’ll return to the estimate total page. If you exit out of this page, your work will be saved as a draft.
If you’d like to send the estimate to the client for consideration, press “Send.” You will be prompted for their email and then it will be sent as a PDF.

Winning EstimatesIf you’re lucky enough to win an estimate, choose “Mark Estimate as Won.” You can have the customer sign to accept the estimated work order, and the information you entered will automatically appear as a draft invoice.
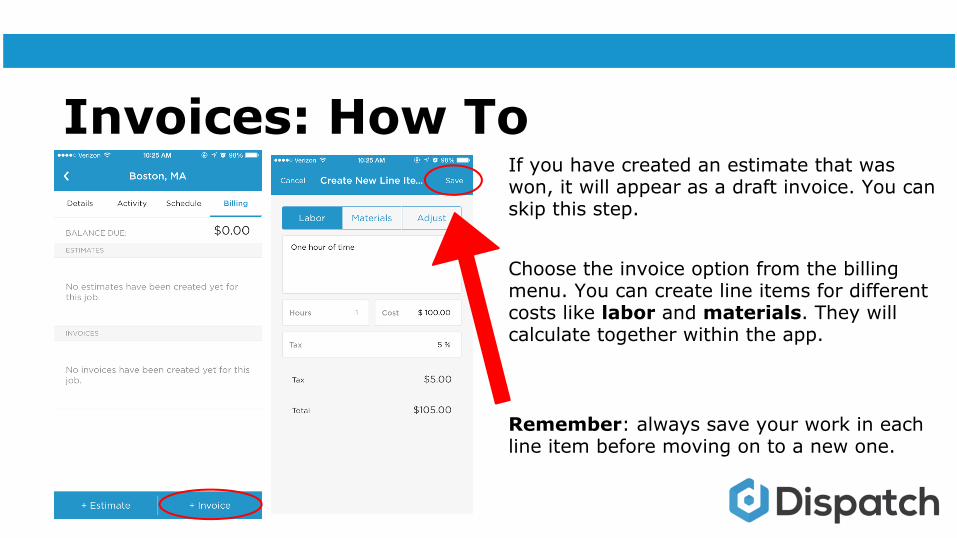
Invoices: How ToIf you have created an estimate that was won, it will appear as a draft invoice. You can skip this step.
Choose the invoice option from the billing menu. You can create line items for different costs like labor and materials. They will calculate together within the app.
Remember: always save your work in each line item before moving on to a new one.
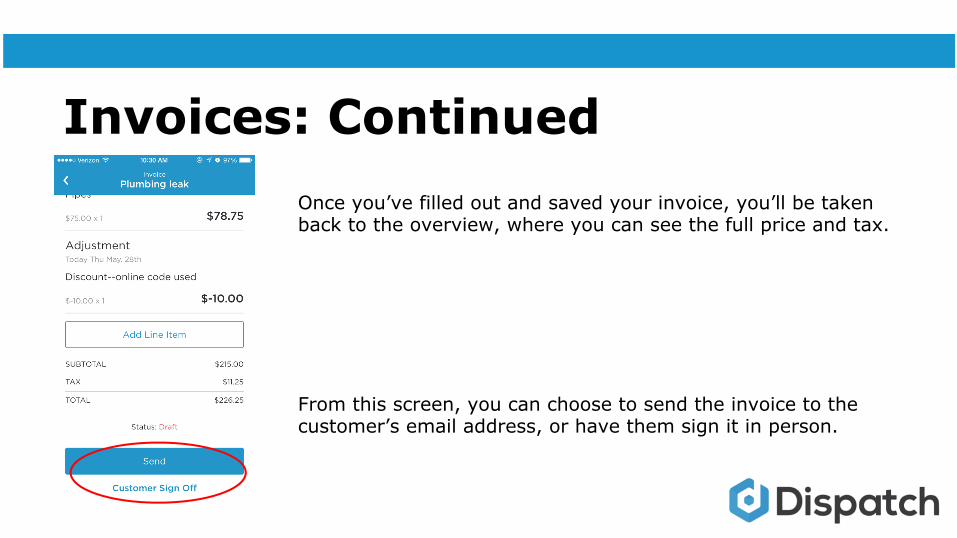
Invoices: ContinuedOnce you’ve filled out and saved your invoice, you’ll be taken back to the overview, where you can see the full price and tax.
From this screen, you can choose to send the invoice to the customer’s email address, or have them sign it in person.

Need Help?You’ve got options.
Message Dispatch directly in the appEmail [email protected] us at (617)500-4326