how to enroll in classes using schedule builder
TRANSCRIPT

Page | 1
How to Enroll in Classes Using Schedule Builder
1. Log into MyCLC at the bottom of the CLC Website:
Then click on Student Center under the Launchpad on the left hand side:
2. Click on “Manage Classes”, then click on Schedule Builder
Page | 2
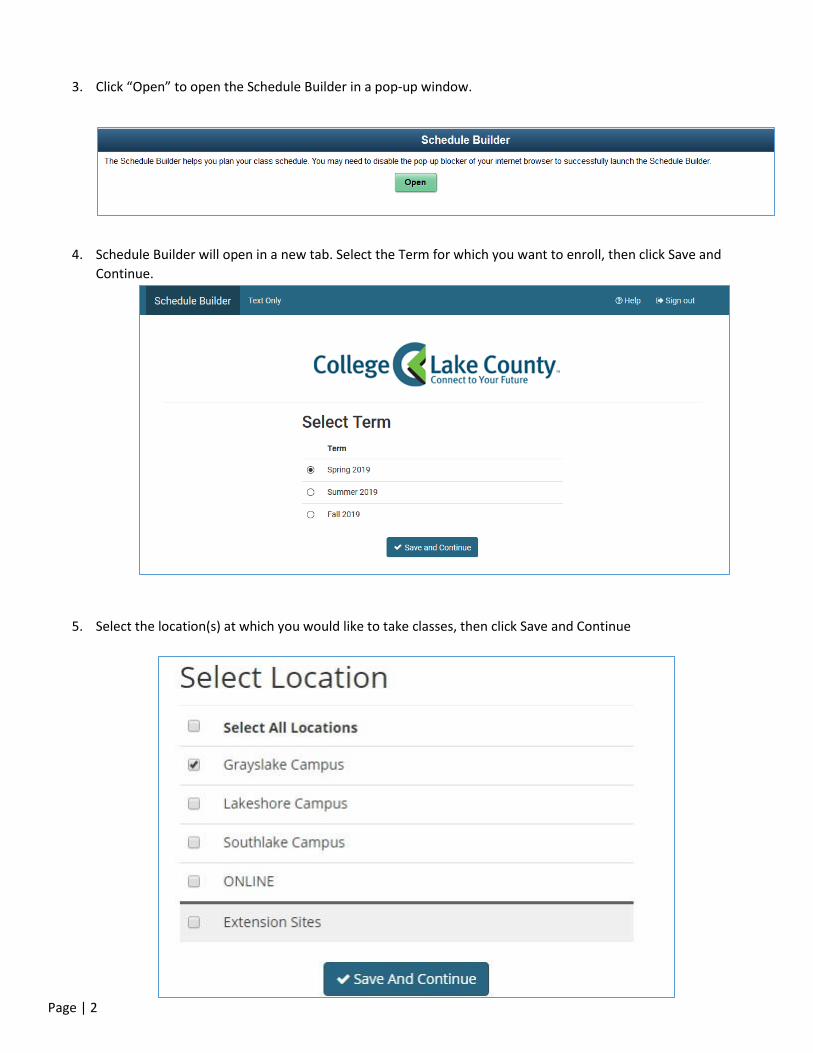
3. Click “Open” to open the Schedule Builder in a pop-up window.
4. Schedule Builder will open in a new tab. Select the Term for which you want to enroll, then click Save and
Continue.
5. Select the location(s) at which you would like to take classes, then click Save and Continue
Page | 3
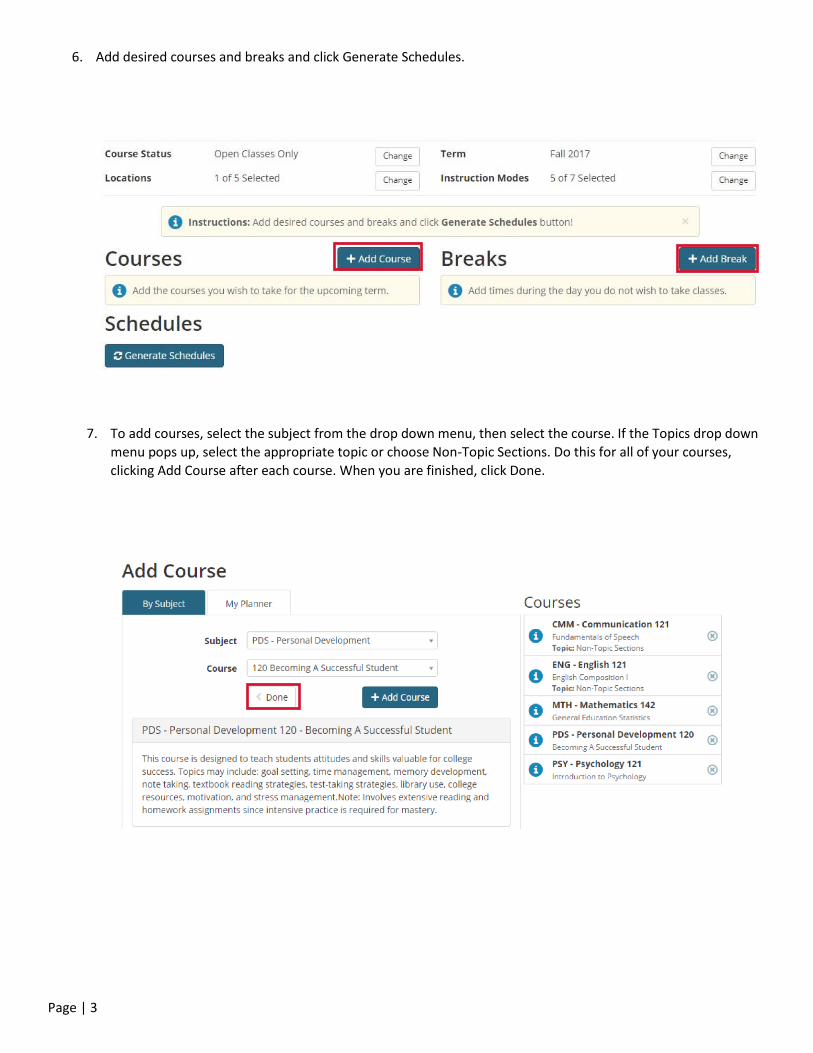
6. Add desired courses and breaks and click Generate Schedules.
7. To add courses, select the subject from the drop down menu, then select the course. If the Topics drop down
menu pops up, select the appropriate topic or choose Non-Topic Sections. Do this for all of your courses,
clicking Add Course after each course. When you are finished, click Done.

Page | 4
8. You can add breaks for days/times you do not wish to take classes. Add in breaks you need for your schedule,
thinking of work or other commitments. Click Add Break when you are done entering your break(s).

Page | 5
9. Once you have added all your courses and breaks, make sure they are checked off and click Generate Schedules.
10. All available schedules will be shown. Click shuffle to see other options. Hover the cursor over the magnifying
glass to get a glimpse of the schedule. Click View to see the schedule.
Page | 6
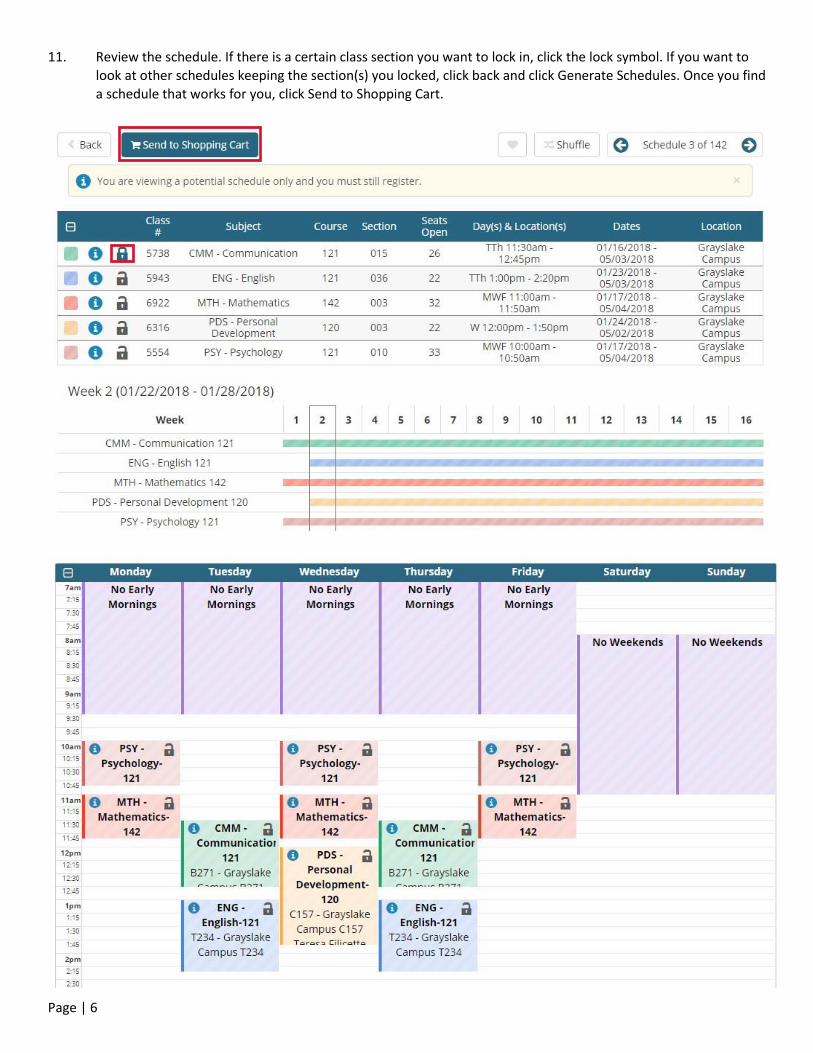
11. Review the schedule. If there is a certain class section you want to lock in, click the lock symbol. If you want to
look at other schedules keeping the section(s) you locked, click back and click Generate Schedules. Once you find
a schedule that works for you, click Send to Shopping Cart.

Page | 7
12. A pop-up window will appear. Click OK to transfer the schedule to your Shopping Cart. Schedule Builder will
redirect you to the PeopleSoft Shopping Cart to finish enrolling.
13. Check the class boxes that you want to enroll in, and click “Enroll”
14. You will receive a confirmation box asking if you are sure you want to enroll. Check Yes.
15. A pop up box notifying you about payment due dates and payment plans will appear, click OK after reading the
message.

Page | 8
16. Click on “Account Balance and Payments” to review your charges, pay in full or set up a payment plan.
17. If you click “View My Classes”, you will see the classes you are enrolled in, including the days/times the
class meets, the start and end date for the class, and the room location.
18. If you click “Bookstore: Course Materials List”, a pop up window will open showing you the books and
materials you need.