how to get the best fun from your firebug€¦ · it has none of the go fast lines and gadgets of...
TRANSCRIPT
1
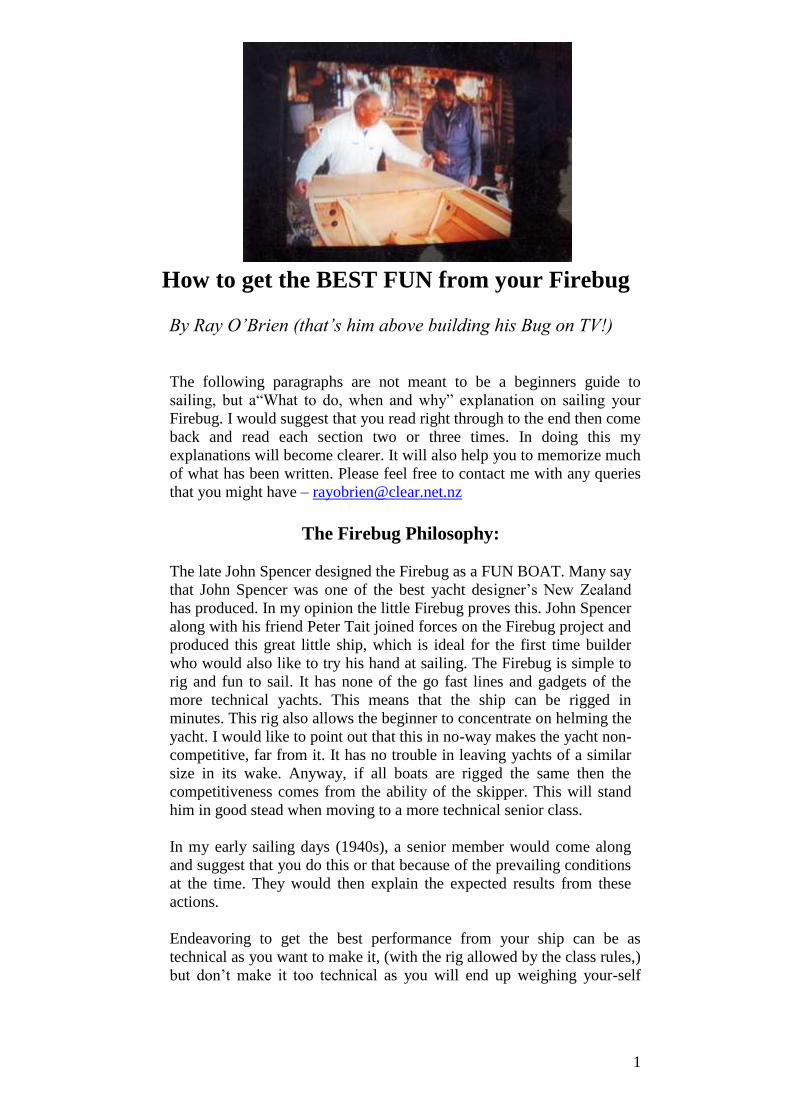
How to get the BEST FUN from your Firebug
By Ray O’Brien (that’s him above building his Bug on TV!)
The following paragraphs are not meant to be a beginners guide to
sailing, but a“What to do, when and why” explanation on sailing your
Firebug. I would suggest that you read right through to the end then come
back and read each section two or three times. In doing this my
explanations will become clearer. It will also help you to memorize much
of what has been written. Please feel free to contact me with any queries
that you might have – [email protected]
The Firebug Philosophy:
The late John Spencer designed the Firebug as a FUN BOAT. Many say
that John Spencer was one of the best yacht designer’s New Zealand
has produced. In my opinion the little Firebug proves this. John Spencer
along with his friend Peter Tait joined forces on the Firebug project and
produced this great little ship, which is ideal for the first time builder
who would also like to try his hand at sailing. The Firebug is simple to
rig and fun to sail. It has none of the go fast lines and gadgets of the
more technical yachts. This means that the ship can be rigged in
minutes. This rig also allows the beginner to concentrate on helming the
yacht. I would like to point out that this in no-way makes the yacht non-
competitive, far from it. It has no trouble in leaving yachts of a similar
size in its wake. Anyway, if all boats are rigged the same then the
competitiveness comes from the ability of the skipper. This will stand
him in good stead when moving to a more technical senior class.
In my early sailing days (1940s), a senior member would come along
and suggest that you do this or that because of the prevailing conditions
at the time. They would then explain the expected results from these
actions.
Endeavoring to get the best performance from your ship can be as
technical as you want to make it, (with the rig allowed by the class rules,)
but don’t make it too technical as you will end up weighing your-self
2
down with all the advanced knowledge being offered, it can become an
obsession that will spoil your fun. There is much more to the sport of
sailing than the Land Lumber thinks, so will leave that to the many
technical books written by more knowledgeable racing skippers than
yours truly.
The Basics
Perhaps if we understand the basic principles of boat design and the sail
power that drives it through the water, things might fall into place and
give more credence to those questions and answers.
Lets look at Boat design first. As you
probably have now realized from the
Americas Cup this is a very complex task,
but if we keep to the Firebug some light
may show at the end of the tunnel, as the
saying goes. The first line a Designer puts
on the paper is the waterline, and from here
he will draw a profile of what is required by
the builder such as the topside shape and the
underwater shape. He then draws the water
line beam shape and the deck beam. Next, he
needs to find the Centre of Buoyancy, as
this is where he will place the Centreboard or keel. The actual centre of
the keel or centreboard is referred to as the Centre of Lateral
Resistance, or C of LR; we will refer to this later.
There was a time when a 4-metre boat would go faster than a 3-metre
boat, as water line length governed the speed, but with the planing hulls
of yachts today there is much more to take into account, such as sail
power and skill.
In the case of the Firebug, if you look at the plans and also the boat
sitting in the water, you will see that some 200 mm is sitting out of the
water, so instead of having a 2.4m boat you really only have about 2.2m
of the boat sitting in the water. We will come
back to this later. The design has a rather
large rocker (curve) in the keel. This makes
the boat very quick in tacking and gives a
good loading capacity. The boat also has a
wide
beam
with both
the water
line
beam
and deck
line
Again the photo shows how the bow is
clearing the water when sitting amid
ships.
Note the bow waterline
Note the bow waterline
3
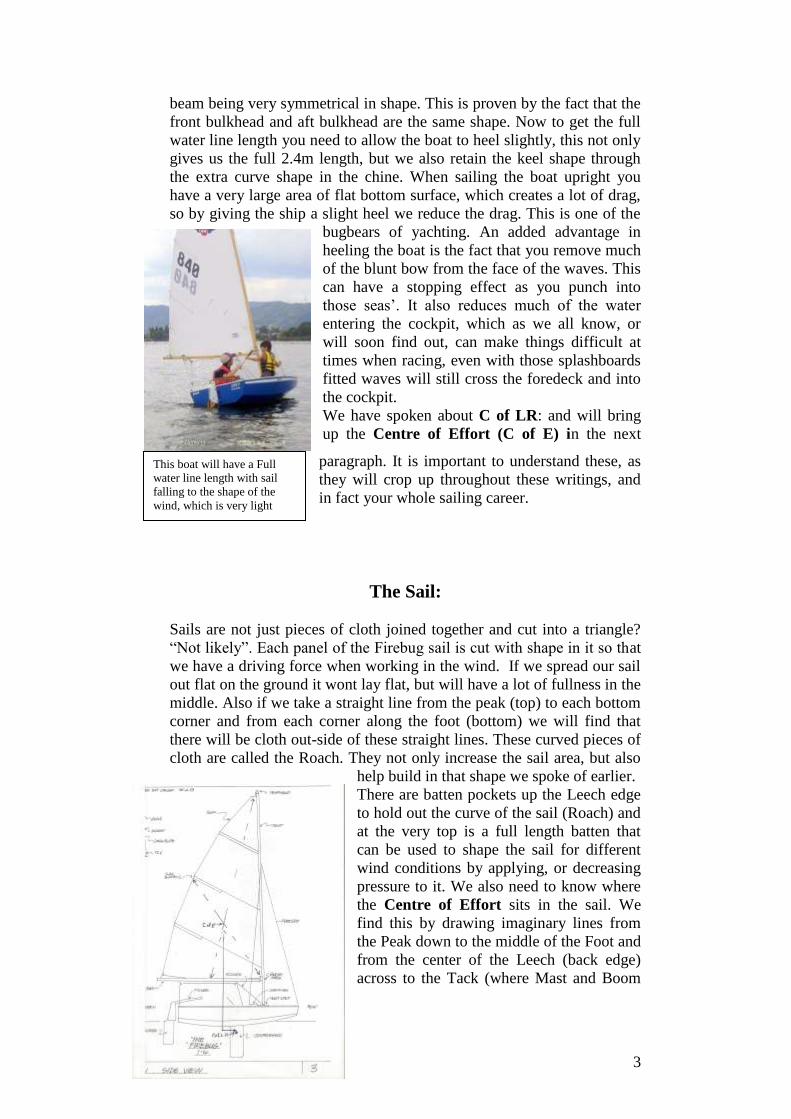
beam being very symmetrical in shape. This is proven by the fact that the
front bulkhead and aft bulkhead are the same shape. Now to get the full
water line length you need to allow the boat to heel slightly, this not only
gives us the full 2.4m length, but we also retain the keel shape through
the extra curve shape in the chine. When sailing the boat upright you
have a very large area of flat bottom surface, which creates a lot of drag,
so by giving the ship a slight heel we reduce the drag. This is one of the
bugbears of yachting. An added advantage in
heeling the boat is the fact that you remove much
of the blunt bow from the face of the waves. This
can have a stopping effect as you punch into
those seas’. It also reduces much of the water
entering the cockpit, which as we all know, or
will soon find out, can make things difficult at
times when racing, even with those splashboards
fitted waves will still cross the foredeck and into
the cockpit.
We have spoken about C of LR: and will bring
up the Centre of Effort (C of E) in the next
paragraph. It is important to understand these, as
they will crop up throughout these writings, and
in fact your whole sailing career.
The Sail:
Sails are not just pieces of cloth joined together and cut into a triangle?
“Not likely”. Each panel of the Firebug sail is cut with shape in it so that
we have a driving force when working in the wind. If we spread our sail
out flat on the ground it wont lay flat, but will have a lot of fullness in the
middle. Also if we take a straight line from the peak (top) to each bottom
corner and from each corner along the foot (bottom) we will find that
there will be cloth out-side of these straight lines. These curved pieces of
cloth are called the Roach. They not only increase the sail area, but also
help build in that shape we spoke of earlier.
There are batten pockets up the Leech edge
to hold out the curve of the sail (Roach) and
at the very top is a full length batten that
can be used to shape the sail for different
wind conditions by applying, or decreasing
pressure to it. We also need to know where
the Centre of Effort sits in the sail. We
find this by drawing imaginary lines from
the Peak down to the middle of the Foot and
from the center of the Leech (back edge)
across to the Tack (where Mast and Boom
This boat will have a Full
water line length with sail
falling to the shape of the
wind, which is very light
4
meet) you can also take one from half the mast length out to the Clew.
Where these lines intersect we find the Centre of Effort (C of E) this is
where the driving force of the wind has the greatest effect. This point is
also important to the balancing of the ship, as we will see later.
I digress for a minute: How does a sail
work? If we take a piece of A4 paper cut it
into four pieces. Take one piece and make a
10mm crease along the narrow edge and then
roll the paper up starting at the back edge,
then flatten it out so it is shaped like a wing.
We then hold the two corners of the flat edge
between thumb and finger and hold it
horizontal in front of the mouth and blow. If you have the right shape the
back edge of the paper will lift up. This happens because the air going
over the top of the curve has to go faster, thus becoming thinner, with
pressure underneath staying the same. This creates a vacuum above the
sail, which sucks the sail into. Now if we turn it on its side as a sail and
put down our centreboard to stop the boat from slipping sideways, the
ship will sail forwards. It was put to me once, does the boat get sucked
along, or does the wind push it along.
A tip:
Saving wear and tear: Have a can of Silicon Spray handy and spray up
the mast track and along the Luff rope edge. This will make the sail slide
more freely and also save wear and tear on the tabling covering the Luff
rope.
Throughout the writing I will give further tips that will help keep your
ship shipshape.
Sail adjustments to suit the various conditions when
Beating to weather:
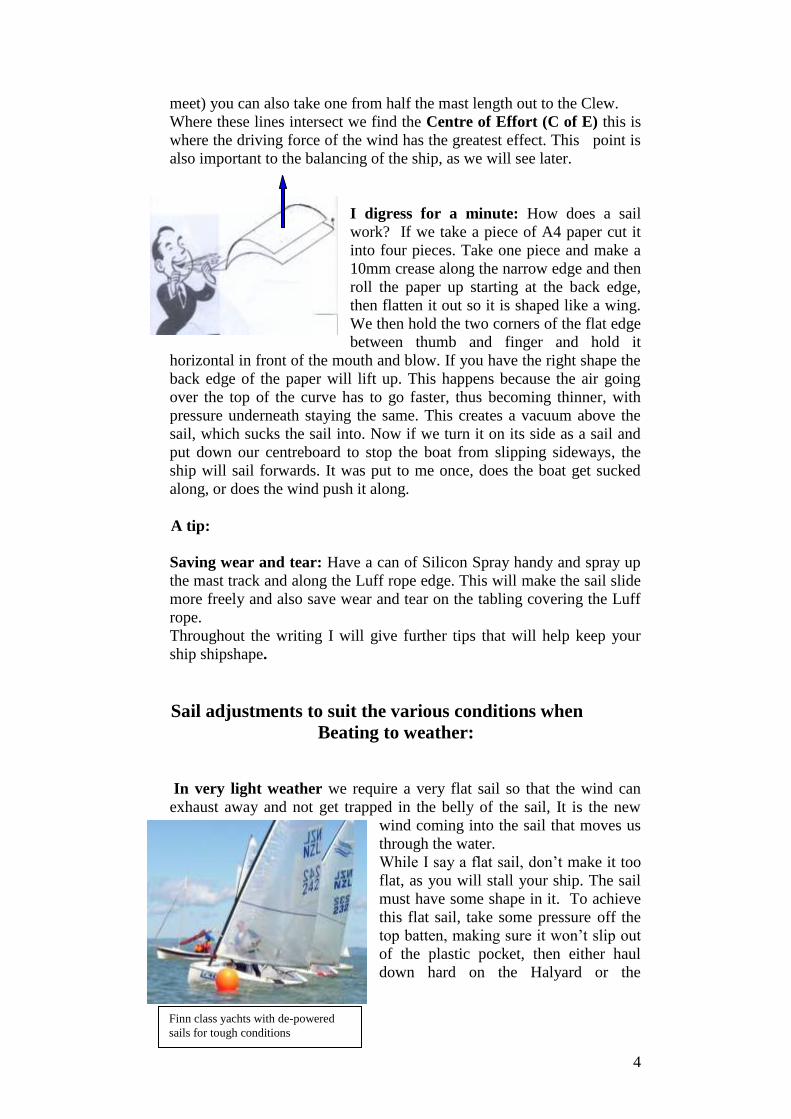
In very light weather we require a very flat sail so that the wind can
exhaust away and not get trapped in the belly of the sail, It is the new
wind coming into the sail that moves us
through the water.
While I say a flat sail, don’t make it too
flat, as you will stall your ship. The sail
must have some shape in it. To achieve
this flat sail, take some pressure off the
top batten, making sure it won’t slip out
of the plastic pocket, then either haul
down hard on the Halyard or the
Finn class yachts with de-powered
sails for tough conditions
5
Downhaul that fastens the tack of the sail to the Boom. (Mast end). The
next thing to do is to apply tension to the Clew of the sail (outer Boom
end) BUT don’t tension it so much that you throw a crease line along the
foot of the sail. To see the result of this, take a look at some of the older
sails that have been tensioned (strained) for several seasons and you will
see a permanent crease along the foot, with the foot Roach flapping
away. The Roach has been made redundant. Applying too much tension
at the clew end of the sail created this ruined Roach. This part of the sail
is on the Bias of the cloth so some
thought is required when applying
tension. An example. Stretch a Hanky at
opposite corners and you will see what I
mean. To apply the right tension on the
out-haul line apply tension until a crease
appears, then slacken off just enough to
remove it. When flattening the sail you
are de-powering it. Remember, the sail is one of the more costly things
on a boat, so look after it.
,
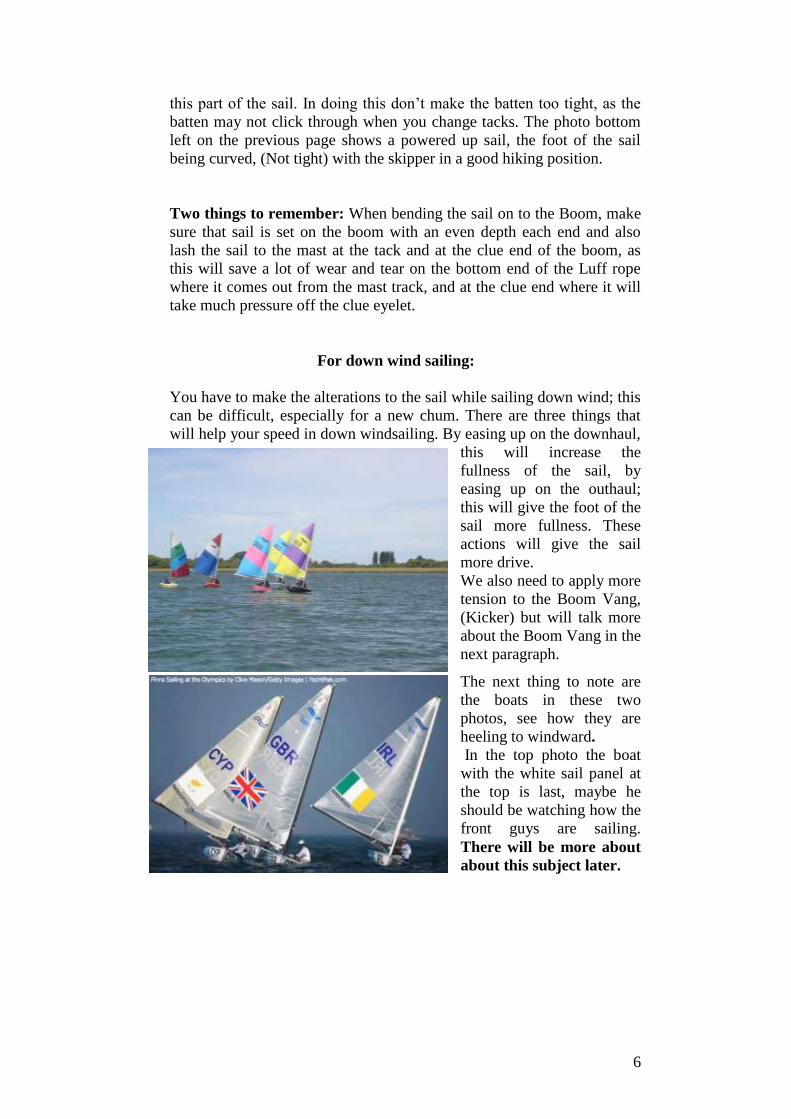
The same above also applies for Heavy weather sailing
There is however another action you can take
in setting your sail for heavy weather, and that
is to take in a reef. If you do decided on this
action make sure the reef points, if you have
them are not fastened to the boom, as the sail
has to be loose footed. Then again, it may be
wise to consider your sailing ability under such
conditions and stay on the beach.
.
Medium weather sailing: That wind
range between 8-15 knots. Power up
your sail by easing up on the
downhaul, and or slacken up on the
Halyard. Also ease up on the clew end.
Before you hoist the sail put more tension on the top batten to power up
This Firebug sail is reefed to suit the
conditions and the ability of the
skipper. It will loose little
performance under such conditions,
and may in fact perform better than
a full rigged boat over-powered and
struggling under heavy conditions
6
this part of the sail. In doing this don’t make the batten too tight, as the
batten may not click through when you change tacks. The photo bottom
left on the previous page shows a powered up sail, the foot of the sail
being curved, (Not tight) with the skipper in a good hiking position.
Two things to remember: When bending the sail on to the Boom, make
sure that sail is set on the boom with an even depth each end and also
lash the sail to the mast at the tack and at the clue end of the boom, as
this will save a lot of wear and tear on the bottom end of the Luff rope
where it comes out from the mast track, and at the clue end where it will
take much pressure off the clue eyelet.
For down wind sailing:
You have to make the alterations to the sail while sailing down wind; this
can be difficult, especially for a new chum. There are three things that
will help your speed in down windsailing. By easing up on the downhaul,
this will increase the
fullness of the sail, by
easing up on the outhaul;
this will give the foot of the
sail more fullness. These
actions will give the sail
more drive.
We also need to apply more
tension to the Boom Vang,
(Kicker) but will talk more
about the Boom Vang in the
next paragraph.
The next thing to note are
the boats in these two
photos, see how they are
heeling to windward.
In the top photo the boat
with the white sail panel at
the top is last, maybe he
should be watching how the
front guys are sailing.
There will be more about
about this subject later.

7
A Tip
To get a consistent sail setting for the various wind conditions glue a
length of measuring tape to the clue end of the boom, say about 10cm
should give you a good range to work from. This measuring strip can
also be purchased from ships chandler. Some skippers also glue a strip to
the mast by the boom.
Boom Vang: (Kicker)
The Boom Vang plays a large part in
controlling your ship. There was a time
when Boom Vangs weren’t in existence
and down wind sailing could be a real
problem. The Boom would lift and allow
the top half of sail to twist forward of
the mast, this created a rolling motion
(Death Roll) which would often end in a
capsize, but by applying the Boom Vang
you will prevent the sail twisting
forward, thus reducing the risk of a
capsize, but not completely I should add.
It can also be used for bending the mast,
but has very little effect on the Firebug
sail as it is loose footed. (See picture left)
Going up wind it pays to have some
tension on the Vang, but this depends on
the wind strength. The stronger the wind
the less Kicker tension is needed. The
reason for this action is to allow the
leach of the sail to open more, creating a
valley up the sail so that the wind can clear away, thus de-powering the sail.
It will also shift the C of E slightly forward, which will help reduce weather
helm. There are times when the Vang can get you into trouble, that is when
the centreboard is lifted too high and the boom comes across jamming it self
An example of a boom vang applied
too tight. It is defeating the object of
flattening the sail as the boom is
bending allowing the foot of the sail to
belly out. The sail Leech looks over
tensioned by the Boom Vang and is
creating a tight (Hooked) Leach.
This Firebug could have a bit
more tension applied to the
Boom Vang. It would present
more of the top half of the sail
to the wind while on this reach.
If you look at boat 2 from the right, notice how
this sail shows in front of the mast from about
1/3rd up. This would be good Boom Vang tension
for strong winds when beating to weather. It
allows the wind to funnel up through the valley of
the sail reducing the heeling momentum however,
for down wind sailing more tension would be
needed.
8
against the Centreboard. This occurs mainly when setting off, coming
ashore, or when Gybing. If the wind is strong enough the centrecase could
be strained. The other time this could occur is when turning away from the
wind (Sailing down wind) Before you make your turn, make sure the
centreboard is well up, (but clearing the Boom Vang,) this will prevent your
boat from tripping over a full depth board and causing the boat to nose
dive as you make your turn.
Remember, A good time to tension the Boom Vang is when heading up to
the top mark on the last beat, as having tension on the Main Sheet will give
some slack in the Vang and make it easy to tension up.
Don’t forget, when reaching the bottom Gybing mark make sure you take
the pressure off the Boom Vang it will make it easier to carry out the Gybe
as previously stated.
.
Having worked out the all adjustments it’s time to go
sailing
If the wind is light you can probably launch the ship with the sail up. But
there will be times when it pays to pull the
sail up after launching if the wind is
strong. The same applies when coming
ashore. Starting out we make sure the
Centreboard is in place and that the rudder
is tensioned down. Then check
the following, which way the
wind is blowing, are there any
other boats in the vicinity. All
clear, then off we go. If in a new boat, haul the sail in slowly to make sure
all things are working as they are meant too.
A tip
When leaving or coming ashore make sure there is enough room at the
ramp. This is a good place to put a hole in your boat if the ramp is
crowded. Some skippers don’t hold the ship at the bow so consequently
they loose control of their ship.
9
That first beat
Getting aboard: Give some thought to the side you are going to get into
your ship. Some beginners don’t consider which way the wind is blowing
and try and get in on the leeward side, the result being that they capsize
before they even get started.
Once aboard you may have to pull your sail in to get the wind in it
depending on the direction you are sailing. Once moving pick a spot up
ahead and try and sail for it. You will probably have to alter course
slightly to keep the sail full and the boat moving. This is because the
wind never blows in a straight line, but swings to the left and the right by
as much as ten degrees. Once you get the hang of it, you will be able to
take advantage of these shifts to get to the point you are heading for
much quicker. Remember to make sure your rudder blade is down and
your centreboard is sitting in the case. One other thing to remember, if
you are a learner never let go of the tiller or mainsheet, unless you’re
tacking. To do this would be like letting go of a car’s steering wheel.
Right of way when beating to windward:
Like the rules of the road there are rules to follow when in a boat, in this
case a yacht. It doesn’t matter how big the other yacht is the same rules
apply. A starboard tack boat has right of way over a port tack boat. You
are on starboard tack when the wind is coming over the right hand side of
your ship. If you meet a boat that is on port tack he has to give way to you,
by either tacking onto starboard or sailing behind you. It is your duty to
make contact by calling out “starboard tack”. He is then made aware of
your position. This is a basic rule. When racing, all the rules become a bit
more complicated, but when explained are easy to follow. It always pays
when tacking onto port tack that you have a quick look and make sure
there are NO starboard tack boats in close vicinity, as you might have to
tack again to clear them. Every time you tack you loose about one and half
boat lengths. So keep your tacking to a minimum. One other thing to
remember is, even though you have right of way you must take action
to prevent a collision.
When to tack: It is here you need to know about wind shifts. You are
sailing along on a good breeze on a designated course when suddenly your
sail starts to flap, you can do two things, (1) pull your tiller towards you
and lay off until the sail fills or (2) you can change tacks. If you are
heading for an up wind mark it might be in your interest to tack, in doing
this you could gain a lot of extra ground.
10
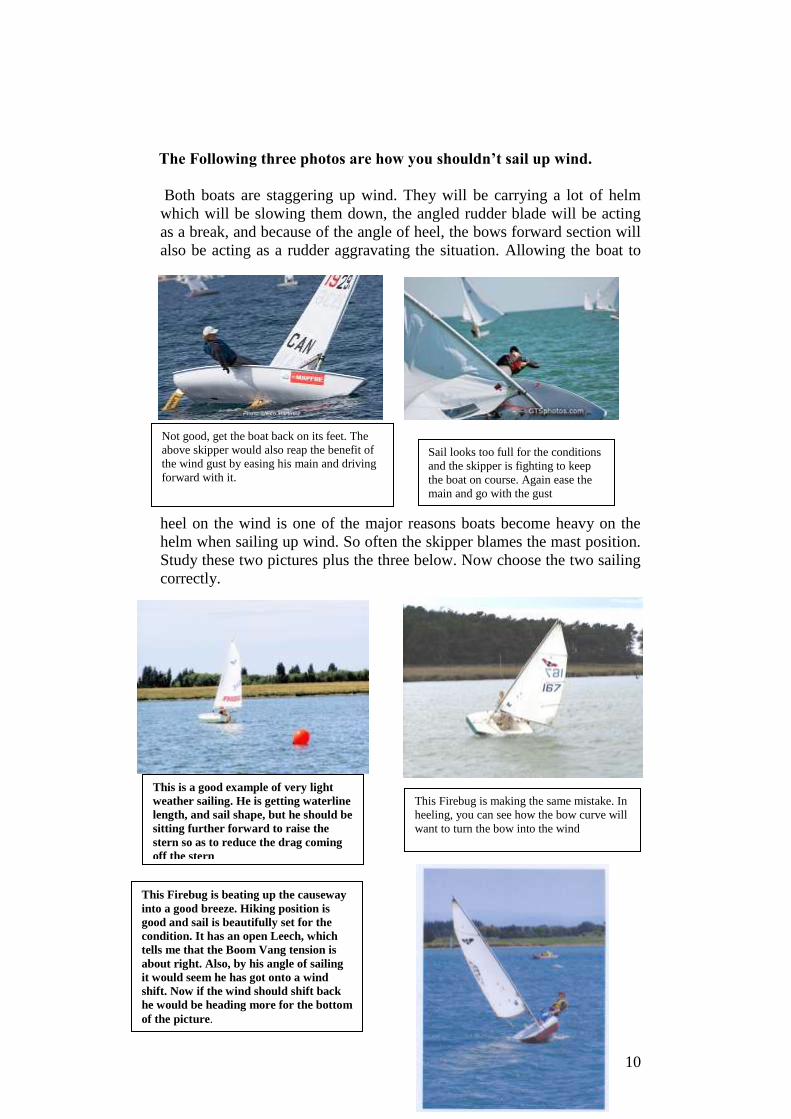
This Firebug is beating up the causeway
into a good breeze. Hiking position is
good and sail is beautifully set for the
condition. It has an open Leech, which
tells me that the Boom Vang tension is
about right. Also, by his angle of sailing
it would seem he has got onto a wind
shift. Now if the wind should shift back
he would be heading more for the bottom
of the picture.
The Following three photos are how you shouldn’t sail up wind.
Both boats are staggering up wind. They will be carrying a lot of helm
which will be slowing them down, the angled rudder blade will be acting
as a break, and because of the angle of heel, the bows forward section will
also be acting as a rudder aggravating the situation. Allowing the boat to
heel on the wind is one of the major reasons boats become heavy on the
helm when sailing up wind. So often the skipper blames the mast position.
Study these two pictures plus the three below. Now choose the two sailing
correctly.
Not good, get the boat back on its feet. The
above skipper would also reap the benefit of
the wind gust by easing his main and driving
forward with it.
Sail looks too full for the conditions
and the skipper is fighting to keep
the boat on course. Again ease the
main and go with the gust
This Firebug is making the same mistake. In
heeling, you can see how the bow curve will
want to turn the bow into the wind
This is a good example of very light
weather sailing. He is getting waterline
length, and sail shape, but he should be
sitting further forward to raise the
stern so as to reduce the drag coming
off the stern

11
Running down wind (When the wind comes
from behind)
Sailing with the wind behind you is easy,
WRONG. Yes you can just sit there and steer the
boat, WRONG. If the wind is right behind, you
will need to watch for
those wind shifts. A
wind shift to leeward
of you could cause you
to Gybe and finish
with you in the tide (A
capsize). Gybing is
when the wind blows
the sail across to the
other side,
intentionally or unintentionally, often with a
crash, you will have to duck your head quickly
to prevent suffering an injury. If it is blowing
hard, downwind sailing can be exciting to say the least. You can make
your boat sail faster if you do the following, make sure your centreboard is
about 2/3rds up in the centrecase, this will help control the ship. Also
make sure you are sitting well to the stern to keep the bow up. Make sure
you have the Boom Vang on tight enough so the boom won’t lift. The next
thing to do, and this can be really exciting, is to lean your boat over
towards the wind. We spoke earlier about the Centre of Effort (In the sail)
and the Centre of Lateral Resistance in the hull. In heeling the boat over
you are bringing them into line with each other. When the mast is straight
up and down the C of E is out to the side. This pressure wants to pivot the
boat on the centreboard, so to counteract this you have to apply pressure to
the helm. This action is going to act as a break as you endeavor to keep
your ship on course. In heeling the boat you will take the pressure off the
rudder, it should feel neutral if you have got the heel right. As you gain
more experience and get used to the feel of the boat; you can try it in a
fresher breeze. Again, this is where the wind shifts can upset your plans, as
I’m sure you will find out. So always be alert to wind shifts. There is a lot
of making sure’s in this paragraph, but they are important.
Two fine examples of skippers heeling their boats to weather
down wind

12
Those death rolls: We spoke of
these earlier. To correct this
problem it will help if you (1) pull
your sail in a bit, or (2) to push your
helm down slightly and bring your
ship onto more of a reach. This
action will bring the wind more
abeam. (Side on) This will/should
correct the problem. Once things
have settled down you can then try
and get back on course.
What ever you do don’t try and
correct the problem by shifting your
weight from side to side as it will
aggravate the problem. It doesn’t
only occur in cat-rigged boats such
as our Firebug, but sloop-rigged boats even when they have their spinnaker
set. While sailing down wind we need to keep our wits about us.
Making that necessary Gybe:
This is probably the most testing manoeuvre to carry out in sailing. The
experts will tell you to carry out your Gybe when the ship is going at it’s
fastest. True, but as you are not an expert yet, I reckon you will probably
pray for the breeze to drop when you carry out this manoeuvre. There are
certain things that will help you in this task, (1) make sure your
centreboard is at least half up so you don’t trip over it. Always make sure
the top of the centreboard will clear the BoomVang. (2) Ease up on the
Boom Vang, it will take the pressure off the Leech (Back edge of the sail)
and make it easier to grab a hand full of mainsheet near the boom and pull
it across, rather than sailing through the Gybe. Whichever manoeuvre you
carryout, remember to duck your head. (3) Again, as your ship goes
through the Gybe bring your tiller back to check the ships swing other
wise it will continue to swing around in a circle heeling right over and
ending in a capsize. This situation is called Broaching. As you complete
the Gybe try and keep the ship flat. Releasing the pressure on the Boom
Vang will also help if your ship heels too much, the Boom will be able to
This is a fine example of an R class going
through the Death rolls on Lyttelton Harbour.
They survived these death rolls. However,
through the conditions prevailing they had
unintentionally Gybed the Mainsail from port
to starboard this further complicated the
situation

13
lift and not drag in the water. A dragging Boom could put you in the tide.
In carrying out the Gybe, don’t hesitate make it a positive move.
Reaching:
NO, It’s not the situation that arises when you get seasick. It is an angle of
sailing across the wind. It could be a Broad Reach, a Beam Reach or a
Tight Reach.
It is probably
the fastest
point of
sailing. To get
onto a Reach
you will need
to turn your
bow so that it
is sailing across the wind in other words the
wind is coming more from the side of the boat.
The secret is to free your sail until it starts to
flap a bit and then pull it in until it stops
flapping. If the Breeze is fresh, you will feel
the boat won’t to get up and go. If she feels a
bit sluggish, it will probably be because you
haven’t lifted your centrebord up by about half.
You will feel how much board you need to
have down. There will be times when
the wind gusts strengthen and you
start to heel more than you want.
That’s fine, quickly let the sail out
until the boat is on a more even keel
and pull your tiller towards you slightly and go with the gust. Man that’s
the fastest point of sailing. As the wind eases and swings back, or drops off
push your helm slightly away from you to get back on course, at the same
time bringing in the slack on your mainsheet. I repeat, as you can see these
situations are mainly caused by those wind shifts. There is a saying from
way back “let your sail out and go with the breeze, don’t fight it”
.
Wave Riding
To carry out the following you need to
be on a beam or Broad Reach. Having
got the hang of the above we can now
look at doing a bit of wave riding.
This will really give you more speed if
a bit of a sea is running, the bigger the
better. It is possible to increase your
The yachts in these three photos have
really got onto a gust, especially the top
one. Yachting at its best. Note the
position of the centerboard.

14
speed by pulling your tiller towards you just as the wave lifts your stern, at
the same time giving more tension on the Mainsheet in the form of a quick
tug, this extra tension will help get you on to the face of the wave, at this
point you are probably going faster than the speed of the wind and your sail
could backwind. (Go slack) As you slip off the back of the wave bring your
boat back onto the Reach and wait for the next wave. It really gives you a
thrill sailing on this course. If you get good at it there will be times when
you sail over the wave in front and down the next one.
A tip
Looking for extra speed? Then try using car polish on the bottom of your
ship. It just might make the difference. There was a time in the early R class
days when skippers polished their boats with graphite. Soon after Graphite
Paint was produced. The paint didn’t last, probably because the only colour
was a dark gray. Regarding the graphite polish, some of the boys reckoned
the powder had probably washed off by the time the first mark was reached.
Beating to windward:
The skipper who can keep
his/her boat at optimum
speed, take advantage of the
wind shifts, keep clear air and
be in a good tactical position
to round the mark is going to
be up with the Leaders,
especially when rounding the
top mark. To do this, DON”T
pinch your ship by sailing too
close to the wind. When the Luff of your sail starts to flutter (That section
by the mast) pull your tiller slightly towards you and get that sail full of
wind again. Don’t sit behind another boat, as he/she will give you a lot of
disturbed air. Always aim to keep clear wind ahead of you. Try not to get
A good start. Notice how one boat has gone onto a flyer to get fresh breeze and not
stayed with the fleet. This move can pay off, but unless he gets the favorable wind
shifts he might be further back in the fleet than he would like.
15
caught on Port tack as you come up to the weather mark. Always try and
approach it on Starboard tack, you can get into all sorts of problems here
that will cost you heaps of time by approaching it on port. There is one
other problem some skippers have, and that is to haul their mainsail in so
tight they actually stall their ship. Give it a bit of freedom and allow it to
do the job. It doesn’t take a lot to get the boat driving foreword again. But
not with a stalled sail.
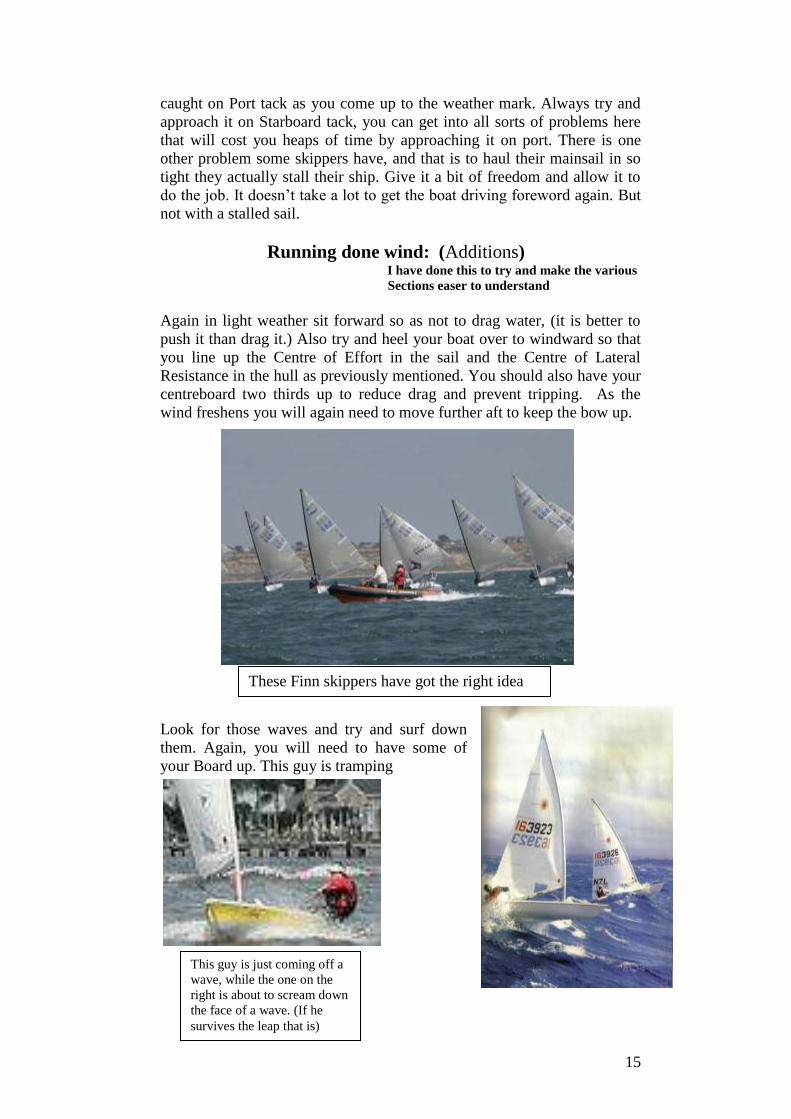
Running done wind: (Additions) I have done this to try and make the various
Sections easer to understand
Again in light weather sit forward so as not to drag water, (it is better to
push it than drag it.) Also try and heel your boat over to windward so that
you line up the Centre of Effort in the sail and the Centre of Lateral
Resistance in the hull as previously mentioned. You should also have your
centreboard two thirds up to reduce drag and prevent tripping. As the
wind freshens you will again need to move further aft to keep the bow up.
Look for those waves and try and surf down
them. Again, you will need to have some of
your Board up. This guy is tramping
These Finn skippers have got the right idea
don’t you think
This guy is just coming off a
wave, while the one on the
right is about to scream down
the face of a wave. (If he
survives the leap that is)
16
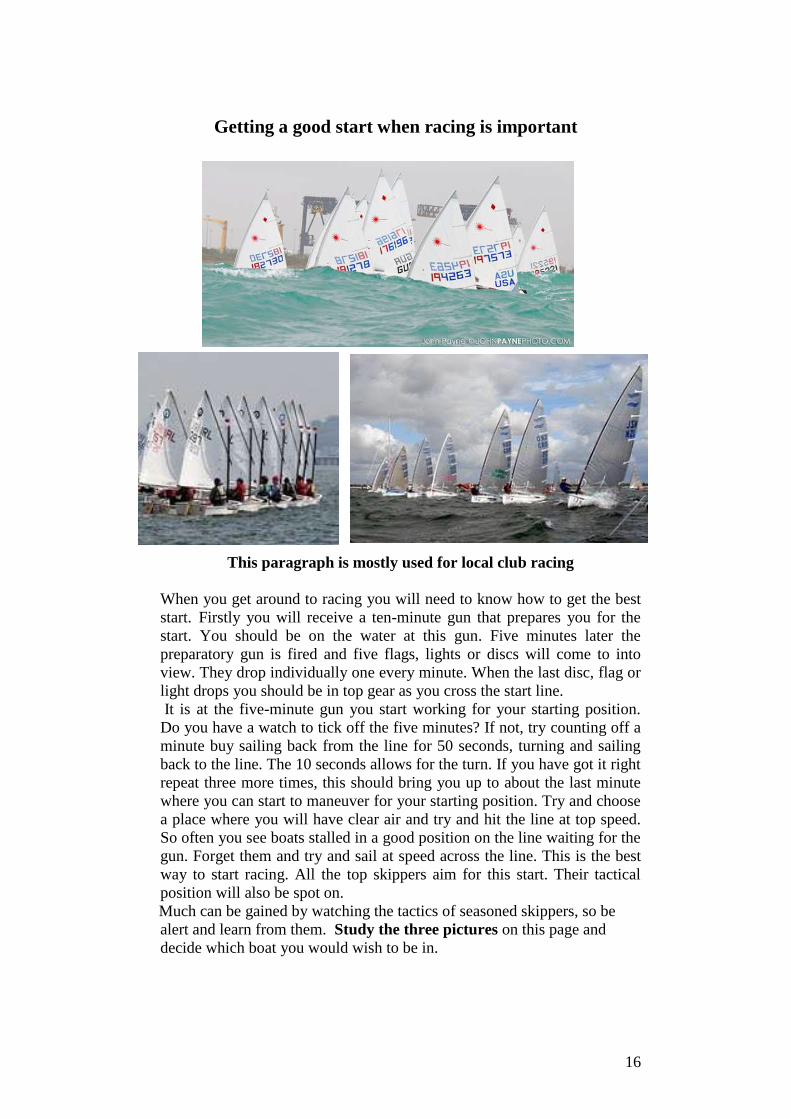
Getting a good start when racing is important
This paragraph is mostly used for local club racing
When you get around to racing you will need to know how to get the best
start. Firstly you will receive a ten-minute gun that prepares you for the
start. You should be on the water at this gun. Five minutes later the
preparatory gun is fired and five flags, lights or discs will come to into
view. They drop individually one every minute. When the last disc, flag or
light drops you should be in top gear as you cross the start line.
It is at the five-minute gun you start working for your starting position.
Do you have a watch to tick off the five minutes? If not, try counting off a
minute buy sailing back from the line for 50 seconds, turning and sailing
back to the line. The 10 seconds allows for the turn. If you have got it right
repeat three more times, this should bring you up to about the last minute
where you can start to maneuver for your starting position. Try and choose
a place where you will have clear air and try and hit the line at top speed.
So often you see boats stalled in a good position on the line waiting for the
gun. Forget them and try and sail at speed across the line. This is the best
way to start racing. All the top skippers aim for this start. Their tactical
position will also be spot on.
Much can be gained by watching the tactics of seasoned skippers, so be
alert and learn from them. Study the three pictures on this page and
decide which boat you would wish to be in.

17
A Tip
If you find you are slipping around on the deck or have trouble keeping
your feet on the cockpit floor, try some non-slip strips that can be
purchased from a Ships Chandlers, they are aprox 5cm wide. Place 4 on
each side of the deck at an angle and 2 strips each side on the cockpit floor
“Things you need to know”
Apparent wind: One thing that needs to be brought to your attention is the
title Apparent Wind. This is the angle the wind direction takes as your boat
goes faster through the water. As speed of the boat picks up, the wind
drives forwards to the bow, so you need to be ready to pull in your main
sail quickly to keep the sail full of wind, thus taking advantage of the
wind’s apparent change of angle. It only happens on Beats and Reaches as
going down wind, once you have caught up with the wind there will be
times when you will have to wait for the wind to catch up with you.
Surf Board Sailors and Land Yachts are fine examples of the wind
moving ahead. They always have their sails pulled in tight during most
points of sailing.
Caught in Irons: This is when your ship, as you tack, comes head to wind and you find you
have stopped. If this happens you will probably go astern. (Making a stern
board) To correct this problem push your helm away from you and as the
ship goes backwards the angle of the rudder will steer your ship onto the
new course. But watch out, because as you go backwards and start to turn,
the wind pressure will increase as it fills the sail. This pressure could put
you in the tide. So be awake to it. In rough conditions try and tack in a
smoother bit of water and always tack as you rise on a swell.
Heavy on the Helm:
The first thing you hear the so-called experts say is “you need to shift your
mast forward”. Yes that could be the case, but the designer, especially of
the caliber of John Spencer; this will not be the problem. Here again the C
of E and the C of LR comes into play. He, the designer has to decide how
far the C of E is behind the C of LR. His experience will tell him where the
best average position for the mast will be, taking into account the various
wind strengths. (1) What will give you a heavy helm is allowing your boat
to heel excessively. When you do this the forward shape of the hull will
act as a rudder and steer you further up into the wind. So keep your boat
fairly flat, but not completely flat. (2) Another action that will give a
heavy helm is to have your sail pulled in too tight and / or having too much
Boom Vang tension on giving you a hooked Leech. This will have the
back edge (Leech) of the sail acting as a rudder. Ease your Boom Vang
and let your sail out and go with the wind. This will create a valley up the
sail shifting your C of E further forward, this acting as if you have moved
18
your mast forward. (3) Also, consider mast rake, too much will shift the C
of E further back creating more weather helm. (4) If the conditions are that
tough and you are really struggling to keep your ship moving and she is
determined to go head to wind, try lifting your centerboard,
About a ¼ or more if needed, as the full centreboard being down will act
as a pivoting point, or as I was told (an axle) you would need to
experiment on how much board to lift. The argument will be, in taking this
action you will move slightly sideways losing weather ground, but you
will still be driving forwards while the other skipper staggers up-wind.
My advise to you is ignore the experts and trust the designer. Also don’t
shift your mast until you have learnt all the basics of sailing and are
comfortable while sailing your ship. This advice also applies to the mast
rake. If you listen to the experts you may well finish up chasing your tail.
Remember to heel the boat slightly in light weather so as to get the full
water-line length, plus helping the sail to create its shape. Remember to sit
well forward to get your stern out of the water. It’s better to push water
than to drag it. As the wind freshens you will need to move aft. This is a
problem with all Cat Rigged short boats they tend to put their nose down
as the wind freshens.
When putting your boat in the water, make sure there is room at the Ramp.
It’s best to wait until there is good room to safely sail away. Always hold
your boat by the bow or forestay. In doing this you will keep control of
your ship if the wind is a bit fresh. The same a applies when you are
coming ashore.
A Tip
If racing, always look to see how the other skipper is going. If he is going
faster than you, or performing better, have a look to see where and how his
mainsail is set, where he is sitting, how much centerboard he has down,
how much angle of heel he has and how much Boom Vang tension he has
on.. Also look to see if he is sailing in more breeze than you. You can tell
this by the darker colour of the water he is in and also the wavelets. Those
wind patches and holes make all the difference to your performance, so
keep away from those smooth shiney patches.
Sailing Rules:
Learn the basic sailing rules. These rules apply to all vessels at sea.
Keep a good look out for other craft. This is really important.
If you capsize and have trouble getting the boat up right, stay with the
vessel as you have a better chance of being seen and picked up.
Make sure you are capable of handling the conditions when you decide to
go sailing.
The most important thing is never to go out unless you are WEARING
YOUR LIFE JACKET and make sure you tell some one where you are
going, what time you will be back and make sure you see and tell them
19
when you are back. THIS IS ALSO IMPORTANT, especially when sailing
from a club.
A Tip
Having rigged your ship, walk around her and check your gear. Also take
the mainsheet, stand at the stern and pull it in tight, at he same time
looking up the Leach edge of the sail. Doing this will tell you if you have a
hooked Leach. It is hooked if it crosses over an imaginary line running
from the top of the mast to the boom end, so ease it off. Check the Boom
Vang tension also, as it will do the same thing. This hooked leech will give
you weather helm. The Leach needs to be open. In other words on the
other side of that imaginary line
Lee Bowing the Current. This will definitely give you more speed, and
help greatly when going to weather, it is called lee bowing the current and
or waves.
To do this you need to get the waves or current hitting the lee side of you
ships bow and or lee side of your centreboard. Imagine holding an orange
pip between your thumb and finger and squeezing the pip, naturally it will
shoot out? You get the same effect when the current or waves hit the lee
side of your ship and against the pressure of wind on the sail. A good time
to try this is when starting at PPYC in an Easterly, club end of the line.
Allow the ship to heel, have some centreboard up to miss the shallow
water and work those wind shifts. Doing it right can bring you up to
weather and in front of the fleet, who most likely will be blanketing each
other at the other end of the line. Good Luck with this manoeuvre.
Safety in Heavy Weather: We have all been taught not to leave the ship
in the advent of a capsizing; if you stay with the ship, you will be easier
seen when rescue craft arrive. The risk of capsizing your ship, especially
when racing is always present, and while some attention is given to this
subject in all sailing manuals, there are several actions that seem to have
slipped off the pages. One action I have found left off is, that if you right
your ship with the mast lying on the weather side, she will most likely
come up-right and then flip over the other way so that the mast is to the lee
of the hull. There are always exceptions to the rules, as they say, but if this
happens, don’t panic as you are now in a more positive situation to right
your ship, with her staying up-right this time, get back on board and carry
on racing.
There is a situation that will arise as you climb back aboard, your weight
and leg drag will start to turn the ship onto the other tack, putting you over
again. I have seen this happen so often, and always ask my-self the same
question, why aren’t these points raised in these manuals? To prevent this
happening you must grab your tiller as soon as you can reach it; pull it
towards you so that you keep her on the same heading or tack. As she
takes off you will find that the water pressure against your legs will assist
you in getting aboard. Remember, that tiller grab is important. One or
two other things you may consider doing when conditions look rough is
20
(1) Run a continuous slack rope through forestay fitting, (Handle) at the
bow, and fastening the ends to the stern deck saddles each side. This will
help with the problem of grabbing hold of the centerboard to start the
righting motion. The centreboard rides high out of the water when the ship
is on its side and some may have difficulty in reaching it, so in the event of
a capsize, this rope can be used as a lever to bring the hull over enough to
take hold of the centerboard and finish the righting of your ship. I have
been told that the best place to start this manoeuver is work from the bow
where the rope is well within reach. Working along the side using the rope
as a lever until you are in a mid ship position to start applying pressure. At
this point you may be able to reach the centreboard and apply leverage to
it. Once the boat is righted you can slip your knee on to it and use this rope
as a step up.
Using The Wind: You will, at some time in your sailing career, have to
really battle the elements to get your ship sailing again, after all, as sailors
we need to be able to take care of our selves in most cases. In the case of
the Firebug if her mast is pointing into the wind, it is possible, if you are
strong enough to lift the under side stay enough to get the mast clear of the
water, and from this position get wind under the sail. It doesn’t take much
of a lift, but with clear space being created between the wave actions, and
the mast, this lift can get enough wind under the sail to help flip your ship
up the right way. It’s hard work, but it works, and it is another means of
self-preservation. BUT make sure you have hold of the bowline, while
doing this manoeuvre, as once up she might sail off leaving you in the
water. The bowline will help bring her head to wind; preventing her from
flipping over again. This is a contradictory statement to righting your
ship on a previous page. The difference is, in the previous case is you
can’t get to the bow quicker enough to bring your ship head to wind. In the
mast lift system you have hold of the bowline, or better still have it
attached to your waist, she will immediately swing head to wind once up
right. It requires some strength, but if a 70-year-old guy can do it, I’m sure
a 14-year old youngster can do it. It may take a big heave and a few
moments to get enough leverage, and you will have to contend with some
water pressure on the submerged sail, but once started it is surprising how
quickly the wind comes to your aid.
Look after your ship:
Wash the hull down after use and dry off with a rag; it will help to
preserve the paintwork. If there has been a lot of salt water wetting your
sail, it will pay to hose it down and leave it flat on the ground to dry.
Always make sure the sail is dry before folding it up. Remember it is the
most costly part of you sport. My method of storing my sail was to roll it
around a length of plastic down pipe, always making sure that the batten
and seams lay parallel with the pipe. By drilling a hole in one end of the
21
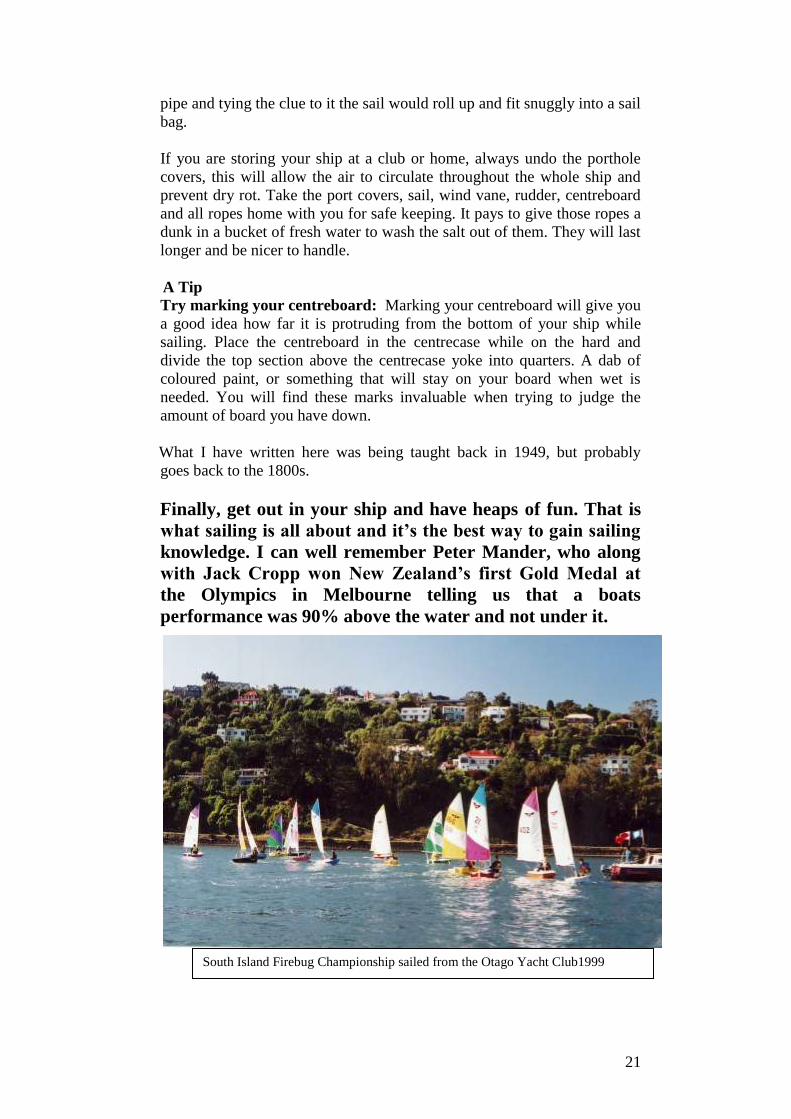
South Island Firebug Championship sailed from the Otago Yacht Club1999
pipe and tying the clue to it the sail would roll up and fit snuggly into a sail
bag.
If you are storing your ship at a club or home, always undo the porthole
covers, this will allow the air to circulate throughout the whole ship and
prevent dry rot. Take the port covers, sail, wind vane, rudder, centreboard
and all ropes home with you for safe keeping. It pays to give those ropes a
dunk in a bucket of fresh water to wash the salt out of them. They will last
longer and be nicer to handle.
A Tip
Try marking your centreboard: Marking your centreboard will give you
a good idea how far it is protruding from the bottom of your ship while
sailing. Place the centreboard in the centrecase while on the hard and
divide the top section above the centrecase yoke into quarters. A dab of
coloured paint, or something that will stay on your board when wet is
needed. You will find these marks invaluable when trying to judge the
amount of board you have down.
What I have written here was being taught back in 1949, but probably
goes back to the 1800s.
Finally, get out in your ship and have heaps of fun. That is
what sailing is all about and it’s the best way to gain sailing
knowledge. I can well remember Peter Mander, who along
with Jack Cropp won New Zealand’s first Gold Medal at
the Olympics in Melbourne telling us that a boats
performance was 90% above the water and not under it.

22