how to integrate fortimail into office 365 · how to integrate fortimail into office 365 fortimail...
TRANSCRIPT

How to integrate FortiMail into Office 365
FortiMail can be integrated with Office 365 to protect your incoming and outgoing
email.
Configuring DNS in Office 365
1. Go to the Manage domains page.
2. Choose Add domain to start the setup wizard.
3. Enter your domain name.
4. Add your DNS records and then select Okay, I’ve added the record.
5. Go to your DNS server.

6. Change the MX record from Office 365 to FortiMail.
Configuring FortiMail to Accept Office 365
You will now have to configure your FortiMail unit to accept mail from your domain and
then forward the mail to Office 365.
1. Go to Mail Settings > Domains > Domains.

2. Select New to create a new domain or right click a domain and select Edit to edit
an existing domain.
3. Enter the domain name.
4. Enter the SMTP server.
Configuring Office 365 to Accept FortiMail
Now you’ll have to configure Office 365 to accept incoming mail from your FortiMail unit
once it’s been checked.
1. Go to the Exchange admin center section.
2. Select mail flow.
3. Select the Plus Sign dropdown menu and select Create a new rule…

4. Enter a name for the new rule.
5. Select More options.

6. Enter the IP address.

7. Configure new rule to drop all inbound mail, unless it comes from FortiMail
servers and select the Accept only from FortiMail checkbox in the rules section of
the Exchange admin center section.

Configuring Outbound Settings in FortiMail
Now that your inbound mail settings are configured in both Office 365 and FortiMail,
you’ll need to configure your outbound settings in FortiMail .
1. Open the FortiMail CLI.
2. Enter the following commands:
config policy access-control receive edit 1 set sender-ip mask 23.103.132.0/22 set action relay next edit 2 set sender ip-mask 23.103.144.0/22 set action relay next

edit 3 set sender-ip-mask 23.103.191.0/24 set action relay next edit 5 <snip) etc
3. Add Office 365 as a trusted relay to FortiMail.
Configuring Outbound Settings in Office 365
Now you’ll need to make Office 365 relay outgoing mail to FortiMai l
1. Create a new connector and enter a descriptive name and description.
Select Next.
2. Select Office 365 from the From dropdown menu and Partner organization from
the To dropdown menu. Select Next.
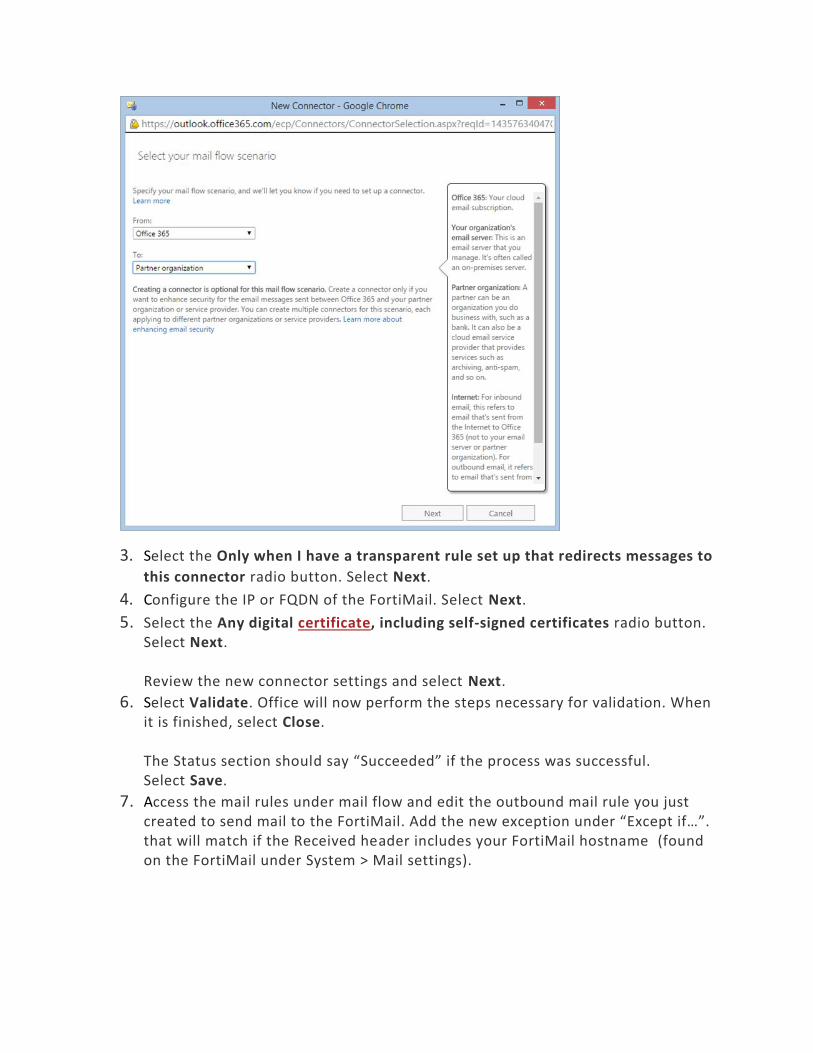
3. Select the Only when I have a transparent rule set up that redirects messages to
this connector radio button. Select Next.
4. Configure the IP or FQDN of the FortiMail. Select Next.
5. Select the Any digital certificate, including self-signed certificates radio button. Select Next. Review the new connector settings and select Next.
6. Select Validate. Office will now perform the steps necessary for validation. When it is finished, select Close. The Status section should say “Succeeded” if the process was successful. Select Save.
7. Access the mail rules under mail flow and edit the outbound mail rule you just created to send mail to the FortiMail. Add the new exception under “Except if…”. that will match if the Received header includes your FortiMail hostname (found on the FortiMail under System > Mail settings).

This exception means that if the email has already been scanned by FortiMail, it will not be sent back again to FortiMail. Your incoming and outgoing messages will now be protected by FortiMail. You should now take the time to apply a FortiMail AntiVirus and AntiSpam profile. Note: You can disable Office 365 AntiSpam services if you feel they are no longer required.