how to paint magnolias with the 36 piece watercolour set · because watercolour is a very fluid...
TRANSCRIPT
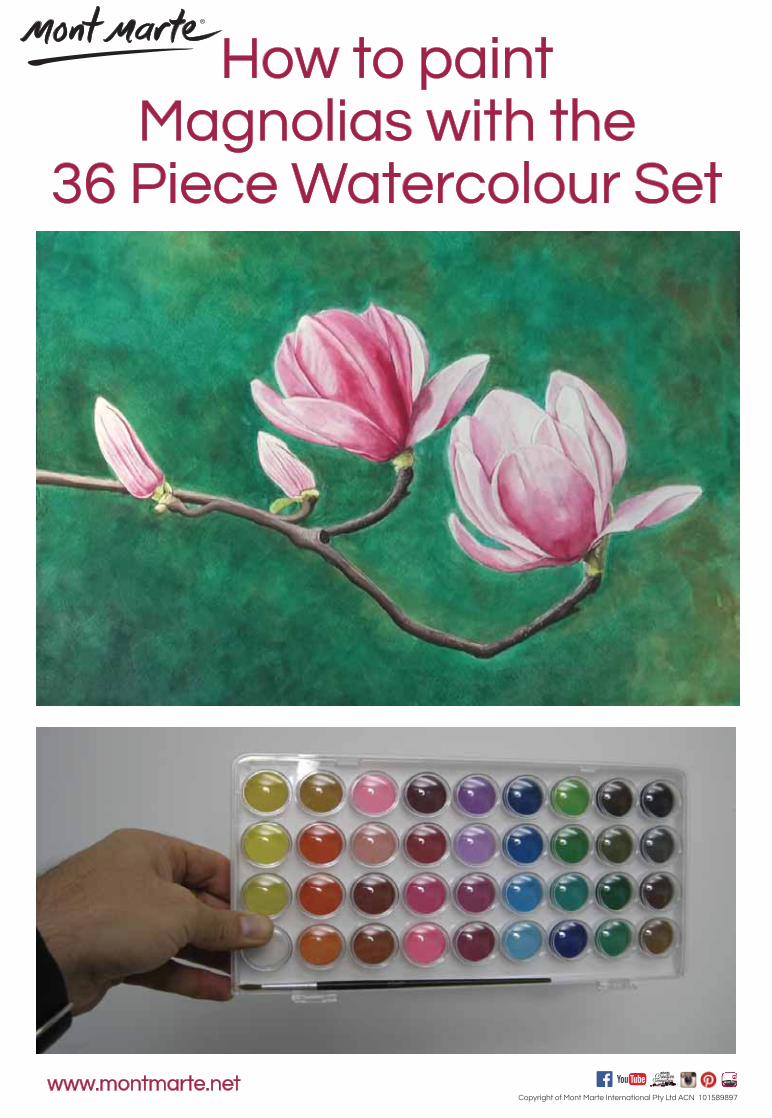
How to paint Magnolias with the
36 Piece Watercolour Set
www.montmarte.netCopyright of Mont Marte International Pty Ltd ACN 101589897
Copyright of Mont Marte International Pty Ltd ACN 101589897
The materials for this lesson can be found at a Gold or above Art Centre.
Go to www.montmarte.net to find the one nearest
to you.
PMHS0038 Mont Marte Watercolour Cake set
MSB0065 Mont Marte Watercolour Pad A3 300gsm
MPB0085 Mont Marte Watercolour Brush Mop
MPB0091 Mont Marte Watercolour Round
MPB0054 Mont Marte Taklon Flat Wide 25mm
Also Required:
Water
Towels
Jug
Duct Tape
Tissues
Materials List . . .
www.montmarte.net
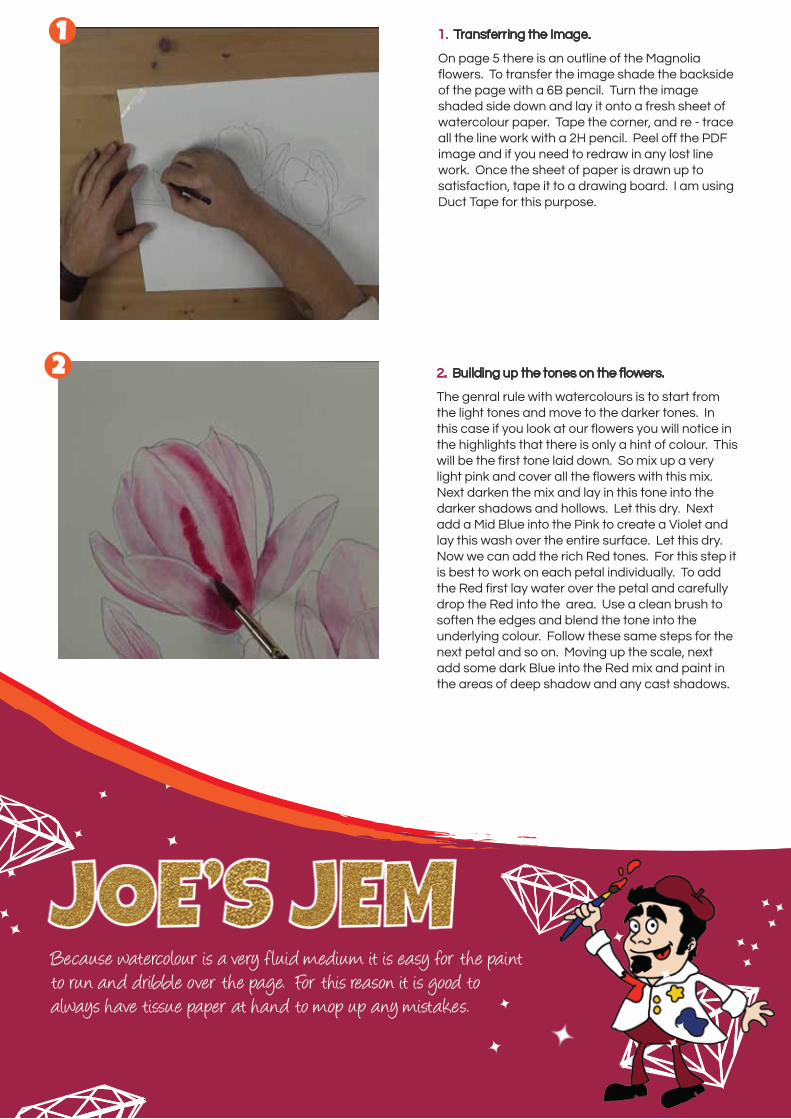
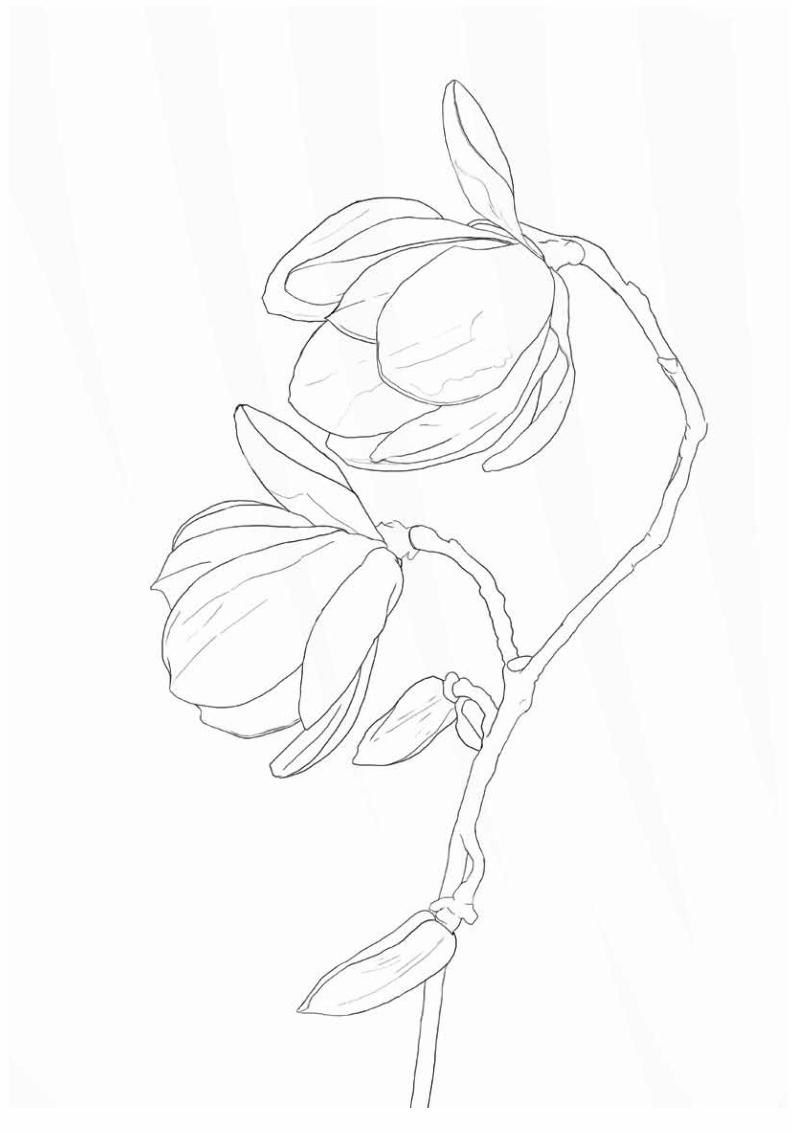
1. Transferring the Image.
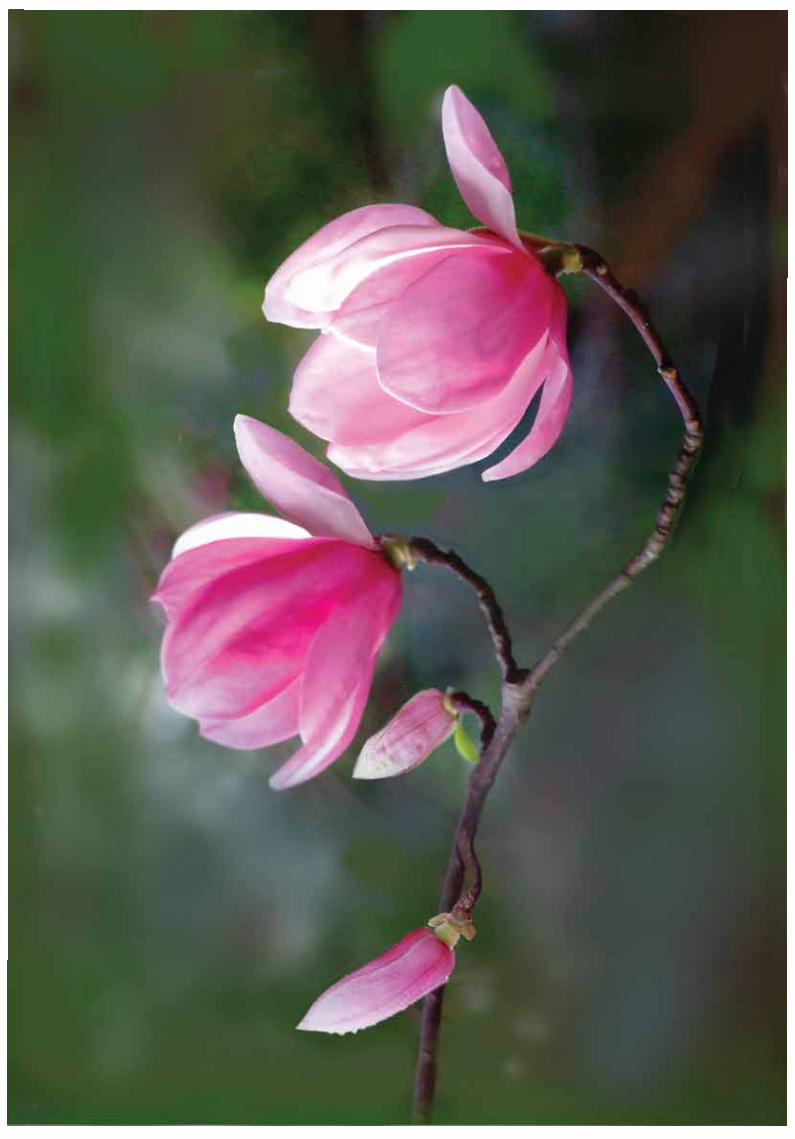
On page 5 there is an outline of the Magnolia flowers. To transfer the image shade the backside of the page with a 6B pencil. Turn the image shaded side down and lay it onto a fresh sheet of watercolour paper. Tape the corner, and re - trace all the line work with a 2H pencil. Peel off the PDF image and if you need to redraw in any lost line work. Once the sheet of paper is drawn up to satisfaction, tape it to a drawing board. I am using Duct Tape for this purpose.
www.montmarte.netCopyright of Mont Marte International Pty Ltd ACN 101589897
www.montmarte.netCopyright of Mont Marte International Pty Ltd ACN 101589897
www.montmarte.net Copyright of Mont Marte International Pty Ltd ACN 101589897Copyright of Mont Marte International Pty Ltd ACN 101589897Copyright of Mont Marte International Pty Ltd ACN 101589897
2. Building up the tones on the flowers.
The genral rule with watercolours is to start from the light tones and move to the darker tones. In this case if you look at our flowers you will notice in the highlights that there is only a hint of colour. This will be the first tone laid down. So mix up a very light pink and cover all the flowers with this mix. Next darken the mix and lay in this tone into the darker shadows and hollows. Let this dry. Next add a Mid Blue into the Pink to create a Violet and lay this wash over the entire surface. Let this dry. Now we can add the rich Red tones. For this step it is best to work on each petal individually. To add the Red first lay water over the petal and carefully drop the Red into the area. Use a clean brush to soften the edges and blend the tone into the underlying colour. Follow these same steps for the next petal and so on. Moving up the scale, next add some dark Blue into the Red mix and paint in the areas of deep shadow and any cast shadows.
Because watercolour is a very f luid medium it is easy for the paint to run and dribble over the page. For this reason it is good to always have tissue paper at hand to mop up any mistakes.
1
2

www.montmarte.net Copyright of Mont Marte International Pty Ltd ACN 101589897Copyright of Mont Marte International Pty Ltd ACN 101589897Copyright of Mont Marte International Pty Ltd ACN 101589897
Traditionally, to stretch watercolour paper, one soaks the paper under water. Then gummed tape is used to adhere the paper to a working board, the paper is then allowed to dry. This way the paper contracts to its maximum point and shouldn't contract anymore so the water won’t effect it.
3. Painting in the background.
By this stage the flowers should be in. Before we can start on the background we need to prepare our sheet as we will be using a wet on wet technique to lay in the background. To prepare the sheet, cover the entire surface (bar the painted flowers) with clean water, the paper will expand and you will see the surface will start to bow. Then let this dry. The paper is now ready to accept large washes of water.
Now we mix up the colours we wish to use in a deep well plastic palette. I have used Yellow Ochre, Dark Grey, Dark Green and Blue.
We can then lay clean water onto the area around the flowers. Once the area has been covered with water we lay in the colours. Allow them to blend together. Let this coat dry. Next lay a thin glaze coat of Green over the coat just laid down.
1
4. Stems leaves and details.
Mix up a Dark Brown and lay it into the stems. Mix some Black into this mix and paint the underside of the stems as these would be in shadow. Blend this tone into the underlying colour. Next lay White into the top side of the stem. Mix up a Light Green and paint it into the leaves.
3
4
1