ibex 1132 rear axle uca truss goat built ibex ...goatbuilt.com/wp-content/uploads/1132-rauca.pdfibex...
TRANSCRIPT

IBEX 1132 REAR AXLE UCA TRUSS
1
GOAT BUILT IBEX REAR AXLE UPPER CONTROL ARM BRACKET/TRUSS
Thank you for purchasing Ibex chassis kit components, before starting your build, we recommend that
you read through these instructions to familiarize yourself with the steps and parts so you can plan and
prepare for your built accordingly.
A few notes about the 1132 Ibex link mount bracket:
This is a universal axle bracket, it should fit most rear axle models, 3.0-3.5" diameter tubes
The truss will need to be trimmed to fit the contour of the differential housing, take your time
and make it a tight fit so you can weld to the differential housing.
Take your time to make sure all the parts fit correctly before tack welding. Use a level, digital
protractor and tape measure to double check according to the instructions.
Bolts and lock nuts for the upper control arms are included, plain nuts are included for mock up,
wait to install the lock nuts until final assembly. Torque the bolts/nuts to 150 ft-lbs during final
assembly. Proper bolt torque will insure maximum bolt/bracket strength. Many link bolt and
bracket failures can be attributed to improperly torqed bolts.
Tack weld everything first, and only weld what is required before you install the front plate.
During final welding, alternate welding around the bracket in 2-3" increments, and try to weld
opposite welds right after one another.
We recommend that brackets be welded by MIG or TIG. The person welding must me a
competent welder capable sufficient weld penetration and weld quality
For MIG welding, we recommend 75/25 AR/CO2 shielding gas; we have found that .035 Lincoln
Super-Arc L-56 wire works best.
For TIG welding, use 100% Argon with ER70S-2 filler rod, we like to use 1/16 diameter filler rod
with this wall thickness of material. When welding to a cast differential center section, stainless
312 filler rod works best. Preheat the weld and lay a root pass, then immediately lay second
weave pass over the root pass.
Additional assembly pictures are posted on the website, www.goatbuilt.com/
1. Prep Axle Housing
If you are using a used axle housing, cut all the brackets from the tubes, there should be no
brackets and only bare tubes. A cutting torch or plasma cutter works best, be careful to not cut
into the tubes. A cut off wheel on a grinder also works. Grind the tubes clean. I recommend a 4-
1/2 angle grinder with a 60 grit flat sanding disc. Once all the welds are ground down, sanding the
tube with an 80 grit DA (dual action) sander will give you a clean look.
Remove any paint or rust from the tubes and diff housing where the bracket will be welded. If you
are welding to the cast center section, I recommend to sand the cast surface smooth where it will
be welded.
IBEX 1132 REAR AXLE UCA TRUSS
2
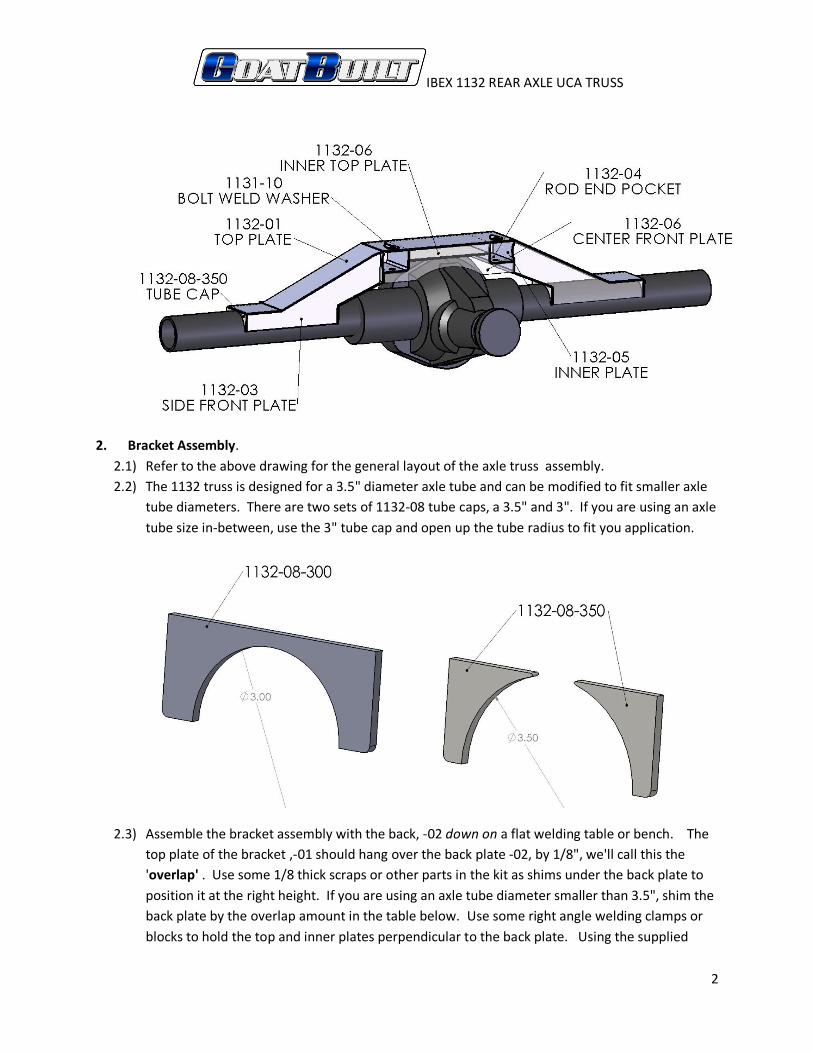
2. Bracket Assembly.
2.1) Refer to the above drawing for the general layout of the axle truss assembly.
2.2) The 1132 truss is designed for a 3.5" diameter axle tube and can be modified to fit smaller axle
tube diameters. There are two sets of 1132-08 tube caps, a 3.5" and 3". If you are using an axle
tube size in-between, use the 3" tube cap and open up the tube radius to fit you application.
2.3) Assemble the bracket assembly with the back, -02 down on a flat welding table or bench. The
top plate of the bracket ,-01 should hang over the back plate -02, by 1/8", we'll call this the
'overlap' . Use some 1/8 thick scraps or other parts in the kit as shims under the back plate to
position it at the right height. If you are using an axle tube diameter smaller than 3.5", shim the
back plate by the overlap amount in the table below. Use some right angle welding clamps or
blocks to hold the top and inner plates perpendicular to the back plate. Using the supplied

IBEX 1132 REAR AXLE UCA TRUSS
3
9/16 x 3-1/4 bolts, plain nuts, weld washers and 2.030" weld spacers, bolt the -01 and -04
plates together. Leave the weld spacers and bolts in the bracket assembly until after final
welding is done.
2.4) FOR AXLE TUBE SIZES SMALLER THAN 3.5 You will need to trim the back of the Rod End
Pockets -04, the Inner Plate -05 and the Inner Top Plate -07. Refer to the following table for the
amount to trim from those parts and the adjusted overlap dimension. You only need to trim
the back edge that is against the back plate, -02. Remember to shim the back plate by the
overlap amount.
AXLE TUBE DIAMETER TRIM BACK OF -04 -05 -07 OVERLAP
3" 1/4" 3/8"
3-1/8" 3/16" 5/16"
3-1/4" 1/8" 1/4" 3-3/8" 1/16" 3/16"
IBEX 1132 REAR AXLE UCA TRUSS
4
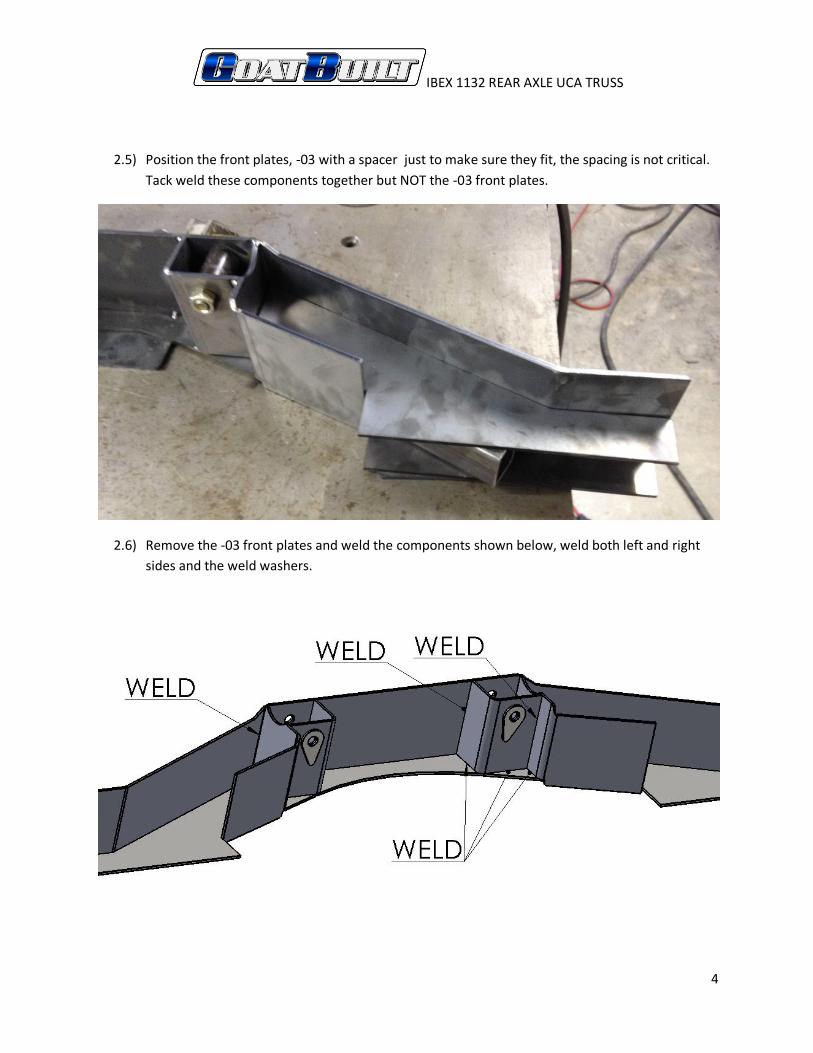
2.5) Position the front plates, -03 with a spacer just to make sure they fit, the spacing is not critical.
Tack weld these components together but NOT the -03 front plates.
2.6) Remove the -03 front plates and weld the components shown below, weld both left and right
sides and the weld washers.

IBEX 1132 REAR AXLE UCA TRUSS
5
3. Trim to fit axle housing
3.1) With the axle on jack stands or some sort of stand, set the pinion angle to your desired angle. I
recommend 6 degrees of pinion angle to match the recommended transmission angle.
3.2) Position the bracket assembly on the axle housing. Measure side to side to center the 1132
bracket assembly to the axle housing. The top of the 1132 bracket should be level and the back
should be vertical at your desired pinion angle. You will need to trim the back plate, -02 to fit
the contour of the top of the diff case. Try to make a precise cut since these sections should be
welded.
3.3) The outer ends of the top plate, -01 where the bump pads are located should rest on top of the
axle tubes for a 3.5" axle tube. If you are using a smaller tube, there should be a gap equal to
half of the difference of tube size from 3.5. For example, a 3" axle tube should have a 1/4" gap.
Put shims equal to the gap thickness there to help position the truss assembly. For smaller than
3.5" axle tubes, make a spacer that fills the gap between the tub the top plate so that the top
plate doesn't dent from the air bump.
IBEX 1132 REAR AXLE UCA TRUSS
6
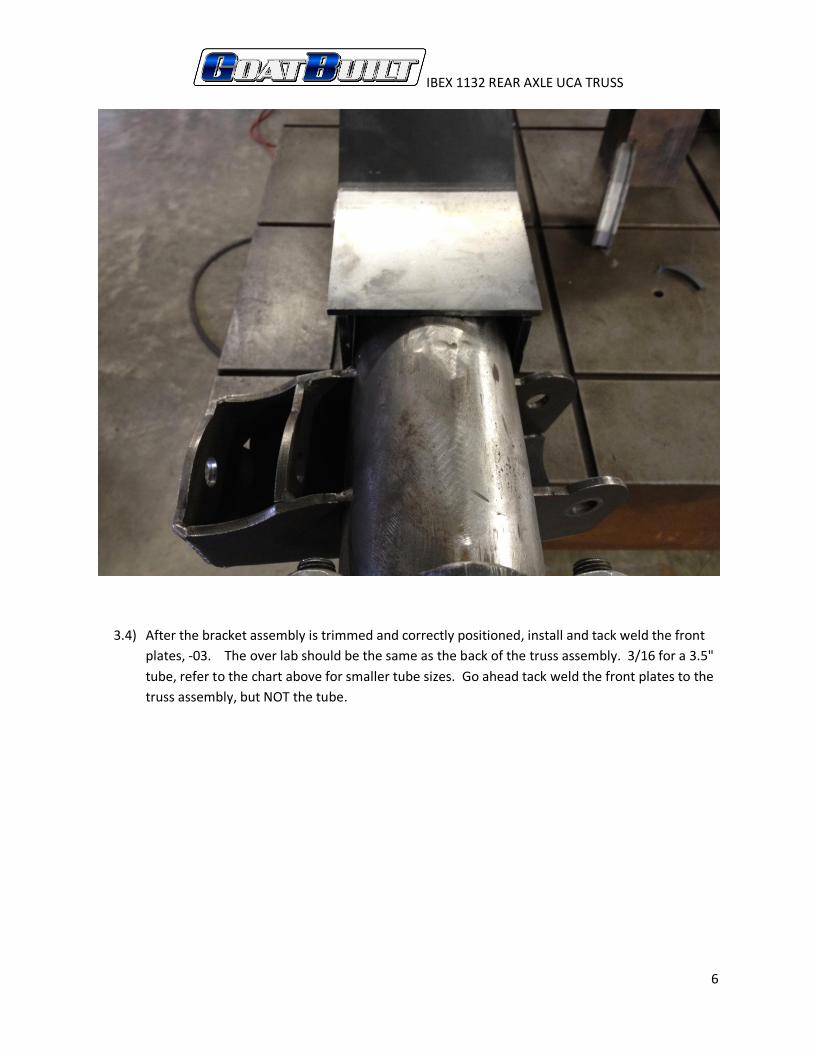
3.4) After the bracket assembly is trimmed and correctly positioned, install and tack weld the front
plates, -03. The over lab should be the same as the back of the truss assembly. 3/16 for a 3.5"
tube, refer to the chart above for smaller tube sizes. Go ahead tack weld the front plates to the
truss assembly, but NOT the tube.

IBEX 1132 REAR AXLE UCA TRUSS
7
3.5) Position and tack weld the end caps, -08. Tack weld them to the 1132 truss assembly and NOT
the axle tube. The end caps should hang over the front and back plates by the same overlap
amount as the top plate.

IBEX 1132 REAR AXLE UCA TRUSS
8
IBEX 1132 REAR AXLE UCA TRUSS
9
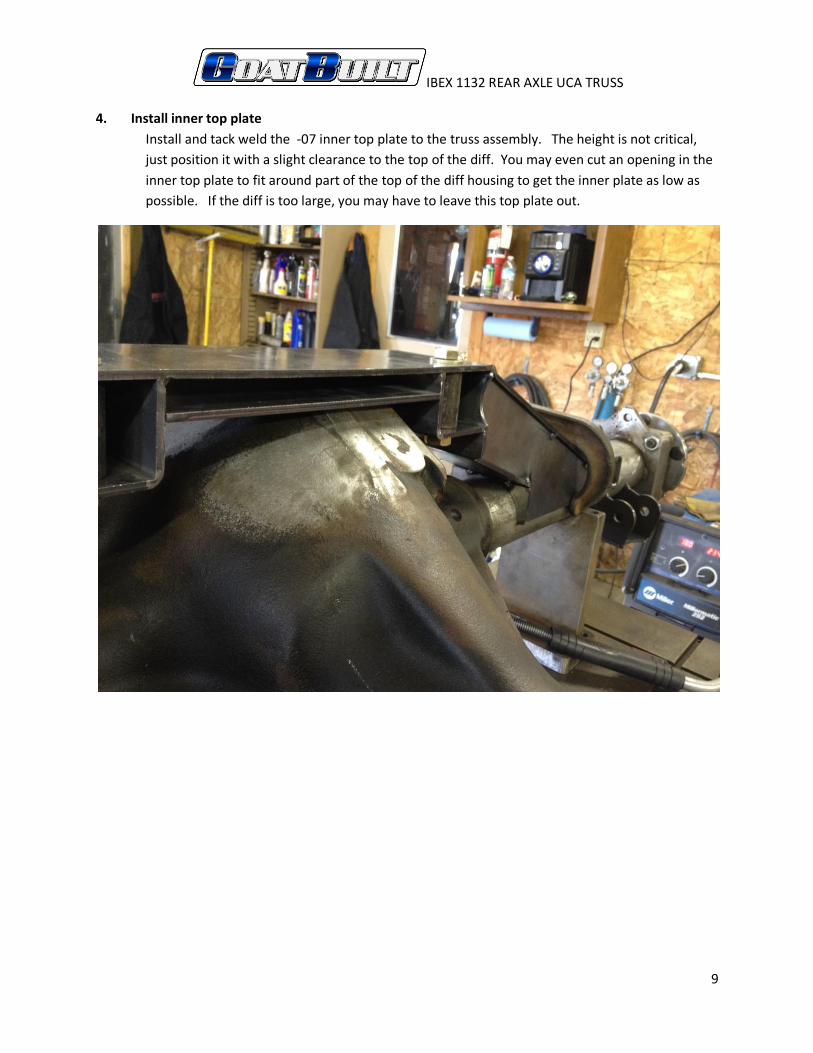
4. Install inner top plate
Install and tack weld the -07 inner top plate to the truss assembly. The height is not critical,
just position it with a slight clearance to the top of the diff. You may even cut an opening in the
inner top plate to fit around part of the top of the diff housing to get the inner plate as low as
possible. If the diff is too large, you may have to leave this top plate out.

IBEX 1132 REAR AXLE UCA TRUSS
10
5. Trim Front Plate
5.1) Install and trim the front plate, -07. Try to make it a close fit to the diff housing as you should
weld the front plate to the diff housing.
6. Weld the truss assembly
6.1) Remove the truss assembly
6.2) Weld the inner top plate on all 4 sides.

IBEX 1132 REAR AXLE UCA TRUSS
11
6.3) Reposition the truss assembly on the axle housing. Center the truss assembly and set the angle.
Tack weld the truss in a couple of places to the axle tube.
6.4) Begin welding the truss assembly. Weld the truss assembly complete first, then weld the truss
to the axle tube and housing last. Start in the middle at the top and work your way outward ,
alternating front to back and side to side. Weld in 3" increments following the weld sequence
below. Put a tack weld every 3" so you know where to stop your weld. When you weld a
section on the front, immediately weld the same section on the back or vise versa, then move
to the other side of the diff.

IBEX 1132 REAR AXLE UCA TRUSS
12
6.5) Let the truss cool before you weld to the axle housing.
6.6) Weld the truss to the axle housing, weld to the axle tubes in 2-3" increments alternating front
to back and side to side. Again, when you weld a section on the front, immediately weld the
same section on the back or vise versa, then move to the other side of the diff. Weld the end
caps to the axle tube, and weld the top to the diff housing.