installation and setup help - daltools 24, 2017 installation and setup 4 daltools setup...
TRANSCRIPT
October 24, 2017
Installation and Setup 1
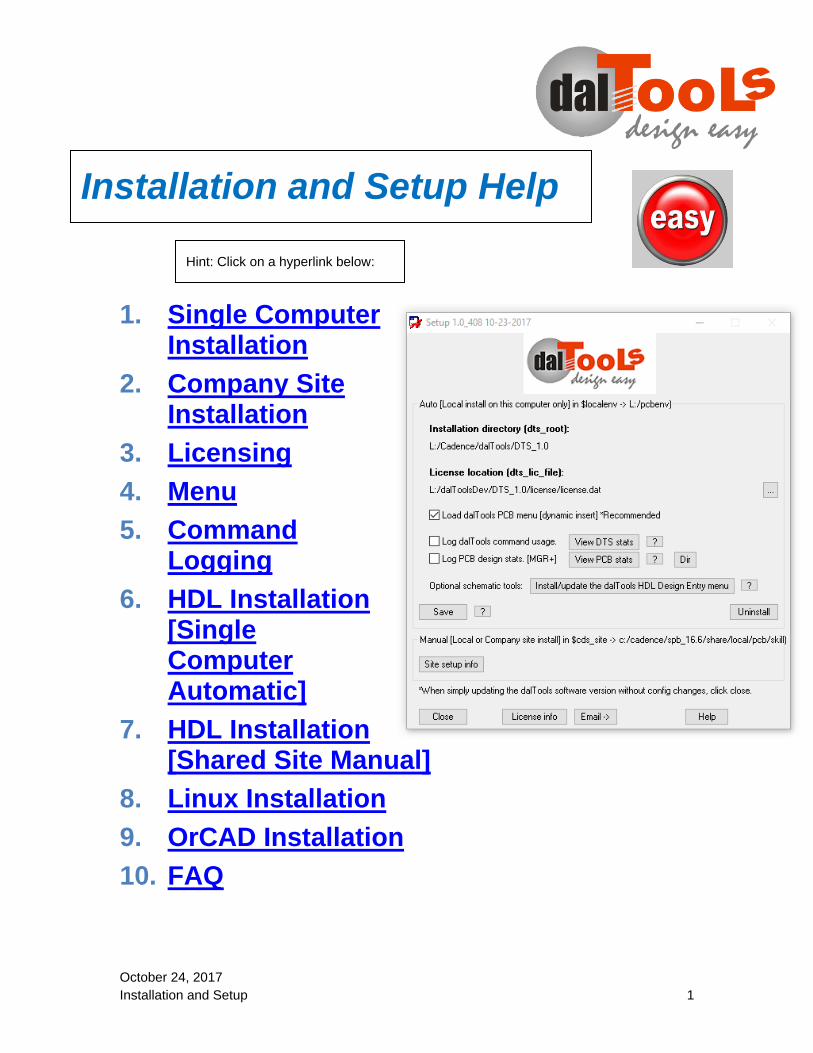
1. Single Computer Installation
2. Company Site Installation
3. Licensing
4. Menu
5. Command Logging
6. HDL Installation [Single Computer Automatic]
7. HDL Installation [Shared Site Manual]
8. Linux Installation
9. OrCAD Installation
10. FAQ
Installation and Setup Help
Hint: Click on a hyperlink below:

October 24, 2017
Installation and Setup 2
1. Single Computer Installation
1. Download and install the software here: www.daltools.com/support.html.
2. Place the license.dat and/or license.txt in the “…\DTS_1.0\license” directory.

October 24, 2017
Installation and Setup 3
2. Company Site Installation

October 24, 2017
Installation and Setup 4
dalTools setup instructions: Note: The allegro.ilinit file is Skill code that is loaded when Allegro is started. For [Local] install on this computer use: $localenv/allegro.ilinit -> L:/pcbenv/allegro.ilinit For [Site] install company wide use: $cds_site/pcb/skill/allegro.ilinit -> c:/cadence/spb_17.2/share/local/pcb/skill/allegro.ilinit *Copy/Paste the following template to your $localenv/allegro.ilinit or $cds_site/pcb/skill/allegro.ilinit file. ;### Start dalTools setup. let((dts_root dts_lic_file dts_menu_dyn dts_cmdstat_enable dts_cmdstat_dir dts_pcbstat_enable dts_pcbstat_dir dts_admin) ;Edit the following lines with the correct values: dts_root = "C:/Cadence/dalTools/DTS_1.0" ;This is the path to the dalTools installation. Notice you must use / instead of \ in the path! dts_lic_file = "C:/Cadence/dalTools/DTS_1.0/license/license.dat" ;Ex.: "5280@localhost" for FlexNet type. dts_menu_dyn = t ;This adds the dalTools menu to the top right side of the editor. t is on and nil is off. ;Optional feature settings: dts_cmdstat_enable = nil ;This records dalTools command usages statistics. t is on and nil is off. dts_cmdstat_dir = "C:/Cadence/dalTools/DTS_1.0/license/cmdstat_log" ;This directory must be writable for all users. dts_pcbstat_enable = nil ;This records PCB Design statistics (Requires MGR+ license). t is on and nil is off. dts_pcbstat_dir = "C:/Cadence/dalTools/DTS_1.0/license/pcbstat_log" ;This directory must be writable for all users. dts_admin = "dlocke" ;When enabled below, add one or more system administrator login names here to restrict access to dal setup for site installs. ;Do not edit any lines below here: axlSetVariable("dts_root" dts_root) axlSetVariable("dts_lic_file" dts_lic_file) axlSetVariable("dts_menu_dyn" dts_menu_dyn) axlSetVariable("dts_cmdstat_enable" dts_cmdstat_enable) axlSetVariable("dts_cmdstat_dir" dts_cmdstat_dir) axlSetVariable("dts_pcbstat_enable" dts_pcbstat_enable) axlSetVariable("dts_pcbstat_dir" dts_pcbstat_dir) axlSetVariable("dts_admin" dts_admin) axlSetVariable("dts_ignore_dts.env" t) ;Needed in case of previous legacy local installs. axlReadOnlyVariable("dts_admin" t) ;Keeps the setting from being changed by local user. load(strcat(dts_root "/bin/dal") "dalTools"),dal("start") );end let ;### End dalTools setup.
October 24, 2017
Installation and Setup 5
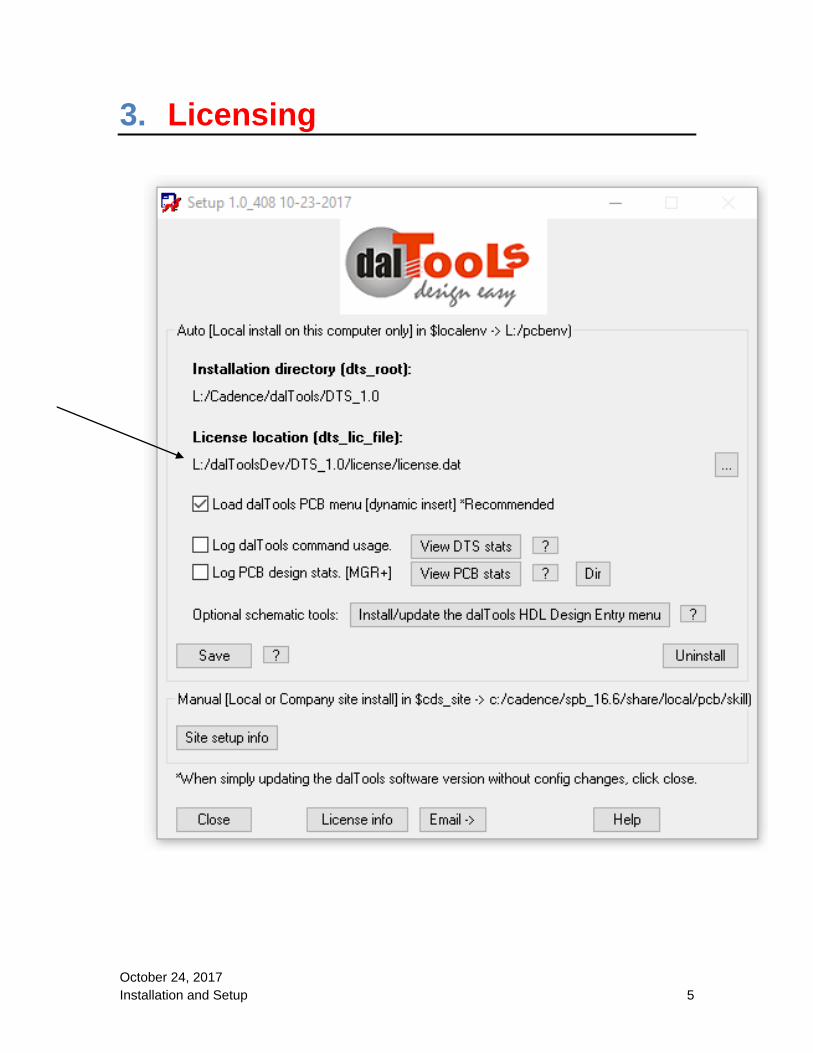
3. Licensing

October 24, 2017
Installation and Setup 6
4. Menu
There are two ways to set up the dalTools menu in the Allegro main window.
1. The preferred and the easiest method is to check the “Load dalTools PCB menu (dynamic)” button. This will add the dalTools menu to the existing menu when Allegro is started. It automatically stays up-to-date with future changes to the menu from daltools.
The optional env variable “dts_menu_offset” controls where the dalTools menu is positioned. For example, the default is set dts_menu_offset = 100 and puts it all the way on the right. A value of -1 puts it just to the left of the Help menu item.
2. If you have not customized your Allegro menu already then you could also click “Load dalTools PCB Menu (static):” This will simply put the dalTools menu first in the menupath:
October 24, 2017
Installation and Setup 7
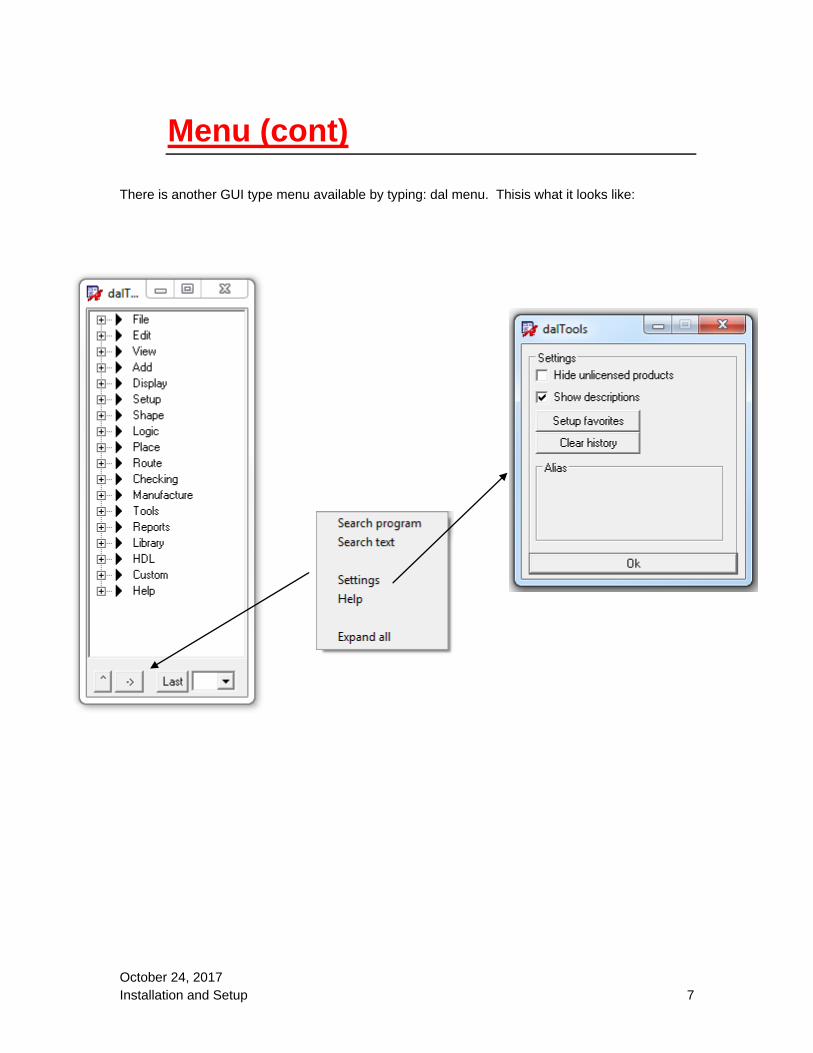
Menu (cont)
There is another GUI type menu available by typing: dal menu. Thisis what it looks like:
October 24, 2017
Installation and Setup 8
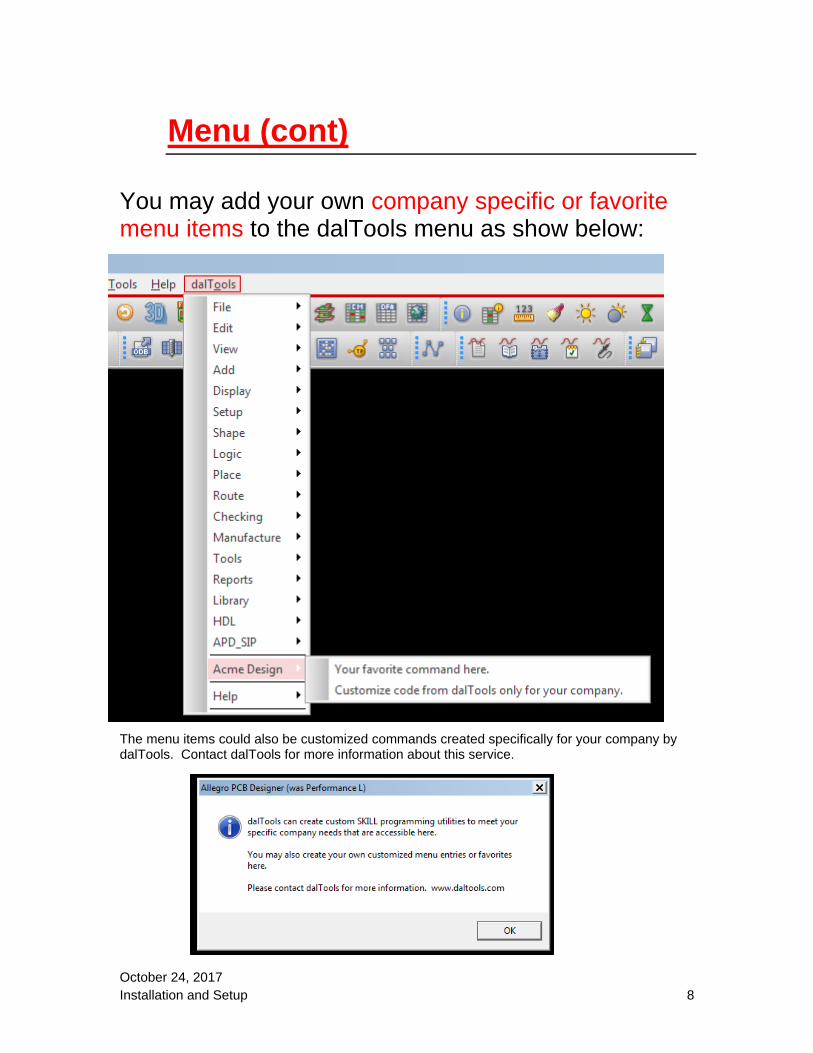
Menu (cont)
You may add your own company specific or favorite menu items to the dalTools menu as show below:
The menu items could also be customized commands created specifically for your company by dalTools. Contact dalTools for more information about this service.
October 24, 2017
Installation and Setup 9
Menu (cont)
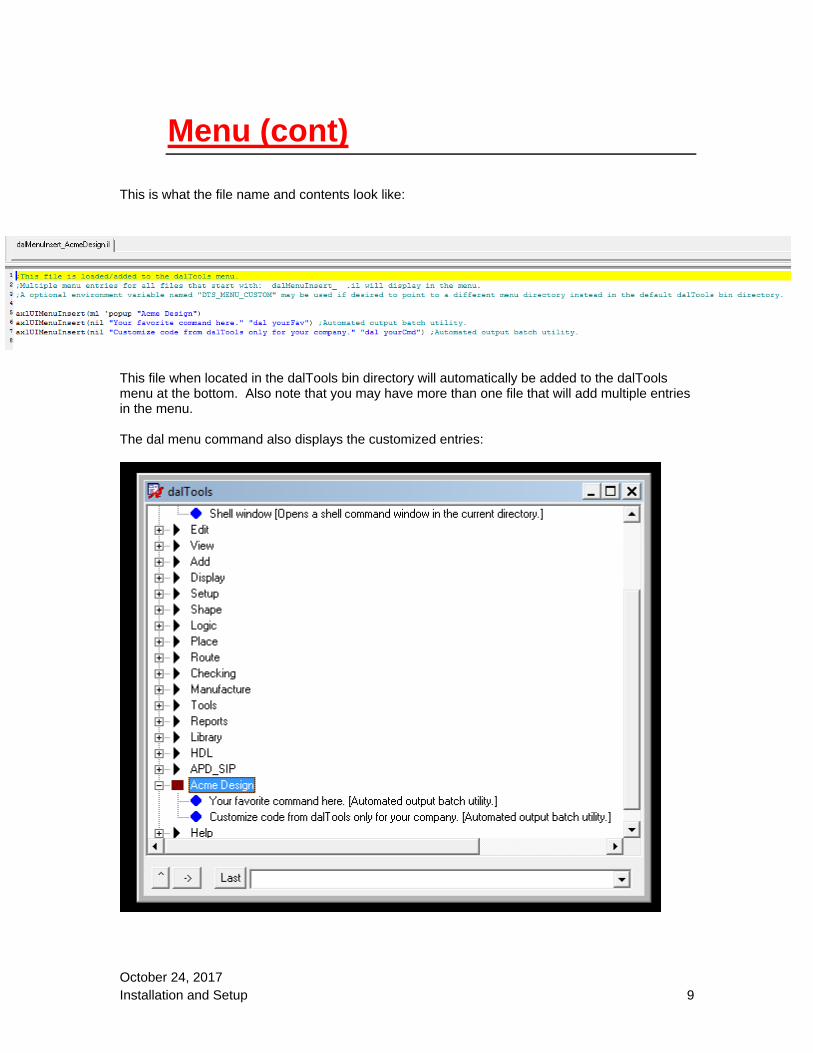
This is what the file name and contents look like:
This file when located in the dalTools bin directory will automatically be added to the dalTools menu at the bottom. Also note that you may have more than one file that will add multiple entries in the menu. The dal menu command also displays the customized entries:

October 24, 2017
Installation and Setup 10
Menu (cont)
A sample menu template file is located here: ...\dalTools\DTS_1.0\share\site\menus If you would like to locate the menu file in a location other than the dalTools/bin directory you may set the following variable in the env file or allegro.ilinit file to point to another location: Ex: DTS_MENU_CUSTOM = your /customDefined/menuPath Or in the allegro.ilinit file: axlSetVariable("dts_menu_custom" “your/customDefined/menuPath”) ;Sets the custom defined menupath. Note: If you don’t want your company specific menu to show up in the dalTools menu, add the following line to your allegro.ilinit file before the dalTools line (axlShell("source ./dts_site/dts.env"),dtsRoot=getShellEnvVa…….): axlSetVariable("dts_no_menu_custom" t) ;Disables the custom company menu.
October 24, 2017
Installation and Setup 11
5. Command Logging
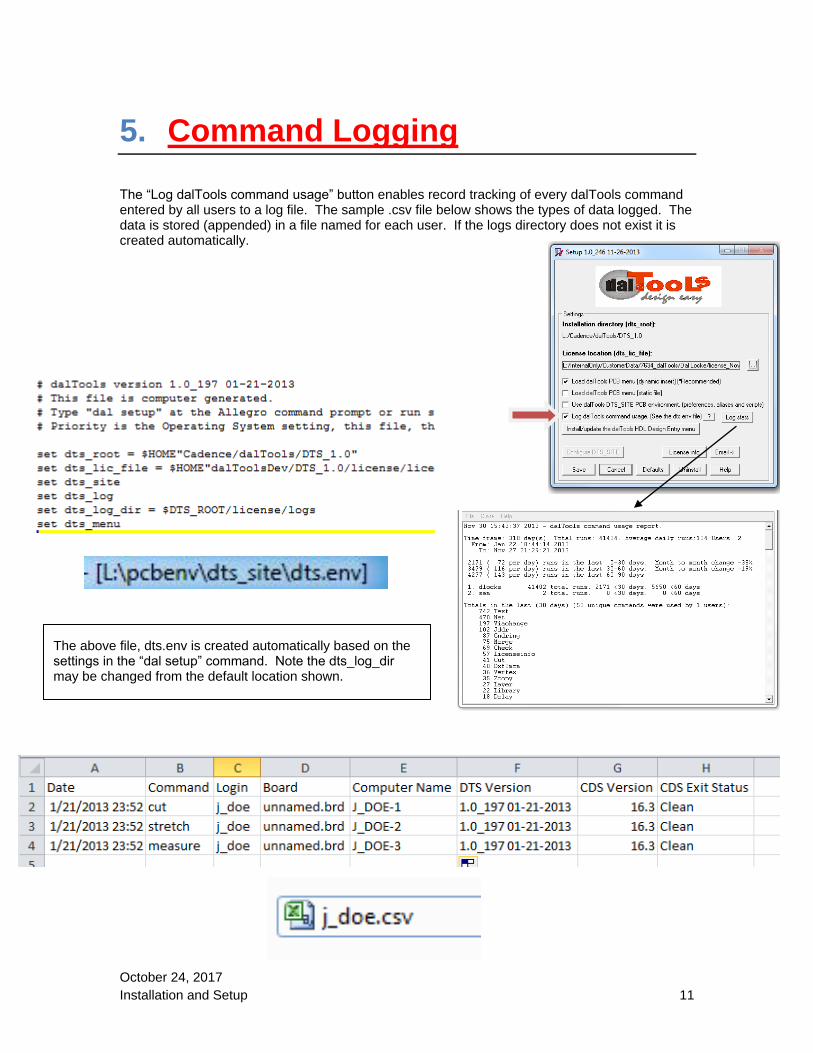
The “Log dalTools command usage” button enables record tracking of every dalTools command entered by all users to a log file. The sample .csv file below shows the types of data logged. The data is stored (appended) in a file named for each user. If the logs directory does not exist it is created automatically.
The above file, dts.env is created automatically based on the settings in the “dal setup” command. Note the dts_log_dir may be changed from the default location shown.

October 24, 2017
Installation and Setup 12
6. HDL Installation [Single Computer -Automatic]
1. To automatically configure the dalTools HDL menu locally, click the “Install/update the dalTools HDL Design Entry Menu in the dal setup GUI. The cdssetup directory is automatically changed.

October 24, 2017
Installation and Setup 13
7. HDL Installation [Shared Site - Manual]
The dalTools HDL commands utilize the Cadence MPS system to communicate between the HDL editor and the Allegro symbol editor or the Free_viewer_plus editor. The reason we do this is because the HDL editor does not have a built in SKILL GUI interface. The MPS sends signals between the two editors so GUI’s may be utilized on the HDL side. In order to make the MPS work the following environment settings must be modified.
1. To manually configure the dalTools HDL menu for a company shared site environment, follow these instructions. Note: Sample files are located in the ...\dalTools\DTS_1.0\share\SPB_16.X directories for copying and pasting below into your cds_site files.
1. Find the cdssetup directory in your company cds_site directory. This is the location where the shared files will be modified. Be sure and back up the original files before proceeding in case you need to revert back later. For example, the directory may be located here:
C:\Cadence\SPB_16.X\share\local\cdssetup
2. These 2 directories should reside in this location: concept and fet. If not you can copy starter files from here: C:\Cadence\SPB_16.X\share\cdssetup
Inside the concept directory there should be the following files:
concepthdl.scr (This script runs when HDL starts)
concepthdl_cmd.txt (This file controls the menu defined commands)
concepthdl_key.txt (This file controls the shortcut keys)
concepthdl_menu.txt (This file defines the HDL menu)
3. Add the following to the end of the concepthdl.scr file:
{Start dalTools section}
mpsdeclare dal
{This is the main program launcher that uses allegro for the GUI.}
mpstool=dalHdlServer
mpstimeout=25
mpsruncommand="cnskill -nongraph dalHdlConfig.il" {Use -i option for debugging.}
{End dalTools section}
4. The concepthdl_cmd.txt file should look like this:
* concepthdl_cmd.txt file, written 06/08/98 11:49:11 */
FileVersion 1;
DAL "Main program launcher" "Main program launcher" "dal" ;
5. The concepthdl_key.txt file does not need to be modified.
October 24, 2017
Installation and Setup 14
6. Add or paste the following from the sample share file into the concepthdl_menu.txt file:
"dalTools" {
"dal (Launch and link the Allegro Drawing Editor)" DAL;
}
So the end of the file should look like this with the closing }
7. Inside the ...\cdssetup\fet directory there is a “skill” directory. Inside this directory there are two directories named: allegro and context.
Next, add or modify the files in the...\cdssetup\fet\skill directory.
Copy the sample file or Create a file in the ...\cdssetup\fet\skill\alegro directory named:
dalHdl.scr
Inside this file add a line containing: dal hdl ;This runs the dalHdl routine that imports the MPS service and starts the menu with the HDL tree open.
8. In the ...\cdssetup\fet\skill\context directory there should be two files:
dalHdlConfig.il and stdAcces.il
The dalHdlConfig.il contains:
;This file is computer generated after running the HDL menu setup in the "dal setup" command.
defun(dalHdlConfig ()
let(
(localenv)
isLinux = nil ;Set = t if Linux OS
isDrawing = t ;Set = nil if you want to use the FREE_VIEWER_PLUS.
localenv = "L:/" ;This is the base directory where the local or cds_site cdssetup directory resides.
);end let
);end defun
printf("W- Using dev directory.\n")
file = "L:/dalTools/DTS_1.0/bin/dalHdl"
if(isFile(file) then
load(file "dalTools")

October 24, 2017
Installation and Setup 15
dalHdlServerStart()
else
opts = cnSetRunOptions(?result cnOUT_VERBOSE)
cmd = "echo E- There was a problem loading a file. Check the path in $localenv/cdssetup/fet/skill/context/dalHdlConfi.il or rerun dal setup in the pcb editor to correct."
cnSendCommand(cnmpsImport() sprintf(nil "%s",cmd) ?runOptions opts)
);end if
The other file in the ...\cdssetup\fet\skill\context directory is named: stdAccess.il
This is a Cadence supplied set of SKILL functions for HDL that is required. If it does not reside here by default then copy it from here:
C:\Cadence\SPB_16.6\tools\fet\varieant\context
No modifications need to be made to the stdAccess.il file.
When HDL is started now you should have a dalTools menu in the upper right of the screen.
When you click on the dal menu, a symbol editor or free_viewer_plus editor should open with the dalTools command menu displayed. From there you may run the HDL command that will interface with the HDL editor. Hint: Click on the center ” _” window sizer button in the upper right of the Allegro window to minimize the editor since only the floating dalTools menu needs to remain visible on the screen.
If you have problems try temporarily adding the –i option in the concepthdl.scr file. This will allow you to see error messages in the black console window. Also, sometimes the MPS service will hang in certain conditions. Start the windows task manager, goto the services tab and look for a service called cdsmps.exe and/or cnskill.exe. Ending those processes will often correct issues when the MPS service hangs or does not start.
Below is what the menu will look like:

October 24, 2017
Installation and Setup 16

October 24, 2017
Installation and Setup 17
Error Messages
1. If you get this error message when the HDL menu loads: ERROR(SPCOCN-1908): <install_path>/cdssetup/concept/concepthdl_menu.txt: error on line 100: Do the following:
1. Make a backup of the existing menu file. 2. Launch DEHDL. 3. Select Tools->Customize 4. Choose the Menus tab and click the Reset button.
This will restore the menu to the original installation content. Then review the copied (corrupt) concepthdl_menu.txt file and add in the desired changes, but do so using the DEHDL GUI.
HDL tips:
1. On Linux, the interactive cnskill –i –nongraph DOES NOT WORK like windows does since the process is not syncronous and Cadence does not support it. You MUST run from the concepthdl.scr file through the editor or open a shell and type: cnskill –i –nongraph –mpssession dlocke_ProjectMgr19842 path/whatever.il The dlocke_ProjectMgr19842 will of course be different for you and is obtained with the mpsinfo command from the shell window. The errors in runtime if any can be viewed from the handle. Ex handle->??
2. cnskill -i -nongraph -mpssession dlocke_ProjectMgr19842
/home/dlocke/cdssetup/fet/skill/context/dalHdlConfig.il
3. Be sure $CDS_SITE is set on the linux env so the dalHdlConfig.il file will be found in the skill search path.

October 24, 2017
Installation and Setup 18
8. Linux Installation
How to install in Linux
1. Place the license.txt and license.dat in the daltools license directory. 2. chmod 777 setup.sh and then run.

October 24, 2017
Installation and Setup 19
9. OrCAD Installation
dalTools is compatible with OrCAD PCB Designer. However, dalTools will not auto install with the OrCAD products like Allegro does due to the fact that OrCAD does not support dynamic loading of SKILL. Please follow the instructions below to install dalTools manually in OrCAD.
1. Download the “Windows EXE” version from the web site here: http://daltools.com/support.html
The .exe will unzip the files to the proper directory but the final part of the install will fail because the orCAD interactive SKILL limitation. At this point, backup your existing pcbenv folder and copy the directory located here to your pcbenv directory: www.daltools.com/files/pcbenv.zip

October 24, 2017
Installation and Setup 20
10. FAQ
1. The dal command is not working in the console window?
The allegro.ilinit file is missing and/or the dts_site directory is missing. Re-intall the software.
2. What is the purpose of the allegro.ilinit file?
The allegro.ilinit is a SKILL command file that is executed when allegro is started. It may contain any SKILL commands. Its function is usually to set the skill path and certain environment variables at startup.
3. How do I get help or report a problem with setting up the dalTools environment?
Goto www.dalTools.com/support and report a bug, documentation issue or request help.
4. What if this happens when I install:
This indicates that you operating system path is not pointing to the Cadence directories. In order to correct please do the following:
1. Right click on My Computer in the Start menu. Select properties. Click on the Advanced tab. Then click on Environment Variables. Then click on the PATH line in the System Variables window and click Edit. Add the following at the BEGINNING of the path: %CDSROOT%\OpenAccess\bin\win32\opt;%CDSROOT%\tools\Capture;%CDSROOT%\tools\PSpice\Library;%CDSROOT%\tools\PSpice;%CDSROOT%\tools\specctra\bin;%CDSROOT%\tools\fet\bin;%CDSROOT%\tools\libutil\bin;%CDSROOT%\tools\bin;%CDSROOT%\tools\pcb\bin; Then you must create a new variable named: CDSROOT and give it the value: C:\Cadence\SPB_16.5 (*The C:\ prefix and 16.5 version may be different in your case)
5. dalTools did not auto install correctly for APD and the Sip editors.
Please check your env files to see if you are sourcing the apd.ilinit file and/or cdnsip.linit file. If so, please copy the dalTools line from the allegro.ilinit file into these files. This

October 24, 2017
Installation and Setup 21
should correct the problem. By default, APD and Sip editors read the allegro.ilinit file only if the apd.ilinit or cdnsip.ilinit file do not exist.
6. I clicked on the Windows EXE download button and the file downloaded ok. But when I run the file it says:
This may occur on older Windows XP operating systems that use the default winzip installation. Please update to the latest winzip software and re-try. The free version works fine. Be sure and re-boot and re-download the .exe file from the web site to make sure everything is updated correctly.