instructions for applicators - permanent building...
TRANSCRIPT

Instructions for Applicators

Loading & Handling Instructions
DOs &

Do not drag the Boards against the stack while loading or unloading.
Loading & Handling Instructions

Lift the Boards and place it down carefully. DOs
Loading & Handling Instructions

Do not stand, sit or place weights on the Boards.
Loading & Handling Instructions

Do not drag the Boards off the stack.
Loading & Handling Instructions

Boards must be lifted off the stack. DOs
Loading & Handling Instructions

Don't hold the Board from the opposite ends.
Loading & Handling Instructions

Don't carry the Board over your head.
Loading & Handling Instructions

The right way to carry the Board. DOs
Loading & Handling Instructions

Storage
DOs

Don't store Boards horizontally or vertically.
Storage
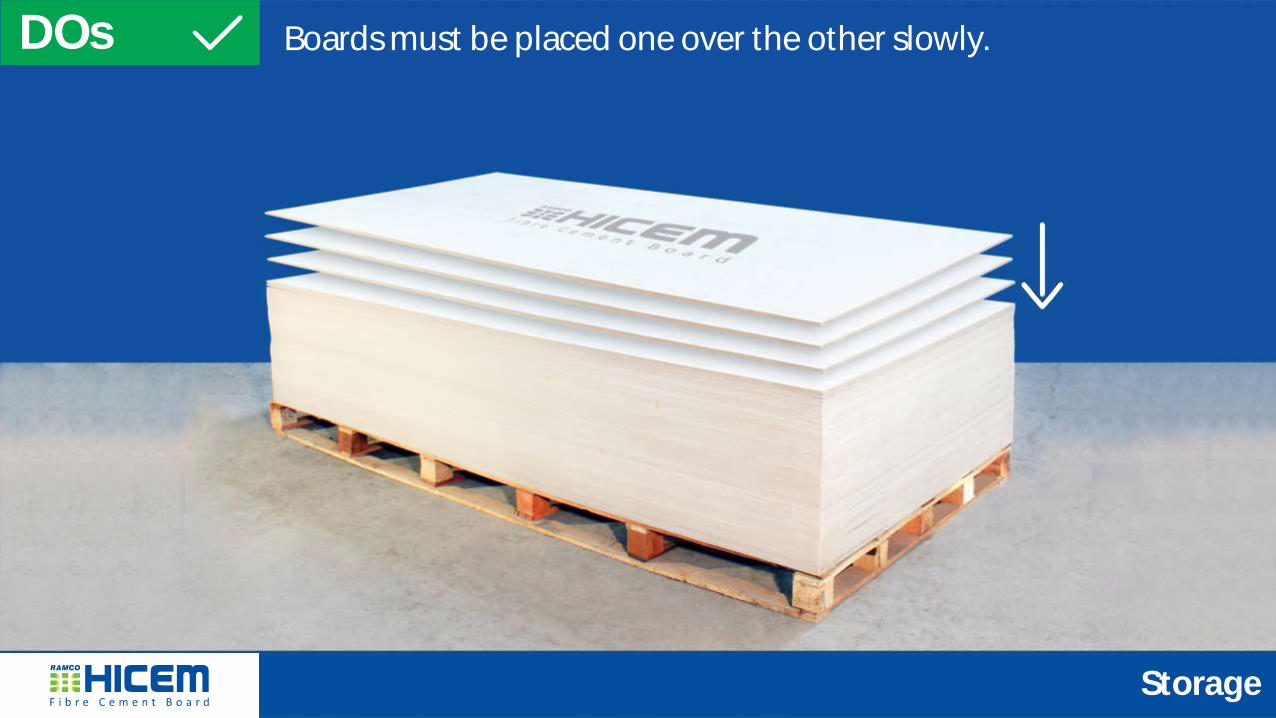
Boards must be placed one over the other slowly. DOs
Storage

Floor surface level
Boards must be stacked on level surface over a Pallet. DOs
Storage

Don't expose the Boards to sun and rain.
Storage

DOs
Keep Boards covered off the ground on a clean, flat and level surface that is protected from direct exposure to weather conditions.
Storage

Before you begin,
Dust Mask Helmet Hand Gloves
Goggles
Always use Safety Equipment
Belt Shoes

Cutting

DOs
Cut Fibre Cement Boards in open ventilated space. When using a circular saw, cut Hicem Fibre Cement Boards smooth side down.
Cutting

Recommended Cutting Equipment
Do not use Wood-cutting Blade.
Cutting Blade Diamond-cutting Disc Blade or Hack Saw
Cutting

Screw fixing

Must be non-corrosive and designed for use with Fibre Cement Boards.
Screw type is determined by application and / or wall design.
Screwing

DONT's Avoid nailing
Screwing

When screwing, the Board should be 25 mm from all corners and 15 mm from all sides of the Board.
Screwing

Fibre Cement Boards should be fastened to studs or solid framing 600 mm between centers.
In some instances, there may not be a stud or framing available to fasten into - such as, along a rake, inside or outside corners, or at a window or door-opening. In such instances, the Fibre Cement Board must be fastened to a structural-rated sheathing.
Fastening
DOs

Recommended Tools & Screws
Screwing
Always use self drilling and self tapping Phillips head screws to fix the Boards.
Size: 3.9 mm dia. length 25, 38 or 50 mm.

Insulation

Insulation
Use Infill material after fixing one side of the board.
Infill material (Mineral wool / Rock wool / Glass wool / Ceramic wool) is to be placed in the cavity of the partition. Density and dimension to be decided, based on requirement.
Use connector clips for staging the Infill Material.

Insulation
Provide servicing conduits, if necessary
Provide membrane (vertical / horizontal) bracing for additional support for hang-loads (Air Conditioners, TVs, Wash Basins, etc.)

Jointing & Finishing (Square / Taper-edge)

Fill the paste mixture initially into the 3-4 mm gap.
Jointing & Finishing to be done over
the installed screws.
1st coat - apply the mixture 75 mm wide.
Fix the fibre mesh tape (48 mm wide).
Allow it to dry for a day.
2nd coat apply the mixture 150 mm wide.
Allow it to dry for 12 hours.
Apply final coat 225 mm wide.
Jointing & Finishing

layer of jointing compound along the seam.
Apply HILUX Drywall Tape along the joints.
Apply a second layer of jointing compound.
smooth final layer of jointing compound.
Finishing

Fold the fibre mesh tape in the middle, to get two parts of 24 mm each.
Align the folded edge along the corner flash so that the two boards are equally covered.
CORNER JOINTS
(Internal & External)
48 mm tape
All cut-outs (service linings) to be done before the jointing application.
Jointing & Finishing

Jointing & Finishing Recommended Materials
Ramco Hilux Jointing Compound
Finishing
Jointing Compound

Sealing

Sealing
Apply Jointing Compound 3-4 mm
in between two Boards.
Over that apply cement-based primer
on surface.
Use appropriate jointing putty on the
primer.
3-4 mm

Never butt two Boards.
Sealing

S
Recommended Materials
Sealing
Sealant Base or PU sealant
Sealan
t Base
Sealan
t Base
PU
sealan
t

Finishing

Allow Jointing compound to dry completely and use 120 grit sandpaper to smoothen the wall surface
Finishing

Painting
Cement primer to be applied on entire surface before putty / painting

CEILING SEAMLESS FINISH

CEILING SEAMLESS FINISH Channel and Accessories
Self Drilling Screw with Underhead Cutter
Perimeter Channel
Soffit Cleat Connecting Clip Metal Rawlplug Intermediate Channel
Ceiling Hanger Ceiling Section
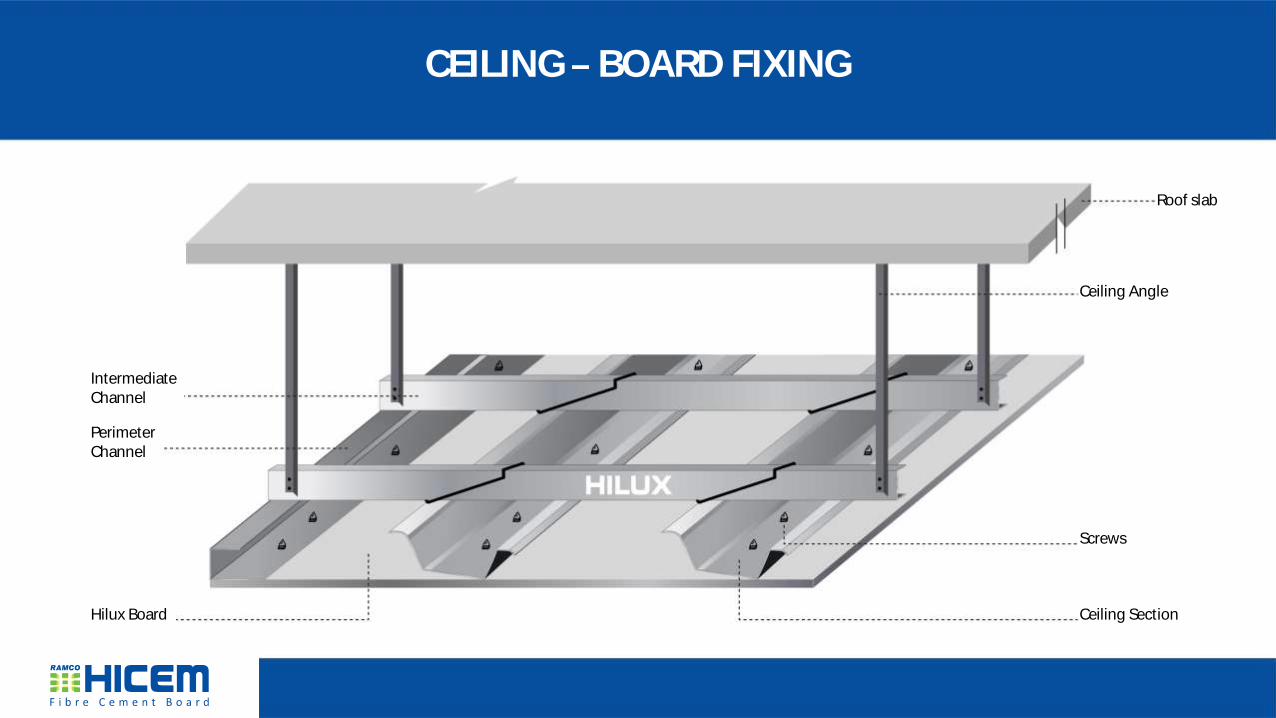
CEILING BOARD FIXING
Ceiling Angle
Ceiling Section
Screws
Hilux Board
Perimeter Channel
Intermediate Channel
Roof slab

JOINTING & FINISHING
Same procedure as partition

Accessories
GRID CEILING
Metal Rawlplug Soffit Cleat
- 3600mm
- 1200mm
- 600mm
Wall Angle
Level Clip with Wire
Level Clip

GRID CEILING FRAME WORK
Wall Angle
Wire Hanger

GRID CEILING LAYING OF BOARDS
Wall Angle
Tile
Wire Hanger
Adjustable Spring Clip
