intel solid-state drive installation guide
TRANSCRIPT

Intel® Solid-State DriveInstallation Guide 1
Intel® Solid-State DriveInstallation Guide
OverviewInstalling an Intel SSD consists of three main steps:
Before you Begin • Download and save the Intel Data Migration Software to your current storage device:
http://www.intel.com/go/ssdinstallation
• Confirm you have the necessary hardware for installation:
Note: Contents vary based on package purchased.
This guide explains how to install an Intel® Solid-State Drive (Intel® SSD) in a SATA-based desktop or notebook computer.
The instructions include migrating your data from your current storage device (such as a hard disk drive) to your new Intel SSD using Intel® Data Migration Software.
1. Connect the Intel SSD to your computer.
2. Migrate your data from your current storage device to your new Intel SSD.
3. Swap the placement of your current storage device with your new Intel SSD.
Hardware item Required for
1. SATA-to-SATA interface cable Desktop computers
2. SATA power adapter Desktop computers without a SATA power cable
3. 3.5-inch mounting adapter and screws Desktop computers with 3.5-inch drive bay
4. USB-to-SATA cable Notebook computers
5. Drive sleeve Notebook computers (optional - for use with your old storage device after the SSD is installed)
6. Phillips screwdriver Most computers
21 3 4 5 6

Intel® Solid-State Drive 2 Installation Guide
Intel® Solid-State Drive
SSD Handling PrecautionsObserve the following before beginning the installation:
• Keep the SSD in the protective anti-static container until you are ready to install.
• Handle the SSD with care. Do not touch the gold connectors.
• To minimize static electricity, touch the computer case before handling the SSD.
• Do not remove the encasement or disassemble the SSD; these actions void the SSD warranty.
This step explains how to connect the Intel SSD to your computer in preparation for migrating your data. Note that your current storage device remains installed until the final step of the installation, “Swap Your Drives” on page 8.Follow the steps for your platform:
— “Desktop Computers” (next section)
— “Notebook Computers” on page 4
Desktop Computers1. If your desktop computer has a 3.5-inch drive bay, attach the Intel SSD to the mounting
adapter. (This helps the SSD fit securely in a drive bay.) If your desktop computer has a 2.5-inch drive bay, you do not need to attach the mounting adapter. Go to step 2 in this section.a. With the SSD right side up (Intel logo showing), place the Intel SSD on the mounting
adapter. Make sure the edge of the Intel SSD (with connectors) aligns with the edge of the mounting adapter. See Figure 1.
b. Turn the SSD and mounting adapter over and insert one screw in each mounting hole on the bottom of the mounting adapter. See Figure 1.
Figure 1. Place and attach Intel SSD on mounting adapter
2. Power off the computer. Keep the power cable connected.
3. Remove the computer case.Refer to your computer documentation to determine how to safely remove the computer case.
1. Connect the Intel SSD to your Computer

Intel® Solid-State Drive Installation Guide 3
Intel® Solid-State Drive
4. Connect one end of the SATA-to-SATA interface cable to a SATA interface connector or SATA host adapter on your computer motherboard and connect the other end to the Intel SSD. See Figure 2.
Note: The SATA cable connectors are keyed to ensure correct orientation and contain a locking bracket for securing in place. Insert cables gently. Do not use excessive force.
5. Locate an available SATA power cable (connected to the internal computer power supply) and connect it to the Intel SSD. See Figure 2.
Note: Most computers have an available SATA power cable. If your computer does not have a SATA power cable and instead uses a 4-pin power connector, use a SATA power adapter. (The SATA power adapter comes with certain packages or can be purchased separately.)
Figure 2. Connect SATA interface and power cables
6. Slide the connected Intel SSD with mounting adapter into an available 3.5-inch drive bay, or secure the Intel SSD to the computer by inserting one screw in each of the side-mounting or bottom-mounting holes.
7. Power on the computer and wait for the operating system to recognize the Intel SSD. A message appears when the SSD is recognized. The Intel SSD is now connected. Proceed to “Migrate Your Data” on page 5.
1. SATA-to-SATA interface cable: Connect to SATA interface connector on computer motherboard and to Intel SSD.
2. SATA power cable (or SATA power adapter): Connect from power supply to Intel SSD.

Intel® Solid-State Drive 4 Installation Guide
Intel® Solid-State Drive
Notebook Computers1. Connect the dual end of a USB-to-SATA cable to two available USB ports on the computer.
See Figure 3. You do not have to power off the computer.
Note: If your computer contains a USB 3.0 port (indicated with a blue connector), connect the blue end of the USB-to-SATA cable to the USB 3.0 port. If your computer does not contain a USB 3.0 port, you can connect the cable to any USB port.
Figure 3. Connect USB-to-SATA cable to notebook
2. Connect the single end of the USB-to-SATA cable to the Intel SSD. See Figure 4.
Figure 4. Connect USB-to-SATA cable to Intel SSD
3. Power on the computer, if necessary, and wait for the operating system to recognize the Intel SSD.A message appears when the operating system recognizes the Intel SSD.
Note: SATA devices may draw more power than some systems are capable of delivering through USB ports. If the Intel SSD is not recognized, remove other USB devices (external keyboards, printers, mice, scanners, etc). Keep these devices removed until you have finished migrating your data from the old storage device to the Intel SSD. In some cases, it may be necessary to purchase an externally powered USB-SATA device or have your system data migrated by a professional.
The Intel SSD is now connected. Proceed to “Migrate Your Data” on page 5.
Intel® Solid-State Drive Installation Guide 5
Intel® Solid-State Drive
This section explains how to migrate (transfer) your data from your current storage device to your new Intel SSD using Intel Data Migration Software.
Note: The migration process is identical for desktop and notebook computers.
1. Make sure you have downloaded and saved the Intel Data Migration Software to your current storage device:http://www.intel.com/go/ssdinstallation
Note: If the amount of data on your current storage device is greater than the capacity of the Intel SSD, the data migration will not complete. Remove unnecessary files or data from your current storage device to reduce its image size.
2. After downloading, double-click the Intel Data Migration Software icon to start the installation.
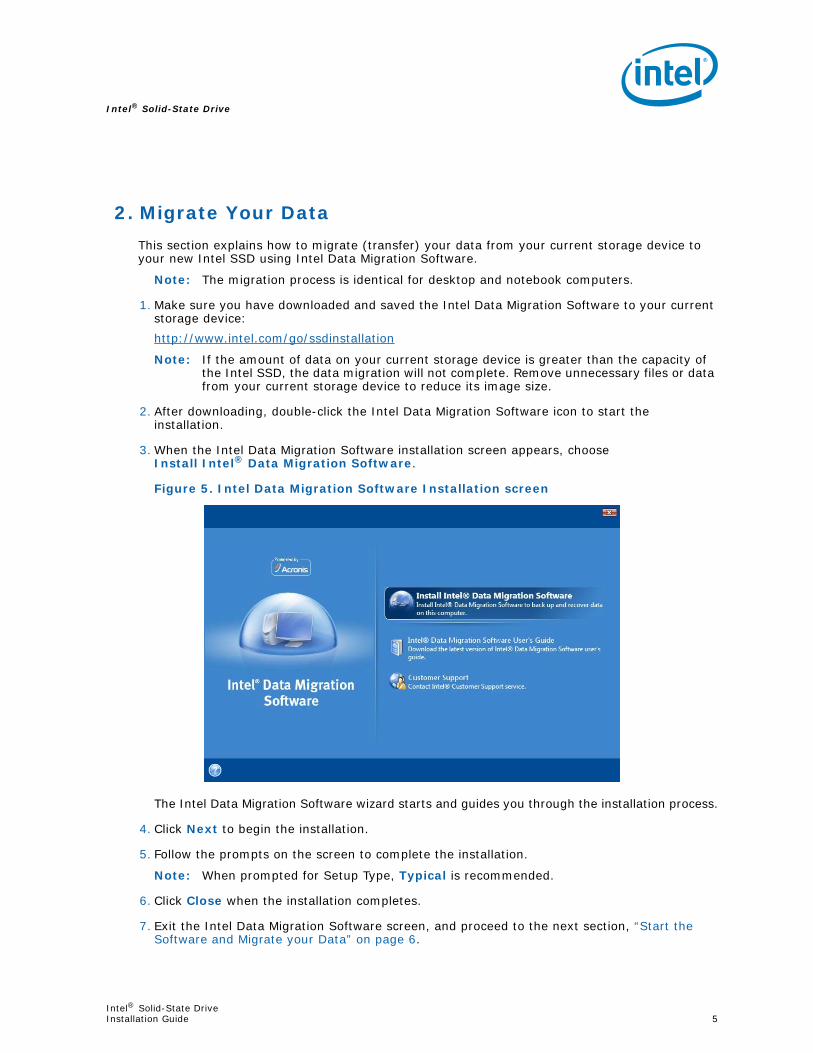
3. When the Intel Data Migration Software installation screen appears, choose Install Intel® Data Migration Software.
Figure 5. Intel Data Migration Software Installation screen
The Intel Data Migration Software wizard starts and guides you through the installation process.
4. Click Next to begin the installation.
5. Follow the prompts on the screen to complete the installation.
Note: When prompted for Setup Type, Typical is recommended.
6. Click Close when the installation completes.
7. Exit the Intel Data Migration Software screen, and proceed to the next section, “Start the Software and Migrate your Data” on page 6.
2. Migrate Your Data

Intel® Solid-State Drive 6 Installation Guide
Intel® Solid-State Drive
Start the Software and Migrate your Data1. Double-click the Intel Data Migration Software shortcut icon on your desktop.
2. Complete the registration form when prompted, and then click Register Now.After registering the software, the Intel Data Migration Software screen appears.
Figure 6. Intel Data Migration Software screen
3. Click Start Now.Intel Data Migration Software automatically detects both drives, and the Clone Now screen appears.
Figure 7. Clone Now screen

Intel® Solid-State Drive Installation Guide 7
Intel® Solid-State Drive
Intel Data Migration Software works with Intel SSDs only. If you receive an error message, make sure that you have an Intel SSD connected to your computer. If you have an Intel SSD connected to your computer and still receive an error message, contact Intel support. See “Additional Support” on page 10.Intel Data Migration Software identifies your SSD and verifies that the used space on your current storage device is the same or smaller than the available space on your SSD.
4. Click Clone Now.The data migration starts. During this process, you will be prompted to reboot your computer.
Figure 8. Reboot screen
5. Click Reboot.As your computer reboots, the migration process continues. View the progress bar to see the status of the data migration. The length of the procedure corresponds to the amount of data on the drive being transferred.
6. Once the operation completes, shut down your computer when prompted. Proceed to “Swap Your Drives” on page 8.
Figure 9. Data Migration Successful screen
Intel Data Migration Software
Synchronizing with operating system:
[############################] 100%
Congratulations!
The cloning process completed successfully.
You can power off your system now and install
the cloned Intel SSD into your system.
Press any key to shut down the computer.

Intel® Solid-State Drive 8 Installation Guide
Intel® Solid-State Drive
After you have migrated your data onto the Intel SSD and shut down your computer, swap the placement of your current storage device with the new Intel SSD.
• For desktop computers:
— You can either physically remove the current storage device and replace it with the Intel SSD (see “Desktop Computers — Physically Swapping the Drives”), or
— Keep the storage device in your computer and change the boot order of the drives in the system BIOS to ensure that the computer boots from the Intel SSD (see “Desktop Computers — Changing the Boot Order of the Drives” on page 9).
• For notebook computers, remove the current storage device and replace it with the Intel SSD (see “Notebook Computers — Swapping the Drives” on page 9).
Desktop Computers — Physically Swapping the Drives1. Make sure the computer is powered off.
2. Swap the SATA cable placement of the Intel SSD and your current storage device.
Figure 10. Swap drives
3. If desired, remove the current storage device.
Note: You may choose to keep your current storage device installed as a secondary or backup drive. However, make sure to configure the system BIOS and change the boot order so that the Intel SSD appears before your current storage device. See “Desktop Computers — Changing the Boot Order of the Drives” on page 9.
3. Swap Your Drives

Intel® Solid-State Drive Installation Guide 9
Intel® Solid-State Drive
4. After swapping the drives, power on the computer.As your computer boots to the Intel SSD for the first time, a notification that the data migration process completed successfully appears when the operating system starts. Enjoy your new high-performing Intel Solid-State Drive!
Desktop Computers — Changing the Boot Order of the Drives1. Close the computer case and start the computer.
2. While the computer is booting, enter the BIOS setup menu.Press a special key such as ESC, F1, or DELETE to enter the BIOS menu. Check your computer manufacturer’s documentation for the correct key(s).
3. Go to the Boot or Startup screen and change the boot order so that the Intel SSD appears before your old storage device.
4. Save the settings and exit the BIOS setup menu.
5. Restart the computer.As your computer boots to the Intel SSD for the first time, a notification that the data migration process completed successfully appears when the operating system starts. Enjoy your new high-performing Intel Solid-State Drive!
Notebook Computers — Swapping the Drives1. Make sure the computer is powered off.
2. Remove the current storage device from the computer's drive bay.Refer to your computer documentation for instructions on safely accessing the drive bay.
3. Remove any brackets or adaptors attached to the current storage device. Not all storage devices have attached brackets or adaptors. If your devices does, remove these and connect them in a similar manner to the Intel SSD.
4. Align the connector pins on the SSD with the SATA connector in the drive bay and slide the SSD into the drive opening.
Figure 11.Install Intel SSD in notebook

Intel® Solid-State Drive 10 Installation Guide
Intel® Solid-State Drive
5. Replace the cover and power on the computer.
Note: You may choose to keep your old storage device as a secondary or backup drive by connecting it to the computer using the USB-to-SATA cable. Protect the old storage device with the drive sleeve included with certain packages. Install the drive sleeve with caution. Intel is not responsible for data loss or damage to system components.
As your computer boots to the Intel SSD for the first time, a notification that the data migration process completed successfully appears when the operating system starts. Enjoy your new high-performing Intel Solid-State Drive!
Additional SupportFor more help with Intel SSDs, go to: http://www.intel.com/support
For more information about Intel SSDs, go to: http://www.intel.com/go/ssd
For instructional videos and to learn more about Intel SSDs, go to:
http://www.intel.com/go/ssdfacebook

Intel® Solid-State Drive Installation Guide 11
Intel® Solid-State Drive

Intel® Solid-State Drive 12 Installation Guide
Intel® Solid-State Drive
INFORMATION IN THIS DOCUMENT IS PROVIDED IN CONNECTION WITH INTEL PRODUCTS. NO LICENSE, EXPRESS OR IMPLIED, BY ESTOPPEL OR OTHERWISE, TO ANY INTELLECTUAL PROPERTY RIGHTS IS GRANTED BY THIS DOCUMENT. EXCEPT AS PROVIDED IN INTEL'S TERMS AND CONDITIONS OF SALE FOR SUCH PRODUCTS, INTEL ASSUMES NO LIABILITY WHATSOEVER, AND INTEL DISCLAIMS ANY EXPRESS OR IMPLIED WARRANTY, RELATING TO SALE AND/OR USE OF INTEL PRODUCTS INCLUDING LIABILITY OR WARRANTIES RELATING TO FITNESS FOR A PARTICULAR PURPOSE, MERCHANTABILITY, OR INFRINGEMENT OF ANY PATENT, COPYRIGHT OR OTHER INTELLECTUAL PROPERTY RIGHT.
UNLESS OTHERWISE AGREED IN WRITING BY INTEL, THE INTEL PRODUCTS ARE NOT DESIGNED NOR INTENDED FOR ANY APPLICATION IN WHICH THE FAILURE OF THE INTEL PRODUCT COULD CREATE A SITUATION WHERE PERSONAL INJURY OR DEATH MAY OCCUR.
Intel may make changes to specifications and product descriptions at any time, without notice. Designers must not rely on the absence or characteristics of any features or instructions marked "reserved" or "undefined." Intel reserves these for future definition and shall have no responsibility whatsoever for conflicts or incompatibilities arising from future changes to them. The information here is subject to change without notice. Do not finalize a design with this information.
The products described in this document may contain design defects or errors known as errata which may cause the product to deviate from published specifications. Current characterized errata are available on request.
Contact your local Intel sales office or your distributor to obtain the latest specifications and before placing your product order.
Copies of documents which have an order number and are referenced in this document, or other Intel literature, may be obtained by calling 1-800-548-4725, or go to: http://www.intel.com/design/literature.htm
Intel and the Intel logo are trademarks or registered trademarks of Intel Corporation or its subsidiaries in the United States and other countries.
*Other names and brands may be claimed as the property of others.
Copyright © 2011, Intel Corporation. All Rights Reserved.
G17251-001