intermediate powerpoint 2007- · pdf filejohn w. jacobs technology center 450 exton square...
TRANSCRIPT

1
John W. Jacobs Technology Center 450 Exton Square Parkway
Exton, PA 19341 610.280.2666 [email protected]
www.ccls.org Facebook.com/ChesterCountyLibrary
Intermediate PowerPoint 2007-

2
Intermediate PowerPoint 2007
The Interface
o Views (Normal, Slide Sorter, Notes Page, and Slide Show)
Slide Sorter (One and Two Files, Hide Slides in Presentation)
Customizing Your Presentation
o Slide Masters
o Themes (Design Tab)
o Templates (Use and Save)
Add Slides with:
o Animation
Visual
Sound
o Bullets and Tables
o Smart Art Graphics
o Action Buttons
Link to Other File
Hyperlink to Open Other File
Custom Slide Shows
Help and other resources from CCLS
3
The Interface
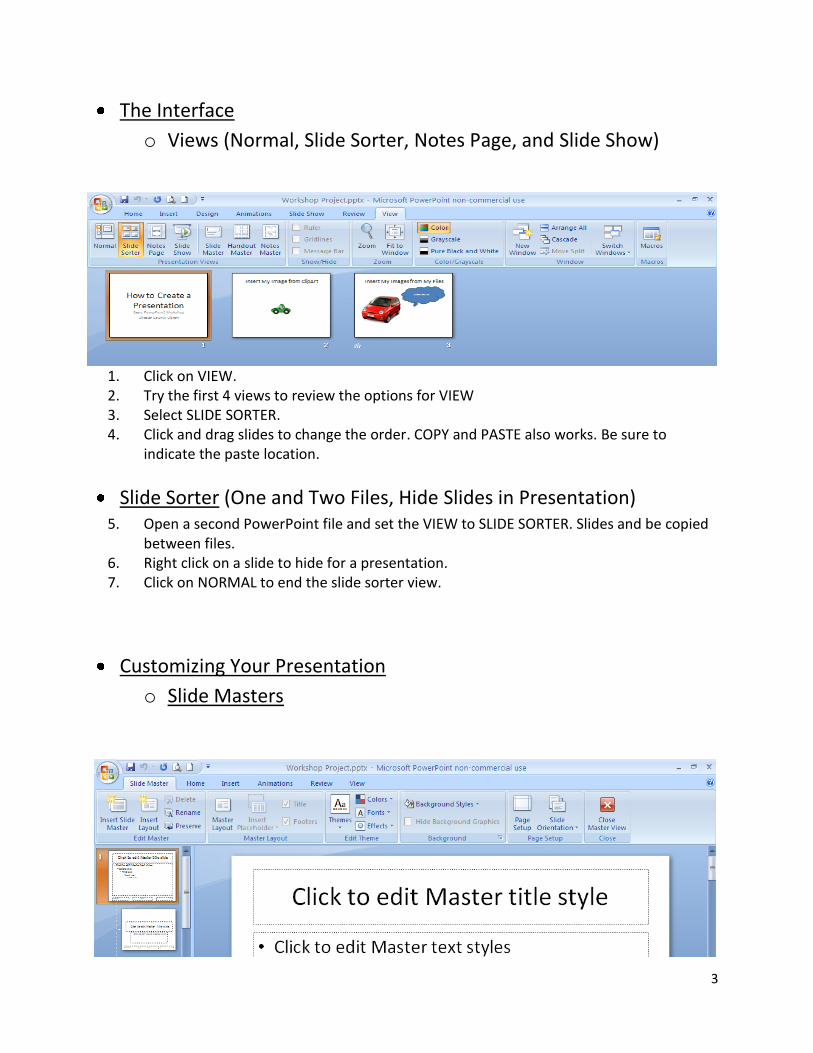
o Views (Normal, Slide Sorter, Notes Page, and Slide Show)
1. Click on VIEW. 2. Try the first 4 views to review the options for VIEW 3. Select SLIDE SORTER. 4. Click and drag slides to change the order. COPY and PASTE also works. Be sure to
indicate the paste location.
Slide Sorter (One and Two Files, Hide Slides in Presentation) 5. Open a second PowerPoint file and set the VIEW to SLIDE SORTER. Slides and be copied
between files. 6. Right click on a slide to hide for a presentation. 7. Click on NORMAL to end the slide sorter view.
Customizing Your Presentation
o Slide Masters
4
8. Click on VIEW and then SLIDE MASTER. 9. Use this tab to provide a standard appearance for all or some of the slide types. Click
INSERT tab to add a logo to all of the slides using the Clip Art option. 10. Click on CLOSE MASTER VIEW to exit.
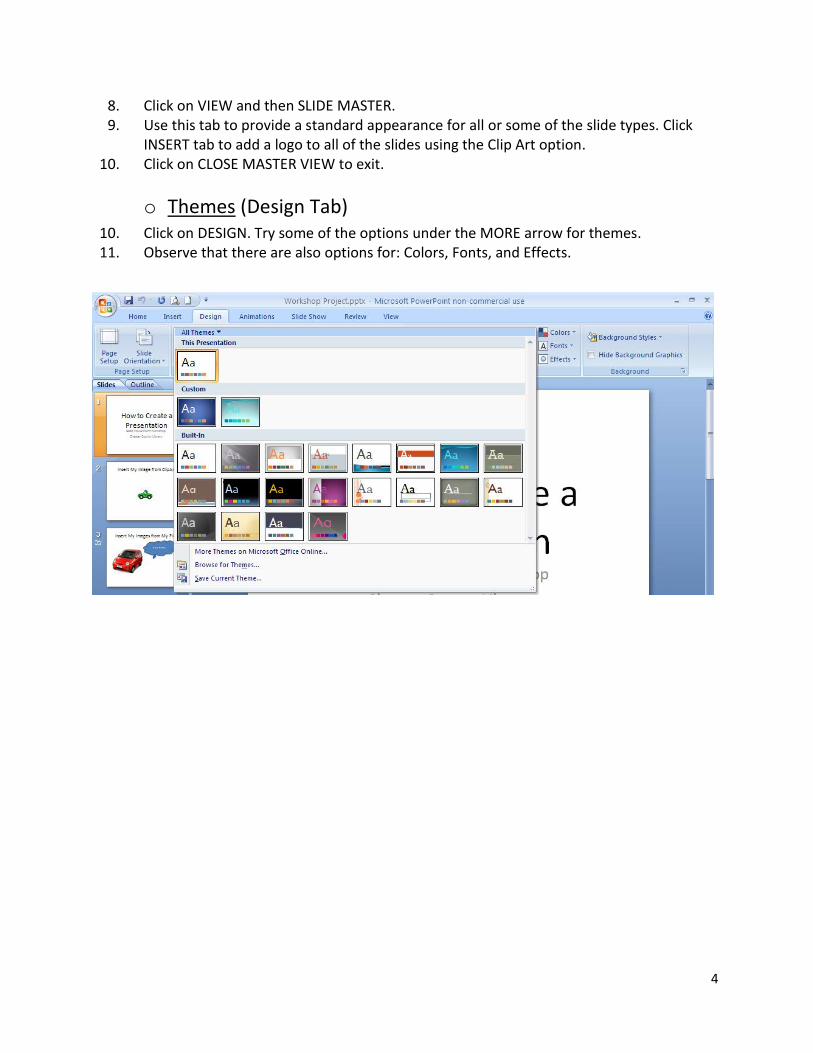
o Themes (Design Tab) 10. Click on DESIGN. Try some of the options under the MORE arrow for themes. 11. Observe that there are also options for: Colors, Fonts, and Effects.
5
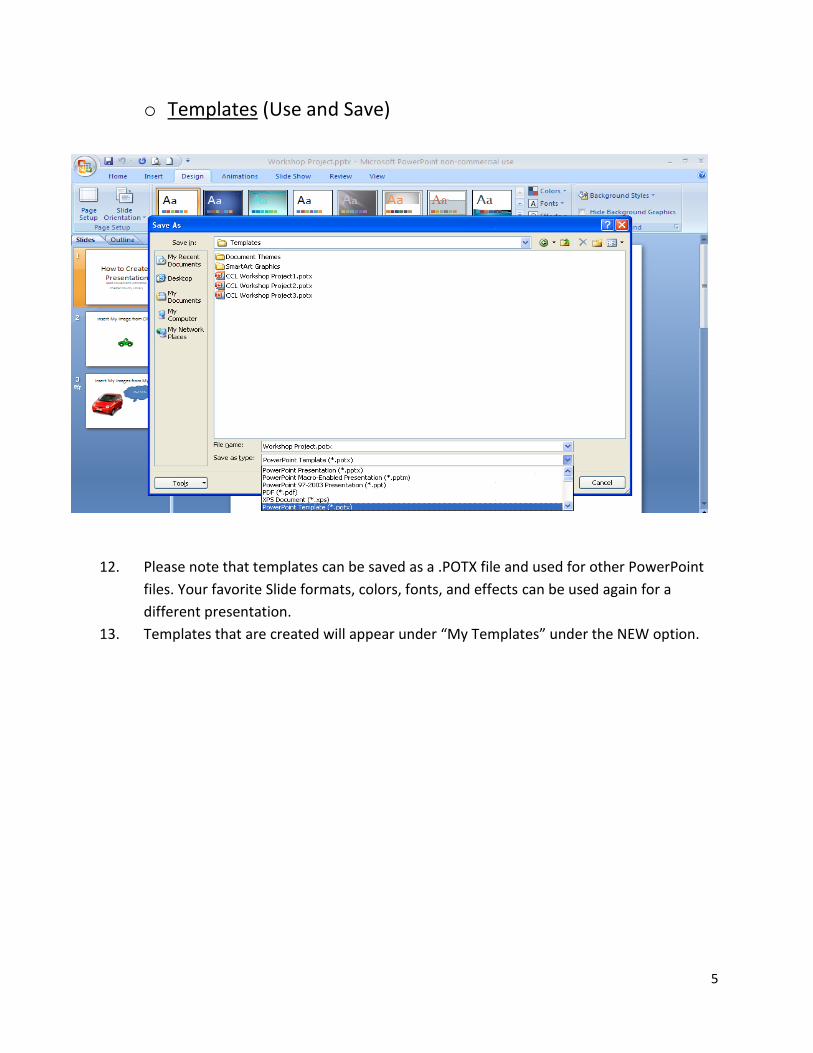
o Templates (Use and Save)
12. Please note that templates can be saved as a .POTX file and used for other PowerPoint
files. Your favorite Slide formats, colors, fonts, and effects can be used again for a
different presentation.
13. Templates that are created will appear under “My Templates” under the NEW option.
6
Add Slides with:
o Animation
Visual
Sound
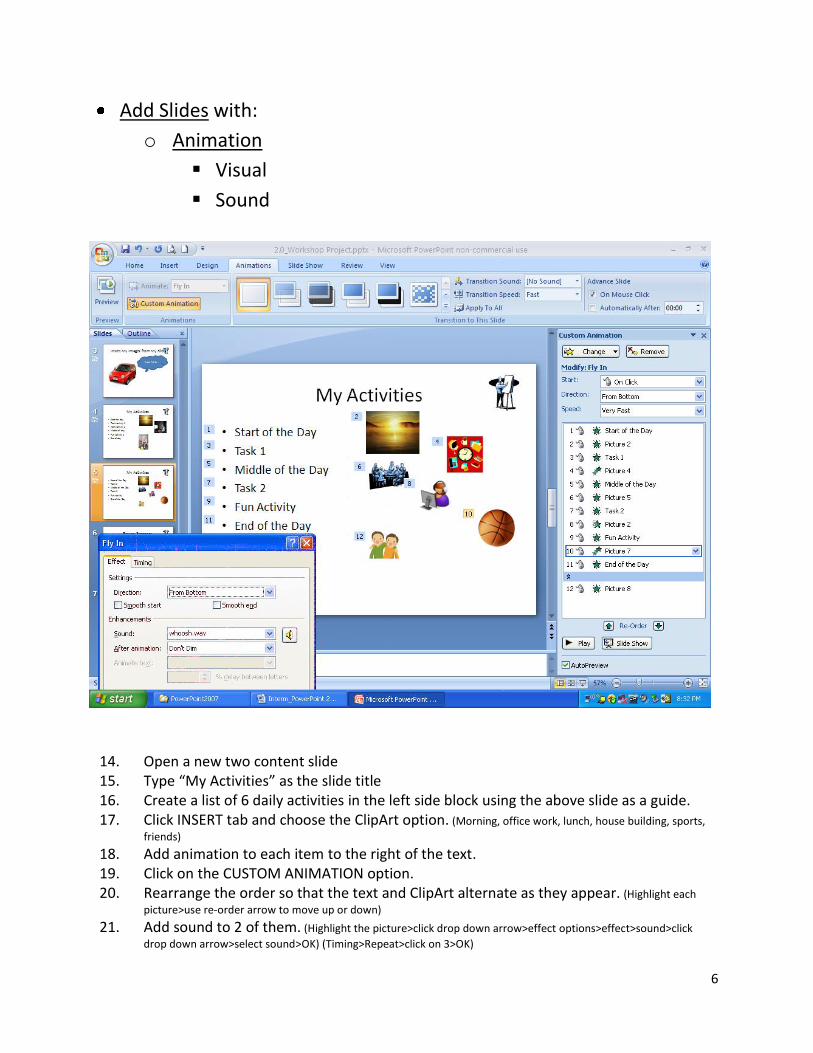
14. Open a new two content slide 15. Type “My Activities” as the slide title 16. Create a list of 6 daily activities in the left side block using the above slide as a guide. 17. Click INSERT tab and choose the ClipArt option. (Morning, office work, lunch, house building, sports,
friends) 18. Add animation to each item to the right of the text. 19. Click on the CUSTOM ANIMATION option. 20. Rearrange the order so that the text and ClipArt alternate as they appear. (Highlight each
picture>use re-order arrow to move up or down) 21. Add sound to 2 of them. (Highlight the picture>click drop down arrow>effect options>effect>sound>click
drop down arrow>select sound>OK) (Timing>Repeat>click on 3>OK)

7
o Bullets and Tables
22. Open a new single content slide.
23. Type “My Table as the slide title.
24. Click INSERT and then TABLE.
25. Draw the 2 Column by 7 row table.
26. Type in your ice cream flavors for each day of the week.
27. Observe the DESIGN and LAYOUT tabs for your use when customizing (Same as WORD
2007).
8
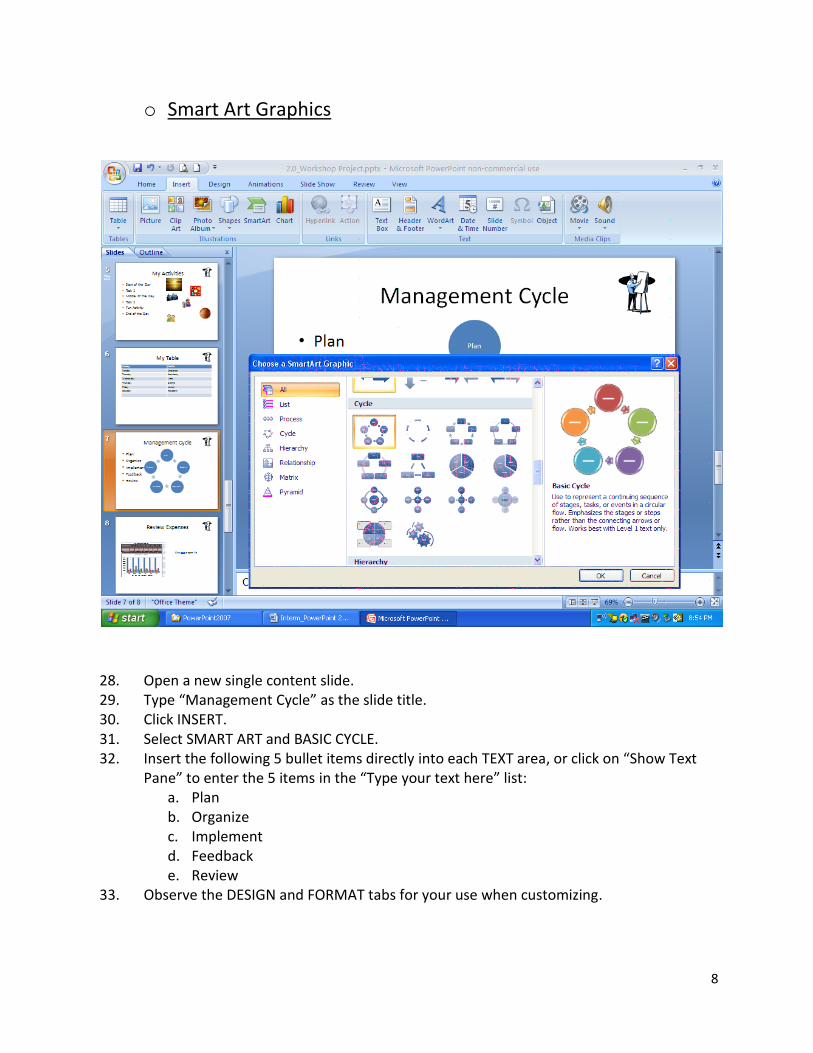
o Smart Art Graphics
28. Open a new single content slide. 29. Type “Management Cycle” as the slide title. 30. Click INSERT. 31. Select SMART ART and BASIC CYCLE. 32. Insert the following 5 bullet items directly into each TEXT area, or click on “Show Text
Pane” to enter the 5 items in the “Type your text here” list: a. Plan b. Organize c. Implement d. Feedback e. Review
33. Observe the DESIGN and FORMAT tabs for your use when customizing.

9
o Action Buttons
34. Click on VIEW and then SLIDE MASTER. 35. Click on INSERT and SHAPES. Scroll down to ACTION BUTTONS. 36. Add the PREVIOUS and NEXT SLIDE action buttons the bottom of the Master Slide. 37. Click on CLOSE MASTER VIEW to exit. 38. Navigate through the slides by using the action buttons during the slide show.

10
Link to Other File
39. Open a new single content slide. 40. Enter Title as “Link to Excel File.” 41. Click INSERT. 42. Select OBJECT 43. Click on CREATE FROM FILE. 44. Click on BROWSE 45. Locate “C:\Desktop” 46. Choose “Rev7 01 13” 47. Select “PowerPoint2007” 48. Highlight “BasicExcelClass.xlsx.” 49. OK 50. Check LINK. 51. OK 52. Resize the chart if necessary.

11
Hyperlink to Open Other File

12
53. Open a new single content slide. 54. Enter Title as “Review Expenses.” 55. Resize the content block to a smaller size. 56. Type “The expense file will be opened.” 57. Click INSERT. 58. Click on TEXT BOX. 59. Type “Click here to open file” in the text box 60. Highlight the word “here” in the text box. 61. Click on HYPERLINK. 62. The word “here” is underlined. 63. Hyperlink is activated for slide when SLIDE SHOW view is used. 64. Try this feature by clicking on the SLIDE SHOW view button at bottom of normal screen
view.
Custom Slide Shows
65. Click on SLIDE SHOW. 66. Select CUSTOM SLIDE SHOW. 67. NEW 68. Name the Custom Slide Show as “css91513[today’s date, (e.g. 91513)]. 69. Select some of the slides and include by pressing the ADD button. 70. OK 71. Choose the Custom Slide Show by selecting the named version and clicking “EDIT.” 72. Use the SHOW option when giving a presentation in future.
13
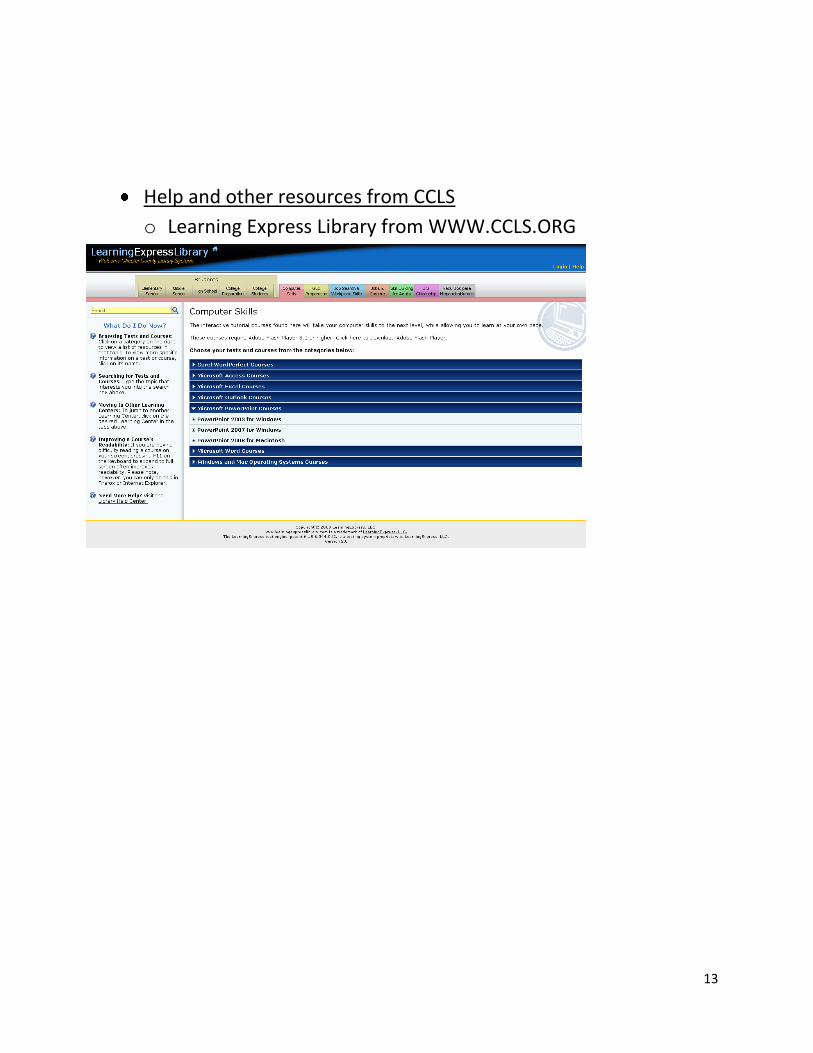
Help and other resources from CCLS
o Learning Express Library from WWW.CCLS.ORG