introduction to latex lambert e. murray august 6, 2010 · abstract this document describes the use...
TRANSCRIPT

Introduction to LATEX
Lambert E. Murray
August 6, 2010

Abstract
This document describes the use of TEXnicCenter (a LATEX editor) andMikTEX (a version of LATEX written for windows) for developing input doc-uments which utilize the TEX computer typesetting program to produce print-quality documents.
First you will be shown how to install and set up MikTEX and TEXnicCenteron your computer. You will then be introduced to the basic structure of aLATEX input document. Here you will be introduced to the way in which LATEXinterprets the input file and produces the type-set output. You will learn someof the basic LATEX commands for inserting headings, footnotes, etc.
Next you will be shown how to input mathematical equations into yourLATEXdocument, as well as chemical equations and symbols.
Finally, you will be shown how to form tables and how to input figures intoyour LATEX document.

Contents
1 MikTEX and TEXnicCenter 3
2 Text Input File Structure 62.1 The LaTeX Command Structure . . . . . . . . . . . . . . . . . . 6
2.1.1 The Document Class . . . . . . . . . . . . . . . . . . . . . 62.1.2 The Overall Structure of the Document . . . . . . . . . . 72.1.3 Other Environments . . . . . . . . . . . . . . . . . . . . . 7
2.2 Title, Author, Data, and Abstract . . . . . . . . . . . . . . . . . 82.3 Section and Paragraph Headings . . . . . . . . . . . . . . . . . . 82.4 Useful Commands for Typsetting Text . . . . . . . . . . . . . . . 9
2.4.1 White Spaces and Paragraphs . . . . . . . . . . . . . . . . 92.4.2 Printing Special Characters . . . . . . . . . . . . . . . . . 92.4.3 More on the LATEX Command Sequence . . . . . . . . . . 102.4.4 Comments: Documenting your LATEX file . . . . . . . . . 102.4.5 Line and Page Breaks . . . . . . . . . . . . . . . . . . . . 112.4.6 Quotes, Dashes and Dots, and Emphasis . . . . . . . . . . 112.4.7 Cross References and Footnotes . . . . . . . . . . . . . . . 12
3 Typesetting Mathematics 133.1 Equation Environments . . . . . . . . . . . . . . . . . . . . . . . 133.2 Numbered Equations . . . . . . . . . . . . . . . . . . . . . . . . . 14
3.2.1 Single Displayed Equations . . . . . . . . . . . . . . . . . 143.2.2 Multiple Aligned Equations . . . . . . . . . . . . . . . . . 143.2.3 Multi-Line Equations . . . . . . . . . . . . . . . . . . . . 153.2.4 Boxed Equations . . . . . . . . . . . . . . . . . . . . . . . 16
3.3 Tips on Entering Math . . . . . . . . . . . . . . . . . . . . . . . . 173.3.1 Spaces and Carriage Returns . . . . . . . . . . . . . . . . 173.3.2 Subscripts and Superscripts . . . . . . . . . . . . . . . . . 173.3.3 Chemical Reaction Equations and Symbols . . . . . . . . 183.3.4 Entering Fractions . . . . . . . . . . . . . . . . . . . . . . 193.3.5 Entering Integrals . . . . . . . . . . . . . . . . . . . . . . 19
3.4 Spacing in Math Expressions . . . . . . . . . . . . . . . . . . . . 203.4.1 Horizontal Spacing . . . . . . . . . . . . . . . . . . . . . . 203.4.2 Vertical Spacing . . . . . . . . . . . . . . . . . . . . . . . 20
1

3.5 Creating New LATEX Commands . . . . . . . . . . . . . . . . . . 21
4 Creating Tables 23
5 Including Graphics 26
2

Chapter 1
MikTEX and TEXnicCenter
LATEX is a programing package that takes as its input simple ASCII text files,containing special LATEX formatting commands. This program then uses theTEX typesetting engine to produce publication quality output, typically in theform of a .pdf file.
LATEX has become the standard computer-based typesetting program usedfor electronic submission to journals within the scientific community. Eachmajor publishing organization has developed their own unique document classeswhich are utilized by the LATEX program. For example the American PhysicalSociety (APS) has developed the APS REVTEX document class for all of thejournals published by the APS. Each individual journal within the APS has itsown unique options which are applied to this document class. For example, thecommand line:
\documentclass[twocolumn,
secnumarabic, amssymb, amsmath,
nofootinbib, tightenlines,
nobibnotes, showkeys, aps, prl]{revtex4-1}
specifies the revtex4.1 document class with several options in square brackets[ ], one of which is the “prl” option, shown above, which specifies formattingfor Physical Review Letters. There are other options that include PhysicalReview A [pra], which covers atomic, molecular and optical physics; PhysicalReview B [prb], which covers condensed matter and materials physics; PhysicalReview C [prc], which covers nuclear physics; Physical Review D [prd], whichcovers particle physics, fields, gravitation and cosmology; Physical Review E[pre], which covers statistical, non-linear, and soft-matter physics; and Physi-cal Review Special Topics [prstab] - both accelerators and beams (STAB) andeducational research (STER).
Because of its wide-spread usage today in the research community, we feelthat our students should be exposed to this powerful typesetting tool. AlthoughLATEX is somewhat overwhelming at first (primarily because the programing en-vironment is comprised of a large number of complex programs), several devel-
3

opments over the past few years have made it much simpler to use. There arenow versions of LATEX that run on the Windows operating system, and new texteditors have been developed which helps to simplify the writing and editing ofLATEX documents.
One of the best distributions of LATEX for Windows is MikTEX. You candownload MikTEX for you own personal use from the MikTEX homepage,1 andit’s free! The MikTEX environment provides the capability of downloading onlythose LATEX files that are necessary for start-up, and provides for automaticallyupdating and upgrading your system as you need it!
The LATEX editor that we will be using, TEXnicCenter, is a feature-rich in-tegrated development environment (IDE) for developing LATEX documents onMicrosoft Windows. TEXnicCenter is especially designed for use with MikTEX,so several settings are generated automatically by the TEXnicCenter setup pro-gram. Best of all: TEXnicCenter is distributed as open source under the termsof the GNU General Public License (GPL) and is consequently available forfree!2
The aim of TEXnicCenter is to support the LATEX newbie by providing himthe most important LATEX commands via menus and by making the use of theLATEX compiler and other tools like MakeIndex and BibTeX and easy as possible.It also supports the LATEX guru by providing a powerful, fully customizableintegrated environment.
All of the tools needed to develop documents with LATEX are integratedinto TEXnicCenter. You have the editor to write your LATEX files, menu barbuttons to build the output, error and warning flags in the compiler outputto aid in source file debugging, and a navigation window that makes movingaround the source file(s) a snap. Viewing the generated output is also easy withTEXnicCenter. Just choose a menu item and the correct viewer application willbe started. We will primarily use the LaTeX=>PDF setting which will produce a.pdf file as output.
If you go to my website3 and click on the LATEX link, you will find a folderentitled “Student LaTeX”. This folder contains the following subfolders:
• Downloads, containing the following programs (in their respective fold-ers) that you will need to install on your computer:
– MikTeX 2 8
– TeXnicCenter
– PrimoPDF
• Intro to LaTeX, containing a .pdf file of the document you are nowreading as well as the .tex file for this document. This may serve as ahelpful reference as you begin using LATEX.
1http://miktex.org/2.8/setup2http://www.texniccenter.org3http://www.harding.edu/lmurray
4

• Intro to LaTeX RevTex – Another version of this document (with afew more details) written in a different documentclass and style. Don’tworry about this until much later.
• LeTeXRef , containing a number of LATEX references, the most usefulare probably:
– lshort 2010.pdf
– ShortMathGuide.pdf
• Template for Lab Reports, which contains a sample lab report withonly the basic, necessary LATEXcommands for setting up your document.This will serve as a template for your lab writeups.
When you run the setup files for the programs in the “Downloads” folder, besure to first load MikTEX and, only then, TEXnicCenter, because TEXnicCenterwill try to link to the main LATEX program loaded on your computer. Once youhave loaded MikTEX, go to
Start>Programs>MikTeX 2.8>Maintenance>Package Manager
and click on the “Repository” button on the top menu. Choose “change packagerepository” and make sure that the radio button marked “Packages shall beinstalled from the Internet” has been selected. You will then be asked for thelocation of the repository that you wish to use. Choose the “USA ctan ....”repository. This tells TEXnicCenter where to go to synchronize the files on yourcomputer with the ones on the repository. To insure that the synchronizationprocess works smoothly, go to
Start>Programs>MikTeX 2.8>Maintenance>Settings
and make sure TEXnicCenter is set to automatically synchronize the files withouthaving to ask your permission. Now, any files needing to be updated will be. Inaddition, if you specify additional packages for use in your LATEX documents thatare not on your computer, TEXnicCenter will automatically go to the repositoryand retrieve them – placing all the necesary files in the appropriate folders.
Next, go to Programs and run TEXnicCenter. You will be asked where theMikTEX executable file is located. This file is located in the folder:
c:\Program Files\MikTeX 2.8\miktex\bin
MikTEX is now ready to run. You should select the LaTeX=>PDF output mode inthe white window at the top of TEXnicCenter. Then open the Student LaTeXfolder, and open the Intro to LaTeX folder and double click on the “Docu-ment.tex” file. This will load the .tex file for this document into TEXnicCenter.Now go up and click on the “compile and view” button on the menu bar (paperswith a magnifying glass). This should compile the program and produce a .pdfoutput on the screen of your computer, if everything is working correctly.
5
Chapter 2
Text Input File Structure
2.1 The LaTeX Command Structure
The first thing you must realize is that the LATEX input document is a simpletext document (which can be written in any common text editor) that containsspecial commands inserted to tell the LATEX type-setting engine how to producethe proper output file. These type-setting commands are typically designatedwith the backslash symbol \, followed by a name consisting only of alphabeticalcharacters. This command typically takes an argument which must be enclosedin curly braces { }, but may also take optional agruments which are enclosed insquare brackets.
2.1.1 The Document Class
A good example of a typical LATEX command is the command which specifies thetype of file that you want to produce. Every LATEX input file must begin witha LATEX command which specifies the “document class” of the document. Thedocument class is a pre-defined set of instructions that tells the type-settingengine how to set up the headings of the different sections (titles, abstracts,sections headings, etc.) - whether they are to be numbered, what font to use,etc. This document begins with the command line
\documentclass[10pt]{article}
as the first line of the text document. You can see that this follows the commandstructure of LATEX: there is a backslash, an alphabetical command followed byan optional input, 12pt, which indicates the size of font, and the final argumentspecifies that the document class is article (not, for example, a book). Manyjournals have specific document classes that are published for use with LATEX.They typcially have many optional settings that can be utilized to change dif-ferent aspects of the formatting of the document.
6

2.1.2 The Overall Structure of the Document
The actual text of the document (along with all the associated control com-mands) must be contained between the two commands
\begin{document}
\end{document}.
These actually set off the text “environment”.
2.1.3 Other Environments
The Quote Environment Other enviroments can also be set up in yourdocument. One that I have already used is the “quote” environment. Thisenvironment is contained between the two commands
\begin{quote}
\end{quote}.
This environment indents the text by an amount predetermined by the docu-ment class and options that may be set. In the examples above, you will noticethat, in addition to being indented, the font of the indented material is differ-ent. This is due to the fact that I had to force the LATEX document to print outexactly what I typed (with the backslash), rather then allowing it to “interpret”the LATEX command which would actually type-set the text.
The Verbatim Environment To print out exactly what is typed, you makeuse of the the “verbatim” environment. This can be accomplished by enclos-ing the text between \begin{verbatim} and \end{verbatim}, or, within aparagraph by using the \verb command (a shortened version of the verbatimenvironment structure). Any text which is set off by some delimiting characters(which may be anything other than letters, * , or a space), and which followsthe \verb command will by output just as you typed it! For example, you couldtype
\verb+\these are \not \LaTeX commands+
or
\verb|\these are \not \LaTeX commands|
to accomplish the same thing. You should notice that within the verbatimenvironment, you get “exactly” what you type. You control the spacing, theline breaks, etc. In this environment, the text is not automatically formattedto fit the page, it will not wrap as it automatically does for a LATEX document!
Itemizing Environments It is often useful to include itemized lists withina document, which may be numbered or simply set off by some symbol. This isaccomplished using an itemized environment. This environment can be insertedinto your document with the TEXnicCenter tools by using
7

• the itemize button (which enters bullets), or
• the enumeration button (which enters numbered items)
In enumerated list, LATEX keeps up with the correct numbering so that youdon’t have to worry about it. If you later go back an elliminate an item, or addanother item, the numbering is automatically changed.
2.2 Title, Author, Data, and Abstract
Following the \begin{document} statement, you can create the title section ofyour paper. This is accomplished using the \maketitle command (without ar-guments). However, the title, author, and date must be set before this commandis given. This is done by entering the following commands:
\title{This is the Title of the Document}
\author{Lambert E. Murray}
\date{\today}
where the argument of each of the commands is what will be outpute in the type-set document. Following the \maketitle command, you can create an abstractby using the “abstract” environment, just as we did the “quote” environment.In the “abstract” environment, the spacing, indentation, and font size are allpredetermined by the document class that you specify.
2.3 Section and Paragraph Headings
As you will have noticed in this document, I have made use of section headings,subheadings, and paragraph headings. The section headings and subheadingsare numbered, whereas the paraphraph headings are not. These are entered inthe input document using LATEX commands of the form
\section{SectionName}
The numbering scheme, the fonts and styles, are all controled by the documentclass that you have specified for your document. If you use the input buttonin TEXnicCenter for headings, you can select the type of heading (section, sub-section, subsubsection, paragraph, etc.) and specify the name of the heading.TEXnicCenter will then insert the proper LATEX command along with a labelwhich will allow you to refer to this section of the paper later on. The label isnot required, however. More about labels later.
LATEX creates a table of contents by taking the section headings and pagenumbers generated from the previously compiled run of the document – thus anew document must be compiled twice to get a correct table of contents. Allthe sectioning commands mentioned above also exist as a “starred” version inthe form
8

section*{...}
This form of the command generates section headings that are not numberedand that will not show up in the table of contents.
2.4 Useful Commands for Typsetting Text
2.4.1 White Spaces and Paragraphs
“Whitespace” characters, such as a blank or a tab, are treated uniformly as a“space” by LATEX. In fact, several consecutive whitespace characters are treatedas one “space.” Whitespace at the start of a line is generally ignored, and asingle line break is treated as “whitespace.” An empty line between two linesof text defines the end of a paragraph, in fact a group of empty lines is treatedthe same as one empty line. For example the input file
You can enter one, or several
spaces between words.
You can even leave empty
space at the beginning of lines,
and LaTeX will format the document
properly.
To start a new paragraph, simply
leave an empty line (which serves to
signal an end of paragraph).
If you leave several empty lines the
result is the same.
when compiled by LATEX produces the following output
You can enter one, or several spaces between words. You caneven leave empty space at the beginning of lines, and LaTeX willformat the document properly.
To start a new paragraph, simply leave an empty line (whichserves to signal an end of paragraph).
If you leave several empty lines the result is the same.
2.4.2 Printing Special Characters
There are a number of “reserved” characters in LATEX. These characters typi-cally have a special meaning or function under LATEX. When the LATEX text fileis compiled these special characters are not printed as text, but often modifyhow the text is printed. We have already mentioned the use of the backslash asa special command character. These special characters are:
9

$ & % # _ { } ~ ^ \
Notice that the square bracket is not a special character.In order to have these special characters print properly as text characters
within a document, we must tell LATEX that these characters are not functioningas control characters in the text document. We have already looked at one wayof doing this: the verbatim environment. Another approach is to use a specialcontrol sequence – the backslash (\) followed by the special character. As wehave already pointed out, the backslash symbol begins all control sequences, orcommands in a LATEX document. Thus, typing the sequence:
\$ \& \% \# \_ \{ \} \~{} \^{} 1
in the LATEX document produces the output
$ & % # { } ˜ ˆ
when compiled. The backslash character, however, cannot be produced bytyping “\\” because this is a reserved control sequence used to start a line break(without producing a new paragraph). In order to obtain the backslash as a textcharacter in the output, you must enter the command “\textbackslash”.
2.4.3 More on the LATEX Command Sequence
As mentioned above, all LATEX control sequences (or commands) begin with thebackslash (\) symbol. These control sequences follow two formats:
• The backslash is followed by just one special character.
• The backslash is followed by the name of the control sequence. The nameof the control sequence consists only of letters and is case sensitive.
The named control sequences may require additional {parameters} and/or [op-tions] which immediately follow the name (with no intervening space). Thesecontrol sequences are terminated by a space, a number, or any other “non-letter”, and LATEX ignores any whitespace after a named control sequence. Inorder to produce a space after a named control sequence you must enter either{} followed by a space, or you must enter a special spacing command. Thecontrol sequences for printing special characters, however, are treated like anyother letter or symbol as far as spacing is concerned.
2.4.4 Comments: Documenting your LATEX file
When LATEX encounters a % character while processing the input file, it ignoresthe rest of the present line. This is especially useful in documenting a LATEXinput file, and I encourage you to document your files extensively – especiallyat the beginning, as you are learning to use LATEX. These comments will helpyou as you discover different “quirks” about how LATEX is sometimes “cajoled”into producing the output you desire.
1The double-braces following the symbols ˜ and ˆ are required for proper spacing.
10
2.4.5 Line and Page Breaks
LATEX inserts the necessary line breaks, spaces between words, and hyphenationsto optimize the words on a page and also make the output look good. However,occasionally things don’t quite work out as you would like. This will oftenmean that you will need to insert a \\ or \newline command, or a \newpage
command. You can even specify how some words are hyphenated by using the\hyphenation{word list} command. For example, the command
\hyphenation{FORTRAN Hy-phen-a-tion}
shows how the word ’hyphenation’ is to be hyphenated, and that the word FOR-TRAN is not to be hyphenated. Hyphenation problems, however, are rare unlessyou are using foreign terms that may not be in the LATEX dictionary, or specialterms that you do not want hyphenated. The ‘hyphenation’ command shouldbe given in the preamble of the input file (i.e., before the \begin{document}
command), and should contain only words built from normal letters. The wordlist in this command is not case sensitive.
2.4.6 Quotes, Dashes and Dots, and Emphasis
Special characters are often used in a document to draw attention to, or setoff certain words or phrases. For example, we often use ‘single’ or “double”quotes to draw attention to a word, or we may italicize the word, or printthe word in boldface type to draw attention to the word. These features arerelatively simple to implement in LATEX using standard LATEX commands orspecial characters. To enclose a word in single quotes you simply enclose theword on the left with the ‘ symbol (or with the \lq command) and on the rightwith the ’ symbol (or with the \rq command). For double quotes you simplyrepeat the character or command string. For example, if your input file is
You can type ‘single’ or ‘‘double’’
quotes by using the ‘quote’ keys, or
by using the \emph{command sequence}
for \lq single\rq~or
\lq\lq double\rq\rq~quotes.
the compiled output will be:
You can type ‘single’ or “double” quotes by using the ‘quote’ keys,or by using the command sequence for ‘single’ or “double” quotes.
In this last example, we made use of the \emph{text} command. The textediting environment of TEXnicCenter makes it easy to bring emphasis to a wordby italicizing it (simply highlight the word and choose the H! menu button), orby changing to bold print (again, simply highlight the word and choose the Fmenu button). There are a number of other formatting menu buttons availablein TEXnicCenter. You may want to try different ones and examine the outputfile to see what each one does. We also made use of the ~ control character.
11

The tilde character inserts a space that cannot be enlarged and which prohibitsa line break. (So be careful not to add an extra space after the tilde!)
2.4.7 Cross References and Footnotes
Using footnotes2 in LATEX is especially easy, since LATEX keeps up with thefootnote number automatically, and places the footnote at the appropriate placewith the appropriate footnote font. All that is required is for you to enter the\footnote{text of footnote} command at the point where you want thefootnote to appear. References are also fairly simple. You can refer back to anypoint in the document where you have placed a label. For example, we can referback to the section entitled “Printing Special Characters” with the command\ref{sec:PrintingSpecialCharacters} to obtain:
If you refer back to Section 2.4.2 you can see how to enter specialcharacters.
You do have to type in the word “Section” before the reference command.
2This is a footnote.
12
Chapter 3
Typesetting Mathematics
You should notice that this document contains an additional statement at thebeginning of the document which instructs the compiler to add an additionalpackage – the “usepackage” command. This command instructs the compilerto load additional features that are needed to properly format the mathemat-ical expressions that will be produced from this document. The “usepackage”command always follows the “document class” command. In more complexdocuments there may be additional packages that must be added.
3.1 Equation Environments
There are two basic types of math environments: the in-line environment, anddisplay environments. To produce in-line math, we use the dollar sign ($) tosignal the LATEX compiler that the enclosed text is to be formated as math. Forexample, if you type:
Alber Einstein’s famous equation $E=mc^2$ was developed
as a result of his special theory of relativity.
the LATEX compiler will produce the following:
Alber Einstein’s famous equation E = mc2 was developed as a resultof his special theory of relativity.
The preferred manner of producing a “displayed” equation (i.e., one that isset off from other text by being centered on a display line) is to enclose a mathexpression within the command sequence \[. . . \], as shown below:
E = mc2
If you click on the formula button at the top of the TEXnicCenter editorpage (the one containing a square root symbol), it is these last two delimitersthat are placed in your document and you can type the equation between them.
13
(Note: You can also highlight a region of text and click on the formula buttonto enclose that region between the displayed-math delimiters.)
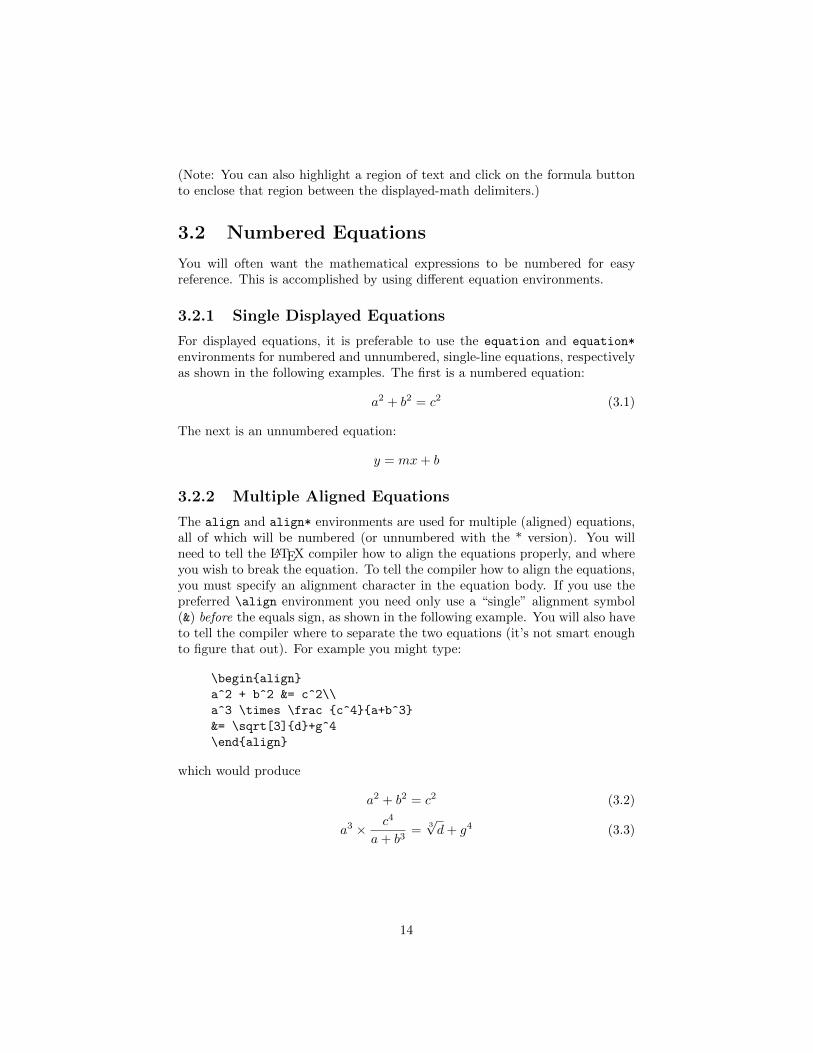
3.2 Numbered Equations
You will often want the mathematical expressions to be numbered for easyreference. This is accomplished by using different equation environments.
3.2.1 Single Displayed Equations
For displayed equations, it is preferable to use the equation and equation*
environments for numbered and unnumbered, single-line equations, respectivelyas shown in the following examples. The first is a numbered equation:
a2 + b2 = c2 (3.1)
The next is an unnumbered equation:
y = mx + b
3.2.2 Multiple Aligned Equations
The align and align* environments are used for multiple (aligned) equations,all of which will be numbered (or unnumbered with the * version). You willneed to tell the LATEX compiler how to align the equations properly, and whereyou wish to break the equation. To tell the compiler how to align the equations,you must specify an alignment character in the equation body. If you use thepreferred \align environment you need only use a “single” alignment symbol(&) before the equals sign, as shown in the following example. You will also haveto tell the compiler where to separate the two equations (it’s not smart enoughto figure that out). For example you might type:
\begin{align}
a^2 + b^2 &= c^2\\
a^3 \times \frac {c^4}{a+b^3}
&= \sqrt[3]{d}+g^4
\end{align}
which would produce
a2 + b2 = c2 (3.2)
a3 × c4
a + b3=
3√d + g4 (3.3)
14

3.2.3 Multi-Line Equations
You use the multiline environment for a single equation that will extend be-yond a single line. Again, you will need to use the \\ symbol to indicate whereto break the equation, as in the following example:
\begin{multline}
x_1+x_2+\ldots+x_n+1/x_1+1/x_2+
\ldots+1/x_n=\\
{y_1}^2+{y_2}^2+\ldots+{y_n}^2+
1/{y_1}^2+1/{y_2}^2+\ldots+
1/{y_n}^2
\end{multline}
which produces the following numbered equation
x1 + x2 + . . . + xn + 1/x1 + 1/x2 + . . . + 1/xn =
y12 + y2
2 + . . . + yn2 + 1/y1
2 + 1/y22 + . . . + 1/yn
2 (3.4)
Special Numbering Environments
Equations with Section Numbers If you want your equation numbers inthe form Equation(m.n), where m is the section number and n is the equationnumber you use the
\numberwithin{equation}{section}
command in the preamble of your document exactly as shown here (the argu-ments of this command are not variables.)
Subequations The subequations environment provides a convenient wayto number equations in a group with a subordinate numbering scheme. Forexample
\begin{subequations}
. . .
\end{subequations}
causes all numbered equations within the “subequations” environment to benumbered (4.9a), (4.9b), . . . , if the equation preceding the environment wasnumbered (4.8). By putting a \label{grp} command immediately following\begin{subequations} you can get a reference to the parent number. You canalso label the individual subequations within this environment (see the examplebelow).
The following example will serve to demonstrate the use of subequations:
\begin{subequations}\label{grp}
The equation
15

\begin{align}
Q_{ik} &= \sum_{j=1}^{N-1} x_{ij}
P_{jk}\label{grp1}\\
\intertext{and}
J_{ik} &= \prod_j x_{ij} P_{jk}
+ Q_{ik}\label{grp2}\\
\intertext{imply}
Q_{ik}-J_{ik} &= W_{ik}\label{grp3}
\end{align}
\end{subequations}
produces
The equation
Qik =
N−1∑j=1
xijPjk (3.5a)
and
Jik =∏j
xijPjk + Qik (3.5b)
imply
Qik − Jik = Wik (3.5c)
Sometimes when working with a list of equations a few words of text maymake the sentence structure flow more smoothly. In the example above we usedthe \intertext{} command to enter text within the math environment.
Since we labeled this group of equations as Equation(3.5) we can refer tothe second equation of this group as Equation(3.5b).
3.2.4 Boxed Equations
You may find a need to set a particular equation apart from others. It may havea particular signigicance, such as the final result of a long series of calculations.To do this you use the “boxed” environment as in the following simple example:
\begin{equation}
\boxed{E=mc^2}
\end{equation}
which would produce
E = mc2 (3.6)
16

3.3 Tips on Entering Math
3.3.1 Spaces and Carriage Returns
When entering mathematical expressions, any extra spaces that you may placein an equation are typcially ignored when the text file is compiled – in fact,carriage returns are also completely ignored. For example, the different inputs
\begin{subequations}
\begin{align}
x ^ 2 + y ^ 2 + z ^ 2 &= 0\\
x^2+y^2+z^2&=0\\
x^2+
y^2+
z^2
&=
0
\end{align}
\end{subequations}
all produce the same output
x2 + y2 + z2 = 0 (3.7a)
x2 + y2 + z2 = 0 (3.7b)
x2 + y2 + z2 = 0 (3.7c)
Notice that we did have to use the double backslash to tell the compiler whereto end the equations, and that we used the alignment character to make sure theequations lined up properly. Even though I may be able to type a mathematicalexpression with no spaces, I may find it harder to read this equation in the inputfile. I fact, sometimes it is an advantage to be able to put spaces into the mathexpressions to help things “line” up and make them easier to read.
3.3.2 Subscripts and Superscripts
In math mode, the subscript indicator is the underscore character and the su-perscript indicator is the carat (the character above the 6). But how does theLATEXcompiler know what to place in the superscript or subscript? In mathmode all subscripts and superscripts are applied only to the next single char-acter, unless you specifically group characters together using {}. The order ofthe subscript or superscript is also totally irrelevant. For example, consider thetwo different input text streams below:
\begin{align}
y&=\sum_{i=1}^{n}x^2_i=x_1^2+x_2^2+\dots+x_n^2
y&=\sim_{i=1}^nx_{i}^2=x_{1}^2+x_{2}^2+\dots+x_{n}^2
\end{align}
17

The LATEX compiler produces the same output for both!
y =
n∑i=1
x2i = x2
1 + x22 + · · ·+ x2
n (3.8)
y =
n∑i=1
x2i = x2
1 + x22 + · · ·+ x2
n (3.9)
You can utilize the math buttons in TEXnicCenter to help you enter sub-scripts and superscripts (both before and after symbols). These are found inthe palette with the integral.
3.3.3 Chemical Reaction Equations and Symbols
Using TEXnicCenter’s helpful buttons, or just the standard LATEX input we canalso construct nuclear reaction equations of the form:
92U235 +0 n
1 →92 U236 (3.10)
where we have to be careful to include within curly braces all the numbersthat are to be super- or subscripted. The spacing in the last expression, however,is not quite right. We need some space between the “plus” sign and the zerosubscript before the n, and perhaps just after the right arrow. We can’t justadd a space, because the compiler will ignore spaces in math mode. The answeris a LATEX command sequence used to produce a “thin” space in math mode.This is the control sequence “\,.” Inserting this thin space into our nuclearreaction expression now produces
92U235 + 0n
1 → 92U236 (3.11)
We can also create expressions like
126C versus 12
6 C (3.12)
with the code
\begin{equation}
^{12}_{\phantom{1}6}\textrm{C}
\qquad \textrm{versus} \qquad
^{12}_{6}\textrm{C}
\end{equation}
Notice the use of the \phantom{} command in this last example to control thespacing in the subscript. The phantom command basically enters the numberof blank spaces that you specify. The size of the blank spaces is based upon thefont size used in your document.
18

3.3.4 Entering Fractions
Fractions can be designated in a mathematical expression in one of several ways.You can enter the slash (/) between the numerator and denominator, or youcan insert the \div command between the numerator and the denominator, oryou can use the \frac{numerator}{denominator} command. For example
\[
(x+y)/z = (x+y)\div z = \frac{x+y}{z}
\]
produces
(x + y)/z = (x + y)÷ z =x + y
z
Each of these different commands gives a different representation of the samemathematical expression for division. If we were to express each of these as anin-line equation, we would obtain (x + y)/z = (x + y) ÷ z = x+y
z . Notice thatthe stacked version (the last term) of this expression looks a bit squeezed! Thedisplayed version of these equations were typeset in “display” mode, with thenumerator and denominator of the stacked division each typeset in “text-sized”(or t-sized) print. When the equation is typed as an in-line expression, thestacked expression is in “text” mode (t-sized) which means the numerator anddenominator are typeset in the smaller s-sized print (subscript size).
There are ways of overriding the automatic font-size adjustments, but theseare not recommended since that also influence the line-spacing of the document.
3.3.5 Entering Integrals
To express integrals in LATEX you use the \int command. This command takesupper and lower limits and is sized differently in displayed or in-line equations(as is the \sum and other similar commands). For example the in-line version
of the integral looks like∫ 5
1f(x) dx, while the displayed version looks like∫ 5
1
f(x) dx
LATEX also has the special expression \oint for closed integrals, which pro-duces ∮
g(x) dx
Sometimes you will need to express multiple integrals. You could type
\[ \int \int f(x,y) dx dy \]
which will produce ∫ ∫f(x, y)dxdy
19

This looks pretty good, but is not typeset quite as nicely as we would like: theintegral symbols are really too far apart, and the spacing between the math-ematical symbols need adjustment for clarity. The first problem is solved byusing the special command \iint which indicates that we want two integralsigns (iiint would designate 3, etc.). The second is accomplished by usingthe special ‘thin’ space command “\,” to add appropriate space between themathematical symbols. Thus, if we type
\[ \iint f(x,y)\,dx\,dy \]
we obtain ∫∫f(x, y) dx dy
which looks just right.
3.4 Spacing in Math Expressions
3.4.1 Horizontal Spacing
If the spaces chosen by LATEX within a mathematical expression are not satis-factory, they can be adjusted by inserting special spacing commands. For smallspaces, there are the commands: (\,) for 3/18 quad; (\:) for 4/18 quad; and(\;) for 5/18 quad, where the size of a ‘quad’ corresponds to the width of thecharacter M of the current font. For larger spaces, we can use the escapedspace character (\ ) (typed with an escape character followed by a single space)which generates a medium sized space, or the (\quad) and (\qquad) commandsfor even large spaces. If we wish to ‘close up’ a formula, we can use the (\!)command which produces a negative space of −3/18 quad.
3.4.2 Vertical Spacing
Occasionally within displayed mathematics, or even in simple text, you mightlike to change the vertical spacing. For example, you might want to producethe following:
This is some text.
This is some more text.
And this is yet some more text.
This was produced with the following input:
This is some text\\[15pt]
This is some more text\\[30pt]
And this is yet some more text.
20

where \\[15pt] indicates a 15–point line break, etc. Font sizes in LATEX arespecified by typing a number followed immediately by a dimension, such as ‘pt’or ‘pc’. For example, the font size [10pt] stands for 10 points, where 1 in =72.72 pt. Similarly, [1pc] stands for 1 pica unit, where 1 pc = 12 pt.
LATEX has a large array of spacing capabilities, both horizontal and vertical,but the standard spacing within LATEX will usually serve us quite well.
3.5 Creating New LATEX Commands
When typing a document – especially mathematical documents – you may findyourself repeatedly entering the same block of text, or math symbols. To sim-plify your task you can create a new command which will do much of the workfor you. For example, the control sequence \LaTeX prints LATEX in the docu-ment. I used this so often that I decided to create the command \lt whichwould enter this control sequence for me (typing the upper and lower cases gotold). However, correct spacing now becomes an issue.
You will recall that a named command such as \LaTeX is terminated by aspace (or any other non-letter) – so a space is often required at the end of thecommand. However, an extra typed space is often not interpreted as a space fortypesetting purposes, since the LATEX compiler ignores all extra spaces betweenwords and at the beginning of lines. This means that you sometimes have toinsert an extra space after a command. To accomplish this, you insert a {}
directly following the command in order to designate the “end” of command.Thus, although I defined the command
\newcommand{\lt}{\LaTeX} to typset LATEX,
I have to insert {} following this command everywhere I need an additionalspace. I could have created the command
\newcommand{\lt}{\LaTeX{}}
which would automatically insert the space after typsetting LATEX, but then Iwould have an extra space before the period if I used LATEX at the end of asentence. This means that I simply have to add and extra {} whereever I needa space following a LATEX command.
The form of the control sequence which defines a new command is:
\newcommand{name}{command-sequence}.
You can define as many of these as you wish and place them in the preambleof your document (before the \begin{document} command). (You can evenput a user-defined command inside a user-defined command.) For typing thisdocument, I have used the user-defined commands:
\newcommand{\lt}{\LaTeX}
\newcommand{\tc}{{{\TeX}nicCenter}}
\newcommand{\miktex}{Mik{\TeX}}
21
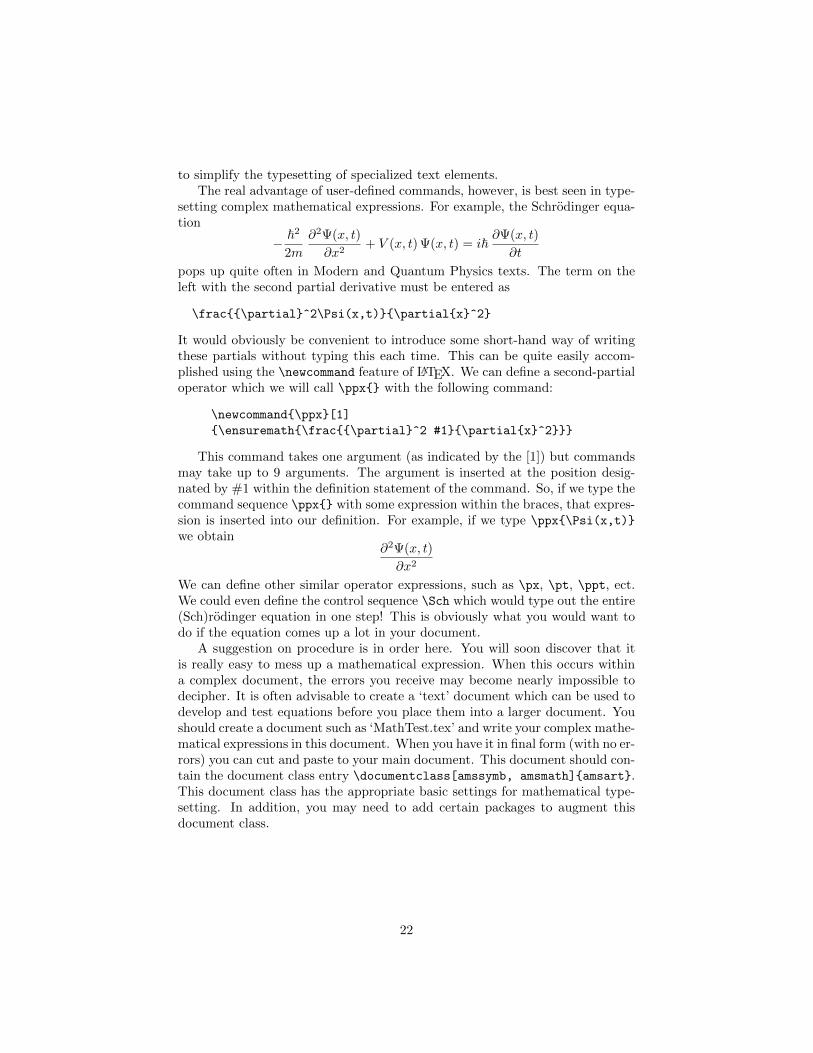
to simplify the typesetting of specialized text elements.The real advantage of user-defined commands, however, is best seen in type-
setting complex mathematical expressions. For example, the Schrodinger equa-tion
− ~2
2m
∂2Ψ(x, t)
∂x2+ V (x, t) Ψ(x, t) = i~
∂Ψ(x, t)
∂t
pops up quite often in Modern and Quantum Physics texts. The term on theleft with the second partial derivative must be entered as
\frac{{\partial}^2\Psi(x,t)}{\partial{x}^2}
It would obviously be convenient to introduce some short-hand way of writingthese partials without typing this each time. This can be quite easily accom-plished using the \newcommand feature of LATEX. We can define a second-partialoperator which we will call \ppx{} with the following command:
\newcommand{\ppx}[1]
{\ensuremath{\frac{{\partial}^2 #1}{\partial{x}^2}}}
This command takes one argument (as indicated by the [1]) but commandsmay take up to 9 arguments. The argument is inserted at the position desig-nated by #1 within the definition statement of the command. So, if we type thecommand sequence \ppx{} with some expression within the braces, that expres-sion is inserted into our definition. For example, if we type \ppx{\Psi(x,t)}
we obtain∂2Ψ(x, t)
∂x2
We can define other similar operator expressions, such as \px, \pt, \ppt, ect.We could even define the control sequence \Sch which would type out the entire(Sch)rodinger equation in one step! This is obviously what you would want todo if the equation comes up a lot in your document.
A suggestion on procedure is in order here. You will soon discover that itis really easy to mess up a mathematical expression. When this occurs withina complex document, the errors you receive may become nearly impossible todecipher. It is often advisable to create a ‘text’ document which can be used todevelop and test equations before you place them into a larger document. Youshould create a document such as ‘MathTest.tex’ and write your complex mathe-matical expressions in this document. When you have it in final form (with no er-rors) you can cut and paste to your main document. This document should con-tain the document class entry \documentclass[amssymb, amsmath]{amsart}.This document class has the appropriate basic settings for mathematical type-setting. In addition, you may need to add certain packages to augment thisdocument class.
22

Chapter 4
Creating Tables
You will often need to present your data in data tables. These are relatively easyto produce in LATEX. Suppose you wanted to report the experimentally measuredwavelengths of the visible spectral lines of Hydrogen, and that you wanted torecord them according to the spectral order used in making the measurement.Table 1 is an example of what you might use to present this data.
Table 4.1: Determination of Hydrogen SpectrumWavelengths per Order
Spectral OrderHydrogen Line First Second Third
Red 657.0 656.7 656.3Blue 487.3 486.7 486.1
Violet 433.5 434.3 ()*
* Not visible in third order.
The input text for LATEX to create this table is shown below, and explana-tions of the various commands and features follow:
1 \begin{table}[here]
2 \begin{center}
3 \begin{threeparttable}
4 \caption{Determination of
5 Hydrogen Spectrum Wavelengths per Order}
6 \label{tab:HSpec}
7 \begin{tabular}{|c | c c c|}
8 \hline
9 & & Spectral Order & \\
10 \cline{2-4}
11 Hydrogen Line & First & Second & Third \\
12 \hline
23

13 Red & 657.0 & 656.7 & 656.3 \\
14 Blue & 487.3 & 486.7 & 486.1 \\
15 Violet & 433.5 & 434.3 & ()\tnote{*}\\
16 \hline
17 \end{tabular}
18 \begin{tablenotes}
19 \item[*]Not visible in third order.
20 \end{tablenotes}
21 \end{threeparttable}
22 \end{center}
23 \end{table}
The first line1 of the input text file opens the table environment with theoption [here] which forces the (floating) table to be placed at this point inthe text (rather than on the next page). The next two lines center the ta-ble and open the enhanced threeparttable environment (you must have theusepackage{threeparttable} command in the preamble of your document).The fourth and fifth lines define the caption that will be printed with the table,while line six assigns a label to this table for future reference.
Line 7 actually defines the basic layout of the table. The command
\begin{tabular}{| c | c c c |}
opens the tabular environment and tells the compiler that there will be four(4) columns, whose contents will be centered (c), and that there will be verticallines drawn on the left of column one and on the right of column 4. There willalso be a vertical line drawn between column 1 and 2. In lines 8, 12, and 16the \hline command is given to draw horizontal lines (lines 8 and 16 draw thelines at the top and bottom of the tabular region).
Line 9 is the first row of the table. Each column of this row is separatedby a column separator (&), and the row ends with the \\ command sequence.You will notice that most of the columns in this first row have been left empty.The second row of the table is on line 11. Notice that each column of thisrow contains data and that each column of data is separated by the columnseparator (&). The end of this row is signaled by the \\ symbol. Practicallyanything can go in the ‘cells’ of the table, italicized words, etc., and the contentsof the column are automatically centered. By placing the text of row one in thethird column, I knew that the text I entered would be centered in that column,and leaving column 2 and 4 empty meant that this text would be centered overthose three columns. (You can highlight the headings by simply making thembold.)
Now look back at line 10. This line contains a command that tells the LATEXcompiler to draw a horizontal line from column 2 to column 4. If you were totype cline(3-3) it would simply draw a horizontal line across column 3.
When making entries in the tabular environment, spaces are generally ig-nored. This means you can judiciously type the input file in such a way that the
1Line numbering is available in the ‘Verbatim’ environment of the ‘fancyvrb’ package.
24

column markers (&) are vertically aligned and the tabular structure is obvious.This is often helpful when constructing the table of data and also in locatingerrors in your document. In fact, the curly braces on line 7 containing the lay-out information can be be placed on a separate line, following the commandline. The locations of the column indicators and the vertical lines can then bespread out so that they will line up with the column delimitors and entries thatwill come below. I could not do that in this document because of limitations ofspace.
You now have the tools to create a wide variety of tables, and, as seen inthe example above, you can also enter ‘tablenotes’ (footnotes associated withthe table) to clarify different items in the table (see line 15, 18–20).
25

Chapter 5
Including Graphics
To include figures in your document, you will need to include the graphicxpackage at the beginning of your document. You accomplish this with the\usepackage{graphicx} command. Within the input document, you will usethe associated \includegraphics command in the form:
\includegraphics[options]\{graphics-filename.ext}
This command should be placed inside a figure environment, so that the graphiccan be centered, and so that a label and caption can be added to the graphicas shown in the example below.
The figure below was produced with the graphing program DrafixCad, whichproduces “.cad” files that cannot be read by LATEX. However, you can createa “.pdf” version of this file by printing it to a pdf-printer (you select the pdf-printer from the drop-down menu on the “print” menu screen if one is installed).You can install the PrimoPDF printer driver (it’s free!) from the Web. Whenyou select the PrimoPDF printer to print your file, do not select “print to file”;Primo will do that automatically, and will ask where to save the file. By default,PrimoPDF will try to print the file to the desktop. Just change the name ofthe file to something you will recognize and PrimoPDF will save the image asa “.pdf” file on your desktop. [Note: Avoid using spaces in filenames that youwill use with LATEX. This will help eliminate some unpredictable results.] Youdo not need to make any changes to the way Primo prints your files; the defaultsettings are what you want to use. (For example, there are advanced settingsthat allow you to change the output to an “.eps” file—but don’t do it – it doesn’twork properly!)
Once the “.pdf” file appears on your desktop, move it to the folder containingyour “.tex” documents. Then you can use the \includegraphics command inthe form:
\includegraphics[options]\{graphics-file.pdf}
to place the image in your document.
26

The text required to include the “fishbowl” diagram is shown below, alongwith the printed graphic.
\begin{figure}[ht]
\centering
\includegraphics[angle=-90,width=0.80\textwidth]
{fishbowl.pdf}
\caption{The correct measurement of the length
of the moving fish requires that you measure
both ends \emph{at the same time}.}
\end{figure}
x xm t
Figure 5.1: The correct measurement of the length of the moving fish requiresthat you measure both ends at the same time.
If you look at the input file for this figure, you will notice the “here” option[ht] entered after the \begin{figure} command. This command instructs theLATEX compiler to place the “floating” figure at this point in the document,not at the bottom of the page, or on some other page. Also the options forthe picture indicate that the original image had to be rotated by 90 degrees(counter-clockwise) and that the width of the image was adjusted to 0.80 timesthe textwidth. The original image was printed as a full page. All scaling androtating was accomplished by the LATEX compiler. When you create a graph andprint it using the “.pdf” printer, what you often produce is a full page output.Your actual graphic, however, may only take up the central part of the page.If you simply import this file as it is, you will have a considerable amount of“white” space surrounding your graphic. To illiminate this excess white space,
27

you can use the viewport and clip options of the \includegraphics commandas shown in the next example.
\begin{figure}[ht]
\centering
\includegraphics[angle=-90,
width=0.8\textwidth,
viewport=1.5in 0in 7in 12in,
clip=true]
{fishbowl.pdf}
\caption{Locating the ends of
a moving fish in a fish bowl.}
\label{fishbowl}
\end{figure}
x xm t
Figure 5.2: Locating the ends of a moving fish in a fish bowl.
As you can see, this has significantly cut down the excess white space atthe top and the bottom of the image. To get the correct dimensions, youmust examine the original drawing. If it is printed in landscape mode, thetop, left-hand corner of the page is the origin for LATEX. Measure the (xul, yul)coordinates (in inches or other units) relative to this point for the upper left-hand (ul) corner of the “viewport”, and then the (xlr, ylr) coordinates for thelower right-hand (lr) corner of the “viewport” and enter these as
viewport = xul yul xlr ylr
with just spaces and no commas. You must include units with the numbers.And to exclude the part of the image outside the viewport, you must includethe “clip=true” option.
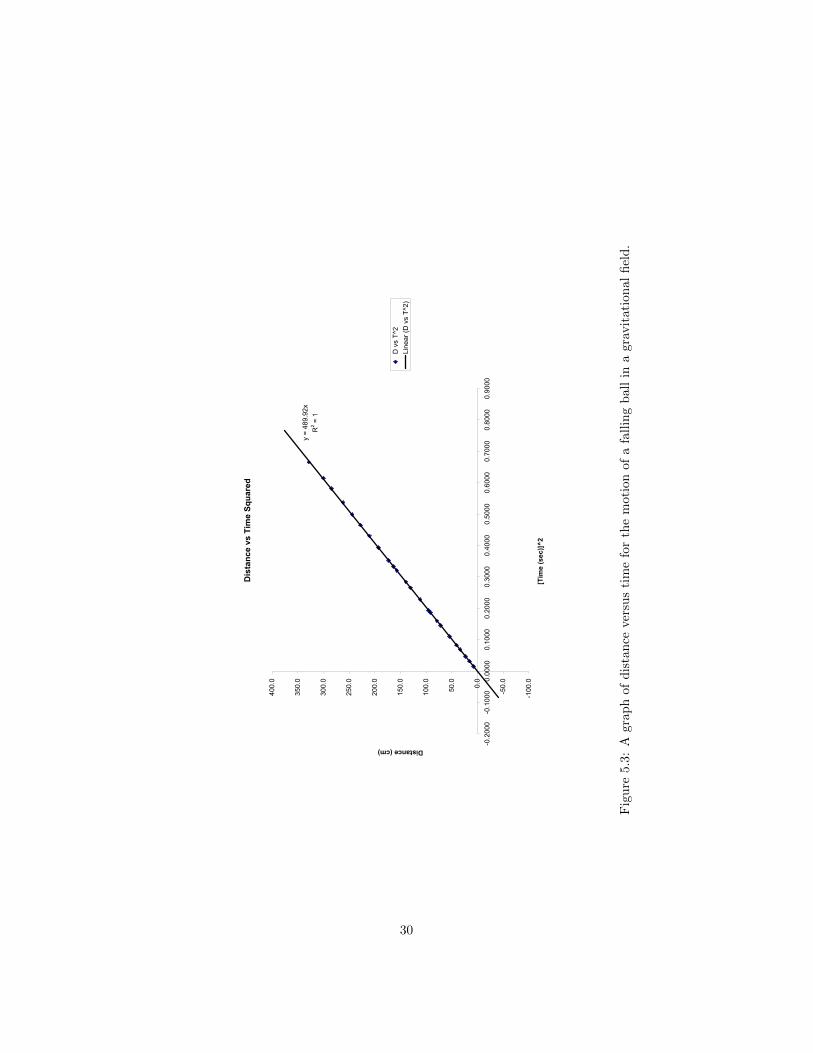
You can include practically anything that can be printed to a .pdf file. Forexample, you can include a graph produced with the Microsoft Excel programby printing the graph with PrimoPDF. Just select the PrimoPDF printer fromthe printer menu. An example of the input file for displaying a graph producedin this way is shown below:
28
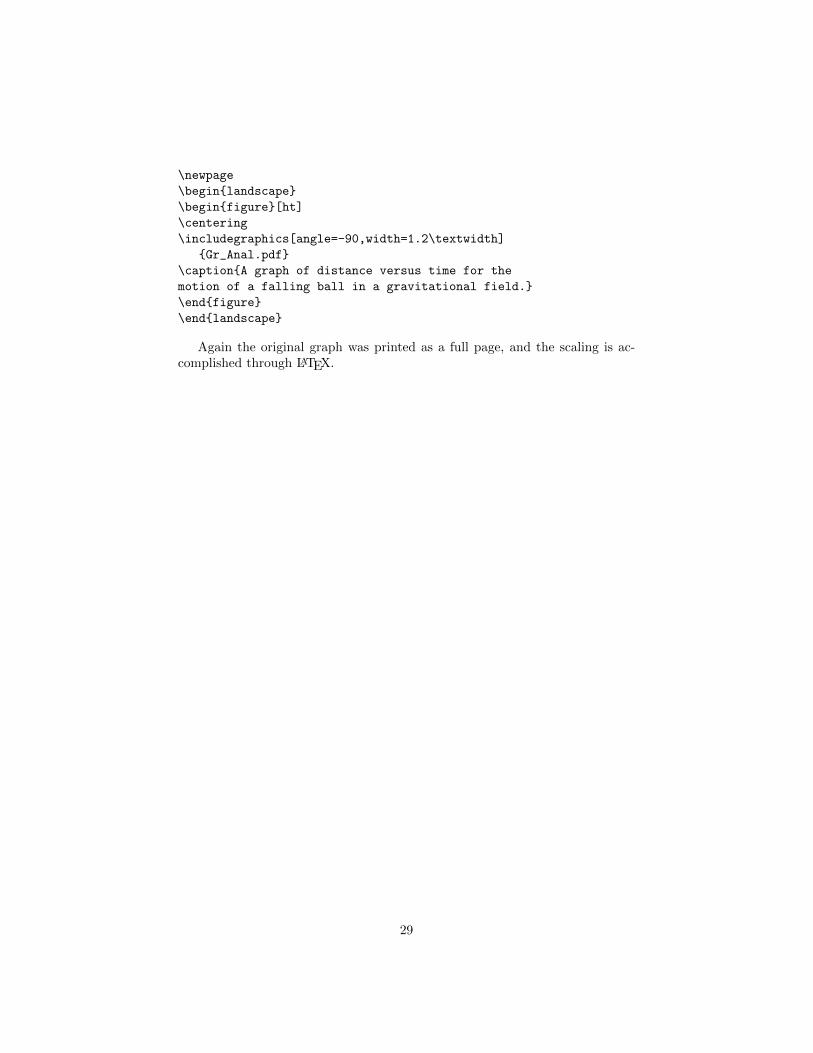
\newpage
\begin{landscape}
\begin{figure}[ht]
\centering
\includegraphics[angle=-90,width=1.2\textwidth]
{Gr_Anal.pdf}
\caption{A graph of distance versus time for the
motion of a falling ball in a gravitational field.}
\end{figure}
\end{landscape}
Again the original graph was printed as a full page, and the scaling is ac-complished through LATEX.
29
Distance vs Time Squared
y = 489.92x
R2 = 1
-100.0
-50.0
0.0
50.0
100.0
150.0
200.0
250.0
300.0
350.0
400.0
-0.2000
-0.1000
0.0000
0.1000
0.2000
0.3000
0.4000
0.5000
0.6000
0.7000
0.8000
0.9000
[Time (sec)]^2
Distance (cm)
D vs T^2
Linear (D vs T^2)
Fig
ure
5.3:
Agr
aph
ofd
ista
nce
vers
us
tim
efo
rth
em
oti
on
of
afa
llin
gb
all
ina
gra
vit
ati
on
al
fiel
d.
30