ip pbx user guide - communicatefreely.ca › pdf › pbxuserguide.pdfcommunicate freely hosted pbx...
TRANSCRIPT

IP PBX
USER GUIDE
Revision 2.0Oct. 2011
Communicate Freely Hosted PBX User Guide Page 1

Table of Contents
Placing Calls P. 3Receiving Calls P. 4
Pickup P. 5Managing calls
Hold P. 6Parking P. 6Transferring P. 7Conference P. 8
Voice Mail P. 9Alternate Number P. 10Menu tree P. 11
Forwarding Codes P. 12Caller Lists P. 13Recording Your Calls P. 14Directory P. 15Using a Headset P. 16
Bluetooth P. 17V911 Emergency Calling P. 18Recording Menus P. 19Menu Options P. 20Answering modes P. 21System Codes P. 22
Troubleshooting P. 23Support Information P. 24
Communicate Freely Hosted PBX User Guide Page 2

Placing CallsPlacing calls on our system is as easy, or even easier than with a traditional telephone. You can use the standard dial pad, Direct Station Select keys, speed dial keys, as well as the phone's built in directory.
Dialing modesYou may dial a number on-hook or off-hook. On-hook dialing allows you to verify the number and make changes before placing the call.1.Dial the number using the keypad. If you make a mistake, use the
left arrow to delete a number. (To make anonymous out going calls [block caller ID] use *67 plus the number.)
2.When you have finished entering the number, lift the handset, or
press the right arrow (or a line key ) to initiate the call. 3.To switch between handset, headset, and speaker phone, press the
speaker phone or button.
4.To conclude your call, hangup the handset, press release or use the goodbye key .
Dialing patterns
Internal CallsTo call another extension, dial the four digit extension number.To intercom another extension, dial * + the four digit extension number.To leave a voice mail message without making the extension ring, dial ** + the four digit extension number.
Calls to North American destinationsDial the area code + phone number. You do not need to dial 1, but you should always dial the area code, even for local calls. If you only enter 7 digits, the default area code will be assumed. External calls may be disabled from individual telephones at your request, or calls may be limited to local or domestic rates.
Calls to Overseas destinationsDial 011+ country code + city code and local number. Calls to island nations within the North American country code must be dialed 1+Area Code, since the cost of these calls can vary significantly.
Communicate Freely Hosted PBX User Guide Page 3
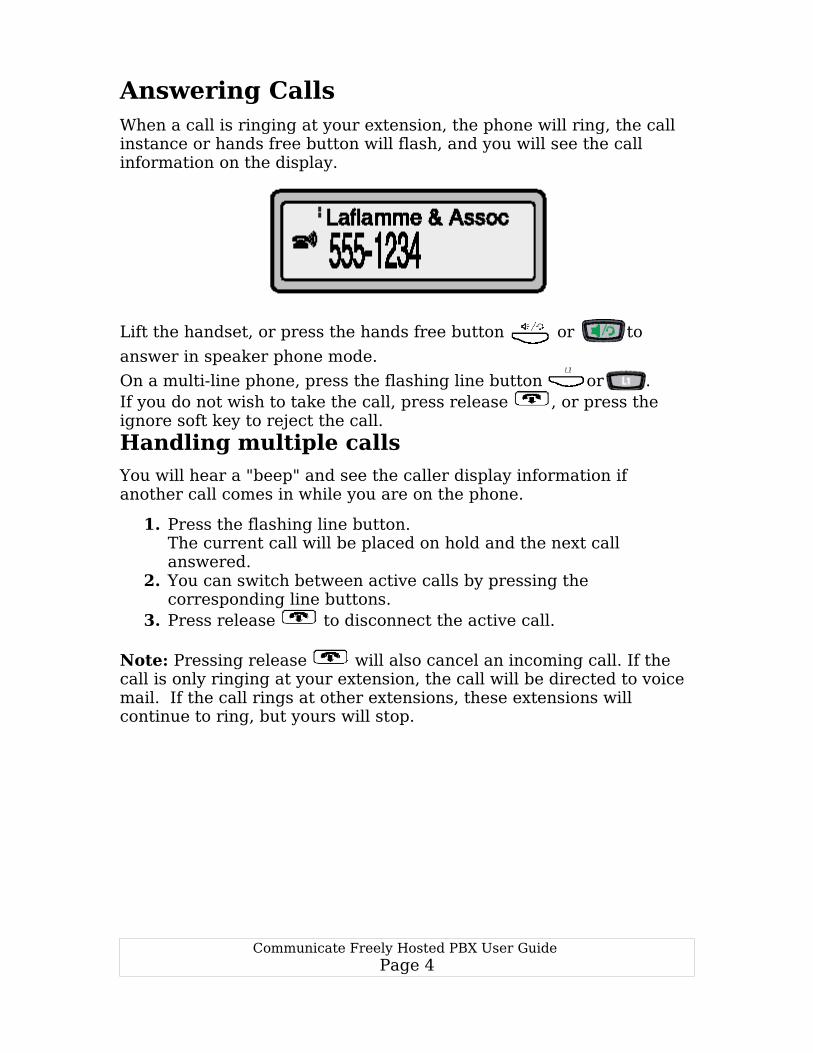
Answering CallsWhen a call is ringing at your extension, the phone will ring, the call instance or hands free button will flash, and you will see the call information on the display.
Lift the handset, or press the hands free button or to
answer in speaker phone mode.
On a multi-line phone, press the flashing line button or .If you do not wish to take the call, press release , or press the ignore soft key to reject the call.
Handling multiple callsYou will hear a "beep" and see the caller display information if another call comes in while you are on the phone.
1. Press the flashing line button.The current call will be placed on hold and the next call answered.
2. You can switch between active calls by pressing the corresponding line buttons.
3. Press release to disconnect the active call.
Note: Pressing release will also cancel an incoming call. If the call is only ringing at your extension, the call will be directed to voice mail. If the call rings at other extensions, these extensions will continue to ring, but yours will stop.
Communicate Freely Hosted PBX User Guide Page 4

Group PickupThe group pickup feature will automatically answer any ringing phone in your pickup group. You can be assigned to more than one pickup group if required. By default, extensions in the same office are generally assigned to the same pickup group.
If you have a Pickup button on your phone:1.Press the Pickup button.2.Lift the handset and answer the call.
If you do not have a pickup button on your phone:1.Dial *82.Lift the handset and answer the call
Directed PickupTo pick up calls for another extension press the flashing BLF key for that extension, or dial *76 + the extension.
Communicate Freely Hosted PBX User Guide Page 5

Managing Calls
Local Hold
Press hold button or to place call on hold. Caller will hear music. You may hang up the handset without disconnecting the call.
Press corresponding call appearance button to retrieve the call.
The type of music played to a caller is set by Customer Service. The type of music played can be set on individual incoming numbers, for incoming calls, and on individual telephones, for outgoing calls.
We currently offer unlicensed public domain music. Several stock playlists are available. If you choose to supply your own music, you are responsible for obtaining the appropriate license if required.
We can also create a custom play list using your music and / or voice announcements (ie your own promotional audio program ).
ParkParking allows a call to be held and retrieved from another extension.
1. Press an un-lit park button. If the button is lit, that park position is in use.
2. To retrieve a parked call, press a lit park button.3. Each park button has a corresponding three digit number from
701-709. If a phone does not have a park button, a parked call can be retrieved by dialing its three digit parking slot number.
4. When parking a call on a phone without a park button, a blind transfer to 700 will park the call on the next free slot. The slot number used will display on the screen of your phone once the parking operation has been completed.
Communicate Freely Hosted PBX User Guide Page 6

TransferringTransferring allows you to pass a call on to another extension, outside number, or voice mail box.
Attended Transfer
1.Press transfer Note: For some models the Xfer option will only appear on screen when a line is in use. Press the associated soft key to use.
2.Dial the extension to transfer to and press Dial , or press the DSS key corresponding to that extension. When calling party answers, tell them who is calling.
3.Press transfer to transfer the call. If the other person does not wish to take the call, wait for them to hang up or press Cancel
to abort the transfer. The call will then be returned to you for other disposition.
Blind Transfer
1.Press transfer ,as noted above for some models the soft key for transfers will only be active when the line is in use.
2.Dial the extension, or press the extension's DSS key to transfer to and press transfer to transfer the call without consulting with the other party.
OrIf your phone has BLF keys configured for “instant transfer” press the the BLF key to immediately transfer the call to that destination.
Transfer to Voice mail
1.Press transfer 2.Dial ** + the extension or mailbox number3.Press transfer again. The caller will hear one ring, and then
be greeted by the recipients unavailable message. The extension will not ring at all.
Communicate Freely Hosted PBX User Guide Page 7

Conference CallsYou can create a 3-way call locally on your phone, or you can use a meet-me conference room for large conferences.
Local Conference
1.Establish a call to the first party. You can call them, or they can call you.
2.Press conference . The first caller will be placed on hold, and a new line opened.
3.Dial the number of the second party and press Dial . If there is no answer, press cancel to return to the first call.
4.To join the calls, press .
5.You can use the arrow keys to scroll between callers information.
Meet Me ConferencingA Meet Me conference room is a special extension number that can be called by several users, joining them together in a conference call. Each caller dials the Meet Me room individually, and joins the conference. Callers can also be transferred into a Meet Me room by another user.
Each organization can be assigned their own Meet Me rooms by the system administrator, and each room can have an optional security password. Meet Me rooms can also be recorded. Call the operator for details or assistance.
If a BLF key for the MeetMe room has been programmed on your phone, the button will light up, or the icon will change if the conference room is in use.
A notify extension feature can also be activated by calling support. This feature allows selected extension's to receive a text message, whenever someone joins the conference room. The message gives the caller ID(name and number) and what conference they have joined.
Communicate Freely Hosted PBX User Guide Page 8

Voice mailVoice mail allows callers to leave messages for you when you are unable to take calls. Each extension can have a voice mailbox, and additional mailboxes can be set-up for general delivery, or departmental messages.
E-mail notifications can be sent, informing you of new messages, who left them, and can also contain a sound file of the message itself. A second, compact message can be sent to another e-mail address for a mobile device, with or without the attachment.
If you choose, your mailbox can automatically delete messages as soon as the e-mail copy has been sent. This is helpful if you listen to all your messages on your computer.
New Message NotificationWhen you have new voice mail messages, the large red message light will flash on your telephone. Additionally, an envelope icon will appear on the display with a count of the unheard messages.
To Connect to Voice Mail1.Press the voice mail button on your telephone, press and hold 1, or
dial *98 or 7000 to access voice mail. If you are at another extension, dial *7000 to be prompted for your mailbox. Your mailbox is usually the same as your extension number.
2.Press 1 to listen to new messages3.Follow the voice mail prompts to perform other tasks.
Record Greetings, Change PasswordYou must set up the greeting messages that callers will hear
Press 0 from the main menu to change your password or record greetings. Up to nine greetings, as well as a name message, can be recorded.
1. Record a Greeting • Standard Greeting 1 is the default message played to callers.
This message will be played unless you have specified another greeting to be used.
The following greetings are optional when they are recorded they will replace the standard greeting under the specified conditions.
• Busy Message 2 is played if your extension cannot handle any more calls, or is in Do Not Disturb mode.
• Direct to Voice mail Message 3 is played when a caller dials (**extension), or is transferred directly to your voice mail.
Communicate Freely Hosted PBX User Guide Page 9

• Unavailable Message 4 is played if you do not answer a call, or if your phone is disconnected.
• Vacation Message 5 is played when selected in option 2 of the advanced options menu.
• IVR Menu (optional)9 If this is enabled, callers pressing 0 when the main greeting is played will access a list of single digit choices (programed in greeting 9) which will transfer them to other programed options.
3.Name Recording is played to callers using the name directory.5.Password is used to access your voice mail when away from your extension, as well as to authenticate to the DISA and user administration tools. Please set this as soon as possible. Easy to guess passwords such as 0000 and 1234 should not be used.
To Check Voice Mail while away:
1. Call your extension2. When voice mail answers, press *3. You will be prompted for your password4. If your incoming number is answered by a voice menu, simply dial 7000 once the first greeting can be heard.
Operator optionOptions 0-9 can be set up for redirecting calls. Please contact customer service to program these options. If a caller presses any of these programmed numbers after your voice mail has answered, their call will be redirected to the number's designated destination. Customer service can customize the 0-9 destinations on a per-extension basis, allowing calls for certain individuals to be directed to a partner, or assistant as well as reception.
If you would like to use this feature, simply include a statement in your voice mail greeting, like “To return to reception press 0, or press 1 to speak to my assistant; otherwise, leave a message after the tone”.
Voice-mail quota
The default voice-mail quota is 45 minutes of recorded messages. If this limit is exceeded new callers cannot leave messages.
Communicate Freely Hosted PBX User Guide Page 10

Voice Mail Menu TreeMain Menu Folders:
1 - New messages2 - Saved messages0 - Advanced Options
# - Exit
Message Options (for saved and new messages)1 – Repeat current message3 – Forward the message to your email4 - Skip back one message5 – Return Call Now6 - Skip forward one message7 - Delete message8 - Forward the message to another user9 - Save message
0 - Advanced options1 – Record a greeting 1-9
If recorded, • 1 is your standard greeting• 2 is your busy message• 3 is your direct to voice mail message• 4 is your unavailable message• 5 is your vacation message• 9 is the IVR menu tree (if enabled)
Notes: If any of these messages are not programed your default message as selected in advanced option 2 will be played. If another default is not set and greeting 5 is programed it will be the default greeting.
2 – Choose a greeting number3 - Name announcement (for directory)
5 - Change password* - Main Menu
Communicate Freely Hosted PBX User Guide Page 11

Forwarding Calls
1. Forwarding ButtonIf you have a forwarding button press the button for an on-screen menu to configure forwarding. You may also use the following service codes to enable and disable simple forwarding rules.
2. Forward on Busy. This option allows you to enter a number where calls will be sent if your extension is busy. An extension is considered busy if the Do Not Disturb button is active, if you reject a call, or if your phone has reached it's maximum number of simultaneous calls. *90 + number to forward on busy/DND *90 to re enable forward on busy *91 to disable forward on busy
3. Forward No AnswerCalls will be diverted to the no answer number if your phone is unanswered after the timeout has elapsed. If the destination is unreachable after 20 seconds, the call will then go to your voice mail.*92 + number to forward calls on no-answer*92 to re-enable forward on no-answer*93 to disable forward an no-answer
4. Forward UnavailableCalls will be diverted to this number if your extension is unreachable by our network. This provides a failure route in the case that your telephone is inoperable due to a utility outage or if it has been unplugged.*94 + number to forward calls on no-service *94 to re-enable forward on no-answer*95 to cancel forward on no-answer
5. Forward All Calls If this option is set, all calls will be directed to the number you enter. This number will be tried for 20 seconds before returning to your voice mail box.*72 + number to forward all calls*72 re-enable forwarding using last number set *73 disable forward all calls
Communicate Freely Hosted PBX User Guide Page 12

Caller Lists
Received CallsYour telephone keeps track of recent incoming and outgoing calls. You can review this information, as well as dial and save numbers from these lists.Incoming Calls:1.Press Callers or Services>Callers List
2.Use the arrow keys to view incoming call details.
Dialed Calls
1.Press or to show recently dialed call.
2.Use the arrow keys to scroll through previous calls.3.Press , ,or lift the handset to dial the currently selected
number.
If you wish to disable this option (on a phone in a public waiting room, for example), please contact your administrator.
Communicate Freely Hosted PBX User Guide Page 13

Recording Your CallsFor security, training, or liability reasons, you can record some, or all of your incoming and out going calls. To toggle this feature on and off, dial *1. It is also possible to have recording started in the routing phase of the call, allowing all calls to your company, or calls to a specific group (ie. technical support or sales) to be recorded.
At the end of a recorded call, a file will be e-mailed to you with the recording. This e-mail address must be set by the administrator before this feature can be used. Call support to have this feature set up. Calls too big to e-mail stay on the system for 7 days and can be res-sent if needed.
Please note Calls answered using the pickup, directed pickup or ring group features are not recorded.
Dynamic Recording Press the record button on your phone to begin recording. Press the button again to stop recording. If you do not have a record button, call customer service to have one programmed.
CautionPlease take into consideration the legal and moral implications of using this feature. Some jurisdictions require you notify the other party that they are being recorded.
Communicate Freely Hosted PBX User Guide Page 14

DirectoryYour telephone has a built in directory function. This directory is pre-loaded with a list of numbers specific to your organization. This list can be customized by your administrator. You can also add your own entries to this list.
Calling from the directory:
1.Press or the Directory soft key.2.Press the first letter of the name you wish to find, or use the arrow
keys to scroll through the list.3.When you find the entry you wish to call, lift the handset, or press
the hands free or button.
4.To leave the directory without making a call, press release or use the Quit soft key.
Adding numbers to the directory:
1.Press (phones with an on screen directory key skip this step)2.Press or Directory>Add New3.Enter the phone number for this entry4.Press or use the Save soft key.5.Enter the name, using the keypad for text entry. This is similar to
entering text on a cell phone.6.Press
You can also add numbers to the directory from the callers list, or from an active call by pressing or Copy when the information is being displayed.
If you would like to set up an office-wide directory, please create a spreadsheet in CSV format, with the name in column 1 and the number (no punctuation) in column 2. Send this file to customer service, and we can load it into your phones.
Communicate Freely Hosted PBX User Guide Page 15

Using a headsetA proper telecom headset is a must for heavy telephone users, or anyone who needs to perform other tasks while using a telephone. You can use any “Direct Connect” telecom headsets that have an RJ-9 connector.
Headset Installation
1.Plug the headset into the back of the phone, into the jack with a picture of a headset.
2.Press or
3.Use the arrow keys to scroll to Headset Settings and press Enter
4.Scroll to Audio Mode and press Enter 5.Select the desired audio mode:6.Speaker – Uses only speaker phone mode7.Speaker/Headset – Uses speaker phone, then headset8.Headset/Speaker – Uses headset, then speaker phone9.Headset – Only uses the headset, disables speaker phone10.Press Set
Headset Operation
• Use the hands free or button to answer or place calls.
This performs the same function as lifting the handset. You can also use this button to transfer a call from the handset to the headset.
• Press the release button to hang up a call.• Use the mute button to disable the headset microphone. You
can press this button when you cough, or need to talk to an associate near by. Press the button a second time to re-activate the microphone.
Wireless HeadsetsThis feature is available only on the 6753i, 6755i, 6757i and 6739i. In addition to the headset audio cable, a DHSG or hook switch cable must also be connected between the phone and the headset.
When a phone is configured to use a wireless headset, calls can be answered and ended by pressing a button on the headset. The headset will also beep if a new call comes in.
Communicate Freely Hosted PBX User Guide Page 16

BluetoothThe 6739i also supports Bluetooth headsets. To use Bluetooth the phone's headset device must be set to Bluetooth
1. Press options
2. Press <Bluetooth> key3. Optional use the Device Name field to assign a name to the
Bluetooth device4. Press <add new device>5. Press <Search> to find a local Bluetooth headset. When a local
Bluetooth has been found it will appear on the screen.6. Select the device to begin pairing it with the phone7. A screen will display with an enter PIN box use the key pad to
enter a pin and press <OK>. The default PIN is 0000 if the phone does not accept this PIN. Consult your Bluetooth owners manual for the applicable PIN.
8. When pairing is complete this screen will display.
Successful pairings display a green box; unsuccessful pairings display's a red box.
9. Use the <Bluetooth Status > key to turn the Bluetooth feature
on or off
10. When active, the Bluetooth icon displays in the status
bar of your phone.
Communicate Freely Hosted PBX User Guide Page 17

V911 Emergency Calling vs. E911
➢ Electrical power and Internet connection are required to operate your phone (make sure you have battery backup). If you are uncertain of your backup power status, or would like more information, please contact customer service.
➢ Since it is possible for your phone to be moved without informing anyone of an address change, the operator will confirm your location, and call-back number before transferring your call.
➢ It is important that your location information is up-to-date with your VoIP provider. If, you are unable to speak during a 911 call the operator may assume the last registered address is your current location.
➢ Do not hang up if you have called by accident. If the operator does not receive a response, the message will still be passed to the PSAP and police may be dispatched.
➢ If your call is disconnected call back.
➢ Know where an alternate system is in case of broadband internet outage and/or phone system unavailability.
Communicate Freely Hosted PBX User Guide Page 18

Recording menu greetingsYour organization account includes the ability to have callers greeted by an automated menu system during certain circumstances, such as after business hours, or when human receptionists are unavailable.
Your administrator will configure the structure of these menus, and provide you with a map of their functions, so that you can record appropriate announcements for each one.
Announcements can be recorded using the menu-recorder application, or if you wish, you can send us audio files of your recordings via e-mail or ftp. Please record files in 8KHz 16bit .wav format.
Menu RecorderThe menu recorder allows you to maintain nine different messages that can be used in your menu system, or as informational announcements. Your administrator will give you a list of each recording's purpose.
1.From any phone within your organization, dial 7007 for prompts in English, or 7008 for prompts in French.
2.Follow the voice prompts for instructions.3.Enter the message number you wish to edit4.To hear an existing recording, press 1.5.To record or rerecord a message press 2. Begin speaking after the
tone.6.To playback your recording press 3, to save it press 9 and press #
to exit.7.Repeat for any additional recordings, press # to exit, or hang up.
For example, message 1 could be a main greeting:Thank you for calling our company. If you know the extension you wish to reach, please dial it now. Press 1 for our directory. Press 2 to leave a general message, or press 3 to hear our weekly specials.
Message 2 could be a mailbox greeting:Please leave us a message with your name and phone number, and we will have one of our staff contact you as soon as possible.
Message 3 could be updated every week with the current sale items.
Note that message numbers and menu selections do not always correspond.
Communicate Freely Hosted PBX User Guide Page 19

Menu OptionsCustomer Service can configure your menu to the specific needs of your company. In order to serve you more effectively, we recommend that you create a flow chart or other list that includes details on how you would like the following options configured and email it to us at [email protected].
Please note that the following list is not exhaustive. If you would like to request menu options not listed below please contact customer service.
Greetings:Long Greeting, is the message file that plays announcing the options. If both a long and a short greeting are set, the long and short greetings are played one after the other. Then, only the short greeting is played if the caller wants to hear the menu again. This allows "Thank you for calling ABC Company" to be split, from "Press 1 for sales". If only the long greeting is set, it is used for everything.
Timeout is how long the system will wait for an answer.
Retries are how many times the menu will repeat if a caller does not complete a valid action.
Extensions that are available to be dialed.
Conferences that are available to be dialed.
Feature codes that are accessible such as check voice mail etc.
Other Available Codes can be specified. Possibilities include the following items:
• Transfer to an extension , or mailbox
• Ring a group of phones
• Execute a sub-menu
• Return to the previous menu
• Execute a route block
• Access the directory
Communicate Freely Hosted PBX User Guide Page 20

Answering Mode SelectionYour call routing can be configured so that the behaviour changes based on a schedule, or when set to certain modes. For example, you may wish to have calls ring at reception during business hours, but go straight to a night menu outside of those times. When your office is closed, you may want an alternate greeting to play, that is specific to the holiday, or other reason for closing. Perhaps another staff member covers the phones when the receptionist is on lunch.
When you plan your call routing and menu trees, consider some of these options, and make notes about when they would be used, and if any of them can be decided on a set schedule.
The Day/Night menu tool is available on your phone, under the Services -> Applications menu. It is also possible to assign a button to this menu to access it more quickly. A voice prompt tool is also available by dialing 7004. You will need to supply an extension and password to use the voice prompt tool.
The tool presents you with the following choices:
Automatic mode will choose one of the other modes based on a pre-set schedule. This schedule can be set by calling customer service.
Day, Night, Lunch, Weekend, and Holiday modes will force a specific behaviour regardless of the time and day. If you want to close early, you can change to night mode ahead of time. Likewise, you can select Holiday mode when you close for the day, before a long weekend or other holiday period. This mode would play your holiday message to callers, and present them with appropriate menu options.
These five options are simply labels for different modes. For some businesses, it may be more useful to define day as “normal”, with the other modes invoking special routing as needed. A good example would be a business that requires a staff member to be on call. Night mode might send emergencies to staff member A, while weekend mode would send emergency calls to staff member B.
Optional Ring Also mode for Extensions
This feature allows other extensions to ring with a short ring splash whenever calls ring at your extension. This is useful if an assistant also answers your calls. The ring-also destination can be a single extension, or a ring group.
Communicate Freely Hosted PBX User Guide Page 21

System CodesThere are a number of codes used for call handling, testing and administration purposes. They are listed as follows.
7000 or *98 Voice mail direct access*7000 Voice mail prompt for mailbox7001 User Administration Menu7002 System Test Menu7003 Direct Inward System Access7004 Day/Night mode selector7007 Menu recording tool in English7008 Menu recording tool in French
*EXTENSION Intercom call to EXTENSION**EXTENSION Direct to voice mail at EXTENSION*1 Toggle call recording*8 Call Pickup911 Emergency operator0 Operator611 Technical Support
Communicate Freely Hosted PBX User Guide Page 22

TroubleshootingThere are a number of error messages that can appear on your telephone display. Here are their meanings, and possible remedies.
Network Disconnected or No NetworkThe phone's network connection has been disconnected. Check the Ethernet cable to see if it has been unplugged or damaged.
No Service – DHCP failedThe phone could not obtain an IP address from your network. Check the Ethernet link, and verify that there is a working DHCP server on your network. If you wish to manually configure the IP settings for the phone, contact your administrator for instructions.
No ServiceThe phone could not contact the server. Verify that the phone has Internet connectivity to the outside world. If you can verify that the phone has Internet service, but still displays this message, contact your administrator.
UnassignedThe phone is not correctly provisioned. Write down the 12 digit MAC address (on a sticker on the back of the phone) and contact your administrator. An unassigned phone should still be able to contact customer service (611).
Communicate Freely Hosted PBX User Guide Page 23

Support InformationCustomer service hours are from 9 AM to 5 PM Monday to
Friday. Our system is monitored 24 hours per day, 365 days per year. If there is a system failure of some kind, our backup systems kick in, and a technician is notified immediately. During the transition to backup systems, there can be a brief interruption in service.
If you you have an urgent need, if your phone isn't working or there is a significant impact to your business, the support telephone numbers have an option to reach the on-call technician.
Please take some basic troubleshooting steps before you call technical support. Make sure that you have a working Internet connection, and your phone is plugged in correctly. Try restarting your phone. You can unplug and plug it back in, or press Options (wrench key), and navigate to restart phone. Restart phone is under the Phone Status menu on some models.
Dial 611
Even if your phone displays no service, you may still be able to dial 611. When technical support is available, you will be placed in queue to reach the first available technician. You may also press 0 to leave a message at any time.
If no technicians are available at that time, you will be prompted to leave a message, or reach the on-call technician. Your issue will be handled as soon as possible.
Toll-free
If your telephone is not working at all, or you are away from your office, you can use our toll-free number. Dial 1-877-291-VOIP (8647) to reach our main menu. Choose the option for Support.
Communicate Freely Hosted PBX User Guide Page 24

Notes
Communicate Freely Hosted PBX User Guide Page 25

Notes
Communicate Freely Hosted PBX User Guide Page 26