joomla developer manual
TRANSCRIPT

signwork
Developer
Eyes on signwork®
ManualPreface ( 2 items )
Basic Templating and Site Design ( 3 items )
Advanced Templating ( 4 items ) Modules ( 4 items )
Mambots ( 8 items )
Components ( 3 items )
Language ( 1 items )
Packaging ( 1 items )
Access Control ( 1 items ) Accessibility, Usability and Standards ( 4 items ) Development Standards ( 2 items ) API Reference ( 16 items ) Appendix ( 5 items )

Preface ( 2 items ) i. Preface ii. Preamble
1.Basic Templating and Site Design ( 3 items ) Templating Overview The Layout File Style Sheets
2. Advanced Templating ( 4 items ) Overview Administrator Templates Function Reference Template Standards
3. Modules ( 4 items ) Writing a Simple Module Module Hello World 1 Module Hello World 2 Module Hello World 3
4. Mambots ( 8 items ) Mambots - Overview Writing a Mambot An onSearch Mambot An onPrepareContent Mambot Editor Mambots Using Parameters within a Mambot Extending Mambots Legacy Mambots - The Old Way
5. Components ( 3 items ) Chapter 5. Components Hello World 1 - The first steps Hello World 2 - Getting personal
IndexJoomla! Developer Manual

6. Language ( 1 items ) Chapter 6. Language Support
7. Packaging ( 1 items ) Chapter 7. Packaging Custom Work
8. Access Control ( 1 items ) Chapter 8. Access Control
9. Accessibility, Usability and Standards ( 4 items ) Terms of Reference Accessibility Statement WCAG Checklist Semantic Ideas
10. Development Standards ( 2 items ) Coding Standards Comment Coding Standards
11. API Reference ( 16 items ) mosHTML class mosHTML::BackButton mosHTML::CloseButton mosHTML::emailCloaking mosHTML::idBox mosHTML::integerSelectList mosHTML::makeOption mosHTML::monthSelectList mosHTML::PrintIcon mosHTML::radioList mosHTML::selectList mosHTML::sortIcon mosHTML::treeSelectList mosHTML::yesnoRadioList mosHTML::yesnoSelectList Chapter 9. API Reference
Appendix ( 5 items )A. Updates for 4.5.1 B. Using Parameters C. mosHTML Reference D. Code and Commenting Standards E. Porting MiniXML to the DOMIT Library

help.joomla :: i. Preface
i. Preface
Joomla Developers' Manual
Acknowledgements
Andrew Eddie, Lead Joomla Developer
Alex Kempkens, Joomla Developer
Dieter Schornböck, Proof Reading
Copyright © 2000-2005 Open Source Matters, All Rights Reserved
Release under the Free Document License, http://www.gnu.org/copyleft/fdl.html
The information in this publication is furnished for informational use only, and should not be construed as a commitment by
the Joomla Project. The Joomla Project reserves the right to update or modify the contents. The Joomla Project assumes
no responsibility or liability for any errors or inaccuracies that may appear in this publication.
Last Updated ( Wednesday, 14 September 2005 )
Close Window
file:///D|/My%20Documents/Joomla!/doc/fileweb/developer/a1.htm11/3/2005 1:12:23 AM
help.joomla :: ii. Preamble
ii. Preamble
Joomla began life as Mambo and morphed into Joomla in September 2005 at which time the version numbering for Joomla
was started at 1.0. Consequently you may see occassional references in this document to Mambo versions which are direct
ancestors of Joomla. In general, versions of Mambo prior to 4.5 are of historical interest only and are not documented
here. Mambo 4.5.2.3 was directly followed by Joomla 1.0.
Right up to the release of the 4.x versions of Mambo, writing components, modules and templates was a fairly convoluted
affair. Files in scattered directories made it difficult to actually package an individual element; code was not organised into
reusable API calls; it was generally hard work. The number of third-party add-ons around the time of the release of Mambo
4.0.x was testimony to this. There were maybe a half dozen templates and not many more components and modules.
The development of Mambo 4.5 sought to change all that. Code was modularised, files were reorganised, and an installer
made it much easier. Today we have literally hundreds of templates, and dozens of components, modules, and mambots.
Amazingly, most of the developers of these add-ons have picked it up by trial and error and following the example of the
main code base. To date, there has not been a great deal of quality developer documentation. The community spirit has
had to come to the aid of many a fledgling developer crying "Help! How do I do this".
Since the release of Mambo 4.5.1, we realised that quality documentation for both users and developers is of paramount
importance. We have worked hard to create documentation in both these areas.
This manual, while not yet complete, seeks to give you an insight into the workings of Joomla.
If you are new to Joomla, the chapters are set out roughly in order of easiest to hardest. We start with the Joomla
template system which is extremely easy to learn. Modules then fit in nicely with your template work. Mambots are little
multi-functional "things" that are like a Swiss Army Knife to Joomla. Then we look at building a Component.
If you are an old hand then we suggest you start in the "Updates" appendix to bring yourself up to speed with changes to
the current version.
If there are any areas which you think are deficient then let us know. Suggestions and contributions are most welcome.
This is a draft manual.
Last Updated ( Wednesday, 14 September 2005 )
Close Window
file:///D|/My%20Documents/Joomla!/doc/fileweb/developer/a2.htm11/3/2005 1:12:24 AM

help.joomla :: Templating Overview
Templating Overview
Overview
The Joomla Template system is amongst the easiest to learn in the Content Management System family.
Templates are located in the /templates directory. The following shows a typical directory structure for a template:
/templates
/basic_template
/css
template_css.css
/images
index.php
template_thumbnail.png
templateDetails.xml
This is the minimum set of files you need to make a template. The filenames must be adhered to as each one is expected
by the core script. Note that while there are no images shown in the /images directory, this is typically where you would
place any supporting images for your template, like backgrounds, banners, etc. Let's have a look at each of these files.
index.php
This is the template layout file.
template_css.css
The css stylesheet for the template.
templateDetails.xml
This is a metadata file in XML format.
template_thumbnail.png
A reduced screenshot of the template, usually around 140 pixels wide and 90 pixels high.
Last Updated ( Saturday, 24 September 2005 )
Close Window
file:///D|/My%20Documents/Joomla!/doc/fileweb/developer/b1.htm11/3/2005 1:12:24 AM

help.joomla :: The Layout File
The Layout File
While the template layout file is a PHP file, it is written mostly in HTML with only a few snippets of PHP. You do not have to be a master of PHP to write a
template file. All you need to be able to do is learn where to place the key "hooks" into the Joomla templating engine.
Within the HTML framework you place "windows" that look into the database behind your web site. There are typically several small windows called Modules
and usually one larger opening (like a frontdoor) for a Component.
You are encouraged to write templates in XHTML. While there is debate over whether XHTML *is* the way of the future, it is a well formed XML standard,
whereas HTML is a loose standard. Future versions of Joomla will rely more and more on XML so it is wise to adopt this model now.
The index.php file for a typical 3-column layout would look like the following in a skeletal form:
1: <?php
2: $iso = explode( '=', _ISO );
3: echo '<?xml version="1.0" encoding="' . $iso[1] . "\">\n";
4: /** ensure this file is being included by a parent file */
5: defined( '_VALID_MOS' ) or die( 'Direct Access to this location is not allowed.' );
6: ?>
7: <!DOCTYPE html PUBLIC "-//W3C//DTD XHTML 1.0 Transitional//EN"
"http://www.w3.org/TR/xhtml1/DTD/xhtml1-transitional.dtd">
8: <html xmlns="http://www.w3.org/1999/xhtml" lang="<?php echo _LANGUAGE; ?>">
9: <head>
10: <title><?php echo $mosConfig_sitename; ?></title>
11: <meta http-equiv="Content-Type" content="text/html; <?php echo _ISO; ?>" />
12: <?php
13: if ($my->id) {
14: initEditor();
15: }
16: ?>
17: <?php mosShowHead(); ?>
18: <link href="<?php echo $mosConfig_live_site;?>/templates/basic_template/css/template_css.
css"
rel="stylesheet" type="text/css" />
19: </head>
20: <body>
21: <table cellspacing="0" cellpadding="5" border="0">
22: <tr>
23: <td colspan="3">
24: <?php echo $mosConfig_sitename; ?>
25: </td>
26: </tr>
27: <tr>
28: <td colspan="3">
29: <?php mosLoadModules ( 'top', 1 ); ?>
30: </td>
31: </tr>
32: <tr>
33: <td width="20%" valign="top">
34: <?php mosLoadModules ( 'left' ); ?>
file:///D|/My%20Documents/Joomla!/doc/fileweb/developer/b2.htm (1 of 2)11/3/2005 1:12:24 AM

help.joomla :: The Layout File
35: </td>
36: <td width="60%" valign="top">
37: <?php mosMainBody(); ?>
38: </td>
39: <td width="20%" valign="top">
40: <?php mosLoadModules ( 'right' ); ?>
41: </td>
42: </tr>
43: <tr>
44: <td colspan="3" valign="top">
45: <?php mosLoadModules ( 'bottom' ); ?>
46: </td>
47: </tr>
48: </table>
49: </body>
50: </html>
Let's have a look at the main features. We are assuming you already know a bit about HTML pages so things like head tags, body tags, tables, etc will be
skipped over.
Line 1-3: Defines the file as a valid XML file. _ISO is a special constant defining the character set encoding to use. It is defined in your language file.
Line 5: Prevents direct access to this file. It is essential that you include this line in your template.
Lines 7-8: Set up the XHTML standard for the page.
Line 10: Prints out the Site Name configuration variable with the opening and closing title tags.
Line 11: _ISO is used again to define the character set to use.
Line 12-16: $my->id is a script variable that is non-zero if a user is logged in to your site. If a user is logged in then the nominated WYSIWYG editor is pre-
loaded. You may, if you wish, always pre-load the editor, but generally an anonymous visitor will not have the need to add content. This saves a little script
overhead for normal browsing of your site.
Line 17: Inserts several metadata blocks.
Lines 18: Loads the CSS stylesheet. $mosConfig_live_site is a configuration variable that holds the absolute URL of your site.
Line 24: This prints the Site Name in a table cell (spanning the three columns).
Line 29: This loads any modules that are published in the "top" position. The second argument, "1", indicates that the modules are to be aligned horizontally.
Line 34: This loads any modules that are published in the "left" position. These modules will be displayed in a single column.
Line 37: This loads the component into your template. The component is set by the URL, for example, index.php?option=com_content will display the Content
Component in this area.
Line 40: This loads any modules that are published in the "right" position. These modules will be displayed in a single column.
Line 45: This loads any modules that are published in the "bottom" position.
Last Updated ( Wednesday, 14 September 2005 )
Close Window
file:///D|/My%20Documents/Joomla!/doc/fileweb/developer/b2.htm (2 of 2)11/3/2005 1:12:24 AM

help.joomla :: Style Sheets
Style Sheets
CSS Stylesheets
TODO
The XML Setup File
TODO
The Thumbnail
When you have finished your template, publish it with the Template Manager in the Adminstrator. Preview the site and take
a screenshot. Import the screen shot into your favourite graphic editing package and crop it down to the contents of the
browser's view port. Reduce the image down to around 140 pixels wide by 90 pixels high and save it in PNG format in your
template directory (that is, /templates/basic_template).
Last Updated ( Saturday, 13 August 2005 )
Close Window
file:///D|/My%20Documents/Joomla!/doc/fileweb/developer/b3.htm11/3/2005 1:12:24 AM

help.joomla :: Overview
Overview
This chapter includes some more advanced features such as hiding template columns and designing templates for the
Administrator.
Hiding Modules
Sometimes it is desirable to hide certain module areas if there are no modules assigned to that region. You can hide these
areas by using the mosCountModules function.
<?php if (mosCountModules( 'right' )) { ?>
<td>
<?php mosLoadModules( 'right' ); ?>
</td>
<?php } ?>
If the mosCountModules function returns a value greater than 1, the table cell will be displayed. If there are no modules
defined for the "right" position for this particular page, then the cell will not be displayed. This is a good technique for
increasing the horizontal screen width on certain pages.
Using Class Suffixes
TODO
Last Updated ( Wednesday, 18 May 2005 )
Close Window
file:///D|/My%20Documents/Joomla!/doc/fileweb/developer/c1.htm11/3/2005 1:12:24 AM

help.joomla :: Administrator Templates
Administrator Templates
At this time the model for Administrator Templates is still being formed. It is intended that both the Site and Administrator templating systems will merge into
a common API in a future version. However, some notes are provided here for reference.
Module Support
You may include modules in your Administrator templates directly with mosLoadAdminModule or in groups, like for the site templates, with
mosLoadAdminModules. For example:
<table width="100%" class="menubar" cellpadding="0" cellspacing="0" border="0">
<tr>
<td class="menubackgr"><?php mosLoadAdminModule( 'fullmenu' );?></td>
<td class="menubackgr" align="right">
<div id="wrapper1">
<?php mosLoadAdminModules( 'header', 2 );?>
</div>
</td>
<td class="menubackgr" align="right">
<a href="index2.php?option=logout" style="color: #333333; font-weight: bold">Logout</a>
<strong><?php echo $my->username;?>&nbsp;
</td>
</tr>
</table>
The mosLoadAdminModule function takes one argument, the name of the module less the "mod_" prefix. The first cell of the example table loads the Full
Menu module (that is, mod_fullmenu).
In the second table cell, all the modules assigned to the "header" position are loaded. The second argument is a style setting:
● 0 = just output sequentially what the modules output
● 1 = display each module in a "Tab"
● 2 = display each module wrapped in a <div> tag
Formatting for the "header" modules is done completely via CSS. For example, the "wrapper1" style is defined as:
#wrapper1 div {
border: 0px;
margin: 0px;
margin-left: auto;
margin-right: auto;
padding: 0px 5px 0px 5px;
display: inline;
}
The modules are enclosed in plain <div> tags. To display modules in a column you may add a width attribute and change the display attribute appropriately.
The following modules are available with the Joomla distribution.
file:///D|/My%20Documents/Joomla!/doc/fileweb/developer/c2.htm (1 of 3)11/3/2005 1:12:25 AM
help.joomla :: Administrator Templates
mod_fullmenu
The Full Menu module displays the traditional DHTML Adminstrator menu. Content Sections and Components are dynamically added with the
remainder of the menu being statically defined.
mod_components
The Components module displays a full list of the Components and sub-menu items. This is useful where many components are installed and the
capacity of the DHTML menus is exceeded.
mod_latest
The Lastest Items module displays the most recently created content items.
mod_mosmsg
The Message module displays the message passed in the URL.
mod_online
The Users Online module displays the number of users logged in.
mod_pathway
The Pathway module displays an Administrator pathway.
mod_popular
The Most Popular module displays a list of the most "hit" content items.
mod_stats
The Menu Stats module shows some statistics about the menus.
mod_toolbar
The Toolbar module displays the icon toolbar.
mod_unread
The Unread Messages module displays the number of unread private messages.
mod_logged
This Logged module displays a list of the currently logged in users.
mod_quickicon
The Quick Icon module displays an array of shortcut icons.
The Control Panel
The Control Panel for the Administrator is a separate file, cpanel.php, that is included with the template. It is a separate file to allow for customisation of this
area as different sites and users are likely to have different needs for this valuable piece of screen real estate.
The Control Panel file does not need to be included but if it is included it will simply display any Administrator Modules published in the "cpanel" position.
The cpanel.php file could be as simple as the following example:
<?php
/**
* @version $ Id: cpanel.php,v 1.3 2004/08/12 08:29:21 rcastley Exp $
* @package Joomla
* @copyright Copyright (C) 2005 Open Source Matters. All rights reserved.
* @license http://www.gnu.org/copyleft/gpl.html GNU/GPL, see LICENSE.php
* Joomla! is free software and parts of it may contain or be derived from the
* GNU General Public License or other free or open source software licenses.
* See COPYRIGHT.php for copyright notices and details.
*/
file:///D|/My%20Documents/Joomla!/doc/fileweb/developer/c2.htm (2 of 3)11/3/2005 1:12:25 AM

help.joomla :: Administrator Templates
/** ensure this file is being included by a parent file */
defined( '_VALID_MOS' ) or die( 'Direct Access to this location is not allowed.' );
?>
<table class="adminform">
<tr>
<td width="100%" valign="top">
<?php mosLoadAdminModules( 'cpanel', 1 ); ?>
</td>
</tr>
</table>
Last Updated ( Wednesday, 14 September 2005 )
Close Window
file:///D|/My%20Documents/Joomla!/doc/fileweb/developer/c2.htm (3 of 3)11/3/2005 1:12:25 AM

help.joomla :: Function Reference
Function Reference
File and Function Reference
The following functions are available to template developers.
mosLoadComponents
Syntax:
mosLoadComponents( $name )
Loads a component. For example "banners". Do not include the "com_" prefix.
mosCountModules
Syntax:
mosCountModules( $position_name )
Counts the number of modules that may be shown on the current page in the "position_name" position.
mosLoadModules
Syntax:
mosLoadModules( $position_name [, $style] )
Displays all modules that are assigned to the "position_name" position for the current page. The "style" argument is optional but may
be:
● 0 = (default display) Modules are displayed in a column. The following shows an example of the output:
<!-- Individual module -->
<table cellpadding="0" cellspacing="0" class="moduletable[suffix]">
<tr>
<th valign="top">Module Title</th>
</tr>
<tr>
<td>
Module output
file:///D|/My%20Documents/Joomla!/doc/fileweb/developer/c3.htm (1 of 4)11/3/2005 1:12:25 AM
help.joomla :: Function Reference
</td>
</tr>
</table>
<!-- Individual module end -->
● 1 = Modules are displayed horizontally. Each module is output in the cell of a wrapper table. The following shows an example
of the output:
<!-- Module wrapper -->
<table cellspacing="1" cellpadding="0" border="0" width="100%">
<tr>
<td align="top">
<!-- Individual module -->
<table cellpadding="0" cellspacing="0" class="moduletable[suffix]">
<tr>
<th valign="top">Module Title</th>
</tr>
<tr>
<td>
Module output
</td>
</tr>
</table>
<!-- Individual module end -->
</td>
<td align="top">
<!-- ...the next module... -->
</td>
</tr>
</table>
● -1 = Modules are displayed as raw output and without titles. The following shows an example of the output
Module 1 OutputModule 2 OutputModule 3 Output
● -2 = Modules are displayed in X-Joomla format. The following shows an example of the output:
file:///D|/My%20Documents/Joomla!/doc/fileweb/developer/c3.htm (2 of 4)11/3/2005 1:12:25 AM
help.joomla :: Function Reference
<!-- Individual module -->
<div class="moduletable[suffix]">
<h3>Module Title</h3>
Module output
</div>
<!-- Individual module end -->
● -3 = Modules are displayed in a format that allows, for example, stretchable rounded corners. This option was introduced in
Mambo 4.5.2.1.
<!-- Individual module -->
<div class="module[suffix]">
<div>
<div>
<div>
<h3>Module Title</h3>
Module output
</div>
</div>
</div>
</div>
<!-- Individual module end -->
Note in all cases that an optional class "suffix" can be applied via the module parameters.
mosShowHead
Syntax:
<?php mosShowHead(); ?>
Assembles various head tags including the title tag and several meta tags.
mosMainBody
Syntax:
<?php mosMainBody(); ?>
file:///D|/My%20Documents/Joomla!/doc/fileweb/developer/c3.htm (3 of 4)11/3/2005 1:12:25 AM
help.joomla :: Function Reference
Includes the output of the component as determined by the value of option in the URL.
Last Updated ( Thursday, 15 September 2005 )
Close Window
file:///D|/My%20Documents/Joomla!/doc/fileweb/developer/c3.htm (4 of 4)11/3/2005 1:12:25 AM

help.joomla :: Template Standards
Template Standards
Standards (DRAFT)
Identify the Language in the Head Tag
The HTML element must include the lang attribute.
<html xmlns="http://www.w3.org/1999/xhtml" lang="<?php echo _LANGUAGE; ?>">
<head>
Note: From Joomla 1.1 onwards it will be possible to use $_LANG->isoCode() instead of _LANGUAGE.
Reference:
● ISO 639 language codes
● Identifying the primary language
Provide a Summary for Tables
The TABLE element should include the summary attribute to describe it's structure and purpose.
<table summary="Hits on news compared to help">
<caption>Hits on news compared to help</caption>
<!--table cells here-->
</table>
The use of the summary attribute for layout tables is at the discretion of the designer but is generally not recommended.
Reference:
● Providing summary information
● Layout Tables
Link Text
Make link text phrases make sense when they are read out in context and also ensure that different link addresses have different
text. For example, avoid the use of "click here".
Reference:
file:///D|/My%20Documents/Joomla!/doc/fileweb/developer/c4.htm (1 of 2)11/3/2005 1:12:25 AM

help.joomla :: Template Standards
● Link text
Associate Form Controls with the LABEL Element
A LABEL element is able to directly associate a description of a form element to the element itself. The LABEL for attribute must
uniquely match the id attribute of the form element.
<label for="mod_login_username">
<?php echo $_LANG->_( '_USERNAME' ); ?>
</label>
<br />
<input id="mod_login_username" name="username" type="text"
class="inputbox<?php echo $moduleclass_sfx; ?>" alt="username" size="10" />
With this association, some browsers allow for the clicking of the label to acquire focus for the control.
Reference:
● Labeling form controls
● Forms - Section 508 Accessibility
Last Updated ( Thursday, 08 September 2005 )
Close Window
file:///D|/My%20Documents/Joomla!/doc/fileweb/developer/c4.htm (2 of 2)11/3/2005 1:12:25 AM

help.joomla :: Writing a Simple Module
Writing a Simple Module
As an example, we will create a module that will list any content items that have keywords that match those in the one that is being viewed.
Where do we start?
First decide on a module name. We are going to call this a Related Items module. The module name will be mod_relcontent. All module
names must be prefixed with "mod_" and the "relcontent" just stands for "related content" in our case.
In a scratch area on your file system, create a directory called mod_relcontent. In this directory, just create two empty files for the moment;
one called mod_relcontent.php and the other called mod_relcontent.xml. Let's build the XML file first. This is a definition file that tells the
Joomla installer, most importantly, what files are required and other metadata about the module. Copy and paste the following code into the
XML file:
<?xml version="1.0" ?>
<mosinstall type="module">
<name>Related Items</name>
<creationDate>19/Aug/2003</creationDate>
<author>Andrew Eddie</author>
<copyright>This template is released under the GNU/GPL License</copyright>
<authorEmail>eddieajau(at)users.sourceforge.net</authorEmail>
<authorUrl></authorUrl>
<version>1.0</version>
<description>Shows related content items based on
keywords in the meta key field</description>
<files>
<filename module="mod_relcontent">mod_relcontent.php</filename>
</files>
</mosinstall>
The important tags here are:
name
The name used in menus.
files
There is only one file required for a module.
Save the XML file and move to the php file. Modules used to store their output in a $content variable. This is still supported, but you can
now either use echo statements or escape in and out of php to provide the output. The complete code is shown at the end of this article.
Let's step through it.
The first line after the comment block is extremely important. This prevents direct and potentially malicious execution of the script.
file:///D|/My%20Documents/Joomla!/doc/fileweb/developer/d1.htm (1 of 4)11/3/2005 1:12:26 AM

help.joomla :: Writing a Simple Module
Next, a couple of URL variables are collected. When you are writing your modules, never assume that variables you need from the URL are
already available. This is not good programming practice and they simply may not be within the scope of the code. For example, this module
code is actually called from within a function, so many global variables simply are not visible. However, several code variables are made
available, like $database.
The script then checks to see if you are viewing a content item. If you are, it selects the value of the `metakey` field from the item.
The Database Connector
First you need to "initialise" the query. The main reason for this is that the query string you supply is parsed for a hash-underscore-
underscore. This is replaced by the database prefix stored in the system configuration variables.
$database->setQuery( "SELECT metakey FROM #__content WHERE id='$id'" );
OK, we've set up our query. This query returns only a single value. This is a really common exercise so we've provided a method called
loadResult() just to grab that single value. Having got the value and checked that it contains something, we explode the string on commas.
We then use arrays to help build a new database query that, in rough pseudo-code says "get all the id's of the content items where their
metakey field is like *this* or *that*".
Now you'll see we have another common operation, that is, getting a list of results from a query. Here we use the database class method
called loadObjectList() to return an array of rows where each row is stored as an object. The method returns null if the query fails to
facilitate error checking.
Having received your list of matched records, it's now a trivial exercise to loop through the array and print out a list of links.
Finishing Up
Well, now we've got some code, how do we get it into Joomla. The module installer now requires a zip file of the php and XML file under it's
parent directory (that is, in this case, mod_relcontent). Zip the two files up. Then, in the Joomla Administrator, select Modules > Install from
the menubar. At the bottom of the list you'll see an upload area. Browse to the zip file and upload it. Viola, all going well, your new module
is now installed and ready to use.
Go to Modules > Manage Modules to publish and select the 'side' and pages you want the module to appear on.
Now, in a couple of content items, put in a couple of different matching keywords in the Metadata tabs. From the front-end, view the items.
You should get a list of other records that have matching keywords.
<?php
//Related Content//
/**
* Related Content Module
* @package Joomla
* @copyright Copyright (C) 2005 Open Source Matters. All rights reserved.
file:///D|/My%20Documents/Joomla!/doc/fileweb/developer/d1.htm (2 of 4)11/3/2005 1:12:26 AM

help.joomla :: Writing a Simple Module
* @license http://www.gnu.org/copyleft/gpl.html GNU/GPL, see LICENSE.php
* Joomla! is free software and parts of it may contain or be derived from the
* GNU General Public License or other free or open source software licenses.
* See COPYRIGHT.php for copyright notices and details.
*/
defined( '_VALID_MOS' ) or die( 'Direct Access to this location is not allowed.' );
$option = trim( mosGetParam( $_REQUEST, 'option', null ) );
$task = trim( mosGetParam( $_REQUEST, 'task', null ) );
$id = intval( mosGetParam( $_REQUEST, 'id', null ) );
if ($option == 'content' && $task == 'view' && $id) {
// select the meta keywords from the item
$query = "SELECT metakey FROM #__content WHERE id='$id'";
$database->setQuery( $query );
if ($metakey = trim( $database->loadResult() )) {
// explode the meta keys on a comma
$keys = explode( ',', $metakey );
$likes = array();
// assemble any non-blank word(s)
foreach ($keys as $key) {
$key = trim( $key );
if ($key) {
$likes[] = $key;
}
}
if (count( $likes )) {
// select other items based on the metakey field 'like' the keys found
$query = "SELECT id, title"
. "nFROM #__content"
. "nWHERE id<>$id AND state=1 AND access <=$my->gid AND (metakey LIKE '%";
$query .= implode( "%' OR metakey LIKE '%", $likes );
$query .= "%')";
$database->setQuery( $query );
if ($related = $database->loadObjectList()) {
foreach ($related as $item) {
file:///D|/My%20Documents/Joomla!/doc/fileweb/developer/d1.htm (3 of 4)11/3/2005 1:12:26 AM

help.joomla :: Writing a Simple Module
echo "<a href="index.php?option=content&task=view&id=$item->id">"
."$item->title</a><br />";
}
}
echo $database->getErrorMsg();
}
}
}
?>
Last Updated ( Thursday, 13 October 2005 )
Close Window
file:///D|/My%20Documents/Joomla!/doc/fileweb/developer/d1.htm (4 of 4)11/3/2005 1:12:26 AM
help.joomla :: Module Hello World 1
Module Hello World 1
TutorialIntroduction
This tutorial aims to give you a grounding in the basic concepts for writing Joomla modules. It will develop a very simple Hello World module
and then extend it using patTemplate for the presentation layer.
Requirements
You need for this tutorial:
● Joomla 1.0 or greater
Let's Roll
We will be creating two files in this tutorial in the folder called /modules/. Let's look at the files we need.
mod_helloworld.php
This file is the actually engine for the module.
mod_helloword.xml
This file is the xml setup files for the module. It defines the information required for the module to be installed.
Installing the Basic Module
You cannot create a module from scratch from the Joomla Administrator, so we have to make some basic files first and then install them as
a module.
Let's make the actually module first. Save the following code as mod_helloworld.php.
<?php
/**
* @version 1.0 $
* @package HelloWorld
* @copyright (C) 2005 Andrew Eddie
* @license http://www.gnu.org/copyleft/gpl.html GNU/GPL
*/
/** ensure this file is being included by a parent file */
defined( '_VALID_MOS' ) or die( 'Direct Access to this location is not allowed.' );
?>
<h1>Hello World</h1>
file:///D|/My%20Documents/Joomla!/doc/fileweb/developer/d2.htm (1 of 5)11/3/2005 1:12:26 AM
help.joomla :: Module Hello World 1
Next save the following code in a file named mod_helloworld.xml.
<?xml version="1.0" encoding="iso-8859-1"?>
<mosinstall type="module" version="4.5.2">
<name>Hello World</name>
<author>Andrew Eddie</author>
<creationDate>February 2005</creationDate>
<copyright>(C) 2005 Andrew Eddie</copyright>
<license>http://www.gnu.org/copyleft/gpl.html GNU/GPL</license>
<version>1.0</version>
<description>A module that says hello</description>
<files>
<filename module="mod_helloworld">mod_helloworld.php</filename>
</files>
<params />
</mosinstall>
The first line of the file is a definition statement. You do not have to worry to much about what it means, but it must be in the file and it
must be the first line (there cannot be any spaces before it). The other tags mean:
mosinstall
This is the parent tag that defines the rest of the installer file for Joomla. It has an attribute for type which in this case is module. It
also takes a value for the version of Joomla it can run on.
name
This is the name of your module.
author
This is the name of the author for the module.
creationDate
This is the date the module was created.
copyright
This is the copyright holder of the module's code.
license
This is the name of, or a reference to, the license under which the module is released.
version
This is the version of the module.
description
This is a free text description of the module.
files
file:///D|/My%20Documents/Joomla!/doc/fileweb/developer/d2.htm (2 of 5)11/3/2005 1:12:26 AM

help.joomla :: Module Hello World 1
This is a collection of the files included with the module.
filename
This is a file that is used by the module. Any number of files can be listed, including files in a subdirectory. The file that Joomla calls
to invoke the module must contain the module attribute that takes a value of the name of the file without the .php extension.
Now, zip these two files up into a file called mod_helloworld.zip or you can download a copy here (mod_helloworld.zip).
Follow these instructions to install the basic module:
1. Log into the Joomla Administrator.
2. Select Modules -> Install/Uninstall from the menu.
3. In the Upload Package File area, click the Browse button and select the zip file you just created for downloaded. Then click the
Upload File and Install button.
Successfull module installIf all goes well, you should now see a message indicating a successful install. Click on the Continue link.
While you are still logged into the Joomla Administrator, select Modules -> Site Modules from the Menu. Scroll down until you see the
listing for Hello World. You will see that the module is unpublished and assigned to the left position in the template. Click on the red X in
the published column to publish the module.
Hello World Module Preview your site. You should see your module saying hi to you.
Congratulations, you have built and deployed your first module. Now that it is installed we can modify the files directly to add more features.
Improving the Presentation
You will find that you new module has been installed in the /modules directory of your site. First we will separate the presentation layer
from the module file.
Create a new directory under /modules called /mod_helloworld. In this new directory create a file called default.html. Copy the
following code in this file:
<mos:comment>
@version 4.5.2
@package HelloWorld
@copyright (C) 2005 Andrew Eddie
@license http://www.gnu.org/copyleft/gpl.html GNU/GPL
</mos:comment>
<mos:tmpl name="helloworld">
<h1>Hello World</h1>
The time is {TIME}
</mos:tmpl>
file:///D|/My%20Documents/Joomla!/doc/fileweb/developer/d2.htm (3 of 5)11/3/2005 1:12:26 AM
help.joomla :: Module Hello World 1
We have added a little extra code here to demonstrate how to add a variable to your module template. You will also notice that the HTML is
wrapped in a mos:tmpl tag. This defines a template and we have given the template the name of helloworld.
Now, find mod_helloworld.php in the /modules directory and open it in your editor.
Tip: There are many quality editors that are available for free, PSPad and HTML-Kit to name a few. For something a little more powerful,
you might like to try out Eclipse.
Delete the existing code and replace it with the following:
<?php
/**
* @version 1.0
* @package HelloWorld
* @copyright (C) 2005 Andrew Eddie
* @license http://www.gnu.org/copyleft/gpl.html GNU/GPL
*/
/** ensure this file is being included by a parent file */
defined( '_VALID_MOS' ) or die( 'Direct Access to this location is not allowed.' );
// load the patTemplate library
require_once( $mosConfig_absolute_path . '/includes/patTemplate/patTemplate.php' );
// create the template
$tmpl =& patFactory::createTemplate( '', false, false );
// set the path to look for html files
$tmpl->setRoot( dirname( __FILE__ ) . '/mod_helloworld' );
$tmpl->readTemplatesFromInput( 'default.html' );
$tmpl->addVar( 'helloworld', 'time', date( 'H:i:s' ) );
$tmpl->displayParsedTemplate( 'helloworld' );
?>
Let's examine what is happening in this file.
● The comment block at the top of the file defines meta data about the file, in particular the license and the copyright. This block has
some special notations that are able to be parse by and application called phpDocumentor. It is used to assemble API (Application
Programmer Interface) documentation. The important thing here is to have a version and explicitly state the copyright and license
file:///D|/My%20Documents/Joomla!/doc/fileweb/developer/d2.htm (4 of 5)11/3/2005 1:12:26 AM
help.joomla :: Module Hello World 1
terms for the file.
● Next we look for a constant called _VALID_MOS. Because this constant is defined elsewhere in Joomla, it ensures that only Joomla
is able to access this file. It prevents a user from opening the file explicitly in a browser.
● We then include the patTemplate library.
● The patTemplate object is created and then we set the root directory for template (HTML) files to the /mod_helloworld
directory in your module.
● Because we have set the root directory, we can just read in the default.html file with the readTemplatesFromInput method.
● Next we want to give the {TIME} variable in our template a value. To do this we use the addVar method of the template object.
The method takes three arguments. The first is the name of the template, the second is the name of the template variable and the
last is the actual value to assign to it.
● Last of all we display the helloworld template.
Save all your files and refresh your browser. You should see that the module now displays the time.
You can download the files for the final part of the tutorial here (mod_helloworld_1.zip). Note that the XML file has been updated to include
the new HTML file.
To suggest a change to this page please click here.
Last Updated ( Tuesday, 04 October 2005 )
Close Window
file:///D|/My%20Documents/Joomla!/doc/fileweb/developer/d2.htm (5 of 5)11/3/2005 1:12:26 AM

help.joomla :: Module Hello World 2
Module Hello World 2
Hello World 2Introduction
This tutorial aims to build on the helloworld module started in part one. You will learn how to retrieve information from the
database and how to present this data is a table using patTemplate.
Requirements
You need for this tutorial:
● Joomla 1.0 or greater
Let's Roll
You will recall that we finished part 1 with your module displaying a message and the current time. This is all very
interesting but far more interesting is the information held in the tables of the Joomla database. What we will do in this
example is develop a type of Current News module.
The Presentation Layer
Let's start with the output of the module. Because the code (or the logic) of the module is now separated from the
presentation layer (the HTML), it gives the graphic designer an opportunity to design the output separate from the module.
The module code designer has informed us that a list of content items will be provided to the template. The content item
data will include the item id, the title of the item, and the number of hits the item has received.
Now, open the default.html file (remember we saved this in the /mod_helloworld directory). Delete what is there
and replace it with the following code:
<mos:comment>
@version 1.0
@package HelloWorld
@copyright (C) 2005 Andrew Eddie
@license http://www.gnu.org/copyleft/gpl.html GNU/GPL
</mos:comment>
file:///D|/My%20Documents/Joomla!/doc/fileweb/developer/d3.htm (1 of 6)11/3/2005 1:12:31 AM

help.joomla :: Module Hello World 2
<mos:tmpl name="helloworld">
<h1>Hello World</h1>
This is the latest and the greatest from <strong>{SITENAME}</strong>
<table>
<tr>
<th>
Title
</th>
<th>
Hits
</th>
</tr>
<mos:tmpl name="rows">
<tr>
<td>
{ROW_TITLE}
</td>
<td>
{ROW_HITS}
</td>
</tr>
</mos:tmpl>
</table>
</mos:tmpl>
As in part 1, we wrap our whole module output in a template that we've named helloworld. It all looks like standard
HTML except for a few things.
You'll see we display a message with the {SITENAME} variable. This variable has already been defined for you in the
template. It's equivalent to printing the $mosConfig_sitename variable. Other predefined variables include
{SITEURL} and {ADMINURL}. These map to the URL of the site and administrator repsectively.
The other thing you'll notice is an embedded template that we have named rows. It enclosed a single row of the HTML
table. The module designer has told us that he has prefixed all variables in the rows template with "row_", and that he
has provided at least the Title, which therefore maps to {ROW_TITLE}, and the Hits, which maps to {ROW_HITS}.
Well, that's the template finished (is it that easy I hear you say?).
file:///D|/My%20Documents/Joomla!/doc/fileweb/developer/d3.htm (2 of 6)11/3/2005 1:12:31 AM

help.joomla :: Module Hello World 2
The Data Layer
Let's move back to the module file, mod_helloworld.php, where we will assemble the data to pass to the template.
Open the file in your editor, delete the code and replace it with the following:
<?php
/**
* @version 1.0 $
* @package HelloWorld
* @copyright (C) 2005 Andrew Eddie
* @license http://www.gnu.org/copyleft/gpl.html GNU/GPL
*/
/** ensure this file is being included by a parent file */
defined( '_VALID_MOS' ) or
die( 'Direct Access to this location is not allowed.' );
// COLLECT DATA
// assemble query
$query = '
SELECT id, title, hits
FROM #__content
ORDER BY hits DESC
LIMIT 5
';
// prepare the query in the database connector
$database->setQuery( $query );
// retrieve the rows as objects
$rows = $database->loadObjectList();
// DISPLAY DATA
// load the patTemplate library
file:///D|/My%20Documents/Joomla!/doc/fileweb/developer/d3.htm (3 of 6)11/3/2005 1:12:31 AM

help.joomla :: Module Hello World 2
require_once( $mosConfig_absolute_path
. '/includes/patTemplate/patTemplate.php' );
// create the template
$tmpl =& patFactory::createTemplate( '', false, false );
// set the path to look for html files
$tmpl->setRoot( dirname( __FILE__ ) . '/mod_helloworld' );
// load the template
$tmpl->readTemplatesFromInput( 'default.html' );
// add the 'rows' to the rows template with a prefix
$tmpl->addObject( 'rows', $rows, 'row_' );
// output the template
$tmpl->displayParsedTemplate( 'helloworld' );
?>
Let's examine what's happening here:
● We start with the standard comment and security block.
● We then prepare our query. The data we want is in the mos_content table. Because we don't always know if the
"mos_" prefix has been used, we use "#__" (hash, underscore, underscore) instead. This is automatically replaced
with the correct database table prefix. You'll notice we are retrieving three fields, the id, the title and the hits. We
are ording them by the number of hits in descending order and limiting the number of results to a maximum of five
(that is, the top five).
● Next we initialise the query in the database connector ($database, which is always available to module files)
using the setQuery method.
● Following this we call the loadObjectList method to retrieve the results from the database as an array of PHP
objects. This is stored in the variable $rows.
That's it for the first half of the module, that is, the collecting of the data. The last half of the module is much that same as
our original module from part 1. The only difference is that we use the addObject method to add the array to the rows
template.
file:///D|/My%20Documents/Joomla!/doc/fileweb/developer/d3.htm (4 of 6)11/3/2005 1:12:31 AM

help.joomla :: Module Hello World 2
Note: the addObject method can take either a single object or an array of objects.
The thing to note here is that for each array member in $rows, the rows template in the HTML file will display a copy of
itself. In other words, if there are five elements in the $rows array (that is, the database was able to retrive five rows of
records), then the rows template will cycle, or iterate, five times. The rows template acts much like a foreach loop in
PHP.
ModuleSave all files and refresh your browser. You should see that the module now displays an opening message
that includes the name of your site, and also a table of the most hit content items.
What's wrong with this picture. Well, you'll see that the query takes no account for publishing dates, whether they are
indeed published at all and the security level of the items. You have to apply that logic yourself. To do this, modifying the
query variable in the following way:
// assemble query
global $mosConfig_offset;
$now = date( 'Y-m-d H:i:s', time() + $mosConfig_offset * 3600 );
$query = '
SELECT id, title, hits
FROM #__content
WHERE ( state = \'1\' AND checked_out = \'0\' )
AND ( publish_up = \'0000-00-00 00:00:00\'
OR publish_up <= \'' . $now . '\' )
AND ( publish_down = \'0000-00-00 00:00:00\'
OR publish_down >= \'' . $now . '\' )
AND access <= \'' . $my->gid .'\'
ORDER BY hits DESC
LIMIT 5
';
In the next part of this series, we will look at adding parameters to the module.
You can download the files for the final part of the tutorial here (mod_helloworld_2.zip).
Last Updated ( Wednesday, 14 September 2005 )
file:///D|/My%20Documents/Joomla!/doc/fileweb/developer/d3.htm (5 of 6)11/3/2005 1:12:31 AM

help.joomla :: Module Hello World 2
Close Window
file:///D|/My%20Documents/Joomla!/doc/fileweb/developer/d3.htm (6 of 6)11/3/2005 1:12:31 AM
help.joomla :: Module Hello World 3
Module Hello World 3
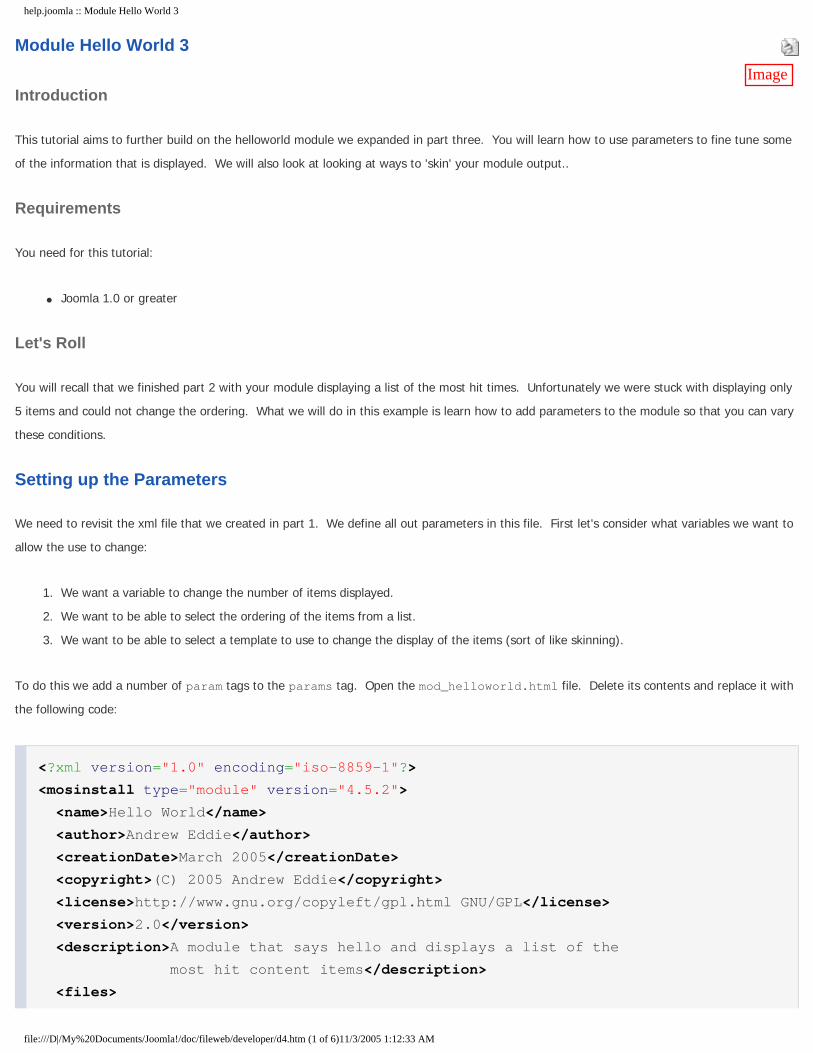
ImageIntroduction
This tutorial aims to further build on the helloworld module we expanded in part three. You will learn how to use parameters to fine tune some
of the information that is displayed. We will also look at looking at ways to 'skin' your module output..
Requirements
You need for this tutorial:
● Joomla 1.0 or greater
Let's Roll
You will recall that we finished part 2 with your module displaying a list of the most hit times. Unfortunately we were stuck with displaying only
5 items and could not change the ordering. What we will do in this example is learn how to add parameters to the module so that you can vary
these conditions.
Setting up the Parameters
We need to revisit the xml file that we created in part 1. We define all out parameters in this file. First let's consider what variables we want to
allow the use to change:
1. We want a variable to change the number of items displayed.
2. We want to be able to select the ordering of the items from a list.
3. We want to be able to select a template to use to change the display of the items (sort of like skinning).
To do this we add a number of param tags to the params tag. Open the mod_helloworld.html file. Delete its contents and replace it with
the following code:
<?xml version="1.0" encoding="iso-8859-1"?>
<mosinstall type="module" version="4.5.2">
<name>Hello World</name>
<author>Andrew Eddie</author>
<creationDate>March 2005</creationDate>
<copyright>(C) 2005 Andrew Eddie</copyright>
<license>http://www.gnu.org/copyleft/gpl.html GNU/GPL</license>
<version>2.0</version>
<description>A module that says hello and displays a list of the
most hit content items</description>
<files>
file:///D|/My%20Documents/Joomla!/doc/fileweb/developer/d4.htm (1 of 6)11/3/2005 1:12:33 AM

help.joomla :: Module Hello World 3
<filename module="mod_helloworld">mod_helloworld.php</filename>
<filename>mod_helloworld/default.html</filename>
</files>
<params>
<param name="moduleclass_sfx" type="text" default=""
label="Module Class Suffix"
description="A suffix to be applied to the css class of the module
(table.moduletable), this allows individual module styling" />
<param name="@spacer" type="spacer" default="" label="" description="" />
<param name="count" type="text" size="20" default=""
label="Number of items" description="The number of items to display" />
<param name="ordering" type="list" default="hits" label="Back Button"
description="Show/Hide a Back Button, that returns you to the previously
view page">
<option value="hits">Hits</option>
<option value="title">Title</option>
</param>
<param name="@spacer" type="spacer" default="" label="" description="" />
<param name="skin" type="list" default="default" label="Module Skin"
description="The skin for the module display">
<option value="default">Default</option>
<option value="bullets">Bullets</option>
</param>
</params>
</mosinstall>
Each param tag has a number of common attributes:
name
The name of the html form field and also the name of the paremeter that you will access in your module code.
type
This is the type of field. The standard types are:
❍ text - a normal text field
❍ textarea - a normal textarea field. You can also add attributes for the rows and cols.
❍ list - a normal select list form field. Lists can have any number of option child tags.
❍ radio - a radio group. The radio type can have any number of option child tags
❍ spacer - shows a html horizontal rule.
❍ imagelist - shows a select list of images. You also provide a required directory attibute (the default is /images/stories), an
optional hide_none attribute (either 0 or 1, where 1 will show a "Use no image" option) and a hide_default attribute (either 0
or 1, where 1 will show a "Use default image" option).
❍ mos_category - shows a select list of Joomla content categories
file:///D|/My%20Documents/Joomla!/doc/fileweb/developer/d4.htm (2 of 6)11/3/2005 1:12:33 AM

help.joomla :: Module Hello World 3
❍ mos_section - shows a select list of Joomla content sections.
❍ mos_menu - shows a list of Joomla menu items.
default
A default value for the form field if no value is provided.
label
A label for the form field.
description
A description (or tooltip) for the form field
There are some additonal attributes based on the type of parameter as described above. For those parameters that allow for options, a
standard html option tag is used, usually with a value attribute.
Let's have a look at each param tag in the params tag (each parameter will be identified by it's name attribute):
moduleclass_sfx
This is a standard parameter to include in all modules. Most modules are placed in a wrapper (unless you are using the loadModules
template macro with a style of less than zero) and this wrapper has a css class of moduleclass. You can include your own variant of
this class and suffix it with a unique identifier, for example, moduleclass_hello. To use your custom class you would enter _hello in
this field
@spacer
This param simply displays as a horizontal rule. It is useful for visually separating groups of associated parameters.
count
This will define the number of items we will show
ordering
This will show a list of possible options for ordering the list of items
@spacer
Another spacer.
skin
This will show a list of the available 'skins' for the output of the module.
Site module list When you updated the xml file, navigate to Modules -> Site Modules from the menu in the Administrator. Click on the
linked name for the Hello World module (it might be on another page of the list depending on it's position).
Editting the moduleWhen the edit screen appears you should see that the parameters show at the bottom of the first column of the
form.
You can see how the spacer works, separating the parameters into groups. You can also see that the lists are populated with the options
defined in the xml file. For now you can leave the count blank, but when we have finished altering all the code, come back to this edit form
and experiment with different values. Note that the Page Class Suffix will only be relevant if you have a custom style in the style sheet for
your site template.
Coding for Module Parameters
file:///D|/My%20Documents/Joomla!/doc/fileweb/developer/d4.htm (3 of 6)11/3/2005 1:12:33 AM

help.joomla :: Module Hello World 3
Our next step is to retrieve the parameters in our module and apply them. Open the module php file, mod_helloworld.php, in your editor,
delete the code and replace it with the following:
<?php
/**
* @version 1.0 $
* @package HelloWorld
* @copyright (C) 2005 Andrew Eddie
* @license http://www.gnu.org/copyleft/gpl.html GNU/GPL
*/
/** ensure this file is being included by a parent file */
defined( '_VALID_MOS' ) or
die( 'Direct Access to this location is not allowed.' );
// COLLECT DATA
// assemble query
global $mosConfig_offset;
$now = date( 'Y-m-d H:i:s', time() + $mosConfig_offset * 3600 );
// Retreive parameters
$count = intval( $params->get( 'count', 10 ) );
$ordering = $params->get( 'ordering', 'hits' );
$skin = $params->get( 'skin', 'default' );
// Assign ordering
switch ($ordering) {
case 'title':
$orderBy = 'title ASC';
break;
case 'hits':
default:
$orderBy = 'hits DESC';
break;
}
$query = '
SELECT id, title, hits
FROM #__content
file:///D|/My%20Documents/Joomla!/doc/fileweb/developer/d4.htm (4 of 6)11/3/2005 1:12:33 AM
help.joomla :: Module Hello World 3
WHERE ( state = \'1\' AND checked_out = \'0\' )
AND ( publish_up = \'0000-00-00 00:00:00\' OR publish_up <= \''
. $now . '\' )
AND ( publish_down = \'0000-00-00 00:00:00\' OR publish_down >= \''
. $now . '\' )
AND access <= \'' . $my->gid .'\'
ORDER BY ' . $orderBy . '
LIMIT ' . $count
;
// prepare the query in the database connector
$database->setQuery( $query );
// retrieve the rows as objects
$rows = $database->loadObjectList();
// DISPLAY DATA
// load the patTemplate library
require_once( $mosConfig_absolute_path . '/includes/patTemplate/patTemplate.php' );
// create the template
$tmpl =& patFactory::createTemplate( '', false, false );
// set the path to look for html files
$tmpl->setRoot( dirname( __FILE__ ) . '/mod_helloworld' );
// load the template based on the selected skin
$tmpl->readTemplatesFromInput( $skin . '.html' );
// add the 'rows' to the rows template with a prefix
$tmpl->addObject( 'rows', $rows, 'row_' );
// output the template
$tmpl->displayParsedTemplate( 'helloworld' );
?>
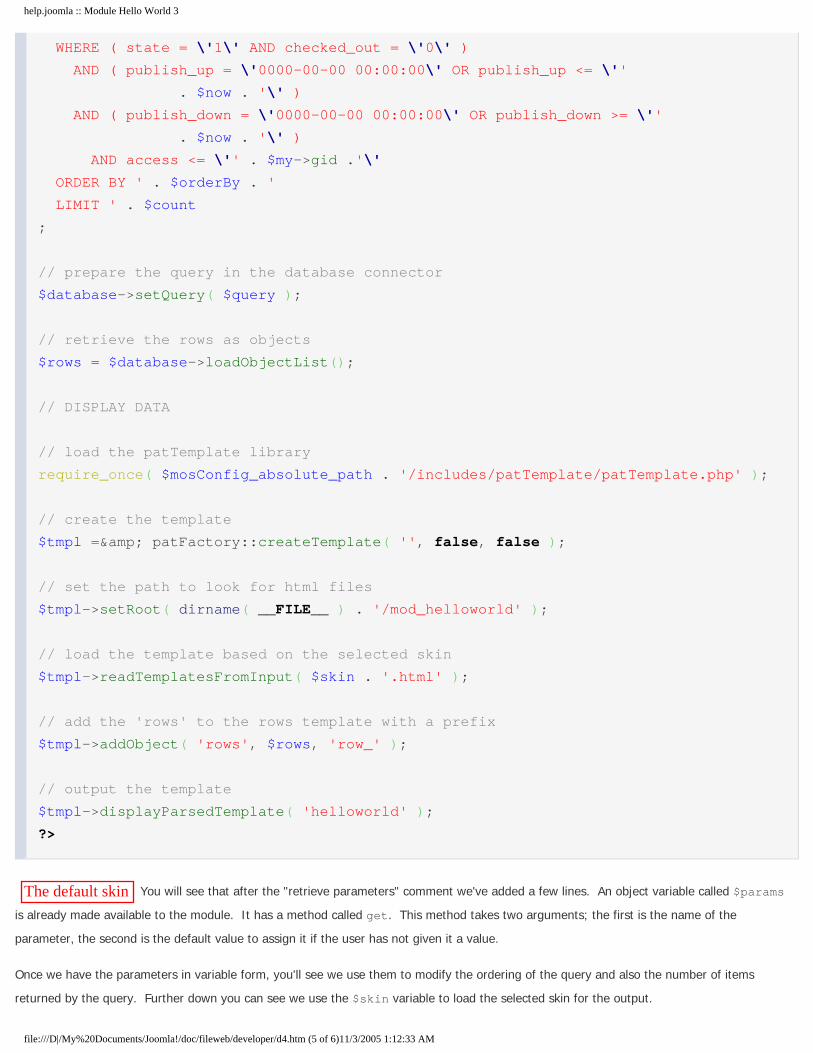
The default skin You will see that after the "retrieve parameters" comment we've added a few lines. An object variable called $params
is already made available to the module. It has a method called get. This method takes two arguments; the first is the name of the
parameter, the second is the default value to assign it if the user has not given it a value.
Once we have the parameters in variable form, you'll see we use them to modify the ordering of the query and also the number of items
returned by the query. Further down you can see we use the $skin variable to load the selected skin for the output.
file:///D|/My%20Documents/Joomla!/doc/fileweb/developer/d4.htm (5 of 6)11/3/2005 1:12:33 AM
help.joomla :: Module Hello World 3
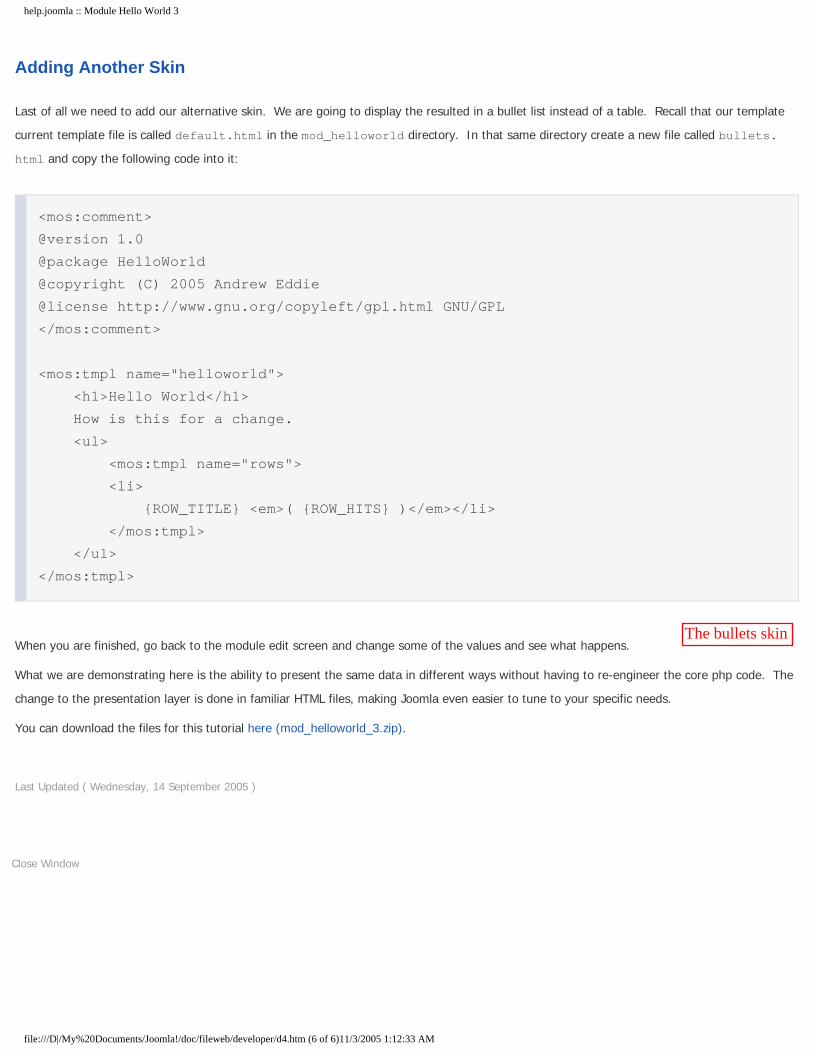
Adding Another Skin
Last of all we need to add our alternative skin. We are going to display the resulted in a bullet list instead of a table. Recall that our template
current template file is called default.html in the mod_helloworld directory. In that same directory create a new file called bullets.
html and copy the following code into it:
<mos:comment>
@version 1.0
@package HelloWorld
@copyright (C) 2005 Andrew Eddie
@license http://www.gnu.org/copyleft/gpl.html GNU/GPL
</mos:comment>
<mos:tmpl name="helloworld">
<h1>Hello World</h1>
How is this for a change.
<ul>
<mos:tmpl name="rows">
<li>
{ROW_TITLE} <em>( {ROW_HITS} )</em></li>
</mos:tmpl>
</ul>
</mos:tmpl>
The bullets skin When you are finished, go back to the module edit screen and change some of the values and see what happens.
What we are demonstrating here is the ability to present the same data in different ways without having to re-engineer the core php code. The
change to the presentation layer is done in familiar HTML files, making Joomla even easier to tune to your specific needs.
You can download the files for this tutorial here (mod_helloworld_3.zip).
Last Updated ( Wednesday, 14 September 2005 )
Close Window
file:///D|/My%20Documents/Joomla!/doc/fileweb/developer/d4.htm (6 of 6)11/3/2005 1:12:33 AM
help.joomla :: Mambots - Overview
Mambots - Overview
Mambots are pluggable elements that perform a specific function when they are triggered. They can be as simple as
something that replaces text or may be fully fledged third party libraries such as a templating system (like patTemplate or
Smarty) or a hit tracker (like phpOpenTracker).
A Mambot is a small, task-oriented function that intercepts content before it is displayed and manipulates it in some way.
Joomla provides a number of Mambots in the core distribution.
mosimage
This mambot converts tags to html img tags.
mospagebreak
This mambot provides pagination and table of contents functionality with a page.
moscode
This mambot replaces the code with tags with php syntax highlighted code.
mosvote
Mambot Groups
Mambots are placed in groups. Some groups have special significance to Joomla and are therefore reserved. The Joomla
distribution includes the following groups:
content
Mambots that modify displayed content
editors
WYSIWYG editors
editors-xtd
Buttons and lists that may allow additional controls in an editor.
search
Allows for the inbuilt search engine to extend to other components.
Last Updated ( Friday, 20 May 2005 )
Close Window
file:///D|/My%20Documents/Joomla!/doc/fileweb/developer/e1.htm11/3/2005 1:12:35 AM

help.joomla :: Writing a Mambot
Writing a Mambot
Mambots are able to be triggered to perform at nominated locations in the execution of the Joomla script. At present these
locations are few but will grow as the new framework for mambots matures. Mambot files are also loaded only once and a
function is registered to be triggered on a particular event.
There are currently three documented event triggers for mambots:
● onPrepareContent
● onSearch
● onInitEditor
● onGetEditorContents
● onEditorArea
All events require different arguments to be passed to them. This is explained in more detail below.
Mambots are also saved in groups under the /mambots directory. You will see all mambots relating to the searching are in
the /mambots/search directory and those relating to content (mosimage, etc) are in the /mambots/content directory. When
the search component is invoked, all the mambots in the 'search' group are loaded. Similarly, when content is to be
displayed, all the mambots in the 'content' group are loaded.
Let's look at how you would write mambot for each of the supported events in the next section.
Last Updated ( Wednesday, 14 September 2005 )
Close Window
file:///D|/My%20Documents/Joomla!/doc/fileweb/developer/e2.htm11/3/2005 1:12:35 AM
help.joomla :: An onSearch Mambot
An onSearch Mambot
Here is a code framework for a mambot that it triggered by the onSearch event (affectionately known as search bots).
<?php
/**
* @version $Id $
* @package Joomla
* @copyright Copyright (C) 2005 Open Source Matters. All rights reserved.
* @license http://www.gnu.org/copyleft/gpl.html GNU/GPL, see LICENSE.php
* Joomla! is free software and parts of it may contain or be derived from the
* GNU General Public License or other free or open source software licenses.
* See COPYRIGHT.php for copyright notices and details.
*/
/** ensure this file is being included by a parent file */
defined( '_VALID_MOS' ) or die( 'Direct Access to this location is not allowed.' );
$_PLUGINS->registerFunction( 'onSearch', 'botSearchContacts' );
/**
* Search method
* @param array Named 'text' element is the search term
*/
function botSearchContacts( $text ) {
global $database;
$text = trim( $text );
if ($text == '') {
return array();
}
$database->setQuery( "SELECT name AS title,"
. " '' AS created,"
. " misc AS text,"
. " 'Contact' AS section,"
. " CONCAT('index.php?option=com_contact&task=view&id=',id) AS href,"
. " '2' AS browsernav"
. " FROM #__contact_details"
. " INNER JOIN #__categories AS b ON b.id=a.catid AND b.access <='$my->gid'"
. " LEFT JOIN #__sections AS u ON u.id = a.sectionid"
. " WHERE name LIKE '%$text%' OR misc LIKE '%$text%'"
file:///D|/My%20Documents/Joomla!/doc/fileweb/developer/e3.htm (1 of 3)11/3/2005 1:12:35 AM

help.joomla :: An onSearch Mambot
. " AND published='1'"
. " ORDER BY name"
);
return $database->loadObjectList();
}
?>
Firstly you have the usual header and security gate.
$_PLUGINS is a variable exposed to the mambot file when it is included. You don't have to declare it as a global.
It has a method called registerFunction in the form:
$_PLUGINS->registerFunction( 'event_name', 'function_name' );
The event available for searching is 'onSearch' so we use this as our event_name.
The function_name is the function that we want the Joomla script to execute when it triggers the on search event. You can call it anything
you like as long as you ensure it is unique. For this example we have named the function botSearchContacts. Functions called by the
onSearch event have a required arguments list:
function function_name( string 'search_text' )
The first argument is the text to search for. The rest of the function simply queries the database and returns an array of results. The query
must return rows with the following fields:
title
A title for the search result
created
The date of the row
section
Where the row is from
href:
The href attribute for the link to the item
browsernav
Set to 2 to open in the current window.
Last Updated ( Thursday, 15 September 2005 )
file:///D|/My%20Documents/Joomla!/doc/fileweb/developer/e3.htm (2 of 3)11/3/2005 1:12:35 AM

help.joomla :: An onSearch Mambot
Close Window
file:///D|/My%20Documents/Joomla!/doc/fileweb/developer/e3.htm (3 of 3)11/3/2005 1:12:35 AM

help.joomla :: An onPrepareContent Mambot
An onPrepareContent Mambot
Here is a code framework for a mambot that it triggered by the onPrepareContent event (this is the traditional Mambot).
<?php
/**
* @version $Id $
* @package Joomla
* @copyright Copyright (C) 2005 Open Source Matters. All rights reserved.
* @license http://www.gnu.org/copyleft/gpl.html GNU/GPL, see LICENSE.php
* Joomla! is free software and parts of it may contain or be derived from the
* GNU General Public License or other free or open source software licenses.
* See COPYRIGHT.php for copyright notices and details.
*/
/** ensure this file is being included by a parent file */
defined( '_VALID_MOS' ) or die( 'Direct Access to this location is not allowed.' );
$_PLUGINS->registerFunction( 'onPrepareContent', 'botMosLink' );
/**
* Link bot
*
* <b>Usage:</b>
* <code>{moslink id="the_id"}</code>
*/
function botMosLink( $published, &$row, $mask=0, $page=0 ) {
global $mosConfig_absolute_path;
if (!$published) {
return true;
}
require_once( $mosConfig_absolute_path . '/includes/domit/xml_saxy_lite_parser.php' );
// define the regular expression for the bot
$regex = "#{moslinks*(.*?)}#s";
// perform the replacement
$row->text = preg_replace_callback( $regex, 'botMosLink_replacer', $row->text );
return true;
}
/**
* Replaces the matched tags an image
file:///D|/My%20Documents/Joomla!/doc/fileweb/developer/e4.htm (1 of 2)11/3/2005 1:12:35 AM

help.joomla :: An onPrepareContent Mambot
* @param array An array of matches (see preg_match_all)
* @return string
*/
function botMosLink_replacer( &$matches ) {
$attribs = @SAXY_Lite_Parser::parseAttributes( $matches[1] );
$id = @$attribs['id'];
return '<a href="'.sefRelToAbs( 'index.php?option=com_content&task=view&id=' .
$id ).'">Link</a>';
}
?>
Functions called by the onPrepareContent event have a required arguments list:
function function_name( int $published, object &$row, int $mask=0, int $page=0 )
published
1 if the mambot is published, 0 if not
row
A variable reference to the content object
mask
The current mask, default is 0
page
The current page number, default is 0
The trigger for the onPrepareContent event allows for unpublished mambots to still be processed.
The use of the built in preg_replace_callback function is a very efficient way of replacing the link tags. Once you define your regular expression,
the nominated callback function is called. You simply return the string you want as a replacement for the regular expression.
You may wonder why we pass a 'published' argument. Some Mambots will need to do something if they are not published. For example, the
mosimage Mambot needs to remove all of the tags from the text if it is not published.
Last Updated ( Thursday, 15 September 2005 )
Close Window
file:///D|/My%20Documents/Joomla!/doc/fileweb/developer/e4.htm (2 of 2)11/3/2005 1:12:35 AM

help.joomla :: Editor Mambots
Editor Mambots
The Editor mambots define plugable WYSIWYG editors that can be made available. Here is a very simple example for no editor. The file none.php looks like:
// snip - the usual header
$_MAMBOTS->registerFunction( 'onInitEditor', 'botNoEditorInit' );
$_MAMBOTS->registerFunction( 'onGetEditorContents', 'botNoEditorGetContents' );
$_MAMBOTS->registerFunction( 'onEditorArea', 'botNoEditorEditorArea' );
/**
* No WYSIWYG Editor - javascript initialisation
*/
function botNoEditorInit() {
return <<<EOD
<script type="text/javascript">
function insertAtCursor(myField, myValue) {
if (document.selection) {
// IE support
myField.focus();
sel = document.selection.createRange();
sel.text = myValue;
} else if (myField.selectionStart || myField.selectionStart == '0') {
// MOZILLA/NETSCAPE support
var startPos = myField.selectionStart;
var endPos = myField.selectionEnd;
myField.value = myField.value.substring(0, startPos)
+ myValue
+ myField.value.substring(endPos, myField.value.length);
} else {
myField.value += myValue;
}
}
</script>
EOD;
}
/**
* No WYSIWYG Editor - copy editor contents to form field
* @param string The name of the editor area
* @param string The name of the form field
*/
function botNoEditorGetContents( $editorArea, $hiddenField ) {
return <<<EOD
EOD;
}
/**
* No WYSIWYG Editor - display the editor
* @param string The name of the editor area
file:///D|/My%20Documents/Joomla!/doc/fileweb/developer/e5.htm (1 of 3)11/3/2005 1:12:36 AM

help.joomla :: Editor Mambots
* @param string The content of the field
* @param string The name of the form field
* @param string The width of the editor area
* @param string The height of the editor area
* @param int The number of columns for the editor area
* @param int The number of rows for the editor area
*/
function botNoEditorEditorArea( $name, $content, $hiddenField, $width, $height, $col, $row ) {
global $mosConfig_live_site, $_MAMBOTS;
$results = $_MAMBOTS->trigger( 'onCustomEditorButton' );
$buttons = array();
foreach ($results as $result) {
$buttons[] = '<img
src="'.$mosConfig_live_site.'/mambots/editors-xtd/'.$result[0].'"
onclick="insertAtCursor( document.adminForm.'.$hiddenField.',
''.$result[1].'' )" />';
}
$buttons = implode( "", $buttons );
return <<<EOD
<textarea
name="$hiddenField" id="$hiddenField" cols="$col" rows="$row"
style="width:$width;height:$height;">$content</textarea>
<br />$buttons
EOD;
}
The onInitEditor event is usually called in the head area of a template. Any javascript the editor needs should be placed here.
The onGetEditorContents event allows for the content of the editor to be copied back to the form field.
The onEditorArea displays the actual editor area.
Editor areas may take advantage of Mambots in the editors-xtd group using the onCustomEditorButton event. Mambots making use of this event must
return an array of two element, the first is the image to display and the second is the text to insert. The following code demonstrates the the Mambot to
include the text for a mosimage tag.
$_MAMBOTS->registerFunction( 'onCustomEditorButton', 'botMosImageButton' );
/**
* mosimage button
* @return array A two element array of ( imageName, textToInsert )
*/
function botMosImageButton() {
global $mosConfig_live_site;
file:///D|/My%20Documents/Joomla!/doc/fileweb/developer/e5.htm (2 of 3)11/3/2005 1:12:36 AM
help.joomla :: Editor Mambots
return array( 'mosimage.gif', '' );
}
Last Updated ( Thursday, 10 February 2005 )
Close Window
file:///D|/My%20Documents/Joomla!/doc/fileweb/developer/e5.htm (3 of 3)11/3/2005 1:12:36 AM

help.joomla :: Using Parameters within a Mambot
Using Parameters within a Mambot
Like with modules or menus it is possible to add parameters to the standard Mambot configuration. These parameters have to be extracted thru the
standard parameter handling.
For a detailed overview of the parameter definition within the Mambot XML file please see the section about parameters. To load the configured
parameters within the Mambot see the following example.
function botTinymceEditorInit() {
global $mosConfig_live_site, $database;
// load tinymce mambot parameters
$query = "SELECT id FROM #__mambots WHERE element = 'tinymce' AND folder = 'editors'";
$database->setQuery( $query );
$id = $database->loadResult();
$mambot = new mosMambot( $database );
$mambot->load( $id );
$mambotParams =& new mosParameters( $mambot->params );
$theme = $mambotParams->get( 'theme', 'basic' );
...
}
The configuration of the parameters will be done thru the Administrator interface.
Last Updated ( Thursday, 10 February 2005 )
Close Window
file:///D|/My%20Documents/Joomla!/doc/fileweb/developer/e6.htm11/3/2005 1:12:36 AM

help.joomla :: Extending Mambots
Extending Mambots
Mambots and Mambot groups can be used for a variety of purposes. For example, suppose you want to include an HTML
Templating system like patTemplate (www.php-tools.de) and load it in your custom components that use it. Here's a rough
outline of the steps that you would take to set this up.
1. Create a directory called "patTemplate" under the /mambots directory.
2. Unpack the patTemplate distribution file such that patTemplate.php is in the new directory you created. All the
patTemplate support files should be in 'another' patTemplate directory. Note that you will also need to include patError.
php and patErrorManager.php in this directory. The /mambots/patTemplate directory should now look something like
this:
/mambots
/patTemplate
patTemplate.php
patError.php
patErrorManager.php
/patTemplate (many files provided under this directory)
3. Create an XML setup file for the Mambot listing all the files under the /mambot/patTemplate directory. It might look
something like this:
<?xml version="1.0" encoding="iso-8859-1"?>
<mosinstall type="mambot" group="patTemplate" version="4.5.1">
<name>patTemplate</name>
<creationDate>01/09/2004</creationDate>
<version>3.0 Beta 1</version>
<author>Stephan Schmidt</author>
<license>http://www.gnu.org/copyleft/lgpl.html GNU/LGPL</license>
<authorEmail>[email protected]</authorEmail>
<authorUrl>www.php-tool.de</authorUrl>
<description>Powerful templating engine</description>
<files>
<filename>patError.php</filename>
<filename>patErrorManager.php</filename>
<filename>patTemplate/Dump/Html.php</filename>
<filename>patTemplate/Dump.php</filename>
<filename>patTemplate/Function/Time.php</filename>
file:///D|/My%20Documents/Joomla!/doc/fileweb/developer/e7.htm (1 of 3)11/3/2005 1:12:36 AM

help.joomla :: Extending Mambots
<filename>patTemplate/Function.php</filename>
<filename>patTemplate/InputFilter/StripComments.php</filename>
<filename>patTemplate/InputFilter.php</filename>
<filename>patTemplate/Modifier/HTML/Img.php</filename>
<filename>patTemplate/Modifier/Wordwrapper.php</filename>
<filename>patTemplate/Modifier.php</filename>
<filename>patTemplate/Module.php</filename>
<filename>patTemplate/OutputCache.php</filename>
<filename>patTemplate/OutputFilter/Gzip.php</filename>
<filename>patTemplate/OutputFilter/StripWhitespace.php</filename>
<filename>patTemplate/OutputFilter.php</filename>
<filename>patTemplate/Reader/File.php</filename>
<filename>patTemplate/Reader/IT.php</filename>
<filename>patTemplate/Reader/String.php</filename>
<filename>patTemplate/Reader.php</filename>
<filename>patTemplate/TemplateCache/File.php</filename>
<filename>patTemplate/TemplateCache.php</filename>
<filename mambot="patTemplate">patTemplate.php</filename>
<filename>patTemplate.xml</filename>
</files>
</mosinstall>
Notice that the file patTemplate.php is given the "mambot" attribute to signify that this is the file to be loaded by the
Mambot handler.
4. Zip up the contents of the /joomla/patTemplate directory and install the Mambot. You should see it listed in the Mambot
Manager.
5. To use this in your code, you would use something similar to the following:
global $_MAMBOTS;
if (!$_MAMBOTS->loadBotGroup( 'patTemplate' )) {
die( 'This component requires the patTemplate Plugin' );
}
$tmpl =& new patTemplate( 'html' );
There are obviously many other applications for this technique.
file:///D|/My%20Documents/Joomla!/doc/fileweb/developer/e7.htm (2 of 3)11/3/2005 1:12:36 AM

help.joomla :: Extending Mambots
Last Updated ( Thursday, 15 September 2005 )
Close Window
file:///D|/My%20Documents/Joomla!/doc/fileweb/developer/e7.htm (3 of 3)11/3/2005 1:12:36 AM

help.joomla :: Legacy Mambots - The Old Way
Legacy Mambots - The Old Way
This example is for writing Mambo 4.5.0 mambots. You can still write mambots in this style for Mambo 4.5.1 and later
providing they are saved in the /mambots directory. These mambots are loaded every time a content item is displayed. So,
for the frontpage component, the same file could be loaded five, ten or twenty times depending on the number of content
items displayed which is extremely inefficent. You are encouraged to look at upgrading your mambots to gain better
performance and flexibility. Additionally, you should upgrade as this method will be deprecated in future versions (after
Mambo 4.5.1 / Joomla 1.0).
For our development example, we'll imagine we are creating a Mambot to replace smile text with smile images.
The file for the mambot will be called mossmiles.php and it is saved in /mambots/mossmiles.php. It looks like this:
if (!defined( '_MOS_CONVERT_SMILES_MAMBOT' )) {
// only define the function once
function MAMBOT_convert_smiles( &$row ) {
$smiles_src = array(
':)',
':('
);
$prefix = '<img src="images/smiles/';
$suffix = ' height="12" width="12" alt="" />';
$smiles_img = array(
"{$prefix}happy.png{$suffix}",
"{$prefix}sad.png{$suffix}" )
);
$row->text = str_replace( $smiles_src, $smiles_img, $row->text );
}
define( '_MOS_CONVERT_SMILES_MAMBOT', 1 );
}
MAMBOT_convert_smiles( $row );
A number of things are set up for a mambot. The mossmiles.php has access to a number of variables:
$row
the current mosContent object. This is an object with all of the fields in the mos_content table.
$mosConfig_absolute_path
file:///D|/My%20Documents/Joomla!/doc/fileweb/developer/e8.htm (1 of 2)11/3/2005 1:12:36 AM
help.joomla :: Legacy Mambots - The Old Way
$mask
a variable holding masks for various display options
In addition, the $row object has a property called text that the mambot will operate on to make changes to the text.
Row is passed by address to the MAMBOT_convert_smiles function so that any changes to the object made within the
Mambot function are retained.
Because a mambot is called more than once during the code execution, you must ensure that the function is defined only
once. Hence, a constant is defined the first time the mambot is loaded. On subsequent load, the function definition is
ignored.
All modifications to the content text are made to the $row->text property variable.
Last Updated ( Wednesday, 14 September 2005 )
Close Window
file:///D|/My%20Documents/Joomla!/doc/fileweb/developer/e8.htm (2 of 2)11/3/2005 1:12:36 AM
help.joomla :: Chapter 5. Components
Chapter 5. Components
Overview
Components are the main functional units that display in your template, like the content management system, contact
forms, web links and the like.
This chapter serves to provide you with a number of useful examples that helps you learn how to create Components.
While we have gone to great lengths to make Joomla easy for content providers to use, we have equally spent a lot of time
developing a flexible framework for developers to extend the capabilities of Joomla without having to touch the core code.
Please note that line numbers shown in code examples may not be sequential.
Last Updated ( Friday, 24 December 2004 )
Close Window
file:///D|/My%20Documents/Joomla!/doc/fileweb/developer/f1.htm11/3/2005 1:12:37 AM
help.joomla :: Hello World 1 - The first steps
Hello World 1 - The first steps
Hello WorldIntroduction
If anyone has every picked up a book on programming, the first things they get you to do is complete a very simple
exercise to write "Hello World" on the screen. This is usually a very exhilarating experience when you complete it because
you know you are on the way to bigger and better things.
This tutorial aims to give you a grounding in the basic concepts for writing Joomla components. It will develop a very
simple Hello World administrator component using patTemplate for the presentation layer.
Requirements
You need for this tutorial:
● Joomla 1.0 or greater
Let's Roll
We will be creating three files in this tutorial in a folder called /administrator/components/com_hello. Our
component is called "hello" so the folder is given this name prefixed by "com_". Let's look at the files we need.
admin.hello.php
This file represents the main task handling file. The Joomla Administrator looks for this file, "admin.
component_name.php", when it first loads the component.
admin.hello.html.php
This file represents the preprocessor for final presentation. As for the previous file, this file needs to the named
"admin.component_name.html.php".
tmpl/helloworld.html
This file represents that presentation layer, or the output, that will be displayed. There is no special naming
convention for this file, although it is a good idea to have a name that closely relates to the task used to display it.
The Event Handler
Let's look at our first file, the task handler, admin.hello.php.
file:///D|/My%20Documents/Joomla!/doc/fileweb/developer/f2.htm (1 of 5)11/3/2005 1:12:37 AM
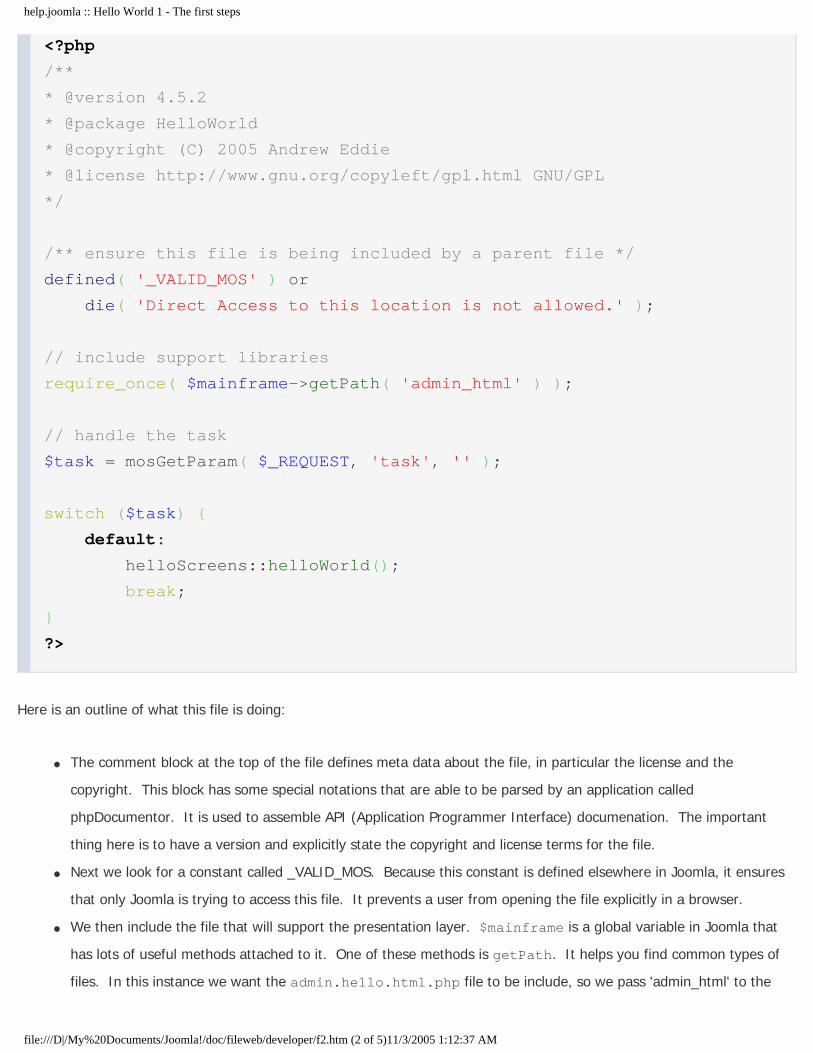
help.joomla :: Hello World 1 - The first steps
<?php
/**
* @version 4.5.2
* @package HelloWorld
* @copyright (C) 2005 Andrew Eddie
* @license http://www.gnu.org/copyleft/gpl.html GNU/GPL
*/
/** ensure this file is being included by a parent file */
defined( '_VALID_MOS' ) or
die( 'Direct Access to this location is not allowed.' );
// include support libraries
require_once( $mainframe->getPath( 'admin_html' ) );
// handle the task
$task = mosGetParam( $_REQUEST, 'task', '' );
switch ($task) {
default:
helloScreens::helloWorld();
break;
}
?>
Here is an outline of what this file is doing:
● The comment block at the top of the file defines meta data about the file, in particular the license and the
copyright. This block has some special notations that are able to be parsed by an application called
phpDocumentor. It is used to assemble API (Application Programmer Interface) documenation. The important
thing here is to have a version and explicitly state the copyright and license terms for the file.
● Next we look for a constant called _VALID_MOS. Because this constant is defined elsewhere in Joomla, it ensures
that only Joomla is trying to access this file. It prevents a user from opening the file explicitly in a browser.
● We then include the file that will support the presentation layer. $mainframe is a global variable in Joomla that
has lots of useful methods attached to it. One of these methods is getPath. It helps you find common types of
files. In this instance we want the admin.hello.html.php file to be include, so we pass 'admin_html' to the
file:///D|/My%20Documents/Joomla!/doc/fileweb/developer/f2.htm (2 of 5)11/3/2005 1:12:37 AM

help.joomla :: Hello World 1 - The first steps
getPath method.
● Next we determine what task has been passed through the URL. To do this we use a utility function in Joomla
called mosGetParam. It takes three arguments, a source array, a key in the array to search for and a default
value to assign if that key is not found. In most instances we are not sure if the task is going to come through the
URL or a form post, so we use $_REQUEST as the source array.
● We then pass the task to a switch control structure. We only have one thing to do in this example so it doesn't
much matter if a task has been nominated or not. Whatever the case, we are going to call a static class method
called helloScreens::helloWorld.
Preparing for Output
The helloScreens class is defined in admin.hello.html.php so let's look at that file now:
<?php
/**
* @version 4.5.2
* @package HelloWorld
* @copyright (C) 2005 Andrew Eddie
* @license http://www.gnu.org/copyleft/gpl.html GNU/GPL
*/
/** ensure this file is being included by a parent file */
defined( '_VALID_MOS' ) or
die( 'Direct Access to this location is not allowed.' );
/**
* @package HelloWorld
*/
class helloScreens {
/**
* Static method to create the template object
* @return patTemplate
*/
function &createTemplate() {
global $option, $mosConfig_absolute_path;
require_once( $mosConfig_absolute_path
file:///D|/My%20Documents/Joomla!/doc/fileweb/developer/f2.htm (3 of 5)11/3/2005 1:12:37 AM

help.joomla :: Hello World 1 - The first steps
. '/includes/patTemplate/patTemplate.php' );
$tmpl =& patFactory::createTemplate( $option, true, false );
$tmpl->setRoot( dirname( __FILE__ ) . '/tmpl' );
return $tmpl;
}
/**
* A simple message
*/
function helloWorld() {
// import the body of the page
$tmpl =& helloScreens::createTemplate();
$tmpl->setAttribute( 'body', 'src', 'helloworld.html' );
$tmpl->displayParsedTemplate( 'form' );
}
}
?>
As you can see, the start of the file is the same as our previous file. It includes a single class called helloScreens. The
first method of the class, createTemplate, is a standard format for creating the template object we will be using to
generate output. This method includes the required patTemplate library file, creates a patTemplate object and then
sets the root directory for template (html) files to the /tmpl directory in your component.
Now, there is a lot going on behind the scenes here. The template object has already loaded and parsed another template
file called page.html which includes many standard wrappers and other things. One of the standard templates is called
form and this one will help us with our display for our component.
The next method is helloWorld and you will recall invoking this method in the admin.hello.php file. After it creates the
template object it sets an attribute in the preloaded template called form that I mentioned before. In the form template
is a sub-template called body. This sub-template is where we graft in the output from our component. You don't have to
understand how all this is happening yet. Just appreciate that the setAttribute method is telling the template object to
set the source of the body template to your html file, helloworld.html.
The last thing to do is to display the "form" template.
file:///D|/My%20Documents/Joomla!/doc/fileweb/developer/f2.htm (4 of 5)11/3/2005 1:12:37 AM

help.joomla :: Hello World 1 - The first steps
The HTML Output File
So now let's look at that html file:
<mos:comment>
@version 4.5.2
@package HelloWorld
@copyright (C) 2005 Andrew Eddie
@license http://www.gnu.org/copyleft/gpl.html GNU/GPL
</mos:comment>
<h1>Hello World<h1>
There's not really much to this file at all. We have a comment block at the top similar to our php files above. In
patTemplate, text enclosed in an xml comment tag is not displayed. The mos: is called the namespace and it distinguishes
the xml tags for patTemplate from any other html or xml tags that may be in your html file.
After the comment block we can include any valid html we like.
That's all the preparation done. Save all these files, log into the Joomla Adminisrator and change the last portion of the
URL to:
index2.php?option=com_hello
You should see a message announcing your successful completion of this tutorial.
You can download the files for the tutorial here (helloworld_1.zip).
Last Updated ( Tuesday, 27 September 2005 )
Close Window
file:///D|/My%20Documents/Joomla!/doc/fileweb/developer/f2.htm (5 of 5)11/3/2005 1:12:37 AM

help.joomla :: Hello World 2 - Getting personal
Hello World 2 - Getting personal
Hello WorldIntroduction
In our first tutorial we created a very simple component that just displayed information. In this tutorial we will show you how to add
a toolbar, create a help file and also pass some dynamic data to your html file using patTemplate.
Requirements
You need for this tutorial:
● Joomla 1.0 or greater
● The files from the Hello World 1 tutorial
Let's Roll
We will be creating four new files in this tutorial:
toolbar.hello.php
This file represents the task handler for the toolbar (like the task handler for the component). The Joomla Administrator
looks for this file, "toolbar.component_name.php", when it first loads the component.
toolbar.hello.html.php
This file actually displays the toolbar for a given task. As for the previous file, this file needs to the named "toolbar.
component_name.html.php".
tmpl/politehello.html
The is the html file for a new task that we will be adding.
help/helloworld.html
This is a plain html file with some sort of helpful message in it.
The Toolbar Event Handler
The toolbar task handler, toolbar.hello.php, is very similar in structure to the event handler of the component:
<?php
/**
* @version $Id: toolbar.languages.php,v 1.4 2005/01/06 01:13:18 eddieajau Exp $
* @package Joomla
* @subpackage Languages
* @copyright Copyright (C) 2005 Open Source Matters. All rights reserved.
file:///D|/My%20Documents/Joomla!/doc/fileweb/developer/f3.htm (1 of 7)11/3/2005 1:12:39 AM

help.joomla :: Hello World 2 - Getting personal
* @license http://www.gnu.org/copyleft/gpl.html GNU/GPL, see LICENSE.php
* Joomla! is free software and parts of it may contain or be derived from the
* GNU General Public License or other free or open source software licenses.
* See COPYRIGHT.php for copyright notices and details.
*/
/** ensure this file is being included by a parent file */
defined( '_VALID_MOS' ) or
die( 'Direct Access to this location is not allowed.' );
// include support libraries
require_once( $mainframe->getPath( 'toolbar_html' ) );
// handle the task
$task = mosGetParam( $_REQUEST, 'task', '' );
switch ($task) {
default:
helloToolbar::helloWorld();
break;
}
?>
From this you can deduce that "toolbar_html" includes the html support for the toolbar which is based on the helloToolbar class. At
the moment we will have the same toolbar regardless of the task.
The Toolbar HTML Handler
The file, toolbar.hello.html.php, actually does the work of displaying the toolbar:
<?php
/**
* @version 1.0
* @package HelloWorld
* @copyright Copyright (C) 2005 Open Source Matters. All rights reserved.
* @license http://www.gnu.org/copyleft/gpl.html GNU/GPL, see LICENSE.php
* Joomla! is free software and parts of it may contain or be derived from the
* GNU General Public License or other free or open source software licenses.
* See COPYRIGHT.php for copyright notices and details.
file:///D|/My%20Documents/Joomla!/doc/fileweb/developer/f3.htm (2 of 7)11/3/2005 1:12:39 AM

help.joomla :: Hello World 2 - Getting personal
*/
/** ensure this file is being included by a parent file */
defined( '_VALID_MOS' ) or
die( 'Direct Access to this location is not allowed.' );
/**
* @package HelloWorld
*/
class helloToolbar {
/**
* Displays toolbar
*/
function helloWorld(){
mosMenuBar::startTable();
mosMenuBar::apply( 'polite', 'Be Polite' );
mosMenuBar::spacer();
mosMenuBar::help( 'helloworld.html', true );
mosMenuBar::endTable();
}
}
?>
As for component task, we define a method in the toolbar class for each different toolbar layout we want to provide. So, in this
exampe, we have our helloWorld method to display the toolbar. It is made up of a number of static methods in the mosMenuBar
class (found in /adminsitator/includes/menubar.html.php).
You must start the toolbar by using the startTable method and finish it with the endTable method. What we have done is to
use the standard Apply button but redefine the task it will call, "polite", and the text that displays beside it, "Be Polite". We then add
a spacer and then a help button. When you click on the help button it will load the helloworld.html file; we will create this later. The
second true argument indicates that the help file is found the component's help directory.
Adding the New Event
Using your code from Hello World 1, add the following case statement to the switch block in admin.hello.php:
case 'polite':
politeHello();
break;
file:///D|/My%20Documents/Joomla!/doc/fileweb/developer/f3.htm (3 of 7)11/3/2005 1:12:39 AM

help.joomla :: Hello World 2 - Getting personal
Then add the following function to the end of the file:
/**
* Polite hello event
*/
function politeHello() {
global $my;
helloScreens::politeHello( $my->username );
}
You can see that we must have set up a new screen method called politeHello. This method takes the name of the user to insert
into the final display. We are making use of a global Joomla variable called $my. This is an object that has information about you,
the user logged in at the time. It has a property called username.
You may ask why we pass the name to the screen function? Why can't we just grab it there? Well, the reason is that this way, we
are separating all of the data assembly operations from the presentation layer. The purpose of the helloScreens class is merely to
insert the data into the html template. Similarly, the component , this politeHello function is not allowed to output any
information or even add any html to the data, that's all to be done by the presentation layer. The principal here is to keep your
business logic out of the html, and your html out of the business logic.
Preparing the Template
Using your code from Hello World 1, add this new method to the helloScreens class in admin.hello.html.php:
/**
* A polite hello
* @param string The name of a person
*/
function politeHello( $name ) {
// import the body of the page
$tmpl =& helloScreens::createTemplate();
$tmpl->setAttribute( 'body', 'src', 'politehello.html' );
$tmpl->addVar( 'body', 'name', $name );
$tmpl->displayParsedTemplate( 'form' );
}
file:///D|/My%20Documents/Joomla!/doc/fileweb/developer/f3.htm (4 of 7)11/3/2005 1:12:39 AM
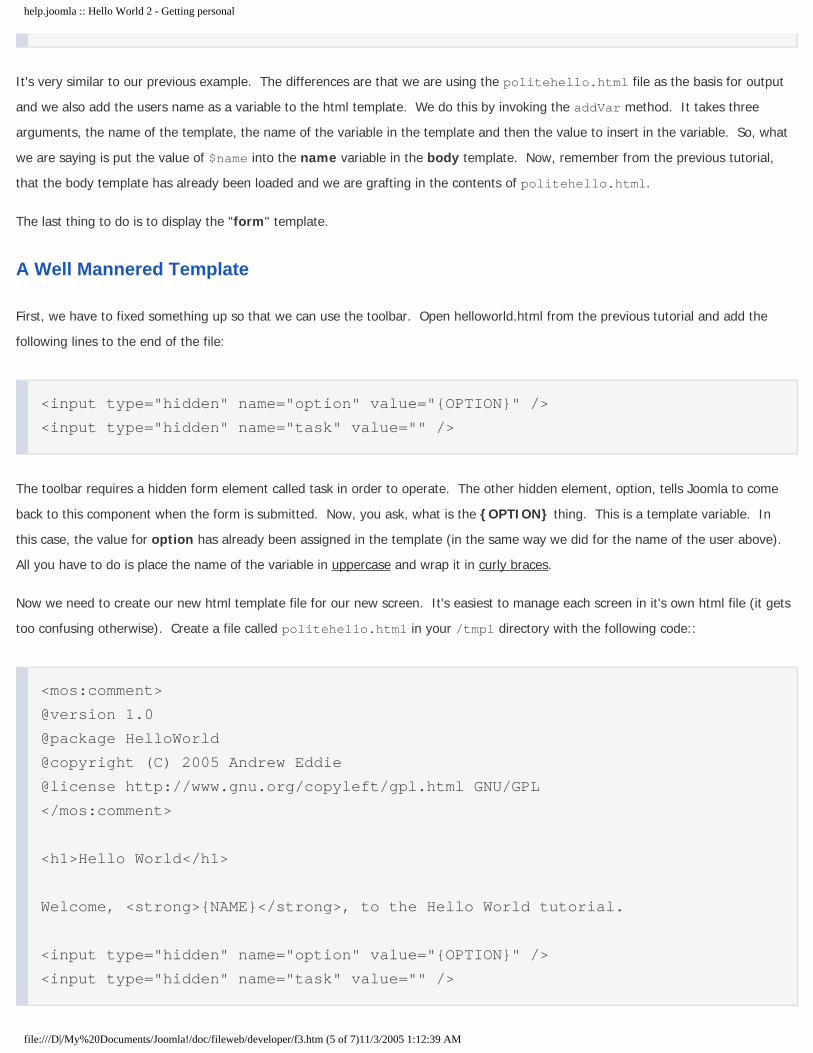
help.joomla :: Hello World 2 - Getting personal
It's very similar to our previous example. The differences are that we are using the politehello.html file as the basis for output
and we also add the users name as a variable to the html template. We do this by invoking the addVar method. It takes three
arguments, the name of the template, the name of the variable in the template and then the value to insert in the variable. So, what
we are saying is put the value of $name into the name variable in the body template. Now, remember from the previous tutorial,
that the body template has already been loaded and we are grafting in the contents of politehello.html.
The last thing to do is to display the "form" template.
A Well Mannered Template
First, we have to fixed something up so that we can use the toolbar. Open helloworld.html from the previous tutorial and add the
following lines to the end of the file:
<input type="hidden" name="option" value="{OPTION}" />
<input type="hidden" name="task" value="" />
The toolbar requires a hidden form element called task in order to operate. The other hidden element, option, tells Joomla to come
back to this component when the form is submitted. Now, you ask, what is the {OPTION} thing. This is a template variable. In
this case, the value for option has already been assigned in the template (in the same way we did for the name of the user above).
All you have to do is place the name of the variable in uppercase and wrap it in curly braces.
Now we need to create our new html template file for our new screen. It's easiest to manage each screen in it's own html file (it gets
too confusing otherwise). Create a file called politehello.html in your /tmpl directory with the following code::
<mos:comment>
@version 1.0
@package HelloWorld
@copyright (C) 2005 Andrew Eddie
@license http://www.gnu.org/copyleft/gpl.html GNU/GPL
</mos:comment>
<h1>Hello World</h1>
Welcome, <strong>{NAME}</strong>, to the Hello World tutorial.
<input type="hidden" name="option" value="{OPTION}" />
<input type="hidden" name="task" value="" />
file:///D|/My%20Documents/Joomla!/doc/fileweb/developer/f3.htm (5 of 7)11/3/2005 1:12:39 AM

help.joomla :: Hello World 2 - Getting personal
You'll see that that we have a similar layout to what we had before except that we have place {NAME} where we want the name to
be displayed. We finish off the file with the hidden form fields to ensure that the toolbar works properly.
A Bit More Help
There's on last thing to do, and that's to create the screen help file. Create a file called politehello.html and place it in a new
directory called /help under your component directory (that is, com_hello). Insert the following code:
<!DOCTYPE html PUBLIC "-//W3C//DTD XHTML 1.0 Transitional//EN"
"http://www.w3.org/TR/xhtml1/DTD/xhtml1-transitional.dtd">
<html xmlns="http://www.w3.org/1999/xhtml" lang="en_US" xml:lang="en_US">
<head>
<title>Hello World</title>
<link href="../../../../help/css/help.css" rel="stylesheet" type="text/css" />
<meta name="copyright" content="(C) 2005 Andrew Eddie" />
<meta name="license" content="http://www.gnu.org/copyleft/gpl.html GNU/GPL" />
</head>
<body>
<h1>Hello World</h1>
Congratulations on completing the <strong>Hello World</strong> tutorials.
</body>
</html>
There's nothing special about this file, it's just regular html.
That's it. We're done. Save all these files, log into the Joomla Administrator and change the last portion of the URL to:
index2.php?option=com_hello
You will see the plain old hello message but also the new toolbar. Click on the Help button first. You new help file should pop up
and give you some meaningful message to inspire you. Next, click on the Be Polite button. Your screen should update with a
message politely acknowledging you by name (well, user login name anyway).
You can download the files for the tutorial here (helloworld_2.zip).
Last Updated ( Tuesday, 27 September 2005 )
file:///D|/My%20Documents/Joomla!/doc/fileweb/developer/f3.htm (6 of 7)11/3/2005 1:12:39 AM

help.joomla :: Hello World 2 - Getting personal
Close Window
file:///D|/My%20Documents/Joomla!/doc/fileweb/developer/f3.htm (7 of 7)11/3/2005 1:12:39 AM
help.joomla :: Chapter 6. Language Support
Chapter 6. Language Support
Overview
The core language support is focused on the static text which is used for the different presentation outputs. Most of the text which you see in the frontend
presentation of your web site is defined within the language files and can be changed easily by adding new languages within the language manager (see
administrator guide). The language support of Joomla is based on the requirement to have a web site in one certain language. With that requirement the feature
enables you to control the following elements of the language presentation:
● Definition of language for static text elements in the frontend
● Definition of locale settings for output of dates, currencies
● Definition of ISO character sets for the HTML header meta tags
The feature to provide a multilingual web site will be supported by Joomla core in a future release (see roadmap). At the moment the support for
multilingual web sites is provided by a third party component Mamblefish.
Installation and global configuration of languages
The language file support is based on the language files stored in the /language directory. The management of these files can be done thru the language
manager within the administration or by copying the content of the language packages (language file and XML declaration for the language) into the /
language directory.
Each Joomla web site must have one active language (default). To change this language, you have to install a second language and either publish this
language within the language manager or activate it in the global configuration. Both actions require administrator rights within your administration and a
writeable configuration.php file.
For further details of installing a language please see the administrator documentation.
Creation of language files
To create your own language file it is necessary that you use the exact contents of the default language file and translate the contents of the define
statements.
Files within a language package
The following files are used within a language package. These files must be provided for each language in order to install reliably within the language
manager.
Table 6-1. Files within the language package
language_name.php
Basic file core manager.
language_name.ignore.php
Definitions of search words that will be ignored for this language.
language_name.xml
Language configuration file. This file contains all information about the language handling and which filenames to be used within the package. In
order to provide installation support thru the administrator this file must be contained in the language package.
Manipulating the static text
The following code is an extract from the english.php language file. In order to present the static text of your site in a different language, you have to
translate the English text. Everything else in the file (especially the define names) must stay the same.
file:///D|/My%20Documents/Joomla!/doc/fileweb/developer/g.htm (1 of 3)11/3/2005 1:12:40 AM

help.joomla :: Chapter 6. Language Support
<?php
/**
* @version $Id: languages.xml,v1.5 2004/09/14 22:33:07 eddieajau Exp $
* @package Joomla
* @copyright Copyright (C) 2005 Open Source Matters. All rights reserved.
* @license http://www.gnu.org/copyleft/gpl.html GNU/GPL, see LICENSE.php
* Joomla! is free software and parts of it may contain or be derived from the
* GNU General Public License or other free or open source software licenses.
* See COPYRIGHT.php for copyright notices and details.
*/
/** ensure this file is being included by a parent file */
defined( '_VALID_MOS' ) or die( 'Direct Access to this location is not allowed.' );
/** common */
DEFINE("_NOT_AUTH","You are not authorized to view this resource.");
DEFINE("_DO_LOGIN","You need to login.");
DEFINE('_VALID_AZ09',"Please enter a valid %s. No spaces, more than %d characters and
contain 0-9,a-z,A-Z");
DEFINE('_CMN_YES',"Yes");
DEFINE('_CMN_NO',"No");
DEFINE('_CMN_SHOW',"Show");
DEFINE('_CMN_HIDE',"Hide");
The translated version (here into German) would look like:
<?php
// $Id: languages.xml,v 1.5 2004/09/14 22:33:07 eddieajau Exp $
/**
* Content code
* @version $Revision: 1.5 $
* @package Joomla
* @copyright Copyright (C) 2005 Open Source Matters. All rights reserved.
* @license http://www.gnu.org/copyleft/gpl.html GNU/GPL, see LICENSE.php
* Joomla! is free software and parts of it may contain or be derived from the
* GNU General Public License or other free or open source software licenses.
* See COPYRIGHT.php for copyright notices and details.
*/
defined( '_VALID_MOS' ) or die( 'Direkter Zugriff zu diesem Bereich ist nicht erlaubt.' );
// common
DEFINE("_NOT_AUTH","Du bist nicht berechtigt, diesen Bereich zu sehen.");
DEFINE("_DO_LOGIN","Du musst dich anmelden.");
DEFINE('_VALID_AZ09',"%s ist nicht zul&auml;ssig. Bitte keine Leerzeichen,
mindestens %d Stellen, 0-9,a-z,A-Z sollte enthalten sein.");
DEFINE('_CMN_YES',"Ja");
DEFINE('_CMN_NO',"Nein");
file:///D|/My%20Documents/Joomla!/doc/fileweb/developer/g.htm (2 of 3)11/3/2005 1:12:40 AM

help.joomla :: Chapter 6. Language Support
DEFINE('_CMN_NAME',"Name");
DEFINE('_CMN_DESCRIPTION',"Beschreibung");
DEFINE('_CMN_SAVE',"Speichern");
● Language configuration XML
The configuration XML file is needed for the installation and basic language settings. In the future this XML file will get more importance because it will
contain language related information such as the usual charsets and ISO code references for the language. So please be sure to provide this XML file in
any language package you distribute.
<xml version="1.0" encoding="iso-8859-1">
<mosinstall type="language">
<name>English</name>
<version>1.14</version>
<creationDate>07/07/2004</creationDate>
<author>Joomla Project</author>
<authorEmail>[email protected]</authorEmail>
<files>
<filename>english.php</filename>
<filename>english.xml</filename>
</files>
</mosinstall>
This XML file covers the standard installer tags and attributes.
Usage of language files
When you write your own Joomla component (or, more generally, Joomla element) and have defined your own language file, you only need one line in
your program to activate the chosen language:
include_once('language/'.$mosConfig_lang.'.php');
This will load the defined text as PHP constants which you have used all over your program.
Last Updated ( Thursday, 15 September 2005 )
Close Window
file:///D|/My%20Documents/Joomla!/doc/fileweb/developer/g.htm (3 of 3)11/3/2005 1:12:40 AM

help.joomla :: Chapter 7. Packaging Custom Work
Chapter 7. Packaging Custom Work
Overview
Joomla comes with an easy-to-use installer for Modules, Mambots, Components and Templates. Using the installer, the site administrator can add
features and templates by uploading one zipped file. This topic describes how to create the Mambot, Module, Component and Template setup files
that are used by the installer.
The XML Setup File
All installations using the installer require a text file marked up in XML. The XML file describes the installation, its authors, and the files to be
installed. Only a passing familiarity with XML is required. Each XML file begins with the prologue, <?xml version="1.0" encoding="iso-8859-1" ?>.
Thereafter, several nested sections appear, all of which are nested in the root, <mosinstall>. The <mosinstall> element has at least two attributes:
"type" is the type of Joomla element you are installing and "version" is the version of Joomla that the element is written for. A third attribute called
"client" is used for some Administrator elements.
<?xml version="1.0" encoding="iso-8859-1" ?>
<mosinstall type="installtype" version="4.5.1">
. . .
</mosinstall>
XML elements that are common to all types of installation are listed below.
<name>
The name element is required. It is used in menus, etc.
<creationDate>
The creation date for the XML file or component. There is no specifically defined format for this date; it is just a string.
<author>
The author of the Component, Module, Template or Mambot.
<copyright>
Copyright information.
<license>
The license under which the element is being released.
<authorEmail>
The email address of the author.
<authorUrl>
The author's URL.
<version>
The version of the package.
<description>
A brief description of the Component, Module, Template or Mambot.
<files>
Optional, but if you don't have it, no files will be installed. The <files> section is used to tell the installer which files it should install. There is
no limit to the number of <filename> elements you can have in this section. Depending on the the installation type, files are copied to /
file:///D|/My%20Documents/Joomla!/doc/fileweb/developer/h.htm (1 of 8)11/3/2005 1:12:41 AM

help.joomla :: Chapter 7. Packaging Custom Work
modules, /components/[component_name] or /templates/[template_name].
Parameters
Module and Component setup files may also have a block defining parameters, for example:
<params>
<param name="count" type="text" default="5" label="Number of items"
description="The number of items to show" />
</params>
Refer to the appendix on parameters for more information.
XML Do's and Don'ts
All XML files must be well-formed without exception. The XML parser used by Mambo will not parse malformed XML documents. While there are
numerous rules as to what makes a well-formed XML document, here is a list of the major checkpoints:
1. Your XML file must not have any whitespace or characters in front of the XML declaration. For example, this is legal if it shows the start of a
file:
<?xml version="1.0" encoding="iso-8859-1"?>
This is not legal:
<?xml version="1.0" encoding="iso-8859-1"?>
Nor is this:
bad<?xml version="1.0" encoding="iso-8859-1"?>
2. You must match every starting element with the same ending element. Note that element names are case sensitive. in XML. For example:
<LeGaL>This is ok</LeGaL>
<illegal>This is not</ILLEGAL>
3. You may nest element tags but they may not overlap. For example, the following is malformed:
<name>Main <author>Harry</name></author>
file:///D|/My%20Documents/Joomla!/doc/fileweb/developer/h.htm (2 of 8)11/3/2005 1:12:41 AM
help.joomla :: Chapter 7. Packaging Custom Work
4. There can only be exactly one root element. For example, the following is a malformed document because there are two root elements:
<?xml version="1.0" encoding="iso-8859-1"?>
<mosinstall type="module">
<!-- the XML definition -->
</mosinstall>
<mosinstall type="component">
<!-- the XML definition -->
</mosinstall>
5. All attributes in a tag must be quoted. For example, the following is malformed because of the missing quotes, as you might often see in
HTML documents (where it might be tolerated):
<mosinstall type=module>
6. You may not have more than one tag attribute with the same name. For example, the following is malformed:
<mosinstall type="module" type="component">
7. You must escape all < and & signs that occur within the character data or attributes of a tag. For example:
<menu link="option=com_foo&amp;task=bar">Sub &lt; menu 1</menu>
8. To use HTML markup in the character data of a tag, you must enclose the text in a CDATA section. For example, the following example
allows for the © markup to be placed in the copyright tag:
<?xml version="1.0" encoding="iso-8859-1"?>
<mosinstall type="template">
<name>How flung</name>
<copyright><![CDATA[&copy; 2004 Me]]></copyright>
There are a number of tools you can use to check that your XML is well-formed. One method is to open the XML file in a modern browser. If it is
well-formed you will likely see a rendering like this (but longer):
- <mosinstall type="template">
<name>How flung</name>
file:///D|/My%20Documents/Joomla!/doc/fileweb/developer/h.htm (3 of 8)11/3/2005 1:12:41 AM

help.joomla :: Chapter 7. Packaging Custom Work
<mosinstall>
A malformed XML file may look like this:
XML Parsing Error: mismatched tag. Expected </name>.
Location: file:///C:/My%20Documents/test.xml
Line Number 4, Column 3:
</mosinstall>
--^
A Mambot Setup File
The XML for a Mambot installation could look like this:
<?xml version="1.0" encoding="iso-8859-1"?>
<mosinstall type="mambot" group="content" version="1.0">
<name>Smilies converter</name>
<creationDate>15/09/2005</creationDate>
<author>Joomla</author>
<copyright>(C) 2005 Open Source Matters. All rights reserved.</copyright>
<license>http://www.gnu.org/copyleft/gpl.html GNU/GPL</license>
<authorEmail>[email protected]</authorEmail>
<authorUrl>help.joomla.org</authorUrl>
<description>Converts text smilies into graphic images.</description>
<version>1.1</version>
<files>
<filename mambot="smilies.bot">smilies.bot.php</filename>
</files>
</mosinstall>
The <mosinstall> element has an additional attribute called "group". This attribute places the Mambot in a sub-directory named "content".
There needs to be ONE and only one <filename> that has a "mambot" attribute. This attribute indicates the file that is called when the Mambot is
loaded. The value of the attribute should be the name of the file less the ".php" extension.
There are two special (or reserved) groups in Joomla:
● content: The Mambots in this group perform operations on displayed content.
● search: The Mambots in this group provide for components to plug in the results to search engine.
A Mambot may optionally have parameters associated with it. If parameters are supported by the Mambot then exactly one <params> element
should be included containing one <param> sub-element for each parameter to be defined. Once the Mambot is installed parameters will be
file:///D|/My%20Documents/Joomla!/doc/fileweb/developer/h.htm (4 of 8)11/3/2005 1:12:41 AM

help.joomla :: Chapter 7. Packaging Custom Work
displayed and values may be entered in the Administrator Mambot Edit form. If no <params> element is defined (and if this is the case then no
<param> elements must be included either) then a simple text box will be provided in the Administrator Mambot Edit form.
A Module Setup File
The XML for a Module installation could look like this:
<?xml version="1.0" encoding="iso-8859-1"?>
<mosinstall type="module" version="1.0">
<name>A Sample Joomla Module</name>
<author>Joomla</author>
<creationDate>15/09/2005</creationDate>
<copyright>(C) 2005 Open Source Matters. All rights reserved.</copyright>
<license>http://www.gnu.org/copyleft/gpl.html GNU/GPL</license>
<authorEmail>[email protected]</authorEmail>
<authorUrl>help.joomla.org</authorUrl>
<description>It displays a menu.</description>
<version>1.1</version>
<files>
<filename module="mod_mainmenu">mod_mainmenu.php</filename>
</files>
<params>
<param name="menutype" type="text" default="" label="Menu Type"
description="The name of the menu (default mainmenu)" />
<param name="class_sfx" type="text" default="" label="Class Suffix"
description="A suffix to be applied to the CSS class" />
<param name="menu_style" type="list" default="vert_indent" label="Menu Style"
description="The menu style">
<option value="vert_indent">Vertical</option>
<option value="horiz_flat">Horizontal</option>
</param>
</params>
</mosinstall>
There needs to be ONE and only one <filename> that has a "module" attribute. This attribute is used as a system variable.
A Joomla Module may optionally have parameters associated with it. If parameters are supported by the Module then exactly one <params>
element should be included containing one <param> sub-element for each parameter to be defined. Once the Module is installed parameters will
be displayed and values may be entered in the Administrator Module Edit form. If no <params> element is defined (and if this is the case then no
<param> elements must be included either) then a simple text box will be provided in the Administrator Module Edit form.
For Administrator Modules you must include a "client" attribute in the <mosinstall> element, for example:
<mosinstall type="module" client="administrator">
file:///D|/My%20Documents/Joomla!/doc/fileweb/developer/h.htm (5 of 8)11/3/2005 1:12:41 AM

help.joomla :: Chapter 7. Packaging Custom Work
A Component Setup File
A Component differs from a Module in that it's more complex and can have extra features to maintain data.
The XML for a Component installation could look like this:
<?xml version="1.0" ?>
<mosinstall type="component" version="1.0">
<name>My Joomla component</name>
<creationDate>15/09/2005</creationDate>
<author>Joomla</author>
<copyright>(C) 2005 Open Source Matters. All rights reserved.</copyright>
<license>http://www.gnu.org/copyleft/gpl.html GNU/GPL</license>
<authorEmail>[email protected]</authorEmail>
<authorUrl>help.joomla.org</authorUrl>
<version>1.1</version>
<description>This is a brief description of the component</description>
<files>
<filename>mycomponent.php</filename>
<filename>mycomponent.html.php</filename>
<filename>images/approve.png</filename>
</files>
<install>
<queries>
<query id="1"># create a table</query>
<query id="2"># populate new table</query>
</queries>
</install>
<uninstall>
<queries>
<query id="1"># delete the table</query>
</queries>
</uninstall>
<installfile>install.mycomponent.php</installfile>
<uninstallfile>uninstall.mycomponent.php</uninstallfile>
<administration>
<menu>My component</menu>
<submenu>
<menu act="sub1">Sub menu 1</menu>
<menu act="sub2">Sub menu 2</menu>
</submenu>
<files>
<filename>admin.mycomponent.php</filename>
<filename>admin.mycomponent.html.php</filename>
file:///D|/My%20Documents/Joomla!/doc/fileweb/developer/h.htm (6 of 8)11/3/2005 1:12:41 AM

help.joomla :: Chapter 7. Packaging Custom Work
<filename>toolbar.mycomponent.php</filename>
<filename>toolbar.mycomponent.html.php</filename>
</files>
<images>
<filename>administrator/images/approve.png</filename>
</images>
</administration>
</mosinstall>
As you can see it has more sections; the sections that differ from the common ones are described below.
There is no limit to the number of <filename> entries and they may refer to sub-directories which will be created by the installer.
As the nature of a Component gets more complex you can use the <install> section to specify creation of tables and the insertion of default data. In
the <install> section you can have <queries>. <queries> is where you can have all the SQL statements that your Component requires e.g. creation
of new tables and adding data to these new tables. There is no limit to the number of <query> sections. Each query must have an id field so that it
can be uniquely identified.
If you have HTML in any of your queries you need to add <![CDATA[ in front and ]]> at the end. For example:
<query><![CDATA[ INSERT INTO #__mytable VALUES
(1, '<P>HTML tags in queries</P><br><a href="http://www.mysite.com">My Site</a>');]]>
</query>
The <installfile> element is used to specify an additional file where you can add code that will be called at the end of the installation. The file MUST
have a com_install() function in order to work. In the com_install() function you can have additional functionality to make the Component work. The
com_install() function must return a string with a status, which will be displayed to the user at the end of the installation.
The <uninstallfile> element is used to specify an additional file where you can add code that will be called at the end of the uninstallation. The file
MUST have a com_uninstall() function in order to work. In the com_uninstall() function you can have additional functionality to do any cleaning up.
The com_uninstall() function must return a string with a status, which wil be displayed to the user at the end of the uninstall.
The <administrator> section is used to add functionality to the Administrator part of Joomla. The <menu> section is used to specify the name of
the menu for maintaining the Component, it will appear under the Components menu. If your Component needs it, you can have sub menus; use
the <submenu> section to add sub menus. The <menu> section of a sub menu has an additional "act" attribute, which is passed to your
component. The "act" attribute is required for sub menus and can be retrieved using the mosGetParam function.
The <administrator> section also has <files> and <images> elements. These work the same way as described before, with the difference that files
are copied to /administrator/components/[component_name]/ and images to /administrator/components/[component_name]/images/.
A Template Setup File
The XML for a Template installation could look like this:
<?xml version="1.0" encoding="iso-88459-1"?>
<mosinstall type="template" version="1.0">
<name>My Joomla template</name>
file:///D|/My%20Documents/Joomla!/doc/fileweb/developer/h.htm (7 of 8)11/3/2005 1:12:41 AM

help.joomla :: Chapter 7. Packaging Custom Work
<creationDate>15/09/2005</creationDate>
<author>Joomla</author>
<copyright>(C) 2005 Open Source Matters. All rights reserved.</copyright>
<license>http://www.gnu.org/copyleft/gpl.html GNU/GPL</license>
<authorEmail>[email protected]</authorEmail>
<authorUrl>help.joomla.org</authorUrl>
<version>1.1</version>
<description>This is a brief description of the template</description>
<files>
<filename>index.php</filename>
<filename>template_thumbnail.png</filename>
<filename>css/template_css.css</filename>
<filename>images/arrow.png</filename>
<filename>images/mt_business_back.png</filename>
<filename>images/mt_business_bottom.png</filename>
<filename>images/mt_business_top.png</filename>
<filename>images/mt_menu_back.jpg</filename>
</files>
<media>
<filename>self-portrait.jpg</filename>
<filename>fruit/melon.gif</filename>
</media>
</mosinstall>
Files are copied to /templates/[template_name]/ including any relative path except for those files in the <media> element. Files under <media> will
be installed in the /images/stories directory.
For Administrator Templates you must include a "client" attribute in the element, for example:
<mosinstall type="template" client="administrator">
Last Updated ( Thursday, 15 September 2005 )
Close Window
file:///D|/My%20Documents/Joomla!/doc/fileweb/developer/h.htm (8 of 8)11/3/2005 1:12:41 AM

help.joomla :: Chapter 8. Access Control
Chapter 8. Access Control
Chapter 8. Access Control
Overview
Joomla is implementing a powerful access control library that will enable both fine and course grained access control
hierarchies to be devised to suit the needs of you site.
phpGACL
The access control system uses a library called PHPgacl. For more information on the technical points of this library, refer
to the site's home page at phpgacl.sf.net.
The library has been slightly modified to use the database abstraction layer used in Joomla as opposed to the ADODB
library. Some additional functions have also been implemented. However, the format of the files has been honoured as
much as possible so that side-by-side comparisons of the modified Joomla files can be made with any future versions of the
PHPgacl library.
The schema has been slightly modified so that primary keys are more descriptive (for example, id become aro_id in the
mos_core_acl_aro table).
The PHPgacl has a good tutorial to help you work through the troubles of creating a robust ACL system. We won't
regurgitate it all here but we will highlight some terminology and concepts that are relevant for developers.
The ACO
An ACO is an Access Control Object. In terms of Joomla, it is an action that you want to perform, such a logging in,
viewing, adding, editting, etc.
TheARO
An ARO is an Access Request Object. In terms of Joomla this is "who" or "what" is asking for permission to do something.
This will generally be a user, and the mos_user table is synconised with the mos_core_acl_aro table. However, there may
be circumstances where system processes will be requesting permission to do something, possibly in the context of a
workflow engine or the like.
ARO's are able to be assigned to a group. The defaultARO groups provided in Joomla are:
ROOT
| - USERS
| -- PublicFrontend
file:///D|/My%20Documents/Joomla!/doc/fileweb/developer/i0.htm (1 of 3)11/3/2005 1:12:41 AM
help.joomla :: Chapter 8. Access Control
| - - - Registered
| - - - - Author
| - - - - - Editor
| - - - - - - Publisher
| - - Public Backend
| - - - Manager
| - - - - Administrator
| - - - - - Super Administrator
The first group is ROOT. This is really a placeholder group as there can only be one root group. The second group, USERS,
is also a placeholder group. It collects all the ARO groups that pertain to users. As mentioned previously, other "things"
may require access and these would all start with their own placeholder group (for example, WORKFLOW).
Next are the start of two branches, one for access to the frontend web site and one for access to the backend
administration.
The AXO
An AXO is an Access eXtensionObject
The ACO, AXO and ACL database schemas are not yet implemented. They are emulated by hand in a simplistic fashion by
the gacl class in /classes/gacl.php
Inserting a New Group
The group mapping for ARO's and AXO's uses a pre-order tree traversal technique to enable more efficient record retrieval
from the hierarchically related data. This means that you cannot simply add a row to the table and expect the hierarchical
relationships to be maintained.
To add a new user group by hand you would use the following SQL:
SET @parent_name = 'Registered';
SET @new_name = 'Support';
-- Select the parent node to insert after
SELECT @ins_id := group_id, @ins_lft := lft, @ins_rgt := rgt
FROM mos_core_acl_aro_groups
WHERE name = @parent_name;
file:///D|/My%20Documents/Joomla!/doc/fileweb/developer/i0.htm (2 of 3)11/3/2005 1:12:41 AM
help.joomla :: Chapter 8. Access Control
SELECT @new_id := MAX(group_id) + 1 FROM mos_core_acl_aro_groups;
-- Make room for the new node
UPDATE mos_core_acl_aro_groups SET rgt=rgt+2 WHERE rgt>=@ins_rgt;
UPDATE mos_core_acl_aro_groups SET lft=lft+2 WHERE lft>@ins_rgt;
-- Insert the new node
INSERT INTO mos_core_acl_aro_groups (group_id,parent_id,name,lft,rgt)
VALUES (@new_id,@ins_id,@new_name,@ins_rgt,@ins_rgt+1);
The parent_name is the name of an existing group that you want to be the parent of the new group. The new_name is the
name of the new group.
The _mos_add_acl method is also available for custom developers to provide for additional ACL checks.
For more information on pre-order tree traversal algorithms refer to the following sites:
http://www.sitepoint.com/article/1105/
http://searchdatabase.techtarget.com/tip/1,289483,sid13_gci537290,00.html
Last Updated ( Thursday, 26 May 2005 )
Close Window
file:///D|/My%20Documents/Joomla!/doc/fileweb/developer/i0.htm (3 of 3)11/3/2005 1:12:41 AM

help.joomla :: Terms of Reference
Terms of Reference
This section of the developer’s manual discusses aspects of usability and accessibility as it pertains to Joomla!
Our brief definition of Accessibility and Usability:
Accessibility:
Determines if the site and its content can be accessed by people with various disabilities.
Usability:
A measure of how easy it is to use a particular website, whether or not a user has a disability.
We will also discuss other web standards and best practices.
In other words:
● Accessibility is focused on the access needs of people with disabilities.
● Usability is focused on everyone's access needs.
By focusing on both accessibility and usability, we are aiming to make sites that everyone can access, including those using
older/different technologies (hardware, software, connections), or other "specific" needs.
We accomplish both by using standards such as (x)html, css, wcag/508, and following best practices.
In theory, an accessible site is a usable site, but that is not always the case. This is why it is important to consider both
accessibility & usability.
Last Updated ( Thursday, 22 September 2005 )
Close Window
file:///D|/My%20Documents/Joomla!/doc/fileweb/developer/i1.htm11/3/2005 1:12:41 AM

help.joomla :: Accessibility Statement
Accessibility Statement
This statement addresses three main areas of accessibility for Joomla!: Sites produced using Joomla! (front end and back
end), and the Joomla.org site.
Sites produced using Joomla!
Front end (website)
We will provide a solution capable of delivering accessible websites that comply with WCAG 1.0 Priority 2 and Section 508
requirements by release 1.2 of Joomla!
The Core Development Team focuses on front-end accessibility for the 1.x series of releases of Joomla!
Please note that while Joomla! will provide the ability to deliver WCAG compliant sites, many requirements depend on the
template designers or content managers. As such, Joomla! sites may well not comply with WCAG, for reasons out of the
control of the Core Development Team. In other words: “We’ll give you the tools to comply, the rest is up to you!”.
Back end (admin)
While we will incorporate as many accessibility “features” in the back-end as possible, the technical changes required to
reach WCAG compliance at this point would involve an extensive re-write of the code. It would be counter-productive to do
this now, as a such a re-write is planned for the 2.x series.
The back-end or administration area of a Joomla! driven site is not a public area. Unless your administrators have
accessibility requirements themselves, the reduced compliance on the back-end will not impact your organisation/site
accessibility levels.
Joomla.org website
Current situation
While we are committed to accessibility, we are aware, and regret, that our website does not comply with many WCAG/508
requirements, nor does it currently validate with XHTML 1.0 Transitional. The site is Joomla! based, and as such, will be
compliant when Joomla! meets requirements.
Future plans
We are dedicated to complying with current web standards (XHTML, CSS, WCAG/508) and best practices. This will become
possible as the Joomla! engine addresses known issues.
file:///D|/My%20Documents/Joomla!/doc/fileweb/developer/i2.htm (1 of 2)11/3/2005 1:12:41 AM

help.joomla :: Accessibility Statement
Existing content created before the implementation of Joomla! 1.2 may not be properly marked up. Efforts may be made
to revise and edit that content, depending on time constraints.
New content will be properly marked up.
Third party applications
In some situations, Joomla! will require the use of 3 rd party applications to assist with the functions of the website.
Features such as the Forum, or the Forge were not programmed by the Joomla! development team. While we will aim to
improve accessibility to those parts of our website, compliance remains outside of our control.
Concerns or Suggestions?
If you have concerns, issues or suggestions, please don’t hesitate to share them with our Usability & Accessibility work
group on the Joomla! forum.
Last Updated ( Thursday, 15 September 2005 )
Close Window
file:///D|/My%20Documents/Joomla!/doc/fileweb/developer/i2.htm (2 of 2)11/3/2005 1:12:41 AM

help.joomla :: WCAG Checklist
WCAG Checklist
The following is the W3C's checklist applied to Joomla 1.0. WCAG's requirements can sometimes be open to
"interpretation". This checklist applies only to the core Joomla install, not to any 3rd Party Component (this will be
addressed in another document).
Many of WCAG's requirements are outside of Joomla! development team. Some requirements must be filled by the
template designer. Some other requirements need to be addressed by the content manager. As such, Joomla! will offer the
ability to make WCAG compliant sites, but will not guarantee that sites created using Joomla! will be compliant.
We have used the following text to denote the status of each item in the checklist:
● OK: Means this is a requirement that can be achieved via Joomla!
● To Do: Means this is a feature that the development team needs to include in future releases of Joomla!
● Not Core ( OK ): Means this requirement is outside the control of the development team (e.g. template or
content focus)
Note that some requirements have been marked as both To Do and Not Core ( OK ). Those instances denote that the
Joomla! engine may be producing content that needs to comply, but that generally it is outside the hands of the
development team.
Priority 1
You must comply with those. Without it, you are cutting out a bunch of people from being able to access your site. By
complying with Priority 1, you have a mostly accessible site.
Priority 2
You should comply with those. If you don’t, you are making the life of many of your visitors much more difficult. By
complying with Priority 2, you make a site that is free of significant barriers.
Priority 3
You may comply with those. If you do, you will have a majority of people able to use your site. By complying with Priority
3, you are really increasing access to your site.
The following checklist was adapted from: http://www.w3.org/TR/WCAG10/full-checklist.html
Priority 1 checkpoints
In General (Priority 1) Yes No N/A
file:///D|/My%20Documents/Joomla!/doc/fileweb/developer/i3.htm (1 of 9)11/3/2005 1:12:42 AM

help.joomla :: WCAG Checklist
1.1 Provide a text equivalent for every non-text element (e.g., via "alt", "longdesc", or in
element content). This includes: images, graphical representations of text (including
symbols), image map regions, animations (e.g., animated GIFs), applets and
programmatic objects, ascii art, frames, scripts, images used as list bullets, spacers,
graphical buttons, sounds (played with or without user interaction), stand-alone audio
files, audio tracks of video, and video.
OK
2.1 Ensure that all information conveyed with color is also available without color, for
example from context or markup. Not Core ( OK )
4.1 Clearly identify changes in the natural language of a document's text and any text
equivalents (e.g., captions). Not Core ( OK )
6.1 Organize documents so they may be read without style sheets. For example, when
an HTML document is rendered without associated style sheets, it must still be possible
to read the document.
To Do Not Core ( OK )
6.2 Ensure that equivalents for dynamic content are updated when the dynamic content
changes. Not Core ( OK )
7.1 Until user agents allow users to control flickering, avoid causing the screen to flicker. Not Core ( OK )
14.1 Use the clearest and simplest language appropriate for a site's content. Not Core ( OK )
And if you use images and image maps (Priority 1) Yes No N/A
1.2 Provide redundant text links for each active region of a server-side image map. Not Core ( OK )
9.1 Provide client-side image maps instead of server-side image maps except where the
regions cannot be defined with an available geometric shape. Not Core ( OK )
And if you use tables (Priority 1) Yes No N/A
5.1 For data tables, identify row and column headers. To Do Not Core ( OK )
5.2 For data tables that have two or more logical levels of row or column headers, use
markup to associate data cells and header cells. To Do Not Core ( OK )
And if you use frames (Priority 1) Yes No N/A
12.1 Title each frame to facilitate frame identification and navigation. Not Core ( OK )
And if you use applets and scripts (Priority 1) Yes No N/A
file:///D|/My%20Documents/Joomla!/doc/fileweb/developer/i3.htm (2 of 9)11/3/2005 1:12:42 AM
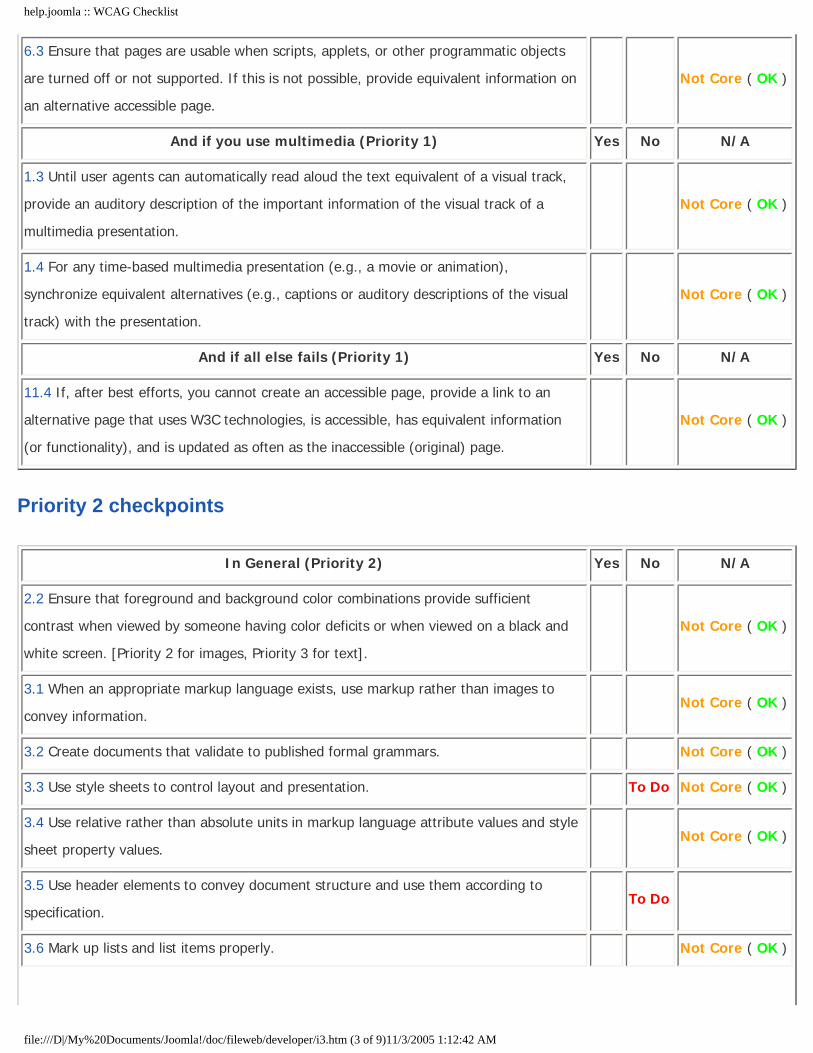
help.joomla :: WCAG Checklist
6.3 Ensure that pages are usable when scripts, applets, or other programmatic objects
are turned off or not supported. If this is not possible, provide equivalent information on
an alternative accessible page.
Not Core ( OK )
And if you use multimedia (Priority 1) Yes No N/A
1.3 Until user agents can automatically read aloud the text equivalent of a visual track,
provide an auditory description of the important information of the visual track of a
multimedia presentation.
Not Core ( OK )
1.4 For any time-based multimedia presentation (e.g., a movie or animation),
synchronize equivalent alternatives (e.g., captions or auditory descriptions of the visual
track) with the presentation.
Not Core ( OK )
And if all else fails (Priority 1) Yes No N/A
11.4 If, after best efforts, you cannot create an accessible page, provide a link to an
alternative page that uses W3C technologies, is accessible, has equivalent information
(or functionality), and is updated as often as the inaccessible (original) page.
Not Core ( OK )
Priority 2 checkpoints
In General (Priority 2) Yes No N/A
2.2 Ensure that foreground and background color combinations provide sufficient
contrast when viewed by someone having color deficits or when viewed on a black and
white screen. [Priority 2 for images, Priority 3 for text].
Not Core ( OK )
3.1 When an appropriate markup language exists, use markup rather than images to
convey information. Not Core ( OK )
3.2 Create documents that validate to published formal grammars. Not Core ( OK )
3.3 Use style sheets to control layout and presentation. To Do Not Core ( OK )
3.4 Use relative rather than absolute units in markup language attribute values and style
sheet property values. Not Core ( OK )
3.5 Use header elements to convey document structure and use them according to
specification. To Do
3.6 Mark up lists and list items properly. Not Core ( OK )
file:///D|/My%20Documents/Joomla!/doc/fileweb/developer/i3.htm (3 of 9)11/3/2005 1:12:42 AM

help.joomla :: WCAG Checklist
3.7 Mark up quotations. Do not use quotation markup for formatting effects such as
indentation. Not Core ( OK )
6.5 Ensure that dynamic content is accessible or provide an alternative presentation or
page. Not Core ( OK )
7.2 Until user agents allow users to control blinking, avoid causing content to blink (i.e.,
change presentation at a regular rate, such as turning on and off). Not Core ( OK )
7.4 Until user agents provide the ability to stop the refresh, do not create periodically
auto-refreshing pages. Not Core ( OK )
7.5 Until user agents provide the ability to stop auto-redirect, do not use markup to
redirect pages automatically. Instead, configure the server to perform redirects. Not Core ( OK )
10.1 Until user agents allow users to turn off spawned windows, do not cause pop-ups
or other windows to appear and do not change the current window without informing
the user.
To Do
11.1 Use W3C technologies when they are available and appropriate for a task and use
the latest versions when supported. Not Core ( OK )
11.2 Avoid deprecated features of W3C technologies. To Do
12.3 Divide large blocks of information into more manageable groups where natural and
appropriate. Not Core ( OK )
13.1 Clearly identify the target of each link. To Do
13.2 Provide metadata to add semantic information to pages and sites. To Do
13.3 Provide information about the general layout of a site (e.g., a site map or table of
contents). To Do
13.4 Use navigation mechanisms in a consistent manner. Not Core ( OK )
And if you use tables (Priority 2) Yes No N/A
5.3 Do not use tables for layout unless the table makes sense when linearized.
Otherwise, if the table does not make sense, provide an alternative equivalent (which
may be a linearized version).
To Do
5.4 If a table is used for layout, do not use any structural markup for the purpose of
visual formatting. Not Core ( OK )
And if you use frames (Priority 2) Yes No N/A
file:///D|/My%20Documents/Joomla!/doc/fileweb/developer/i3.htm (4 of 9)11/3/2005 1:12:42 AM

help.joomla :: WCAG Checklist
12.2 Describe the purpose of frames and how frames relate to each other if it is not
obvious by frame titles alone. Not Core ( OK )
And if you use forms (Priority 2) Yes No N/A
10.2 Until user agents support explicit associations between labels and form controls, for
all form controls with implicitly associated labels, ensure that the label is properly
positioned.
OK
12.4 Associate labels explicitly with their controls. OK
And if you use applets and scripts (Priority 2) Yes No N/A
6.4 For scripts and applets, ensure that event handlers are input device-independent. Not Core ( OK )
7.3 Until user agents allow users to freeze moving content, avoid movement in pages. Not Core ( OK )
8.1 Make programmatic elements such as scripts and applets directly accessible or
compatible with assistive technologies [Priority 1 if functionality is important and not
presented elsewhere, otherwise Priority 2.]
Not Core ( OK )
9.2 Ensure that any element that has its own interface can be operated in a device-
independent manner. Not Core ( OK )
9.3 For scripts, specify logical event handlers rather than device-dependent event
handlers. Not Core ( OK )
Priority 3 checkpoints
In General (Priority 3) Yes No N/A
4.2 Specify the expansion of each abbreviation or acronym in a document where it first
occurs. Not Core ( OK )
4.3 Identify the primary natural language of a document. To Do
9.4 Create a logical tab order through links, form controls, and objects. To Do
9.5 Provide keyboard shortcuts to important links (including those in client-side image
maps), form controls, and groups of form controls. To Do
10.5 Until user agents (including assistive technologies) render adjacent links distinctly,
include non-link, printable characters (surrounded by spaces) between adjacent links. To Do Not Core ( OK )
file:///D|/My%20Documents/Joomla!/doc/fileweb/developer/i3.htm (5 of 9)11/3/2005 1:12:42 AM

help.joomla :: WCAG Checklist
11.3 Provide information so that users may receive documents according to their
preferences (e.g., language, content type, etc.) OK
13.5 Provide navigation bars to highlight and give access to the navigation mechanism.
13.6 Group related links, identify the group (for user agents), and, until user agents do
so, provide a way to bypass the group. To Do
13.7 If search functions are provided, enable different types of searches for different
skill levels and preferences. To Do
13.8 Place distinguishing information at the beginning of headings, paragraphs, lists,
etc. Not Core ( OK )
13.9 Provide information about document collections (i.e., documents comprising
multiple pages.). To Do
13.10 Provide a means to skip over multi-line ASCII art. Not Core ( OK )
14.2 Supplement text with graphic or auditory presentations where they will facilitate
comprehension of the page. Not Core ( OK )
14.3 Create a style of presentation that is consistent across pages. OK
And if you use images and image maps (Priority 3) Yes No N/A
1.5 Until user agents render text equivalents for client-side image map links, provide
redundant text links for each active region of a client-side image map. Not Core ( OK )
And if you use tables (Priority 3) Yes No N/A
5.5 Provide summaries for tables. To Do Not Core ( OK )
5.6 Provide abbreviations for header labels. To Do Not Core ( OK )
10.3 Until user agents (including assistive technologies) render side-by-side text
correctly, provide a linear text alternative (on the current page or some other) for all
tables that lay out text in parallel, word-wrapped columns.
And if you use forms (Priority 3) Yes No N/A
10.4 Until user agents handle empty controls correctly, include default, place-holding
characters in edit boxes and text areas. To Do
Priority 1
file:///D|/My%20Documents/Joomla!/doc/fileweb/developer/i3.htm (6 of 9)11/3/2005 1:12:42 AM

help.joomla :: WCAG Checklist
6.1 Organize documents so they may be read without style sheets. For example, when an HTML document is rendered
without associated style sheets, it must still be possible to read the document
❍ Organise the content so it has a logical reading structure without stylesheets.
❍ Core: Ensure that generated content is rendered using structural markup (such as div).
5.1 For data tables, identify row and column headers.
❍ Properly use td for data cell, and th for header cells.
❍ Core: Using tables to deliver the list of content items in Category section is an appropriate use of tables,
particularly if dates, authors, hits, etc are listed with each Item Title. This is considered "tabular data".
Ensure that table headers are using th.
5.2 For data tables that have two or more logical levels of row or column headers, use markup to associate data cells and
header cells.
❍ Use markup to associate cells with their relevant headers
❍ Core: Assign ids for each th, and associate the same id to each td in the same column. See http://www.
w3.org/TR/WCAG10-HTML-TECHS/#identifying-table-rows-columns for example.
Priority 2
3.3 Use style sheets to control layout and presentation.
❍ Visual design and layout should be handled through the use of CSS. Content should be completely
separated from its presentation.
❍ Core: Develop alternative template to deliver content without tables. Best suggestion at this point would
be to create a set of tableless content pages, using patTemplates. These alternative files could be
packaged in the core, and the user could select to use either the "old" tabled content, or the "new"
tableless. The advantage of this is that older templates relying on legacy code won't break.
3.5 Use header elements to convey document structure and use them according to specification.
❍ Use proper semantic markup to determine document content hierarchy.
❍ Core: Assign elements such as moduleheader, contentdeading, etc by appropriate h1, h2, h3, etc. Please
refer to suggested use of headers for appropriate of "translation".
10.1 Until user agents allow users to turn off spawned windows, do not cause pop-ups or other windows to appear and do
not change the current window without informing the user.
❍ Don't force links to open in new windows without warning the user.
❍ Core: Provide a way to let users know links open in a new browser window. e.g. "The following link opens
in a new browser window". Some places uses a small popup notification along the same lines.
file:///D|/My%20Documents/Joomla!/doc/fileweb/developer/i3.htm (7 of 9)11/3/2005 1:12:42 AM

help.joomla :: WCAG Checklist
11.2 Avoid deprecated features of W3C technologies.
❍ Don't use deprecated elements such as the font tag
❍ Core: Go through and make sure that old tags don't get generated. In particular: font, b, i
13.1 Clearly identify the target of each link.
❍ Several links with the same name are confusing (such as "read more"). Also, links saying simply "click
here" are not meaningful.
❍ Core: Change the behaviour of the link added for "Read more". Use the title alias (or title if alias doesn't
exist). Instead of hard coding "read more", provide the user with a variable to edit the text. Provide
another variable to go after the title alias, so users can build links such as "Read more about the title alias
article"
13.2 Provide metadata to add semantic information to pages and sites.
❍ Some metadata is already used, such as title, and doctype is up to the template developer. Providing
users the ability to include the link tag in the document's head would allow greater accessibility. Link can
be used to build navigation systems or provide alternative versions (e.g. text-only). See http://www.w3.
org/TR/WCAG10-HTML-TECHS/#document-meta for more details.
❍ Core: Explore the possibility of adding link tag generation to the head of individual content items.
13.3 Provide information about the general layout of a site (e.g., a site map or table of contents).
❍ Particularly on complex sites, a sitemap is really helpful to find what you're looking for. This is a usability
factor as much as an accessibility factor.
❍ Core: While there are 3PD components to create sitemaps, we should incorporate a sitemap in the core if
we want to be able to offer WCAG compliant sites. Sitemaps should give the flexibility to users to select
which bits appear on the sitemap, in which order. A possible solution would be to list all sections,
categories, static content, components (and perhaps even an option for content items), and let the user
select which ones are to appear on the sitemap, and in which order. This may become clumsy with sites
with 1,000's of items, but it would be the most flexible solution. Using the menu structure to deliver the
sitemap (as some components do), is too limiting.
5.3 Do not use tables for layout unless the table makes sense when linearized. Otherwise, if the table does not make
sense, provide an alternative equivalent (which may be a linearized version).
❍ If we use tables for layout, the content must make sense when you read it from left-to-right and top-to-
bottom (for most languages), as this is how a screen reader goes through a table. Nested tables cause
more problems. Simple solution to this iss the oft-requested tableless content generation.
❍ Core: Develop alternative template to deliver content without tables, as already addressed by point 3.3.
file:///D|/My%20Documents/Joomla!/doc/fileweb/developer/i3.htm (8 of 9)11/3/2005 1:12:42 AM
help.joomla :: WCAG Checklist
Last Updated ( Friday, 16 September 2005 )
Close Window
file:///D|/My%20Documents/Joomla!/doc/fileweb/developer/i3.htm (9 of 9)11/3/2005 1:12:42 AM

help.joomla :: Semantic Ideas
Semantic Ideas
The following article describes the best approach to properly structure your side through semantic markup.
Written by Lawrence Meckan - Absalom Media. Re-used with permission from: http://www.absalom.biz/Services/News/
Mambo/Semantic_Ideas.html.
Creating a readable document on the web requires skill and precision. Creating a document that matches the intent of the
publisher should mean that when a search engine browses the website and finds the relevant article, that article is able to
be searched and archived correctly. This is why semantically correct and well-formed code matter.
Merely having article titles as <h1> and <h2> tags for content does not allow a definitive site structure as they do not
reflect a semantic, 'webified' document, especially when the document is linearized. This may also influence accessibility
considerations as a definitive site structure may not be built if all content and article titles remain major headings inside the
web structure.
Here is the methodology I recommend:
● <h1> should be used for the site name.
● <h2> for branding / alias / related titling
● <h3> is the Joomla standard for module headings, and since 'content' is by design, a component, modules and
components of any nature should have the same heading format.
● <h4> to <h7> should be used inside components, modules and content as sub-headings on various levels.
Furthermore, the methodology I am using for Orange (currently) is that the heading will not need to be styled
independently. People should not need to rewrite the methodology to get a semantic header structure.
Through this, the style sheet defines a global h3 tag. Joomla default CSS calls of .contentheading and .componentheading
can then be used by a designer to style the content and components independently (if they wish) to the global tag due to
CSS being a cascading architecture.
This minimises markup and allows the CMS to deliver greater flexibility in a simpler format. It also makes allowance for pre-
existing templates that already define .contentheading and .componentheading independent of a <h1> or <h2>. It means
that those templates, irrespective of when they were released in comparison to the semantic extensions to Joomla, receive
the benefit of semantic structure without having to needlessly redeclare styles.
Furthermore, by having <h3> as the standard Joomla class for all headings, irrespective of component, content or module,
that leaves the <h1> and <h2> calls to be styled independently by a designer to end up with the effects seen in websites
like the CSS Zen Garden.
Last Updated ( Wednesday, 14 September 2005 )
file:///D|/My%20Documents/Joomla!/doc/fileweb/developer/i4.htm (1 of 2)11/3/2005 1:12:43 AM

help.joomla :: Semantic Ideas
Close Window
file:///D|/My%20Documents/Joomla!/doc/fileweb/developer/i4.htm (2 of 2)11/3/2005 1:12:43 AM
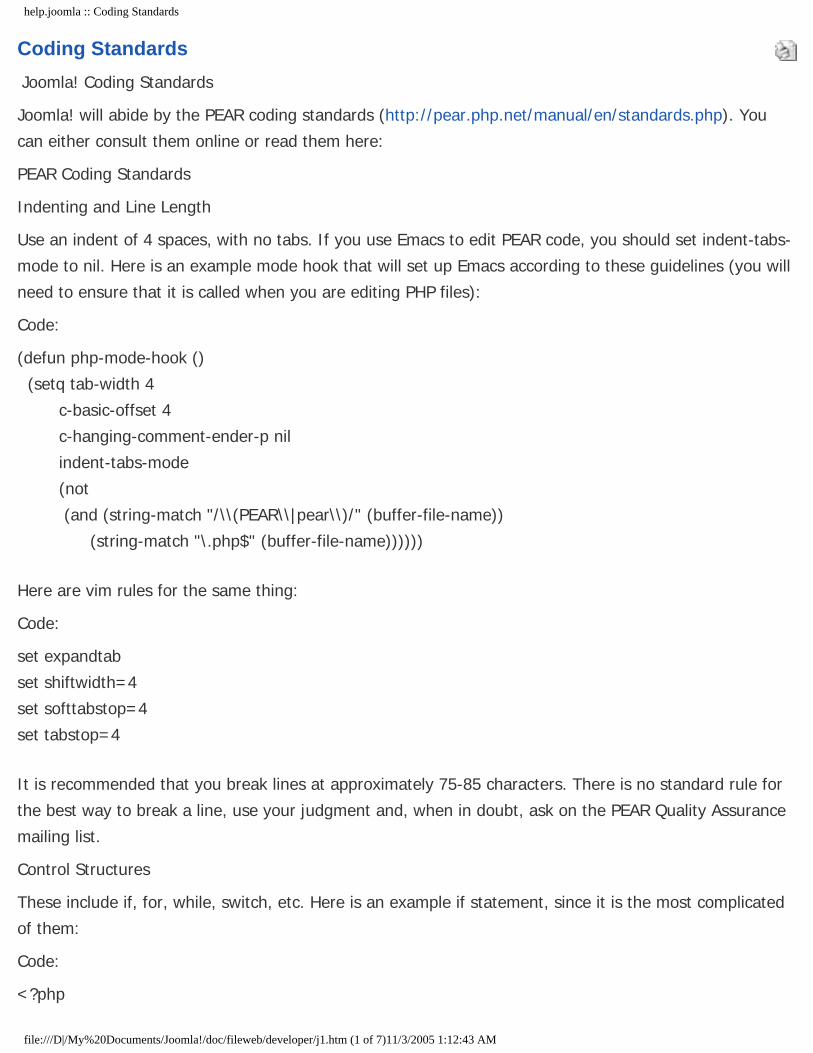
help.joomla :: Coding Standards
Coding Standards
Joomla! Coding Standards
Joomla! will abide by the PEAR coding standards (http://pear.php.net/manual/en/standards.php). You
can either consult them online or read them here:
PEAR Coding Standards
Indenting and Line Length
Use an indent of 4 spaces, with no tabs. If you use Emacs to edit PEAR code, you should set indent-tabs-
mode to nil. Here is an example mode hook that will set up Emacs according to these guidelines (you will
need to ensure that it is called when you are editing PHP files):
Code:
(defun php-mode-hook ()
(setq tab-width 4
c-basic-offset 4
c-hanging-comment-ender-p nil
indent-tabs-mode
(not
(and (string-match "/\\(PEAR\\|pear\\)/" (buffer-file-name))
(string-match "\.php$" (buffer-file-name))))))
Here are vim rules for the same thing:
Code:
set expandtab
set shiftwidth=4
set softtabstop=4
set tabstop=4
It is recommended that you break lines at approximately 75-85 characters. There is no standard rule for
the best way to break a line, use your judgment and, when in doubt, ask on the PEAR Quality Assurance
mailing list.
Control Structures
These include if, for, while, switch, etc. Here is an example if statement, since it is the most complicated
of them:
Code:
<?php
file:///D|/My%20Documents/Joomla!/doc/fileweb/developer/j1.htm (1 of 7)11/3/2005 1:12:43 AM
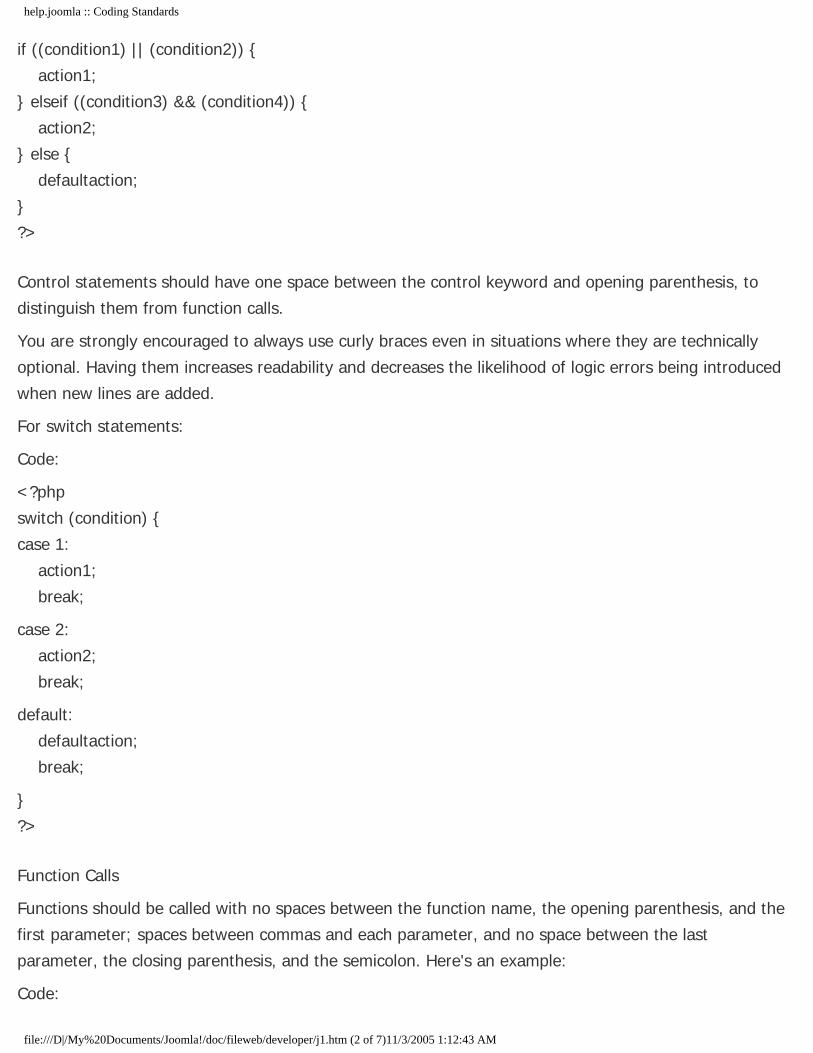
help.joomla :: Coding Standards
if ((condition1) || (condition2)) {
action1;
} elseif ((condition3) && (condition4)) {
action2;
} else {
defaultaction;
}
?>
Control statements should have one space between the control keyword and opening parenthesis, to
distinguish them from function calls.
You are strongly encouraged to always use curly braces even in situations where they are technically
optional. Having them increases readability and decreases the likelihood of logic errors being introduced
when new lines are added.
For switch statements:
Code:
<?php
switch (condition) {
case 1:
action1;
break;
case 2:
action2;
break;
default:
defaultaction;
break;
}
?>
Function Calls
Functions should be called with no spaces between the function name, the opening parenthesis, and the
first parameter; spaces between commas and each parameter, and no space between the last
parameter, the closing parenthesis, and the semicolon. Here's an example:
Code:
file:///D|/My%20Documents/Joomla!/doc/fileweb/developer/j1.htm (2 of 7)11/3/2005 1:12:43 AM

help.joomla :: Coding Standards
<?php
$var = foo($bar, $baz, $quux);
?>
As displayed above, there should be one space on either side of an equals sign used to assign the return
value of a function to a variable. In the case of a block of related assignments, more space may be
inserted to promote readability:
Code:
<?php
$short = foo($bar);
$long_variable = foo($baz);
?>
Function Definitions
Function declarations follow the "one true brace" convention:
Code:
<?php
function fooFunction($arg1, $arg2 = '')
{
if (condition) {
statement;
}
return $val;
}
?>
Arguments with default values go at the end of the argument list. Always attempt to return a meaningful
value from a function if one is appropriate. Here is a slightly longer example:
Code:
<?php
function connect(&$dsn, $persistent = false)
{
if (is_array($dsn)) {
$dsninfo = &$dsn;
} else {
file:///D|/My%20Documents/Joomla!/doc/fileweb/developer/j1.htm (3 of 7)11/3/2005 1:12:43 AM
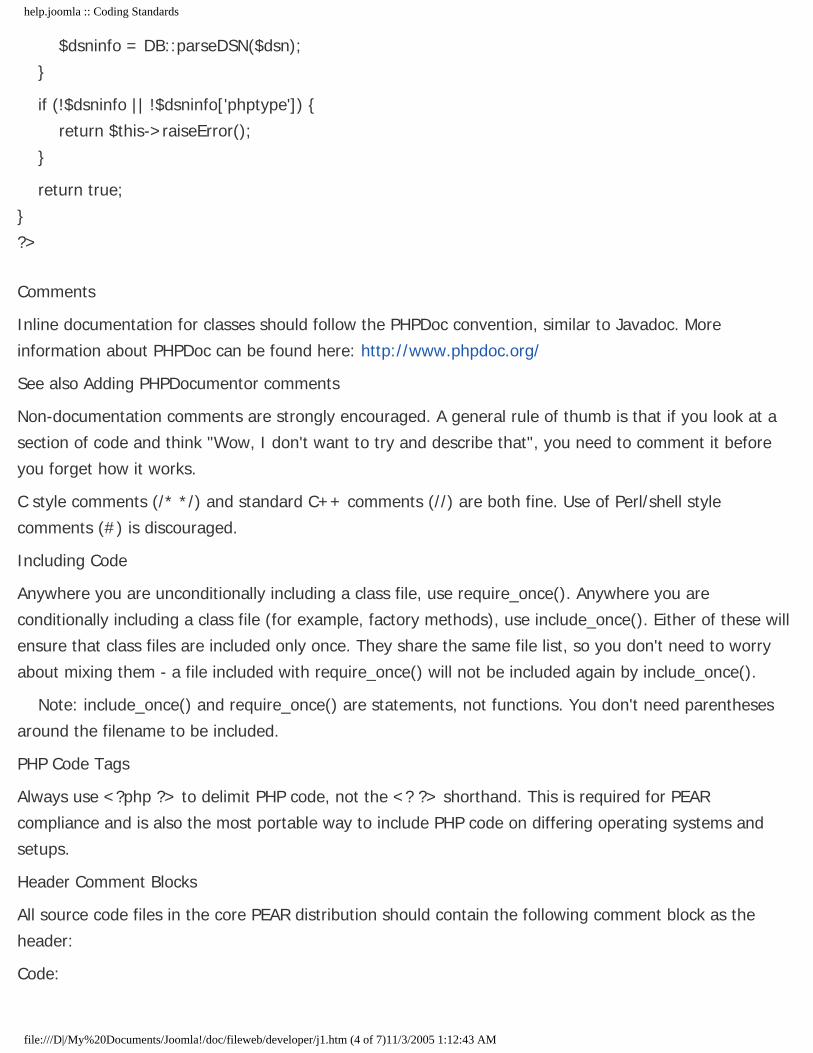
help.joomla :: Coding Standards
$dsninfo = DB::parseDSN($dsn);
}
if (!$dsninfo || !$dsninfo['phptype']) {
return $this->raiseError();
}
return true;
}
?>
Comments
Inline documentation for classes should follow the PHPDoc convention, similar to Javadoc. More
information about PHPDoc can be found here: http://www.phpdoc.org/
See also Adding PHPDocumentor comments
Non-documentation comments are strongly encouraged. A general rule of thumb is that if you look at a
section of code and think "Wow, I don't want to try and describe that", you need to comment it before
you forget how it works.
C style comments (/* */) and standard C++ comments (//) are both fine. Use of Perl/shell style
comments (#) is discouraged.
Including Code
Anywhere you are unconditionally including a class file, use require_once(). Anywhere you are
conditionally including a class file (for example, factory methods), use include_once(). Either of these will
ensure that class files are included only once. They share the same file list, so you don't need to worry
about mixing them - a file included with require_once() will not be included again by include_once().
Note: include_once() and require_once() are statements, not functions. You don't need parentheses
around the filename to be included.
PHP Code Tags
Always use <?php ?> to delimit PHP code, not the <? ?> shorthand. This is required for PEAR
compliance and is also the most portable way to include PHP code on differing operating systems and
setups.
Header Comment Blocks
All source code files in the core PEAR distribution should contain the following comment block as the
header:
Code:
file:///D|/My%20Documents/Joomla!/doc/fileweb/developer/j1.htm (4 of 7)11/3/2005 1:12:43 AM

help.joomla :: Coding Standards
<?php
/* vim: set expandtab tabstop=4 shiftwidth=4 softtabstop=4: */
/**
* Short description for file
*
* Long description for file (if any)...
*
* PHP versions 4 and 5
*
* LICENSE: This source file is subject to version 3.0 of the PHP license
* that is available through the world-wide-web at the following URI:
* http://www.php.net/license/3_0.txt. If you did not receive a copy of
* the PHP License and are unable to obtain it through the web, please
* send a note to [email protected] so we can mail you a copy immediately.
*
* @category CategoryName
* @package PackageName
* @author Original Author <[email protected]>
* @author Another Author <[email protected]>
* @copyright 1997-2005 The PHP Group
* @license http://www.php.net/license/3_0.txt PHP License 3.0
* @version CVS: $Id:$
* @link http://pear.php.net/package/PackageName
* @see NetOther, Net_Sample::Net_Sample()
* @since File available since Release 1.2.0
* @deprecated File deprecated in Release 2.0.0
*/
/*
* Place includes, constant defines and $_GLOBAL settings here.
* Make sure they have appropriate docblocks to avoid phpDocumentor
* construing they are documented by the page-level docblock.
*/
/**
* Short description for class
*
* Long description for class (if any)...
file:///D|/My%20Documents/Joomla!/doc/fileweb/developer/j1.htm (5 of 7)11/3/2005 1:12:43 AM
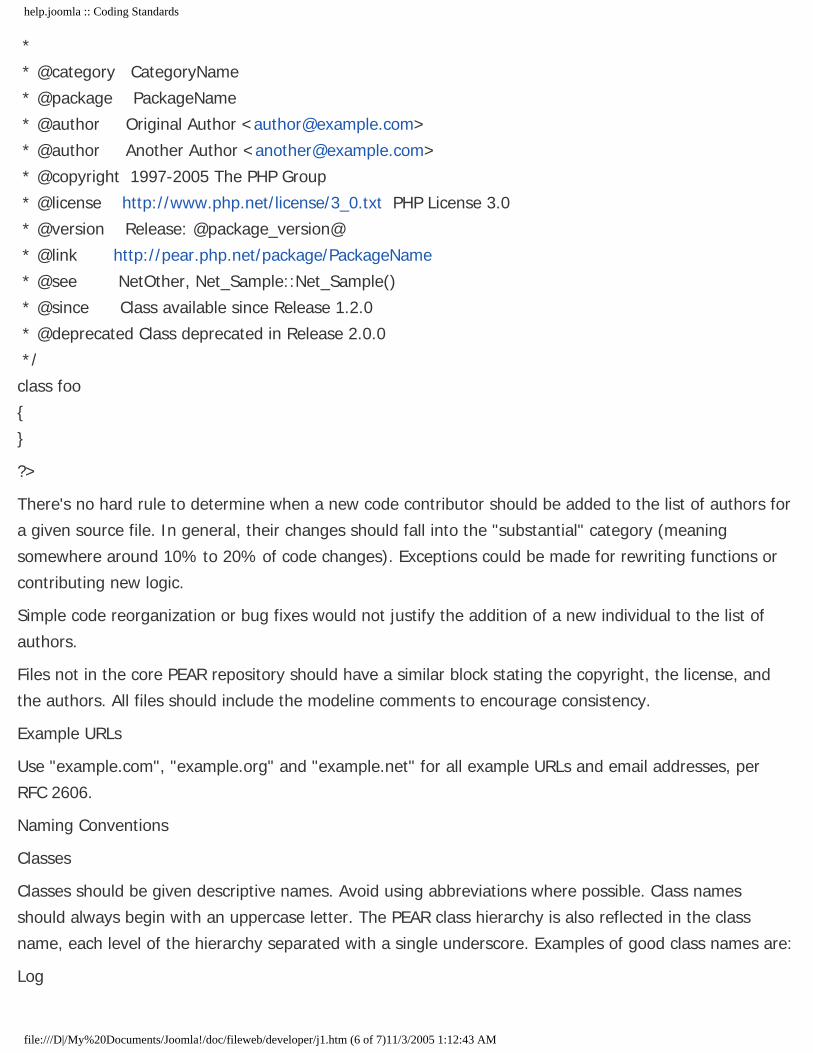
help.joomla :: Coding Standards
*
* @category CategoryName
* @package PackageName
* @author Original Author <[email protected]>
* @author Another Author <[email protected]>
* @copyright 1997-2005 The PHP Group
* @license http://www.php.net/license/3_0.txt PHP License 3.0
* @version Release: @package_version@
* @link http://pear.php.net/package/PackageName
* @see NetOther, Net_Sample::Net_Sample()
* @since Class available since Release 1.2.0
* @deprecated Class deprecated in Release 2.0.0
*/
class foo
{
}
?>
There's no hard rule to determine when a new code contributor should be added to the list of authors for
a given source file. In general, their changes should fall into the "substantial" category (meaning
somewhere around 10% to 20% of code changes). Exceptions could be made for rewriting functions or
contributing new logic.
Simple code reorganization or bug fixes would not justify the addition of a new individual to the list of
authors.
Files not in the core PEAR repository should have a similar block stating the copyright, the license, and
the authors. All files should include the modeline comments to encourage consistency.
Example URLs
Use "example.com", "example.org" and "example.net" for all example URLs and email addresses, per
RFC 2606.
Naming Conventions
Classes
Classes should be given descriptive names. Avoid using abbreviations where possible. Class names
should always begin with an uppercase letter. The PEAR class hierarchy is also reflected in the class
name, each level of the hierarchy separated with a single underscore. Examples of good class names are:
Log
file:///D|/My%20Documents/Joomla!/doc/fileweb/developer/j1.htm (6 of 7)11/3/2005 1:12:43 AM
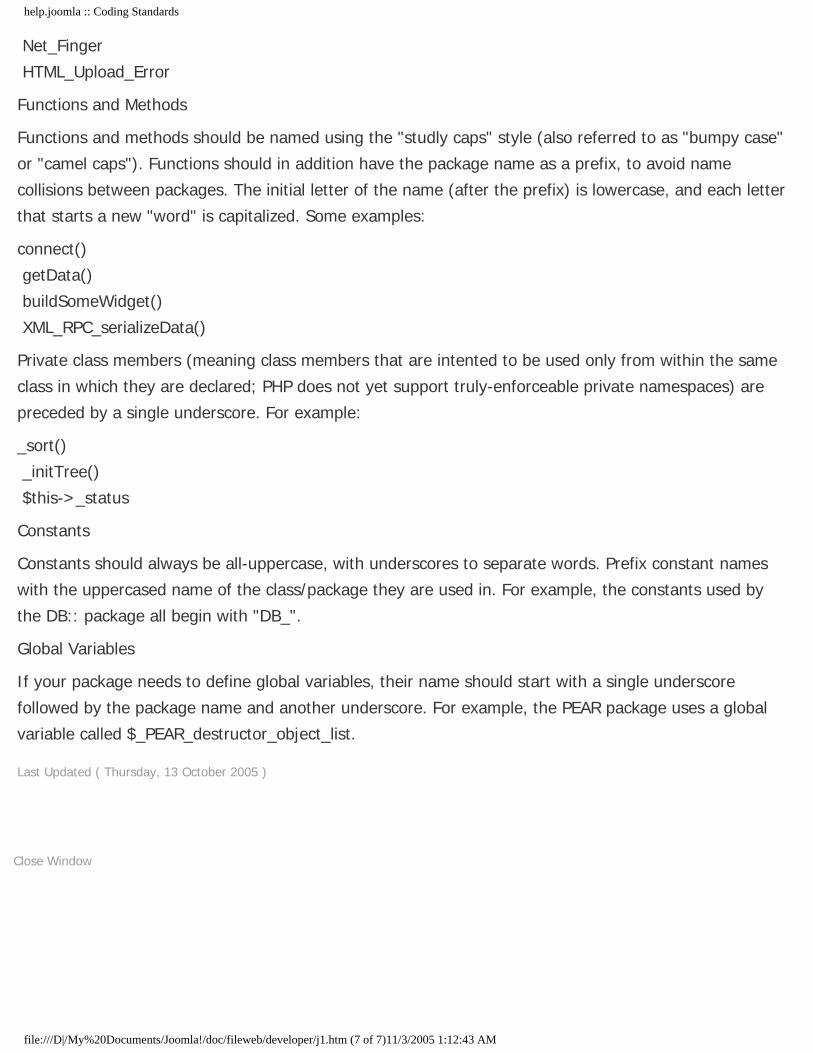
help.joomla :: Coding Standards
Net_Finger
HTML_Upload_Error
Functions and Methods
Functions and methods should be named using the "studly caps" style (also referred to as "bumpy case"
or "camel caps"). Functions should in addition have the package name as a prefix, to avoid name
collisions between packages. The initial letter of the name (after the prefix) is lowercase, and each letter
that starts a new "word" is capitalized. Some examples:
connect()
getData()
buildSomeWidget()
XML_RPC_serializeData()
Private class members (meaning class members that are intented to be used only from within the same
class in which they are declared; PHP does not yet support truly-enforceable private namespaces) are
preceded by a single underscore. For example:
_sort()
_initTree()
$this->_status
Constants
Constants should always be all-uppercase, with underscores to separate words. Prefix constant names
with the uppercased name of the class/package they are used in. For example, the constants used by
the DB:: package all begin with "DB_".
Global Variables
If your package needs to define global variables, their name should start with a single underscore
followed by the package name and another underscore. For example, the PEAR package uses a global
variable called $_PEAR_destructor_object_list.
Last Updated ( Thursday, 13 October 2005 )
Close Window
file:///D|/My%20Documents/Joomla!/doc/fileweb/developer/j1.htm (7 of 7)11/3/2005 1:12:43 AM

help.joomla :: Comment Coding Standards
Comment Coding Standards
Start Of the Document
/**
* Joomla Coding Documentation Quickstart
*
* This file demonstrates the rich information
* that can be included in-code and subsequently
* used to generate documentation for Joomla!
* components using phpDocumentor
*
* This is a copy of sample2.php by Greg Beaver of
* php.net and is provided with phpDocumentor package.
*
* @author copy/pasted by Predator
* @package sample
*/
Add descriptions to included files
/**
* Provide a description of 'include' or 'required'
* and its purpose
*/
include_once 'sample3.php';
Use special declaration for global variables.
/**
file:///D|/My%20Documents/Joomla!/doc/fileweb/developer/j2.htm (1 of 8)11/3/2005 1:12:43 AM

help.joomla :: Comment Coding Standards
* Special global variable declaration DocBlock
* @global integer $GLOBALS['_myvar']
* @name $_myvar
*/
$GLOBALS['_myvar'] = 6;
Use special declaration for Constants.
/**#@+
* Constants
*/
/**
* first constant
*/
define('testing', 6);
/**
* second constant
*/
define('anotherconstant', strlen('hello'));
file:///D|/My%20Documents/Joomla!/doc/fileweb/developer/j2.htm (2 of 8)11/3/2005 1:12:43 AM

help.joomla :: Comment Coding Standards
/**#@-*/
Functions or Methods have lots of valuable information you can declare
/**
* A sample function docblock
* @global string document that this function uses $_myvar
* @staticvar integer $staticvar this is what is returned
* @param string $param1 name to declare
* @param string $param2 value of the name
* @return integer
*/
function firstFunc($param1, $param2 = 'optional')
{
static $staticvar = 7;
global $_myvar;
return $staticvar;
}
Many special declarations for Classes as well.
file:///D|/My%20Documents/Joomla!/doc/fileweb/developer/j2.htm (3 of 8)11/3/2005 1:12:43 AM

help.joomla :: Comment Coding Standards
/**
* The first example class, this is in the same
* package as declared at the start of file but
* this example has a defined subpackage
* @package sample
* @subpackage classes
*/
class myclass {
/**
* A sample private variable, this can be hidden with the --parseprivate
* option
* @access private
* @var integer|string
*/
var $firstvar = 6;
/**
* @link http://www.example.com Example link
* @see myclass()
* @uses testing, anotherconstant
* @var array
file:///D|/My%20Documents/Joomla!/doc/fileweb/developer/j2.htm (4 of 8)11/3/2005 1:12:43 AM
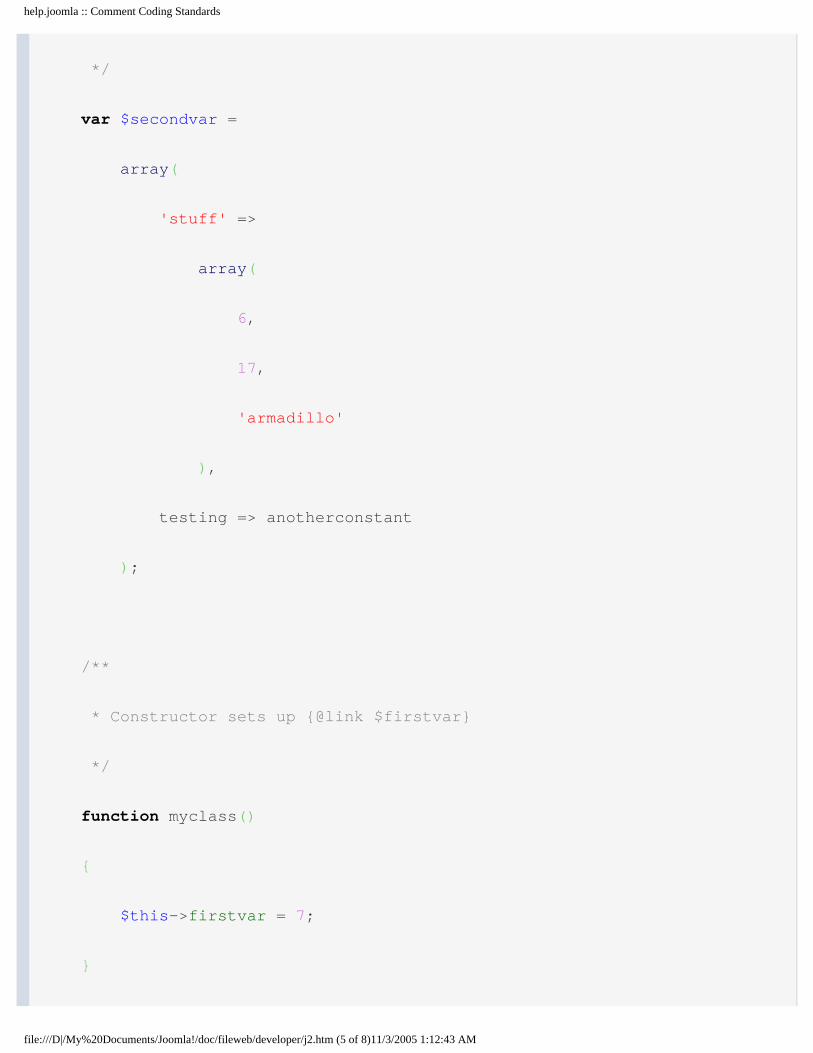
help.joomla :: Comment Coding Standards
*/
var $secondvar =
array(
'stuff' =>
array(
6,
17,
'armadillo'
),
testing => anotherconstant
);
/**
* Constructor sets up {@link $firstvar}
*/
function myclass()
{
$this->firstvar = 7;
}
file:///D|/My%20Documents/Joomla!/doc/fileweb/developer/j2.htm (5 of 8)11/3/2005 1:12:43 AM
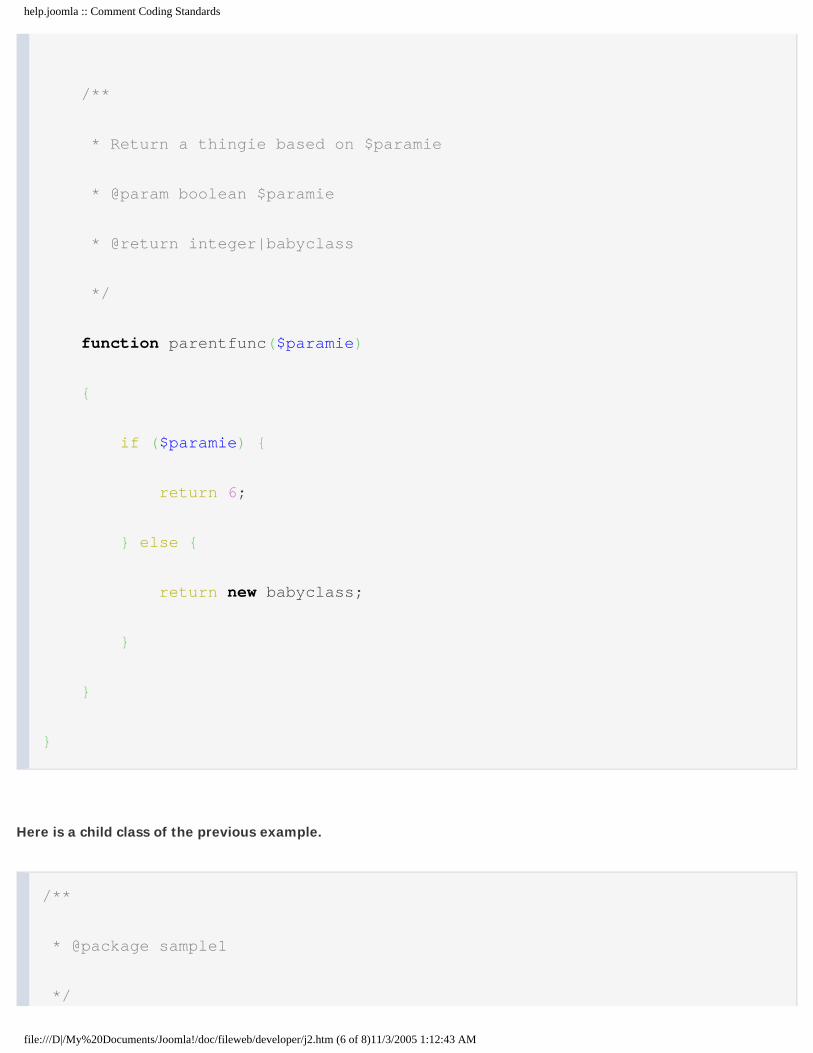
help.joomla :: Comment Coding Standards
/**
* Return a thingie based on $paramie
* @param boolean $paramie
* @return integer|babyclass
*/
function parentfunc($paramie)
{
if ($paramie) {
return 6;
} else {
return new babyclass;
}
}
}
Here is a child class of the previous example.
/**
* @package sample1
*/
file:///D|/My%20Documents/Joomla!/doc/fileweb/developer/j2.htm (6 of 8)11/3/2005 1:12:43 AM

help.joomla :: Comment Coding Standards
class babyclass extends myclass {
/**
* The answer to Life, the Universe and Everything
* @var integer
*/
var $secondvar = 42;
/**
* Configuration values
* @var array
*/
var $thirdvar;
/**
* Calls parent constructor, then increments {@link $firstvar}
*/
function babyclass()
{
parent::myclass();
$this->firstvar++;
file:///D|/My%20Documents/Joomla!/doc/fileweb/developer/j2.htm (7 of 8)11/3/2005 1:12:43 AM

help.joomla :: Comment Coding Standards
}
/**
* This always returns a myclass
* @param ignored $paramie
* @return myclass
*/
function parentfunc($paramie)
{
return new myclass;
}
} <!--</body-->
Last Updated ( Wednesday, 28 September 2005 )
Close Window
file:///D|/My%20Documents/Joomla!/doc/fileweb/developer/j2.htm (8 of 8)11/3/2005 1:12:43 AM

help.joomla :: mosHTML class
mosHTML class
Last reviewed: 25 May 2005
phpDocumentor
mosHTML is a helper class for rendering HTML controls.
Joomla version
Unknown
Defined in
libraries/joomla/html.php
(includes/joomla.php prior to Joomla 1.1)
(includes/mambo.php prior to Joomla 1.0)
Functions
BackButton
Displays a standard back button.
CloseButton
Displays a standard close button for a pop-up window.
emailCloaking
A simple method for cloaking email addresses.
idBox
Builds the HTML code for a standard id box.
integerSelectList
Builds an HTML <select> list containing a series of consecutive numbers.
makeOption
Returns an option object to include in a <select> list.
monthSelectList
Builds an HTML select list for the months of the year.
PrintIcon
Displays a standard print icon.
radioList
Builds a list of HTML radio buttons.
selectList
Builds an HTML <select> list complete with options.
sortIcon
file:///D|/My%20Documents/Joomla!/doc/fileweb/developer/k1.htm (1 of 2)11/3/2005 1:12:44 AM

help.joomla :: mosHTML class
Builds the HTML code for a standard clickable sort icon.
treeSelectList
Builds an HTML <select> list from a tree based query list.
yesnoRadioList
Builds an HTML radio button list consisting of just a 'yes' and a 'no' button.
yesnoSelectList
Builds an HTML select list consisting of just a 'yes' and a 'no' option.
Please report any errors on this page to the Developer Documentation Forum.
Last Updated ( Monday, 31 October 2005 )
Close Window
file:///D|/My%20Documents/Joomla!/doc/fileweb/developer/k1.htm (2 of 2)11/3/2005 1:12:44 AM

help.joomla :: mosHTML::BackButton
mosHTML::BackButton
Last reviewed: Not reviewed
phpDocumentor
mosHTML::BackButton
Displays a standard back button. The text for the button will be taken from the current language settings. The button is
created with a CSS class of 'back_button'. This function has been deprecated in the conversion to patTemplate in Joomla
1.1. It is no longer used by the Joomla core but is being kept for compatibility with third-party software.
Syntax
void BackButton ( object &$params [, boolean $enable] )
$params
is an object of type mosParameters. If $params->get( 'back_button' ) is false then this function will not produce
any output. If $params->get( 'popup' ) is true then this function will not produce any output (in other words, the
back button will be suppressed if the window is a pop-up).
$enable
is a flag. If false then this function will not produce any output. The flag is optional and if omitted will default to
false.
Examples
Example: This example uses the global configuration 'back_button' setting.
// Set-up the parameters object.
$params = & new mosParameters( '' );
$params->def( 'back_button', $mainframe->getCfg( 'back_button' ));
$params->def( 'popup', false );
// Draw the Back button.
mosHTML::BackButton( $params );
Please report any errors on this page to the Developer Documentation Forum.
file:///D|/My%20Documents/Joomla!/doc/fileweb/developer/k2.htm (1 of 2)11/3/2005 1:12:44 AM

help.joomla :: mosHTML::BackButton
Last Updated ( Wednesday, 28 September 2005 )
Close Window
file:///D|/My%20Documents/Joomla!/doc/fileweb/developer/k2.htm (2 of 2)11/3/2005 1:12:44 AM
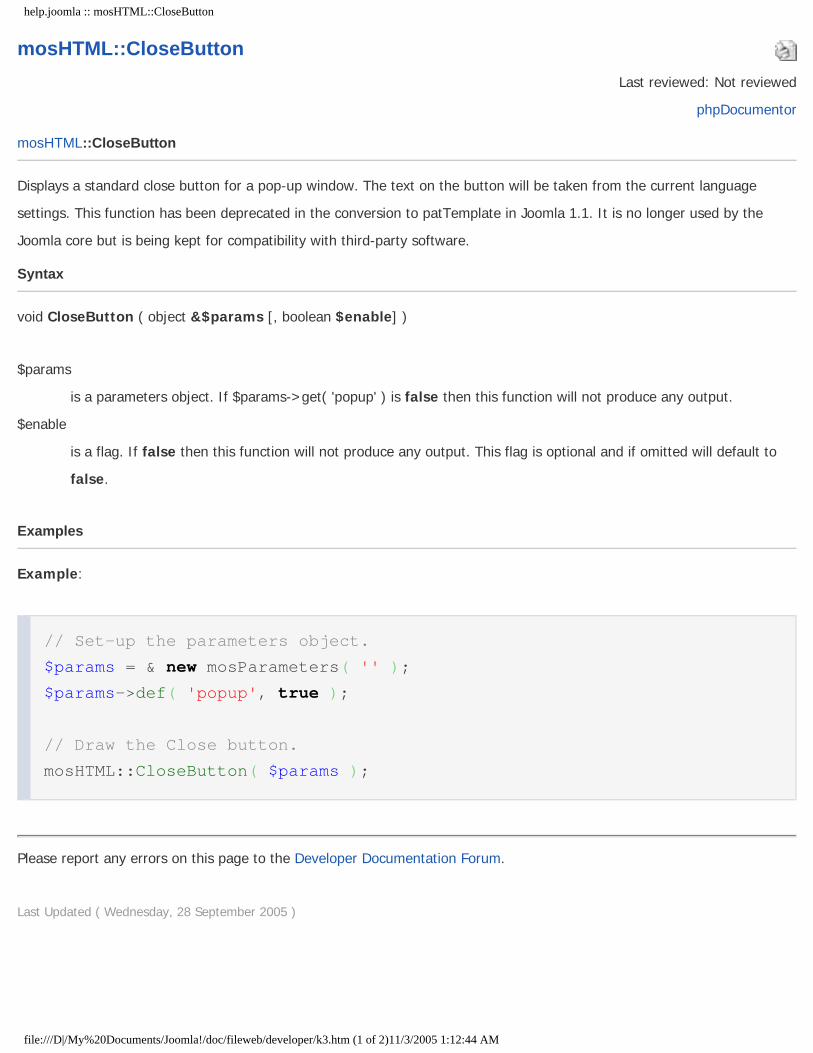
help.joomla :: mosHTML::CloseButton
mosHTML::CloseButton
Last reviewed: Not reviewed
phpDocumentor
mosHTML::CloseButton
Displays a standard close button for a pop-up window. The text on the button will be taken from the current language
settings. This function has been deprecated in the conversion to patTemplate in Joomla 1.1. It is no longer used by the
Joomla core but is being kept for compatibility with third-party software.
Syntax
void CloseButton ( object &$params [, boolean $enable] )
$params
is a parameters object. If $params->get( 'popup' ) is false then this function will not produce any output.
$enable
is a flag. If false then this function will not produce any output. This flag is optional and if omitted will default to
false.
Examples
Example:
// Set-up the parameters object.
$params = & new mosParameters( '' );
$params->def( 'popup', true );
// Draw the Close button.
mosHTML::CloseButton( $params );
Please report any errors on this page to the Developer Documentation Forum.
Last Updated ( Wednesday, 28 September 2005 )
file:///D|/My%20Documents/Joomla!/doc/fileweb/developer/k3.htm (1 of 2)11/3/2005 1:12:44 AM

help.joomla :: mosHTML::CloseButton
Close Window
file:///D|/My%20Documents/Joomla!/doc/fileweb/developer/k3.htm (2 of 2)11/3/2005 1:12:44 AM

help.joomla :: mosHTML::emailCloaking
mosHTML::emailCloaking
Last reviewed: Not reviewed
phpDocumentor
mosHTML::emailCloaking
A simple method for cloaking email addresses. Returns JavaScript that replaces the email address with a mailto link with the address cloaked.
Syntax
string emailCloaking ( string $address [, boolean $maito [, string $text [, boolean $email [, boolean $noscript ]]]] )
$address
is the email address to be cloaked.
$mailto
is a flag. If true then a clickable "mailto:" link will be produced; otherwise $address will be shown but not as a link. This parameter is optional
and if omitted will default to true.
$text
is the text to be displayed to the user for the address link. If empty then $address will be displayed to the user. This parameter is optional and if
omitted will default to an empty string (so that the displayed text will be $address).
is a flag. If true then it indicates that $text is itself an email address and an extra precaution against address harvesting can be taken; otherwise
$text is considered to be an arbitrary string and only basic encoding will be applied. This parameter is optional and if omitted will default to true.
This parameter was introduced in mambo 4.5.2.2.
$noscript
is a flag. If true then an HTML <noscript> tag pair will be appended to the returned string containing a message that may be shown to the user
in the event that their browser does not support scripts or currently has them disabled. The text returned is taken from the CLOAKING language
variable. This parameter is optional and if omitted will default to false. This parameter was introduced in Joomla 1.1 with prior versions always
outputting a <noscript> tag pair.
Examples
Example 1: Just using the email address with none of the optional parameters. The user will see the email address as a clickable link.
$address = '[email protected]';
echo mosHTML::emailcloaking( $address );
which will produce something like:
<script language='JavaScript' type='text/javascript'>
<!--
var prefix = 'ma' + 'il' + 'to';
var path = 'hr' + 'ef' + '=';
var addy39561 = 'john.doe' + '@' + 'w3c' + '.' + 'org';
document.write( '<a ' + path + '\'' + prefix + ':' + addy39561 + '\'>' );
document.write( addy39561 );
file:///D|/My%20Documents/Joomla!/doc/fileweb/developer/k4.htm (1 of 2)11/3/2005 1:12:44 AM

help.joomla :: mosHTML::emailCloaking
document.write( '<\/a>' );
//-->
</script>
<noscript>
This email address is being protected from spam bots, you need Javascript enabled to view it
</noscript>
Example 2: In this example the user will see the link as 'John Doe':
$address = '[email protected]';
$name = 'John Doe';
echo mosHTML::emailcloaking( $address, true, $name, false );
which will produce something like:
<script language='JavaScript' type='text/javascript'>
<!--
var prefix = 'ma' + 'il' + 'to';
var path = 'hr' + 'ef' + '=';
var addy38289 = 'john.doe' + '@' + 'w3c' + '.' + 'org';
var addy_text38289 = 'John Doe';
document.write( '<a ' + path + '\'' + prefix + ':' + addy38289 + '\'>' );
document.write( addy_text38289 );
document.write( '<\/a>' );
//-->
</script>
<noscript>
This email address is being protected from spam bots, you need Javascript enabled to view it
</noscript>
Please report any errors on this page to the Developer Documentation Forum.
Last Updated ( Thursday, 15 September 2005 )
Close Window
file:///D|/My%20Documents/Joomla!/doc/fileweb/developer/k4.htm (2 of 2)11/3/2005 1:12:44 AM
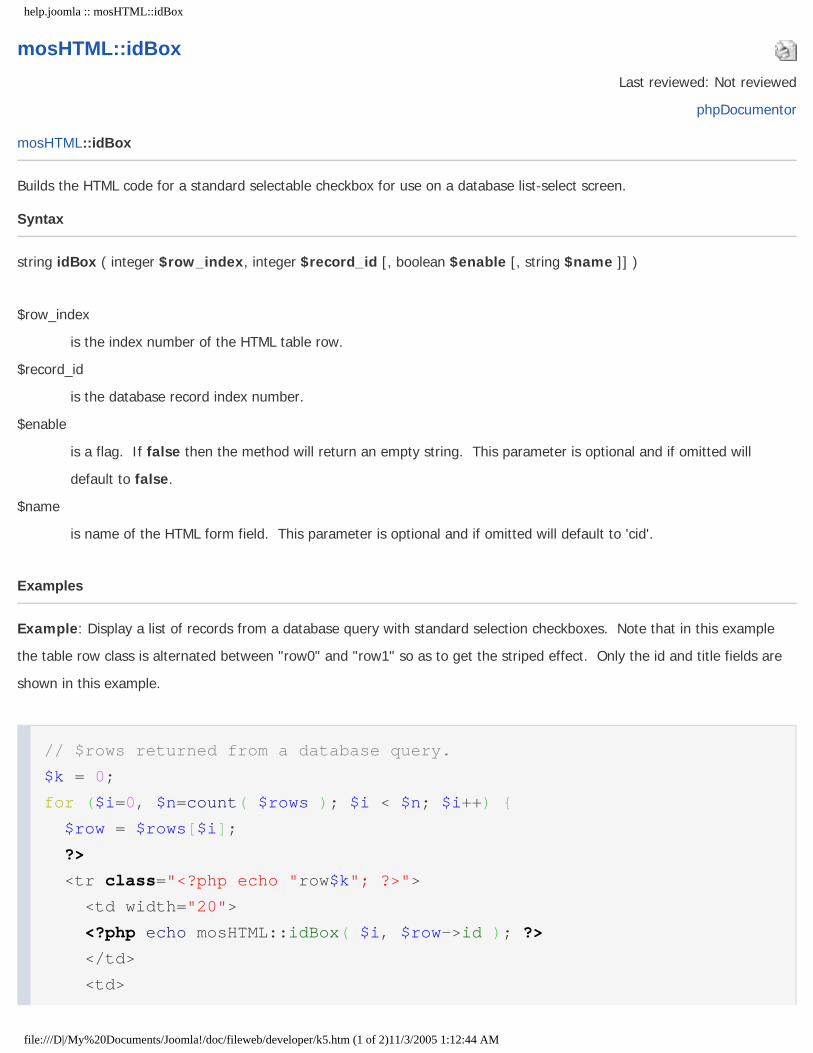
help.joomla :: mosHTML::idBox
mosHTML::idBox
Last reviewed: Not reviewed
phpDocumentor
mosHTML::idBox
Builds the HTML code for a standard selectable checkbox for use on a database list-select screen.
Syntax
string idBox ( integer $row_index, integer $record_id [, boolean $enable [, string $name ]] )
$row_index
is the index number of the HTML table row.
$record_id
is the database record index number.
$enable
is a flag. If false then the method will return an empty string. This parameter is optional and if omitted will
default to false.
$name
is name of the HTML form field. This parameter is optional and if omitted will default to 'cid'.
Examples
Example: Display a list of records from a database query with standard selection checkboxes. Note that in this example
the table row class is alternated between "row0" and "row1" so as to get the striped effect. Only the id and title fields are
shown in this example.
// $rows returned from a database query.
$k = 0;
for ($i=0, $n=count( $rows ); $i < $n; $i++) {
$row = $rows[$i];
?>
<tr class="<?php echo "row$k"; ?>">
<td width="20">
<?php echo mosHTML::idBox( $i, $row->id ); ?>
</td>
<td>
file:///D|/My%20Documents/Joomla!/doc/fileweb/developer/k5.htm (1 of 2)11/3/2005 1:12:44 AM
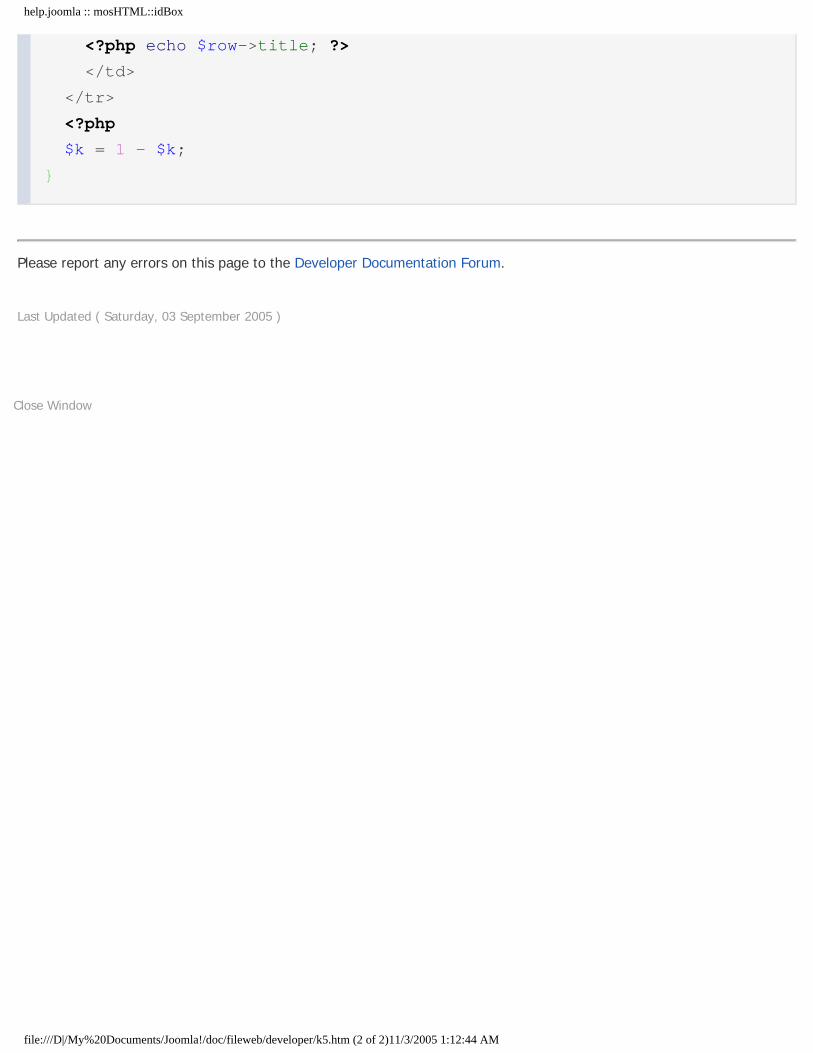
help.joomla :: mosHTML::idBox
<?php echo $row->title; ?>
</td>
</tr>
<?php
$k = 1 - $k;
}
Please report any errors on this page to the Developer Documentation Forum.
Last Updated ( Saturday, 03 September 2005 )
Close Window
file:///D|/My%20Documents/Joomla!/doc/fileweb/developer/k5.htm (2 of 2)11/3/2005 1:12:44 AM

help.joomla :: mosHTML::integerSelectList
mosHTML::integerSelectList
Last reviewed: Not reviewed
phpDocumentor
mosHTML::integerSelectList
This method builds a list of numbers from $start to $end with an increment of $inc. The optional $format argument allows you to apply a printf sytle
format to the numbers.
Syntax
string integerSelectList ( int $start, int $end, int $inc, string $tag_name,
string $tag_attribs, mixed $selected [, string $format] )
$start
is the first number on the select list.
$end
is the last number on the select list.
$inc
is the increment between successive numbers on the list.
$tag_name
is the name attribute of the HTML <select> tag.
$tag_attribs
is a string containing any additional attributes that you want to assign to the <select> tag.
$selected
is either a string value for a single value select list or an array for a multiple value select list.
$format
is a printf style format string to be applied to each number in the list.
Examples
Example:
$html = mosHTML::integerSelectList( -12, 12, 1, 'tzoffset', 'size="1" class="inputbox"', 0, "%
02d" );
echo $html;
which produces:
<select name="tzoffset" size="1" class="inputbox">
<option value="-12">-12</option>
<option value="-11">-11</option>
<option value="-10">-10</option>
<option value="-9">-9</option>
<option value="-8">-8</option>
<option value="-7">-7</option>
file:///D|/My%20Documents/Joomla!/doc/fileweb/developer/k6.htm (1 of 2)11/3/2005 1:12:46 AM

help.joomla :: mosHTML::integerSelectList
<option value="-6">-6</option>
<option value="-5">-5</option>
<option value="-4">-4</option>
<option value="-3">-3</option>
<option value="-2">-2</option>
<option value="-1">-1</option>
<option value="00" selected="selected">00</option>
<option value="01">01</option>
<option value="02">02</option>
<option value="03">03</option>
<option value="04">04</option>
<option value="05">05</option>
<option value="06">06</option>
<option value="07">07</option>
<option value="08">08</option>
<option value="09">09</option>
<option value="10">10</option>
<option value="11">11</option>
<option value="12">12</option>
</select>
which renders as:
Please report any errors on this page to the Developer Documentation Forum.
Last Updated ( Saturday, 03 September 2005 )
Close Window
file:///D|/My%20Documents/Joomla!/doc/fileweb/developer/k6.htm (2 of 2)11/3/2005 1:12:46 AM
help.joomla :: mosHTML::makeOption
mosHTML::makeOption
Last reviewed: Not reviewed
phpDocumentor
mosHTML::makeOption
This method returns an object that can be passed in an array to another list handling method such as mosHTML::selectList. The
method takes two arguments, one for the value of the option tag and optionally one for the text to display. If the text is omitted
the single string is used for both the option value and the text.
From Joomla 1.0 onwards it is also optionally possible to override the default attribute names ('value' and 'text').
Syntax
object makeOption ( string $value [, string $text [, string $value_name [, string $text_name ] ] ] )
$value
is the value that will be used for the HTML tag.
$text
is the text to be displayed in the HTML tag. This parameter is optional and if omitted the text displayed will be the same
as $value.
$value_name
is the class variable name to be used for the 'value' attribute. This parameter is optional and if omitted will default to
'value'. This parameter was introduced in Joomla 1.0.
$text_name
is the class variable name to be used for the 'text' attribute. This parameter is optional and if omitted will default to
'text'. This parameter was introduced in Joomla 1.0.
The mosHTML::makeOption method returns a stdClass object with class variables 'value' and 'text'. From Joomla 1.0 onwards the
class variable names actually used can be overridden as described above.
Examples
Example 1: creating a list with hard coded values:
// Option value and text will be the same.
$mylist1 = array();
$mylist1[] = mosHTML::makeOption( 'Good' );
$mylist1[] = mosHTML::makeOption( 'Bad' );
$mylist1[] = mosHTML::makeOption( 'Ugly' );
file:///D|/My%20Documents/Joomla!/doc/fileweb/developer/k7.htm (1 of 2)11/3/2005 1:12:47 AM

help.joomla :: mosHTML::makeOption
// Option value and text will be different.
$mylist2 = array();
$mylist2 = mosHTML::makeOption( '0', 'Select priority' );
$mylist2 = mosHTML::makeOption( '1', 'Low' );
$mylist2 = mosHTML::makeOption( '2', 'High' );
Example 2: creating a list from a database query:
// alias the 'value' and 'text' fields and the array will
// be in the correct format.
$users = array();
$users[] = mosHTML::makeOption( '0', 'Select user' );
$database->setQuery( "SELECT id AS value, username AS text FROM #__users" );
$users = array_merge( $users, $database->loadObjectList() );
Please report any errors on this page to the Developer Documentation Forum.
Last Updated ( Friday, 16 September 2005 )
Close Window
file:///D|/My%20Documents/Joomla!/doc/fileweb/developer/k7.htm (2 of 2)11/3/2005 1:12:47 AM

help.joomla :: mosHTML::monthSelectList
mosHTML::monthSelectList
Last reviewed: Not reviewed
phpDocumentor
mosHTML::monthSelectList
A convenient method for producing a list of months in an HTML form field using the current language settings.
Syntax
string monthSelectList ( string $tag_name, string $tag_attribs, mixed $selected )
$tag_name
is the name attribute of the HTML <select> tag..
$tag_attribs
is a string containing any additional attributes that you want to assign to the HTML <select> tag..
$selected
is either a string value for a single value select list or an array for a multiple value select list. Note that the values
used here are the month numbers with a leading zero for months 1 to 9.
Examples
Example:
$html = mosHTML::monthSelectList( 'month', 'class="inputbox"', '01' );
echo $html;
which produces:
<select name="month" class="inputbox">
<option value="01" selected="selected">January</option>
<option value="02">February</option>
<option value="03">March</option>
<option value="04">April</option>
<option value="05">May</option>
<option value="06">June</option>
file:///D|/My%20Documents/Joomla!/doc/fileweb/developer/k8.htm (1 of 2)11/3/2005 1:12:47 AM
help.joomla :: mosHTML::monthSelectList
<option value="07">July</option>
<option value="08">August</option>
<option value="09">September</option>
<option value="10">October</option>
<option value="11">November</option>
<option value="12">December</option>
</select>
Please report any errors on this page to the Developer Documentation Forum.
Last Updated ( Saturday, 03 September 2005 )
Close Window
file:///D|/My%20Documents/Joomla!/doc/fileweb/developer/k8.htm (2 of 2)11/3/2005 1:12:47 AM
help.joomla :: mosHTML::PrintIcon
mosHTML::PrintIcon
Last reviewed: Not reviewed
phpDocumentor
mosHTML::PrintIcon
Displays a standard print icon. The alternative text for the icon will be taken from the current language settings. This function has been
deprecated in the conversion to patTemplate in Joomla 1.1. It is no longer used by the Joomla core but is being kept for compatibility with third-
party software.
Syntax
void PrintIcon ( int &$row, object &$params, boolean $enable, string $link [, string $window_params] )
$row
is the row index.
$params
is an object of type mosParameters. If $params->get( 'print' ) is false then this function will produce no output. If $params->get
( 'popup' ) is true then the icon will be a print icon; if false it will be a print preview icon.
$enable
is a flag. If false then this function will produce no output.
$link
is the complete URI of the resource to be printed or print previewed.
$window_params
is a string containing the window parameters that will be used for the popup print preview window. This parameter is optional and if
omitted will default to 'status=no, toolbar=no, scrollbars=yes, titlebar=no, menubar=no, resizable=yes, width=640, height=480,
directories=no, location=no'.
Examples
Example: In this example the popup window that will be opened if the print icon is clicked will make use of the standard window parameters.
// Set-up the parameters object.
$params = & new mosParameters( '' );
$params->def( 'print', true );
$params->def( 'popup', true );
// Set-up the URL that will be opened if the print icon is clicked.
$url = $mosConfig_live_site . '/index2.php?option=com_content&task=view&id=' .
$row->id .'&Itemid='. $Itemid;
// Draw the Print icon.
mosHTML::PrintIcon( $row, $params, true, $url );
file:///D|/My%20Documents/Joomla!/doc/fileweb/developer/k9.htm (1 of 2)11/3/2005 1:12:47 AM

help.joomla :: mosHTML::PrintIcon
Please report any errors on this page to the Developer Documentation Forum.
Last Updated ( Wednesday, 28 September 2005 )
Close Window
file:///D|/My%20Documents/Joomla!/doc/fileweb/developer/k9.htm (2 of 2)11/3/2005 1:12:47 AM

help.joomla :: mosHTML::radioList
mosHTML::radioList
Last reviewed: Not reviewed
phpDocumentor
mosHTML::radioList
A convenient method of producing a list of HTML radio buttons.
Syntax
string radioList ( array &$arr, string $tag_name, string $tag_attribs
[, mixed $selected [, string $key [, string $text ]]] )
$arr
is an array of objects that have been returned by a query or the mosHTML::makeOption method.
$tag_name
is the name of the HTML radio button field.
$tag_attribs
is a string containing any additional attributes that you want to assign to each HTML radio button field.
$selected
is a string containing the value of the radio button that will be selected as the default. This parameter is optional and if absent none
of the radio buttons will be selected by default.
$key
is the name of the class variable holding the option 'value'. Should generally be 'value' and will default to this if this parameter is
omitted.
$text
is the name of the class variable holding the option 'text'. Should generally be 'text' and will default to this if this parameter is
omitted.
Examples
Example:
// Create an array of options.
$mylist = array();
$mylist[] = mosHTML::makeOption( 'Radio 1' );
$mylist[] = mosHTML::makeOption( 'Radio 2' );
$mylist[] = mosHTML::makeOption( 'Radio 3' );
// Generate the HTML radio button list.
$html = mosHTML::radioList( $mylist, 'chan', 'class="inputbox"', 'Radio 2' );
echo $html;
file:///D|/My%20Documents/Joomla!/doc/fileweb/developer/k91.htm (1 of 2)11/3/2005 1:12:47 AM

help.joomla :: mosHTML::radioList
which produces:
<input type="radio" name="chan" id="chanRadio 1" value="Radio 1" class="inputbox" />
<label for="chanRadio 1">Radio 1</label>
<input type="radio" name="chan" id="chanRadio 2" value="Radio 2" checked="checked"
class="inputbox" />
<label for="chanRadio 2">Radio 2</label>
<input type="radio" name="chan" id="chanRadio 3" value="Radio 3" class="inputbox" />
<label for="chanRadio 3">Radio 3</label>
which renders as:
Radio 1 Radio 2 Radio 3
Please report any errors on this page to the Developer Documentation Forum.
Last Updated ( Friday, 23 September 2005 )
Close Window
file:///D|/My%20Documents/Joomla!/doc/fileweb/developer/k91.htm (2 of 2)11/3/2005 1:12:47 AM
help.joomla :: mosHTML::selectList
mosHTML::selectList
Last reviewed: Not reviewed
phpDocumentor
mosHTML::selectList
Builds an HTML <select> form field with <options> built from an array of values. Both single item selects and multiple item selects are supported.
Syntax
string selectList ( array &$options, string $tag_name, string $tag_attribs,
string $key, string $text [, mixed $selected ] )
$options
is an array of objects that have been returned by a query or the mosHTML::makeOption function.
$tag_name
is the name attribute of the HTML <select> tag.
$tag_attribs
is a string containing any additional attributes that you want to assign to the HTML <select> tag.
$key
is the name of the class variable holding the option 'value'. Should generally be 'value'.
$text
is the name of the class variable holding the option 'text'. Should generally be 'text'.
$selected
is either a string value for a single value select list or an array for a multiple value select list. This parameter is optional and if omitted
defaults to null.
Examples
Example 1: a single value select list:
// The option tag with the value of zero is selected.
$colours = array();
$colours[] = mosHTML::makeOption( '0', 'Red');
$colours[] = mosHTML::makeOption( '1', 'Green');
$colours[] = mosHTML::makeOption( '2', 'Blue');
$html = mosHTML::selectList( $colours, 'colour', 'size="1" class="inputbox"', 'value',
'text', 0 );
echo $html;
which produces:
<select name="colour" size="1" class="inputbox">
<option value="0" selected="selected">Red</option>
file:///D|/My%20Documents/Joomla!/doc/fileweb/developer/k92.htm (1 of 3)11/3/2005 1:12:48 AM
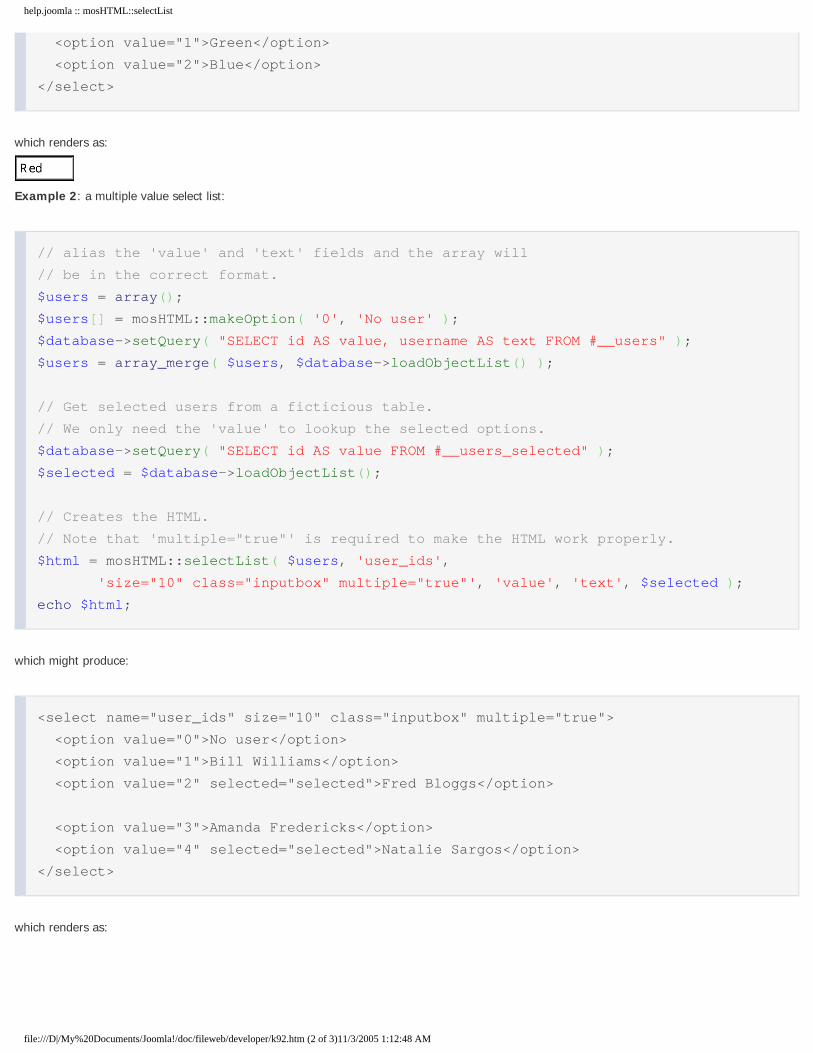
help.joomla :: mosHTML::selectList
<option value="1">Green</option>
<option value="2">Blue</option>
</select>
which renders as:
Example 2: a multiple value select list:
// alias the 'value' and 'text' fields and the array will
// be in the correct format.
$users = array();
$users[] = mosHTML::makeOption( '0', 'No user' );
$database->setQuery( "SELECT id AS value, username AS text FROM #__users" );
$users = array_merge( $users, $database->loadObjectList() );
// Get selected users from a ficticious table.
// We only need the 'value' to lookup the selected options.
$database->setQuery( "SELECT id AS value FROM #__users_selected" );
$selected = $database->loadObjectList();
// Creates the HTML.
// Note that 'multiple="true"' is required to make the HTML work properly.
$html = mosHTML::selectList( $users, 'user_ids',
'size="10" class="inputbox" multiple="true"', 'value', 'text', $selected );
echo $html;
which might produce:
<select name="user_ids" size="10" class="inputbox" multiple="true">
<option value="0">No user</option>
<option value="1">Bill Williams</option>
<option value="2" selected="selected">Fred Bloggs</option>
<option value="3">Amanda Fredericks</option>
<option value="4" selected="selected">Natalie Sargos</option>
</select>
which renders as:
file:///D|/My%20Documents/Joomla!/doc/fileweb/developer/k92.htm (2 of 3)11/3/2005 1:12:48 AM

help.joomla :: mosHTML::selectList
Please report any errors on this page to the Developer Documentation Forum.
Last Updated ( Saturday, 03 September 2005 )
Close Window
file:///D|/My%20Documents/Joomla!/doc/fileweb/developer/k92.htm (3 of 3)11/3/2005 1:12:48 AM
help.joomla :: mosHTML::sortIcon
mosHTML::sortIcon
Last reviewed: Not reviewed
phpDocumentor
mosHTML::sortIcon
Builds the HTML code for displaying a standard clickable sort icon. The alternative text for the image is taken from the current language settings.
Syntax
string sortIcon ( string $base_href, string $field [, string $state] )
$base_href
is the base URL that will be used if the user clicks the image.
$field
is the name of the field that is being sorted.
$state
is the current sort state of the field. This parameter is optional and if omitted will default to 'none'. Possible values are:
none
indicates that the field is not currently sorted. Clicking the image will request an ascending sort.
asc
indicates that the field is currently sorted in ascending order. Clicking the image will request a descending sort.
desc
indicates that the field is currently sorted in descending order. Clicking the image will request an ascending sort.
Examples
Example: This example (abstracted from the com_statistics component) shows the construction of an array, $sorts, containing the HTML for two sort
icons.
// get sort field and check against allowable field names
$field = strtolower( mosGetParam( $_REQUEST, 'field', '' ) );
if (!in_array( $field, array( 'agent', 'hits' ) )) {
$field = '';
}
// get field ordering or set the default field to order
$order = strtolower( mosGetParam( $_REQUEST, 'order', 'asc' ) );
if ($order != 'asc' && $order != 'desc' && $order != 'none') {
$order = 'asc';
} else if ($order == 'none') {
$field = 'agent';
$order = 'asc';
}
// browser stats
file:///D|/My%20Documents/Joomla!/doc/fileweb/developer/k93.htm (1 of 2)11/3/2005 1:12:48 AM

help.joomla :: mosHTML::sortIcon
$order_by = '';
$sorts = array();
$sort_base = "index2.php?option=$option&task=$task";
switch ($field) {
case 'hits':
$order_by = "hits $order";
$sorts['agent'] = mosHTML::sortIcon( "$sort_base", "agent" );
$sorts['hits'] = mosHTML::sortIcon( "$sort_base", "hits", $order );
break;
case 'agent':
default:
$order_by = "agent $order";
$sorts['agent'] = mosHTML::sortIcon( "$sort_base", "agent", $order );
$sorts['hits'] = mosHTML::sortIcon( "$sort_base", "hits" );
break;
}
$database->setQuery( "SELECT * FROM #__stats_agents WHERE type='0' ORDER BY $order_by" );
$browsers = $database->loadObjectList();
Please report any errors on this page to the Developer Documentation Forum.
Last Updated ( Wednesday, 28 September 2005 )
Close Window
file:///D|/My%20Documents/Joomla!/doc/fileweb/developer/k93.htm (2 of 2)11/3/2005 1:12:48 AM
help.joomla :: mosHTML::treeSelectList
mosHTML::treeSelectList
Last reviewed: Not reviewed
phpDocumentor
mosHTML::treeSelectList
Generates an HTML select list from a tree based query list.
Syntax
string treeSelectList ( array &$options, int $id, array $preload, string $tag_name,
string $tag_attribs, string $key, string $text, mixed $selected )
$options
is an array of objects that have been returned by a database query or the mosHTML::makeOption method. Each object in the array
must contain id and parent properties.
$id
is the id of the current list item.
$preload
is an array of objects that will be used to preload the selection list. The objects might have been returned by a database query or
the mosHTML::makeOption method. The array may be empty.
$tag_name
is the name attribute of the HTML <select> tag.
$tag_attribs
is a string containing any additional attributes that you want to assign to the HTML <select> tag.
$key
is the name of the class variable holding the option 'value'. Should generally be 'value'
$text
is the name of the class variable holding the option 'text'. Should generally be 'text'.
$selected
is either a string value for a single value select list or an array for a multiple value select list.
Examples
Example 1: a single value select list:
$query = "SELECT * FROM #__menu WHERE menutype='mainmenu' ORDER BY ordering";
$database->setQuery( $query );
$src_list = $database->loadObjectList();
$selected = array();
$selected[] = mosHTML::makeOption( '2' );
echo mosHTML::treeSelectList( &$src_list, 1, array(), 'cid',
'class="inputbox" size="1"', 'value', 'text', $selected );
file:///D|/My%20Documents/Joomla!/doc/fileweb/developer/k94.htm (1 of 3)11/3/2005 1:12:48 AM

help.joomla :: mosHTML::treeSelectList
which might produce:
<select name="cid" class="inputbox" size="1">
<option value="33">Joomla License</option>
<option value="2" selected="selected">News</option>
<option value="48">. <sup>L</sup> All that's fit to print</option>
<option value="49">. <sup>L</sup> Everything else</option>
<option value="39">Blog</option>
<option value="4">Links</option>
<option value="3">Contact Us</option>
<option value="27">Search</option>
</select>
which will render as:
Example 2: a multiple value select list:
$query = "SELECT * FROM #__menu WHERE menutype='mainmenu' ORDER BY ordering";
$database->setQuery( $query );
$src_list = $database->loadObjectList();
$preload = array();
$preload[] = mosHTML::makeOption( '0', 'Select one or more menu options' );
$selected = array();
$selected[] = mosHTML::makeOption( '2' );
$selected[] = mosHTML::makeOption( '4' );
echo mosHTML::treeSelectList( &$src_list, 1, $preload, 'cid',
'class="inputbox" size="10" multiple="true"', 'value', 'text', $selected );
might produce:
<select name="cid" class="inputbox" size="10" multiple="true">
<option value="0">Select one or more menu options</option>
<option value="33">Joomla License</option>
<option value="2" selected="selected">News</option>
file:///D|/My%20Documents/Joomla!/doc/fileweb/developer/k94.htm (2 of 3)11/3/2005 1:12:48 AM

help.joomla :: mosHTML::treeSelectList
<option value="48">. <sup>L</sup> All that's fit to print</option>
<option value="49">. <sup>L</sup> Everything else</option>
<option value="39">Blog</option>
<option value="4" selected="selected">Links</option>
<option value="3">Contact Us</option>
<option value="27">Search</option>
</select>
which will render as:
Please report any errors on this page to the Developer Documentation Forum.
Last Updated ( Wednesday, 28 September 2005 )
Close Window
file:///D|/My%20Documents/Joomla!/doc/fileweb/developer/k94.htm (3 of 3)11/3/2005 1:12:48 AM

help.joomla :: mosHTML::yesnoRadioList
mosHTML::yesnoRadioList
Last reviewed: Not reviewed
phpDocumentor
mosHTML::yesnoRadioList
A convenient method of building an HTML radio list consisting of just a 'yes' button and a 'no' button. The words for 'yes' and 'no' are taken
from the current language settings. The HTML field will return a '0' is the user selects 'no' or '1' if the user selects 'yes'.
Syntax
string yesnoRadioList ( string $tag_name, string $tag_attribs, mixed $selected [, string $yes [, string $no ]] )
$tag_name
is the name attribute of the HTML radio button field.
$tag_attribs
is a string containing any additional attributes that you want to assign to each HTML radio button field.
$selected
is a string containing the value of the radio button that will be selected by default. This will be '0' for 'no' or '1' for 'yes'.
$yes
is a string containing the word for 'Yes' that will be displayed to the user. This parameter is optional and if omitted will default to the
word for 'Yes' taken from the current language settings.
$no
is a string containing the word for 'No' that will be displayed to the user. This parameter is optional and if omitted will default to the
word for 'No' taken from the current language settings.
Examples
Example 1: A simple yes/no radio button field with 'No' selected by default.
// A simple yes/no radio button field.
$html = mosHTML::yesnoRadioList( 'myswitch', 'class="inputbox"', '0' );
echo $html;
which produces:
<input type="radio" name="myswitch" value="0" checked="checked" class="inputbox" />No
<input type="radio" name="myswitch" value="1" class="inputbox" />Yes
which renders as:
No Yes
Example 2: A radio button field for 'On' or 'Off' selection with 'On' selected by default.
file:///D|/My%20Documents/Joomla!/doc/fileweb/developer/k95.htm (1 of 2)11/3/2005 1:12:49 AM

help.joomla :: mosHTML::yesnoRadioList
// An on/off radio button field.
$html = mosHTML::yesnoRadioList( 'myswitch', 'class="inputbox"', '1', 'On', 'Off' );
echo $html;
which produces:
<input type="radio" name="myswitch" value="0" class="inputbox" />Off
<input type="radio" name="myswitch" value="1" checked="checked" class="inputbox" />On
which renders as:
Off On
Please report any errors on this page to the Developer Documentation Forum.
Last Updated ( Saturday, 03 September 2005 )
Close Window
file:///D|/My%20Documents/Joomla!/doc/fileweb/developer/k95.htm (2 of 2)11/3/2005 1:12:49 AM

help.joomla :: mosHTML::yesnoSelectList
mosHTML::yesnoSelectList
Last reviewed: Not reviewed
phpDocumentor
mosHTML::yesnoSelectList
A convenient method of building an HTML select list consisting of just a 'No' and a 'Yes' option. The words for 'Yes' and 'No' are taken from the
current language settings. The HTML field will return a '0' is the user selects 'no' or '1' if the user selects 'yes'.
Syntax
string yesnoSelectList ( string $tag_name, string $tag_attribs, mixed $selected [, string $yes [, string $no ]] )
$tag_name
is the name attribute of the HTML <select> tag.
$tag_attribs
is a string containing any additional attributes that you want to assign to the HTML <select> tag.
$selected
is either a string value for a single value select list or an array for a multiple value select list.
$yes
is a string containing the word for 'Yes' that will be displayed to the user. This parameter is optional and if omitted will default to the
word for 'Yes' taken from the current language settings.
$no
is a string containing the word for 'No' that will be displayed to the user. This parameter is optional and if omitted will default to the
word for 'No' taken from the current language settings.
Examples
Example 1: A simple yes/no select field with 'No' selected by default
$html = mosHTML::yesnoSelectList( 'show_banners', 'class="inputbox"', '0' );
echo $html;
which produces:
<select name="show_banners" class="inputbox">
<option value="0" selected="selected">No</option>
<option value="1">Yes</option>
</select>
which renders as:
file:///D|/My%20Documents/Joomla!/doc/fileweb/developer/k96.htm (1 of 2)11/3/2005 1:12:49 AM

help.joomla :: mosHTML::yesnoSelectList
Example 2: A select list for 'On' or 'Off' with 'On' selected by default.
$html = mosHTML::yesnoSelectList( 'myswitch', 'class="inputbox"', '1', 'On', 'Off' );
echo $html;
which produces:
<select name="myswitch" class="inputbox">
<option value="0">Off</option>
<option value="1" selected="selected">On</option>
</select>
which renders as:
Please report any errors on this page to the Developer Documentation Forum.
Last Updated ( Saturday, 03 September 2005 )
Close Window
file:///D|/My%20Documents/Joomla!/doc/fileweb/developer/k96.htm (2 of 2)11/3/2005 1:12:49 AM

help.joomla :: Chapter 9. API Reference
Chapter 9. API Reference
Joomla includes many stand alone utility functions and Object Oriented helper class to reduce the tedium of repetitive task
and increase your productivity as a developer.
Last Updated ( Sunday, 08 May 2005 )
Close Window
file:///D|/My%20Documents/Joomla!/doc/fileweb/developer/k97.htm11/3/2005 1:12:49 AM

help.joomla :: A. Updates for 4.5.1
A. Updates for 4.5.1
Mambots
Mambots are changing format. The format for Mambo 4.5 is still supported but will be deprecated in the next version. See
the chapter on Mambots for more information on performance and feature enhancements for event driven Mambots.
A notable addition is that searching is now done via Mambots. This allows any component to craft their own search bot and
have it added to the results of the search component.
In this version, Mambots cannot be enabled or disabled by the Administrator. If they are present they will be functioning.
To remove the functionality of a Mambot you must delete the file.
Installer Parameters
You can now format your parameters in modules and components that appear as menu items. XML files are now copied
with modules to support this feature.
Two types of parameter tags are currently supported, a textbox and a list box.
Let's use the Main Menu module as an example. The XML file looks like the following:
<?xml version="1.0" encoding="iso-8859-1"?>
<mosinstall type="module">
<name>Main Menu</name>
<author>Joomla</author>
<copyright>(C) 2005 Open Source Matters. All rights reserved.</copyright>
<license>http://www.gnu.org/copyleft/gpl.html GNU/GPL</license>
<authorEmail>[email protected]</authorEmail>
<authorUrl>www.joomla.org</authorUrl>
<description>Displays a menu.</description>
<files>
<filename module="mod_mainmenu">mod_mainmenu.php</filename>
</files>
<params>
<param name="menutype" type="text" default="" label="Menu Type"
description="The name of the menu (default mainmenu)" />
<param name="class_sfx" type="text" default="" label="Class Suffix"
description="A suffix to be applied to the css class" />
<param name="menu_style" type="list" default="vert_indent" label="Menu Style"
file:///D|/My%20Documents/Joomla!/doc/fileweb/developer/l1.htm (1 of 5)11/3/2005 1:12:49 AM
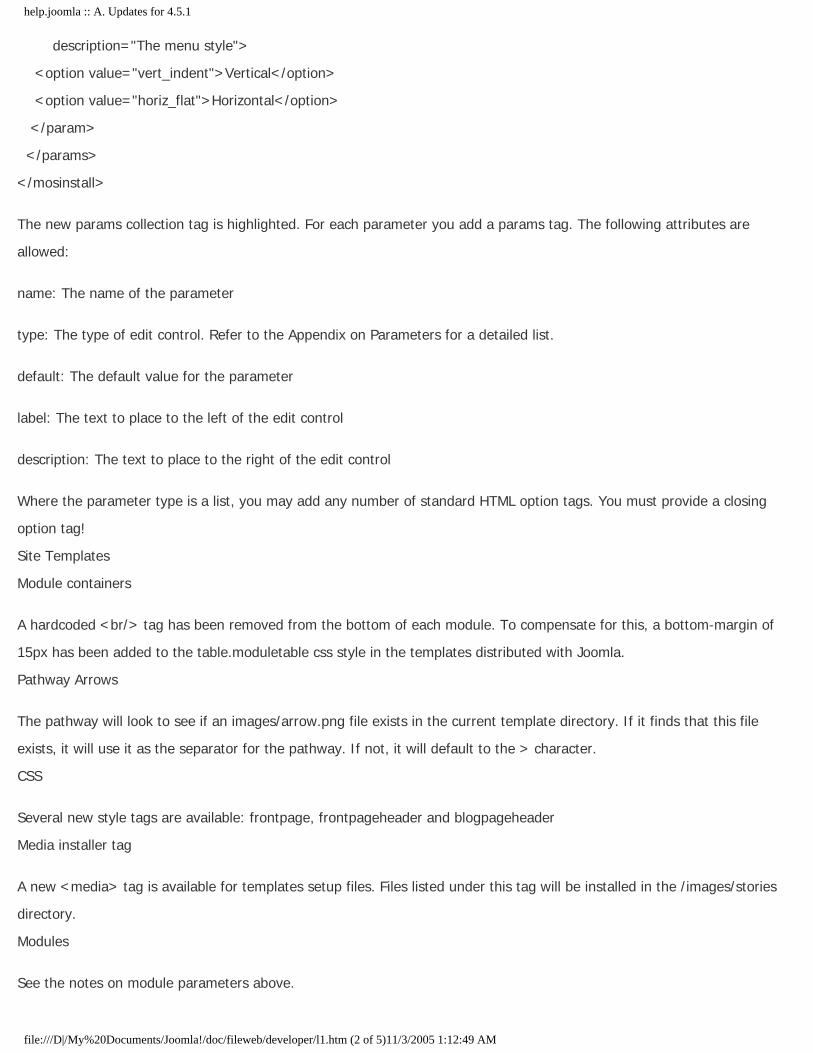
help.joomla :: A. Updates for 4.5.1
description="The menu style">
<option value="vert_indent">Vertical</option>
<option value="horiz_flat">Horizontal</option>
</param>
</params>
</mosinstall>
The new params collection tag is highlighted. For each parameter you add a params tag. The following attributes are
allowed:
name: The name of the parameter
type: The type of edit control. Refer to the Appendix on Parameters for a detailed list.
default: The default value for the parameter
label: The text to place to the left of the edit control
description: The text to place to the right of the edit control
Where the parameter type is a list, you may add any number of standard HTML option tags. You must provide a closing
option tag!
Site Templates
Module containers
A hardcoded <br/> tag has been removed from the bottom of each module. To compensate for this, a bottom-margin of
15px has been added to the table.moduletable css style in the templates distributed with Joomla.
Pathway Arrows
The pathway will look to see if an images/arrow.png file exists in the current template directory. If it finds that this file
exists, it will use it as the separator for the pathway. If not, it will default to the > character.
CSS
Several new style tags are available: frontpage, frontpageheader and blogpageheader
Media installer tag
A new <media> tag is available for templates setup files. Files listed under this tag will be installed in the /images/stories
directory.
Modules
See the notes on module parameters above.
file:///D|/My%20Documents/Joomla!/doc/fileweb/developer/l1.htm (2 of 5)11/3/2005 1:12:49 AM
help.joomla :: A. Updates for 4.5.1
Modules written for version 4.5 that use parameters will not work correctly in version 4.5.1. See the appendix on
Parameters for more information.
Modules are also supported for Administrator. Modules with an "iscore" field value of 2 or 3 and an access level of 99 are
considered Administrator modules.
API Changes
Page Navigation
A new method called getLimitBox has been added to the pageNav class which returns the html for the limit box. The
writeLimitBox method is still provided for backward compatibility but this method simply returns the return string from
getLimitBox.
In the Administrator version of the Page Navigation class, there is a new method called getListFooter. This method returns
an HTML table of the Paging links, the list limit selection box and the Page X - Y of Z results.
The methods rowNumber, orderUpIcon and orderDownIcon have also been added.
mosHTML
Some extra methods have been added to the mosHTML class to support radio lists.
Tabs
Following is a skeletal example of how to implement the new style of tabs:
<?php
// Construct the object
// Call class, set persistant (useCookies) to no (0) or yes (1)
$tabs = new mosTabs( 0 );
// Start a new pane
// Note, you can have more than one pane on a page (think wrapper)
$tabs->startPane( "module" );
// Start first tab with TabText of Details
// and the 2nd var can be anything UNIQUE
$tabs->startTab("Details","Details-page");
?>
Put some Content here !!!!!!!!
<?php
// end this first tab
file:///D|/My%20Documents/Joomla!/doc/fileweb/developer/l1.htm (3 of 5)11/3/2005 1:12:49 AM
help.joomla :: A. Updates for 4.5.1
$tabs->endTab();
// Create a new tab!!
// Same vars as before (but different names)
$tabs->startTab("Parameters","params-page");
?>
More content
<?php
//end this tab
$tabs->endTab();
// end this pane (wrapper)
$tabs->endPane();
?>
DON'T FORGET to remove legacy calls as follows (normally right at the end of the file).
<script language="javascript" type="text/javascript">
dhtml.cycleTab('tab1');
</script>
Administrator
Templates and Modules
The template and module support in the Administrator should be considered experimental and may change before the final
release of 4.5.1. It is intended that in coming versions the templating engines for both the Site and the Administrator
combine. By all means play with the current system and suggest improvements and point out strategic deficiencies. The
active template may be changed by directly editing the configuration.php file.
Banners
The useBanner configuration variable has been dropped from Global Configuration.
Help Component
The help component has been dropped from the 4.5.1 distribution. A new system based on XML DocBook files has been
implemented. Refer to the Documentation Manual for how you add compile help files for your applications.
Backup to mosDBTable
A new option exists in the Database Backup screen. You may select a mosDBTable as a format. This is useful when
designing new components. After you have created your database table, select this function and a skeleton PHP class will
be provided for you.
file:///D|/My%20Documents/Joomla!/doc/fileweb/developer/l1.htm (4 of 5)11/3/2005 1:12:49 AM

help.joomla :: A. Updates for 4.5.1
WYSIWYG Editors
Editors are now Mambots installable in the "editors" group.
Miscellaneous
TODO
Future Versions
The MENU_Default class will be deprecated in the next version.
Problems with XML Installer Files
DOMIT is more strict with XML parsing than was the MiniXML library. If you are receiving complaints that your package file
cannot be installed because an installer file cannot be found, it's likely that the file is not well formed. You can quickly test
this by opening the XML file in any modern browser.
If you want to have html or other special characters in any field you will need to enclose the contents of the tag CDATA
tags, for example:
<copyright><![CDATA[ © Copyright Me - 2004 ]]></copyright>
Last Updated ( Thursday, 15 September 2005 )
Close Window
file:///D|/My%20Documents/Joomla!/doc/fileweb/developer/l1.htm (5 of 5)11/3/2005 1:12:49 AM
help.joomla :: B. Using Parameters
B. Using Parameters
This appendix describes how to use the parameter system in your Joomla Modules and Components. Parameters provided
with components relate to them when they are added to menu items. The parameters will show when you edit the menu
item.
XML Definition
The Modules and Components setup files define the parameters. Parameters are wrapped in a <params> collection tag and
then individual parameters are defined in a <param> tag. A typical parameter block may look like:
<params name="" description="">
<param name="count" type="text" default="5" label="Number of items"
description="The number of items to show" />
</params>
The following attributes are allowed for the <params> tag:
*
name: The name of the group of parameters parameter
*
description: A description for the group of parameters
Both these attributes are optional.
The following attributes are allowed for the <param> tag:
*
name: the name of the parameter
*
type: the type of form element
*
default: the default value for the parameter
*
label: The text to place to the left of the edit control
*
description: The text to place to the right of the edit control.
file:///D|/My%20Documents/Joomla!/doc/fileweb/developer/l2.htm (1 of 6)11/3/2005 1:12:50 AM

help.joomla :: B. Using Parameters
The available types for parameters are as follows:
text
The "text" type provides a simple text box, for example:
<param name="count" type="text" default="5" label="Number of items"
description="The number of items to show" />
list
The "list" type provides for an HTML select list. You provide the necessary HTML options as child elements of this tag in the
same way as you would for an HTML select list, for example:
<param name="hide_author" type="list" default="" label="Hide Author"
description="Show/Hide the item author - only affects this page">
<option value="">Use Global</option>
<option value="1">Hide</option>
<option value="0">Show</option>
</param>
radio
The "radio" type provides for an HTML radio group. You provide the necessary HTML options as child elements of this tag
in the same way as you would for an HTML select list, for example:
<param name="show_leading" type="radio" default="1" label="Show Leading"
description="Show leading items">
<option value="0">No</option>
<option value="1">Yes</option>
</param>
Radio list groups are formatted horizontally.
mos_section
The "mos_section" type provides a list of published sections, for example:
<param name="section_id" type="mos_section" default="0" label="Section"
description="A content section" />
The section id (primary key) is returned.
file:///D|/My%20Documents/Joomla!/doc/fileweb/developer/l2.htm (2 of 6)11/3/2005 1:12:50 AM

help.joomla :: B. Using Parameters
mos_category
The "mos_category" type provides a list of published categories, for example:
<param name="catid" type="mos_category" default="0" label="Category"
description="A content cateogry" />
The lists displays items in "Section-Category" format. The cateogry id (primary key) is returned.
mos_menu
The "mos_menu" type provides a list of the defined menu types used in the site, for example:
<param name="menutype" type="mos_menu" default="mainmenu" label="Menu Type"
description="The name of the menu (default mainmenu)" />
mos_imagelist
The "mos_imagelist" type provides a list of images in the directory defined by the "directory" attribute, for example:
<param name="menu_image" type="imagelist" directory="/images/M_images" default=""
label="Menu Image"
description="A small image to be placed to the left or right of your menu item..." />
The directory is relative to the installation directory of Joomla.
textarea
The "textarea" type provides a simple textarea, for example:
<param name="description_text" type="textarea" default="" label="Description Text" rows="30" cols="5
description="Description for page, if left blank it will load _WEBLINKS_DESC from your language file"/>
Note that rows and cols attributes are available for this parameter type.
The mosParameters Class
A helper class is available for working with parameters called mosParameters.
The mosParameters class constructor takes two arguments, the first the textual parameter values retrieved from the
database, and the second in the xml setup file where the parameters are defined. See the following example:
global $mainframe;
$option = 'com_content';
// get params definitions
file:///D|/My%20Documents/Joomla!/doc/fileweb/developer/l2.htm (3 of 6)11/3/2005 1:12:50 AM

help.joomla :: B. Using Parameters
$params =& new mosParameters( $menu->params,
$mainframe->getPath( 'com_xml', $option ), 'component' );
To display the parameters pass the params variable to your display function and simply echo the text returned by the
"render" method, for example:
<?php
function displayFoo( &$params ) {
echo $params->render();
}
?>
Always pass the params variable by reference as this conserves memory.
Extending Parameters
NOTE: Experimental
It is possible to add your own form elements by extending the parameters class. For example, to add a form element that
lists users you might do something like the following:
class myParameters extends mosParameters {
function _form_userlist() {
global $database;
$database->setQuery( "SELECT a.id AS value, a.name AS text"
. "nFROM #__users AS a"
. "nWHERE a.blocked='0'"
. "nORDER BY a.name"
);
$options = $database->loadObjectList();
array_unshift( $options, mosHTML::makeOption( '0', '- Select User -' ) );
return mosHTML::selectList( $options, "params[$name]", "class="inputbox"",
'value', 'text', $value );
}
}
// get params definitions
$params =& new myParameters( $params_text, $xml_file );
file:///D|/My%20Documents/Joomla!/doc/fileweb/developer/l2.htm (4 of 6)11/3/2005 1:12:50 AM
help.joomla :: B. Using Parameters
echo $params->render();
Using Parameters on the Site
Parameters replaces the bit-wise masking technique used in site components and modules.
The mosParameters class has three methods that you will use to access parameters:
get( 'name' [, 'default' )
This methods will return the value of a parameter if it exists or is set, otherwise it returns the 'default' value (or an empty
string).
set( 'name', 'value' )
This method method sets the value of a parameter. It returns the value set.
def( 'name', 'default' )
This method combines both get and set. It will check to see if the parameter of 'name' exists. If it does it returns it. If it
doesn't it sets it to 'default' and returns that value.
Here are some examples:
// Parameters
$menu =& new mosMenu( $database );
$menu->load( $Itemid );
$params =& new mosParameters( $menu->params );
$header = $params->get( 'header' );
$count = $params->def( 'count', 10 );
$params->set( 'readon', 1 );
A good example of how to use the def method is when you want to use a global state by default, for example, a parameter
may be defined like:
<param name="hide_author" type="list" default="" label="Hide Author"
description="Show/Hide the item author - only affects this page">
<option value="">Use Global</option>
<option value="1">Hide</option>
<option value="0">Show</option>
file:///D|/My%20Documents/Joomla!/doc/fileweb/developer/l2.htm (5 of 6)11/3/2005 1:12:50 AM

help.joomla :: B. Using Parameters
</param>
Notice that the "Use Global" option is an empty string. You may then have the following code in your module or component:
$hide_author = $params->def( 'hide_author', $mosConfig_hideauthor );
If the "hide_author" parameter is not defined, that is, is an empty string or not present at all, then the parameter will be
set to the second argument, in this case the global setting for hiding author names, and that value will be returned by the
method. If the parameter is not empty, that is, either "0" or "1" then the parameter will not be changed and the actual
setting is returned by the method.
Quick Fix for Old Modules
Modules written for version Mambo 4.5 that use parameters will not work correctly in Mambo 4.5.1 or Joomla 1.0 or later.
Developers are encouraged to upgrade the method of using parameters as it is very simple to do so. However, to get
things running quickly you may insert the following code near the head of you module, before the parameters are used:
$params = mosParseParams( $module->params );
Last Updated ( Wednesday, 14 September 2005 )
Close Window
file:///D|/My%20Documents/Joomla!/doc/fileweb/developer/l2.htm (6 of 6)11/3/2005 1:12:50 AM

help.joomla :: C. mosHTML Reference
C. mosHTML Reference
mosHTML Helper Class
mosHTML is a helper class for rendering lists. Following are some examples of how to use the methods in this class.
mosHTML::makeOption
makeOption( string $value [, string $text )
This method returns an object that can be passed in an array to another list handling method. The method takes two
arguments, one for the value of the option tag and optionally one for the text to display. If the text is ommitted, the single
string is used for both the option value and the text.
Example: creating a list with hard coded values:
// Option value and text will be the same
$mylist1 = array();
$mylist1[] = mosHTML::makeOption( 'Good' );
$mylist1[] = mosHTML::makeOption( 'Bad' );
$mylist1[] = mosHTML::makeOption( 'Ugly' );
// Option value and text will be different
$mylist2 = array();
$mylist2[] = mosHTML::makeOption( '0', 'Select Priority' );
$mylist2[] = mosHTML::makeOption( '1', 'Low' );
$mylist2[] = mosHTML::makeOption( '2', 'High' );
Example: creating a list from a database query:
// alias the 'value' and 'text' fields and the array will
// be in the correct format
$users = array();
$users[] = mosHTML::makeOption( '0', 'Select User' );
$database->setQuery( "SELECT id AS value, username AT text"
. "nFROM #__users" );
$users = merge_array( $users, $database->loadObjectList() );
The mosHTML method returns a stdClass object with class variables of 'value' and 'text'.
mosHTML::selectList
file:///D|/My%20Documents/Joomla!/doc/fileweb/developer/l3.htm (1 of 4)11/3/2005 1:12:50 AM
help.joomla :: C. mosHTML Reference
selectList( array $values, string $tag_name, string $tag_attribs, string $key, string $text, mixed $selected )
The selectList method builds an HTML select tag complete with options. It takes six arguments:
$values - An array of objects that have been returned by a query or the mosHTML method (see above, the $mylist1 and
the $mylist2 variables would be suitable).
$tag_name - The name attribute of the select tag.
$tag_attributes - Any additional attributes you want to assign to the select tag.
$key - The name of the class variable holding the option 'value'. Should generally be 'value'.
$text - The name of the class variable holding the option 'text'. Should generally be 'text'.
$selected - Either a string value for a single value select list or an array for a multiple value select list.
Example: a single value select list
// Creates a list select list of the users (see previous example)
// The option tag with the value of zero is selected
$html = mosHTML::selectList( $users, 'size="1" class="inputbox"',
'value', 'text', 0 );
echo $html;
Example: a multiple value select list
// alias the 'value' and 'text' fields and the array will
// be in the correct format
$users = array();
$users[] = mosHTML::makeOption( '0', 'No User' );
$database->setQuery( "SELECT id AS value, username AT text"
. "nFROM #__users" );
$users = merge_array( $users, $database->loadObjectList() );
// Get the selected users from a ficticious table
// We only need the 'value' to lookup the selected options
$database->setQuery( "SELECT id AS value"
. "nFROM #__users_selected" );
file:///D|/My%20Documents/Joomla!/doc/fileweb/developer/l3.htm (2 of 4)11/3/2005 1:12:50 AM

help.joomla :: C. mosHTML Reference
$selected = $database->loadObjectList();
// Creates the html
$html = mosHTML::selectList( $users, 'size="10" class="inputbox" multiple="true"',
'value', 'text', $selected );
echo $html;
mosHTML::integerSelectList
integerSelectList( $start, $end, $inc, $tag_name, $tag_attribs, $selected, $format="" )
The integerSelectList method builds a list of numbers from $start to $end with an increment of $inc. The optional $format
argument allows to apply a printf style format to the number.
Example:
$html = mosHTML::integerSelectList( -12, 12, 1, 'tzoffset',
'size="1" class="inputbox"', 0, "%02d" );
echo $html;
mosHTML::monthSelectList
monthSelectList( $tag_name, $tag_attribs, $selected )
A convenient method for producing a list of months.
$html = mosHTML::monthSelectList( 'month', 'class="inputbox"', '01' );
mosHTML::treeSelectList
Todo.
mosHTML::yesnoSelectList
yesnoSelectList( $tag_name, $tag_attribs, $selected )
A convenient method for producing a simple Yes/No select list.
$html = mosHTML::yesnoSelectList( 'show_banners', 'class="inputbox"', 0 );
mosHTML::radioList
radioList( &$arr, $tag_name, $tag_attribs, $selected=null, $key='value', $text='text' )
mosHTML::yesnoRadioList
file:///D|/My%20Documents/Joomla!/doc/fileweb/developer/l3.htm (3 of 4)11/3/2005 1:12:50 AM

help.joomla :: C. mosHTML Reference
yesnoRadioList( $tag_name, $tag_attribs, $selected )
A convenient method for producing a simple Yes/No radio button combination.
$html = mosHTML::yesnoRadioList( 'show_banners', 'class="inputbox"', 0 );
Last Updated ( Thursday, 23 December 2004 )
Close Window
file:///D|/My%20Documents/Joomla!/doc/fileweb/developer/l3.htm (4 of 4)11/3/2005 1:12:50 AM

help.joomla :: D. Code and Commenting Standards
D. Code and Commenting Standards
A small subset of the available commenting tags are shown in the following examples. For more details, see the phpDocumentor
documentation.
File Header Comment
All php files must have the following comment block after the opening php tag:
/**
* This is a broad desciption of the file function
* @version $ Id $
* @package Joomla
* @copyright Copyright (C) 2005 Open Source Matters. All rights reserved.
* @license http://www.gnu.org/copyleft/gpl.html GNU/GPL, see LICENSE.php
* Joomla! is free software and parts of it may contain or be derived from the
* GNU General Public License or other free or open source software licenses.
* See COPYRIGHT.php for copyright notices and details.
*/
This example is used for core files. Replace the description with a brief statement of what the file is for. Where files are stored in a CVS, the $
Id $ tag (remove the spaces around the Id text) otherwise use whatever version numbering system you care to employ. Replace the copyright
and license with the appropriate details.
The package should be a single word (no spaces) that describes the application this file is a part of. For example, all core files are in the
Joomla package. A third party element called Super Forum may be given the package name of SuperForum. When the documentation is
compiled by phpDocumentor, it is grouped into it's respective packages.
Documenting Classes
Classes should be commented in the following way:
/**
* A utility class
*/
class mosUtility extends mosAbstractUtility {
/** @var string A temporary string */
var $temp;
/**
* Constructor
* @param string A string to store
* @return boolean True if the string is not empty, false otherwise
file:///D|/My%20Documents/Joomla!/doc/fileweb/developer/l4.htm (1 of 5)11/3/2005 1:12:50 AM

help.joomla :: D. Code and Commenting Standards
*/
function mosUtility( $temp ) {
$this->temp = $temp;
return strlen( $temp ) > 0;
}
}
There are a number of comment blocks used here.
The first is placed before the class definition and should briefly describe what the class is. If the class has a tutorial document related to it,
you can link this via the @tutorial tag.
For each class variable (for example, $temp) provide a comment block on the line before with the @var tag. The syntax is:
@var data-type description
For each class method provide a comment block. The first line should be a brief description. For each argument in the function statement,
provide a @param tag and, if the function returns a value, provide a @return tag. Both tags have the same syntax as for the @var tag.
Abstract classes should include the @abstract tag as follows:
/**
* An abstract utility class
* @tutorial utility.cls
* @abstract
*/
class mosAbstractUtility {
// this class does nothing
}
Documenting Functions
Functions are documented in the same way as class methods, for example:
/**
* Strips html tags from a string
* @param string The source string
* @return string
*/
file:///D|/My%20Documents/Joomla!/doc/fileweb/developer/l4.htm (2 of 5)11/3/2005 1:12:50 AM
help.joomla :: D. Code and Commenting Standards
function mosStripTags( $text ) {
return strip_tags( $text );
}
Miscellaneous Documentation
Additional comment throughout the code should be used "just enough" to help you remember what you where doing when you haven't looked
at the code for three weeks. To many comments just bulk the code and too few can reduce the effectiveness of a development team or even
your own debugging.
You should include short notes before query statements describing what they are for (it's not always obvious just looking at the SQL). You
should also use comments to breakup lengthy functions or class methods into logical clumps of code (for example, query data, validate,
prepare output, etc).
Always use C-style comments, not Perl style (hash). Here are some examples:
// print something out, this is acceptable for a short note
echo $var;
/*
Here is something that needs a little more explanation
over a few lines. This is acceptable.
*/
echo $var->complex();
## Avoid this style of comment
echo badPractice();
// ---------------------------------------------------------------------------------
// Try to avoid the ascii equivalent of a page break unless it is really necessary
// The bytes add up over time
File Formats
Files must be committed to the CVS in Unix format.
Code Styles
The Joomla core scripts use a modifed Pear standard. All indents must be made up of tab characters.
Language control blocks, such as if, while, switch, etc, have a space before the opening bracket but no space around the arguments in the
file:///D|/My%20Documents/Joomla!/doc/fileweb/developer/l4.htm (3 of 5)11/3/2005 1:12:50 AM

help.joomla :: D. Code and Commenting Standards
brackets. There is a space between the last bracket and the opening curly brace (this is not on a new line). Subsequent lines are indented
with a tab (generally set to the equivalent of 4 spaces in your editor for looks). The closing brace is outdented to align with the opening
statement. For example:
if ($less < $more) {
echo 'Here';
}
Functions have no space between the name and the opening bracket but have space around the enclosed arguments. This distinguishes them
from language constructs. Arguments are separated by a comma-space pair. For example:
echo myFunction( $arg1, $arg2 );
if (myCompare( $arg1, $arg2 )) {
echo 'My compare is true';
}
Switch statements should have indented "case" statements followed by indented code including the "break" statement. For example:
switch ($task) {
case 'edit':
doEditFunction( $option );
break;
case 'view':
default:
doViewFunction( $option );
break;
}
Classes should naturally indent their methods. For example:
class foo {
function bar( $hah ) {
return "humbug";
}
}
file:///D|/My%20Documents/Joomla!/doc/fileweb/developer/l4.htm (4 of 5)11/3/2005 1:12:50 AM

help.joomla :: D. Code and Commenting Standards
Anchor tags may be broken over two lines provided that the closing tag has not space between it and the contents of the tag, for example:
<a href="index.php">
This is a really long link</a>
Table should be naturally indented, for example:
<table>
<tr>
<td>
A cell
</td>
</tr>
</table>
Last Updated ( Thursday, 15 September 2005 )
Close Window
file:///D|/My%20Documents/Joomla!/doc/fileweb/developer/l4.htm (5 of 5)11/3/2005 1:12:50 AM

help.joomla :: E. Porting MiniXML to the DOMIT Library
E. Porting MiniXML to the DOMIT Library
E. Porting MiniXML to the DOMIT Library
From 4.5.1 the XML parser has been upgraded to DOMIT! (http://www.engageinteractive.com/domit/). This has been done
to solve a conflict in the MiniXML library with PHP Version 4.2.2. DOMIT is also a far more mature library and development
is ongoing where other libraries seem to have stagnated.
As a result, the MiniXML libraries have been deleted from the source distribution.
Any component or module that relied on the MiniXML libraries has two choices. Either include your own MiniXML source file,
or upgrade to using DOMIT! The later is obviously recommended. It's quite easy. It just takes a few steps to convert a few
functions over. Just following the following steps.
Finding elements by path
Replace:
$e = &$xml->getElementByPath( 'mosinstall/name' );
With:
$e = &$xml->getElementsByPath( 'name', 1 );
Getting the contents of a text node
Replace:
$e->getValue();
With:
$e->getText();
Getting the child nodes array
Replace:
$e->getAllChildren( );
With:
$e->childNodes;
Loading the XML file
Replace the following type of block
file:///D|/My%20Documents/Joomla!/doc/fileweb/developer/l5.htm (1 of 3)11/3/2005 1:12:51 AM

help.joomla :: E. Porting MiniXML to the DOMIT Library
$xmlDoc = new MiniXMLDoc( $dirName . $xmlfile );
$xmlDoc->fromFile( $dirName . $xmlfile );
$element = &$xmlDoc->getElementByPath( 'mosinstall' );
mosDebugVar( $element );
if ( is_null( $element ) ) {
continue;
}
if ( $element->attribute( "type" ) != "mosbot") {
continue;
}
With the following type of code block
// Read the file to see if it's a valid MOSBot XML file
$xmlDoc =& new DOMIT_Lite_Document();
$xmlDoc->resolveErrors( true );
if (!$xmlDoc->loadXML( $dirName . $xmlfile, false, true )) {
continue;
}
$element = &$xmlDoc->documentElement;
if ($element->getTagName() != 'mosinstall') {
continue;
}
if ($element->getAttribute( "type" ) != "mosbot") {
continue;
}
Getting the root node
Replace:
$element = &$xmlDoc->getElementByPath( 'mosinstall' );
With:
$element = &$xmlDoc->documentElement;
file:///D|/My%20Documents/Joomla!/doc/fileweb/developer/l5.htm (2 of 3)11/3/2005 1:12:51 AM

help.joomla :: E. Porting MiniXML to the DOMIT Library
Last Updated ( Wednesday, 14 September 2005 )
Close Window
file:///D|/My%20Documents/Joomla!/doc/fileweb/developer/l5.htm (3 of 3)11/3/2005 1:12:51 AM