jsp - class2
TRANSCRIPT

8/7/2019 jsp - class2
http://slidepdf.com/reader/full/jsp-class2 1/23
http://www.easywayserver.com/t http://www.easywayserver.com/t omcat omcat--installationinstallation--
configuration.htmconfiguration.htm

8/7/2019 jsp - class2
http://slidepdf.com/reader/full/jsp-class2 2/23
SP needs any web server; this can be SP needs any web server; this can be tomcat by apache, WebLogic by bea, or tomcat by apache, WebLogic by bea, or WebSphere by IBM.WebSphere by IBM.
All jsp should be deployed inside web All jsp should be deployed inside web server. We will use Tomcat server to run server. We will use Tomcat server to run
JSP, this Tomcat server can run on any JSP, this Tomcat server can run on any platform like windows or linux.platform like windows or linux.Install tomcat with this step Install tomcat with this step

8/7/2019 jsp - class2
http://slidepdf.com/reader/full/jsp-class2 3/23
Tomcat is java based web server, support Tomcat is java based web server, support jsp ,servlet, and java application, but does jsp ,servlet, and java application, but does
not work as application server. Tomcat not work as application server. Tomcat need java environment to execute jsp and need java environment to execute jsp and servlet or java class files. This needs to be servlet or java class files. This needs to be JVM installed on server or machine, before JVM installed on server or machine, before
running Tomcat.running Tomcat.Java, JDK , JRE, JVM is available Java, JDK , JRE, JVM is available
freely from sun, and other third party freely from sun, and other third party

8/7/2019 jsp - class2
http://slidepdf.com/reader/full/jsp-class2 4/23
This site provides useful information regarding This site provides useful information regarding installation of Tomcat server. The steps by step of the installation of Tomcat server. The steps by step of the installation are shown properly. Every step will followed installation are shown properly. Every step will followed by a capture of screen that enable user to better by a capture of screen that enable user to better understand what they are doing currently and what they understand what they are doing currently and what they will be doing after. This will attract new user of Tomcat will be doing after. This will attract new user of Tomcat that are using Window platform to further reading on that are using Window platform to further reading on this site before continuing into installation. In the subtitle this site before continuing into installation. In the subtitle
'Deployment of jsp or servlet in tomcat ', user will be 'Deployment of jsp or servlet in tomcat ', user will be provided with example of creating first servlet. This is provided with example of creating first servlet. This is helpful for new user to test the example given and get helpful for new user to test the example given and get knowledge from that before going in depth. knowledge from that before going in depth.

8/7/2019 jsp - class2
http://slidepdf.com/reader/full/jsp-class2 5/23
Installation of JDK JavaInstallation of JDK Java
Download JDK or JRE from sun websiteDownload JDK or JRE from sun website
http://java.sun.com/javase/downloahttp://java.sun.com/javase/downloads/index.jspds/index.jspSun provides different executable file for Sun provides different executable file for Windows and Linux operating system version. Windows and Linux operating system version.
Sun provide JDK for Linux in .bin or tar.gz Sun provide JDK for Linux in .bin or tar.gz format, and for Windows .exe format. After format, and for Windows .exe format. After downloading file from sun, install JDK simple downloading file from sun, install JDK simple double click or through command prompt .double click or through command prompt .

8/7/2019 jsp - class2
http://slidepdf.com/reader/full/jsp-class2 6/23
Default installation directory for java in Default installation directory for java in Windows is Program file à Java, and Linux Windows is Program file à Java, and Linux /opt. Tomcat 5.5.17 version requires at /opt. Tomcat 5.5.17 version requires at least java1.5 version. least java1.5 version.

8/7/2019 jsp - class2
http://slidepdf.com/reader/full/jsp-class2 7/23
Environment Variable SettingEnvironment Variable Setting
Environment variable is next to set java home in Environment variable is next to set java home in
system environment. This will help to know system environment. This will help to know others application where is java is installed and others application where is java is installed and where java file have to compile. JAVA_HOMEwhere java file have to compile. JAVA_HOMEvariable name needs to set in environment variable name needs to set in environment
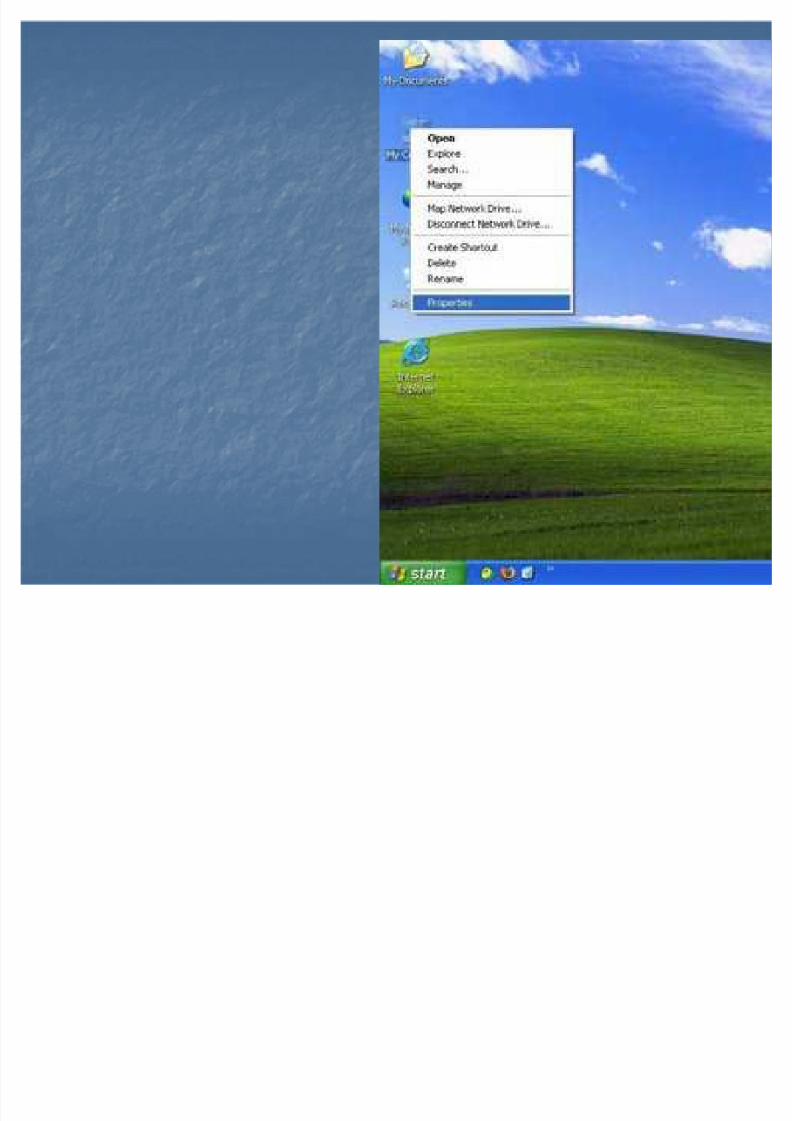
variable as variable name and variable value as variable as variable name and variable value as the java home directory c:the java home directory c:\\ jdk1.5.0.jdk1.5.0.Step to do this setting, go to my computer icon Step to do this setting, go to my computer icon and right click and go to propertiesand right click and go to properties
8/7/2019 jsp - class2
http://slidepdf.com/reader/full/jsp-class2 8/23

8/7/2019 jsp - class2
http://slidepdf.com/reader/full/jsp-class2 9/23
My computerMy computer-->right click>right click-->properties>properties--> >
8/7/2019 jsp - class2
http://slidepdf.com/reader/full/jsp-class2 10/23
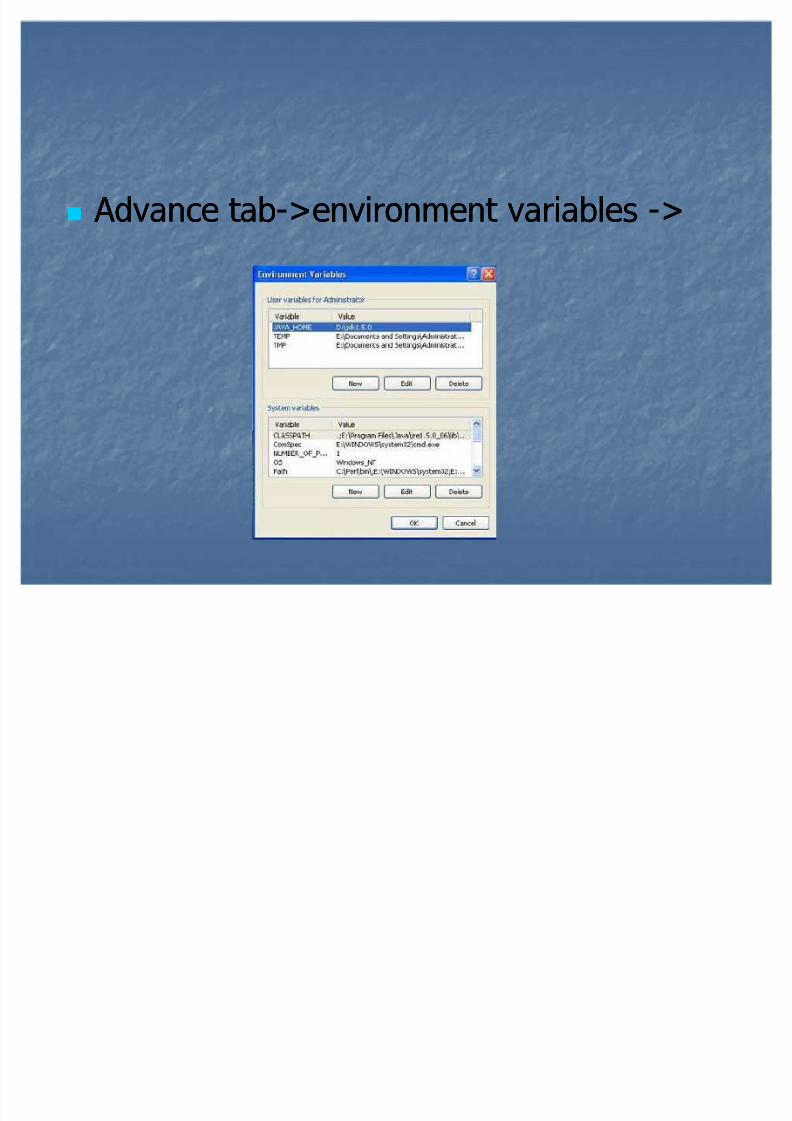
Advance tabAdvance tab-->environment variables >environment variables --> >

8/7/2019 jsp - class2
http://slidepdf.com/reader/full/jsp-class2 11/23
User variables User variables > New > New
Click on new button and new pop up will Click on new button and new pop up will open.open.In variable value, enter your java path In variable value, enter your java path where java is installed in system. where java is installed in system.

8/7/2019 jsp - class2
http://slidepdf.com/reader/full/jsp-class2 12/23
Tomcat installationTomcat installation Tomcat installationTomcat installation is of two types. Apache provides self installer is of two types. Apache provides self installer
for tomcat installation.This tomcat is in executable binary file. for tomcat installation.This tomcat is in executable binary file. Download,and install, self installer do all work automatically.Second Download,and install, self installer do all work automatically.Second is source code extractor. This tomcat installation is also easy as self is source code extractor. This tomcat installation is also easy as self installer. Before tomcat installation, check all jvm, java, and installer. Before tomcat installation, check all jvm, java, and environment path set properly.environment path set properly.
Apache tomcat is freely available from apache jakarta siteApache tomcat is freely available from apache jakarta sitehttp://archive.apache.org/dist/tomcat/tomcathttp://archive.apache.org/dist/tomcat/tomcat--5/5/According to per requirement, tomcat is downloaded in form of According to per requirement, tomcat is downloaded in form of
binaries or source code.binaries or source code.We are using zipped pack for windows installation. Download zipped We are using zipped pack for windows installation. Download zipped binaries code latest one from this site.Unzip this code and c:binaries code latest one from this site.Unzip this code and c:\\ drive drive and anywhere desired directoryand anywhere desired directoryAfter unzipped directory system will like that After unzipped directory system will like that

8/7/2019 jsp - class2
http://slidepdf.com/reader/full/jsp-class2 13/23

8/7/2019 jsp - class2
http://slidepdf.com/reader/full/jsp-class2 14/23
This is means that tomcat is installed This is means that tomcat is installed properly and ready to run web server. properly and ready to run web server.
Open bin directory and double click on Open bin directory and double click on startup.bat file. Startup.bat will open in startup.bat file. Startup.bat will open in dos command prompt dos command prompt

8/7/2019 jsp - class2
http://slidepdf.com/reader/full/jsp-class2 15/23

8/7/2019 jsp - class2
http://slidepdf.com/reader/full/jsp-class2 16/23
After starting tomcat, check tomcat in web After starting tomcat, check tomcat in web browser by typing localhost:8080 in browser by typing localhost:8080 in
address baraddress barhttp://localhost:8080/http://localhost:8080/

8/7/2019 jsp - class2
http://slidepdf.com/reader/full/jsp-class2 17/23
Setting up tomcat portSetting up tomcat port
Apache Tomcat ConfigurationApache Tomcat Configuration Tomcat Tomcat use 8080 port instead of 80 port. User can use 8080 port instead of 80 port. User can easily change default port from tomcat. easily change default port from tomcat. Open c:/tomcat/config/server.xml folder in Open c:/tomcat/config/server.xml folder in
tomcat installed and tomcat installed and openopen server.xmlserver.xml file.file.
8/7/2019 jsp - class2
http://slidepdf.com/reader/full/jsp-class2 18/23
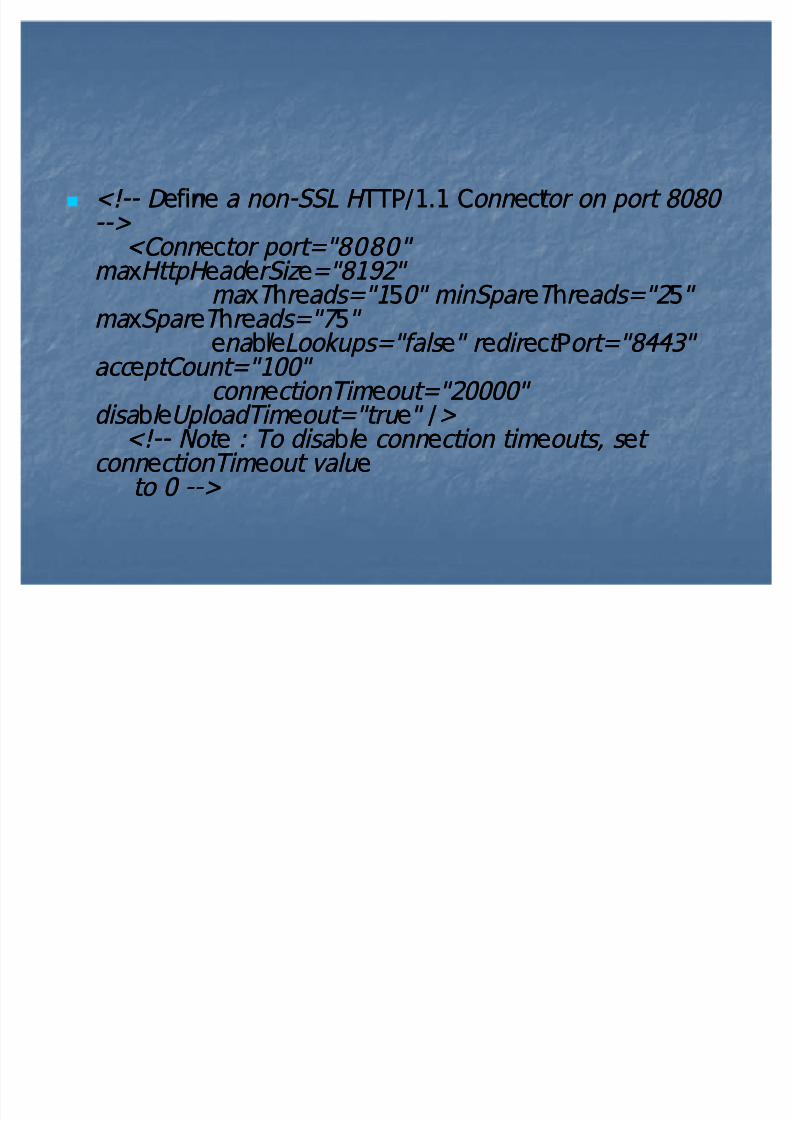
<! <!-- -- D efine a non D efin e a non - -SSL HTTP/1.1 Conn ect or on port 8080 SSL HTTP/1.1 Conn ector on port 8080 -- -->>
<C onn ector port=" <C onn ector port=" 80808080" "
ma xHttpH ead er Siz e="8192" ma xHttpH ead er Siz e="8192" ma xThr eads="150" m i n S par eThr eads="25" ma xThr eads="150" m i n S par eThr eads="25" ma xS par eThr eads="75" ma xS par eThr eads="75"
ena bleL ookups="fals e" r ed i r ectPort="8443" ena bl eL ookups="fals e" r ed i r ectPort="8443" acc ept C ount="100" acc ept C ount="100"
conn ect i on T i m eout="20000" conn ect i on T i m eout="20000"
d i sa bl eU pload T i m eout="tru e" />d i sa bl eU pload T i m eout="tru e" /><! <!-- -- N ot e : T o d i sa bl e conn ect i on t i m eouts, s et N ot e : T o d i sa bl e conn ect i on t i m eouts, s et
conn ect i on T i m eout valu econn ect i on T i m eout valu eto 0 to 0 -- -->>

8/7/2019 jsp - class2
http://slidepdf.com/reader/full/jsp-class2 19/23
In connector port change 8080 to 80, now In connector port change 8080 to 80, now save this save and shutdown.bat tomcat save this save and shutdown.bat tomcat
and startup.bat tomcat.This time user and startup.bat tomcat.This time user need not to write 8080 port need not to write 8080 port inin http://localhost/http://localhost/

8/7/2019 jsp - class2
http://slidepdf.com/reader/full/jsp-class2 20/23
Servlet invokerServlet invoker
Servlet container of tomcat engine doesnt start Servlet container of tomcat engine doesnt start automatically. WEBautomatically. WEB--INF deployment descriptor needs to INF deployment descriptor needs to tell servlet engine, where your servlet and mapping of tell servlet engine, where your servlet and mapping of
servlet.This is is can be done without any setting servlet.This is is can be done without any setting through servlet invoker. We just need to uncommented through servlet invoker. We just need to uncommented the code in web.xml in config folder.Servlet invoker the code in web.xml in config folder.Servlet invoker automatically load servlet in context and map it.automatically load servlet in context and map it.Open c:/tomcat/config/web.xml and edit this code as Open c:/tomcat/config/web.xml and edit this code as
shown.shown.First uncommented invoker then servlet mappingFirst uncommented invoker then servlet mapping

8/7/2019 jsp - class2
http://slidepdf.com/reader/full/jsp-class2 21/23
<!<!---- ---->><!<!---- debugdebug Debugging detail level for messages Debugging detail level for messages
loggedlogged ---->><!<!---- by this servlet.by this servlet. [0][0] ---->>
<servlet><servlet><servlet <servlet--name>invoker</servlet name>invoker</servlet--name>name><servlet <servlet--class>class>
org.apache.catalina.servlets.InvokerServlet org.apache.catalina.servlets.InvokerServlet </servlet </servlet--class>class><init <init--param>param>
<param<param--name>debug</paramname>debug</param--name>name><param<param--value>0</paramvalue>0</param--value>value>
</init </init--param>param><load<load--onon--startup>2</loadstartup>2</load--onon--startup>startup>
</servlet></servlet>

8/7/2019 jsp - class2
http://slidepdf.com/reader/full/jsp-class2 22/23

8/7/2019 jsp - class2
http://slidepdf.com/reader/full/jsp-class2 23/23
If you are using tomcat 6, need to define If you are using tomcat 6, need to define privileges for context. In tomcat 5.5.x privileges for context. In tomcat 5.5.x
version no need to define privileges for version no need to define privileges for context. Tomcat 5.5.x take automatically.context. Tomcat 5.5.x take automatically.
Privileges setting can be done in Privileges setting can be done in tomcat/conf/context.xml file. Add this linetomcat/conf/context.xml file. Add this line
<Context <Context reloadable="true"reloadable="true"privileged="true"privileged="true">>