kit 4170 adam riser rail assembly - national shower spares · kit 4170 adam riser rail assembly....
TRANSCRIPT
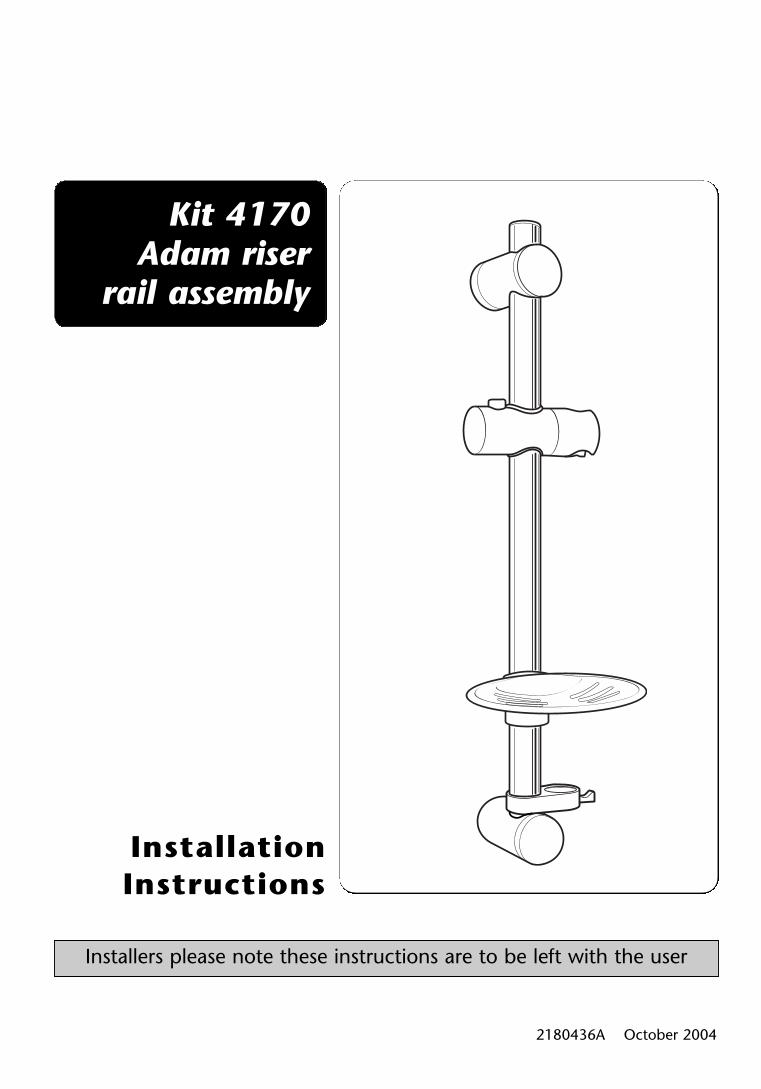
2180436A October 2004
InstallationInstructions
Installers please note these instructions are to be left with the user
Kit 4170Adam riser
rail assembly

Decide the position for the rail on the wallwithin the shower area. Proceed as follows:
Offer the upper bracket to the wall. Position thebracket and mark the centre hole. Remove thebracket then drill and plug the wall. (Thewallplugs provided are suitable for most brickwalls – use an appropriate masonry drill, but if thewall is plasterboard or a soft building block, usespecial wallplugs and a suitable drill bit).
Fit the spacer onto the bracket. Replace thebracket and spacer to the wall and secure inplace using the screw supplied (Fig.1).
Slide the riser rail into the recess in the lowerbracket (fig.2). Note that the hole in thebottom of the riser rail should align with theopening in the lower bracket. With both partsto hand, slide the riser rail through the openingin the upper bracket (fig.3). The riser railshould be about 4mm proud of the upperbracket. Make sure the rail is vertical then markthe centre hole for the lower bracket. Removethe rail and lower bracket. Drill and plug thewall.
Fit the sprayhead holder onto the riser rail. Pressthe button on the top of the holder to releasethe locking mechanism, then slide the holderonto the rail (fig.4). To secure the holder inplace, simply release the button.
Slide the soapdish and hose retainer onto thebottom of the riser rail, below the holder(fig.5).
Refit the lower bracket to the riser rail. Take theriser rail/lower bracket assembly and again slideit through the upper bracket. Secure in placeusing the screw supplied. Note that the screwshould pass though the hole in the base of theriser rail (fig.6) to stop it from turning withinthe bracket.
FITTING THE ADAM RISER RAIL ASSEMBLY
WARNING!
Check there are no hidden cables orpipes before drilling holes for wallplugs. Use great care when using
power tools near water. The use of aresidual current device (RCD) is
recommended.
Riser rail
to be 4mm proud
of bracket
Riser rail
Upper bracket
Slider/holder
assembly
Press and hold
button to unlock
mechanism
Riser rail
Fig.1
Fig.2
Fig.3
Fig.4
Align riser
rail with
centre hole
Washers
Shower
Sprayhead Sprayhead
Holder
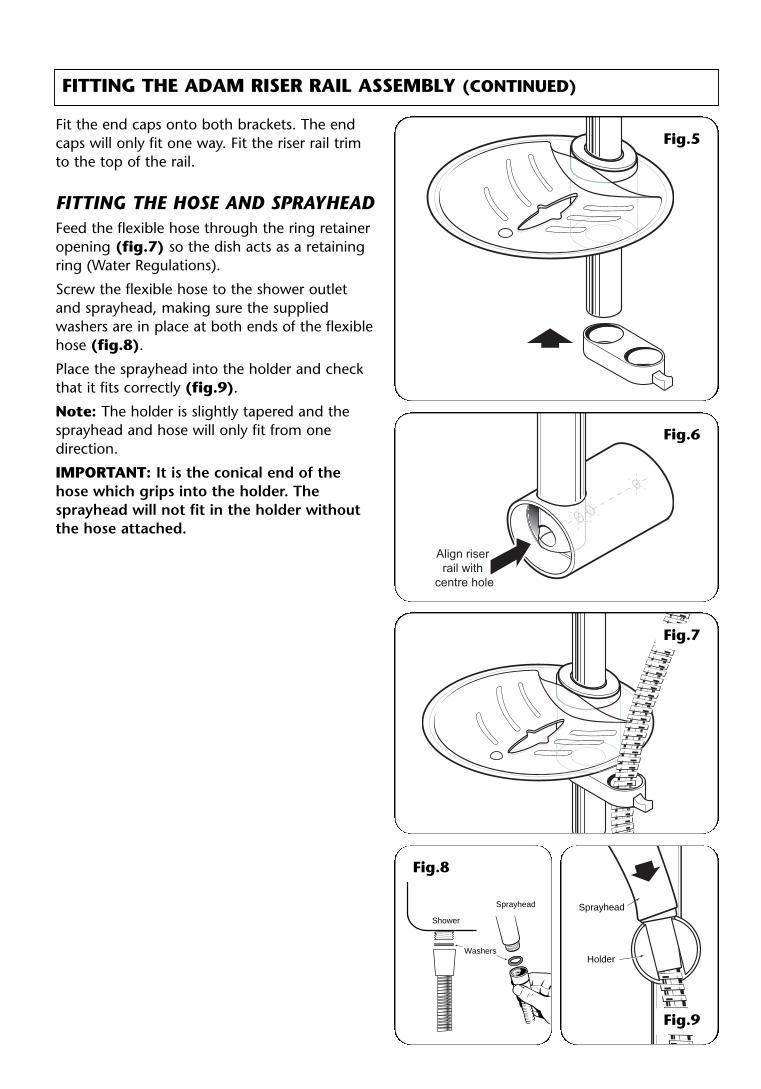
Fit the end caps onto both brackets. The endcaps will only fit one way. Fit the riser rail trimto the top of the rail.
FITTING THE HOSE AND SPRAYHEADFeed the flexible hose through the ring retaineropening (fig.7) so the dish acts as a retainingring (Water Regulations).
Screw the flexible hose to the shower outletand sprayhead, making sure the suppliedwashers are in place at both ends of the flexiblehose (fig.8).
Place the sprayhead into the holder and checkthat it fits correctly (fig.9).
Note: The holder is slightly tapered and thesprayhead and hose will only fit from onedirection.
IMPORTANT: It is the conical end of thehose which grips into the holder. Thesprayhead will not fit in the holder withoutthe hose attached.
FITTING THE ADAM RISER RAIL ASSEMBLY (CONTINUED)
Fig.5
Fig.6
Fig.7
Fig.9
Fig.8
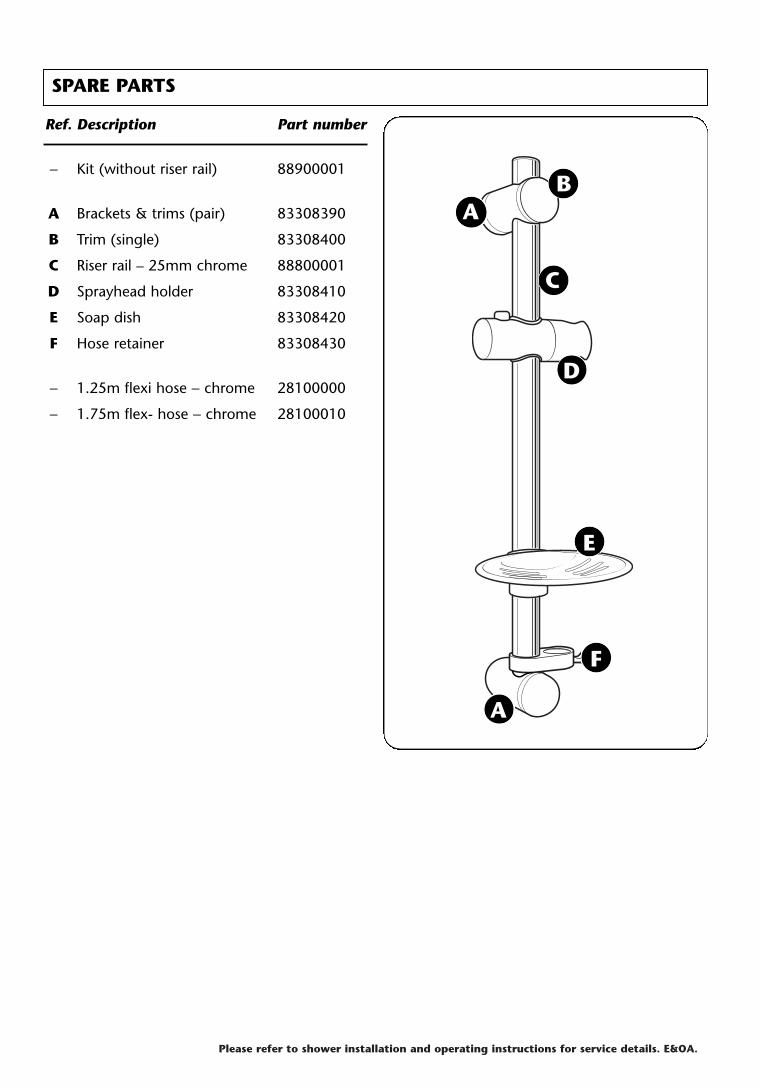
Ref. Description Part number
− Kit (without riser rail) 88900001
A Brackets & trims (pair) 83308390
B Trim (single) 83308400
C Riser rail – 25mm chrome 88800001
D Sprayhead holder 83308410
E Soap dish 83308420
F Hose retainer 83308430
− 1.25m flexi hose − chrome 28100000
− 1.75m flex- hose − chrome 28100010
SPARE PARTS
AB
C
D
E
F
A
Please refer to shower installation and operating instructions for service details. e&OA.