labelshop® 8 - honeywell productivity and workflow...
TRANSCRIPT
LabelShop® 8
Quick Start Guide

Quick Start GuideDOC-OEMCS80-QSM-US-27-02-06

The information in this manual is not binding and may bemodified without prior notice.Supply of the software described in this manual is subject toa user license. The software may not be used, copied orreproduced on any medium whatsoever, except inaccordance with this license.No portion of this manual may be copied, reproduced ortransmitted by any means whatsoever, for purposes otherthan the personal use of the buyer, unless writtenpermission is obtained from Braton Groupe sarl.
©2006 Braton Groupe sarl,All rights reserved.
Teklynx and its products are trademarks or registeredtrademarks of Braton Group sarl or its affiliatedcompanies. All other brands and product names are thetrademarks of their respective owners.

Table of Contents
Chapter 1: Introduction . . . . . . . . . . . . . . . . . . . . . . . . . . . . . . . . . . . . . . . 1-1
Welcome ! . . . . . . . . . . . . . . . . . . . . . . . . . . . . . . . . . . . . . . . . . . . . . . . . . . 1-1Product description. . . . . . . . . . . . . . . . . . . . . . . . . . . . . . . . . . . . . . . . . . . . 1-1System requirements. . . . . . . . . . . . . . . . . . . . . . . . . . . . . . . . . . . . . . . . . . 1-2Installation . . . . . . . . . . . . . . . . . . . . . . . . . . . . . . . . . . . . . . . . . . . . . . . . . . 1-2Software protection . . . . . . . . . . . . . . . . . . . . . . . . . . . . . . . . . . . . . . . . . . . 1-3
Hardware Key connexion . . . . . . . . . . . . . . . . . . . . . . . . . . . . . . . . . . . . 1-4Error messages when launching the software . . . . . . . . . . . . . . . . . . . . 1-5Activating the software key protection . . . . . . . . . . . . . . . . . . . . . . . . . . 1-5Installing the driver key manually . . . . . . . . . . . . . . . . . . . . . . . . . . . . . . 1-7
Launching the program . . . . . . . . . . . . . . . . . . . . . . . . . . . . . . . . . . . . . . . . 1-8
Chapter 2: Discovering the Interface . . . . . . . . . . . . . . . . . . . . . . . . . . . . 2-9
Description of the main window . . . . . . . . . . . . . . . . . . . . . . . . . . . . . . . . . . 2-9Menu bar . . . . . . . . . . . . . . . . . . . . . . . . . . . . . . . . . . . . . . . . . . . . . . . . 2-9Workspace . . . . . . . . . . . . . . . . . . . . . . . . . . . . . . . . . . . . . . . . . . . . . . . 2-9Document . . . . . . . . . . . . . . . . . . . . . . . . . . . . . . . . . . . . . . . . . . . . . . 2-10Status bar . . . . . . . . . . . . . . . . . . . . . . . . . . . . . . . . . . . . . . . . . . . . . . 2-10Standard toolbar . . . . . . . . . . . . . . . . . . . . . . . . . . . . . . . . . . . . . . . . . 2-10View toolbar . . . . . . . . . . . . . . . . . . . . . . . . . . . . . . . . . . . . . . . . . . . . . 2-10Creation Toolbar . . . . . . . . . . . . . . . . . . . . . . . . . . . . . . . . . . . . . . . . . 2-11Document Browser . . . . . . . . . . . . . . . . . . . . . . . . . . . . . . . . . . . . . . . 2-13Graduated rulers . . . . . . . . . . . . . . . . . . . . . . . . . . . . . . . . . . . . . . . . . 2-14Rotation button . . . . . . . . . . . . . . . . . . . . . . . . . . . . . . . . . . . . . . . . . . 2-14Color palette . . . . . . . . . . . . . . . . . . . . . . . . . . . . . . . . . . . . . . . . . . . . 2-15
Chapter 3: Creating Your First Label . . . . . . . . . . . . . . . . . . . . . . . . . . . 3-17
Introduction. . . . . . . . . . . . . . . . . . . . . . . . . . . . . . . . . . . . . . . . . . . . . . . . . 3-17Setting up the interface . . . . . . . . . . . . . . . . . . . . . . . . . . . . . . . . . . . . . . . 3-18Selecting the printer . . . . . . . . . . . . . . . . . . . . . . . . . . . . . . . . . . . . . . . . . . 3-19Document page setup . . . . . . . . . . . . . . . . . . . . . . . . . . . . . . . . . . . . . . . . 3-20Creating Database Variables . . . . . . . . . . . . . . . . . . . . . . . . . . . . . . . . . . . 3-21
ii Quick Start Guide
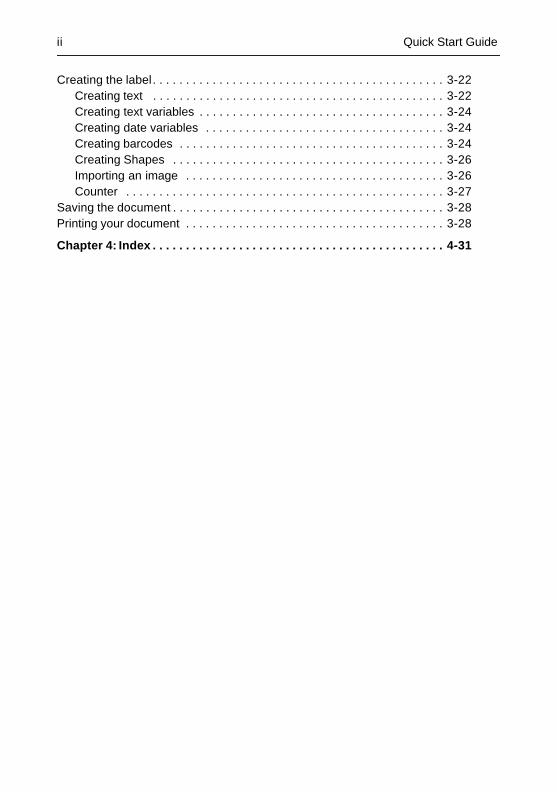
Creating the label. . . . . . . . . . . . . . . . . . . . . . . . . . . . . . . . . . . . . . . . . . . . 3-22Creating text . . . . . . . . . . . . . . . . . . . . . . . . . . . . . . . . . . . . . . . . . . . . 3-22Creating text variables . . . . . . . . . . . . . . . . . . . . . . . . . . . . . . . . . . . . . 3-24Creating date variables . . . . . . . . . . . . . . . . . . . . . . . . . . . . . . . . . . . . 3-24Creating barcodes . . . . . . . . . . . . . . . . . . . . . . . . . . . . . . . . . . . . . . . . 3-24Creating Shapes . . . . . . . . . . . . . . . . . . . . . . . . . . . . . . . . . . . . . . . . . 3-26Importing an image . . . . . . . . . . . . . . . . . . . . . . . . . . . . . . . . . . . . . . . 3-26Counter . . . . . . . . . . . . . . . . . . . . . . . . . . . . . . . . . . . . . . . . . . . . . . . . 3-27
Saving the document . . . . . . . . . . . . . . . . . . . . . . . . . . . . . . . . . . . . . . . . . 3-28Printing your document . . . . . . . . . . . . . . . . . . . . . . . . . . . . . . . . . . . . . . . 3-28
Chapter 4: Index . . . . . . . . . . . . . . . . . . . . . . . . . . . . . . . . . . . . . . . . . . . . 4-31

About this manual
Typographical conventions
This manual distinguishes between different types ofinformation using the following conventions:
• Terms taken from the interface itself, such ascommands, appear in bold.• Keys appear in small caps, for example: ”Press theSHIFT key”.• Numbered lists mean there is a procedure to follow.• When the conjunction -or- appears next to aparagraph, it means there is the choice of anotherprocedure for carrying out a given task.• When a menu command contains submenus, themenu name followed by the command to select appearin bold. Thus, ”Go to File > Open” means choose theFile menu then the Open command.
This symbol highlights important information on
how a particular command or procedure works.
Following this symbol you will find hints and tips foroptimizing tasks, speeding up commands, and soon.

iv Quick Sart Guide
About your product
Some of the functions described in this manual may not beavailable in your product.
For the complete list of specific features available in yoursoftware, refer to the specification sheet provided with theproduct.

C H A P T E R 1
Introduction
Welcome !
Congratulations, you have just acquired the world’s leadingautomatic identification software package!
This label design application offers you the simplest andmost effective way of creating complex documentsintegrating both fixed and variable data.
Product description
The software is designed to run on any PC or IBMcompatible computer that can support the Microsoft®Windows® graphic environment.
Your product includes the following components:
• a CD-ROM
• complete documentation
• a license agreement and registration card
• a protection key either electronic (software key) or hard(dongle)
Note
The Releasus.txt file contains the latest information on the software. This information supercedes that
Chapter 1 - 2 Quick Start Guide
contained in this manual.
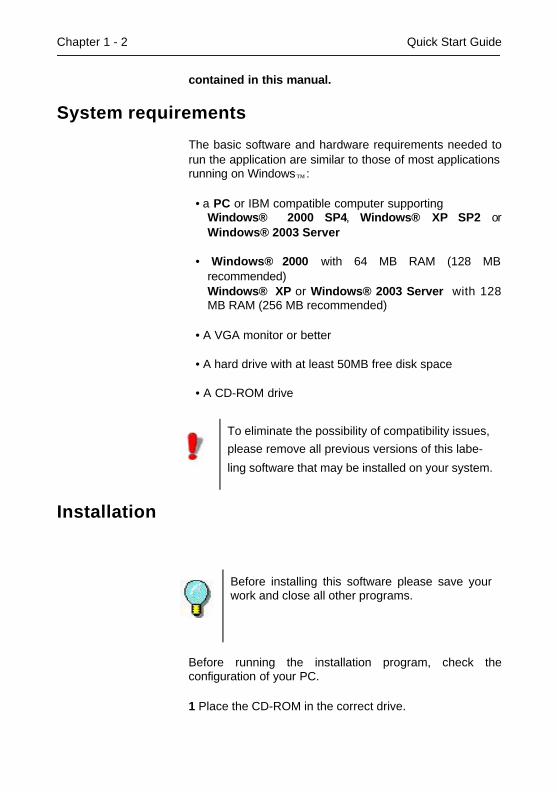
System requirements
The basic software and hardware requirements needed torun the application are similar to those of most applicationsrunning on Windows™ :
• a PC or IBM compatible computer supporting Windows® 2000 SP4, Windows® XP SP2 orWindows® 2003 Server
• Windows® 2000 with 64 MB RAM (128 MBrecommended)Windows® XP or Windows® 2003 Server with 128MB RAM (256 MB recommended)
• A VGA monitor or better
• A hard drive with at least 50MB free disk space
• A CD-ROM drive
Installation
Before running the installation program, check theconfiguration of your PC.
1 Place the CD-ROM in the correct drive.
To eliminate the possibility of compatibility issues, please remove all previous versions of this labe-
ling software that may be installed on your system.
Before installing this software please save yourwork and close all other programs.

Introduction Chapter 1 - 3
The Installation window appears.
If the CD-ROM does not start up automatically:
2 Go to Start > Run... , then type the letter of the CD-ROMdrive followed by the filename cdsetup.exe (e.g.D:\cdsetup.exe).
3 Select the product you wish to install, then click on theInstall button and follow the instructions displayed on yourscreen.
Software protection
Your software can be protected using a software key ( anactivation code) or a hardware key ( a dongle).
The dongle is a small electronic device that you plug intoyour PC’s parallel or USB port before launching thesoftware. Without the hardware protection key, the programwill run in ’evaluation’ mode. You will not be able to saveyour labels, ’e’ will be replaced with ’x’, ’0’ with ’5’ andimages will be crossed when printing.
The software key is an activation code that is requested bythe Activation Wizard when you launch the software for thefirst time or for as long as you are running a trial version. Ifyou are using a trial software key, you will be given 100 runsor 30 days to try the product with all of the product’sfunctionalities available to you.
Once the product has been installed, remember tofill-in and mail the registration card. Registeringyour product gives you access to technical supportfrom your supplier and pre-release information onnew products.
When you launch the application, if the protectionkey does not correspond to your product version, adialog box will appear providing the necessaryinstructions.

Chapter 1 - 4 Quick Start Guide
You must first run your labeling software installation andthen activate or connect the protection key to yourcomputer.
Hardware Key connection
If you have purchased the software with a dongle, you maychoose between a USB or parallel port dongle.
Connecting the parallel key
Figure 1 Connecting the dongle to the parallel port of your PC
Connecting the USB key
Figure 2 Connecting the dongle to the USB port of your PC
When you use a USB key and have multiple USB ports, itdoes not matter which port you use. If you do not have anavailable USB port, you can use a USB expander hub. USB
If you need to use a printer on the same parallelport, simply plug it into the software protection key.In this case, it may be necessary to switch theprinter on in order for the software protection keyto be recognized.
USB Port
Key

Introduction Chapter 1 - 5
devices are hot-swappable, meaning you can plug andunplug them into the bus any time, without restarting the PC
Note
Drivers can be installed while the application is running. However you must restart your labeling software for the changes to take effect.
Error messages when launching the software
If you are prompted with an error message when launchingthe software, please check the following items:
• The administrative rights. You must have localadministrative rights on your PC so that the keyinstallation works properly. If you do not have them, youwill be prompted an error message when launching thesoftware. You will have to manually install the drivers.
• Drivers installation. If you had trouble during installationor if you are prompted an error message when launchingthe software, you will have to manually install the drivers.
• The key. If you are prompted an error message whenlaunching the software, check that the connected keyworks with your labeling software.
Driver update. If you are prompted an error message whenlaunching the software, your driver may not be updated. Toupdate your driver you have to download it from ftp://ftp.ealaddin.com/pub/hasp/NEW_RELEASES/driver/hdd32.zip.
Activating the software key protection
Once you have installed the labeling software, theActivation Wizard will be launched taking you through thesoftware key protection process.
To Activate the software key
1 In the Activation wizard, select Activate then click on Next
USB hardware keys are not supported using Win-dows 95 and Windows NT4 operating systems.

Chapter 1 - 6 Quick Start Guide
There are three possible activation methods; Internet(Automatic), Fax / email, and phone
Internet activation method
1 Select Automatic from the list of activation modes. Thisoption allows the activation of the software key via asecure Internet connection. This is the quickest andeasiest option available
2 Input your information in the User Registration form.Remember that all fields marked by an asterisk (*) arerequired. Click on Next
3 Enter the activation code provided with the product andclick on Next
4 Click on Finish if your activation results are successful. Ifany problems were encountered, a message will inform youthat the activation has failed and an error will be displayed.
Fax / Email activation method
1 Select the Fax / Email activation method
2 Input your information in the User Registration form.Remember that all fields marked by an asterisk (*) arerequired. Click on Next
3 Enter the activation code provided with the product andclick on Next
4 Click the Create Form... button. An Activation RequestForm will be created with all the required user information.This form must be sent by fax or email in order to receivethe response code. Please see the contact info on yourscreen for more information.
5 Click Next. While waiting for a Response Code, you maychoose to launch your software and begin using it, or, closeit and return to the activation process once you havereceived your response code.
Once you have received your Response Code, you canreturn to the activation process by restarting the wizard and
Introduction Chapter 1 - 7
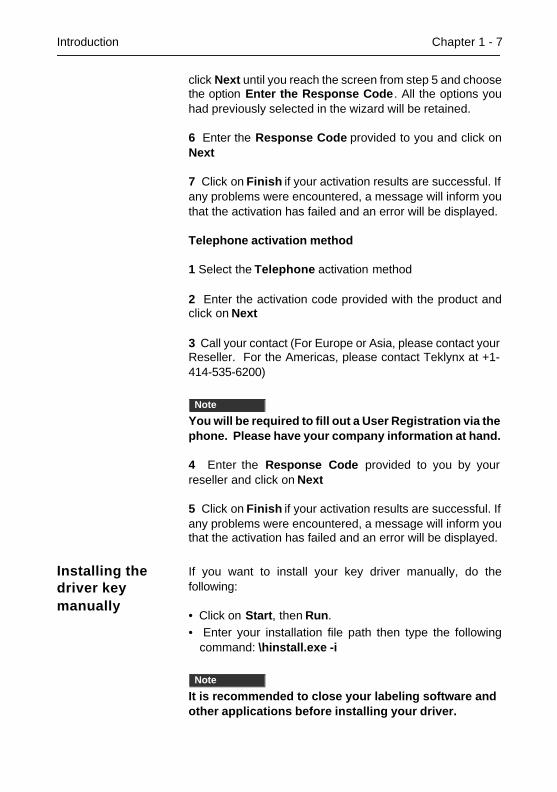
click Next until you reach the screen from step 5 and choosethe option Enter the Response Code. All the options youhad previously selected in the wizard will be retained.
6 Enter the Response Code provided to you and click onNext
7 Click on Finish if your activation results are successful. Ifany problems were encountered, a message will inform youthat the activation has failed and an error will be displayed.
Telephone activation method
1 Select the Telephone activation method
2 Enter the activation code provided with the product andclick on Next
3 Call your contact (For Europe or Asia, please contact yourReseller. For the Americas, please contact Teklynx at +1-414-535-6200)
Note
You will be required to fill out a User Registration via the phone. Please have your company information at hand.
4 Enter the Response Code provided to you by yourreseller and click on Next
5 Click on Finish if your activation results are successful. Ifany problems were encountered, a message will inform youthat the activation has failed and an error will be displayed.
Installing the driver key manually
If you want to install your key driver manually, do thefollowing:
• Click on Start, then Run. • Enter your installation file path then type the following
command: \hinstall.exe -i
Note
It is recommended to close your labeling software and other applications before installing your driver.

Chapter 1 - 8 Quick Start Guide
Launching the program
1 Go to Start > Programs.
2 Select the name you gave to the program group duringinstallation (by default, it is the name of the application).
The main window appears on the screen.

C H A P T E R 2
Discovering the Interface
Description of the main window
This section presents a general overview of the main interfaceelements as they appear in the main window at the beginning ofa work session.
Menu bar The menu bar comprises seven drop-down menus: File, Edit,View, Object, Data Source, Tools, Window and Help.
To open a menu:
1 Click on it with the left mouse button.
2 Then choose the required command.
Workspace The workspace is the entire middle portion of the window,located between the graduated rulers and the scroll bars. Itincludes the frame that outlines the physical limits of thedocument, where the objects to be printed are placed, as wellas a non-printable area where you can insert comments orobjects that you do not wish to appear in the printed label.
To access commands using the keyboard, use thekeyboard shortcuts. Press ALT then the keycorresponding to the letter underlined in the menuname followed by the key corresponding to theletter underlined in the command name.
Chapter 2 - 10 Quick Start Guide
Document When you start a new session, the program displays a framealigned with the top left-hand corner of the window. Thisframe represents the physical limits of the document to beprinted. The objects that make up your document should beplaced inside it.
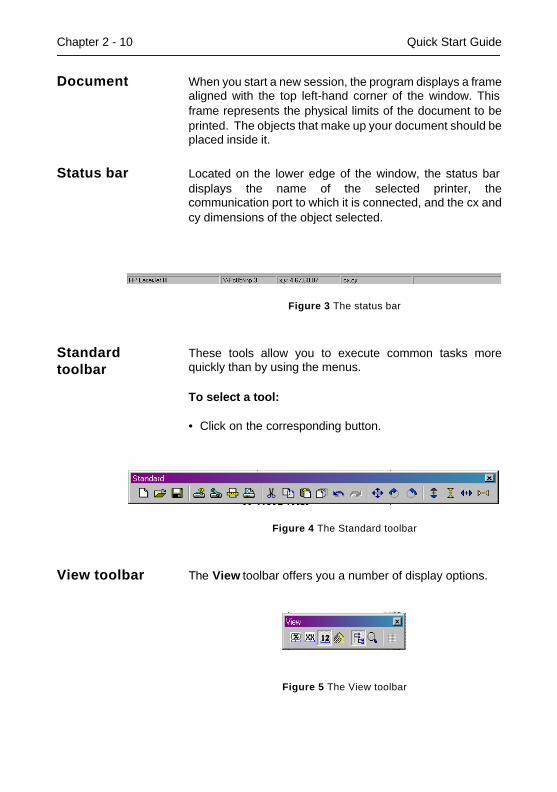
Status bar Located on the lower edge of the window, the status bardisplays the name of the selected printer, thecommunication port to which it is connected, and the cx andcy dimensions of the object selected.
Figure 3 The status bar
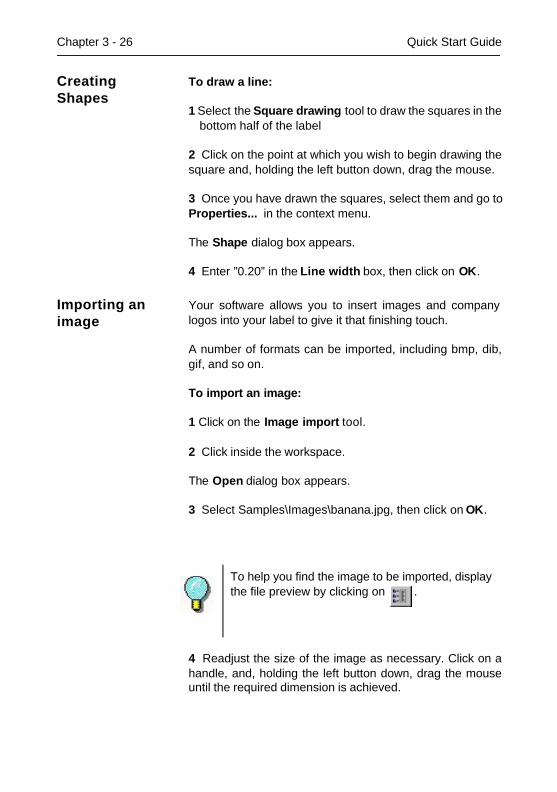
Standard toolbar
These tools allow you to execute common tasks morequickly than by using the menus.
To select a tool:
• Click on the corresponding button.
Figure 4 The Standard toolbar
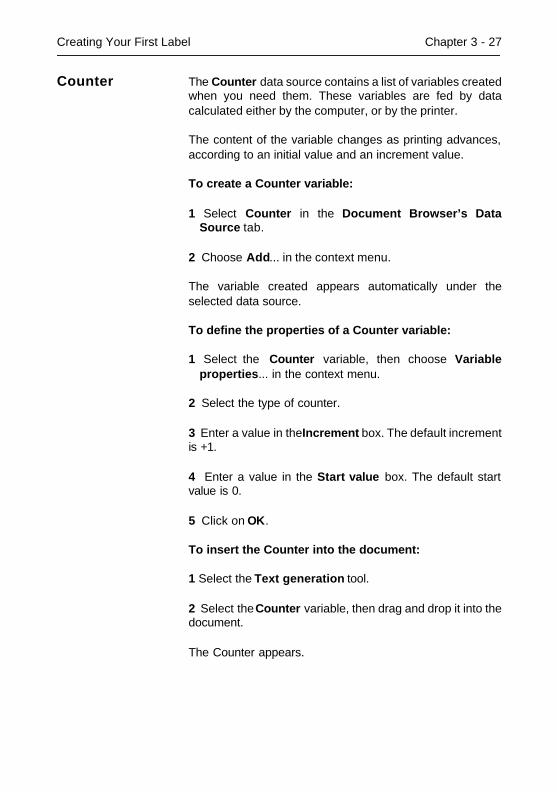
View toolbar The View toolbar offers you a number of display options.
Figure 5 The View toolbar

Discovering the Interface Chapter 2 - 11
To change the view mode:
• Click on the required view mode:
Creation Toolbar
The creation toolbar contains a number of buttons, each ofwhich represents a tool. With these tools you can create andmanipulate objects.
Figure 6 The Creation toolbar
Button Name of tool Use
Name displaying variable names.
Size displaying variable sizemaximum.
Contents displaying variable values.
Form displaying the Form.
DocumentBrowser
displaying the DocumentBrowser.
Zoom allows you to increase ordecrease object detail.
All these options can also be accessed via theView menu.

Chapter 2 - 12 Quick Start Guide
Button Name of tool Use
Select objects select and manipulatingall types of objects.
Text generation creat fixed and variabletext.
Barcode generation creat fixed and variablebarcodes.
Image import insert images.
External objectinsertion
insert objects external tothe application.
Line drawing draw horizontal or verticallines.
Rectangle drawing draw rectangles orsquares.
Circle or ellipsedrawing
draw circular shapes.
Polygon drawing draw free shapescomposed of lines.
Oblique line drawing draw diagonals.
Rounded rectangledrawing
draw rectangles withrounded corners.
Shapes Gallery tool import ready-to-useshapes into the document
UCC/EAN 128 andMaxicode wizards
create barcodes with theUCC/EAN 128 andMaxicode wizards
Plug-ins create TextArt, ListFieldsand RichText Fields

Discovering the Interface Chapter 2 - 13
Document Browser
The Document Browser contains two tabs: Data Sourcesand Objects. The arrow up and arrow down keys on yourkeyboard allow you to move up and down the tree. The +and - symbols allow you to expand or shrink the list anddisplay the list of variables associated with each data sourceor the objects available for each category.
The Data Sources tab displays the data sources and thenumber of variables associated. You can insert variableobjects simply by dragging and dropping them into yourdocument. You can also add, delete and modify variableproperties using the context menu.
The Objects tab displays the number of objects createdaccording to type, and their properties such as position,height and width. You can also use this tab to select anobject and change its position.
Figure 7 The Document Browser
About data sources
A data source contains a list of variables fed by data fromthe same source.

Chapter 2 - 14 Quick Start Guide
When you select a data source, you are indicating where therequired data is located, and what type of data it is. The datacan be of internal origin (Date, Counter) or external to theapplication (Database, direct data entry using the Form).
The different data sources available in the DocumentBrowser’s Data Sources tab are the following: Database,Date, Form, Formula and Counter.
Graduated rulers
The rulers allow you to pinpoint the position of the mousepointer and place the various objects you include in yourdocument with total precision. They may be configured ininches or millimeters using the Tools > Options > Displaycommand.
• Double-clicking on the left half of the horizontal rulerreduces the display scale.
• Double-clicking on the right half of the horizontal rulerincreases the display scale.
Rotation button Clicking on located in the top-left corner of yourdocuments allows you to rotate the document on the screen90°, 180°, 270° or 360°. Screen rotation is merely a displayfeature, and has no effect on printing.
To rotate the document:
• Click on the rotation button with the left mouse button torotate the document 90° to the left.
• Click on the rotation button with the right mouse button torotate the button 90° to the right.
You can display the Zoom factor context menu byright-clicking on the horizontal ruler, or theOrientation context menu by right-clicking on thevertical ruler.

Discovering the Interface Chapter 2 - 15
Color palette The color palette is displayed at the bottom of theworkspace and allows you to modify the color of any objectin your document (text, barcodes, shapes and monochromeimages).
Figure 8 The color palette
To change the color of an object:
1 Select the required object.
2 Click on a color in the palette with the left mouse buttonto apply text, line or outline color.
3 Click on a color in the palette with the right mouse buttonto apply background color.
Note
This button removes the background color from an object.
You can obtain the same document rotation effectby using the View > Orientation command, or byclicking on the vertical ruler with the right mousebutton to display the context menu.
The Online Help provides full information onchoosing the color palette, customizing it, and soon.

Chapter 2 - 16 Quick Start Guide

C H A P T E R 3
Creating Your First Label
Introduction
The purpose of this chapter is to get you off to a quick startwith the software by familiarizing you with its most commonfunctions. We will demonstrate just how quickly and easily alabel can be constructed by creating a label step-by-step inthis chapter.
We are going to create the following label:
Figure 9 Introduction to the example label

Chapter 3 - 18 Quick Start Guide
Setting up the interface
With a simple click of the mouse, the interface can beinstantly translated into the language of your choice.
1 Go to Tools > Options...
2 Select the required language and unit of measurement asshown in the Figure below, then click on OK.
Figure 10 The Options dialog box
You can access the Online Help at any time bypressing the F1 key.You can also access it from the dialog boxes byclicking on the Help button.
You are recommended to save your document atregular intervals so as to avoid losing data in theevent of a problem such as a power failure.

Creating Your First Label Chapter 3 - 19
Selecting the printer
Before starting, you will need to define the printer you wishto use as not all printers share the same characteristics. Asa result, settings such as choice of character fonts, pageformats, and so on, may differ according to the modelchosen.
• Go to File > Select printer...-or-Click on (or the F5 key).
The Printer dialog appears on the screen.
Figure 11 The Printer dialog box
If the printer you wish to use is not listed in the box, you willneed to add it.
To add a printer:
1 Click on the Add button, then select the printer from theModel list.
2 Select the port on which you wish to install the printer.
3 Click on OK.
You are now back at the Printer dialog box.
Windows Drivers
Drivers providedwith the application
Note : Drivers provided with the application are indicated by an icon

Chapter 3 - 20 Quick Start Guide
4 Select the printer you have just added, then click on OK.
Note
To create the example label described in this manual, we recommend you use a printer that uses the drivers provided with the application
Document page setup
Once you have selected the printer on which the label will beprinted, you can begin creating your document. The firststage involves setting its dimensions.
1 Go to File > Page setup...-or-click on
The Page setup dialog box appears on the screen.
You are recommended to use printer fonts andbarcodes as this reduces data transfer time andthus optimizes label printing speed.
The Stock tab allows you to open anexisting stock, or create a new one
The Label tab allows you to definethe size of the document and thenumber of documents per row andper column on the page
The Page tab allows you to definethe page format
The Margins tab allows you todefine the margins and the distancebetween documents on the samepage

Creating Your First Label Chapter 3 - 21
Figure 12 The Page setup dialog box
2 Click on the Label tab and enter the following information:- Width: 77- Height: 82- Corner roundness: 1- Number of labels per row: 1- Number of labels per column: 1
3 Click on the Page tab and enter the following information:- Page size: Customized- Automatic sizing: yes
4 Click on the Margins tab and enter the followinginformation:- Left margin: 1- Top margin: 1.5- Gap between columns: 1
5 Click on OK.
The workspace displays the outline of your label.
Creating Database Variables
The Database data source allows you to import data from adatabase.
1 Go to Data source > Databases > Create/Edit query...
2 Select ODBC
3 Click on the database icon button
Page setup parameters may differ according to theprinter used. In this case, messages will guide youthrough the process of modifying the valuessuggested in this example.

Chapter 3 - 22 Quick Start Guide
4 Click on Add...
5 Select the Microsoft Access Database driver (*.mdb)
6 Click on Finish
7 Name the database: “Fruits” and click OK
8 Select the new database from the list and click OK
9 In the Select Data Source drop-down menu, selectFruits and find its location .\Libraries\Data\Fruits.mdb
10 Select Products from the list of tables
11 Click Select All
12 Click OK
The variables are created automatically and are displayedunder Database in the document browser. They will carrythe same field name as those defined in your database.
To add a variable to the document, select a Databasevariable from the list, then drag and drop it into thedocument (see Creating text variables).
Creating the label
Creating text 1 Select the Text generation tool, then click inside theworkspace.
2 Enter ”From:”.
3 Using the Select tool, right-click on the text you have justcreated. and go to Properties...
4 Complete the dialog box as shown

Creating Your First Label Chapter 3 - 23
.
Figure 13 The Text dialog box
5 Repeat steps 1 and 2 for the following text:
• ”Best before:” • ”Shipping Date” • “Package Price:”• “Quantity:”• “Weight:”
6 Create also a empty text box in which the ProductNamevariables will be inserted. (see Creating text variables)
To retain the set text attributes for all newtextboxes, right-click on the configured textboxand select Set as default.

Chapter 3 - 24 Quick Start Guide
To apply color to the text.
1 Select ”Best before”, then click on the required color in thepalette with the left mouse button.
The text will immediately display the color chosen.
2 Select ”Shipping Date:”, then click on the required color inthe palette with the right mouse button.
The text will immediately display a background color.
Creating text variables
Once your textboxes have been created, place the datafrom your database on your label by dragging and droppingthe various database items onto your label. Remember toplace all the ProductNames in an empty textbox. Thevariables to be moved over are: OrderQty, Origin,Proce_per_kg, ProdNameCh, ProdNameFr, ProdNameGe,ProdNameIt, ProdNameRu, ProdNameSp, ProdNameUs.When you drop the variable into the label, you will be givena choice to create it as a text, barcode or image... For theabove mentioned items, always choose Text.
Creating date variables
1 Right-click on the date item in the document browser andselect Add...
2 Select a date format
3 Drag and drop the newly created date variable into thelabel as a text item
Configuring a date variable
1 Repeat steps 1 and 2
2 Click the Options tab in the Date variable dialog box
3 Add a fixed value of 15 (days) and click ok.
This will add 15 calendar days to the current date - used forthe ”Best Before” date variable.
Creating barcodes
1 Select the CodeArticle variable from the list of databaseitems in your document browser

Creating Your First Label Chapter 3 - 25
2 Drag and drop it into the label as a barcode
You can change the type of barcode it produces by right-clicking on the barcode, selecting Properties... from thecontext menu and defining the settings.
Figure 14 The Barcode dialog box
To access the Barcode dialog box more quickly,double-click on the object.
Chapter 3 - 26 Quick Start Guide
Creating Shapes
To draw a line:
1 Select the Square drawing tool to draw the squares in thebottom half of the label
2 Click on the point at which you wish to begin drawing thesquare and, holding the left button down, drag the mouse.
3 Once you have drawn the squares, select them and go toProperties... in the context menu.
The Shape dialog box appears.
4 Enter ”0.20” in the Line width box, then click on OK.
Importing an image
Your software allows you to insert images and companylogos into your label to give it that finishing touch.
A number of formats can be imported, including bmp, dib,gif, and so on.
To import an image:
1 Click on the Image import tool.
2 Click inside the workspace.
The Open dialog box appears.
3 Select Samples\Images\banana.jpg, then click on OK.
4 Readjust the size of the image as necessary. Click on ahandle, and, holding the left button down, drag the mouseuntil the required dimension is achieved.
To help you find the image to be imported, displaythe file preview by clicking on .
Creating Your First Label Chapter 3 - 27
Counter The Counter data source contains a list of variables createdwhen you need them. These variables are fed by datacalculated either by the computer, or by the printer.
The content of the variable changes as printing advances,according to an initial value and an increment value.
To create a Counter variable:
1 Select Counter in the Document Browser’s DataSource tab.
2 Choose Add... in the context menu.
The variable created appears automatically under theselected data source.
To define the properties of a Counter variable:
1 Select the Counter variable, then choose Variableproperties... in the context menu.
2 Select the type of counter.
3 Enter a value in the Increment box. The default incrementis +1.
4 Enter a value in the Start value box. The default startvalue is 0.
5 Click on OK.
To insert the Counter into the document:
1 Select the Text generation tool.
2 Select the Counter variable, then drag and drop it into thedocument.
The Counter appears.
Chapter 3 - 28 Quick Start Guide
Saving the document
Before printing your label, save your document.
1 Go to File > Save.
The Save as dialog box appears if you are saving yourdocument for the first time.
2 Name your document, then click on OK.
Printing your document
You have finished creating your label, so you can now printit.
1 Go to File > Print...orclick on the button.
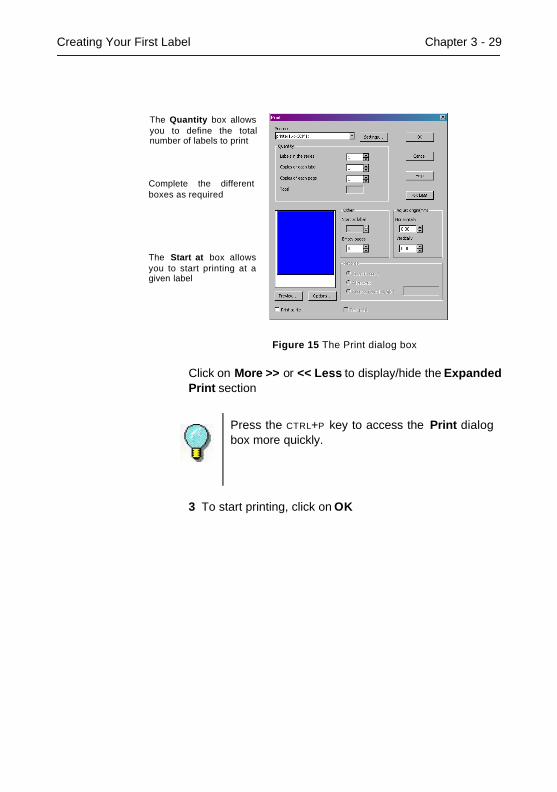
2 The Print dialog box appears.
Don’t forget to activate Contents mode if you wishto display the current value of the counter.
Creating Your First Label Chapter 3 - 29
Figure 15 The Print dialog box
Click on More >> or << Less to display/hide the ExpandedPrint section
3 To start printing, click on OK
The Quantity box allowsyou to define the totalnumber of labels to print
The Start at box allowsyou to start printing at agiven label
Complete the differentboxes as required
Press the CTRL+P key to access the Print dialogbox more quickly.

Chapter 3 - 30 Quick Start Guide
Index
B
Barcode , Chap 3-25
Barcode generation tool , Chap2-12
barcodes , Chap 3-24
C
Circle or ellipse drawing tool ,Chap 2-12
color , Chap 3-24
Color palette , Chap 2-15
Creating Database Variables ,Chap 3-21
Creating text , Chap 3-22
Creating the label , Chap 3-22
Creation Toolbar , Chap 2-11
D
data sources , Chap 2-13
Data Sources tab , Chap 2-13
date variables , Chap 3-24
Document , Chap 2-10
Document Browser , Chap 2-12
Document page setup , Chap 3-20
E
External object insertion tool ,Chap 2-12
G
Graduated rulers , Chap 2-14

Chapitre 4 - 32 Quick Start Guide
I
image , Chap 3-26
Image import tool , Chap 2-12
Importing , Chap 3-26
Installation , Chap 1-2
Introduction , Chap 1-1
creating a label , Chap 3-17
L
Line , Chap 3-26
Line drawing tool , Chap 2-12
M
Margins , Chap 3-21
Menu bar , Chap 2-9
Model , Chap 3-19
O
Objects tab , Chap 2-13
Oblique line drawing tool , Chap2-12
P
Page , Chap 3-21
Polygon drawing tool , Chap 2-12
Printing , Chap 3-28, , Chap 3-29
Product description , Chap 1-1
R
Rectangle drawing tool , Chap 2-12
Rotation button , Chap 2-14
Rounded rectangle drawing tool ,Chap 2-12
S
Saving your document , Chap 3-28
Select objects tool , Chap 2-12
Selecting the printer , Chap 3-19
Setting up the interface , Chap 3-18

Index Chapter 4 - 33
Shapes , Chap 3-26
Software protection key , Chap 1-3
Standard toolbar , Chap 2-10
Status bar , Chap 2-10
System requirements , Chap 1-2
T
Text generation , Chap 3-22
Text generation tool , Chap 2-12
text variables , Chap 3-24
To print , Chap 3-28
V
View toolbar , Chap 2-10
W
Workspace , Chap 2-9
Z
Counter , Chap 3-27

Chapitre 4 - 34 Quick Start Guide