laboratory manual - jawaharlal nehru engineering collegejnec.org/lab-manuals/cse/te/sdl-i vb.pdf ·...
TRANSCRIPT

Jawaharlal Nehru Engineering College
Laboratory Manual
PROGRAMMING IN VB.NET
For
Third Year Students CSE Dept: Computer Science & Engineering (NBA Accredited)
Author JNEC, Aurangabad

FOREWORD
It is my great pleasure to present this laboratory manual for Third year engineering students for the subject of Programming in VB.NET As a student, many of you may be wondering with some of the questions in your mind regarding the subject and exactly what has been tried is to answer through this manual. As you may be aware that MGM has already been awarded with ISO 9001:2000 certification and it is our endure to technically equip our students taking the advantage of the procedural aspects of ISO 9001:2000 Certification. Faculty members are also advised that covering these aspects in initial stage itself, will greatly relived them in future as much of the load will be taken care by the enthusiasm energies of the students once they are conceptually clear.
Dr. S.D.Deshmukh Principal

LABORATORY MANUAL CONTENTS
This manual is intended for the Third year students of Computer Science and Engineering in the subject of Programming in VB.NET. This manual typically contains practical/Lab Sessions related Programming In VB.NET covering various aspects related the subject to enhanced understanding. Students are advised to thoroughly go through this manual rather than only topics mentioned in the syllabus as practical aspects are the key to understanding and conceptual visualization of theoretical aspects covered in the books. Good Luck for your Enjoyable Laboratory Sessions Prof.D.S.Deshpande Mrs. P V BIDWAI HOD, CSE Lecturer, CSE Dept.

SUBJECT INDEX
1. Study of VB.NET
2. Design form to create calculator application
3. Design a Logon form and validate it
4. Design a form to create digital clock
5. Design form to select image from list and display it in the picture box.
6. Design Traffic Signal application.
7. Study experiment on menus
8. Design a form to open and save files using menus.
9. Study of ADO.NET
10. Deployment of project
DOs and DON’Ts in Laboratory:
1. Make entry in the Log Book as soon as you enter the Laboratory.
2. All the students should sit according to their roll numbers starting from their left to
right.
3. All the students are supposed to enter the terminal number in the log book.
4. Do not change the terminal on which you are working.
5. All the students are expected to get at least the algorithm of the program/concept
to be implemented.
6. Strictly observe the instructions given by the teacher/Lab Instructor.
Instruction for Laboratory Teachers::
1. Submission related to whatever lab work has been completed should be done during
the next lab session. The immediate arrangements for printouts related to submission on
the day of practical assignments.
2. Students should be taught for taking the printouts under the observation of lab
teacher.
3. The promptness of submission should be encouraged by way of marking and
evaluation patterns that will benefit the sincere students.
1. Lab Exercise
Exercise No1: ( 2 Hours) – 1 Study Practical
AIM - Introduction to Dotnet
POINTS TO BE COVERED
- What is Dotnet?
- Describing Dotnet Framework
- Describing its core components
- Advantages of Dotnet
- Dotnet languages
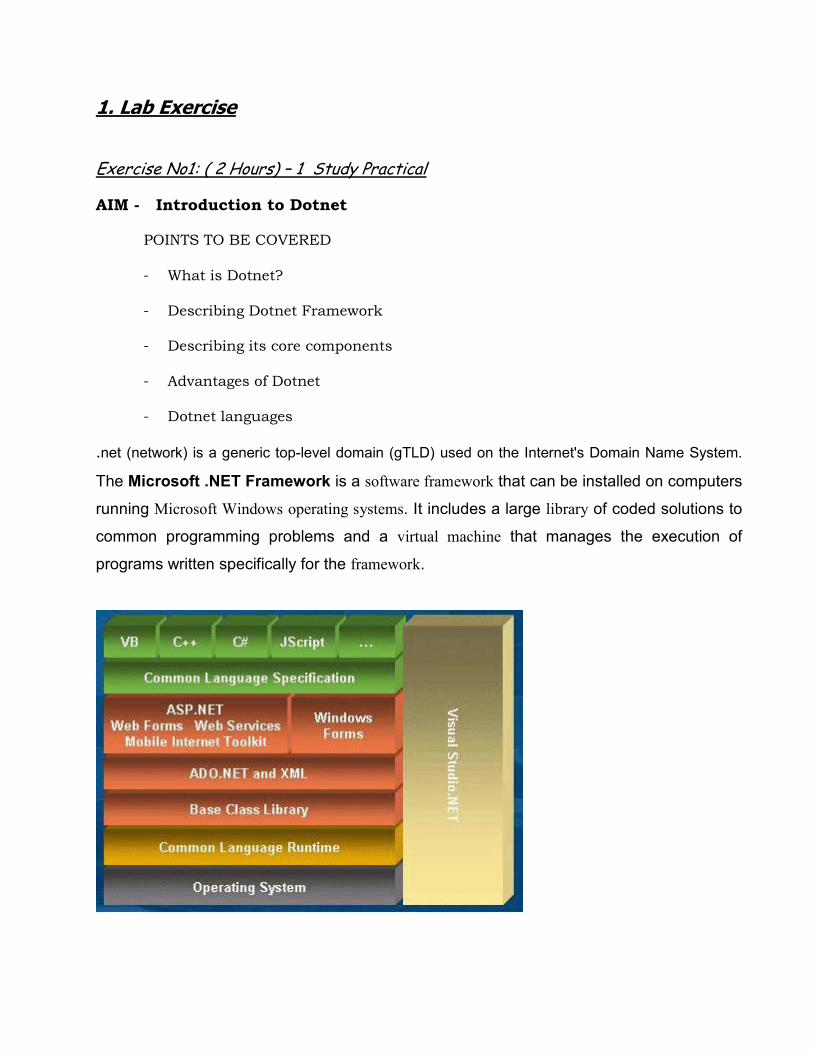
.net (network) is a generic top-level domain (gTLD) used on the Internet's Domain Name System.
The Microsoft .NET Framework is a software framework that can be installed on computers
running Microsoft Windows operating systems. It includes a large library of coded solutions to
common programming problems and a virtual machine that manages the execution of
programs written specifically for the framework.
The framework's Base Class Library provides a large range of features including user
interface, data and data acces, database connectivity, cryptography, web application
development, numeric algorithms, and network communications. The class library is used by
programmers, who combine it with their own code to produce applications.Programs written
for the .NET Framework execute in a software environment that manages the program's
runtime requirements. Also part of the .NET Framework, this runtime environment is known
as the Common Language Runtime (CLR). The CLR provides the appearance of an
application virtual machine so that programmers need not consider the capabilities of the
specific CPU that will execute the program. The CLR also provides other important services
such as security, memory management, and exception handling. The class library and the CLR
together constitute the .NET Framework.
Conclusion: Hence we have studied architecture as well as Framework of Dotnet.

2. Lab Exercises: Exercise No 2: ( 2 Hours) – 1 Practical
AIM - Design a form to create calculator application
- Calculator must possess the following function buttons
- +, _, *, /,log, sqr, cube, sqrt, cube root, mod, %, sin, cos, tan, cancel, 1/x, pie
Steps to create windows application
- In Visual Studio, select File|New|Project. Visual studio will display the new
project dialog box.
- In the new project dialog box, click the windows Application icon. In the name
field, type a project name that describes the program you are binding, such as
Demo program. Then, in the location field, type the name of the folder in which
you want visual studio to place the projects folder and files. Click ok. Visual
studio will display a design window where you can drag and drop controls onto
your form.
- To display the toolbox that contains the control you can drag and drop on to
your form, select View|Toolbox.Visual studio will open the Toolbox window.
- In the toolbox window, locate the various button control and textbox control
- In the property window give the text to the button control
- As mentioned above the calculator must possess the buttons
- Use operators and select case statements to execute the programme.
- To run the programme select the debug menu and then press start.

Output:
Conclusion:
Hence we have implemented the calculator programme in vb.net.

3. Lab Exercises:
Exercise No 3: ( 2 Hours) – 2 Practical AIM - Design a Logon form and validate it
- Create a logon form
- Enter the fields for username and password
- Validate whether the entered fields are correct or not.
Steps to create windows application
- In Visual Studio, select File|New|Project. Visual studio will display the new
project dialog box.
- In the new project dialog box, click the windows Application icon. In the name
field, type a project name that describes the program you are binding, such as
Demo program. Then, in the location field, type the name of the folder in which
you want visual studio to place the projects folder and files. Click ok. Visual
studio will display a design window where you can drag and drop controls onto
your form.
- To display the toolbox that contains the control you can drag and drop on to
your form, select View|Toolbox.Visual studio will open the Toolbox window.
- In the toolbox window, locate the various button control, textbox control and
label control
- In the property window give the text to the button, label and button control.
- Set the password char property for password textbox as “ * ”
- To run the programme select the debug menu and then press start.
- Your output must look as shown.
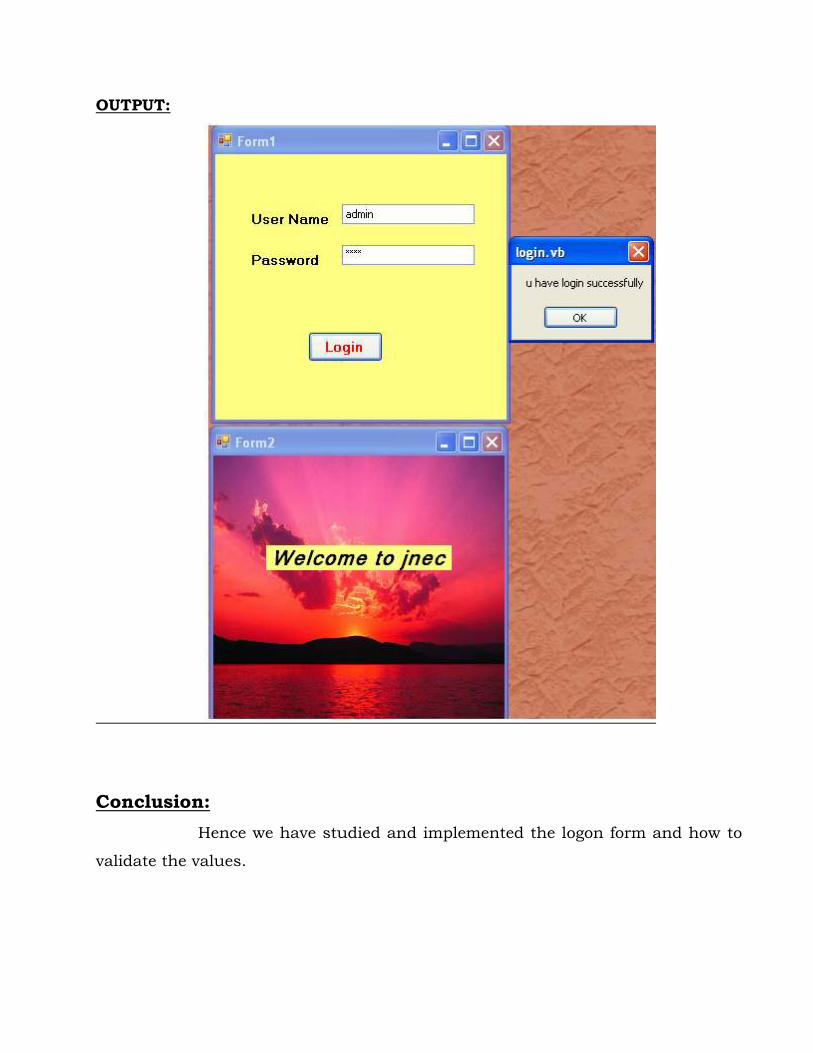
OUTPUT:
Conclusion:
Hence we have studied and implemented the logon form and how to
validate the values.

4. Lab Exercises: Exercise No 4: ( 2 Hours) – 3 Practical
AIM - Design a form to create digital clock
- Design a digital clock which shows detail time.
- It must display hours, minute and second
- Use Timer control.
Steps to create windows application
- In Visual Studio, select File|New|Project. Visual studio will display the new
project dialog box.
- In the new project dialog box, click the windows Application icon. In the name
field, type a project name that describes the program you are binding, such as
Demo program. Then, in the location field, type the name of the folder in which
you want visual studio to place the projects folder and files. Click ok. Visual
studio will display a design window where you can drag and drop controls onto
your form.
- To display the toolbox that contains the control you can drag and drop on to
your form, select View|Toolbox.Visual studio will open the Toolbox window.
- In the toolbox window, locate the various button control and textbox control
- In the property window give the text to the button control
- Drag and drop the timer control. Set the properties as
Enabled-true
Interval-10000
- To run the programme select the debug menu and then press start.
- Your output must look as shown.

OUTPUT:
Conclusion: Hence we have studied and implemented Digital clock using timer control.
5. Lab Exercises:
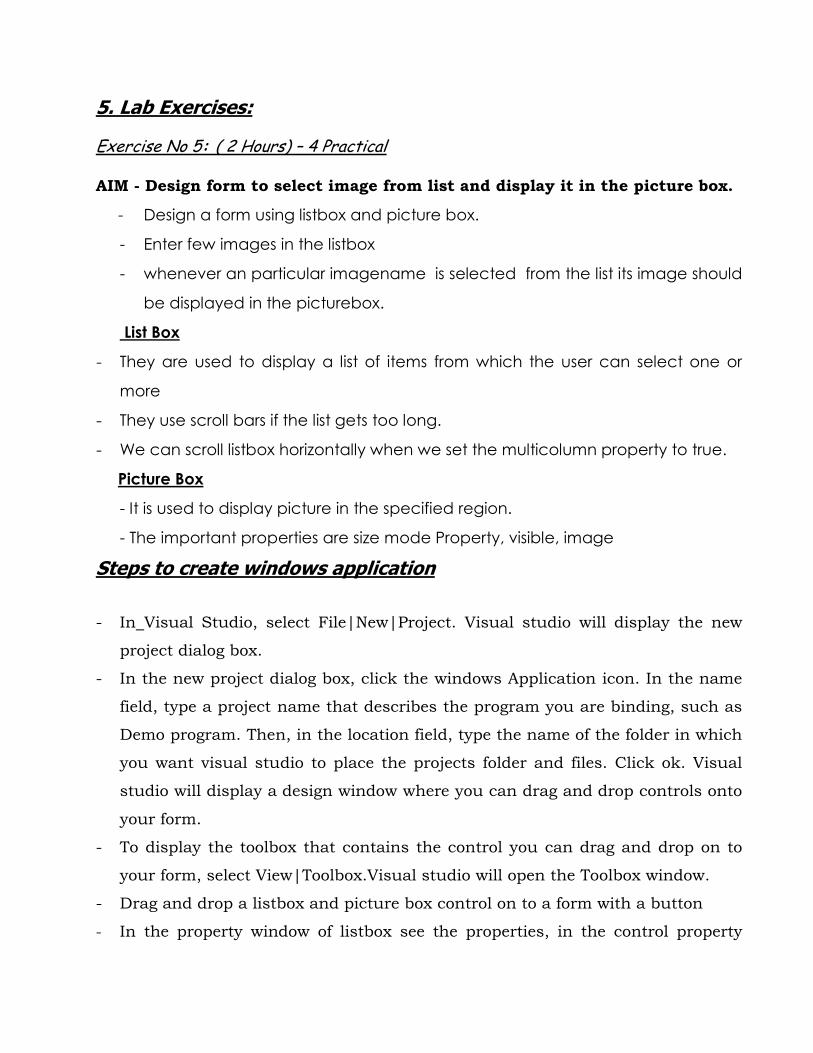
Exercise No 5: ( 2 Hours) – 4 Practical AIM - Design form to select image from list and display it in the picture box.
- Design a form using listbox and picture box.
- Enter few images in the listbox
- whenever an particular imagename is selected from the list its image should
be displayed in the picturebox.
List Box
- They are used to display a list of items from which the user can select one or
more
- They use scroll bars if the list gets too long.
- We can scroll listbox horizontally when we set the multicolumn property to true.
Picture Box
- It is used to display picture in the specified region.
- The important properties are size mode Property, visible, image
Steps to create windows application
- In Visual Studio, select File|New|Project. Visual studio will display the new
project dialog box.
- In the new project dialog box, click the windows Application icon. In the name
field, type a project name that describes the program you are binding, such as
Demo program. Then, in the location field, type the name of the folder in which
you want visual studio to place the projects folder and files. Click ok. Visual
studio will display a design window where you can drag and drop controls onto
your form.
- To display the toolbox that contains the control you can drag and drop on to
your form, select View|Toolbox.Visual studio will open the Toolbox window.
- Drag and drop a listbox and picture box control on to a form with a button
- In the property window of listbox see the properties, in the control property
locate and select the items entry,visual studio will display the string collection
editor dialog box in which u can type the list of images. Perform the coding and
execute the results.
OUTPUT:
conclusion:
Hence we have implemented the preogramme using listbox and
picturebox
6. Lab Exercises:
Exercise No 6: ( 2 Hours) – 5 Practical
AIM - Design Traffic Signal application.
- Create a square whose each end possess three signals red, blue and green
- Use a Timer control to demonstrate the working of the traffic signals
Steps to create windows application
- In Visual Studio, select File|New|Project. Visual studio will display the new
project dialog box.
- In the new project dialog box, click the windows Application icon. In the name
field, type a project name that describes the program you are binding, such as
Demo program. Then, in the location field, type the name of the folder in which
you want visual studio to place the projects folder and files. Click ok. Visual
studio will display a design window where you can drag and drop controls onto
your form.
- To display the toolbox that contains the control you can drag and drop on to
your form, select View|Toolbox.Visual studio will open the Toolbox window.
- Design the Diagram of Square with signals on each terminals
- In the property window set the textbox property backcolor using colors red,blue
and green as the colors of the signal
- Drag and drop the timer control. Set the properties enable to true and set
interval.
- To run the programme select the debug menu and then press start.
- Your output must look as shown.

OUTPUT:
CONCLUSION: Hence we have implemented the traffic signal application using Timer Control.

7. Lab Exercises:
Exercise No 7: ( 2 Hours) – 2 study AIM - Study of Menus
- Describe different types of menus
- various dialog boxes in detail.
Menus (File, Edit, Format etc in all windows applications) are those that allow us
to make a selection when we want to perform some action with the application, for
example, to format the text, open a new file, print and so on. In VB .NET
MainMenu is the container for the Menu structure of the form. Menus are made of
MenuItem objects that represent individual parts of a menu (like File->New, Open,
Save, Save As etc). The two main classes involved in menu handling are,
MainMenu and MenuItem. The MainMenu class let's us assign objects to a form's
menu class and MenuItem is the class which supports the items in a menu
system. Menus like File, Edit, Format etc and the items in those Menus are
supported by this MenuItem class. It's this MenuItem's click event that makes
Menus Event of the MenuItem
The default event of the MenuItem is the Click event which looks like this in code:
Private Sub MenuItem1_Click(ByVal sender As System.Object,
ByVal e As_ System.EventArgs) Handles MenuItem1.Click
End Sub
Creating Menus is simple. Drag a MainMenu component from the toolbar onto
the form. When you add a MaiuMenu component to the form it appears in the
component tray below the form. Windows form designer will add the
MenuItem's for this by default, you need not add this. Once when you finish
adding a MainMenu component to the form you will notice a "TypeHere" box
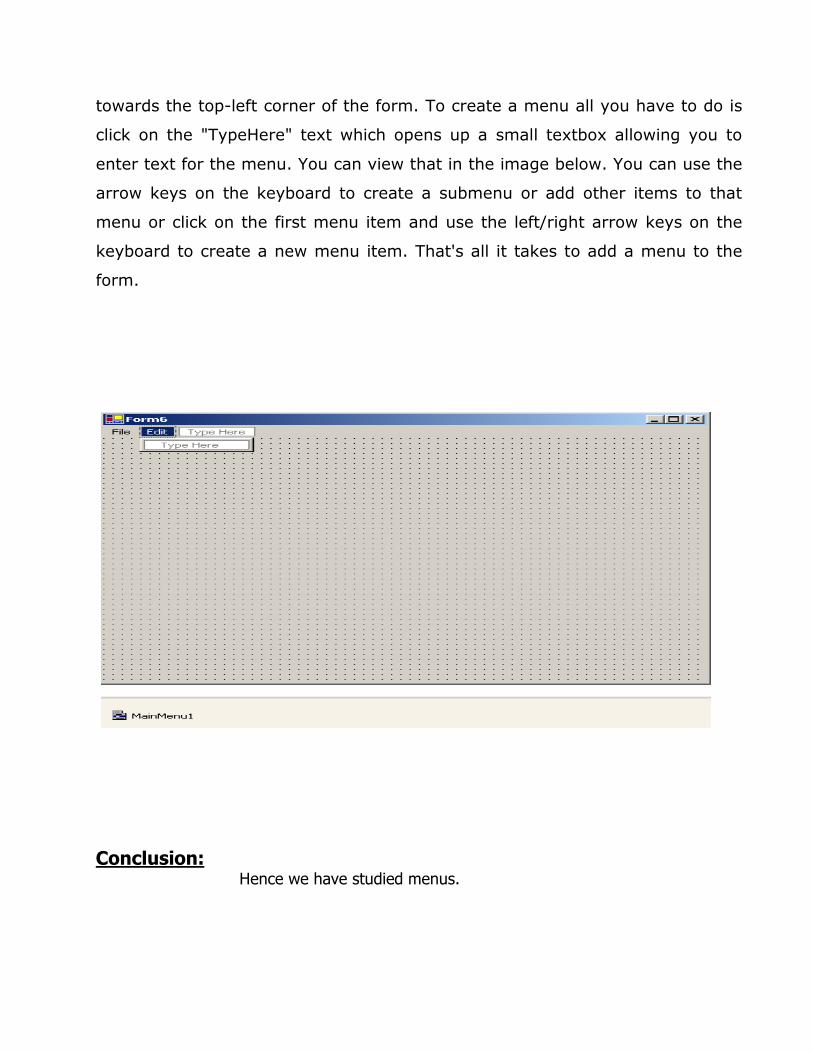
towards the top-left corner of the form. To create a menu all you have to do is
click on the "TypeHere" text which opens up a small textbox allowing you to
enter text for the menu. You can view that in the image below. You can use the
arrow keys on the keyboard to create a submenu or add other items to that
menu or click on the first menu item and use the left/right arrow keys on the
keyboard to create a new menu item. That's all it takes to add a menu to the
form.
Conclusion:
Hence we have studied menus.

8. Lab Exercises:
Exercise No 8: ( 2 Hours) – 7 Practical AIM - Design a form to open and save files using menus.
- Design a form using menus
- Create submenus to open and save files using open and save dialog boxes
Steps to create windows application
- In Visual Studio, select File|New|Project. Visual studio will display the new
project dialog box.
- In the new project dialog box, click the windows Application icon. In the name
field, type a project name that describes the program you are binding, such as
Demo program. Then, in the location field, type the name of the folder in which
you want visual studio to place the projects folder and files. Click ok. Visual
studio will display a design window where you can drag and drop controls onto
your form.
- To display the toolbox that contains the control you can drag and drop on to
your form, select View|Toolbox.Visual studio will open the Toolbox window.
- In the toolbox window, drag and drop menu control
- Create submenus like copy, paste, undo
- Create submenus like new, open , save, saveas etc.
- Drag and drop opendialogbox and savedialogbox on to the form.
- Write the code to open the dialogbox and save the respected form using various
methods.
- Select Debug menu and then start to run the programme.
- Your programme output should look as shown.

OUTPUT:
CONCLUSION:
Hence we have studied menus using dialog boxes.

9. Lab Exercises:-
Exercise No 9: ( 2 Hours) – 3 study AIM - Study of ADO.NET
- Explain block diagram
- Describe various components
- Write all the steps to connect to a database.
ADO.NET provides consistent access to data sources such as Microsoft SQL Server, as
well as data sources exposed through OLE DB and XML. Data-sharing consumer
applications can use ADO.NET to connect to these data sources and retrieve, manipulate,
and update data.
ADO.NET cleanly factors data access from data manipulation into discrete components
that can be used separately or in tandem. ADO.NET includes .NET Framework data
providers for connecting to a database, executing commands, and retrieving results. Those
results are either processed directly, or placed in an ADO.NET Dataset object in order to
be exposed to the user in an ad-hoc manner, combined with data from multiple sources, or
remote between tiers. The ADO.NET Dataset object can also be used independently of a
.NET Framework data provider to manage data local to the application or sourced from
XML.
The ADO.NET classes are found in System.Data.dll, and are integrated with the XML
classes found in System.Xml.dll. When compiling code that uses the System. Data
namespace, reference both System.Data.dll and System.Xml.dll. For an example of
compiling an ADO.NET application using a command line compiler
most applications need data access at one point of time making it a crucial component
when working with applications. Data access is making the application interact with a
database, where all the data is stored. Different applications have different requirements for
database access. VB .NET uses ADO .NET (Active X Data Object) as it's data access and
manipulation protocol which also enables us to work with data on the Internet. Let's take a
look why ADO .NET came into picture replacing ADO.

Block Diagram
The ADO.NET Data Architecture
Data Access in ADO.NET relies on two components: Dataset and Data Provider.
Dataset: The dataset is a disconnected, in-memory representation of data. It can be
considered as a local copy of the relevant portions of the database. The Dataset is
persisted in memory and the data in it can be manipulated and updated independent of the
database. When the use of this Dataset is finished, changes can be made back to the
central database for updating. The data in Dataset can be loaded from any valid data
source like Microsoft SQL server database, an Oracle database or from a Microsoft Access
database.

Data Provider
The Data Provider is responsible for providing and maintaining the connection to the
database. A DataProvider is a set of related components that work together to provide data
in an efficient and performance driven manner. The .NET Framework currently comes with
two DataProviders: the SQL Data Provider which is designed only to work with Microsoft's
SQL Server 7.0 or later and the OleDb DataProvider which allows us to connect to other
types of databases like Access and Oracle. Each DataProvider consists of the following
component classes:
The Connection object which provides a connection to the database
The Command object which is used to execute a command
The DataReader object which provides a forward-only, read only, connected record set
The Data Adapter object which populates a disconnected Dataset with data and performs
update
Data access with ADO.NET can be summarized as follows:
A connection object establishes the connection for the application with the database. The
command object provides direct execution of the command to the database. If the
command returns more than a single value, the command object returns a DataReader to
provide the data. Alternatively, the DataAdapter can be used to fill the Dataset object. The
database can be updated using the command object or the DataAdapter.
Component classes that make up the Data Providers
The Connection Object
The Connection object creates the connection to the database. Microsoft Visual Studio
.NET provides two types of Connection classes: the SqlConnection object, which is
designed specifically to connect to Microsoft SQL Server 7.0 or later, and the
OleDbConnection object, which can provide connections to a wide range of database types
like Microsoft Access and Oracle. The Connection object contains all of the information
required to open a connection to the database.

The Command Object
The Command object is represented by two corresponding classes: SqlCommand and
OleDbCommand. Command objects are used to execute commands to a database across
a data connection. The Command objects can be used to execute stored procedures on
the database, SQL commands, or return complete tables directly. Command objects
provide three methods that are used to execute commands on the database:
ExecuteNonQuery:
Executes commands that have no return values such as INSERT, UPDATE or DELETE
ExecuteScalar: Returns a single value from a database query
ExecuteReader: Returns a result set by way of a DataReader object
The DataReader Object
The DataReader object provides a forward-only, read-only, connected stream recordset
from a database. Unlike other components of the Data Provider, DataReader objects
cannot be directly instantiated. Rather, the DataReader is returned as the result of the
Command object's ExecuteReader method. The SqlCommand.ExecuteReader method
returns a SqlDataReader object, and the OleDbCommand.ExecuteReader method returns
an OleDbDataReader object. The DataReader can provide rows of data directly to
application logic when you do not need to keep the data cached in memory. Because only
one row is in memory at a time, the DataReader provides the lowest overhead in terms of
system performance but requires the exclusive use of an open Connection object for the
lifetime of the DataReader.
The DataAdapter Object
The DataAdapter is the class at the core of ADO .NET's disconnected data access. It is
essentially the middleman facilitating all communication between the database and a
DataSet. The DataAdapter is used either to fill a DataTable or DataSet with data from the
database with it's Fill method. After the memory-resident data has been manipulated, the
DataAdapter can commit the changes to the database by calling the Update method. The

DataAdapter provides four properties that represent database commands:
SelectCommand
InsertCommand
DeleteCommand
UpdateCommand
When the Update method is called, changes in the DataSet are copied back to the
database and the appropriate InsertCommand, DeleteCommand, or UpdateCommand is
executed.
Using OleDb Provider
The Objects of the OleDb provider with which we work are:
TheOleDbConnectionclass The OleDbConnection class represents a connection to OleDb
data source. OleDb connections are used to connect to most databases.
TheOleDbCommandClass The OleDbCommand class represents a SQL statement or
stored procedure that is executed in a database by an OLEDB provider.
TheOleDbDataAdapterClass The OleDbDataAdapter class acts as a middleman between
the datasets and OleDb data source. We use the Select, Insert, Delete and Update
commands for loading and updating the data.
TheOleDbDataReaderClass The OleDbDataReader class creates a data reader for use
with an OleDb data provider. It is used to read a row of data from the database. The data is
read as forward-only stream which means that data is read sequentially, one row after
another not allowing you to choose a row you want or going backwards.

Sample Code
We will work with the sample Emp table in Oracle.
Retrieving Records
Imports System.Data.OleDB
Public Class Form1 Inherits System.Windows.Forms.Form
Dim myConnection As OleDbConnection
Dim myCommand As OleDbCommand
Dim dr As New OleDbDataReader()
'declaration
Private Sub Form1_Load(ByVal sender As System.Object, ByVal e As
System.EventArgs)_
Handles MyBase.Load
myConnection = New OleDbConnection_
("Provider=MSDAORA.1;UserID=scott;password=tiger; database=ora")
'MSDORA is the provider when working with Oracle
Try
myConnection.Open()
'opening the connection
myCommand = New OleDbCommand("Select * from emp", myConnection)
'executing the command and assigning it to connection
dr = myCommand.ExecuteReader()
While dr.Read()
'reading from the datareader
MessageBox.Show("EmpNo" & dr(0))
MessageBox.Show("EName" & dr(1))
MessageBox.Show("Job" & dr(2))
MessageBox.Show("Mgr" & dr(3))
MessageBox.Show("HireDate" & dr(4))
'displaying data from the table
End While
dr.Close()
myConnection.Close()
Catch e As Exception
End Try
End Sub
End Class
The above code displays first 5 columns from the Emp table in Oracle.
Inserting Records
Drag a Button from the toolbox onto the Form. When this Button is clicked the values
specified in code will be inserted into the Emp table.
Imports System.Data.OleDb
Public Class Form2 Inherits System.Windows.Forms.Form
Dim myConnection As OleDbConnection
Dim myCommand As OleDbCommand
Dim ra as Integer
'integer holds the number of records inserted
Private Sub Form2_Load(ByVal sender As System.Object, ByVal e As_
System.EventArgs) Handles MyBase.Load
End Sub
Private Sub Button1_Click(ByVal sender As System.Object, ByVal e As _
System.EventArgs) Handles Button1.Click
myConnection = New OleDbConnection(""Provider=MSDAORA.1;User_
ID=scott;password=tiger;database=ora")
Try
myConnection.Open()
myCommand = New OleDbCommand("Insert into emp values
12,'Ben','Salesman',300,_
12-10-2001,3000,500,10 ", myConnection)
'emp table has 8 columns. You can work only with the columns you want

ra=myCommand.ExecuteNonQuery()
MessageBox.Show("Records Inserted" & ra)
myConnection.Close()
Catch
End Try
End Sub
End Class
Deleting Records
Drag a Button on a new form and paste the following code.
Imports System.Data.OleDb
Public Class Form3 Inherits System.Windows.Forms.Form
Dim myConnection As OleDbConnection
Dim myCommand As OleDbCommand
Dim ra as Integer
Private Sub Form3_Load(ByVal sender As System.Object, ByVal e As_
System.EventArgs) Handles MyBase.Load
End Sub
Private Sub Button1_Click(ByVal sender As System.Object, ByVal e_
As System.EventArgs) Handles Button1.Click
Try
myConnection = New OleDbConnection(""Provider=MSDAORA.1;User_
ID=scott;password=tiger;database=ora")
myConnection.Open()
myCommand = New OleDbCommand("Delete from emp where DeptNo=790220",_
myConnection)
ra=myCommand.ExecuteNonQuery()
MessageBox.Show("Records Deleted" & ra)
myConnection.Close()

Catch
End Try
End Sub
End Class
Updating Records
Drag a Button on a new form and paste the following code.
Imports System.Data.OleDb
Public Class Form4 Inherits System.Windows.Forms.Form
Dim myConnection As OleDbConnection
Dim myCommand As OleDbCommand
Dim ra as Integer
Private Sub Form4_Load(ByVal sender As System.Object, ByVal e As_
System.EventArgs) Handles MyBase.Load
End Sub
Private Sub Button1_Click(ByVal sender As System.Object, ByVal e_
As System.EventArgs) Handles Button1.Click
Try
myConnection = New OleDbConnection(""Provider=MSDAORA.1;User_
ID=scott;password=tiger;database=ora")
myConnection.Open()
myCommand = New OleDbCommand("Update emp Set DeptNo=65 where
DeptNo=793410",_ myConnection)
ra=myCommand.ExecuteNonQuery()
MessageBox.Show("Records Updated" & ra)
myConnection.Close()

Catch
End Try
End Sub
End Class
Conclusion: Hence we have studied ADO.NET.
10. Lab Exercises: Exercise No 10: ( 2 Hours) – 8 practical AIM - Deployment of project
-One has to create a project based on all the controls and tools.
Quiz on the subject: Quiz should be conducted on tips in the laboratory, recent trends and subject
knowledge of the subject. The quiz questions should be formulated such that
questions are normally are from the scope outside of the books. However twisted
questions and self formulated questions by the faculty can be asked but
correctness of it is necessarily to be thoroughly checked before the conduction of
the quiz.
Conduction of Viva-Voce Examinations: Teacher should oral exams of the students with full preparation. Normally, the
objective questions with guess are to be avoided. To make it meaningful, the
questions should be such that depth of the students in the subject is tested Oral
examinations are to be conducted in co-cordial environment amongst the teachers
taking the examination. Teachers taking such examinations should not have ill
thoughts about each other and courtesies should be offered to each other in case
of difference of opinion, which should be critically suppressed in front of the

students.
Evaluation and marking system:
Basic honesty in the evaluation and marking system is absolutely essential and in
the process impartial nature of the evaluator is required in the examination
system to become popular amongst the students. It is a wrong approach or
concept to award the students by way of easy marking to get cheap popularity
among the students to which they do not deserve. It is a primary responsibility of
the teacher that right students who are really putting up lot of hard work with
right kind of intelligence are correctly awarded.
The marking patterns should be justifiable to the students without any ambiguity
and teacher should see that `students are faced with unjust circumstances.The
assessment is done according to the directives of the Principal/ Vice-Principal/
Dean Academics.