lapointeproductionsblog.files.wordpress.com€¦ · web viewinsert word art. title it with your...
TRANSCRIPT
OBJECTIVES:
1. Insert Word Art2. Title it with your name3. Change the Shape “TextBox” outline appearance, color, and width4. Change the text outline, appearance, font type, attributes, color, and add a text effect.
a. The size should be around
How to get started:
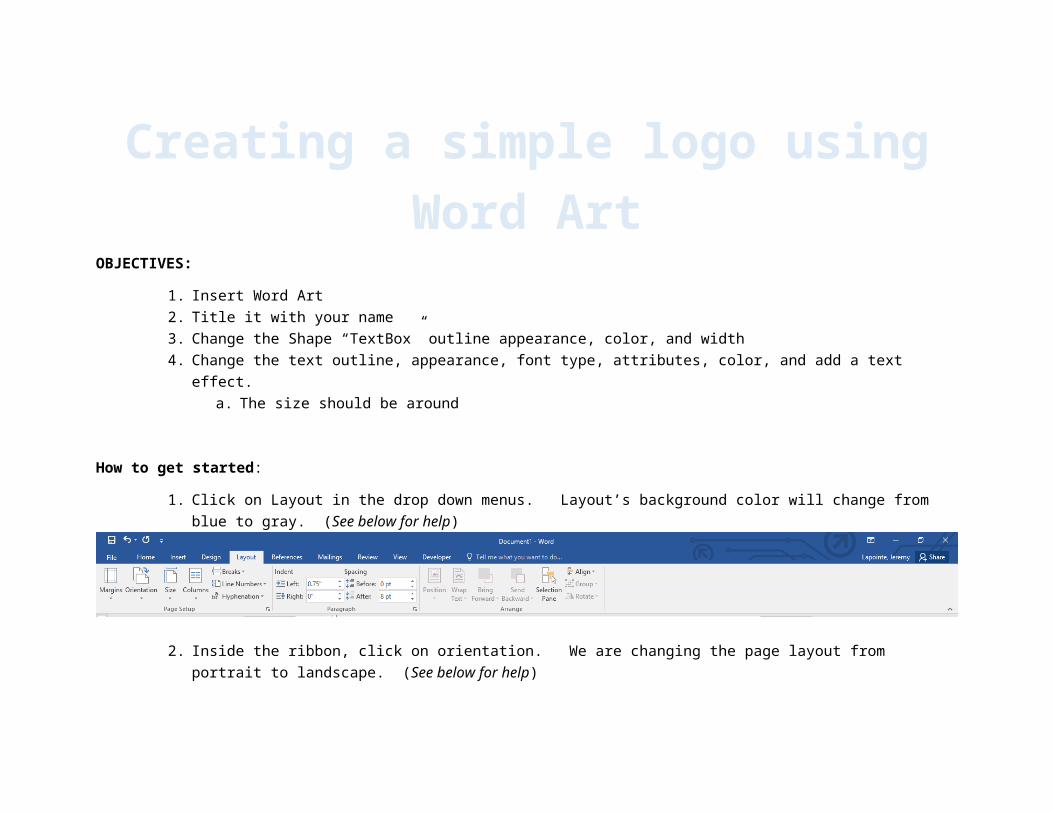
1. Click on Layout in the drop down menus. Layout’s background color will change from blue to gray. (See below for help)
2. Inside the ribbon, click on orientation. We are changing the page layout from portrait to landscape. (See below for help)
3. Click on insert located on the top of your screen in the drop down menus.
Creating a simple logo using Word Art
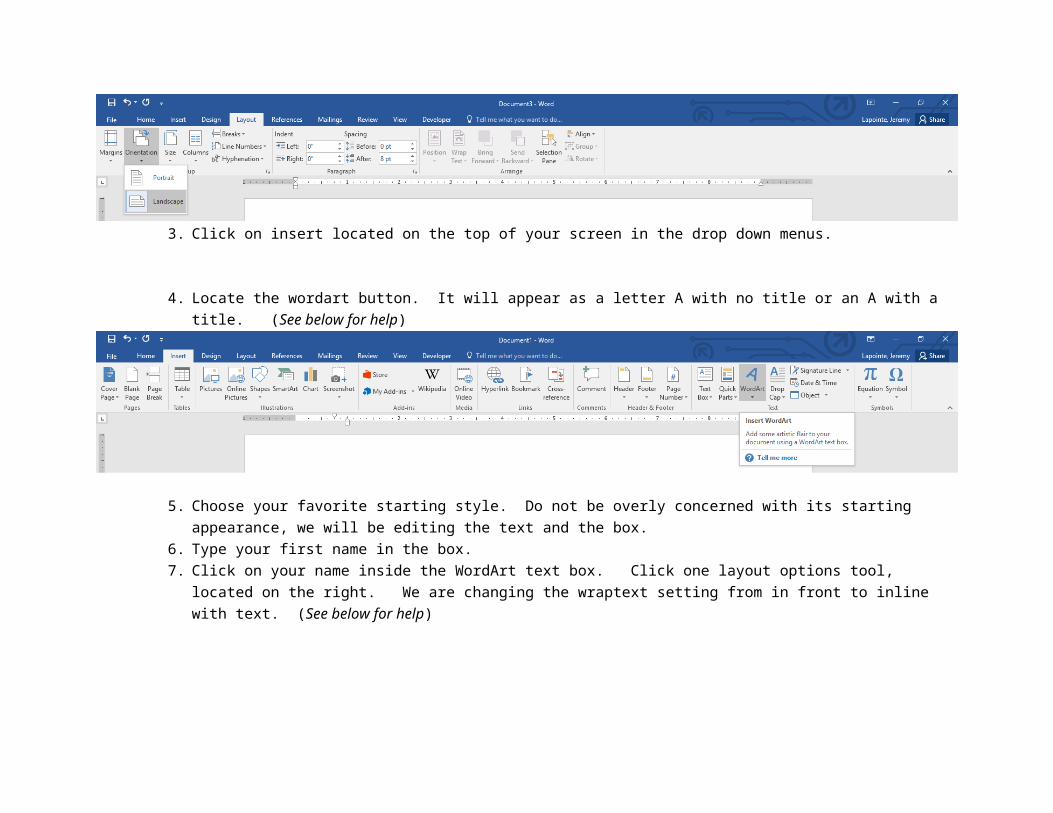
4. Locate the wordart button. It will appear as a letter A with no title or an A with a title. (See below for help)
5. Choose your favorite starting style. Do not be overly concerned with its starting appearance, we will be editing the text and the box.
6. Type your first name in the box.7. Click on your name inside the WordArt text box. Click one layout options tool, located on the right. We are changing the
wraptext setting from in front to inline with text. (See below for help)
8. On your Home menu, change the font type. 9. Set the font size between 160-200. Your first name should be on oneline.
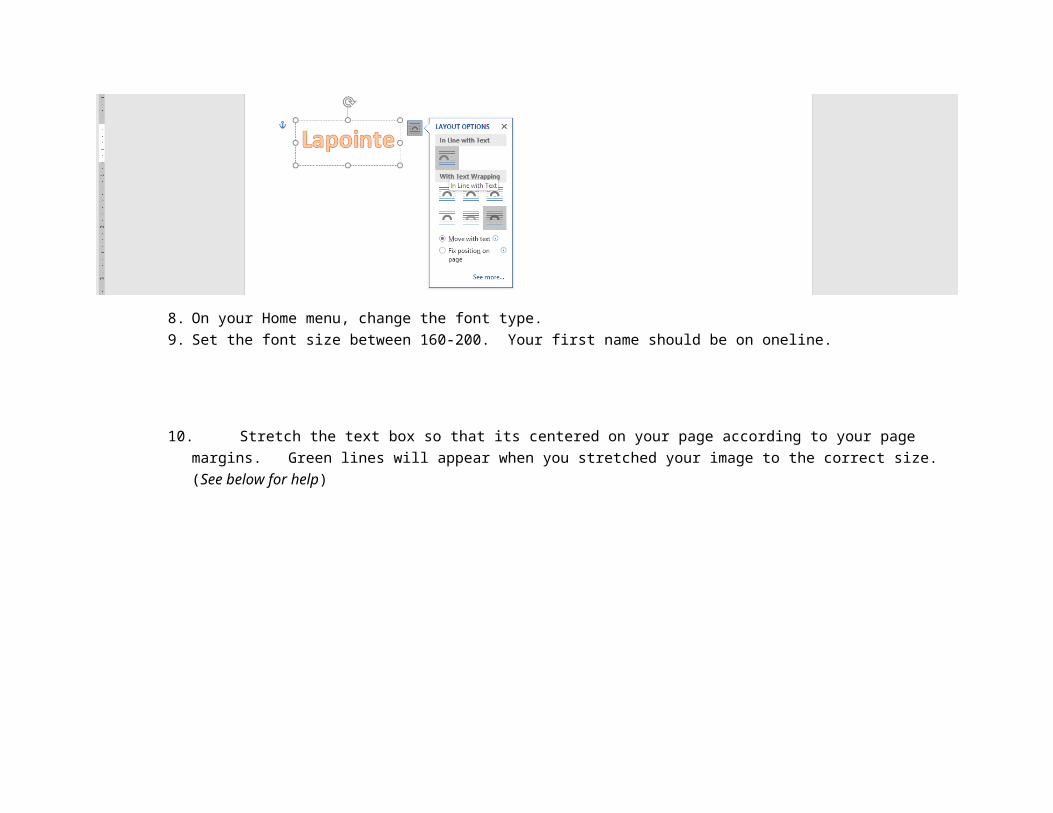
10. Stretch the text box so that its centered on your page according to your page margins. Green lines will appear when you stretched your image to the correct size. (See below for help)

11. Click back on your WordArt. You should see Drawing Tools, WordArt in your drop down options. Click on this. (See below for help)
12. We are going to edit your shape (the textbox). Set the shape out line to either a solid border or a dashed border. (See below for help)

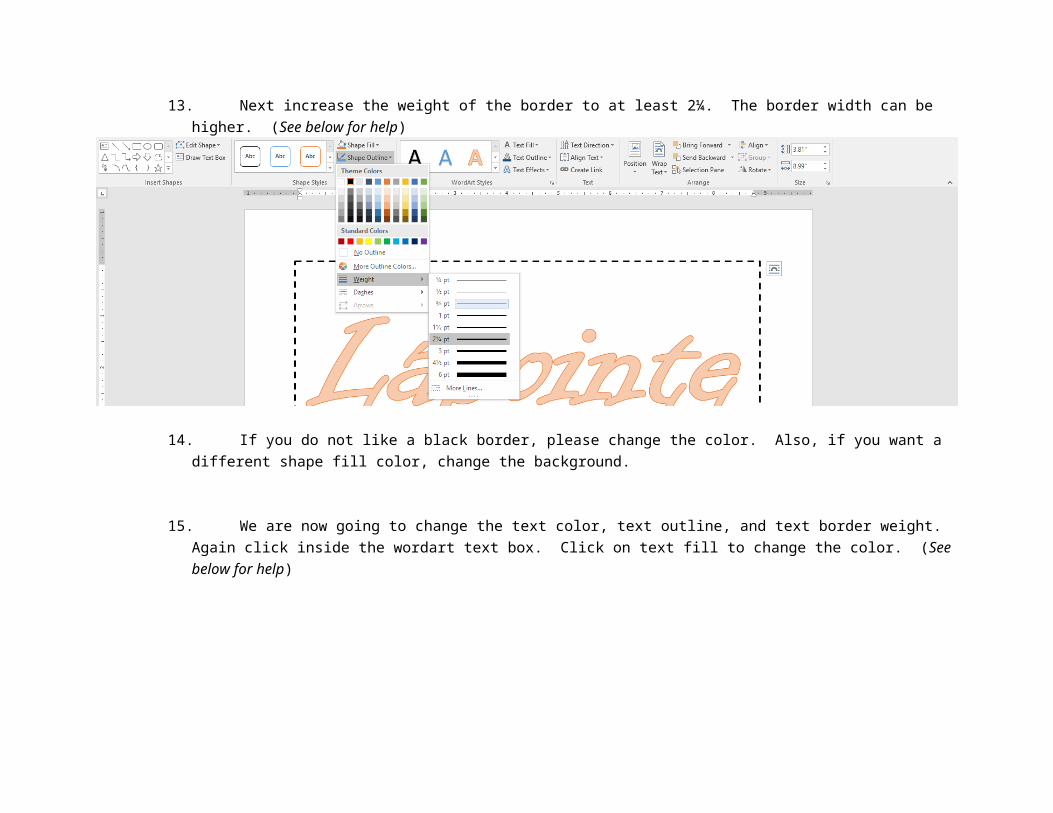
13. Next increase the weight of the border to at least 2¼. The border width can be higher. (See below for help)
14. If you do not like a black border, please change the color. Also, if you want a different shape fill color, change the background.
15. We are now going to change the text color, text outline, and text border weight. Again click inside the wordart text box. Click on text fill to change the color. (See below for help)
16. Add at least one Text effect. (See below for help)
17. When you are finished, please make sure that your logo has good contrast between the foreground and background. Look at the color wheel for help if you’re not sure.
18. Title this document as simple logo and email it to me.