leostream with scale omputing h3...scale omputing and leostream provide a complete vdi solution to...
TRANSCRIPT

Leostream with Scale Computing HC3 Intuitive VDI for the SMB, Edge, and Distributed Enterprise
Version 9.0 January 2020
2
Contacting Leostream
Leostream Corporation http://www.leostream.com 271 Waverley Oaks Rd. Telephone: +1 781 890 2019 Suite 206 Waltham, MA 02452 USA
To submit an enhancement request, email [email protected]. To request product information or inquire about our future directions, email [email protected].
Copyright
© Copyright 2002-2020 by Leostream Corporation This software program and documentation are copyrighted by Leostream. The software described in this document is provided under a license agreement and may be used or copied only under the terms of this agreement. No part of this manual may be copied or reproduced in any form without prior written consent from Leostream.
Trademarks
The following are trademarks of Leostream Corporation.
Leostream™ The Leostream graphical logo™
The absence of a product name or logo from this list does not constitute a waiver of the trademark or other intellectual property rights concerning that product, name, or logo by Leostream. Microsoft, Active Directory and Windows are trademarks or registered trademarks of Microsoft Corporation in the United States and/or other countries. Other brand and product names are trademarks or registered trademarks of their respective holders. Leostream claims no right to use of these marks.
Patents
Leostream software is protected by U.S. Patent 8,417,796.
Using Leostream to Manage Scale Computing HC3 Virtual Environment
3
Contents CONTENTS ................................................................................................................................................ 3
CHAPTER 1: INTRODUCTION AND ARCHITECTURE ...................................................................................... 4
WHY USE LEOSTREAM TO MANAGE YOUR HC3 ENVIRONMENT................................................................................... 4 HIGH-LEVEL ARCHITECTURE DIAGRAMS ................................................................................................................... 4
On-Premises Environments ....................................................................................................................... 5 Remote User Access .................................................................................................................................. 5
CHAPTER 2: INSTALLING LEOSTREAM ......................................................................................................... 7
INSTALLING THE CONNECTION BROKER .................................................................................................................... 7 OBTAINING YOUR LEOSTREAM LICENSE ................................................................................................................... 7
CHAPTER 3: PREPARING A MASTER VIRTUAL MACHINE .............................................................................. 9
INSTALLING THE LEOSTREAM AGENT ....................................................................................................................... 9 ASSIGNING THE TEMPLATE TAG .............................................................................................................................. 9
CHAPTER 4: INTEGRATING WITH YOUR HC3 SYSTEM AND AUTHENTICATION SERVERS ................................. 10
CONNECTING TO YOUR AUTHENTICATION SERVERS.................................................................................................... 10 CONNECTING TO YOUR HC3 SYSTEM ...................................................................................................................... 11
CHAPTER 5: POOLING AND PROVISIONING ON YOUR HC3 SYSTEM ............................................................. 14
CREATING POOLS ................................................................................................................................................. 14 PROVISIONING NEW INSTANCES ............................................................................................................................. 15 DISABLING PROVISIONING ..................................................................................................................................... 17 JOINING INSTANCES TO A DOMAIN .......................................................................................................................... 17
CHAPTER 6: OFFERING DESKTOPS TO USERS .............................................................................................. 19
DEFINING POOL-BASED PLANS .............................................................................................................................. 19 Protocol Plans ........................................................................................................................................... 19 Power Control Plans .................................................................................................................................. 21 Release Plans ............................................................................................................................................ 22
BUILDING USER POLICIES ...................................................................................................................................... 25 ASSIGNING POLICIES TO USERS .............................................................................................................................. 26 TESTING YOUR CONNECTION BROKER CONFIGURATION ............................................................................................. 29

Chapter 1: Introduction and Architecture
4
Chapter 1: Introduction and Architecture
Why use Leostream to Manage Your HC3 Environment
The Leostream Connection Broker now delivers the ability to manage virtual machines hosted on the Scale Computing HC3® virtualization platform. Scale Computing and Leostream provide a complete VDI solution to satisfy a wide range of use cases and maximize the utility of desktops and applications on HC3. With the combination of Leostream and Scale Computing, you can:
1. Simplify VDI – HC3 is a complete “datacenter in a box” with servers, storage, and virtualization integrated into a single appliance to deliver simplicity, availability, and scalability at a fraction of the cost.
2. Provide desktops on-demand – Leostream quickly provisions virtual machines preconfigured from customized template VMs created in HC3.
3. Improve security – keep data off of the end user’s client device, to ensure that sensitive data never leaves your data center.
4. Lower costs – avoid licensing fees associated with full VDI stack solutions.
This document describes how to configure the Leostream Connection Broker to manage capacity and user connections to virtual machines hosted on HC3. For an introduction to Leostream, including a description of key concepts and components, please reference the Getting Started with Leostream Concepts guide available on the Leostream web site. For complete details on using the Leostream Connection Broker, download the Connection Broker Administrator’s Guide.
High-Level Architecture Diagrams
Leostream provides remote access to virtual machines hosted on HC3 for both on-premises and remote users. How you architect your environment varies slightly based on which types of users you plan to support. The following diagrams show where the Leostream platform components are located when working with HC3. For a complete architecture diagram, including external databases, authentication servers, and public clouds, see the section on “Network Level Access” in the Connection Broker Security Review document.

Using Leostream to Manage Scale Computing HC3 Virtual Environment
5
On-Premises Environments
The simplest Leostream environments manage logins for users on the same network as your HC3 infrastructure. This configuration requires a Connection Broker that is reachable by the user’s client device and by the desktops hosted on HC3. The desktops have an installed Leostream Agent, which communicates information about the user’s desktop connection to the Connection Broker. The user’s client may be running the Leostream Connect software client, but users can also log into Leostream from a Web browser or from a number of thin and zero clients, such as Dell Wyse thin clients running the Dell Wyse ThinOS. The following diagram shows a high-level architecture, including the ports required for login, Leostream Agent, and desktop connection traffic.
Remote User Access
If you need to connect users that are outside your corporate network to desktops hosted on your HC3 infrastructure, you can introduce the Leostream Gateway into your architecture. The Leostream Gateway provides three key pieces of functionality.
1. The Leostream Gateway forwards user login traffic to the Connection Broker, so the Connection Broker can authenticate the user and offer them the appropriate desktops.

Chapter 1: Introduction and Architecture
6
2. The Leostream Gateway has a built-in HTML5 RDP, VNC, and SSH viewer, allowing users to connect to their desktops inside of a Web browser without installing additional client software.
3. The Leostream Gateway forwards display protocol traffic from the user’s client outside the network to the HC3 hosted desktops.
The following diagram includes the Leostream Gateway in the high-level architecture, and shows the default port range used by the Leostream Gateway to forward display protocol traffic. The Leostream Gateway manages its firewall appropriately, opening and closing ports only when required by desktop connections. If you place the Leostream Gateway in a DMZ that includes additional firewalls, ensure that you open the appropriate ports.
Note that this Quick Start guide does not cover using the Leostream Gateway. For more information on configuring your Connection Broker to work with the Leostream Gateway, see the Leostream Gateway Guide.

Using Leostream to Manage Scale Computing HC3 Virtual Environment
7
Chapter 2: Installing Leostream You can quickly and easily install the Leostream Connection Broker on a virtual machine running on the HC3 system. The VM guest operating system should be using the latest CentOS or Red Hat Enterprise Linux version 7. To run properly, the Connection Broker requires, at least, the following resources.
• 1 vCPU
• 2 GB of RAM
• At least 20 GB of virtual drive space
• 1 vNIC, ideally with Internet connectivity
Installing the Connection Broker
Prior to installing your Connection Broker, install the latest updates to the operating system. After the updates are applied, if your Connection Broker instance has access to the internet, you can install the Connection Broker by logging into the instance’s console and executing the following command. curl http://downloads.leostream.com/broker.prod.sh | bash
If your Connection Broker instance does not have internet access, download the Connection Broker package from the following location and copy the RPM file into your Connection Broker instance. https://www.leostream.com/resource/leostream-connection-broker-9-0/ See the Leostream Installation Guide for instructions on how to complete the installation.
Obtaining Your Leostream License
After installing your Connection Broker, you must obtain your Leostream license key. Your Connection Broker license key is derived from the serial number you received from Leostream Sales. If you did not receive your Connection Broker 9.0 serial number, please contact [email protected]. You can generate the license key by logging into your Connection Broker Administrator web interface from any web browser with internet access, as follows.
1. Enter your Connection Broker address in your Web browser’s URL edit field. The Connection Broker Sign In page opens.
2. Sign into the Connection Broker Web interface using the following default credentials:
• User name: admin
• Password: leo
3. Click Sign In. The Leostream license page opens.

Chapter 2: Installing Leostream
8
4. If your Connection Broker has internet access, click the link to go to https://license.leostream.com. The installation code for your Connection Broker is automatically populated. If your Connection Broker does not have internet access, note the Installation code to the right of the form and navigate to the Leostream license server from a device with internet access.
5. In the Leostream license key generator, enter the Serial number you received from Leostream. If you do not have a Leostream Serial number, contact [email protected].
6. If the Installation code is not automatically populated, enter the Installation code listed on your Connection Broker.
7. In the Email address form, enter your email address.
8. Click Generate a license.
9. If you navigated to the Leostream license generator from your Connection Broker, click Apply to the broker to copy the new license key into your Connection Broker. Otherwise, copy the key into a text file.
10. Back on your Connection Broker Leostream License form, enter the license key you obtained from the Leostream license generator. Ensure that you include the BEGIN and END lines.
11. Click on the License Agreement link to view the end user license agreement. Select the I have read and accept the License Agreement option if you agree to the terms of the Leostream end user license agreement.
12. Click Save. The Welcome page opens, giving you the option to check for any Connection Broker updates.

Using Leostream to Manage Scale Computing HC3 Virtual Environment
9
Chapter 3: Preparing a Master Virtual Machine
Installing the Leostream Agent
Leostream can manage connections to existing Windows and Linux virtual machines, and can provision new virtual machines from master VMs in your HC3 platform. All VMs managed by Leostream should have an installed Leostream Agent configured to communicate with your Connection Broker. Leostream Agents are available on the Leostream Product Downloads page. The Leostream Installation Guide contains complete instructions for installing the Leostream Agent. When installing the Leostream Agent, ensure that you enter your Connection Broker address and that the agent registers with the Connection Broker. You can use the Test button on the Leostream Agent Control Panel dialog to ensure that the Leostream Agent can contact the Connection Broker. To test if the Connection Broker can contact the Leostream Agent, go to the > Resources > Desktops page in the Connection Broker Administrator Web interface and click the Status link associated with the instance’s record in the Connection Broker. Communication must work in both directions to use all Leostream functionality.
Assigning the Template Tag
To specify that a VM is a master image to use for provisioning, assign the tag template to the VM card in your HC3 platform.
Do not set up replication for virtual machines you plan to use as templates. If you need to enable replication, do so on your master VM then make a clone of that master and tag that as your template. If you plan to use Leostream to provision new virtual machines on HC3 and have Leostream join the new VMs to your Active Directory domain, please adhere to the following guidelines.
• The virtual machine tagged as a template must not already be joined to the domain. Leostream only joins desktops to a domain if they are currently part of a local Workgroup.
• The virtual machine must have an installed Leostream Agent that is registered with your Connection Broker. If the Leostream Agent cannot communicate with the Connection Broker, new desktops will not be joined to the domain.
After you create an image from an instance following the previous guidelines, you can configure Leostream pools that automatically provision new desktop VMs on HC3 based on pre-defined rules (see Chapter 5: Pooling and Provisioning in HC3.)

Chapter 4: Integrating Leostream with Your HC3 System
10
Chapter 4: Integrating with Your HC3 System and Authentication Servers
In the Setup section of the Connection Broker Administrator Web Interface, you integrate Leostream with the other components of your hosted desktop environment, such as your HC3 system and your authentication servers. The Setup section is also used to integrate your Connection Broker with the Leostream Gateway. Note that this Quick Start guide does not cover using the Leostream Gateway. For more information on configuring your Connection Broker to work with the Leostream Gateway, see the Leostream Gateway Guide.
Connecting to Your Authentication Servers The Connection Broker can authenticate users against Microsoft Active Directory, OpenLDAP, and NIS authentication servers. To authenticate users, you first register your domain with your Connection Broker. For example, the following procedure shows how to integrate with Microsoft Active Directory.
1. Go to the > Setup > Authentication Servers menu.
2. Click the Add Authentication Server link.
3. In the Add Authentication Server form, enter a name for this server in the Connection Broker in the Authentication Server name edit field.
4. In the Domain edit field, enter the domain name associated with this Active Directory server.
5. In the Connection Settings section, shown in the following figure, use the following procedure to integrate with your Active Directory authentication server.
a. Select Active Directory from the Type drop-down list.
b. From the Specify address using drop-down menu, select Hostname or IP address.

Using Leostream to Manage Scale Computing HC3 Virtual Environment
11
c. Enter the authentication server hostname or IP address in the Hostname or IP address edit field.
d. Enter the port number in the Port edit field.
e. Check the Encrypt connection to authentication server using SSL (LDAPS) checkbox if you need a secure connection to the authentication server. The port number automatically changes to 636. Re-edit the Port edit field if you are not using port 636 for secure connections.
6. In the Search Settings section, shown in the following figure, enter the username and password for
an account that has read access to the user records. Leostream does not need full administrator rights to your Active Directory authentication server.
7. In the User Login Search section, ensure that the Match Login name against this field edit field is set to sAMAccountName. This is the attribute that the Connection Broker uses to locate the user in the authentication server, based on the information the user enters when logging into Leostream.
8. Click Save.
Connecting to your HC3 System
In order to manage existing virtual machines on your HC3 system and to create and delete VMs, you need to create a Scale Computing center in your Leostream Connection Broker.
Leostream defines centers as the external systems that inform the Connection Broker about desktops, images, and other resources that are available for use in the Connection Broker and for assignment to end users. To create a Scale Computing center:
1. Go to the > Setup > Centers page.
2. Click the Add Center link.
3. In the Add Center form, select Scale Computing from the Type drop-down menu. The Add Center form updates to display the fields shown in the following figure.

Chapter 4: Integrating Leostream with Your HC3 System
12
4. Enter a name for the center in the Name edit field.
5. Enter the Hostname or IP address of your Scale Computing HC3 system.
6. Enter the username and password for an HC3 web interface user with admin-level role access.
7. Select a time from the Inventory refresh interval drop-down menu. This setting tells the Connection Broker how often to refresh the desktops imported from this center. The refresh interval is the length of time between when one refresh action completes and the next refresh action begins. If you create, delete, or tag virtual machines in the Scale Computing Console, the Connection Broker updates these records when the next refresh interval occurs.
8. Click Save to create the center.
As soon as you save the form, the Connection Broker inventories all virtual machines as either desktops or images in your Connection Broker. Desktops are listed on the > Resources > Desktops page and images (virtual machines with the template tag in HC3) are listed on the > Resources > Images page.
Any desktops that were already registered through an Uncategorized Desktops center are removed when the duplicate record is inventoried through your Scale Computing center.

Using Leostream to Manage Scale Computing HC3 Virtual Environment
13
Any time new desktops are added, either when the center is saved or when a refresh occurs, the Connection Broker submits a job to scan each virtual machine for an installed Leostream Agent. You can find these jobs on the > System > Job Queue page as hda_scan jobs. The Leostream Agent must already be registered with your Connection Broker or the agent will not accept Connection Broker communications. If you specified your Connection Broker address when you installed the Leostream Agent, the agent registered with the Connection Broker when the installation completed.
The Connection Broker relies on the Leostream Agent to obtain accurate IP address, hostname, and operating system information for the virtual machines hosted on your Scale Computing system. After the hda_scan jobs complete, you can test the Leostream Agent communication by clicking the Status link on the > Resources > Desktops page for any desktop listed as having a running Leostream Agent.

Chapter 5: Pooling and Provisioning on Your HC3 System
14
Chapter 5: Pooling and Provisioning on Your HC3 System
After you create your centers and the Connection Broker inventories your desktops and images, the next step is to group the desktops into pools. The Leostream Connection Broker defines a pool as any group of desktops. Pools can be nested within one another, to create sub-pools. These pools and sub-pools have three distinct functions in Leostream:
1. Organizing desktops on the > Resources > Desktops page 2. Provisioning new virtual machines on your HC3 system 3. Indicating the desktops that a user may connect to and how the Connection Broker manages the
user’s connection to those desktops
Creating Pools
When using Leostream to provision new instances on the HC3 system, the key is to construct your pool in a way that ensures that newly provisioned desktops become members of that pool. One method to ensure this is to define your pool based on the instance name, which you set as one of your provisioning parameters, for example:
1. Go to the > Configuration > Pools page.
2. Click the Create Pool link. The Create Pool form opens.
3. Enter a name for the pool in the Name edit field.
4. In the first row of the Desktop Attribute Selection section:
a. Select Name from the Desktop attribute drop-down menu.
b. Select begins with from the Conditional drop-down menu.
c. In the Text value field, enter the beginning of the name you will use for all the instances in this pool.
5. Click Save to save the pool. For a complete description of creating pools, including how to create a pool of all the desktops in your Scale Computing center, see the “Creating Desktop Pools” chapter in the Connection Broker Administrator’s Guide.
When using pools for provisioning, do not define the pool based on the desktop’s operating system version or type. The Connection Broker does not know the operating system of the desktop at the time the desktop is provisioned, and therefore the desktop will not appear in the pool.

Using Leostream to Manage Scale Computing HC3 Virtual Environment
15
Provisioning New Instances
Your Leostream license determines if provisioning is enabled in your Connection Broker. If you do not see the options described in this section, contact [email protected] to update your license key. The Provisioning section of the Edit Pool page, partially shown in the following figure, allows you to configure when and how the Connection Broker creates new virtual machines on your HC3 system.
The Connection Broker determines when to create new VMs by comparing the thresholds specified in the Provisioning Limits section to the current metrics of the pool. If you edit an existing pool, the Connection Broker displays the current metrics of the pool to the right of the Edit Pool form, for example:
The number entered into the Start provisioning when unassigned desktops in pool drops below field specifies a lower bound on the number of unassigned desktops in the pool, where the number of unassigned desktops is the total number of desktops minus the number of assigned desktops. For example, the previous figure shows one assigned desktop and 46 total desktops. Therefore, there are 45 unassigned desktops. An unassigned desktop can have a desktop status of either available or unavailable. The Connection Broker checks the provisioning limits and creates new instances at the following times
• When the pool is saved
• When a user is assigned to a desktop in this pool
• When any pool_stats or pool_history_stats job runs
The Connection Broker continues to provision new desktops whenever the lower threshold is crossed and until the upper threshold specified in the Stop provisioning when total desktops in pool reaches field is reached, indicated by the Total value in the pool size information.

Chapter 5: Pooling and Provisioning on Your HC3 System
16
Use the Provisioning Parameters section to configure how Leostream provisions new virtual machines on your HC3 system.
1. Select your HC3 system from the Provision in center drop-down menu.
2. Configure the Virtual machine name for the newly provisioned machines. Note: If you created your pool based on the desktop name, make sure the Virtual machine name is set to satisfy the naming convention so the newly provisioned machines are placed in this pool. Creating a desktop in a particular pool does not guarantee it is placed in that pool if the desktop does not satisfy the rules in the pool definition. The Connection Broker automatically replaces the {SEQUENCE} dynamic tag with the value displayed in the Optional sequence number for virtual machine name field. The Connection Broker automatically increments that value each time a new desktop is provisioned.
3. Select your master image from the Deploy from template drop-down menu. This menu contains all virtual machines on your HC3 system that are tagged as a template. Ensure that you select an image that contains a Leostream Agent that is registered with your Connection Broker.
4. If you want Leostream to delete virtual machines when the user logs out, ensure that you select the Initialize newly-provisioned desktops as “deletable” checkbox.
For example:

Using Leostream to Manage Scale Computing HC3 Virtual Environment
17
Disabling Provisioning
If you’ve set non-zero provisioning limits in your pool and need to temporarily disable provisioning, uncheck the Provisioning enabled check box, shown in the following figure.
The Connection Broker automatically disables provisioning in some cases when provisioning fails due to configuration errors in your pool. If this occurs, please check and correct your provisioning parameters before enabling provisioning.
Joining Instances to a Domain
You can use Leostream to join desktops to any Active Directory domain you registered with your Connection Broker in Chapter 4. When enabled, the Connection Broker attempts to join a desktop to the domain as soon as the Leostream Agent on the desktop registers with the Connection Broker, for example, when a desktop is provisioned or when you reboot the desktop.
The desktop must have an installed and running Leostream Agent that is properly registered with the Connection Broker in order to be joined to a domain. To enable domain joining for a pool:
1. Select the Join virtual machine to a domain option in the Domain Join section, shown in the following figure.
2. Select the domain from the Domain drop-down menu.
3. Optionally, from the Organizational Unit drop-down menu, select an OU for the desktops.

Chapter 5: Pooling and Provisioning on Your HC3 System
18
4. To reset the desktops hostname when joining it to the domain, select the Set desktop hostname to virtual machine name check box. With this option selected, the Leostream Agent attempts to set the hostname to the value shown in the Name column on the > Resources > Desktops page. If the pool provisions new desktops, this is the name created by the value of the Virtual machine name field. The Name field must contain a valid hostname, restricted by the following rules.
• The name uses only the standard character set for Computer Name, which includes letters,
numbers, and the following symbols: ! @ # $ % ^ & ' ) ( . - _ { } ~
• Then name cannot be longer than 15 characters.
Leostream performs the domain join for any desktop in the pool that is not already joined to a domain. Leostream does not have to provision the desktop to perform the domain join.

Using Leostream to Manage Scale Computing HC3 Virtual Environment
19
Chapter 6: Offering Desktops to Users In the Configuration section of the Connection Broker Administrator Web interface, you define the plans and policies that determine which users have access to which desktops, how they are connected, and how the Connection Broker manages the user’s session.
Defining Pool-Based Plans
After you separate your desktops into pools, define the rules that control how the Connection Broker manages the user’s connection to the desktops in those pools. To perform this step, ask yourself the following questions.
• What display protocols do I want to use to connect users to their desktops? • How do I want to manage the power state of each desktop, for example, should it be powered off
when the user logs out? • How long can users remain assigned to a particular desktop? For example, if the user logs out,
should they remain assigned to that desktop, or should another user be able to log in?
Protocol Plans
Protocol plans determine the display protocol the Connection Broker uses to connect a user to their desktop. The Connection Broker contains one default protocol plan on the > Configuration > Protocol Plans page, shown in the following figure.
The Leostream Connection Broker defines a pool-based plan as a set of rules that determine how the Connection Broker manages the connection to a desktop in a pool. This step describes three types of pool-based plans. 1) Protocol, 2) Power Control, and 3) Release. The Connection Broker also provides location-based plans for setting registry keys and attaching network printers to the remote desktop. See the Connection Broker Administrator’s Guide for information on using location-based plans.

Chapter 6: Offering Desktops to Users
20
The default Protocol Plan instructs the Connection Broker to connect to the remote desktops using Microsoft RDP.
To create a new Protocol Plan, click the Create Protocol Plan link. The Create Protocol Plan form is divided into sections based on the type of client device used to log into Leostream, for example, Leostream Connect or the Leostream Web client.
In each section, indicate which protocol the Connection Broker should use to connect users to their desktops by selecting 1 from that protocol’s Priority drop-down menu. Then, use the Configuration file and Command line parameters to determine how that connection is launched. For example, the RDP configuration file is a list of RDP-file parameters used to launch the RDP client.
For a complete description of protocol plans, see “Building Pool-Based Plans” in the Connection Broker Administrator’s Guide.
See the Leostream Guide for Working with Display Protocols for more information on defining command line parameters and configuration files for each supported display protocol.
Your Connection Broker license determines which display protocols your Connection Broker can use. If the display protocol you want to use is not shown on the Create Protocol Plan, please contact [email protected] to obtain an updated license key.

Using Leostream to Manage Scale Computing HC3 Virtual Environment
21
Power Control Plans
Power control and release plans allow you to take actions on the user’s remote session based on different events, such as:
• When the user disconnects from their desktop
• When the user logs out of their desktop
• When the desktop is released to its pool
• When the user’s session has been idle for a specified length of time
Power control plans define the power control action to take on a desktop. Available power control plans are shown on the > Configuration > Power Control Plans page, shown in the following figure.
New Connection Broker installations contain one default power control plan, called Default. You can create as many additional power control plans as needed for your deployment. To build a new power control plan:
1. Click the Create Power Control Plan link on the > Configuration > Power Control Plans page. The Create Power Control Plan form, shown in the following figure, opens.
The remote desktop must have an installed and running Leostream Agent to allow the Connection Broker to distinguish between user logout and disconnect and to perform actions based on idle time.

Chapter 6: Offering Desktops to Users
22
Enter a descriptive name. You’ll refer to this name when assigning the plan to a pool. Select the amount of time to wait before changing the desktop’s power state. A wait time of zero tells the Connection Broker to immediately execute the selected power control action. Select the power control action to take after the wait time elapses. For the Connection Broker to take actions based on disconnect or idle-time events, you must install the Leostream Agent on that desktop.
2. Enter a unique name for the plan in the Plan name field.
3. For each of the remaining sections:
a. From the Wait drop-down menu, select the time to wait before applying the power action.
b. From the then drop-down menu, select the power control action to apply. Selecting Do not
change power state renders the setting in the Wait drop-down menu irrelevant, as no action is ever taken.
4. Click Save to store the changes or Cancel to return to the > Configuration > Power Control Plans page without creating the plan.
Release Plans
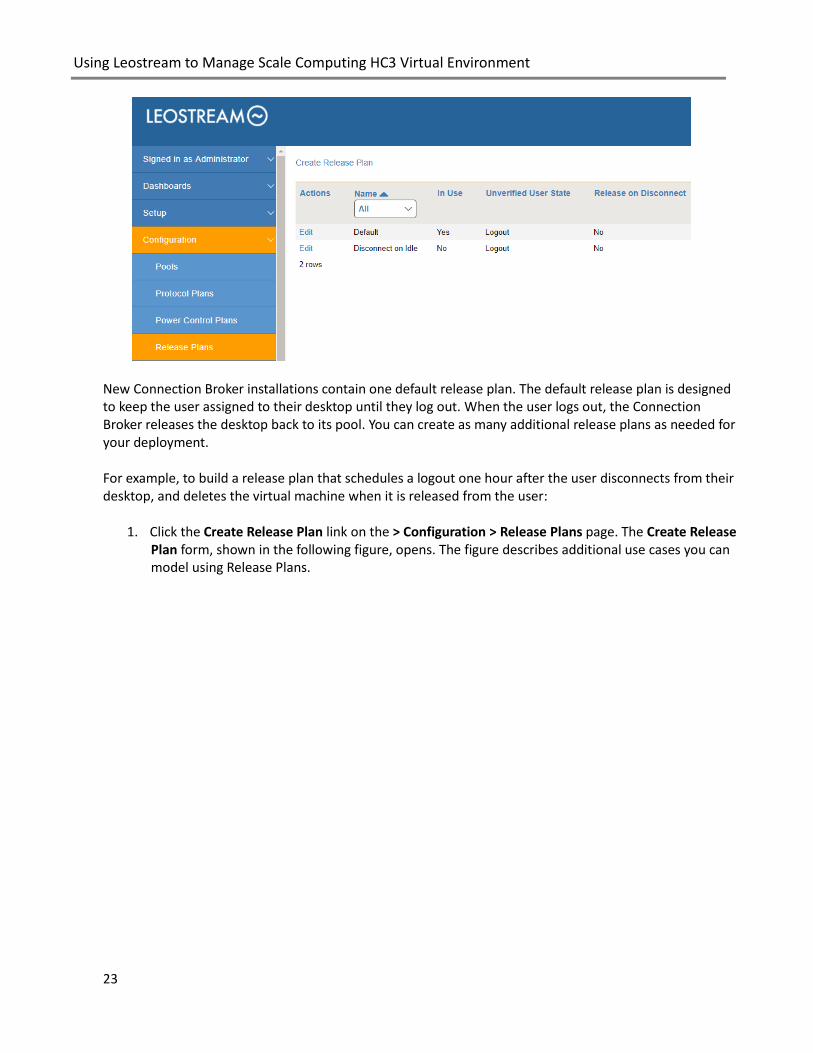
Release plans determine how long a desktop remains assigned to a user. When the assignment is broken, the Connection Broker releases the desktop back to its pool, making it available for other users. Available release plans are shown on the > Configuration > Release Plans page, shown in the following figure.
When a desktop is assigned to a user, the Connection Broker always offers that desktop to that user, regardless of where the user logs in, and to no other users. Desktops can be policy-assigned or hard-assigned. For a description of hard-assigned desktops, see the Connection Broker Administrator’s Guide.
Using Leostream to Manage Scale Computing HC3 Virtual Environment
23
New Connection Broker installations contain one default release plan. The default release plan is designed to keep the user assigned to their desktop until they log out. When the user logs out, the Connection Broker releases the desktop back to its pool. You can create as many additional release plans as needed for your deployment. For example, to build a release plan that schedules a logout one hour after the user disconnects from their desktop, and deletes the virtual machine when it is released from the user:
1. Click the Create Release Plan link on the > Configuration > Release Plans page. The Create Release Plan form, shown in the following figure, opens. The figure describes additional use cases you can model using Release Plans.

Chapter 6: Offering Desktops to Users
24
Enter a descriptive name. Refer to this name when assigning this plan to pools. After logging the user out, based on this setting, the Connection Broker runs the “When User Logs Out of Desktop” section of the plan. If a Leostream Agent is not installed on the remote desktop, the Connection Broker cannot distinguish when the user disconnects or logs out of their desktop. If the user logs in using Leostream Connect, the client sends a Connection Close event, and you can determine if the Disconnect or Log out portion of the release plan should be executed. You can perform actions on the desktop after the user’s session is idle for the selected elapsed time. Here, we log out after an hour, which invokes the “When User Logs out of Desktop” section of the plan. You can release a desktop back to its pool after a specified elapsed time since the desktop was initially assigned to the user. After the desktop is released, if the user remains logged in, the Connection Broker considers them to be rogue. To avoid rogue users, forcefully log out the user when the desktop is released to its pool. Select this option to have the Connection Broker completely delete the VM from disk as soon as the desktop is released to its pool. The Connection Broker deletes the VM only if the “Allow this desktop to be deleted from disk” option is enabled on the VM’s “Edit Desktop” page.
2. Enter a unique name for the plan in the Plan name edit field.
3. To build the Release Plan for our example, in the When User Disconnects from Desktop section,
select after 1 hour from the Log user out drop-down menu.
4. In the When Desktop is Released section, select Immediately from the Delete virtual machine from disk drop-down menu.
5. Click Save.

Using Leostream to Manage Scale Computing HC3 Virtual Environment
25
When using this release plan, the Connection Broker forcefully logs the user out an hour after they disconnect from their desktop. The logout event then triggers the When User Logs Out of Desktop section of the release plan, which releases the desktop back to its pool and removes the user’s assignment to the desktop. The release event triggers the When Desktop is Released part of the plan, which then deletes the virtual machine from your HC3 system. For more details on creating and using release plans, see the “Release Plans” section in Chapter 11 of the Connection Broker Administrator’s Guide.
Building User Policies
After you define your pools and plans, build policies.
The Connection Broker provides a Default policy that applies if no other policy exists or is applicable. The Default policy assigns one desktop from the All Desktops pool. To create additional policies:
1. Navigate to the > Configuration > Policies menu.
2. Click the Create Policy link, shown in the following figure.
3. In the Create Policy form, enter a name for the policy in the Policy name edit field. For a discussion on the remaining general policy properties, see the Connection Broker Administrator’s Guide.
The Leostream Connection Broker defines a policy as a set of rules that determine which pools to offer desktops from, which display protocol to use to connect to those desktops, which power control and release plans to apply to those desktops, which USB devices the user can access in their remote desktop, and more.
Chapter 6: Offering Desktops to Users
26
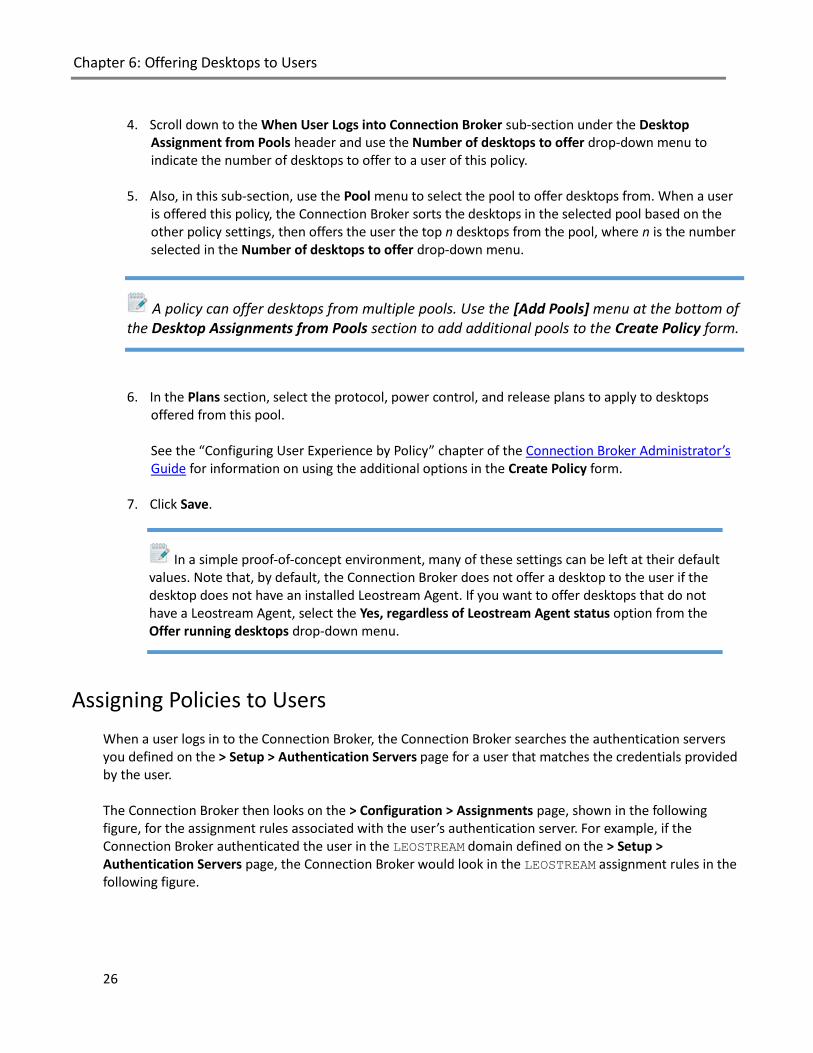
4. Scroll down to the When User Logs into Connection Broker sub-section under the Desktop
Assignment from Pools header and use the Number of desktops to offer drop-down menu to indicate the number of desktops to offer to a user of this policy.
5. Also, in this sub-section, use the Pool menu to select the pool to offer desktops from. When a user is offered this policy, the Connection Broker sorts the desktops in the selected pool based on the other policy settings, then offers the user the top n desktops from the pool, where n is the number selected in the Number of desktops to offer drop-down menu.
A policy can offer desktops from multiple pools. Use the [Add Pools] menu at the bottom of the Desktop Assignments from Pools section to add additional pools to the Create Policy form.
6. In the Plans section, select the protocol, power control, and release plans to apply to desktops offered from this pool. See the “Configuring User Experience by Policy” chapter of the Connection Broker Administrator’s Guide for information on using the additional options in the Create Policy form.
7. Click Save.
Assigning Policies to Users
When a user logs in to the Connection Broker, the Connection Broker searches the authentication servers you defined on the > Setup > Authentication Servers page for a user that matches the credentials provided by the user. The Connection Broker then looks on the > Configuration > Assignments page, shown in the following figure, for the assignment rules associated with the user’s authentication server. For example, if the Connection Broker authenticated the user in the LEOSTREAM domain defined on the > Setup > Authentication Servers page, the Connection Broker would look in the LEOSTREAM assignment rules in the following figure.
In a simple proof-of-concept environment, many of these settings can be left at their default values. Note that, by default, the Connection Broker does not offer a desktop to the user if the desktop does not have an installed Leostream Agent. If you want to offer desktops that do not have a Leostream Agent, select the Yes, regardless of Leostream Agent status option from the Offer running desktops drop-down menu.

Using Leostream to Manage Scale Computing HC3 Virtual Environment
27
To assign policies to users in a particular authentication server, click the Edit link associated with that authentication server on the > Configuration > Assignments tab, shown in the previous figure. The Edit Assignment form for this authentication server appears, shown in the following figure.

Chapter 6: Offering Desktops to Users
28
By default, the Connection Broker matches the selection in the Group drop-down menu to the user’s memberOf attribute in Active Directory.
To assign policies based on the user’s memberOf attribute:
1. Select the group from the Group drop-down menu.
2. If you are using locations, select a location from the Client Location drop-down menu.
If you modified your groups in Active Directory after you last signed into your Connection Broker, you must sign out and sign back in to have your Connection Broker reflect the authentication server changes.

Using Leostream to Manage Scale Computing HC3 Virtual Environment
29
3. Assign a role to this group and client location pair by selecting an item from the User Role drop-down menu.
4. Assign a policy to this group and client location pair by selecting an item from the User Policy drop-down menu.
If you need to assign roles and policies based on a different user attributes, see “Assigning Roles and Policies Based on any Attribute” in Chapter 14 of the Connection Broker Administrator’s Guide.
Testing Your Connection Broker Configuration
To test your Connection Broker, ensure that users are being assigned to the correct policy, and offered the correct desktops. You can test user logins before the user has ever logged into, and been loaded into, Leostream.
1. Navigate to the > Resources > Users menu. As users log into your Leostream environment, their user information is added to this page. You do not need to load users before they can log in.
2. Click the Test Login link at the top of the page, shown in the following figure.
3. In the Test Login form that opens, enter the name of the user to test in the User Name edit field.
4. If you are allowing the user to specify their domain, select a domain from the Domain drop-down.
In Leostream, roles are permissions that control the actions an end user can take on their desktop and the level of access the user has to the Connection Broker Administrator Web interface. A location is a group of clients defined by attributes such as manufacturer, device type, OS version, IP address, etc. For more information on building roles and locations, see Chapters 10 and 13 in the Connection Broker Administrator’s Guide.

Chapter 6: Offering Desktops to Users
30
5. Click Run Test. The Connection Broker searches the authentication server for your user, and then
presents a report, for example:
The test login results show the role and policy assigned to the user, and what desktops the user will be offered
Please complete a login test before contacting Leostream support.