contentsbmedley.org/mojo.pdfcontents license 4 rationale 5 ... 1.1 mojolicious thus begins our quest...
TRANSCRIPT

Contents
License 4
Rationale 51.1 Mojolicious . . . . . . . . . . . . . . . . . . . . . . . . . . . . . . . . . . . . 5
Preparation 6
Going Forward 102.1 Preamble . . . . . . . . . . . . . . . . . . . . . . . . . . . . . . . . . . . . . 102.2 HTTP 1.1 . . . . . . . . . . . . . . . . . . . . . . . . . . . . . . . . . . . . . 112.3 Routes . . . . . . . . . . . . . . . . . . . . . . . . . . . . . . . . . . . . . . . 122.4 Logging . . . . . . . . . . . . . . . . . . . . . . . . . . . . . . . . . . . . . . 132.5 Placeholders . . . . . . . . . . . . . . . . . . . . . . . . . . . . . . . . . . . . 142.6 Parameters . . . . . . . . . . . . . . . . . . . . . . . . . . . . . . . . . . . . . 162.7 Templates and Stash . . . . . . . . . . . . . . . . . . . . . . . . . . . . . . . 182.8 Sessions . . . . . . . . . . . . . . . . . . . . . . . . . . . . . . . . . . . . . . 192.9 Forms . . . . . . . . . . . . . . . . . . . . . . . . . . . . . . . . . . . . . . . 21
Mojolicious Applications 243.1 A Photo app . . . . . . . . . . . . . . . . . . . . . . . . . . . . . . . . . . . . 24
3.1.1 Startup . . . . . . . . . . . . . . . . . . . . . . . . . . . . . . . . . . 253.1.2 Controller . . . . . . . . . . . . . . . . . . . . . . . . . . . . . . . . . 273.1.3 Landing Page . . . . . . . . . . . . . . . . . . . . . . . . . . . . . . . 28
3.2 Blogging app . . . . . . . . . . . . . . . . . . . . . . . . . . . . . . . . . . . 353.2.1 Startup . . . . . . . . . . . . . . . . . . . . . . . . . . . . . . . . . . 353.2.2 Controller . . . . . . . . . . . . . . . . . . . . . . . . . . . . . . . . . 37
3.3 Chat app . . . . . . . . . . . . . . . . . . . . . . . . . . . . . . . . . . . . . . 39
Examples 43
2

4.1 Basic Authentication . . . . . . . . . . . . . . . . . . . . . . . . . . . . . . . 434.2 Session Authentication . . . . . . . . . . . . . . . . . . . . . . . . . . . . . . 454.3 JSON API . . . . . . . . . . . . . . . . . . . . . . . . . . . . . . . . . . . . . 484.4 Synchronizing non-blocking operations . . . . . . . . . . . . . . . . . . . . . 534.5 Mojo::UserAgent Command-Line . . . . . . . . . . . . . . . . . . . . . . . . 55
3
License
Please download and share this book unmodified. (The book is available under a CreativeCommons Attribution-NonCommercial-NoDerivs 3.0 Unported License.)
https://creativecommons.org/licenses/by-nc-nd/3.0/
Attribution: Perl 5 Raptor: https://github.com/kraih/perl-raptor
4
Rationale
1.1 Mojolicious
Thus begins our quest for Mojo - a tutorial approach to learning web technologies. We will belearning Mojolicious [http://mojolicious.org]; at the time of this writing it is a "next generationweb framework for the Perl Programming language". The next generation feature set is:
• Full stack HTTP and WebSocket client/server• IPv6, TLS, SNI, IDNA, Comet• Non-blocking I/O and embeddable web server• JSON and HTML/XML parse with CSS selectors• Perlish Templates• Sessions• Cookie management• HTTP / WebSocket• Routes• CGI / PSGI auto-detection• Static files• Testing framework• Plugins
Chapter 2 will focus on introducing Mojolicious while chapter 3 has several apps for perusal. Aphoto app, blogging app, and a real-time chat app. Chapter 4 has several practical examples.
5

Preparation
PerlMojolicious requires Perl. These days we separate a system perl with a user installed Perl. Theuser installed is necessary so that we have free reign over what is installed, configured, and canallow for easier debugging.
We will be using Perl on OS X with 5.20.1. Your system Perl will be used to bootstrap ourinstall with Perl-Build and App::cpanminus. Perl-Build will download, configure, and installPerl, while App::cpanminus allows for easier installation of modules.$ curl ≠L ≠n ≠O https://raw.githubusercontent.com/tokuhirom/Perl≠Build/master/perl≠build$ perl perl≠build 5.20.1 /opt/perl≠5.20.1
Fetching 5.20.1 ...Downloaded http://.../SHAY/perl-5.20.1.tar.bz2 to .../perl-5.20.1.tar.bz2Configuring perl ’5.20.1’...
$ curl ≠L http://cpanmin.us | /opt/perl≠5.20.1/perl ≠ App::cpanminus
--> Working on App::cpanminusFetching http://www.cpan.org/authors/id/M/MI/MIYAGAWA/App-cpanminus-1.7014.tar.gz ... OKConfiguring App-cpanminus-1.7014 ... OK...Building and testing App-cpanminus-1.7014 ... OKSuccessfully installed App-cpanminus-1.70143 distributions installed
6

After doing these things it will be easier to install Mojolicious and any required modules. Also,there is now a fully functional Perl install that can be tinkered with to your heart’s content. Toverify the install run:$ /opt/perl≠5.20.1/bin/perl ≠v
This is perl 5, version 20, subversion 1 (v5.20.1) built for darwin-2level
Copyright 1987-2014, Larry Wall
Perl may be copied only under the terms of either the Artistic License or theGNU General Public License, which may be found in the Perl 5 source kit.
Complete documentation for Perl, including FAQ lists, should be found onthis system using "man perl" or "perldoc perl". If you have access to theInternet, point your browser at http://www.perl.org/, the Perl Home Page.
For convenience, a symlink can be added so that /opt/perl points to /opt/perl/5.20.1/bin/perl.$ ln ≠s /opt/perl≠5.20.1/bin/perl /opt/perl
InstallationAdding the Mojolicious CPAN module to the system installs everything required for developingand running a web app.$ /opt/perl≠5.20.1/bin/cpanm Mojolicious
...Mojolicious will be installed by the cpanm utility.
Hello World In TextNow that we have Mojolicious installed, we can start writing code for our website. Our firstexample is a full program and you are not expected to understand everything. It is geared toget your feet wet. After this, we will have a tutorial introduction in HTTP, HTML, Javascript,CSS, and other Web technologies. The first example is a Mojolicious::Lite application. It is areal-time micro web framework. This micro web framework can have the entire web structurein a single file.
Several key features that enable the real-time aspects of the framework are websockets, RESTfulroutes, non-blocking I/O web server, and long polling.
The framework is predominately written by Sebastian Riedel.
Now, lets turn our attention onto some code. In the code below, line 1 turns your Perl script intoa full featured web application that uses strict, warnings, and utf8. It’s fun.
7
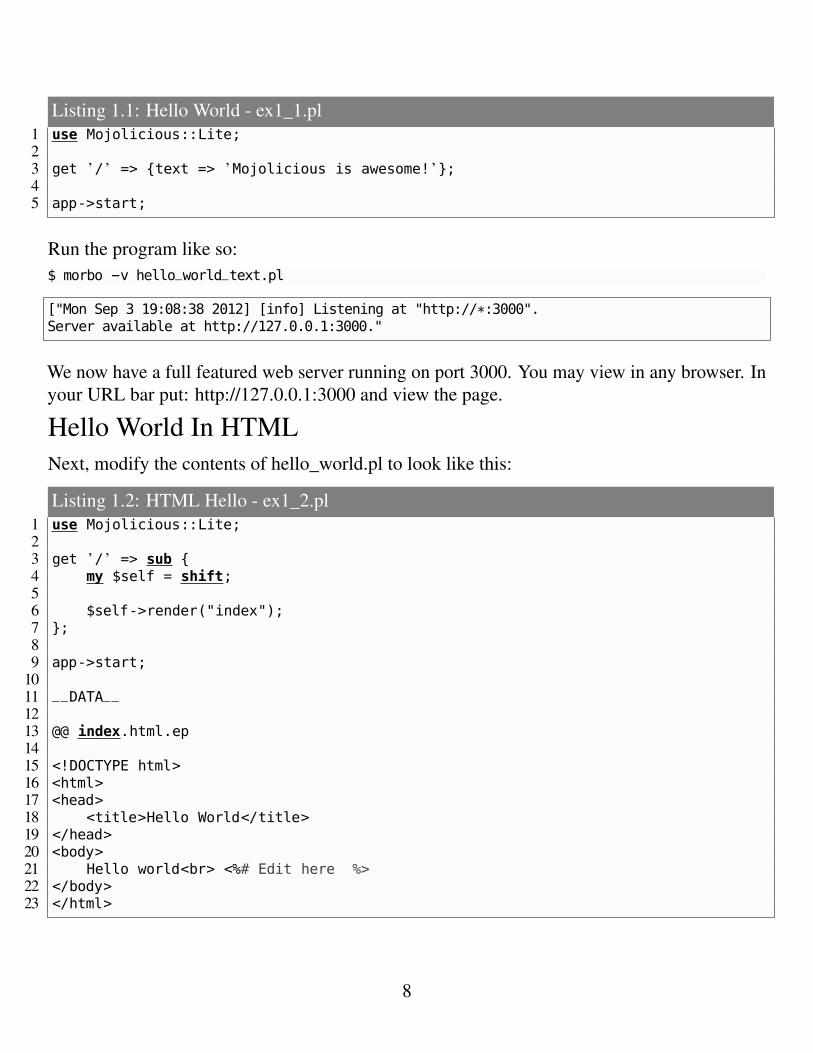
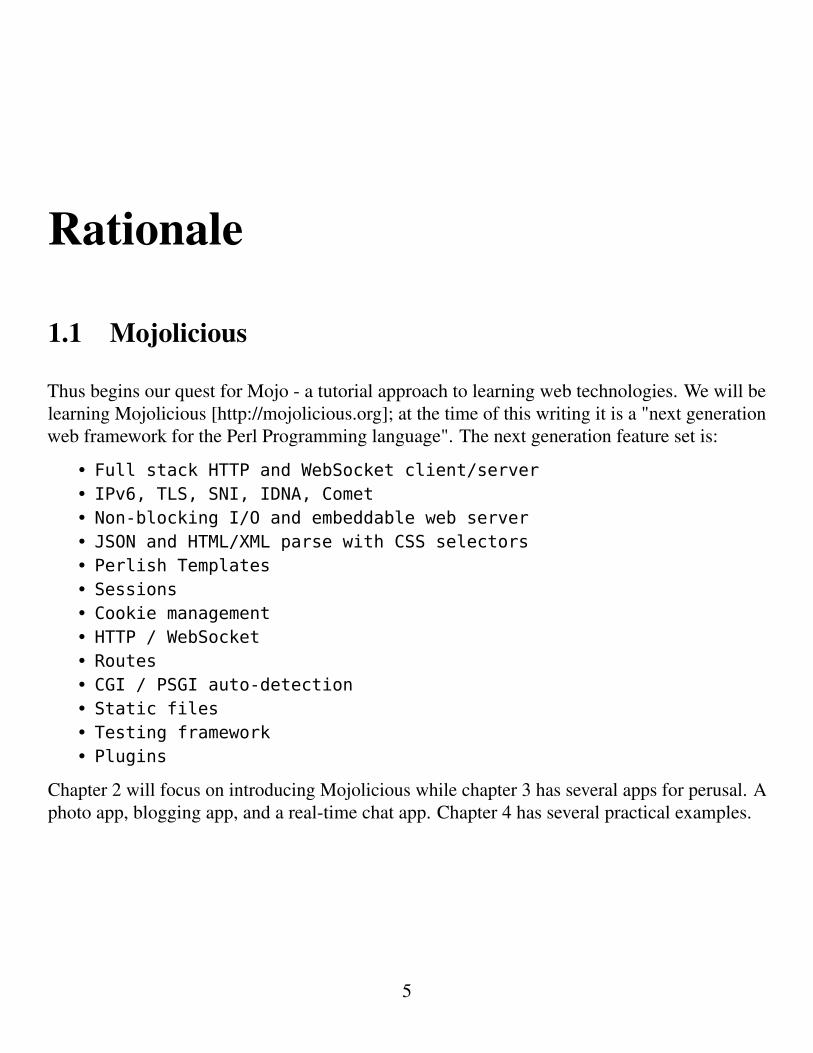
Listing 1.1: Hello World - ex1_1.pl1 use Mojolicious::Lite;23 get ’/ ’ => {text => ’Mojolicious is awesome! ’};45 app->start;
Run the program like so:$ morbo ≠v hello_world_text.pl
["Mon Sep 3 19:08:38 2012] [info] Listening at "http://*:3000".Server available at http://127.0.0.1:3000."
We now have a full featured web server running on port 3000. You may view in any browser. Inyour URL bar put: http://127.0.0.1:3000 and view the page.
Hello World In HTMLNext, modify the contents of hello_world.pl to look like this:
Listing 1.2: HTML Hello - ex1_2.pl1 use Mojolicious::Lite;23 get ’/ ’ => sub {4 my $self = shift;56 $self->render("index");7 };89 app->start;
1011 __DATA__1213 @@ index.html.ep1415 <!DOCTYPE html>16 <html>17 <head>18 <title>Hello World</title>19 </head>20 <body>21 Hello world<br> <%# Edit here %>22 </body>23 </html>
8

Our morbo server should automatically restart and load the new file contents. The code at line 6displays the inlined page below.
Next, add "Carpe diem" after line 21. Save the file and reload the page in the browser. Themorbo server will restart your server once a change is detected.
The other way to build an app is with a well-structured web application. This is where thebusiness logic and application set up are put in several files, as opposed to just one. A full app iscreated with the "generate app" command, and we will discuss this further with the Photo app.
We are going to be using lite apps going forward until the photo album is encountered later on.
9
Going Forward
2.1 Preamble
Here we get down with Mojo. A brief introduction of HTTP 1.1 is given and then we look atsome specific ways that Mojolicious creates a framework around web technologies to makethings easier for development. Specifically, we will look at what follows:
• Routes• Logging• Placeholders• Query Parameters• Templates and Stash• Sessions• Forms
After that our attention will be turned to apps and examples.
10

2.2 HTTP 1.1
Under the HoodAs you know, web pages are loaded from a server. When you go to domain.com, then thedefault HTML is loaded using HTTP. As you will see, the transfer, or request, from the webbrowser client (aka user agent) to the server can be considered a file transfer. For example, whenhttp://127.0.0.1:3000 was visited something like the following was sent from your browser tothe server (the request):
GET / HTTP/1.1Host: 127.0.0.1:3000Connection: keep-aliveCache-Control: max-age=0Accept: text/html,application/xhtml+xml,application/xml;q=0.9,*/*;q=0.8User-Agent: Mozilla/5.0 (Macintosh; Intel Mac OS X 10_8_5) AppleWebKit/537.36 (KHTAccept-Encoding: gzip,deflate,sdchAccept-Language: en-US,en;q=0.8
Then, the server responded with (the reply):HTTP/1.1 200 OKContent-Length: 2Server: Mojolicious (Perl)Connection: keep-aliveDate: Wed, 30 Oct 2013 23:44:04 GMTContent-Type: text/html;charset=UTF-8
If we were to go to http://127.0.0.1:3000/hello, then the GET request would start with:GET /hello HTTP 1.1
Of note, is that when we access http://127.0.0.1:3000 there is an implied "/" and whenhttp://127.0.0.1:3000/hello there is a specific "/hello". These are the pages that the serveris being requested to serve.
Also, the structure of the request and response should be noted. The lines that are Word:or Word-Dash-Word: are called headers. These are metadata that describe your request andresponse.
11

2.3 Routes
Finding our wayRoutes enable Mojolicious to easily glue together an incoming request with code.
For example, if we pointed our browser at http://127.0.0.1:3000, then the following requestwould be sent to the server:
GET / HTTP 1.1
And the route below would be used.
Listing 2.1: Index Route - ex2_1.pl1 get ’/ ’ => sub {2 my $self = shift;34 $self->render(text => "Hello world");5 };
The get ’/’ will redirect the HTTP GET / request to the anonymous subroutine shown. It shouldbe noted that a GET and POST can be redirected to different subroutines; and we will examinePOST later in the chapter. This is a very powerful construct that allows us to execute arbitrarybusiness logic (system commands, SQL, control flow logic, etc) for a given request.
Also, $self is a Mojolicious::Controller object. This contains both the HTTP request and HTTPresponse.
12
2.4 Logging
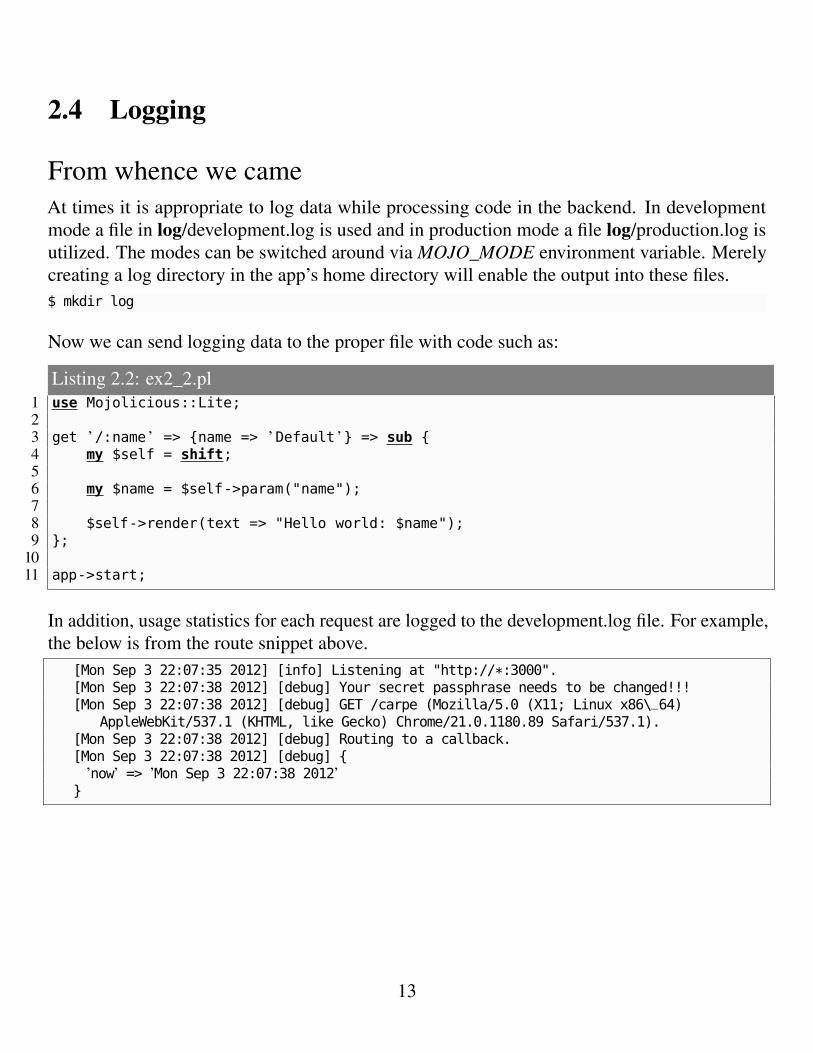
From whence we cameAt times it is appropriate to log data while processing code in the backend. In developmentmode a file in log/development.log is used and in production mode a file log/production.log isutilized. The modes can be switched around via MOJO_MODE environment variable. Merelycreating a log directory in the app’s home directory will enable the output into these files.$ mkdir log
Now we can send logging data to the proper file with code such as:
Listing 2.2: ex2_2.pl1 use Mojolicious::Lite;23 get ’/:name ’ => {name => ’Default ’} => sub {4 my $self = shift;56 my $name = $self->param("name");78 $self->render(text => "Hello world: $name");9 };
1011 app->start;
In addition, usage statistics for each request are logged to the development.log file. For example,the below is from the route snippet above.
[Mon Sep 3 22:07:35 2012] [info] Listening at "http://*:3000".[Mon Sep 3 22:07:38 2012] [debug] Your secret passphrase needs to be changed!!![Mon Sep 3 22:07:38 2012] [debug] GET /carpe (Mozilla/5.0 (X11; Linux x86\_64)
AppleWebKit/537.1 (KHTML, like Gecko) Chrome/21.0.1180.89 Safari/537.1).[Mon Sep 3 22:07:38 2012] [debug] Routing to a callback.[Mon Sep 3 22:07:38 2012] [debug] {
’now’ => ’Mon Sep 3 22:07:38 2012’}
13
2.5 Placeholders
What’s in a name...Input and output are intrinsic to any computer program, perhaps doubly so to a web application.A significant source of user input comes from the URL that the user typed in. These areplaceholders and GET/POST parameters.
They are embedded in the the URLs, which makes things easy for copying and pasting withfriends. We will be discussing placeholders in this section.
A placeholder is embedded in the URL and parsed by Mojolicious. They are available via the->param method.
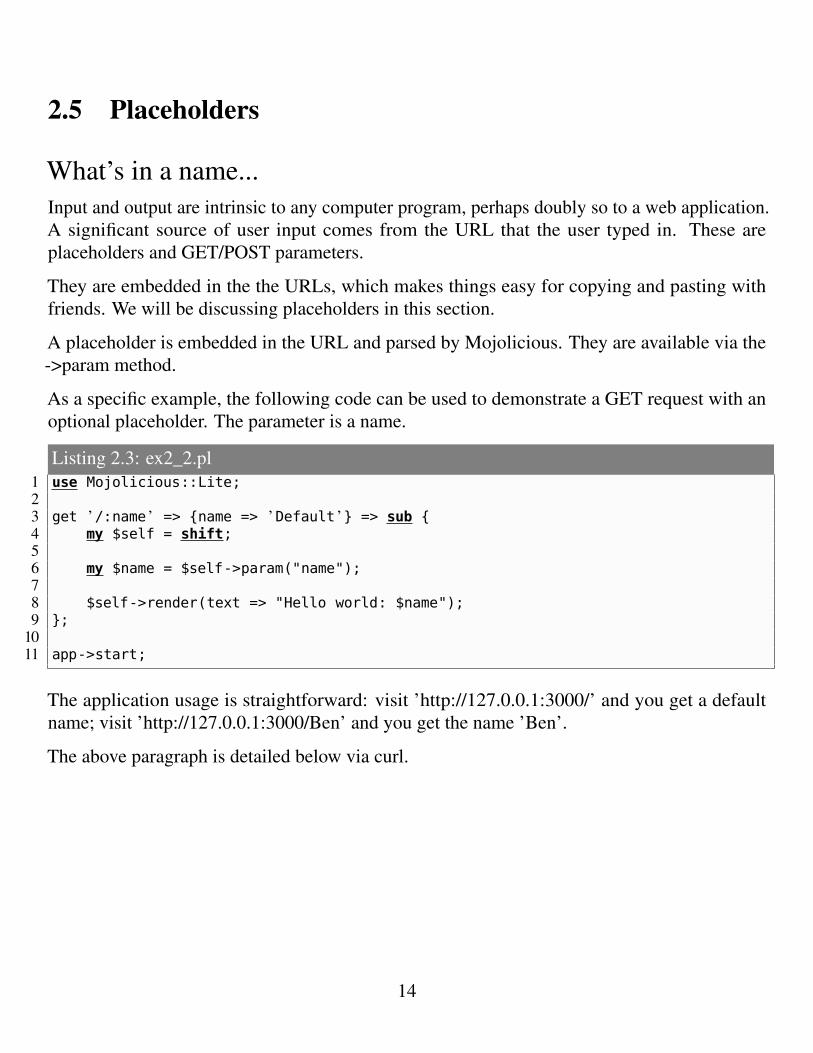
As a specific example, the following code can be used to demonstrate a GET request with anoptional placeholder. The parameter is a name.
Listing 2.3: ex2_2.pl1 use Mojolicious::Lite;23 get ’/:name ’ => {name => ’Default ’} => sub {4 my $self = shift;56 my $name = $self->param("name");78 $self->render(text => "Hello world: $name");9 };
1011 app->start;
The application usage is straightforward: visit ’http://127.0.0.1:3000/’ and you get a defaultname; visit ’http://127.0.0.1:3000/Ben’ and you get the name ’Ben’.
The above paragraph is detailed below via curl.
14

$ curl -v http://127.0.0.1:3000/* Trying 127.0.0.1...* Connected to 127.0.0.1 (127.0.0.1) port 3000 (#0)> GET / HTTP/1.1> Host: 127.0.0.1:3000> User-Agent: curl/7.43.0> Accept: */*>< HTTP/1.1 200 OK< Content-Length: 20< Server: Mojolicious (Perl)< Date: Fri, 29 Apr 2016 21:21:12 GMT< Content-Type: text/html;charset=UTF-8<* Connection #0 to host 127.0.0.1 left intactHello world: Default$ curl -v http://127.0.0.1:3000/Ben* Trying 127.0.0.1...* Connected to 127.0.0.1 (127.0.0.1) port 3000 (#0)> GET /Ben HTTP/1.1> Host: 127.0.0.1:3000> User-Agent: curl/7.43.0> Accept: */*>< HTTP/1.1 200 OK< Content-Length: 16< Server: Mojolicious (Perl)< Date: Fri, 29 Apr 2016 21:21:16 GMT< Content-Type: text/html;charset=UTF-8<* Connection #0 to host 127.0.0.1 left intactHello world: Ben
Of note is that the default GET request looks exactly similar with the one in the prior section.However, when we add /Ben onto the URL we get "GET /Ben".
15

2.6 Parameters
Variety is the spice...This section deals with GET and POST parameters. These parameters present themselvesthrough the request in the query string. This will be made clearer in the curl output below;however, something like "GET /?age=25" is presented to the server when the user types (orclicks on a link that has) http://127.0.0.1:3000/?age=25
As a specific example, the following code can be used to demonstrate a GET request with aplaceholder and GET parameter. Both are optional.
Listing 2.4: ex2_3.pl1 use Mojolicious::Lite;23 get ’/:name ’ => {name => ’Default ’} => sub {4 my $self = shift;56 my $name = $self->param("name");7 my $age = $self->param("age") // 20;89 $self->render(text => "Hello world: $name and $age years old.");
10 };1112 app->start;
The application usage is straightforward: visit ’http://127.0.0.1:3000/’ and you get a defaultname; visit ’http://127.0.0.1:3000/Ben?age=30’ and you get the name ’Hello world: Ben and 30years old.’.
The above paragraph is detailed below via curl.
16

$ curl -v http://127.0.0.1:3000/* Trying 127.0.0.1...* Connected to 127.0.0.1 (127.0.0.1) port 3000 (#0)> GET / HTTP/1.1> Host: 127.0.0.1:3000> User-Agent: curl/7.43.0> Accept: */*>< HTTP/1.1 200 OK< Content-Type: text/html;charset=UTF-8< Server: Mojolicious (Perl)< Content-Length: 38< Date: Fri, 29 Apr 2016 21:55:57 GMT<* Connection #0 to host 127.0.0.1 left intactHello world: Default and 20 years old.$ curl -v http://127.0.0.1:3000/Ben?age=30* Trying 127.0.0.1...* Connected to 127.0.0.1 (127.0.0.1) port 3000 (#0)> GET /Ben?age=30 HTTP/1.1> Host: 127.0.0.1:3000> User-Agent: curl/7.43.0> Accept: */*>< HTTP/1.1 200 OK< Content-Type: text/html;charset=UTF-8< Date: Fri, 29 Apr 2016 21:56:01 GMT< Content-Length: 34< Server: Mojolicious (Perl)<* Connection #0 to host 127.0.0.1 left intactHello world: Ben and 30 years old.
Again, the default GET request looks exactly similar with the one in the prior section. However,when we add /Ben?age=30 onto the URL we get "GET /Ben?age=30".
Multiple paramters can be added with a &. The first requires a ? and then the rest are separatedby &.
For example http://127.0.0.1:3000/Ben?age=30&developer=1.
17

2.7 Templates and Stash
How did that get there?Templates are the bread and butter of dynamic content generation. They take input from thecontroller and load that into a templating system to create content. The content is usually a webpage with HTML, CSS, and Javascript. However, there are other possibilities, as well, such astext, XML, and pdf.
The input from the controller is placed in a "stash" data structure. There are a few ways to setup this data structure. One approach is to use the "stash" controller method.
Listing 2.5: ex2_4.pl1 use Mojolicious::Lite;23 get ’/:name ’ => {name => ’ ’} => sub {4 my $c = shift;56 my $name = $c->param("name");78 $c->stash(name => $name);9
10 $c->render("slash");11 };1213 app->start;1415 __DATA__1617 @@ slash.html.ep1819 % if (stash( ’name ’)) {20 You are <%= stash( ’name ’) %>21 % } else {22 Please pass in a name to the url like so ’<%= url_for( ’/Ben ’)->to_abs %> ’.23 % }
For example, in line 8 of ex2_4.pl we set the "name" stash parameter which will be availablein the templates. Specifically, at line 19 the "stash" helper is used to dynamically adjust thetemplate output.
18

2.8 Sessions
Lets stick aroundA session is mechanism that uses cookies for saving state between different requests andresponses. The cookie is a special header in the browser that is saved by the browser betweenrequests and responses in a cookie jar. Technically, the session is defined as:Persistent data storage for the next few requests, all session data getsserialized with Mojo::JSON and stored Base64 encoded in HMAC-SHA1 signedcookies, to prevent tampering. Note that cookies usually have a 4096 byte (4KB)limit, depending on browser.
In the code below, when we visit http://127.0.0.1:3000 and reload several times, then the browserwill remember the counter at line 6. Then, the user will be shown how many times they havevisted.
Listing 2.6: ex2_5.pl1 use Mojolicious::Lite;23 get ’/ ’ => sub {4 my $self = shift;56 ++$self->session->{count};78 $self->render("slash");9 };
1011 app->start;1213 __DATA__1415 @@ slash.html.ep1617 % if (1 == session("count")) {18 You have visted once.19 % } else {20 You have visted <%= session("count") %> times.21 % }
Lets examine what happens in the actual request and response. What we’re going to do is usecurl and show the headers that are interchanged via the user agent and the server.
19
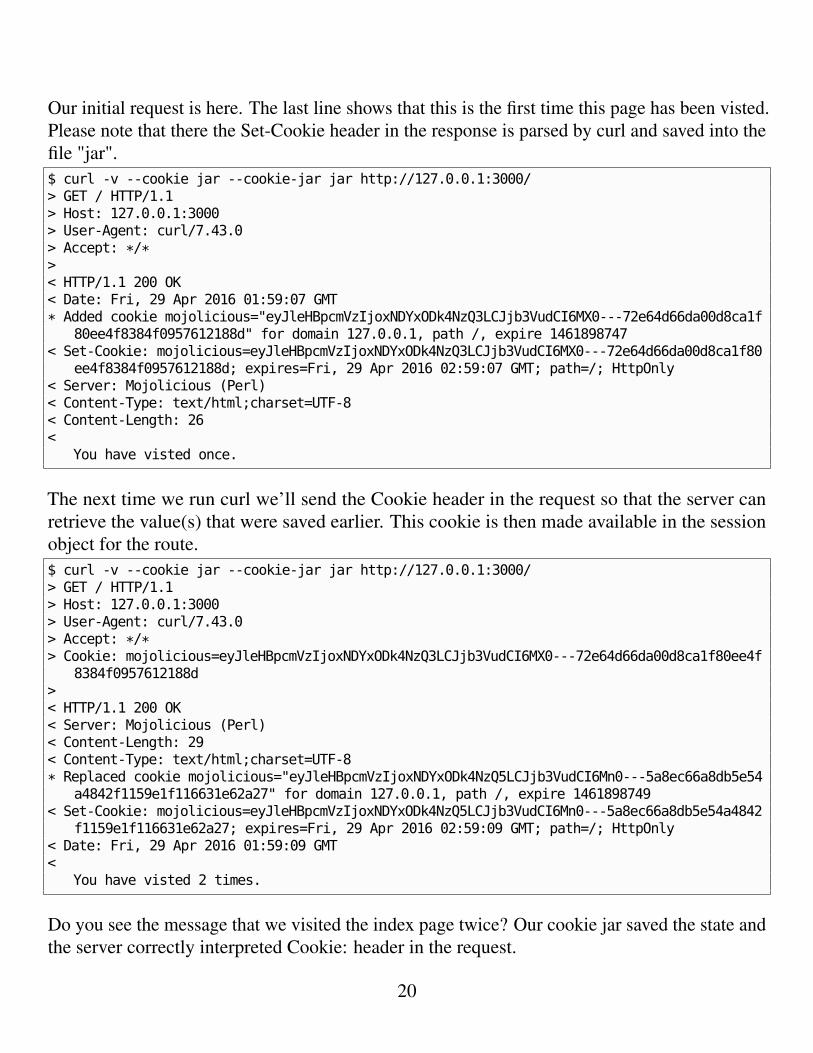
Our initial request is here. The last line shows that this is the first time this page has been visted.Please note that there the Set-Cookie header in the response is parsed by curl and saved into thefile "jar".$ curl -v --cookie jar --cookie-jar jar http://127.0.0.1:3000/> GET / HTTP/1.1> Host: 127.0.0.1:3000> User-Agent: curl/7.43.0> Accept: */*>< HTTP/1.1 200 OK< Date: Fri, 29 Apr 2016 01:59:07 GMT* Added cookie mojolicious="eyJleHBpcmVzIjoxNDYxODk4NzQ3LCJjb3VudCI6MX0---72e64d66da00d8ca1f
80ee4f8384f0957612188d" for domain 127.0.0.1, path /, expire 1461898747< Set-Cookie: mojolicious=eyJleHBpcmVzIjoxNDYxODk4NzQ3LCJjb3VudCI6MX0---72e64d66da00d8ca1f80
ee4f8384f0957612188d; expires=Fri, 29 Apr 2016 02:59:07 GMT; path=/; HttpOnly< Server: Mojolicious (Perl)< Content-Type: text/html;charset=UTF-8< Content-Length: 26<
You have visted once.
The next time we run curl we’ll send the Cookie header in the request so that the server canretrieve the value(s) that were saved earlier. This cookie is then made available in the sessionobject for the route.$ curl -v --cookie jar --cookie-jar jar http://127.0.0.1:3000/> GET / HTTP/1.1> Host: 127.0.0.1:3000> User-Agent: curl/7.43.0> Accept: */*> Cookie: mojolicious=eyJleHBpcmVzIjoxNDYxODk4NzQ3LCJjb3VudCI6MX0---72e64d66da00d8ca1f80ee4f
8384f0957612188d>< HTTP/1.1 200 OK< Server: Mojolicious (Perl)< Content-Length: 29< Content-Type: text/html;charset=UTF-8* Replaced cookie mojolicious="eyJleHBpcmVzIjoxNDYxODk4NzQ5LCJjb3VudCI6Mn0---5a8ec66a8db5e54
a4842f1159e1f116631e62a27" for domain 127.0.0.1, path /, expire 1461898749< Set-Cookie: mojolicious=eyJleHBpcmVzIjoxNDYxODk4NzQ5LCJjb3VudCI6Mn0---5a8ec66a8db5e54a4842
f1159e1f116631e62a27; expires=Fri, 29 Apr 2016 02:59:09 GMT; path=/; HttpOnly< Date: Fri, 29 Apr 2016 01:59:09 GMT<
You have visted 2 times.
Do you see the message that we visited the index page twice? Our cookie jar saved the state andthe server correctly interpreted Cookie: header in the request.
20

2.9 Forms
User InputWithout user input the web would be boring. We need the user’s data so that we can domeaningful work. A large percentage of user data originates from forms. For this section, letslook at the example in different parts. First, we’ll have our application logic, and next we’ll lookat the templates.
The application logic displays the form at line 2; processes our form at line 8; and either displaysan error, or success at lines 16 and 19.
Listing 2.7: Application logic - ex2_6.pl1 # Present form2 get ’/ ’ => "slash";34 post ’/ ’ => sub {5 my $self = shift;67 # Process8 if ("Bender" eq $self->param("name")) {9 $self->redirect_to("/bender");
1011 return;12 }1314 # Error15 $self->flash(error => "Not bender");16 $self->redirect_to("/");17 };1819 get ’/bender ’;
We use the flash for presenting any error message during form processing. The flash is set atline 15 and its value is used in the template. The flash is a methodology for passing a value fromone request to another and only lasts for that one request.
This is perfect for passing success, informational, and error messages between requests - suchas what is done at line 3 below.
One more thing to note is that in our <form> we have an "action" attribute. With this we set thedestination of our POST request. Very important so that data shows up at the proper spot.
21

Listing 2.8: Templates - ex2_6.pl1 @@ slash.html.ep23 % if (flash("error")) {4 <%= flash("error") %><br>5 % }67 <form method=post action="/">8 Name: <input type=text name=name>9 </form>
1011 @@ bender.html.ep1213 Awesome!
Now, lets examine exactly what happens when we use our form.
Using curl, we’re going to request our form, and then submit the form. The initial request isshown below. This is exactly as if typing "http://127.0.0.1:3000" in the URL bar and then hittingenter.
This will send off a GET request to the server which responds with our form.$ curl -v http://127.0.0.1:3000/* Connected to 127.0.0.1 (127.0.0.1) port 3000 (#0)> GET / HTTP/1.1> Host: 127.0.0.1:3000> User-Agent: curl/7.43.0> Accept: */*>< HTTP/1.1 200 OK< Content-Length: 73< Server: Mojolicious (Perl)< Date: Fri, 29 Apr 2016 03:02:40 GMT< Content-Type: text/html;charset=UTF-8<
<form method=post action="/">Name: <input type=text name=name></form>
The next command will simulate sending filling out the form with "Bender" and pressing enter.Note how the curl request is now a POST. This queues our application logic to process the ’post=> "/"’ route. The route verifies the user input (that name does, in fact, equal "Bender") andredirects us onto success route.
Note the use of 302 Found redirection logic.
22

This is a separate request that the user agent must follow in order to complete the form.$ curl -v -L -d ’name=Bender’ http://127.0.0.1:3000/* Connected to 127.0.0.1 (127.0.0.1) port 3000 (#0)> POST / HTTP/1.1> Host: 127.0.0.1:3000> User-Agent: curl/7.43.0> Accept: */*> Content-Length: 11> Content-Type: application/x-www-form-urlencoded>< HTTP/1.1 302 Found< Location: /bender< Date: Fri, 29 Apr 2016 03:06:38 GMT< Content-Length: 0< Server: Mojolicious (Perl)<* Connection #0 to host 127.0.0.1 left intact* Issue another request to this URL: ’http://127.0.0.1:3000/bender’* Switch from POST to GET* Re-using existing connection! (#0) with host 127.0.0.1* Connected to 127.0.0.1 (127.0.0.1) port 3000 (#0)> GET /bender HTTP/1.1> Host: 127.0.0.1:3000> User-Agent: curl/7.43.0> Accept: */*>< HTTP/1.1 200 OK< Date: Fri, 29 Apr 2016 03:06:38 GMT< Content-Length: 9< Server: Mojolicious (Perl)< Content-Type: text/html;charset=UTF-8<Awesome!
We have achieved Awesome via our form processing.
23

Mojolicious Applications
3.1 A Photo app
The previous portion of this book focused on Mojolicious::Lite applications; however, in orderto realize our Photo application it will be easier to use the full blown application features ofMojolicious. An application of this type can be started with:$ mojo generate app Photo
[mkdir] /.../photo/script[write] /.../photo/script/photo[chmod] /.../photo/script/photo 744[mkdir] /.../photo/lib[write] /.../photo/lib/Photo.pm[mkdir] /.../photo/lib/Photo/Controller[write] /.../photo/lib/Photo/Controller/Example.pm[mkdir] /.../photo/t[write] /.../photo/t/basic.t[mkdir] /.../photo/public[write] /.../photo/public/index.html[mkdir] /.../photo/templates/layouts[write] /.../photo/templates/layouts/default.html.ep[mkdir] /.../photo/templates/example[write] /.../photo/templates/example/welcome.html.ep
As you can see, it has an invocation script, startup package (lib/Example.pm), an exampleController, some tests, and example content (the index.html and .ep template files).
However, starting from scratch is not necessary; we are going to use the git checkout of thisbook which includes all the code for our Photo app.$ cd ~$ git clone [email protected]:brianmed/mojo_book.git$ cd mojo_book
24

The app is runnable via:$ cd photo$ morbo ≠v script/photo
When we point our browser to http://127.0.0.1:3000 we’ll get our app. As you can see, ourversion is in /mojo_book/photo and expects its config file to be in /photo.
After the config file has been set up, we can run our app via "script/photo"; this is a Perl scriptthat bootstraps our app. Most of the time you won’t need to modify this; however, if moduledirectories are needed, then "use lib" statements can be put here.
What happens next?
3.1.1 Startup
Mojolicious initializes our app and then calls Photo::startup.
The startup method adds and configures plugins; sets up some logging; adds in helpers; and setsup routes. For example, as you can see below in the line from lib/Photo.pm our route for theindex page is set up.
Listing 3.1: Index Route - lib/Photo.pm$r->get( ’/ ’)->to(controller => ’Index ’, action => ’slash ’);
When a user agent does a GET /, then Photo::Controller::Index::slash will be called and theslash.html.ep file will be served.
Given that, lets go back and dissect Photo::startup one "section" at a time.
First, we turn on development logging for when we are running in production mode. This is aconvenience for early stage production or when debugging something. Simply comment outfor Production. Next, we initialize the config data structure with a file. These are lines 1 and 3below.
Listing 3.2: Setup - lib/Photo.pm1 $self->log->level("debug");23 my $site_config = $self->plugin("Config" => {file => $self->home->rel_file( ’../
photo.config ’)});
This file is just a Perl data structure and can be hand edited or programmatically defined. Anotheroption is to use JSONConfig and a JSON config file. Below is an example config file.
25

Listing 3.3: Configuration - photo.config1 {2 site_secret => "MOAR COREZ foR all the things!",3 };
The next set up phase is to initialize the secret passphrase. Multiple passphrases are supportedthat allows for phasing out an old passphrase. These passphrases are used for things like signedcookies (which are used in the sessions).
Listing 3.4: Secrets setup - lib/Photo.pm$self->secrets([$$site_config{site_secret}]);
After our passphrase we set up our routes; an "under" nested route that verifies the session; androute set up itself. At line 15 the "entry" point to our app from the user agent is defined - namelythe initial page. It should be noted that we can define "get" and "post" for these routes.
Listing 3.5: Under route - lib/Photo.pm1 my $r = $self->routes;23 my $have_album = $r->under (sub {4 my $self = shift;56 if (!$self->session("album")) {7 my $url = $self->url_for( ’/ ’);8 $self->redirect_to($url);9 return undef;
10 }1112 return 1;13 });1415 $r->get( ’/ ’)->to(controller => ’Index ’, action => ’slash ’);
Arbitrary Perl (DB lookups, JSON parsing, file processing) can be put in the nested route. If "1"is returned the child route will be allowed to run and if "undef" is returned it won’t. Very handyfor doing basic authentication and authorization checks. If they don’t pass either one, then aredirect can happen, or some flag can be set.
26

In addition "any" is supported - which is useful for supporting GET and POST on the sameroute. Below are a couple example routes. One for GET and another for POST.
Listing 3.6: Initial routes - lib/Photo.pm1 $r->get( ’/album/switch/:name ’)->to(2 controller => ’Album ’,3 action => ’switch ’,4 name => undef5 );6 $r->post( ’/album/save ’)->to(7 controller => ’Album ’,8 action => ’save ’9 );
One thing that should be mentioned about our routes is that they have two modes of operation.One is when we have no session and another is when there is a session. Our session stores theselected album and the $have_album nested route verifies if the session is still valid. If not, theuser agent will be redirected back to the landing page.
The above app logic is shown in the code below.
Listing 3.7: Session route - lib/Photo.pm1 $have_album->get( ’/album/show ’)->to(2 controller => ’Album ’,3 action => ’show ’4 );
3.1.2 Controller
A controller encapsulates the business logic for our website. Fine grained control can be exertedover the app by using packages and subs. One package can control the "main" page with loginand logout and other packages can focus on other sub systems of our app.
For our app, we have the Index and Album controllers. One is the landing page for our app andthe other holds all the business logic for the photo album.
We can view an album, create one, switch to a new album, upload a photo, and view a photo.
27
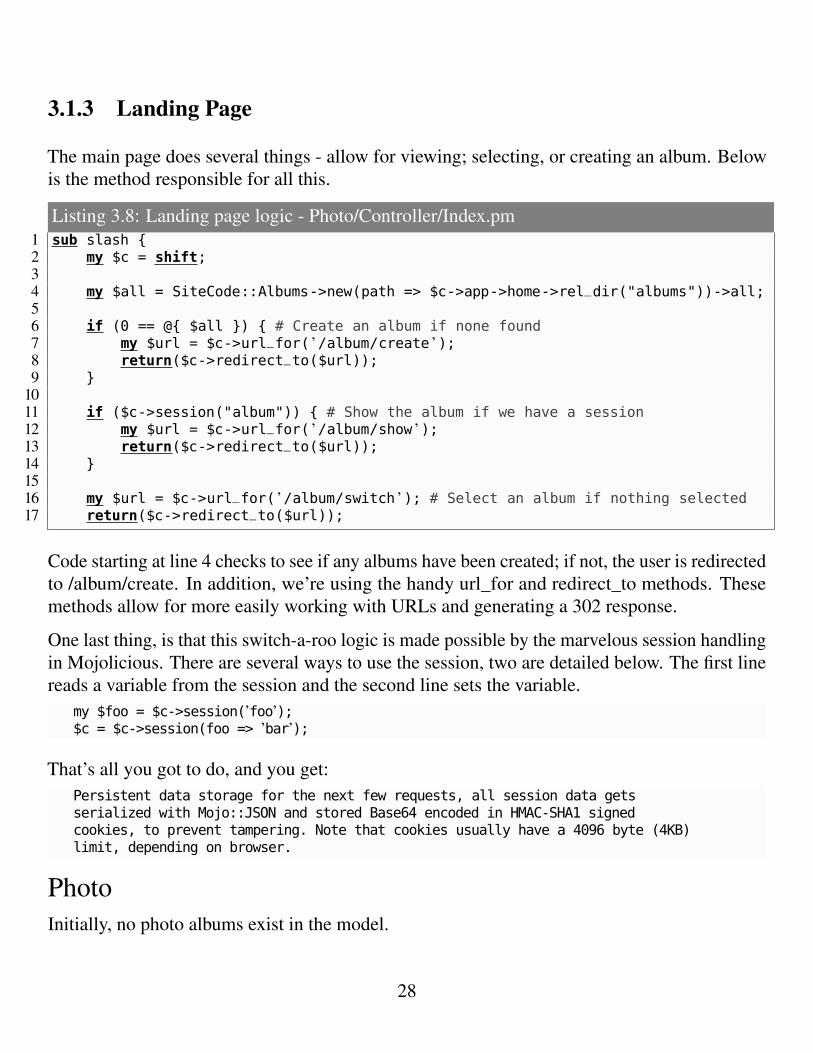
3.1.3 Landing Page
The main page does several things - allow for viewing; selecting, or creating an album. Belowis the method responsible for all this.
Listing 3.8: Landing page logic - Photo/Controller/Index.pm1 sub slash {2 my $c = shift;34 my $all = SiteCode::Albums->new(path => $c->app->home->rel_dir("albums"))->all;56 if (0 == @{ $all }) { # Create an album if none found7 my $url = $c->url_for( ’/album/create ’);8 return($c->redirect_to($url));9 }
1011 if ($c->session("album")) { # Show the album if we have a session12 my $url = $c->url_for( ’/album/show ’);13 return($c->redirect_to($url));14 }1516 my $url = $c->url_for( ’/album/switch ’); # Select an album if nothing selected17 return($c->redirect_to($url));
Code starting at line 4 checks to see if any albums have been created; if not, the user is redirectedto /album/create. In addition, we’re using the handy url_for and redirect_to methods. Thesemethods allow for more easily working with URLs and generating a 302 response.
One last thing, is that this switch-a-roo logic is made possible by the marvelous session handlingin Mojolicious. There are several ways to use the session, two are detailed below. The first linereads a variable from the session and the second line sets the variable.
my $foo = $c->session(’foo’);$c = $c->session(foo => ’bar’);
That’s all you got to do, and you get:Persistent data storage for the next few requests, all session data getsserialized with Mojo::JSON and stored Base64 encoded in HMAC-SHA1 signedcookies, to prevent tampering. Note that cookies usually have a 4096 byte (4KB)limit, depending on browser.
PhotoInitially, no photo albums exist in the model.
28
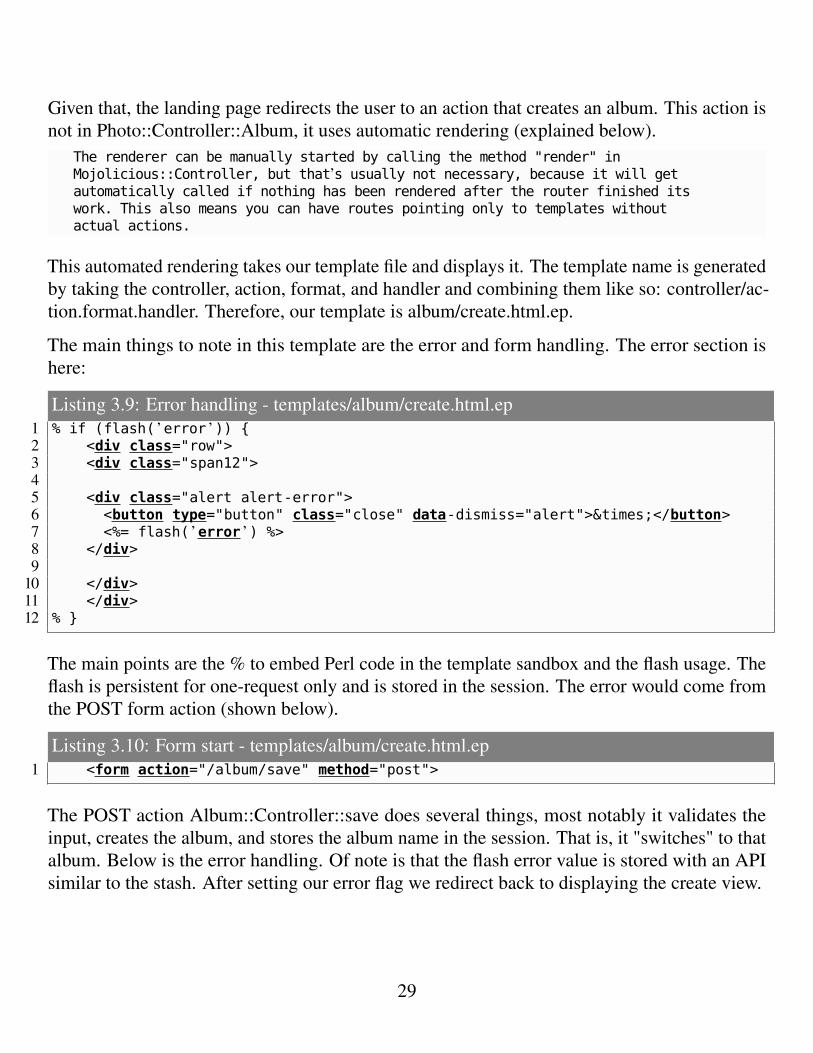
Given that, the landing page redirects the user to an action that creates an album. This action isnot in Photo::Controller::Album, it uses automatic rendering (explained below).
The renderer can be manually started by calling the method "render" inMojolicious::Controller, but that’s usually not necessary, because it will getautomatically called if nothing has been rendered after the router finished itswork. This also means you can have routes pointing only to templates withoutactual actions.
This automated rendering takes our template file and displays it. The template name is generatedby taking the controller, action, format, and handler and combining them like so: controller/ac-tion.format.handler. Therefore, our template is album/create.html.ep.
The main things to note in this template are the error and form handling. The error section ishere:
Listing 3.9: Error handling - templates/album/create.html.ep1 % if (flash( ’error ’)) {2 <div class="row">3 <div class="span12">45 <div class="alert alert-error">6 <button type="button" class="close" data-dismiss="alert">×</button>7 <%= flash( ’error ’) %>8 </div>9
10 </div>11 </div>12 % }
The main points are the % to embed Perl code in the template sandbox and the flash usage. Theflash is persistent for one-request only and is stored in the session. The error would come fromthe POST form action (shown below).
Listing 3.10: Form start - templates/album/create.html.ep1 <form action="/album/save" method="post">
The POST action Album::Controller::save does several things, most notably it validates theinput, creates the album, and stores the album name in the session. That is, it "switches" to thatalbum. Below is the error handling. Of note is that the flash error value is stored with an APIsimilar to the stash. After setting our error flag we redirect back to displaying the create view.
29

Listing 3.11: Switching albums error checking - lib/Photo.pm1 my $dir = $c->app->home->rel_dir("albums");2 my $album_name = $c->param("album_name");34 unless ($album_name) {5 $c->flash("error" => "No album name given");67 my $url = $c->url_for( ’/album/create ’);8 return($c->redirect_to($url));9 }
After the input checks are done and the album created, we switch to that album and redirectback to the landing page - which will detect the selected album and act appropriately.
Listing 3.12: Switching albums logic - lib/Photo/Controller/Album.pm1 warn("album_name: $album_name");2 $c->session(album => $album_name);34 my $url = $c->url_for( ’/ ’);5 return($c->redirect_to($url));
Also, one thing to see that we have a "warn" in the code there. It’s main purpose is to showthat this is possible and will go the "console". For example, if running through morbo, then themessage will be intermixed in the morbo output and not in the log file.
So, after the above, we go back to the landing page - which redirects to the album viewer. Theaction for this is Photo::Controller::Album::show. This sub is responsible for shimmying datafrom our model (a bunch of JSON files) to the view. Below is how that is accomplished.
It should be noted that we are able to pass an object to the view.
Listing 3.13: Viewing albums - lib/Photo/Controller/Album.pm1 $c->stash(album => $album);2 $c->stash(slots => $album->slots);3 $c->stash(albums => $albums->all);
In addition, we put some debug information in the log to demonstrate how that operates.
Listing 3.14: Debugging example - lib/Photo/Controller/Album.pm1 $c->app->log->debug("album: " . $album->name);
Our template for this action (album/show.html.ep) does several things. In the HTML body wehave our error handling, form to handle a new photo upload, button that allows for switchingbetween albums, and the picture viewing code.
30
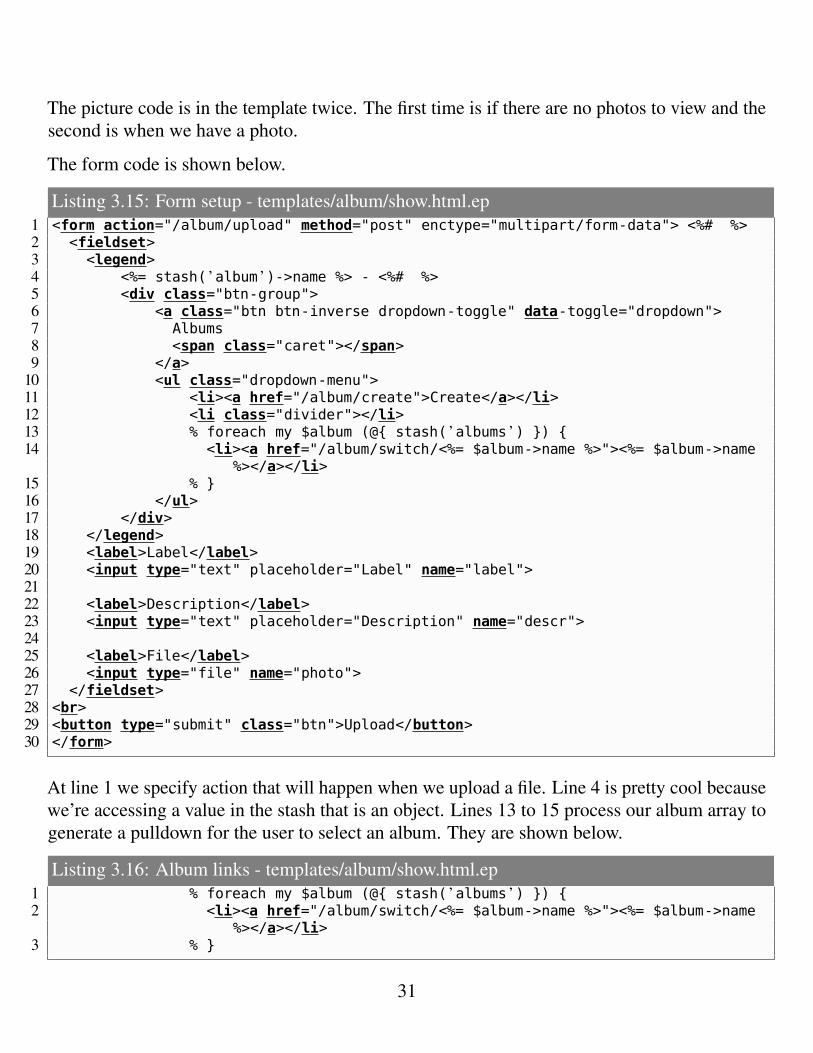
The picture code is in the template twice. The first time is if there are no photos to view and thesecond is when we have a photo.
The form code is shown below.
Listing 3.15: Form setup - templates/album/show.html.ep1 <form action="/album/upload" method="post" enctype="multipart/form-data"> <%# %>2 <fieldset>3 <legend>4 <%= stash( ’album ’)->name %> - <%# %>5 <div class="btn-group">6 <a class="btn btn-inverse dropdown-toggle" data-toggle="dropdown">7 Albums8 <span class="caret"></span>9 </a>
10 <ul class="dropdown-menu">11 <li><a href="/album/create">Create</a></li>12 <li class="divider"></li>13 % foreach my $album (@{ stash( ’albums ’) }) {14 <li><a href="/album/switch/<%= $album->name %>"><%= $album->name
%></a></li>15 % }16 </ul>17 </div>18 </legend>19 <label>Label</label>20 <input type="text" placeholder="Label" name="label">2122 <label>Description</label>23 <input type="text" placeholder="Description" name="descr">2425 <label>File</label>26 <input type="file" name="photo">27 </fieldset>28 <br>29 <button type="submit" class="btn">Upload</button>30 </form>
At line 1 we specify action that will happen when we upload a file. Line 4 is pretty cool becausewe’re accessing a value in the stash that is an object. Lines 13 to 15 process our album array togenerate a pulldown for the user to select an album. They are shown below.
Listing 3.16: Album links - templates/album/show.html.ep1 % foreach my $album (@{ stash( ’albums ’) }) {2 <li><a href="/album/switch/<%= $album->name %>"><%= $album->name
%></a></li>3 % }
31

The ability to intermix Perl loop and control structures with plain html is very powerful. As aspecific example, the above allows us to iterate over an array of objects in the stash to create aportion of our html document.
After our form, we process the HTML to display the album. This is shown below.
Listing 3.17: Display album - templates/album/show.html.ep1 % if (0 == @{ stash( ’slots ’) }) {2 <div class="row">3 <div class="span12">4 No photos found5 </div>6 </div>7 % }89 % if (0 != @{ stash( ’slots ’) }) {
10 ...11 % }
Note that there are two sections. One is for when there are no photos in the album and the otheris for when there are. The code for when there are photos is much more interesting than whenthere aren’t, so lets look at a few snippets from it:
This snippet processes our album array and is used to give us a ’lil dot to click on to maneuverthrough the pics. Of note is how the $active variable is used to populate our class.
Listing 3.18: Dot code - templates/album/show.html.ep1 % foreach my $slot (@{ stash( ’slots ’) }) {2 % my $active = $slot->{idx} ? "" : "active";3 <li data-target="#myCarousel" data-slide-to="<%= $slot->{idx} %>" class="
<%= $active %>"></li>4 % }
32
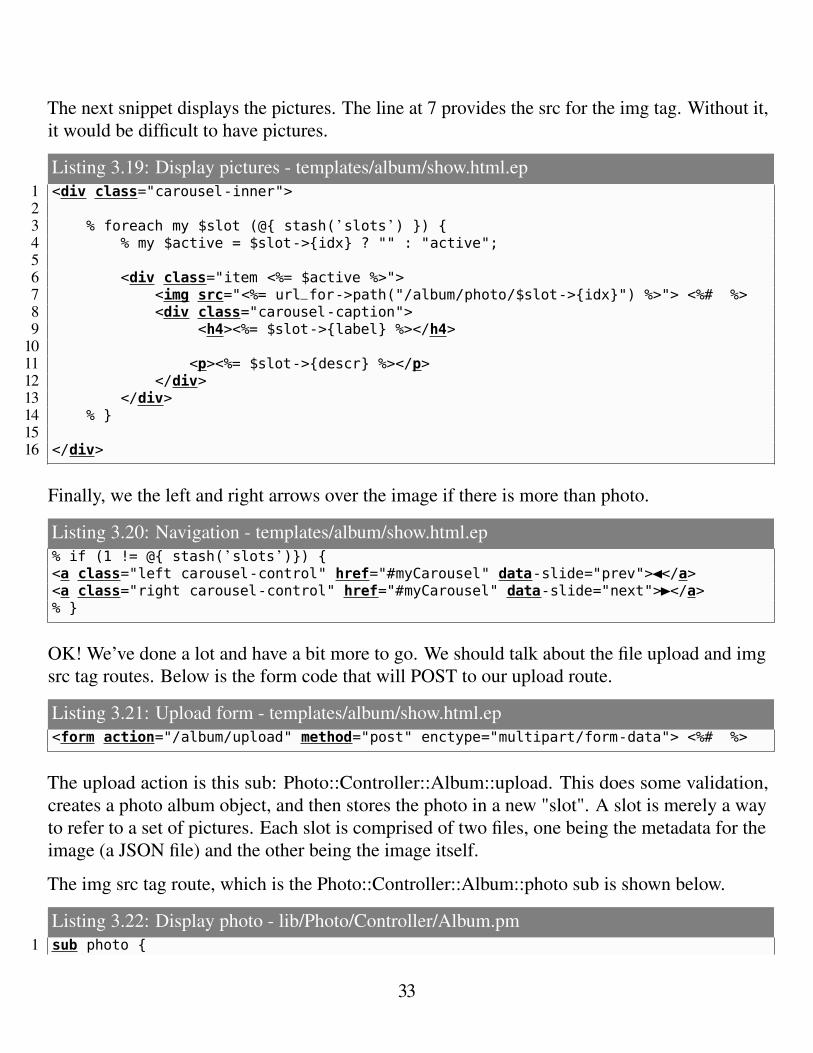
The next snippet displays the pictures. The line at 7 provides the src for the img tag. Without it,it would be difficult to have pictures.
Listing 3.19: Display pictures - templates/album/show.html.ep1 <div class="carousel-inner">23 % foreach my $slot (@{ stash( ’slots ’) }) {4 % my $active = $slot->{idx} ? "" : "active";56 <div class="item <%= $active %>">7 <img src="<%= url_for->path("/album/photo/$slot->{idx}") %>"> <%# %>8 <div class="carousel-caption">9 <h4><%= $slot->{label} %></h4>
1011 <p><%= $slot->{descr} %></p>12 </div>13 </div>14 % }1516 </div>
Finally, we the left and right arrows over the image if there is more than photo.
Listing 3.20: Navigation - templates/album/show.html.ep% if (1 != @{ stash( ’slots ’)}) {<a class="left carousel-control" href="#myCarousel" data-slide="prev">⇣</a><a class="right carousel-control" href="#myCarousel" data-slide="next">⌘</a>% }
OK! We’ve done a lot and have a bit more to go. We should talk about the file upload and imgsrc tag routes. Below is the form code that will POST to our upload route.
Listing 3.21: Upload form - templates/album/show.html.ep<form action="/album/upload" method="post" enctype="multipart/form-data"> <%# %>
The upload action is this sub: Photo::Controller::Album::upload. This does some validation,creates a photo album object, and then stores the photo in a new "slot". A slot is merely a wayto refer to a set of pictures. Each slot is comprised of two files, one being the metadata for theimage (a JSON file) and the other being the image itself.
The img src tag route, which is the Photo::Controller::Album::photo sub is shown below.
Listing 3.22: Display photo - lib/Photo/Controller/Album.pm1 sub photo {
33
2 my $c = shift;34 my $dir = $c->app->home->rel_dir("albums");5 my $album = SiteCode::Album->new(path => "$dir/" . $c->session->{album}, name
=> $c->session->{album}); @67 my $slot = $c->param("slot");89 my $filename = $album->photo($slot);
1011 $c->reply->asset(Mojo::Asset::File->new(path => $filename));12 }
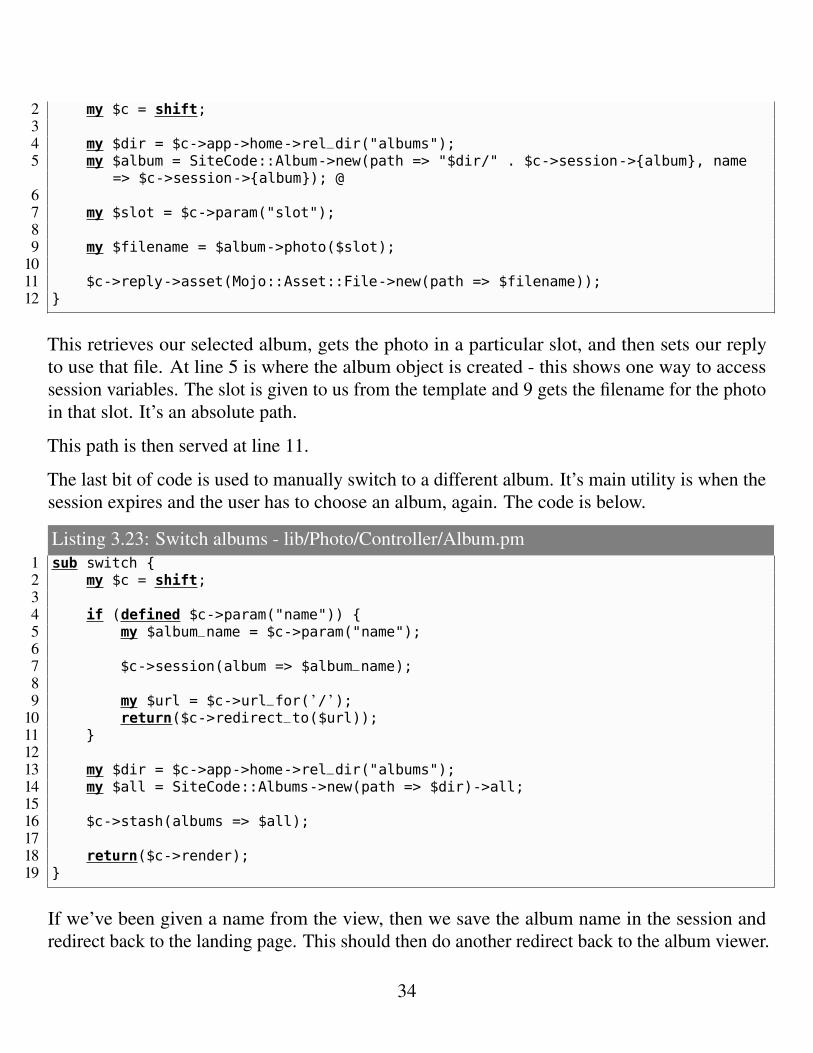
This retrieves our selected album, gets the photo in a particular slot, and then sets our replyto use that file. At line 5 is where the album object is created - this shows one way to accesssession variables. The slot is given to us from the template and 9 gets the filename for the photoin that slot. It’s an absolute path.
This path is then served at line 11.
The last bit of code is used to manually switch to a different album. It’s main utility is when thesession expires and the user has to choose an album, again. The code is below.
Listing 3.23: Switch albums - lib/Photo/Controller/Album.pm1 sub switch {2 my $c = shift;34 if (defined $c->param("name")) {5 my $album_name = $c->param("name");67 $c->session(album => $album_name);89 my $url = $c->url_for( ’/ ’);
10 return($c->redirect_to($url));11 }1213 my $dir = $c->app->home->rel_dir("albums");14 my $all = SiteCode::Albums->new(path => $dir)->all;1516 $c->stash(albums => $all);1718 return($c->render);19 }
If we’ve been given a name from the view, then we save the album name in the session andredirect back to the landing page. This should then do another redirect back to the album viewer.
34
3.2 Blogging app
Next, we will focus on a new app that was heavily adapted from Mojo::Pg (another one ofSebastian Riedel’s many creations). We will look at adding helpers and database usage into ourbag of tricks.
The code is available via git:$ cd ~$ git clone [email protected]:brianmed/mojo_book.git
We’ll will need the Mojo::SQLite CPAN module for this, so lets cpanm the module:$ /opt/perl≠5.20.1/bin/cpanm Mojo::SQLite
The app is runnable via:$ cd blog$ morbo ≠v script/blog
This app should feel similar to the Photo app; so, we won’t repeat very much of the informationthat can be retrieved from there. Below we start examining the unique aspects of the startuproutine.
3.2.1 Startup
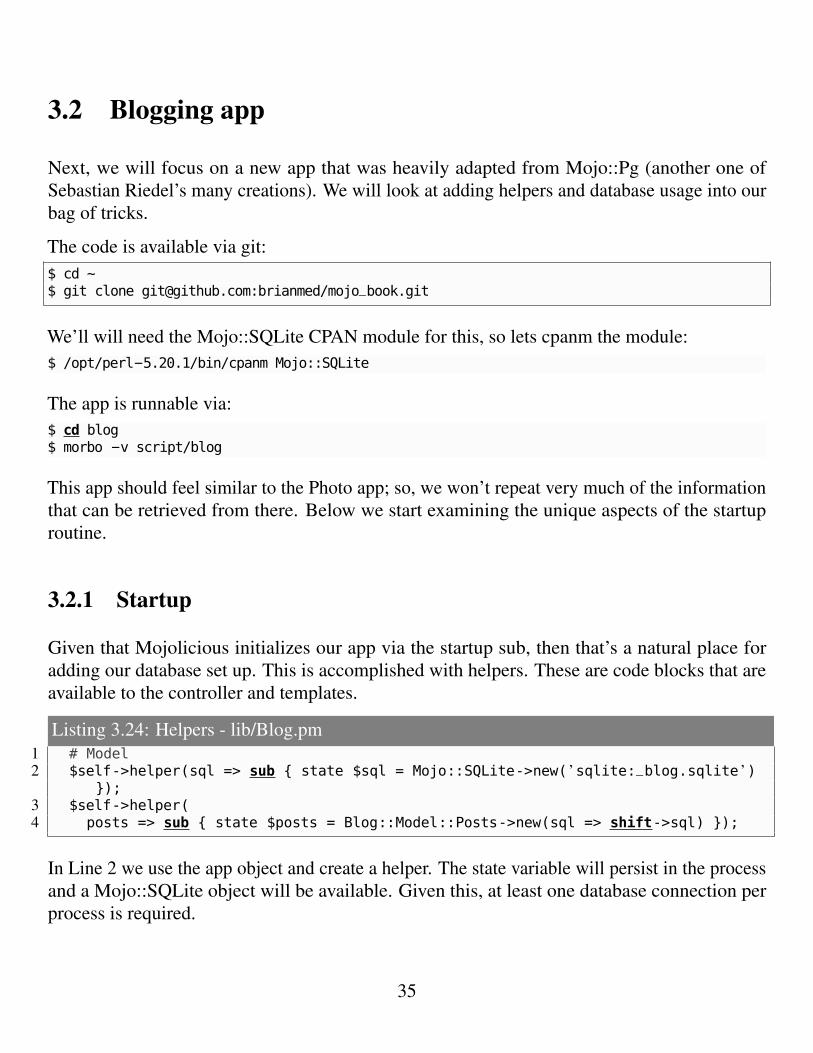
Given that Mojolicious initializes our app via the startup sub, then that’s a natural place foradding our database set up. This is accomplished with helpers. These are code blocks that areavailable to the controller and templates.
Listing 3.24: Helpers - lib/Blog.pm1 # Model2 $self->helper(sql => sub { state $sql = Mojo::SQLite->new( ’sqlite:_blog.sqlite ’)
});3 $self->helper(4 posts => sub { state $posts = Blog::Model::Posts->new(sql => shift->sql) });
In Line 2 we use the app object and create a helper. The state variable will persist in the processand a Mojo::SQLite object will be available. Given this, at least one database connection perprocess is required.
35
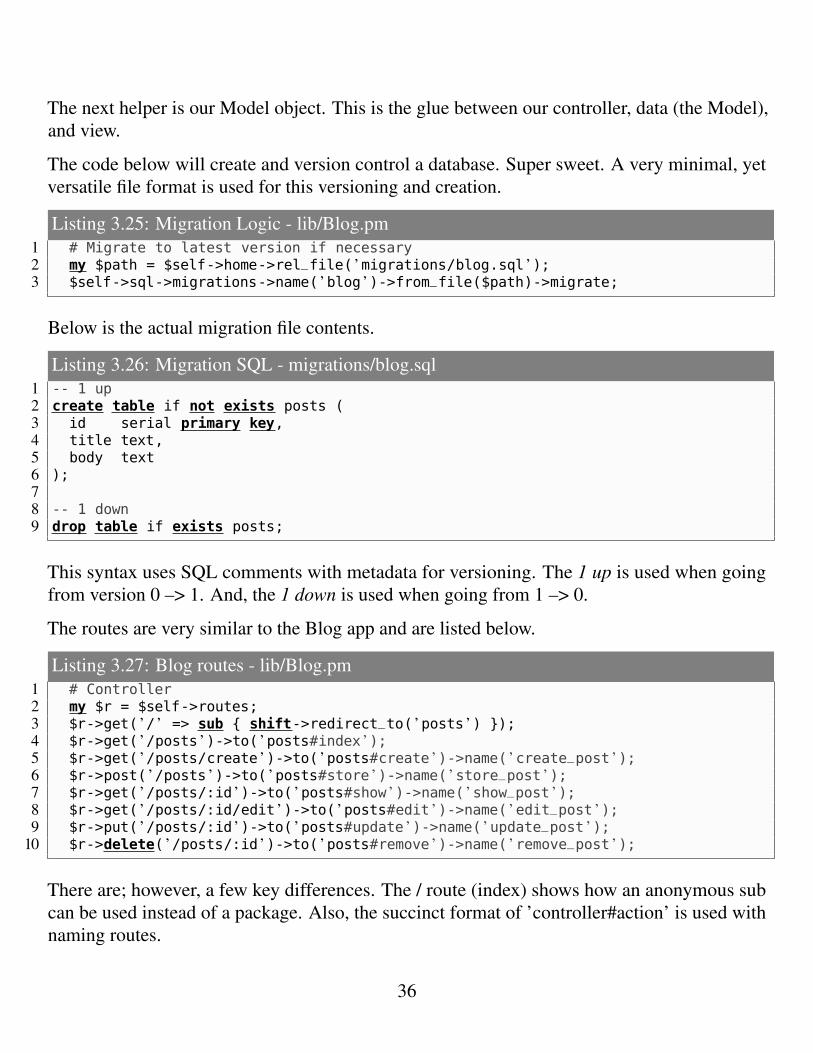
The next helper is our Model object. This is the glue between our controller, data (the Model),and view.
The code below will create and version control a database. Super sweet. A very minimal, yetversatile file format is used for this versioning and creation.
Listing 3.25: Migration Logic - lib/Blog.pm1 # Migrate to latest version if necessary2 my $path = $self->home->rel_file( ’migrations/blog.sql ’);3 $self->sql->migrations->name( ’blog ’)->from_file($path)->migrate;
Below is the actual migration file contents.
Listing 3.26: Migration SQL - migrations/blog.sql1 -- 1 up2 create table if not exists posts (3 id serial primary key,4 title text,5 body text6 );78 -- 1 down9 drop table if exists posts;
This syntax uses SQL comments with metadata for versioning. The 1 up is used when goingfrom version 0 –> 1. And, the 1 down is used when going from 1 –> 0.
The routes are very similar to the Blog app and are listed below.
Listing 3.27: Blog routes - lib/Blog.pm1 # Controller2 my $r = $self->routes;3 $r->get( ’/ ’ => sub { shift->redirect_to( ’posts ’) });4 $r->get( ’/posts ’)->to( ’posts#index ’);5 $r->get( ’/posts/create ’)->to( ’posts#create ’)->name( ’create_post ’);6 $r->post( ’/posts ’)->to( ’posts#store ’)->name( ’store_post ’);7 $r->get( ’/posts/:id ’)->to( ’posts#show ’)->name( ’show_post ’);8 $r->get( ’/posts/:id/edit ’)->to( ’posts#edit ’)->name( ’edit_post ’);9 $r->put( ’/posts/:id ’)->to( ’posts#update ’)->name( ’update_post ’);
10 $r->delete( ’/posts/:id ’)->to( ’posts#remove ’)->name( ’remove_post ’);
There are; however, a few key differences. The / route (index) shows how an anonymous subcan be used instead of a package. Also, the succinct format of ’controller#action’ is used withnaming routes.
36

These names can be referenced later via url_for and redirect_to - in fact, the / route usesredirect->to(’posts’).
3.2.2 Controller
Our blog begins here:
Listing 3.28: Initial route - lib/Blog/Controller/Posts.pm1 sub index {2 my $self = shift;3 $self->render(posts => $self->posts->all);4 }
Line 3 is where the magic happens. We use the posts helper and call the all sub in theBlog::Model::Posts package.
This returns an array of posts which the template then processes.
Listing 3.29: Posts SQL - lib/Blog/Model/Posts.pm1 sub all { shift->sql->db->query( ’select * from posts ’)->hashes->to_array }
The template is below and uses a layout for making templates with a common structure easier(e.g. HTML documents).
Listing 3.30: Post template - templates/posts/index.html.ep1 % layout ’blog ’, title => ’Blog ’;2 % for my $post (@$posts) {3 <p>4 <h2><%= link_to $post->{title} => show_post => {id => $post->{id}} %></h2>5 %= $post->{body}6 </p>7 % }8 %= link_to ’New post ’ => ’create_post ’
As you can tell, line 2 processes our array and creates the post listings. Our layout, listed below,allows for rapid and concise construction of a plethora of templates.
37
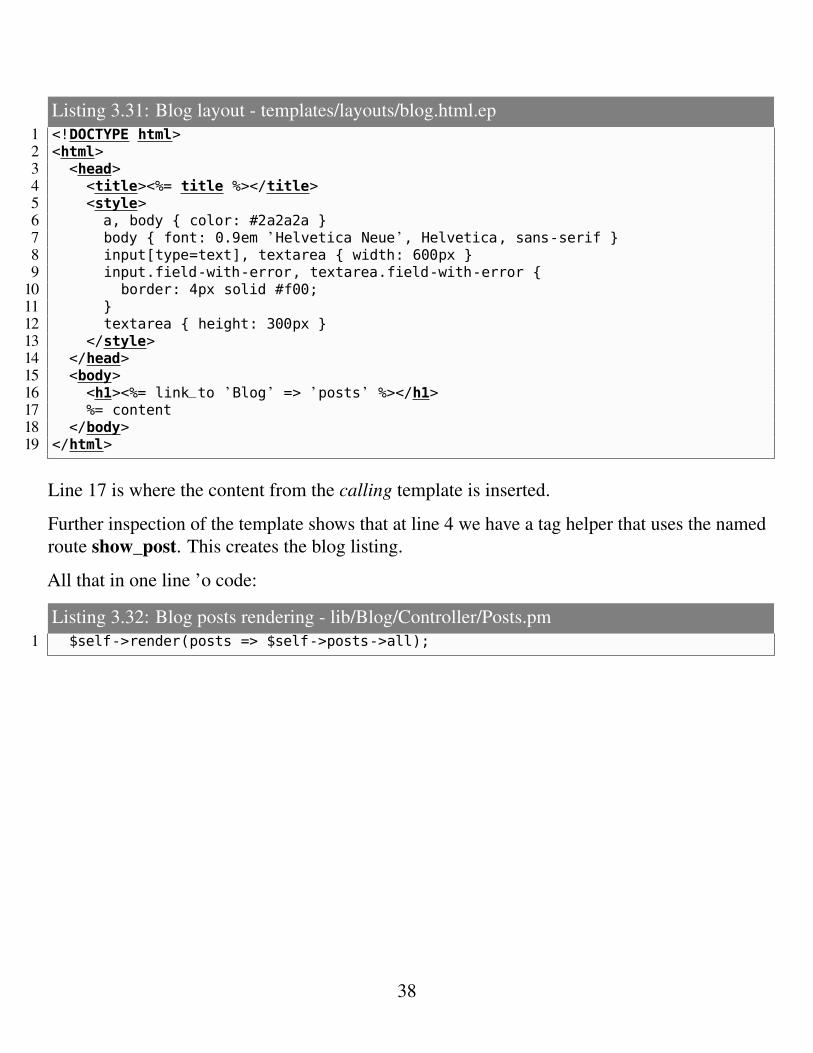
Listing 3.31: Blog layout - templates/layouts/blog.html.ep1 <!DOCTYPE html>2 <html>3 <head>4 <title><%= title %></title>5 <style>6 a, body { color: #2a2a2a }7 body { font: 0.9em ’Helvetica Neue ’, Helvetica, sans-serif }8 input[type=text], textarea { width: 600px }9 input.field-with-error, textarea.field-with-error {
10 border: 4px solid #f00;11 }12 textarea { height: 300px }13 </style>14 </head>15 <body>16 <h1><%= link_to ’Blog ’ => ’posts ’ %></h1>17 %= content18 </body>19 </html>
Line 17 is where the content from the calling template is inserted.
Further inspection of the template shows that at line 4 we have a tag helper that uses the namedroute show_post. This creates the blog listing.
All that in one line ’o code:
Listing 3.32: Blog posts rendering - lib/Blog/Controller/Posts.pm1 $self->render(posts => $self->posts->all);
38

3.3 Chat app
Wow, we have a photo app and a blogging app. What’s next is a chat app. It’s a Mojolicious::Liteapp that in around 80 lines has...
• Real-time websocket chat• Database Schema Set up• Database Data Reset• Records number of users• Sends status messages every 10 seconds• All templates included
The code is available via git:$ cd ~$ git clone [email protected]:brianmed/mojo_book.git
The app is runnable via:$ cd chat$ morbo ≠v chat.pl
Starting from the top, we use a helper in exactly the same way as our blogging app and then usethe super sweet migration features of Mojo::SQLite and resets the number of connected users.
This is reflected in the lines below.
Listing 3.33: Chat database - chat.pl1 helper sql => sub { state $sql = Mojo::SQLite->new("sqlite:_chat.sqlite") };23 # Setup and reset database4 app->sql->migrations->from_data("main", "migrations")->migrate;5 app->sql->db->query("DELETE FROM connected");
Next, our index page is configured via..
Listing 3.34: Index route - chat.pl1 get "/" => "chat";
39
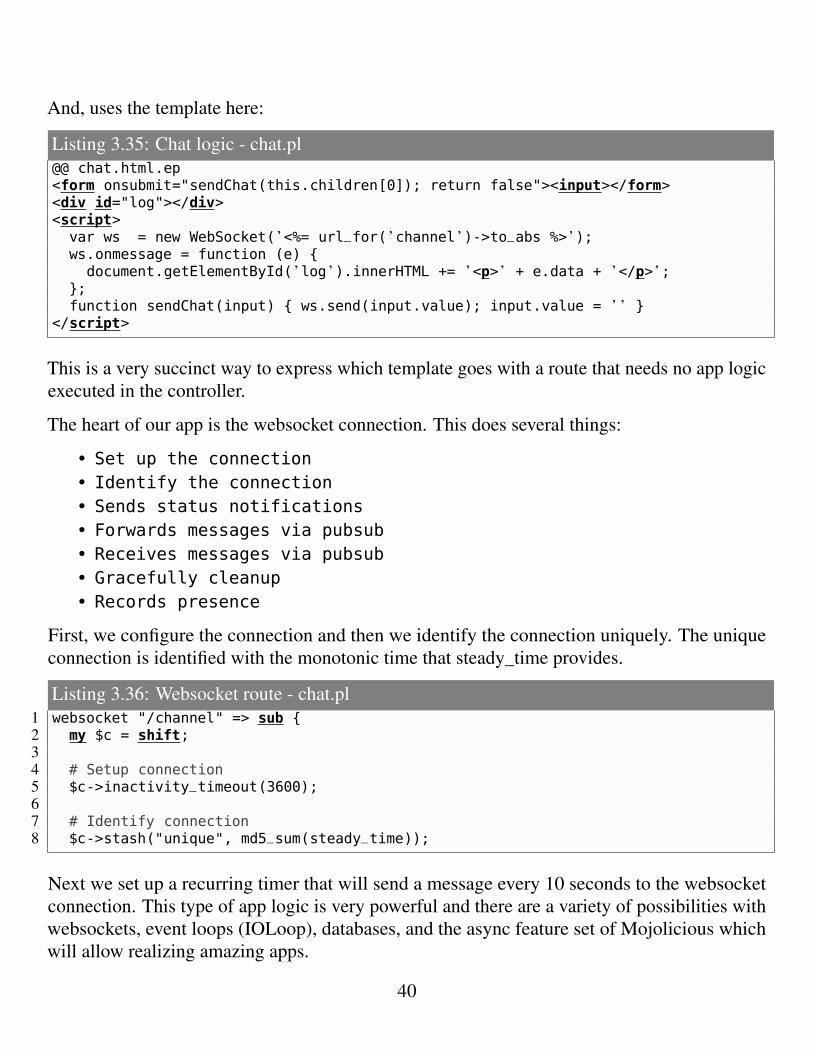
And, uses the template here:
Listing 3.35: Chat logic - chat.pl@@ chat.html.ep<form onsubmit="sendChat(this.children[0]); return false"><input></form><div id="log"></div><script>
var ws = new WebSocket( ’<%= url_for( ’channel ’)->to_abs %> ’);ws.onmessage = function (e) {
document.getElementById( ’log ’).innerHTML += ’<p>’ + e.data + ’</p>’;};function sendChat(input) { ws.send(input.value); input.value = ’ ’ }
</script>
This is a very succinct way to express which template goes with a route that needs no app logicexecuted in the controller.
The heart of our app is the websocket connection. This does several things:
• Set up the connection• Identify the connection• Sends status notifications• Forwards messages via pubsub• Receives messages via pubsub• Gracefully cleanup• Records presence
First, we configure the connection and then we identify the connection uniquely. The uniqueconnection is identified with the monotonic time that steady_time provides.
Listing 3.36: Websocket route - chat.pl1 websocket "/channel" => sub {2 my $c = shift;34 # Setup connection5 $c->inactivity_timeout(3600);67 # Identify connection8 $c->stash("unique", md5_sum(steady_time));
Next we set up a recurring timer that will send a message every 10 seconds to the websocketconnection. This type of app logic is very powerful and there are a variety of possibilities withwebsockets, event loops (IOLoop), databases, and the async feature set of Mojolicious whichwill allow realizing amazing apps.
40
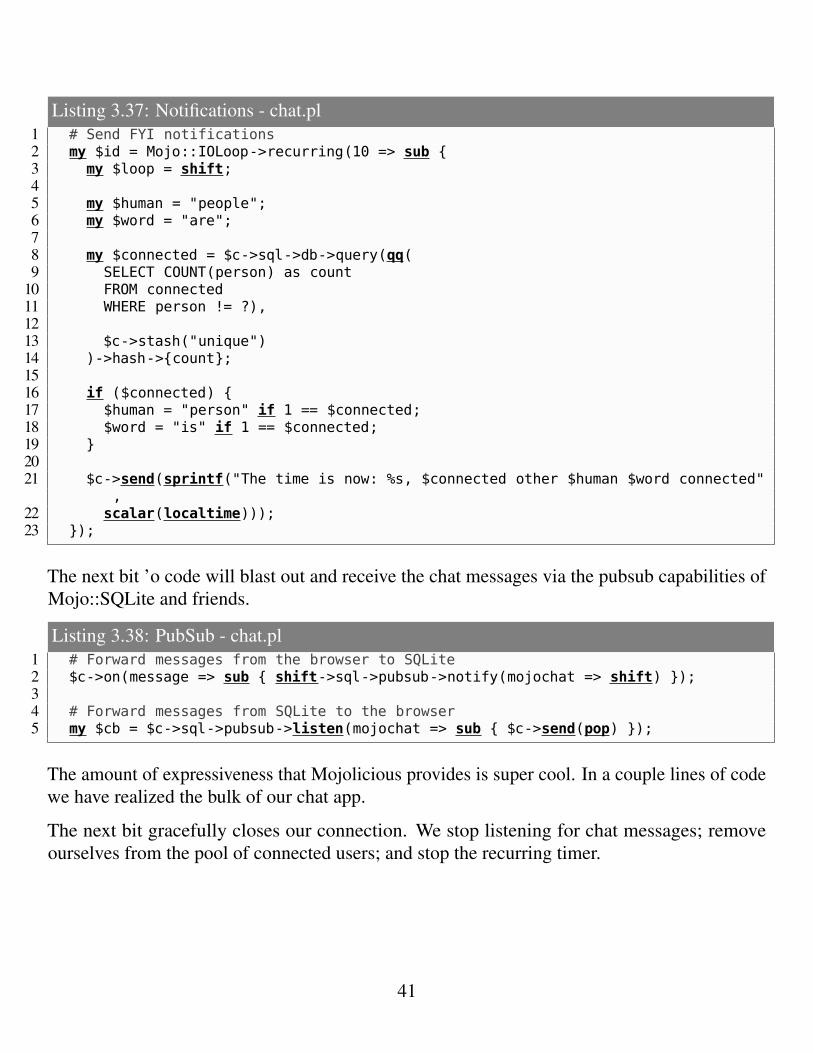
Listing 3.37: Notifications - chat.pl1 # Send FYI notifications2 my $id = Mojo::IOLoop->recurring(10 => sub {3 my $loop = shift;45 my $human = "people";6 my $word = "are";78 my $connected = $c->sql->db->query(qq(9 SELECT COUNT(person) as count
10 FROM connected11 WHERE person != ?),1213 $c->stash("unique")14 )->hash->{count};1516 if ($connected) {17 $human = "person" if 1 == $connected;18 $word = "is" if 1 == $connected;19 }2021 $c->send(sprintf("The time is now: %s, $connected other $human $word connected"
,22 scalar(localtime)));23 });
The next bit ’o code will blast out and receive the chat messages via the pubsub capabilities ofMojo::SQLite and friends.
Listing 3.38: PubSub - chat.pl1 # Forward messages from the browser to SQLite2 $c->on(message => sub { shift->sql->pubsub->notify(mojochat => shift) });34 # Forward messages from SQLite to the browser5 my $cb = $c->sql->pubsub->listen(mojochat => sub { $c->send(pop) });
The amount of expressiveness that Mojolicious provides is super cool. In a couple lines of codewe have realized the bulk of our chat app.
The next bit gracefully closes our connection. We stop listening for chat messages; removeourselves from the pool of connected users; and stop the recurring timer.
41
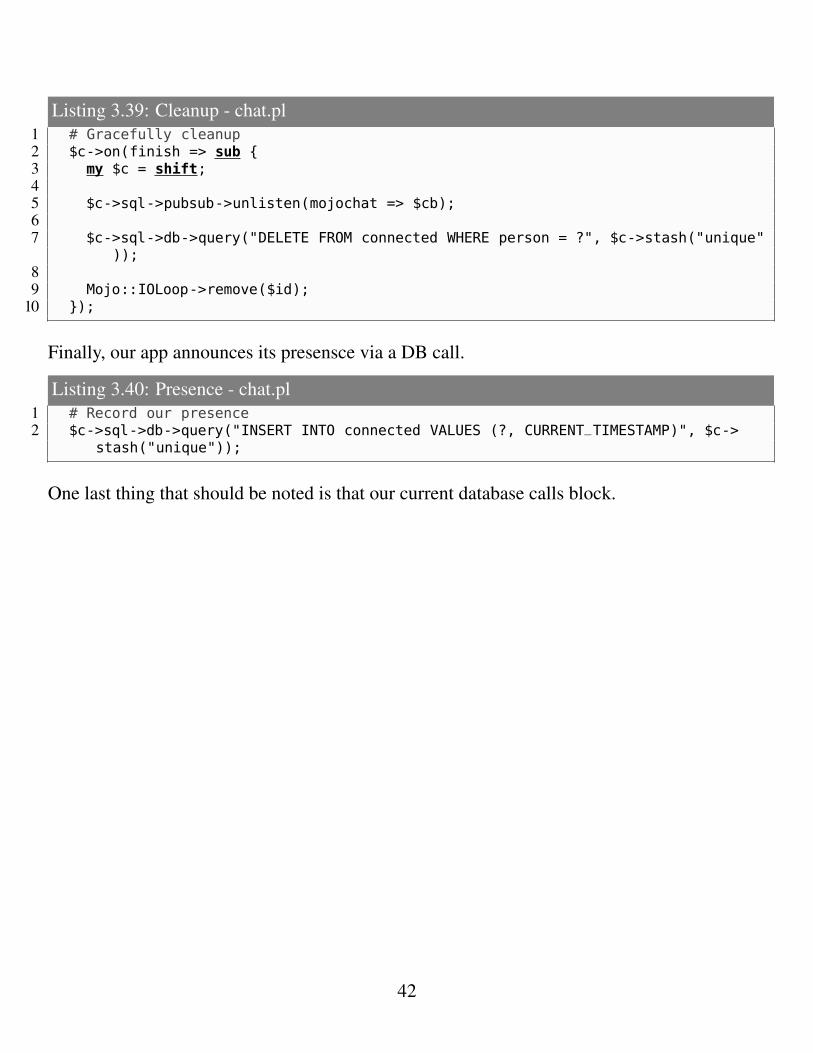
Listing 3.39: Cleanup - chat.pl1 # Gracefully cleanup2 $c->on(finish => sub {3 my $c = shift;45 $c->sql->pubsub->unlisten(mojochat => $cb);67 $c->sql->db->query("DELETE FROM connected WHERE person = ?", $c->stash("unique"
));89 Mojo::IOLoop->remove($id);
10 });
Finally, our app announces its presensce via a DB call.
Listing 3.40: Presence - chat.pl1 # Record our presence2 $c->sql->db->query("INSERT INTO connected VALUES (?, CURRENT_TIMESTAMP)", $c->
stash("unique"));
One last thing that should be noted is that our current database calls block.
42
Examples
4.1 Basic Authentication
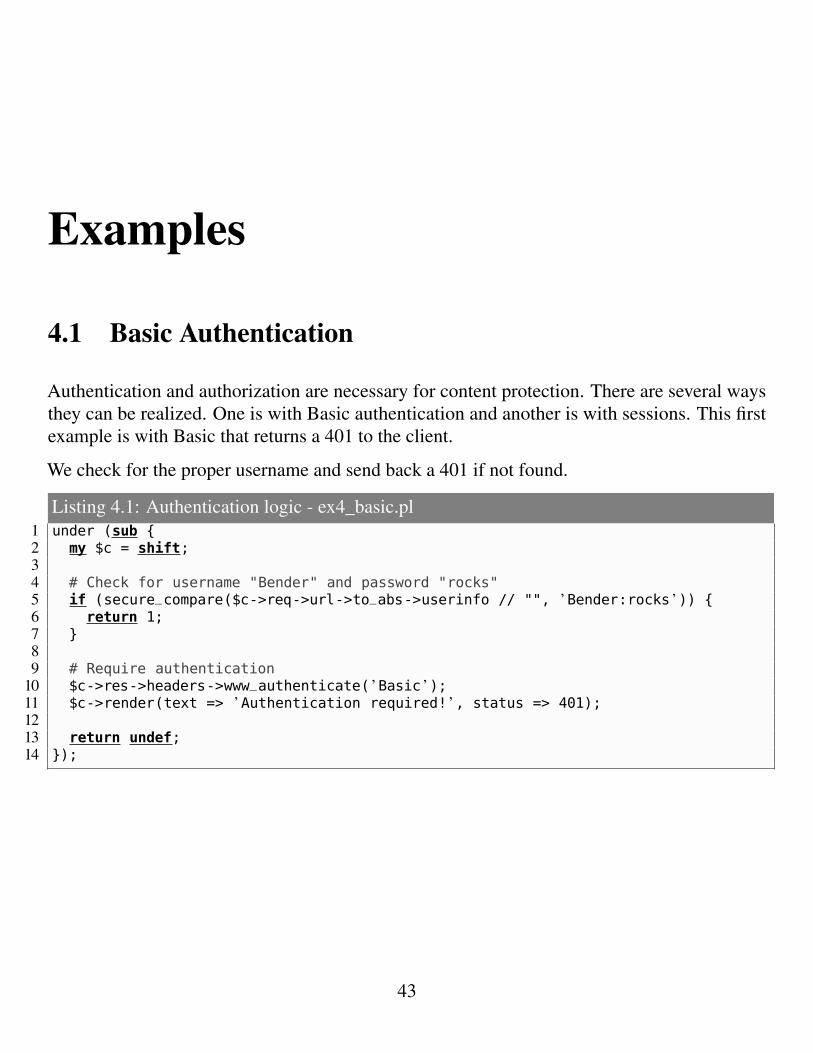
Authentication and authorization are necessary for content protection. There are several waysthey can be realized. One is with Basic authentication and another is with sessions. This firstexample is with Basic that returns a 401 to the client.
We check for the proper username and send back a 401 if not found.
Listing 4.1: Authentication logic - ex4_basic.pl1 under (sub {2 my $c = shift;34 # Check for username "Bender" and password "rocks"5 if (secure_compare($c->req->url->to_abs->userinfo // "", ’Bender:rocks ’)) {6 return 1;7 }89 # Require authentication
10 $c->res->headers->www_authenticate( ’Basic ’);11 $c->render(text => ’Authentication required! ’, status => 401);1213 return undef;14 });
43
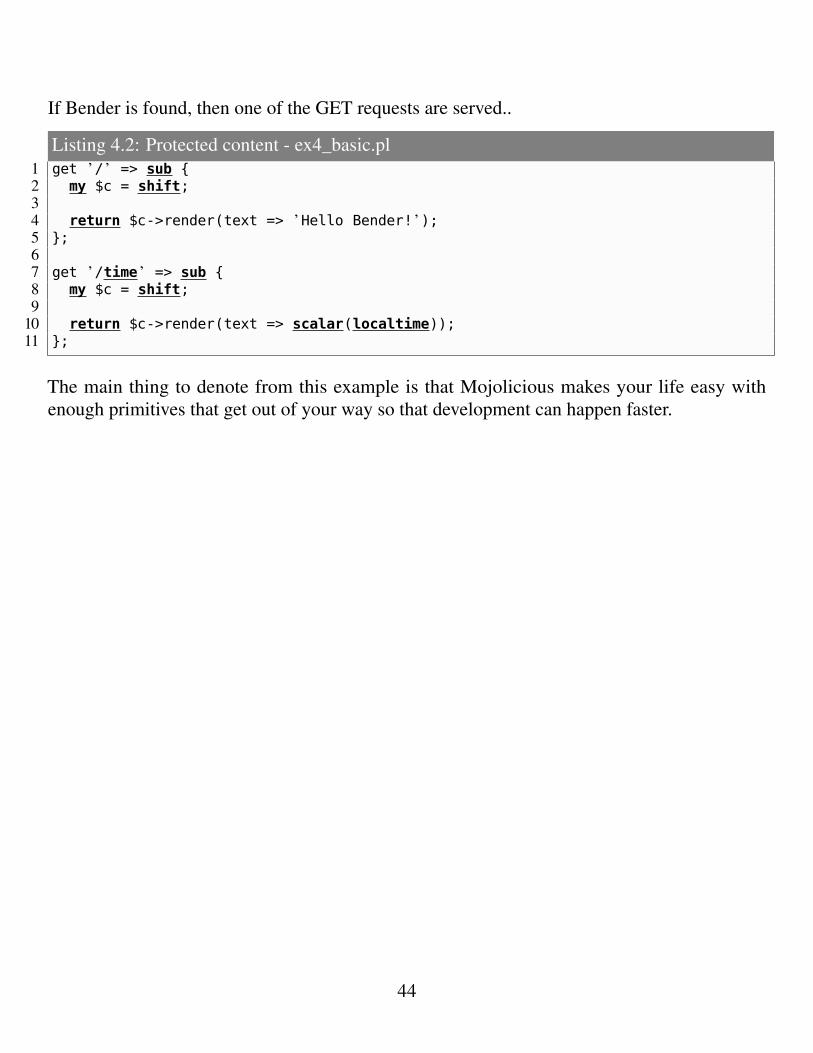
If Bender is found, then one of the GET requests are served..
Listing 4.2: Protected content - ex4_basic.pl1 get ’/ ’ => sub {2 my $c = shift;34 return $c->render(text => ’Hello Bender! ’);5 };67 get ’/time ’ => sub {8 my $c = shift;9
10 return $c->render(text => scalar(localtime));11 };
The main thing to denote from this example is that Mojolicious makes your life easy withenough primitives that get out of your way so that development can happen faster.
44
4.2 Session Authentication
Our next example is with session authentication. We have..
• A Landing page• Login page view• Login page processing• Logout processing• Session authentication• Member area• Private file retrieval
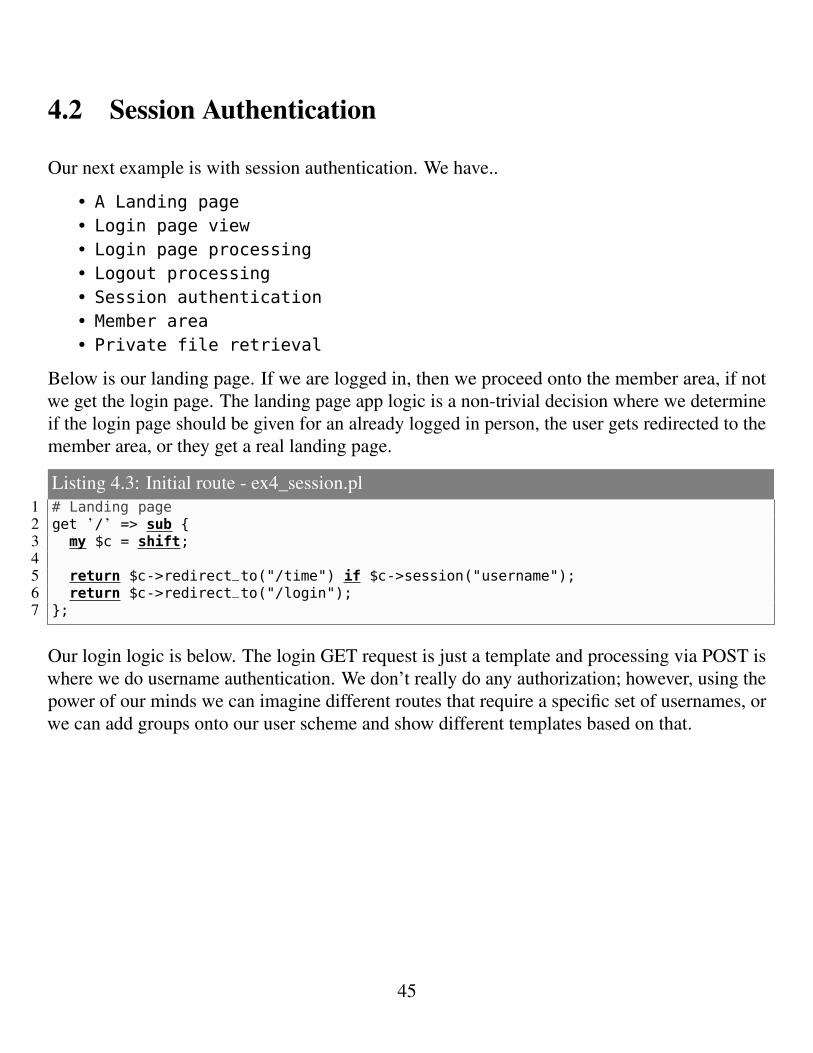
Below is our landing page. If we are logged in, then we proceed onto the member area, if notwe get the login page. The landing page app logic is a non-trivial decision where we determineif the login page should be given for an already logged in person, the user gets redirected to themember area, or they get a real landing page.
Listing 4.3: Initial route - ex4_session.pl1 # Landing page2 get ’/ ’ => sub {3 my $c = shift;45 return $c->redirect_to("/time") if $c->session("username");6 return $c->redirect_to("/login");7 };
Our login logic is below. The login GET request is just a template and processing via POST iswhere we do username authentication. We don’t really do any authorization; however, using thepower of our minds we can imagine different routes that require a specific set of usernames, orwe can add groups onto our user scheme and show different templates based on that.
45

The options are really almost limitless.
Listing 4.4: Login logic - ex4_sesion.pl1 # Show login2 get ’/login ’ => ’login ’;34 # Process login5 post ’/login ’ => sub {6 my $c = shift;78 # Authentication9 unless ("Bender" eq $c->param("username")) {
10 return $c->redirect_to("/login");11 }12 if ("rocks" ne $c->param("password")) {13 return $c->redirect_to("/login");14 }1516 ### The session persists across requests via cookies17 $c->session(username => $c->param("username"));1819 # Expiration date in seconds from now (persists between requests)20 #21 # This is how long they are logged in22 $c->session(expiration => 604800);2324 return $c->redirect_to("/time");25 };
The final piece for our login scheme is that session expiration can be set programmatically. Thiswill give us the ability to set the time our user can stay logged in.
An important piece of our session management is the ability to logout. This is done via HTMLlinks. Below we set the session expiration to a previous time and this resets the session.
46

Listing 4.5: Logout logic - ex4_sesion.pl1 # Exit member area2 get ’/logout ’ => sub {3 my $c = shift;45 # Delete whole session by setting an expiration date in the past6 $c->session(expires => 1);78 $c->redirect_to("/login");9 };
Our actual session validation is done via an under route. Since this is a Mojolicious::Lite app,then all routes after the under will be subject to authentication. The session authenticationmerely verifies that a username is present in the session.
If no username, then we go back to the login screen. If so, we continue our march into the routein question.
Listing 4.6: Authentication logic - ex4_sesion.pl1 # Session authentication2 under (sub {3 my $c = shift;45 # Already logged in?6 if ($c->session("username")) {7 return 1;8 }9
10 $c->redirect_to("/login");1112 return undef;13 });
The main new feature of our member area is that "private" files are protected. We useMojo::Asset::File and present the "private" file (i.e. any file with an absolute path) for theuser. These lines are below.
Listing 4.7: Protected content - ex4_sesion.pl1 $c->res->headers->content_type( ’text/plain ’);2 $c->reply->asset(Mojo::Asset::File->new(path => ’/etc/passwd ’));
47

4.3 JSON API
Moving along, our next example utilizes a JSON API that abstracts out a key/value store writtenusing Mojo::SQLite.
In our under route which allows for the JSON API authentication. The under does several things,which are:
• Validate JSON• Verify username• Verify API key• Authenticate user
Below is the validation. Note how the controller object ($c) has a req object which includes theJSON already parsed. Also, our under renders and returns undef so that the user is presentedwith their JSON and the child routes are not processed.
Listing 4.8: Authentication start - ex4_api.pl1 under (sub {2 my $c = shift;34 unless ($c->req->json) {5 $c->render(json => {6 status => "error", data => { message => "No JSON found" }7 });89 return undef;
10 }
48
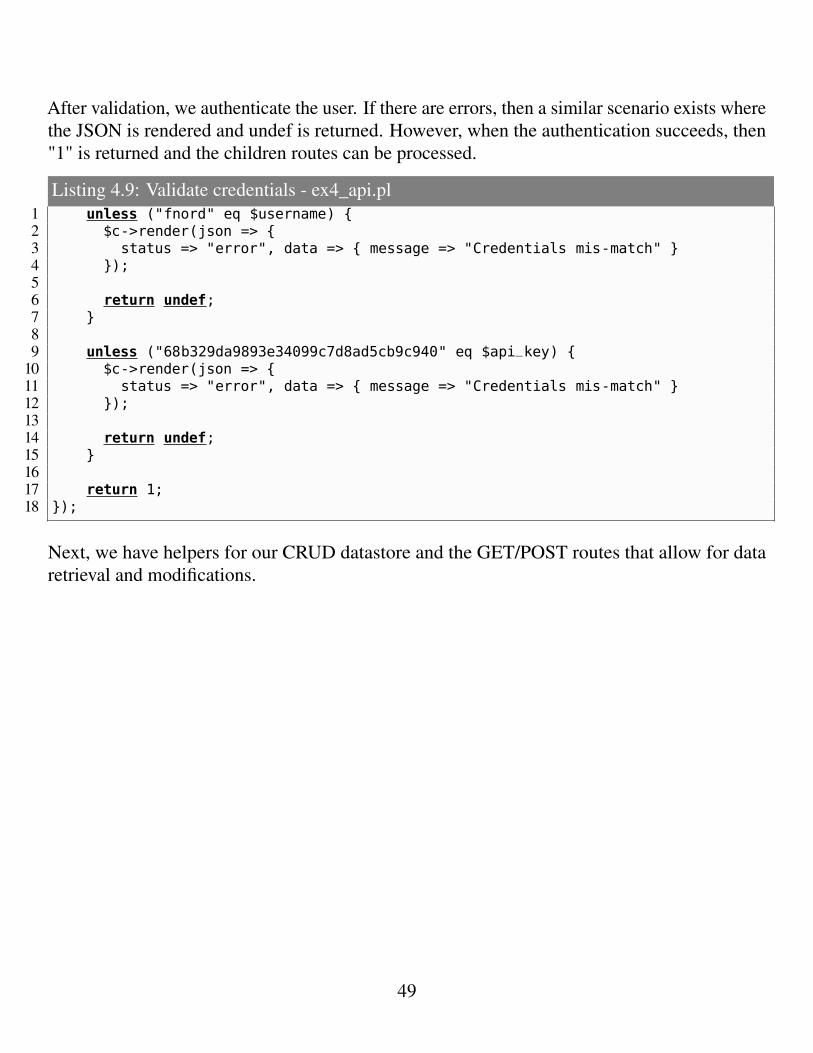
After validation, we authenticate the user. If there are errors, then a similar scenario exists wherethe JSON is rendered and undef is returned. However, when the authentication succeeds, then"1" is returned and the children routes can be processed.
Listing 4.9: Validate credentials - ex4_api.pl1 unless ("fnord" eq $username) {2 $c->render(json => {3 status => "error", data => { message => "Credentials mis-match" }4 });56 return undef;7 }89 unless ("68b329da9893e34099c7d8ad5cb9c940" eq $api_key) {
10 $c->render(json => {11 status => "error", data => { message => "Credentials mis-match" }12 });1314 return undef;15 }1617 return 1;18 });
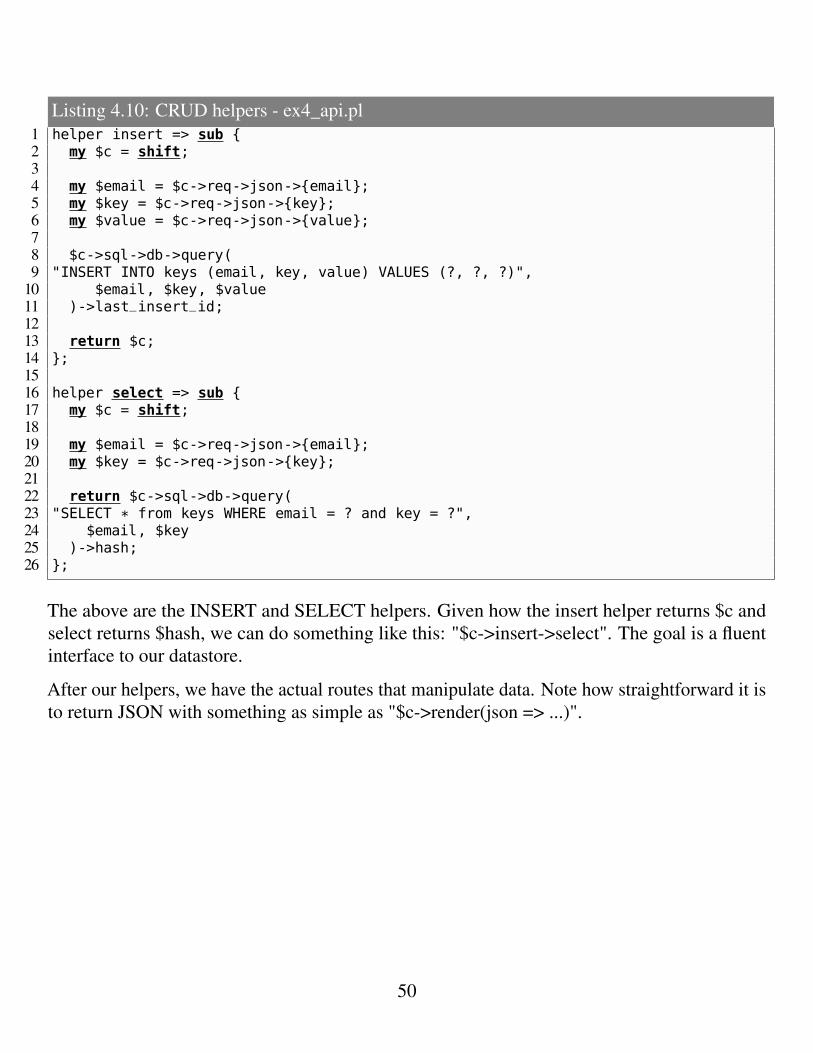
Next, we have helpers for our CRUD datastore and the GET/POST routes that allow for dataretrieval and modifications.
49
Listing 4.10: CRUD helpers - ex4_api.pl1 helper insert => sub {2 my $c = shift;34 my $email = $c->req->json->{email};5 my $key = $c->req->json->{key};6 my $value = $c->req->json->{value};78 $c->sql->db->query(9 "INSERT INTO keys (email, key, value) VALUES (?, ?, ?)",
10 $email, $key, $value11 )->last_insert_id;1213 return $c;14 };1516 helper select => sub {17 my $c = shift;1819 my $email = $c->req->json->{email};20 my $key = $c->req->json->{key};2122 return $c->sql->db->query(23 "SELECT * from keys WHERE email = ? and key = ?",24 $email, $key25 )->hash;26 };
The above are the INSERT and SELECT helpers. Given how the insert helper returns $c andselect returns $hash, we can do something like this: "$c->insert->select". The goal is a fluentinterface to our datastore.
After our helpers, we have the actual routes that manipulate data. Note how straightforward it isto return JSON with something as simple as "$c->render(json => ...)".
50
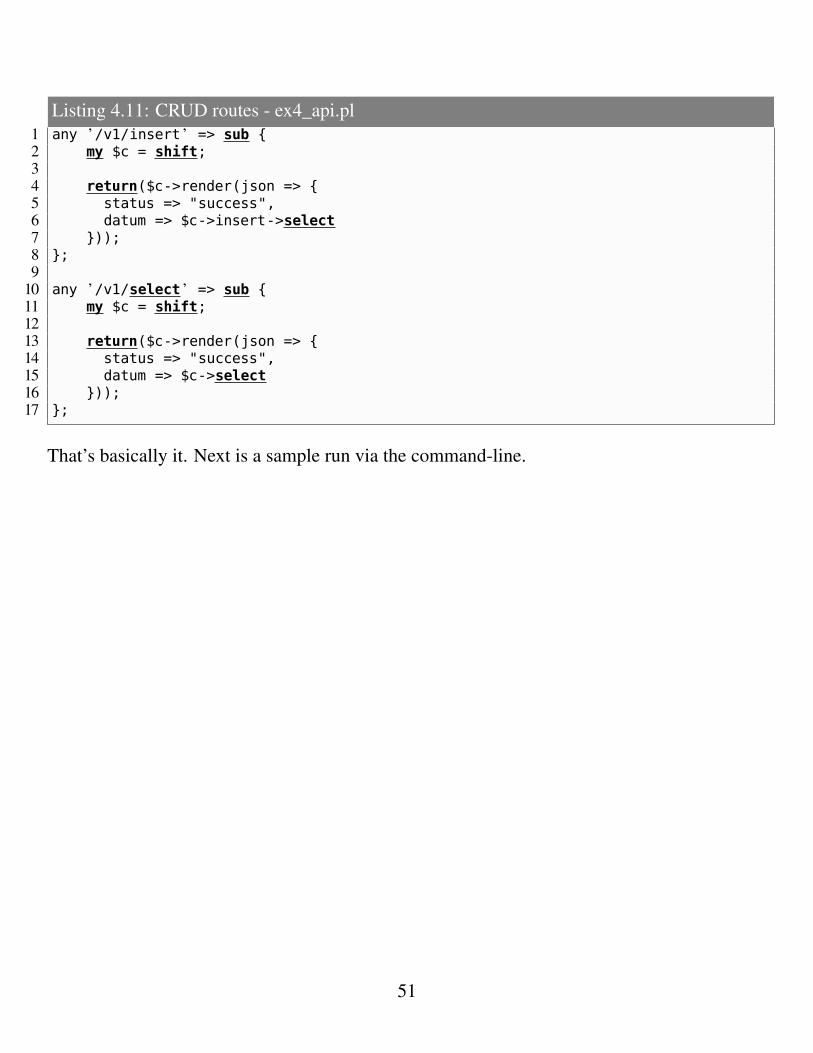
Listing 4.11: CRUD routes - ex4_api.pl1 any ’/v1/insert ’ => sub {2 my $c = shift;34 return($c->render(json => {5 status => "success",6 datum => $c->insert->select7 }));8 };9
10 any ’/v1/select ’ => sub {11 my $c = shift;1213 return($c->render(json => {14 status => "success",15 datum => $c->select16 }));17 };
That’s basically it. Next is a sample run via the command-line.
51
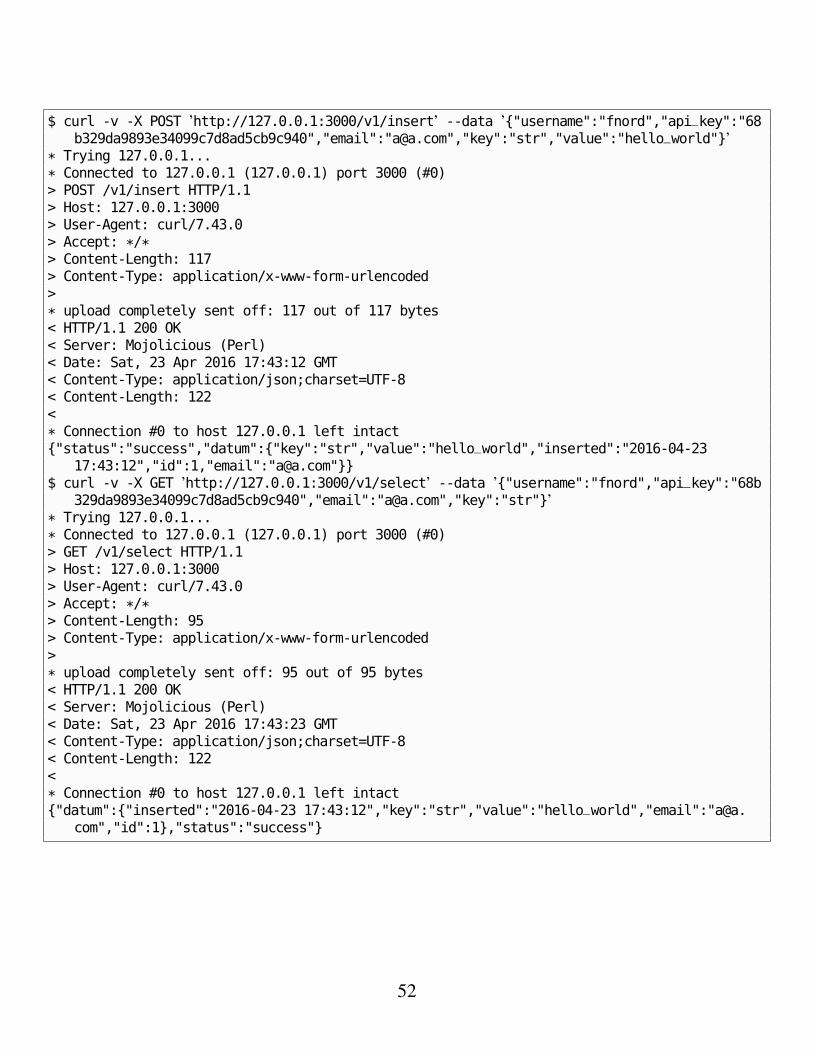
$ curl -v -X POST ’http://127.0.0.1:3000/v1/insert’ --data ’{"username":"fnord","api_key":"68b329da9893e34099c7d8ad5cb9c940","email":"[email protected]","key":"str","value":"hello_world"}’
* Trying 127.0.0.1...* Connected to 127.0.0.1 (127.0.0.1) port 3000 (#0)> POST /v1/insert HTTP/1.1> Host: 127.0.0.1:3000> User-Agent: curl/7.43.0> Accept: */*> Content-Length: 117> Content-Type: application/x-www-form-urlencoded>* upload completely sent off: 117 out of 117 bytes< HTTP/1.1 200 OK< Server: Mojolicious (Perl)< Date: Sat, 23 Apr 2016 17:43:12 GMT< Content-Type: application/json;charset=UTF-8< Content-Length: 122<* Connection #0 to host 127.0.0.1 left intact{"status":"success","datum":{"key":"str","value":"hello_world","inserted":"2016-04-23
17:43:12","id":1,"email":"[email protected]"}}$ curl -v -X GET ’http://127.0.0.1:3000/v1/select’ --data ’{"username":"fnord","api_key":"68b
329da9893e34099c7d8ad5cb9c940","email":"[email protected]","key":"str"}’* Trying 127.0.0.1...* Connected to 127.0.0.1 (127.0.0.1) port 3000 (#0)> GET /v1/select HTTP/1.1> Host: 127.0.0.1:3000> User-Agent: curl/7.43.0> Accept: */*> Content-Length: 95> Content-Type: application/x-www-form-urlencoded>* upload completely sent off: 95 out of 95 bytes< HTTP/1.1 200 OK< Server: Mojolicious (Perl)< Date: Sat, 23 Apr 2016 17:43:23 GMT< Content-Type: application/json;charset=UTF-8< Content-Length: 122<* Connection #0 to host 127.0.0.1 left intact{"datum":{"inserted":"2016-04-23 17:43:12","key":"str","value":"hello_world","email":"a@a.
com","id":1},"status":"success"}
52

4.4 Synchronizing non-blocking operations
Our next example was lifted from the Mojolicious Cookbook. The cookbook has a plethora ofexamples and other goodness. The example we are focusing on is synchronizing api calls in anon-blocking fashion.
What we are going to do is search metacpan with a couple queries in a non-blocking fashion.
The first bit is the delay. This is methodology for orchestrating callbacks. Simply do Mojo::IOLoop->delay and you..Build Mojo::IOLoop::Delay object to manage callbacks and control the flow ofevents for this event loop, which can help you avoid deep nested closures thatoften result from continuation-passing style. Callbacks will be passed along to"steps" in Mojo::IOLoop::Delay.
Below is what the code looks like that starts the delay.
Listing 4.12: Index route - ex4_delay.pl1 # Search MetaCPAN for "mojo" and "minion"2 get ’/ ’ => sub {3 my $c = shift;45 # Prepare response in two steps6 $c->delay(
The steps needed by the delay are sub CODE blocks. The first one sets up our concurrentrequests. This is shown below:
Listing 4.13: GET requests - ex4_delay.pl1 # Concurrent requests2 sub {3 my $delay = shift;4 my $url = Mojo::URL->new( ’api.metacpan.org/v0/module/_search ’);5 $url->query({sort => ’date:desc ’});6 $c->ua->get($url->clone->query({q => ’mojo ’}) => $delay->begin);7 $c->ua->get($url->clone->query({q => ’minion ’}) => $delay->begin);8 },
We use the embedded Mojo::UserAgent object and the begin methods of the delay that set upthe number of requests that will happen concurrently. When the GET request is finished, thenthe UserAgent will execute the begin callback. This callback does the following:Indicate an active event by incrementing the event counter, the returnedcallback needs to be executed when the event has completed, to decrement the
53
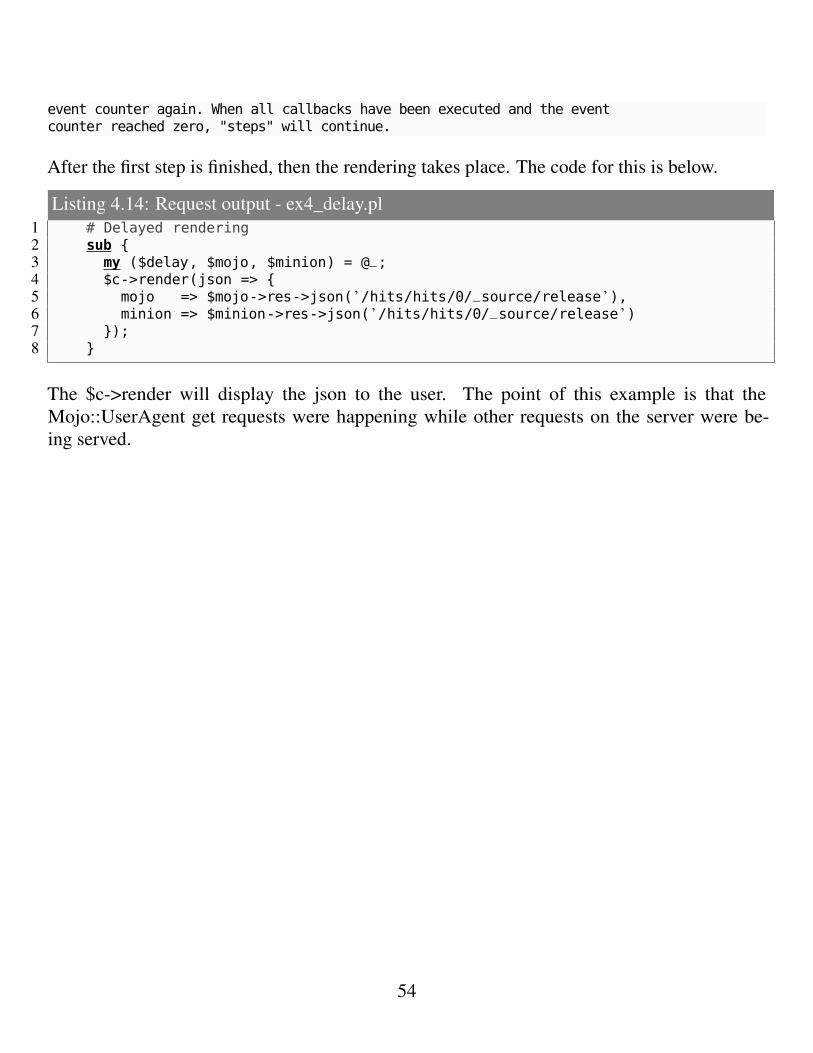
event counter again. When all callbacks have been executed and the eventcounter reached zero, "steps" will continue.
After the first step is finished, then the rendering takes place. The code for this is below.
Listing 4.14: Request output - ex4_delay.pl1 # Delayed rendering2 sub {3 my ($delay, $mojo, $minion) = @_;4 $c->render(json => {5 mojo => $mojo->res->json( ’/hits/hits/0/_source/release ’),6 minion => $minion->res->json( ’/hits/hits/0/_source/release ’)7 });8 }
The $c->render will display the json to the user. The point of this example is that theMojo::UserAgent get requests were happening while other requests on the server were be-ing served.
54

4.5 Mojo::UserAgent Command-Line
This is our first command-line example. We are retrieving the weather for a given IP address.There are two GET requests. One retrieve the latitude and longitude for an IP address, and thenext takes that and gets the weather.
The below code sets up our script. We use Mojo::Base -strict for enabling Modern Perl featuresin our script. Also, the very succinct Mojo::IOLoop->delay allows us some freedom for runningnon-blocking code in a serial fashion.
Listing 4.15: Setup - ex4_cli.pl1 #!perl2 use Mojo::Base -strict;34 use Mojo::IOLoop;5 use Mojo::UserAgent;67 my $ua = Mojo::UserAgent->new;8 my $addr = shift // die("Please pass in an IP");
After this, the 1st GET request is done. Note how we use an array of CODE references for ourdelay method. The first sub initiates a non-blocking request with ip-api.com.
Listing 4.16: Lat/Lon - ex4_cli.pl1 # Non-blocking requests (synchronized with a delay)2 Mojo::IOLoop->delay(3 sub {4 my $delay = shift;56 my $ip_query = sprintf("http://ip-api.com/json/%s", $addr);7 $ua->get($ip_query => $delay->begin);8 },
55
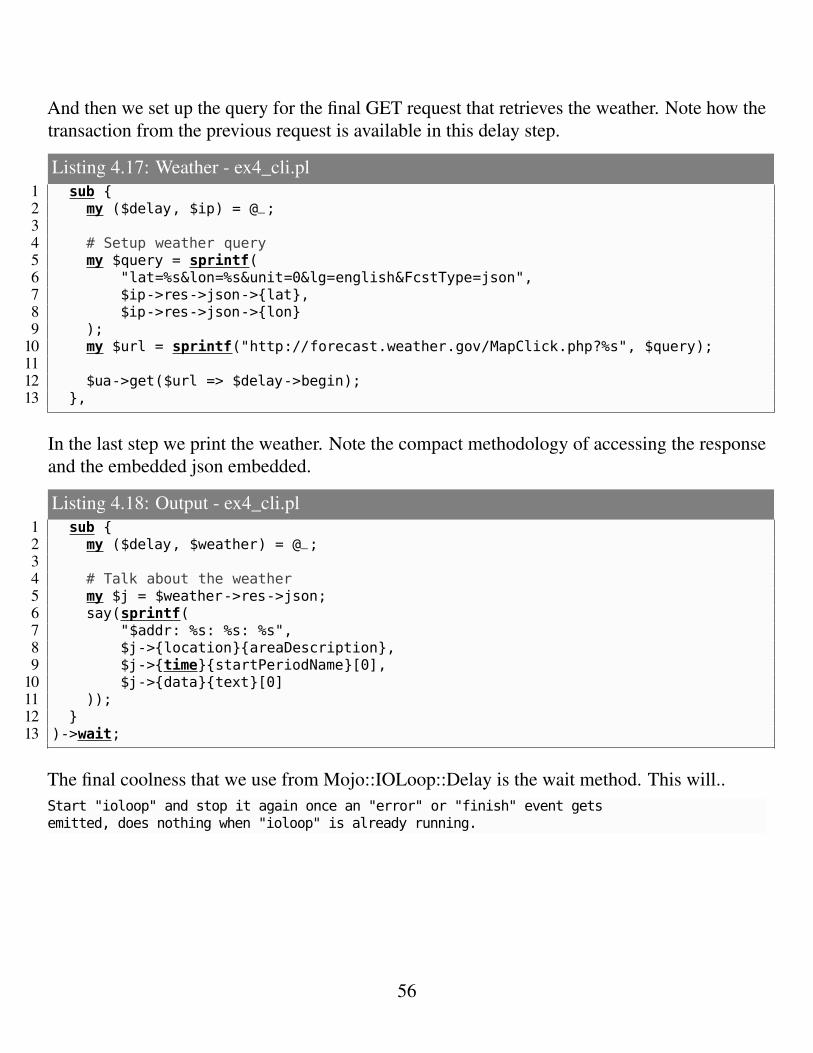
And then we set up the query for the final GET request that retrieves the weather. Note how thetransaction from the previous request is available in this delay step.
Listing 4.17: Weather - ex4_cli.pl1 sub {2 my ($delay, $ip) = @_;34 # Setup weather query5 my $query = sprintf(6 "lat=%s&lon=%s&unit=0&lg=english&FcstType=json",7 $ip->res->json->{lat},8 $ip->res->json->{lon}9 );
10 my $url = sprintf("http://forecast.weather.gov/MapClick.php?%s", $query);1112 $ua->get($url => $delay->begin);13 },
In the last step we print the weather. Note the compact methodology of accessing the responseand the embedded json embedded.
Listing 4.18: Output - ex4_cli.pl1 sub {2 my ($delay, $weather) = @_;34 # Talk about the weather5 my $j = $weather->res->json;6 say(sprintf(7 "$addr: %s: %s: %s",8 $j->{location}{areaDescription},9 $j->{time}{startPeriodName}[0],
10 $j->{data}{text}[0]11 ));12 }13 )->wait;
The final coolness that we use from Mojo::IOLoop::Delay is the wait method. This will..Start "ioloop" and stop it again once an "error" or "finish" event getsemitted, does nothing when "ioloop" is already running.
56