loadrunner enterprise installation guide · silentlyinstallloadrunnerenterpriseserverandhosts 57...
TRANSCRIPT

Software Version: 2020
LoadRunner Enterprise
Installation Guide
Go to HELP CENTER ONLINEhttp://admhelp.microfocus.com/pc/
Document Release Date: February 25, 2020 | Software Release Date: December 2019

Legal Notices
DisclaimerCertain versions of software and/or documents (“Material”) accessible here may contain branding from Hewlett-Packard
Company (now HP Inc.) and Hewlett Packard Enterprise Company. As of September 1, 2017, the Material is now offered by
Micro Focus, a separately owned and operated company. Any reference to the HP and Hewlett Packard Enterprise/HPE marks
is historical in nature, and the HP and Hewlett Packard Enterprise/HPE marks are the property of their respective owners.
WarrantyThe only warranties for products and services of Micro Focus and its affiliates and licensors (“Micro Focus”) are set forth in
the express warranty statements accompanying such products and services. Nothing herein should be construed as
constituting an additional warranty. Micro Focus shall not be liable for technical or editorial errors or omissions contained
herein. The information contained herein is subject to change without notice.
Restricted Rights LegendContains Confidential Information. Except as specifically indicated otherwise, a valid license is required for possession, use or
copying. Consistent with FAR 12.211 and 12.212, Commercial Computer Software, Computer Software Documentation, and
Technical Data for Commercial Items are licensed to the U.S. Government under vendor's standard commercial license.
Copyright Notice© Copyright 2001 - 2020 Micro Focus or one of its affiliates.
Installation Guide
LoadRunner Enterprise (2020) Page 2 of 146

Contents
LoadRunner Enterprise 1
Part 1: Installation overview 7Chapter 1: Before you install 8
LoadRunner Enterprise components and data flow 9
Architecture and components 9
Applications 11
Communication paths 12
Load considerations 15
Clustered configuration 17
System component considerations 18
Windows system locale considerations 21
Required services 21
LoadRunner Enterprise prerequisite software 22
Pre-installation prerequisites and considerations 26
Database prerequisites 27
Prerequisites: Oracle Database servers 28
Prerequisites: Microsoft - SQL Database servers 29
Installation package details 30
Part 2: Pre-installation project migration steps 31Chapter 2: Project migration pre-installation activities 32
Pre-installation project migration considerations 32
Upgrade existing projects to ALM 12.6x 32
Back up projects in existing ALM installation 33
Overview of migration process 34
Part 3: Installation and configuration 35Chapter 3: Install LoadRunner Enterprise 36
Installation flow 37
Install and configure LoadRunner Enterprise servers and hosts 38
Configure LoadRunner Enterprise 51
Configure LoadRunner Enterprise using the Configuration Wizard 51
Log on to LoadRunner Enterprise Administration 52
Perform site and lab administration tasks 52
Install LoadRunner Enterprise silently 54
Prerequisite software for silent installation 54
Customize silent installation 55
Installation Guide
LoadRunner Enterprise (2020) Page 3 of 146

Silently install LoadRunner Enterprise server and hosts 57
Install standalone components (Windows) 60
Available standalone components for Windows 60
Install standalone components 61
Silently install standalone applications 62
Install Load Generator on Linux 64
Deploy dockerized load generators on Linux 64
Prerequisites 64
Run a dockerized load generator using the predefined image 64
Run a dockerized load generator using a custom image 65
After running the load generator containers 67
Build a custom Dockerfile image 67
Tips and guidelines 68
Deploy dockerized load generators or Controllers on Windows 69
Prerequisites 69
Run a dockerized load generator or Controller using the predefined image 70
Run a dockerized load generator using a custom image 70
Examples of customized content for Dockerfiles 72
After running the load generator containers 72
Tips and guidelines 73
Install additional components 73
Deploy LoadRunner Enterprise on the cloud 74
Uninstall LoadRunner Enterprise server and hosts 75
Uninstall Load Generator from Linux 76
Chapter 4: Post installation verification 77
Chapter 5: LoadRunner Enterprise configuration options 79
Configure IIS on LoadRunner Enterprise machines to use SSL 80
Before you configure IIS 80
Configure the LoadRunner Enterprise server backend behind IIS reverse proxy 80
Configuring IIS to work over SSL 82
Configure LoadRunner Enterprise to support SSL 82
Configure secure communication with LoadRunner components using TLS (SSL) 91
Working with the LoadRunner Enterprise agent 91
Run the LoadRunner Enterprise agent as a process 91
Run the LoadRunner Enterprise agent as a service 91
Configure the agent on load generator machines 92
Map network drives when running the agent as service 92
LoadRunner Remote Management Agent 92
Recommended configuration for Linux load generators 93
Recommended change to the TEMP folder used by the load generator 93
Enable downloading standalone applications 94
Customize the Download Applications window 94
Installation Guide
LoadRunner Enterprise (2020) Page 4 of 146

Enable MS-SQL Windows authentication 95
Configure SSL for load generators 95
Create and copy digital certificates 95
Enable SSL communication for load generators in LoadRunner Enterprise Administration 98
Part 4: Working with firewalls 99Chapter 6: Using firewalls 100
About using firewalls in LoadRunner Enterprise 101
Example of over firewall deployment 103
Set up the system to use firewalls: basic steps 103
Install over firewall components 105
Initial configuration of the over firewall system 106
Set up your deployment (TCP or HTTPS) 106
Configure the firewall to allow agent access 108
TCP configuration 108
HTTPS configuration 108
Local System account configuration 108
Configure the MI Listener 108
Specify MI Listeners 109
Chapter 7: Run Vusers over a firewall 111
Run Vusers over a firewall: basic steps 112
Configure hosts to run Vusers over a firewall 113
Chapter 8: Monitor over a firewall 116
Monitor over a firewall: basic steps 117
Configure monitor settings 118
Clone a monitored server's properties 120
Add and remove measurements 120
Configure measurement frequency 121
Configure the project to receive monitor over firewall information 121
Edit monitor over firewall machines during a test run 122
Chapter 9: Configure the LoadRunner Enterprise agent 123
Configure LoadRunner Enterprise agents over the firewall: basic steps 124
Configure the Windows LoadRunner Enterprise agent 124
Configure and run the Linux LoadRunner Enterprise agent 125
Agent configuration settings 126
Check connectivity 128
Part 5: Troubleshooting 131Chapter 10: Troubleshooting installation issues 132
Unable to load Windows 8 Explorer shell after installing LoadRunner Enterprise host 133
Host silent installation stops after installing .NET Framework 4.8 133
Installation Guide
LoadRunner Enterprise (2020) Page 5 of 146

Working with LoadRunner Enterprise when Windows Firewall is enabled 133
LoadRunner Enterprise uninstall fails or freezes 135
Cannot log in to LoadRunner Enterprise via the client machine: JavaScript Error 135
Initializing Run page does not load when starting a test run 136
Unable to run the LoadRunner Enterprise component installation from a network drive 136
Unable to install LoadRunner Enterprise components from the installation directory 137
Unable to install a LoadRunner Enterprise component if the default port is in use 138
Unable to use non-default ports in Microsoft SQL 140
No error message when a test fails to start 141
Unable to display online topology monitors 141
Unable to configure LoadRunner Enterprise server or host when the process is used by another
process 142
LoadRunner Enterprise configuration host fails to start the 'LoadRunner Center Data Service' 142
Configure LoadRunner Enterprise to work with secure cookies over a secure connection 142
Unable to log on to the database server 143
Incorrect time range displayed in online graph 144
Unable to install Network Virtualization (NV) components 144
Send Us Feedback 145
Installation Guide
LoadRunner Enterprise (2020) Page 6 of 146

LoadRunner Enterprise (2020) Page 7
Part 1: Installation overview

Chapter 1: Before you installThis chapter provides information that will help you prepare for the LoadRunner Enterprisecomponent installations.
This chapter includes:
• LoadRunner Enterprise components and data flow 9• System component considerations 18• Windows system locale considerations 21• Required services 21• LoadRunner Enterprise prerequisite software 22• Pre-installation prerequisites and considerations 26• Database prerequisites 27• Installation package details 30
LoadRunner Enterprise (2020) Page 8 of 146

LoadRunner Enterprise components and data flowThis section describes the LoadRunner Enterprise system.
This section includes:
l "Architecture and components" below
l "Applications " on page 11
l "Communication paths" on page 12
l "Load considerations" on page 15
l "Clustered configuration" on page 17
Architecture and components
This section describes the architecture and components of LoadRunner Enterprise.
Architecture/Component Description
Database server The database server stores three types of schemas:
l Site Administration schema. Stores information related to theLoadRunner Enterprise system, such as domains, users, andsite parameters. A row exists in this schema for each projectyou create. Irrespective of how you configure your system,there is always only one Site Administration schema.
l Lab Management. Stores lab information related to managinglab resources (such as hosts and host pools), and for managingLoadRunner Enterprise assets (such as LoadRunner Enterpriseserver, licenses, and usage reports). There is always only oneLab Management schema.
l Project schemas. Stores project information, such as entity dataand user data. A separate schema exists for every project youcreate.
The schemas can reside on an Oracle or on a Microsoft SQLserver.
Note: To improve system performance, it is advisable that theLoadRunner Enterprise server and the Database server beinstalled on separate machines and be connected over LAN.
Installation GuideChapter 1: Before you install
LoadRunner Enterprise (2020) Page 9 of 146

Architecture/Component Description
Project repository Stores all files to be used by all the projects in the system. Forexample, scripts, run results, .xml files, templates, andattachments. By default the repository is located on the samemachine as the application server, which is useful for smallersetups. For larger organizations however, or when working in aclustered environment, it is advisable to install the repository on adedicated machine.
When working in a clustered environment, the repository must beaccessible by all nodes.
LoadRunner EnterpriseServer
Hosts the LoadRunner Enterprise Web pages that enable you todesign performance tests, configure monitors, reserve testingresources, run and monitor test runs, and analyze test results.
LoadRunner EnterpriseAdministration
The center for managing lab resources (such as hosts and hostpools), and for managing LoadRunner Enterprise assets (such asLoadRunner Enterprise servers, licenses, projects, runs, timeslots,diagnostics, and usage reports).
Also used for managing cloud settings when using cloud hosts inLoadRunner Enterprise, and automated maintenance of thesystem's key components to detect system failures.
LoadRunner EnterpriseHosts
Used to control performance tests, generate load, and analyzedata. LoadRunner Enterprise hosts can be configured asControllers, load generators, or data processors:
l Controller. The manager of a performance test. The Controllerreceives scripts, runtime settings, and a list of load generatorsto use. The Controller issues instructions to the loadgenerators including which scripts to run, how many Vusers torun per script, and scheduler settings. At the conclusion of thetest run, the Controller collates the data. There is only oneController per performance test.
l Load Generator. Generate load by running virtual users(Vusers). The Controller dictates the manner in which they startand stop running. There can be any number of load generatorsfor a given test.
l Data Processor. Used for analyzing and publishingperformance test results.
Installation GuideChapter 1: Before you install
LoadRunner Enterprise (2020) Page 10 of 146

Applications
The following standalone applications integrate with your LoadRunner Enterprise system:
Application Description
Virtual UserGenerator(VuGen)
Generates Vusers by recording actions that typical end-users would performon your application. VuGen records your actions into automated Vuser scriptswhich form the foundation of your performance tests.
Analysis Provides graphs and reports with in-depth performance analysis information.Using these graphs and reports, you can pinpoint and identify the bottlenecksin your application and determine what changes need to be made to yoursystem to improve its performance.
NetworkVirtualization(NV)
Installs Network Virtualization for the LoadRunner Enterprise machine.
MI Listener Needed when running Vusers and monitoring applications over a firewall.
MonitorsOver FirewallAgent
Used to monitor servers that are located over a firewall.
PAL Data SetCreator
This tool enables you to create production data sets. After creating the datasets, you can upload them from PAL and use them in your reports. You cancreate IIS W3C, Apache logs, Google Analytics, Webtrends, or RUM datasets.For details, see the PAL section in the LoadRunner Enterprise Help Center.
TruClientStandalone
Installs TruClient as a standalone application. Install this tool to record Webapplications with TruClient technology. You save the recordings to a scriptthat can be used in a performance test run.
Use the diagram and table in the "Communication paths" on the next page and "Loadconsiderations" on page 15 sections to determine which machines to allocate for whichperformance testing tasks.
For example, you can combine a number of applications that have a light load on a single machine.For details on which standalone applications can be installed together, see the SystemRequirements Guide.
For information on installing the standalone applications, see "Install additional components" onpage 73.
Installation GuideChapter 1: Before you install
LoadRunner Enterprise (2020) Page 11 of 146

Communication paths
When installing LoadRunner Enterprise, it is important to consider the communication pathsbetween the various components, and their resource demands.
When running a performance test, components share information with LoadRunner Enterprise viaa distinct system of communication. Understanding which components communicate with oneanother and the method of communication is essential for configuring your system.
The following diagram illustrates the LoadRunner Enterprise communication paths in anadvanced deployment:
Note:
l To view other deployment options that can be used for configuring LoadRunnerEnterprise on-premises or on the cloud, see LoadRunner Enterprise Deployments in theLoadRunner Enterprise Help Center.
Installation GuideChapter 1: Before you install
LoadRunner Enterprise (2020) Page 12 of 146

l If the installation cannot use a default port because it is already in use, you can changethe port. For details, see "Unable to install a LoadRunner Enterprise component if thedefault port is in use" on page 138.
l You cannot have a firewall between the LoadRunner Enterprise server, LoadRunnerEnterprise hosts (used as Controllers), and MI Listener.
l Port 8182 from LoadRunner Enterprise host to load generators is relevant whenrunning NV emulation for viewing NV related graphs during online. If the port is closed,graphs are still available in the offline results analysis report.
l Port 54345 in the connection from LoadRunner Enterprise host to Diagnostics shouldbe open from the LoadRunner Enterprise host to the Diagnostics Mediators. In a simpledeployment, Diagnostic Commander and Mediator are the same server.
l Connections from APM tools to the AUT are not displayed in the diagram. Each AUTtool uses its own ports, which can be found in the corresponding product’sdocumentation.
l The external load balancer for LoadRunner Enterprise servers needs to be configuredfor sticky sessions based on the HTTP cookie ASP.Net_SessionId.
The following table displays the connection ports that must be opened for the incoming traffic onthe various LoadRunner Enterprise components:
Component Ports
LoadRunnerEnterpriseServer
HTTP (80, 5876, 5878) * **
Note:
l 5876 should be open for incoming and outgoing traffic on the LoadRunnerEnterprise server. If IIS is configured as a reverse proxy (which isrecommended to hide the backend), then 5876 only needs to be open foroutgoing traffic. For details, see "Configure the LoadRunner Enterprise serverbackend behind IIS reverse proxy" on page 80.
l 5876 and 5878 should be open on the localhost machine of the LoadRunnerEnterprise server. 5876 should also be open to incoming traffic from theLoadRunner Enterprise host (note that Windows Firewall can block internalports).
Installation GuideChapter 1: Before you install
LoadRunner Enterprise (2020) Page 13 of 146

Component Ports
LoadRunnerEnterpriseHost
HTTP (8731, 5876)
TCP (3333, 54245, 54345)
5876 should be open to outbound traffic on the LoadRunner Enterprise host(not required if IIS is configured as a reverse proxy. For details, see "Configurethe LoadRunner Enterprise server backend behind IIS reverse proxy" onpage 80).
8182 for LoadRunner Enterprise hosts used as Load Generators to see onlinegraphs for NV emulation information. If the port is closed, you can still see NVinformation in the offline results.
8731 for LoadRunner Enterprise server to communicate with the Load TestingOperator service that orchestrates the test.
8086 for LoadRunner Enterprise server/host to get online/offline analysis data.The port should be open for outgoing communication from the LoadRunnerEnterprise server, and for incoming communication for the LoadRunnerEnterprise host (for an internal database). For an external database, the portshould be open for both incoming and outgoing communication from theLoadRunner Enterprise server and LoadRunner Enterprise host.
54345 for LoadRunner Agent Service. Enables the Controller to connect to thishost when it acts as a Load Generator.
54245 for LoadRunner Remote Management Agent Service. EnablesLoadRunner Enterprise server to perform lab maintenance operations on thishost.
3333 for LoadRunner Data Collection Agent. Enables LoadRunner Enterprise tocontrol the machine routing table during test execution, based on the definitionsset in Target IPs in the project settings. It also enables getting resourceutilization metrics while a test is running.
Database TCP 1433 (SQL), 1521 (Oracle) **
Repository NetBIOS
DiagnosticsServer
HTTP (2006) *
TCP (54345)
StandaloneLoadGenerator
TCP (54245, 54345)
8182 to see online graphs for NV emulation information. If the port is closed,you can still see NV information in the offline results.
Installation GuideChapter 1: Before you install
LoadRunner Enterprise (2020) Page 14 of 146

Component Ports
Cloud-based LoadGenerator
As defined in the Cloud Network Settings dialog box. For details, see Initial cloudsettings in the LoadRunner Enterprise Help Center.
MI Listener HTTP/TCP for load generator only: 443 **
TCP for LoadRunner Enterprise server and host (used as a Controller) only:50500
Applicationunder test
Any; HTTP (Random)
SiteScope -Topology
HTTP (8080) *
SiteScope -MonitorProfiles
HTTP (8888) *
* HTTPS is also supported on this component.
** Default values that can be changed during configuration
Load considerations
The following table provides some basic installation considerations for each LoadRunnerEnterprise component:
MachineQuantity in thesystem Load Considerations
LoadRunnerEnterpriseServer
At least one.
Also supportsclusterconfiguration.For details, see"Clusteredconfiguration" onpage 17.
Heavy load.
To balance the load, LoadRunner Enterprise has built inload balancing capabilities.
For additional load balancing support, you can installmultiple LoadRunner Enterprise Servers.
For details on load balancing, see Software Self-solveknowledge base article KM1052520.
Installation GuideChapter 1: Before you install
LoadRunner Enterprise (2020) Page 15 of 146

MachineQuantity in thesystem Load Considerations
LoadRunnerEnterpriseHosts:Controller,LoadGenerator, andData Processor
At least one ofeach.
Controller has heavy load.
Load generator has medium load.
Data processor has medium to high load.
It is recommended to designate spare Controllers andload generators for fault-tolerance and high availabilitypurposes.
Note:
l You can configure a host as a Controller + LoadGenerator, but this is not recommended becauserunning Vusers consumes a lot of resources. RunningVusers on the Controller host is only appropriate forperformance tests that have a very small number ofVusers.
l You can configure a host as a Controller + DataProcessor, but this is not recommended because dataprocessing might consume high amounts of CPU andresources.
MI Listener At least one, ifyou aremonitoring over afirewall.
Medium load.
l Standalone installation is required.
l Cannot exist on a machine running IIS.
Monitor OverFirewallmachine
At least one, ifyou aremonitoring over afirewall.
Light load.
Standalone installation is required.
SiteScope(optional)
One Light load.
Tip: You should also consider the communication paths between the various componentswhen installing LoadRunner Enterprise, and their resource demands. This informationhelps you configure your system to evenly distribute the load, and prevent overloadingany particular resource. For details, see "Communication paths" on page 12.
Installation GuideChapter 1: Before you install
LoadRunner Enterprise (2020) Page 16 of 146

Clustered configuration
LoadRunner Enterprise supports clustering. A cluster is a group of application servers that run asif they were a single system. Each application server in a cluster is referred to as a node.
Clusters provide mission-critical services to ensure maximum scalability. The load balancingtechnique within the cluster is used to distribute client requests across multiple applicationservers, making it easy to scale to an infinite number of users.
Take the following into consideration when setting up a clustered environment:
l All nodes must have access to the database server on which you configure the system.
l All nodes must have access to the repository. For example, if the repository is located on thefirst node in the cluster, all other nodes must have access to the first node. If you install therepository on a dedicated machine, each node must have access to that machine.
l The load balancer must be configured with session persistency. Set the persistency to stickysession enabled or destination address affinity, depending on the load balancer.
The following diagram illustrates a clustered LoadRunner Enterprise system configuration:
Tip: It is recommended to configure the system with a reverse proxy. For details, see
Installation GuideChapter 1: Before you install
LoadRunner Enterprise (2020) Page 17 of 146

"Configure the LoadRunner Enterprise server backend behind IIS reverse proxy" onpage 80.
Prerequisites for clustering
You can install LoadRunner Enterprise on a single node or as a cluster. This section describes theprerequisites for installing LoadRunner Enterprise as a cluster on a Windows environment.
l Check with your system administrator whether you are installing LoadRunner Enterprise on asingle node or as a cluster.
l If you are installing LoadRunner Enterprise on cluster nodes, verify which machine to use as thefirst node to start the installation and the number of machines you should use. This dependson the number of users and availability considerations.
For details on installing LoadRunner Enterprise as a cluster, contact Micro Focus support.
System component considerationsThe LoadRunner Enterprise system includes several components. This section provides pre-installation considerations for each of the components.
For system requirement details for each component, see the System Requirements Guide.
Installation GuideChapter 1: Before you install
LoadRunner Enterprise (2020) Page 18 of 146

LoadRunnerEnterpriseServer
General:
l Uninstall any previous installations of the LoadRunner Enterprise Server(formerly Performance Center Server) from your machine. Also make surethat Network Virtualization was uninstalled, or uninstall it manually.
l To install a LoadRunner Enterprise Server, you must have full localadministrative rights on the designated machine.
l For best results, install the LoadRunner Enterprise Server on a clean machinewith a new image.
l The LoadRunner Enterprise Server requires a specific Windows user to bedefined on the machine. When using the default user or a custom local user,the user will be created on the machine and will be added to the Administratorgroup. Ensure that there is no security system in place that will preventcreating the user or that will remove the user from the Administrators group.For details on how to create this user, see "Install and configure LoadRunnerEnterprise servers and hosts" on page 38.
l Microsoft Windows Script Host should be version 5.6 or later. To verify theversion number, navigate to the <Windows installationdirectory>\Windows\system32 directory. Right-click wscript.exe and selectProperties. In the Version tab, verify the file version number.
IIS:
l Before you install the LoadRunner Enterprise Server, you must installMicrosoft Internet Information Services (IIS 8.0/8.5/10).
Note: For better security, we recommend you follow the Microsoft IIS securitybest practices to harden your IIS web server.
l You must allow LoadRunner Enterprise file extensions in IIS. To do so, openIIS Manager. Under the IIS section for the LoadRunner Enterprise Serverapplication, open Request Filtering. Click Edit Feature Settings and clear theAllow unlisted file name extensions option so only file extensions that areexplicitly defined are used. Add the following to the list of allowed fileextensions: .html, .js, .css, .map, .aspx, .ascx, .ash, .woff, .json, .svg, .xml, .png,.jpg, .jpeg, .gif, .axd, .ico, and . (to include paths with no extension).
l During installation, some IIS features are updated on all LoadRunnerEnterprise Servers using IIS.
l The following features are enabled: Active Server Pages, ASP.NET 4.5 (IIS8.0/8.5), ASP.NET 4.6 (IIS 10), Metabase, Static content, IIS 6.0Management Compatibility, and Dynamic Compression.
l The following feature is disabled: URL Authorization
Oracle:
l If LoadRunner Enterprise is working with an Oracle database, ensure that the
Installation GuideChapter 1: Before you install
LoadRunner Enterprise (2020) Page 19 of 146

Oracle client installed on the LoadRunner Enterprise Server machine is at leastthe same version as on the Oracle server, and that connectivity is establishedwith the Oracle Server.
l You must install the 32-bit and 64-bit Oracle client installation.
l If you install the Oracle client after installing the LoadRunner EnterpriseServer, you must restart the machine after installing the Oracle client.
l Oracle Monitoring: When defining Oracle monitors, install the LoadRunnerEnterprise Server in a directory whose path does not include any of thefollowing characters: ( ) : ; * \ / " ~ & ? { } $ % | < > + = ^ [ ]. For example, on a 64-bit machine, do not install the LoadRunner Enterprise Server in the defaultinstallation directory (C:\Program Files (x86)\....), as this path includes illegalcharacters.
LoadRunnerEnterpriseHost
l Uninstall any previous installations of LoadRunner Enterprise hosts (formerlyPerformance Center hosts) from your machine.
l To install a LoadRunner Enterprise Host, you must have full localadministrative rights on the designated machine.
l The LoadRunner Enterprise Host requires a specific Windows user to bedefined on the machine. This user is configured when adding the Host toLoadRunner Enterprise Administration. When using a default user or acustom local user, the user will be created on the machine and added to theAdministrator group. Ensure that there is no security system in place that willprevent creating the user or that will remove the user from the Administratorsgroup. For details on how to create this user, see "Install and configureLoadRunner Enterprise servers and hosts" on page 38.
StandaloneLoadGenerator(Windows)
You cannot install the Standalone Load Generator on the same machine as theLoadRunner Enterprise Server or LoadRunner Enterprise host.
StandaloneLoadGenerator(Linux)
You can install the Standalone Load Generator on Linux to run Vusers. TheLinux Vusers interact with the Controller that is installed on a Windows machine.For details, see "Install Load Generator on Linux" on page 64.
MI Listener l The MI Listener must be installed on a standalone machine.
l The MI Listener cannot be installed on a machine running IIS.
MonitorOverFirewallMachine
The Monitor Over Firewall agent must be installed on a standalone machine.
Installation GuideChapter 1: Before you install
LoadRunner Enterprise (2020) Page 20 of 146

ERP andCRMMediator
l The ERP and CRM Mediator must be installed on a machine that resides in thesame LAN as the monitored ERP/CRM server, preferably on a dedicatedmachine. It is not recommended to install the Mediator on a Siebel or Oracleserver that is involved in the performance test.
Note: When using SAP Diagnostics, ensure that a SAPGUI client isinstalled on the same machine as the ERP/CRM Mediator.
l By default, the ERP/CRM Mediator agent is installed to run as a service. Afterinstalling the agent, verify that it is running as a service and not as a process.If it is running as a process, you must stop the process and run the agent as aservice.
l For information about configuring the ERP/CRM Mediator after installationand using the ERP and CRM Mediator to collect diagnostics data, see theLoadRunner Enterprise User Guide.
SiteScopeServer
l SiteScope is used for monitoring applications.
l Refer to the SiteScope Deployment Guide for minimum requirements.
Windows system locale considerationsThe Windows system locale (Culture and UI Culture) of the user running the LoadRunnerEnterprise environment (IUSR_METRO unless changed) must match the localized version of yourLoadRunner Enterprise software. When working with a non-localized version of LoadRunnerEnterprise, the locale must be set to English (EN-xx). Since the LoadRunner Enterprise user iscreated and configured when the machine is added to the LAB project, the system locale needs tobe verified after completing all of the configuration steps.
For more details on setting the Windows system locale, see Software Self-solve knowledge basearticle KM01215254.
Required servicesBefore you install LoadRunner Enterprise components, check that the services defined in thetable below are running on each component machine and that the startup type for each service isdefined as Automatic.
Note: The default settings for running the services on the operating system may differfrom one version to another. You should go through all of the services on each machine toensure that the required services are running.
Installation GuideChapter 1: Before you install
LoadRunner Enterprise (2020) Page 21 of 146

Machine Services
All LoadRunner Enterpriseservers and hosts
l IPsec Policy Agent (for TCP/IP security)
l Remote Procedure Call (RPC)
l Windows Management Instrumentation (forLoadRunner Enterprise health check)
l Windows Event Log (optional— used for debugging)
l COM+ services (Event System and System application)
l System Event Notification (for COM+)
LoadRunner Enterprise servers l IIS Admin Service (Microsoft Service)
l Workstation
l TCP/IP NetBIOS Helper
l World Wide Web Publishing Service (Microsoft Service)
l Distributed Transaction Coordinator (MSDTC)
LoadRunner Enterprise hosts l Remote Registry Service (requires for host monitor)
LoadRunner Enterprise prerequisite softwareBefore you can install LoadRunner Enterprise, some prerequisite software must be installed onyour machine. During installation, LoadRunner Enterprise checks whether the prerequisitesoftware is installed on your machine. LoadRunner Enterprise enables you to automatically installmissing software from the LoadRunner Enterprise installation package.
The following table provides a list of the prerequisite software and how LoadRunner Enterprisedetects whether the software is installed.
Note:
l If Visual C++ 2017 Redistributable is already installed Visual C++ 2015 Redistributablewill not be installed. Visual C++ 2017 Redistributable should be compatible in mostcases. For more details, see the Microsoft documentation.
l If installation of Visual C++ 2015 Redistributable Update 3 fails, install KB2999226manually.
Installation GuideChapter 1: Before you install
LoadRunner Enterprise (2020) Page 22 of 146

PrerequisiteSoftware Machines Means of detection
.NETFramework 4.8
l All LoadRunnerEnterprise server andhost machines
l Standalone VuGen
l Standalone LoadGenerator
l Standalone Analysis
Searches the registry key for the Release value.Its expected value should be greater than528040:
HKLM\SOFTWARE\Microsoft\NET FrameworkSetup\NDP\v4\Full
Note: .NET Framework 4.8 replaces the .NETFramework 4.6.2 and earlier files. If there are anyapplications that are using the .NET Framework4..6.2 or earlier files and are running during theinstallation of .NET Framework 4.8, you mayneed to restart your machine. If you areprompted to restart the machine, restart it beforecontinuing the installation.
.NET Core 2.2or later
All LoadRunnerEnterprise servermachines
From PowerShell run:
(dir (Get-Command dotnet).Path.Replace('dotnet.exe','shared\Microsoft.NETCore.App')).Name
Microsoft DataAccessComponents(MDAC) 2.8SP1 (or later)
l All LoadRunnerEnterprise server andhost machines
l Standalone VuGen
l Standalone Analysis
l Standalone LoadGenerator
Searches the registry key:
HKLM\Software\Microsoft\Data Access
Microsoft CoreXML Services(MSXML) 6.0
l All LoadRunnerEnterprise server andhost machines
l Standalone VuGen
l Standalone Analysis
l Standalone LoadGenerator
Queries the existence and version of:
%systemroot%\system32\msxml6.dll
Installation GuideChapter 1: Before you install
LoadRunner Enterprise (2020) Page 23 of 146

PrerequisiteSoftware Machines Means of detection
MicrosoftVisual C++Redistributablefor VisualStudio 2015
l All LoadRunnerEnterprise server andhost machines
l Standalone VuGen
l Standalone Analysis
l Standalone LoadGenerator
Queries the MSI manager for the GUID:
{65E5BD06-6392-3027-8C26-853107D3CF1A}
In addition, the following Windows updates needto be manually installed:
l Windows 7 or Windows 2008 R2:
Required Updates:
l SP1
l Update for Universal C Runtime inWindows (Also known as UCRT orKB2999226. Seehttps://support.microsoft.com/en-us/kb/2999226.)
l Windows Server 2012:
Required Updates:
l Update for Universal C Runtime inWindows (Also known as UCRT orKB2999226. Seehttps://support.microsoft.com/en-us/kb/2999226.)
l Windows 8.1 or Windows Server 2012 R2:
Required Updates:
l March 2014 servicing stack update forWindows 8.1 and Windows Server 2012 R2(See: https://support.microsoft.com/en-us/kb/2919442. Includes the KB2919442update.)
l Windows RT 8.1, Windows 8.1, andWindows Server 2012 R2 update: April2014 (Seehttps://support.microsoft.com/en-us/kb/2919355. Includes the followingupdates: KB2932046, KB2937592,KB2938439, KB2934018, KB2959977,KB2919355)
l Update for Universal C Runtime inWindows (Also known as UCRT or
Installation GuideChapter 1: Before you install
LoadRunner Enterprise (2020) Page 24 of 146

PrerequisiteSoftware Machines Means of detection
KB2999226. Seehttps://support.microsoft.com/en-us/kb/2999226.)
l Windows 10: No updates required
MicrosoftVisual C++Redistributablefor VisualStudio 2015x64
l All LoadRunnerEnterprise server andhost machines
l Standalone VuGen
l Standalone Analysis
l Standalone LoadGenerator
Queries the MSI manager for the GUID:
{36F68A90-239C-34DF-B58C-64B30153CE35}
MicrosoftWindowsInstaller 3.1
l All LoadRunnerEnterprise server andhost machines
l Standalone VuGen
l Standalone Analysis
Looks for one of the following:
l Registration of the WindowsInstaller.Installer.com object version 3 or later
l MSI.dll version 3 or later in the %systemroot%
InternetInformationServices (IIS)
LoadRunner Enterpriseserver
HKLM\SOFTWARE\Microsoft\InetStp
Looks for both Major and Minor numbers.
Supports following versions:
l 8.0 (Windows Server 2112)
l 8.5 (Windows Server 2012 R2)
l 10.0 (Windows Server 2016 with DesktopExperience)
StrawberryPearl 5.10.1
l Standalone VuGen Queries the MSI manager for the GUID:
{C977182F-221A-337A-B681-963808E0023A}
WindowsImagingComponent(WIC)
l All LoadRunnerEnterprise server andhost machines
l Standalone VuGen
l Standalone Analysis
l Standalone LoadGenerator
Queries the version of:%systemroot%\system32\WindowsCodecs.dll
Installation GuideChapter 1: Before you install
LoadRunner Enterprise (2020) Page 25 of 146

Pre-installation prerequisites and considerationsThis section includes pre-installation prerequisites and considerations for all LoadRunnerEnterprise components.
Permissionrequirements
To install and configure a LoadRunner Enterprise server or LoadRunnerEnterprise host, you must have full local administrative rights on thedesignated machine.
Planning theenvironment
l Separate machines. The LoadRunner Enterprise server and the LoadRunnerEnterprise host cannot be installed on the same machine.
l LoadRunner installations. You cannot install LoadRunner Enterprisecomponents on machines with existing LoadRunner installations. Beforeinstalling LoadRunner Enterprise, ensure that you have removed all versionsof LoadRunner from the machine.
l Load considerations. Before you begin installing, you should decide whichmachine is to be used for what purpose. Consider the expected load on eachmachine when determining which components to install on which machines.For details, see "Load considerations" on page 15.
l Dedicated host machines. We strongly recommend that you installLoadRunner Enterprise hosts on dedicated machines that do not contain, orprovide access to sensitive information; and that you do a thorough securityreview of the network topology and access levels in your testingenvironment.
Disable UACand DEP
To install LoadRunner Enterprise, you must first disable User Access Control(UAC) and Data Execution Prevention (DEP).
For details on how to disable UAC, see:http://gallery.technet.microsoft.com/Registry-Key-to-Disable-UAC-45d0df25.
For details on how to disable DEP, seehttps://community.softwaregrp.com/t5/LoadRunner-User-Discussions/How-to-TurnOff-Disable-DEP-completely/td-p/618234.
FIPScompliant
LoadRunner Enterprise server and host components are not FIPS complaintand cannot operate on a FIPS enabled Windows machine without additionalconfiguration. For details on how to work with LoadRunner Enterprise on aFIPS enabled Windows machine, see Software Self-solve knowledge basearticle KM01420828.
Installation GuideChapter 1: Before you install
LoadRunner Enterprise (2020) Page 26 of 146

Map networkdrive
If the LoadRunner Enterprise installation directory is located on a networkdrive, it is recommended to map the network drive before you run theinstallation.
Add toTrusted Sites
To enable running the installation from a network location, make sure that thenetwork location path is added to the Trusted Sites of the machine on whichyou are running the installation.
RemoteDesktopconnection
If you are installing a LoadRunner Enterprise server or LoadRunner Enterprisehost using a Remote Desktop connection (RDP), you must connect using theConsole session.
VMWare LoadRunner Enterprise is certified to work with VMWare ESX/ESXi 5.0 andhigher. Due to the rapidly evolving architectures provided by Virtualizationvendors, as long as the third party vendor guarantees full compatibility of thevirtualized environment with the LoadRunner Enterprise approved systemrequirements for physical hardware, then LoadRunner Enterprise will functionas designed.
Standaloneapplications
For installation of standalone applications, you must manually install theprerequisite software. For the list of required prerequisites, see "LoadRunnerEnterprise prerequisite software" on page 22. For details on installing theprerequisites in silent mode, see "Install LoadRunner Enterprise silently" onpage 54.
Languagesettings
Ensure that the operating system and the database are both configured for thesame language. If not, some texts displayed in LoadRunner Enterprise will becorrupted. For example, if you are working with German, ensure that you areworking on a German operating system, and that the database is configuredfor German.
Database prerequisitesThis section provides an overview of the prerequisites for connecting LoadRunner Enterprise toan Oracle or Microsoft SQL database server.
Note: Make sure you create the LoadRunner Enterprise database user before you start theLoadRunner Enterprise installation process.
Installation GuideChapter 1: Before you install
LoadRunner Enterprise (2020) Page 27 of 146

Prerequisites: Oracle Database servers
Oracle Database Admin user requirements:
l To connect LoadRunner Enterprise to an Oracle database server, the installing database usermust have sufficient permissions to perform certain administrative tasks in Oracle. These tasksinclude creating the project user schema and copying data between projects.
l If you are unable to use the Oracle system user due to security reasons, we recommend thatyour database administrator create a LoadRunner Enterprise database administrative user, forexample lre_admin_db, with the specific privileges required to install LoadRunner Enterprise.
Your database administrator can create a LoadRunner Enterprise database administrative userusing a script, see this KB article. This script creates the LoadRunner Enterprise databaseadministrative user with the recommended grants required on the database.
If you are using a container database (CDB), all scripts for creating the LoadRunner Enterprisedatabase user must be run while directly connected to the CDB. Those scripts should be run bya user with SYSDBA system privileges.
Note: When using CDB, the script invokes the "CONTAINER=Current" parameter.
Oracle client requirements:
l The Oracle clients should be installed on the LoadRunner Enterprise server with Administratorinstallation type, and connectivity must be successfully established with the Oracle server.
l The tnsnames.ora file should contain the net service configuration that has the information toaccess the Oracle database server.
l You must install both the 32-bit and 64-bit Oracle client installations, even though you arerunning the LoadRunner Enterprise server on a 64-bit operating system. Both Oracle clientsmust be installed in separate folders under the same root folder, as in the example below (the64-bit version should be installed first).
Installation GuideChapter 1: Before you install
LoadRunner Enterprise (2020) Page 28 of 146

To install the Oracle clients:
a. Create a root folder for the Oracle clients (c:\oracle in the example).
b. Install the Oracle client 64-bit version within a new dedicated folder (client_64 in theexample) under the root folder.
c. Install the Oracle client 32-bit version within a new dedicated folder (client_32 in theexample) under the root folder.
d. Copy the relevant tnsnames.ora and sqlnet.ora files into the Oracle clients root folder.
e. Set the TNS_ADMIN environment variable for the Oracle clients root folder (see theexample above).
f. Restart the machine.
g. Install LoadRunner Enterprise. See "Install and configure LoadRunner Enterprise serversand hosts" on page 38.
Prerequisites: Microsoft - SQL Database servers
To connect LoadRunner Enterprise to a Microsoft SQL database server, the installing databaseuser must have sufficient permissions to perform certain administrative tasks in SQL.
l For SQL Authentication: A user with "dbcreator" permissions (not required if the databases arecreated by the administrator ahead of installation) and a user with "public" permissions.
l For Windows Authentication: A domain user with "dbcreator" permissions. LoadRunnerEnterprise must be configured with this service user.
Installation GuideChapter 1: Before you install
LoadRunner Enterprise (2020) Page 29 of 146

Installation package detailsYou can find information and components for the installation as follows:
System requirements andsupported versions
System Requirements (previously named Product AvailabilityMatrix or PAM)
Supported integrations Integrations Catalog
Standalone installations (forexample, for the loadgenerator)
Found in the installation package's Standalone Applicationsfolder. For details, see "Install standalone components" onpage 61.
Additional components (suchas the Citrix Agent and so on)
Found in the installation package's Additional Componentsfolder. For details, see "Install additional components" onpage 73.
Installation GuideChapter 1: Before you install
LoadRunner Enterprise (2020) Page 30 of 146

LoadRunner Enterprise (2020) Page 31
Part 2: Pre-installation project migrationsteps

Chapter 2: Project migration pre-installationactivitiesIf you are migrating performance tests from Performance Center, this chapter presents migrationconsiderations to be taken into account before installing LoadRunner Enterprise.
This chapter includes:
l "Pre-installation project migration considerations" below
l "Upgrade existing projects to ALM 12.6x" below
l "Back up projects in existing ALM installation" on the next page
l "Overview of migration process" on page 34
Pre-installation project migration considerationsReview and perform the following before migrating existing projects to LoadRunner Enterprise.
l To work with projects from an earlier version of LoadRunner Enterprise, you will first need toupgrade your projects to LoadRunner Enterprise 12.6x (ALM 12.60) before you can migrate toLoadRunner Enterprise. For details, see "Upgrade existing projects to ALM 12.6x" below.
l In addition, review the System Requirements to make sure you meet the requirements in theLoadRunner Enterprise Help Center.
l Before beginning the installation, back up the projects, the database, and the repository. Fordetails, see "Back up projects in existing ALM installation" on the next page.
Note: During the migration process, data is taken from ALM in read-only mode so nochanges should occur on the database level.
l To migrate a copy of the Site Administration database schema, you need the Confidential DataPassphrase that was used in the existing installation, and you must manage changes to theexisting schema (if any).
Upgrade existing projects to ALM 12.6xThe following table describes how to upgrade and migrate projects from previous versions ofPerformance Center to LoadRunner Enterprise 2020. Note that not all projects can be migrateddirectly to LoadRunner Enterprise 2020.
LoadRunner Enterprise (2020) Page 32 of 146

From version: To LoadRunner Enterprise 2020
PerformanceCenter 12.6x
Projects in ALM 12.60 can be migrated directly to LoadRunnerEnterprise 2020. For details, see "Project migration pre-installation activities"on the previous page.
PerformanceCenter 11.52 -12.5x
Projects must first be upgraded to ALM 12.60. For details, see the ALM12.60 Installation and Upgrade Guide.
Note: You must first upgrade LAB_PROJECT, and then any PerformanceCenter template projects, before migrating Performance Center projects.
PerformanceCenter 11.00
Projects must first be upgraded to ALM 11.52, and then to ALM 12.60. Fordetails, see the ALM 11.52 Installation and Upgrade Guide.
Note: You must first upgrade LAB_PROJECT, and then any PerformanceCenter template projects, before upgrading Performance Center projects.
Caution: Before performing any upgrade, the current repository must be moved to thecorrect location for the new version.
Back up projects in existing ALM installationBack up all your projects in the existing ALM installation that you plan to migrate. We stronglyrecommend that you deactivate projects before backing them up.
If you must back up while your project is still active, you must back up the database before the filesystem. We also recommend backing up the file system as soon as possible after backing up thedatabase. To back up and restore data from active projects, see this KB article.
Note:
l Before you run the migration process, perform a full backup of your projects thatincludes the project database schema and the project repository.
l Version Control: Version control enabled projects cannot be backed up while there arechecked out entities. All entities must be checked in to the corresponding version ofQuality Center or ALM. To determine if there are checked out entities, see this KBarticle.
To back up the project database schema on the database server:
l Microsoft SQL database. To back up the project database schema on the database server, seethis KB article.
Installation GuideChapter 2: Project migration pre-installation activities
LoadRunner Enterprise (2020) Page 33 of 146
l Oracle database. To back up the project database schema on the database server, see this KBarticle.
Overview of migration processMigrating projects from Performance Center to LoadRunner Enterprise requires the followingsteps:
1. Upgrading Performance Center projects to ALM 12.60 (pre-installation)
For details on upgrading Performance Center projects to ALM 12.60, see Upgrading Projectsto a New Version in the ALM Help Center.
2. Migrating the Site Admin and LAB schemas from ALM (during installation)
During the installation process, you need to migrate the configuration data that was stored inALM Site Admin and LAB to LoadRunner Enterprise.
For details, see "Install and configure LoadRunner Enterprise servers and hosts" on page 38.
Note: You can also perform this step post-installation from the Configuration wizard,provided you specify a new Site Admin and LAB schema for LoadRunner Enterprise(if you use the existing schemas nothing will happen). For details, see "ConfigureLoadRunner Enterprise" on page 51.
3. Migrating the project data (post-installation)
After installing LoadRunner Enterprise, you need to migrate project data and the filerepository from existing projects to LoadRunner Enterprise using the migration tool inLoadRunner Enterprise Administration.
Project data which includes scripts, attachments, run results, .xml files, and templates ismigrated from ALM Site Admin and LAB to the LoadRunner Enterprise server.
For details, see Migrate projects to LoadRunner Enterprise in the LoadRunner EnterpriseHelp Center.
Installation GuideChapter 2: Project migration pre-installation activities
LoadRunner Enterprise (2020) Page 34 of 146

LoadRunner Enterprise (2020) Page 35
Part 3: Installation and configuration

Chapter 3: Install LoadRunner EnterpriseThis chapter describes how to install LoadRunner Enterprise.
This chapter includes:
• Installation flow 37• Install and configure LoadRunner Enterprise servers and hosts 38• Configure LoadRunner Enterprise 51• Install LoadRunner Enterprise silently 54• Install standalone components (Windows) 60• Install Load Generator on Linux 64• Deploy dockerized load generators on Linux 64• Deploy dockerized load generators or Controllers on Windows 69• Install additional components 73• Deploy LoadRunner Enterprise on the cloud 74• Uninstall LoadRunner Enterprise server and hosts 75• Uninstall Load Generator from Linux 76
LoadRunner Enterprise (2020) Page 36 of 146

Installation flowThis section describes the steps required to install LoadRunner Enterprise.
Before beginning the actual installation procedure,check that you meet the prerequisite criteria forworking with LoadRunner Enterprise. For details,see "Before you install" on page 8.
If you plan to work with projects from an earlierversion of LoadRunner Enterprise (formerlyPerformance Center), follow the "Project migrationpre-installation activities" on page 32.
Uninstall any previous installations of LoadRunnerEnterprise (Performance Center) server and hostsfrom the machine. For details, see "UninstallLoadRunner Enterprise server and hosts" onpage 75.
Install the Database server. For details, see"Database prerequisites" on page 27 and"LoadRunner Enterprise configuration options" onpage 79.
1. Install and configure LoadRunner Enterpriseservers and hosts. For details, see "Install andconfigure LoadRunner Enterprise servers andhosts" on the next page.
2. Configure LoadRunner Enterprise inLoadRunner Enterprise Administration. Fordetails, see "Configure LoadRunner Enterprise"on page 51.
Installation GuideChapter 3: Install LoadRunner Enterprise
LoadRunner Enterprise (2020) Page 37 of 146

l Install standalone applications that provideadvanced features for working with LoadRunnerEnterprise. For details, see "Install standalonecomponents (Windows)" on page 60.
l To install a load generator on Linux, see "InstallLoad Generator on Linux" on page 64.
l To install the load generator through a Dockercontainer, see "Deploy dockerized loadgenerators on Linux " on page 64 / Windows.
l Perform additional tuning and configurationsettings to get the most out of LoadRunnerEnterprise. For details, see "LoadRunnerEnterprise configuration options" on page 79.
l You can set LoadRunner Enterprise to runVusers and monitor servers over a firewall. Fordetails, see "Working with firewalls" on page 99.
l Perform a post-installation verification. Fordetails, see "Post installation verification" onpage 77.
l For installation troubleshooting details, see"Troubleshooting" on page 131.
After the installation is successful, you can migrateexisting projects from LoadRunner Enterprise12.6x (ALM 12.60) to LoadRunner Enterprise. Youmigrate projects from LoadRunner EnterpriseAdministration. For details, see Migrate projects toLoadRunner Enterprise in the LoadRunnerEnterprise Help Center.
Install and configure LoadRunner Enterprise serversand hostsThis section describes how to install and configure LoadRunner Enterprise servers and hosts.
Note:
l Before beginning the actual installation procedure, review the LoadRunner Enterpriseinstallation flow. For details, see "Installation flow" on the previous page.
Installation GuideChapter 3: Install LoadRunner Enterprise
LoadRunner Enterprise (2020) Page 38 of 146
l If you are migrating from an earlier version of LoadRunner Enterprise, follow theinstructions in "Project migration pre-installation activities" on page 32.
l The default installation folder is now under Micro Focus\LoadRunner Enterprise in theProgram Files folder.
To install a LoadRunner Enterprise server or host:
1. Launch the LoadRunner Enterprise installer.
Download the installer package, and run setup.exe.
2. Select an installation option.
The setup program starts and displays the installation menu page.
Select LoadRunner Enterprise or LoadRunner Enterprise Host.
Note: If a particular host machine is to be used as a load generator only, werecommend that you install the Standalone Load Generator because the installationrequires less disk space, and it is less time-consuming to move the load generator'ssetup files (compared to the LoadRunner Enterprise Host). For details on installingthe Standalone Load Generator, see "Install standalone components (Windows)" onpage 60. To install a load generator on Linux, see "Install Load Generator on Linux"on page 64.
3. If necessary, install prerequisite software.
Some prerequisite software must be installed on the machine before installing theLoadRunner Enterprise component. If any of the prerequisite software is not alreadyinstalled on the machine, the prerequisite software dialog box opens.
Click OK and follow the on-screen instructions to install the prerequisite software beforecontinuing with the LoadRunner Enterprise component installation. You cannot continuewith the LoadRunner Enterprise component installation unless all the prerequisite software isinstalled.
For a full list of prerequisite software, see "LoadRunner Enterprise prerequisite software" onpage 22.
Note:
l If you are prompted to restart the machine after installing the prerequisitesoftware, you must do so before continuing with the installation. After rebootingthe machine, run setup.exe again to continue with the installation. If theinstallation continues from where it left off before rebooting, we recommendstarting the setup again—the installer will detect the installed prerequisites and
Installation GuideChapter 3: Install LoadRunner Enterprise
LoadRunner Enterprise (2020) Page 39 of 146

continue with the installation.
l When installing a LoadRunner Enterprise server, if Microsoft Internet InformationServices (IIS) 8.0/8.5/10 is listed on this page, it is required that you close theinstallation, install IIS, and restart the installation.
4. If an earlier version of LoadRunner Enterprise is installed on your machine.
A dialog box opens indicating that you must first manually uninstall the previous versionbefore installing this version. For more details on how to uninstall LoadRunner Enterprise,see "Uninstall LoadRunner Enterprise server and hosts" on page 75.
Note: Make sure that Network Virtualization was also uninstalled; if necessary,uninstall it manually.
5. Start the installation.
For LoadRunner Enterprise Server:
The LoadRunner Enterprise Setup Wizard opens, displaying the Welcome page. Click Next.
For LoadRunner Enterprise Host:
The LoadRunner Setup Wizard opens, displaying the Welcome page. Select LoadRunnerEnterprise Host, and click Next.
6. Review the License agreement.
To accept the terms of the license agreement, select I accept the terms in the LicenseAgreement.
Note: (LoadRunner Enterprise Host only). While you can participate in the VuGenimprovement program by selecting Participate in VuGen improvement program, wedo not recommend it because it creates unnecessary overhead on the host machine.
The program helps us improve the quality, reliability, and performance ofLoadRunner Enterprise by enabling it to collect anonymous information about yoursoftware and hardware configuration, and about how you use LoadRunnerEnterprise. For details, click More Details in the user interface.
Click Next.
7. Select a destination folder.
Specify the location in which to install the LoadRunner Enterprise component. To browsepossible locations, click the Browse button, select a location, and click OK.
To choose a different location, enter the location or click the Change button, select a location,and click OK.
Installation GuideChapter 3: Install LoadRunner Enterprise
LoadRunner Enterprise (2020) Page 40 of 146

Note: (LoadRunner Enterprise Host only). To reduce problems due to the MicrosoftWindows API path limitation, choose a short name for your installation directory path.
For example: “C:\PCHost”.
Click Next.
8. Start the installation process.
The wizard prompts you to confirm the details and start the installation. To review or changeany settings, click Back.
Click Install to start the installation. The wizard displays the installation progress.
9. Upon completion of the installation, determine whether to install NetworkVirtualization (NV).
Upon completion of the installation, the Finish page opens.
To view the installation log files, click the Open Installation Log link. The files are alsoavailable on the LoadRunner Enterprise server or host from <installationfolder>\orchidtmp\Configuration\configurationWizardLog_pcs.txt.
To install NV, choose one of the below options, or click Do not install to skip NV installation(you can install NV manually at a later time).
l Typical. Automatically launches a non-interactive NV installation, using the default NVsettings.
l Custom. Automatically launches an interactive NV installation, enabling you to set theinstallation folder, data folder, and port to be used, and select which NV components toinstall.
Note:
l The LoadRunner Enterprise installation is complete, regardless of the selected NVinstallation option.
l If you are installing NV on a LoadRunner Enterprise server, the NV forLoadRunner Enterprise installation will be launched.
l If you are installing NV on a LoadRunner Enterprise host, both the NV forController and the NV for Load Generator installations will be launched (one afterthe other).
l If you choose to install NV automatically, you must disable Windows SmartScreenbefore proceeding with the NV installation. To do so, open HKEY_LOCAL_MACHINE\SOFTWARE\Microsoft\Windows\CurrentVersion\Explorer in theRegistry Editor, and change the Value data for "SmartScreenEnabled" to "Off". Youdo not need to disable SmartScreen when installing NV manually.
Installation GuideChapter 3: Install LoadRunner Enterprise
LoadRunner Enterprise (2020) Page 41 of 146

l Upgrading from Performance Center 12.6x to LoadRunner Enterprise 2020 (forLoadRunner Enterprise host only): If NV for Controller and NV for Load Generatorco-exist on the machine, and you select Custom mode installation, then you areunable to modify Setup configuration settings.Resolution: Exit the wizard and uninstall the NV components. Then reinstall themby manually running the NV installation. See the installation section in the NetworkVirtualization for LoadRunner Help.
l The NV installation log files are available from C:\Temp\NV_Logs.
10. Start the LoadRunner Enterprise Server configuration.
Upon completion of the LoadRunner Enterprise installation (and NV installation if selected),click Next. The Welcome page of the Configuration wizard opens.
11. Create the LoadRunner Enterprise service user (LoadRunner Enterprise server only).
LoadRunner Enterprise requires that a system user is created for use by the LoadRunnerEnterprise server, hosts and the Load Generator standalone machines.
a. In the LRE Service User page, specify a user to run the service.o If you select Use Default Credentials, LoadRunner Enterprise is configured with the
LoadRunner Enterprise system user, IUSR_METRO, and adds it to the machine'sAdministrators group.
o To define your own system user for the LoadRunner Enterprise environment, clearthe Use Default Credentials check box, and enter the domain, user, and password.Enter credentials using one of the following formats: domain\username orusername@domain.
Note:
o You can use a local or a domain user. When using a local user, if the user doesnot exist on the LoadRunner Enterprise server machine, the installer will createit.
o When using a local user, if the user name does not exist or is not in theAdministrators group, it will be added to the Administrators group.
o When using a domain user, make sure that the domain user is a member of theAdministrators group.
o The LRE Service user you set here must have permissions for the filerepository (see Configure the repository).
o After adding the LoadRunner Enterprise server to the project, theLoadRunner Enterprise user will be saved to that database. Each subsequentLoadRunner Enterprise server or host added, will be configured with that user.
Installation GuideChapter 3: Install LoadRunner Enterprise
LoadRunner Enterprise (2020) Page 42 of 146
o After a LoadRunner Enterprise server is added, you can use the SystemIdentity utility (<LoadRunner Enterprise server installationdirectory>/bin/IdentityChangerUtil.exe) to change the user. For details, seethe System Identity Utility Window in the LoadRunner Enterprise Help Center.
o Once you succeed in creating the user and configuring the server, the nexttime you launch the configuration wizard, this page will not be displayed.
b. Click Next.
12. Configure the database connection.
a. In the DB Connection page, select the database type to be used in your LoadRunnerEnterprise system (Oracle or Microsoft SQL).
If you select a Microsoft SQL Server (MS-SQL), choose the authentication type:
MS-SQL (SQLAuth)
Authenticates the user to the database using a database username and password.
MS-SQL(Windows Auth)
Windows authentication relies on the user being authenticated bythe operating system.
b. Enter a name for the database server.
c. Configure the database credentials:
DatabaseAdministratorCredentials
For MS-SQL:o SQL Authentication: Enter the name and password of the user
with the "dbcreator" level permissions required to installLoadRunner Enterprise on the database server.
Note: "dbcreator" level permissions are not required if thedatabases are created ahead of time by the user.
o Windows Authentication: Read-only field which displays the nameand password of the domain user used for LoadRunner Enterpriseinstallation.
Note: This authentication mode is only supported if LoadRunnerEnterprise is configured with a domain user. If it is configured witha local user, such as IUSR_METRO, only SQL Authentication will beavailable.
For Oracle:o Enter the name and password of the user with the administrative
permissions required to install LoadRunner Enterprise on thedatabase server.
Installation GuideChapter 3: Install LoadRunner Enterprise
LoadRunner Enterprise (2020) Page 43 of 146

DatabaseUserCredentials
For SQL Authentication:o Enter the name and password of a user with "public" level
privileges to be used by LoadRunner Enterprise to connect to thedatabase after the installation is complete.
For Oracle:o Set the default password for the new database users.
d. In the Connection Details section, select one of the following options:o Connection string parameters. Select this option to enter database server information
using the following fields:
Server Host (MS-SQL only) Enter the database server name. For example,dbsrv01.
(Oracle) This field is read-only.
Port (MS-SQL only) Enter the database server port number, or acceptthe default port number.
(Oracle only) This field is read-only.
Net ServiceName
(Oracle only) Enter the net service name found in the localtnsnames.ora file.
o Connection string. Select this option to manually edit the database server connectionstring, and provide the net service name from the local tnsnames.ora file.
e. Click Test Connection to check whether you can connect to the database server using theuser credentials you provided.
f. Click Next.
13. Configure the database schema.
a. In the DB Schema Configuration page, enter schema names for the Site Admin databaseand LAB database.
b. If you are creating a Microsoft SQL project, proceed to the next step. For an Oracleproject, enter the following:
Tablespace Select or type the path to a storage location that has sufficientspace to store the new project.
You should not use UNDO as the storage location.
TemporaryTablespace
Select or type the path to a temporary storage location that hassufficient space to store the new project.
c. Click Next.
14. Configure security settings.
Installation GuideChapter 3: Install LoadRunner Enterprise
LoadRunner Enterprise (2020) Page 44 of 146

a. Confidential data encryption
In the Security Settings page, enter a confidential data passphrase that LoadRunnerEnterprise uses to encrypt the information. Passwords for accessing external systems(databases and LDAP) are stored by LoadRunner Enterprise after encryption. Thepassphrase is case-sensitive, and must contain at least 12 alphanumeric characters only.
Make a note of the passphrase for future support calls. You need the passphrase if youchoose to redeploy LoadRunner Enterprise and choose to upgrade a copy of the existingSite Admin database schema. The passphrase is also required for the next LoadRunnerEnterprise installation.
Note:
o If you are migrating project data from Performance Center (ALM), werecommend that you use the same passphrase that was used in ALM if youwant the ALM user’s passwords to remain valid in LoadRunner Enterprise.
o If you are planning to migrate LoadRunner Enterprise enabled projects ontothe server on which you are performing the installation, you must use thesame Confidential Data Passphrase that was defined on the server on whichthe projects were created.
o If you are installing LoadRunner Enterprise on a cluster, you must use thesame passphrase for all nodes.
o After completing the server configuration wizard, you cannot change theconfidential data encryption passphrase.
o Make sure there are no empty spaces before or after the passphrase.
b. Communication security
Enter a secure communication passphrase that LoadRunner Enterprise uses to encryptthe SSO token. Communication between LoadRunner Enterprise and other Micro Focusapplications is enabled after authentication by a Single Sign-On (SSO) token.
The passphrase must contain at least 12 alphanumeric characters only.
c. Click Next.
15. Define the site administrator.
You use the site administrator name and password that you define here to log in toLoadRunner Enterprise for the first time. After installation, you can change the siteadministrator or add other site administrators.
a. In the User Configuration page, enter a site administrator user name and password, andretype the password to confirm.
Note:
Installation GuideChapter 3: Install LoadRunner Enterprise
LoadRunner Enterprise (2020) Page 45 of 146

o The user name cannot include the following characters: \ / : * ? " < > |
o The password cannot be longer than 20 characters.
o It is important that you remember the site administrator user name andpassword so you can log in to LoadRunner Enterprise.
b. Select a secret question for resetting the password and enter an answer.
c. Click Next.
16. Configure the repository.
a. In the Repository page, click the Browse button to navigate to, or enter the path of therepository root folder.
Note:
o Make sure you select a path where you have full read and write permissions.
o The user account that was set in the LRE Service User page must havepermissions for the file repository (see Create the LRE Service User).
o To work with cluster nodes, make sure that all nodes have access to the filerepository path and that the path is UNC. All nodes in the cluster must havethe same string for the repository path.
o The length of the file repository path cannot exceed 200 characters.
o The file repository path cannot reside on the root folder.
o Due to a Windows limitation, the file repository path cannot be on a mappeddrive.
b. Click Check Connection to check whether you can connect to the repository using theuser credentials you provided.
c. Click Next.
17. Configure the mail server.
A mail server enables LoadRunner Enterprise users to send emails to other users in a project.
a. In the Mail Server Configuration page, select Configure Mail Server if you plan to use amail server. Otherwise, click Next and proceed to the next step.
Installation GuideChapter 3: Install LoadRunner Enterprise
LoadRunner Enterprise (2020) Page 46 of 146

b. Select which server to use and complete the SMTP account settings:
UI Element Description
Address The user's email address.
Outgoing mailserver (SMTP)
The SMTP server available on your local area network.
Port The port number used by the outgoing mail server. By default,port 25.
Use the followingtype of encryptedconnection
Choose whether to make your connection more secure. Thefollowing options are available: SSL and Start TLS.
Note: SSL/TLS is currently not supported.
Outgoing server(SMTP) requiresauthentication
If your SMTP server requires authentication, select this optionto provide credentials for authentication. Enter the user nameand password.
Send test mailverification
Opens the Test Mail dialog box. Type an email address andclick Send. A message box confirms whether the mail was sentsuccessfully.
c. Click Next.
18. Configure Site Admin and LAB schema migration.
To work with projects from a previous version of LoadRunner Enterprise (in which theprojects were stored in ALM), you need to migrate data from the Site Admin andLAB schemas to LoadRunner Enterprise.
a. In the Migration Configuration page, select Migrate Site Admin and LAB data andconfiguration to perform the migration during the installation process.
Otherwise, click Next and proceed to the next step.
Note:
o This option is disabled if the Site Admin or LAB schemas already exist inLoadRunner Enterprise.
o You can also migrate Site Admin and LAB configuration data post-installationfrom the Configuration wizard, provided you specify a new Site Admin andLAB schema for LoadRunner Enterprise (if you use the existing schemasnothing will happen).
b. In the Import Configuration (Step) section, enter the names of the source Site Admin and
Installation GuideChapter 3: Install LoadRunner Enterprise
LoadRunner Enterprise (2020) Page 47 of 146

LAB database schemas.
c. Select the database type: MS-SQL (SQL Authentication), MS-SQL (WindowsAuthentication), or Oracle.
d. Configure the database schema credentials:
DatabaseSchemaCredentials
For MS-SQL:o SQL Authentication: Enter the name and password of the user with
rights on the database server; it does not need to be "dbcreator" levelpermissions or administrator rights. The user also needs permissionsfor the database.
o Windows Authentication: Read-only field which displays the nameand password of the user domain user used for LoadRunnerEnterprise installation (read only).
For Oracle:o Enter the password of the user with the administrative permissions
required to install LoadRunner Enterprise on the database server(this must be the same for both databases, since the user is itself thedatabase).
Note: For the database migration, if the ALM Site Admin and LAB databases werecreated using SQL Authentication, you should also use SQL Authentication inLoadRunner Enterprise; if ALM used Windows Authentication then you shoulduse Windows Authentication for migration.
e. In the Connection Details section, select one of the following options:o Connection String Parameters. Select this option to enter database server information
using the following fields:
Server Host (MS-SQL only) Type the database server name. For example,dbsrv01.
Port (MS-SQL only) Type the database server port number, or acceptthe default port number.
Net ServiceName
(Oracle only) Enter the net service name found in the localtnsnames.ora file.
o Connection string. Select this option to manually edit the database server connectionstring, and provide the net service name from the local tnsnames.ora file.
f. Click Test Connection to check whether you can connect to the database server using theuser credentials you provided.
g. Click Next.
Installation GuideChapter 3: Install LoadRunner Enterprise
LoadRunner Enterprise (2020) Page 48 of 146

19. Check the configuration summary.
The Configuration Summary page opens, and displays the configuration settings youselected. Review and confirm the details.
To change any settings, click Edit in the relevant section to open the corresponding page inthe wizard, and make the necessary changes.
Click Start Configuration to start the configuration.
20. The background configuration starts.
The Configuration Process page opens, and displays the progress bar as it performs theconfigurations on the relevant component.
The wizard performs the following configurations on the relevant component:
ConfigurationLoadRunner EnterpriseServer
LoadRunner EnterpriseHost
Copies and updates configuration files. Yes Yes
Creates the LoadRunner Enterprise system
user
For information about changing the system
user, see Change the LoadRunner Enterprise
system user system user in the LoadRunner
Enterprise Help Center.
Yes No (The user is created
when adding a host to
LoadRunner Enterprise
Administration)
Configures DCOM objects. No (the DCOM objects are
configured when adding a
server to LoadRunner
Enterprise Administration)
No (the DCOM objects are
configured when adding a
host to LoadRunner
Enterprise Administration)
Installs LoadRunner Enterprise services:
l LoadRunner Data Collection Agent
l LoadRunner Remote Management Agent
Service
l LoadRunner Backend Service
Note: For details on how to reconfigure the
port used by the LoadRunner Data Collection
Agent service, see Software Self-solve
knowledge base article KM01526547.
Yes Yes (except for
LoadRunner Backend
Service)
Installation GuideChapter 3: Install LoadRunner Enterprise
LoadRunner Enterprise (2020) Page 49 of 146

ConfigurationLoadRunner EnterpriseServer
LoadRunner EnterpriseHost
Installs LoadRunner Enterprise services:
l LoadRunner Agent Service
l LoadRunner Data Service
l LoadRunner Load Testing Service
l LoadRunner Analytics Service
Note: If you stop the LoadRunner
Analytics Service, the test will still run but
there will be no online or offline results
available. You can still collate and analyze
results.
-- Yes
Configures IIS:
l Creates virtual directories and application
pools.
l Configures IIS application pools to work as
32-bit application pools.
l Sets the .NET version for the application
pools to .NET 4 (v4.0.30319).
l Sets Integrated mode for the application
pools.
l Sets read and write permissions for the
Modules feature.
l Updates Mime type list.
l Updates IIS Feature Delegation.
IIS 8.0/8.5/10:
l Add rules: IIS-ASP, IIS-ASPNET, IIS-
ASPNET45,
IIS-ManagementConsole, IIS-Metabase,
IIS-IIS6ManagementCompatibility, IIS-
StaticConten,
IIS-HttpCompressionDynamic.
l Disables rules: IIS-URLAuthorization
Yes --
21. Database schema creation.
After the configuration process is completed successfully, the DB Schema Creation pageopens, and displays the progress of the database schema creation.
22. Complete the configuration.
Installation GuideChapter 3: Install LoadRunner Enterprise
LoadRunner Enterprise (2020) Page 50 of 146

Upon completion of schema creation, the Finish page opens.
To view the configuration log files click the Open Configuration Log link. The files are alsoavailable on the LoadRunner Enterprise server or host from <installationfolder>\orchidtmp\Configuration\configurationWizardLog_pcs.txt.
Click Finish to exit the Configuration wizard.
23. Perform additional required LoadRunner Enterprise configuration steps.
For details, see "Configure LoadRunner Enterprise" below.
Configure LoadRunner EnterpriseAfter running the LoadRunner Enterprise Server installation and the LoadRunner EnterpriseServer Configuration wizard, you must perform additional configuration steps in LoadRunnerEnterprise Administration before you can use the product.
This section includes:
l "Configure LoadRunner Enterprise using the Configuration Wizard" below
l "Log on to LoadRunner Enterprise Administration" on the next page
l "Perform site and lab administration tasks" on the next page
Configure LoadRunner Enterprise using the Configuration Wizard
Note: You can skip these steps if you configured LoadRunner Enterprise servers and hostsduring the installation process.
While you configure LoadRunner Enterprise servers and hosts during the installation process, youcan also configure them separately from the installation using the Configuration Wizard from theStart menu. To do so, you must run the wizard as an administrator.
1. Prerequisites
Install LoadRunner Enterprise. For details, see "Install and configure LoadRunner Enterpriseservers and hosts" on page 38.
2. Launch the Server Configuration Wizard or Host Configuration Wizard from the Start menuusing the Run as administrator option.
Alternatively, choose Start > All Programs > Micro Focus > LoadRunner EnterpriseServer/Host > Tools, right-click Server/Host Configuration Wizard, and select Run asadministrator.
For details, see step 9 in "Install and configure LoadRunner Enterprise servers and hosts" onpage 38.
Installation GuideChapter 3: Install LoadRunner Enterprise
LoadRunner Enterprise (2020) Page 51 of 146

Log on to LoadRunner Enterprise Administration
LoadRunner Enterprise administration tasks are performed in LoadRunner EnterpriseAdministration.
To log in to LoadRunner Enterprise Administration:
1. Open your Web browser (Chrome, Internet Explorer, Firefox or Safari are supported) andtype the LoadRunner Enterprise Administration URL in the following format:
http://<LoadRunner_Enterprise_Server_name>/admin
The LoadRunner Enterprise Administration Login window opens.
2. In the User Name box, type your user name. Only a Site or Tenant Admin user can log on toLoadRunner Enterprise Administration. For details, see About administrator users in theLoadRunner Enterprise Help Center.
Note: The first time you log in to LoadRunner Enterprise Administration, you mustuse the site administrator name that you specified during the installation ofLoadRunner Enterprise (see page 45). After you log in to LoadRunner EnterpriseAdministration, you can define additional site administrators. For details, see Define aLoadRunner Enterprise site administrator in the LoadRunner Enterprise Help Center.
3. In the Password box, type the site administrator password.
4. Select the language for displaying the LoadRunner Enterprise user interface.
The multilingual user interface, or MLU, provides support for multiple languages on a singleinstance of LoadRunner Enterprise without having to install language packs. Supportedlanguages are English, French, German, Japanese, Russian, Simplified Chinese, and Korean.
5. Click the Login button. LoadRunner Enterprise Administration opens.
Perform site and lab administration tasks
After installing LoadRunner Enterprise servers and hosts, you perform the site and labadministration tasks from LoadRunner Enterprise Administration.
1. Log on to LoadRunner Enterprise Administration
For details, see "Log on to LoadRunner Enterprise Administration" above.
2. Perform site configuration tasks
Configure the authentication method which allows users to log in to LoadRunner Enterprise,and define the project file repository.
For details, see Select authentication type and Manage the project repository in theLoadRunner Enterprise Help Center.
3. Create and maintain projects
Installation GuideChapter 3: Install LoadRunner Enterprise
LoadRunner Enterprise (2020) Page 52 of 146

You can create and maintain projects, and define the limits and other settings for the projectfrom Management > Projects.
For details, see Manage projects in the LoadRunner Enterprise Help Center.
4. Create and manage users and user roles
You can create users and control access to a project by defining the users who can log in tothe project, and by specifying the types of tasks (roles) each user may perform fromManagement > Users.
For details, see Manage users in a project and Assign roles and permissions in theLoadRunner Enterprise Help Center.
5. Add or reconfigure LoadRunner Enterprise hosts
To work with LoadRunner Enterprise hosts, you must first add them to LoadRunnerEnterprise Administration. To add a host, you must define the host's location in LoadRunnerEnterprise Administration. If the host is a load generator over a firewall, you must define theMI Listener through which the load generator will communicate with the LoadRunnerEnterprise server.
For details, see Add a host in the LoadRunner Enterprise Help Center.
Note: When adding the hosts, the system configures the LoadRunner Enterprise useron that machine.
Reconfiguring hosts after upgrading an existing LAB project
If you upgrade an existing LAB Project (after uninstalling the previous version ofLoadRunner Enterprise, and installing LoadRunner Enterprise 2020 on the hosts),LoadRunner Enterprise hosts are displayed in the Unavailable state, and you need toperform the following:
a. In LoadRunner Enterprise Administration, select Management > Hosts.
b. Select the hosts you want to reconfigure in the Hosts grid, and click Reconfigure Host.
6. Run a system health check
After adding a LoadRunner Enterprise server to the system, and adding or reconfiguringLoadRunner Enterprise hosts, you should perform a system health check to make sure allcomponents are running as expected.
For details, see Perform a system health check in the LoadRunner Enterprise Help Center.
7. Set the license keys
To run tests from LoadRunner Enterprise, you must install the appropriate LoadRunnerEnterprise server and host licenses.
For details, see Manage licenses in the LoadRunner Enterprise Help Center.
Installation GuideChapter 3: Install LoadRunner Enterprise
LoadRunner Enterprise (2020) Page 53 of 146

Install LoadRunner Enterprise silentlyA silent installation is an installation that is performed automatically, without the need for userinteraction. This section describes how to perform a silent installation of LoadRunner Enterprisecomponents.
Before you perform the installation, review the pre-installation information, including the systemrequirements, described in "Before you install" on page 8.
This section includes:
l "Prerequisite software for silent installation" below
l "Customize silent installation" on the next page
l "Silently install LoadRunner Enterprise server and hosts" on page 57
Prerequisite software for silent installation
Install the prerequisite software silently by running the relevant commands as follows:
PrerequisiteSoftware Command
.NET Framework4.8
<Installation_Disk_Root_Directory>\Setup\Common\dotnet48\ndp48-x86-x64-allos-enu.exe /LCID /q /norestart /c:"install /q"
Notes:
l .NET Framework 4.8 replaces the .NET Framework 4.6.2 and earlier files.If there are any applications that are using the .NET Framework 4.6.2 orearlier files and are running during the installation of .NET Framework4.8, you may need to restart your machine. If you are prompted to restartthe machine, restart it before continuing the installation. For details, seehttp://msdn.microsoft.com/en-us/library/hh527997%28v=vs.110%29.aspx.
MicrosoftVisual C++Redistributablefor VisualStudio 2015
<Installation_Disk_Root_Directory>\Setup\Common\vc2015_redist_x86\vc_redist.x86.exe /quiet /norestart
Installation GuideChapter 3: Install LoadRunner Enterprise
LoadRunner Enterprise (2020) Page 54 of 146

PrerequisiteSoftware Command
MicrosoftVisual C++Redistributablefor VisualStudio 2015(x64)
<Installation_Disk_Root_Directory>\Setup\Common\vc2015_redist_x64\vc_redist.x64.exe /quiet /norestart
WindowsImagingComponent(WIC)
<Installation_Disk_Root_Directory>\Setup\Common\dotnet40\wic_x64_enu.exe /q /norestart
Microsoft DataAccessComponents(MDAC) 2.8 SP1(or later)
<Installation_Disk_Root_Directory>\Setup\<environment>\prerequisites\mdac28\mdac28.exe/q:A /C:"setup /QNT"
Microsoft CoreXML Services(MSXML) 6.0
For x64: msiexec /log c:\msxml.log /quiet /I <Installation_Disk_Root_Directory>\Common\msxml6\msxml6_x64.msi
For ia64: msiexec /log c:\msxml.log /quiet /I <Installation_Disk_Root_Directory>\Common\msxml6\msxml6_ia64.msi
MicrosoftWindowsInstaller 3.1
<Installation_Disk_Root_Directory>\Setup\Common\msi31\WindowsInstaller-KB893803-v2-x86.exe /q /norestart
InternetInformationServices (IIS)
See the Microsoft documentation for the PowerShell command required foryour IIS version.
Note: LoadRunner Enterprise Server only.
Customize silent installation
This section describes how to customize the file used for silent configuration of the LoadRunnerEnterprise. The UserInput.xml file—installed with LoadRunner Enterprise—contains parametersfor the LoadRunner Enterprise server and LoadRunner Enterprise host configurations.
You can customize the parameters in the UserInput.xml file. You then instruct the Installer to usethe customized file for the silent configuration input.
To configure the properties in the UserInput.xml file:
Installation GuideChapter 3: Install LoadRunner Enterprise
LoadRunner Enterprise (2020) Page 55 of 146

1. Copy the UserInput.xml file from the LoadRunner Enterprise installation directory(...\Setup\Install\[Host][Server]\) to another location.
2. Open the copy of the file and enter a user-defined value for the following property:
Property Description
LW_CRYPTO_INIT_STRING
This passphrase must be identical to the passphrase defined duringthe installation.
3. For LoadRunner Enterprise Server only:
Property Description
IIS_WEB_SITE_NAME
Choose the IIS web site that will be used to host the LoadRunnerEnterprise server services.
Note:
l The web site must exists prior to running the configuration.
l The value is optional. If no web site is specified and there is morethan one defined on your machine, the configuration will use thefirst one (the one with the smallest ID value).
SystemUserName Choose the name of the user that will be configured as theLoadRunner Enterprise Windows system user.
Note: You can use a local or a domain user:
l If you are using a local user, the user will be added to theAdministrator group.
l If you are using a domain user, the value for this property should bein the form of <domain\user>. Make sure the machine and the userare part of the same domain and that the user exists on themachine.
l If you do not provide a user name, the system will use the defaultuser name ('IUSR_METRO').
l A user name cannot include the following characters [ ] : | < + > = ; ,? * @
l If the supplied user's details are invalid (for example, the user namecontains invalid characters, or the domain user does not exist), thesystem will use the default user name ('IUSR_METRO') instead.
For details on defining a user, see "Install and configure LoadRunnerEnterprise servers and hosts" on page 38.
Installation GuideChapter 3: Install LoadRunner Enterprise
LoadRunner Enterprise (2020) Page 56 of 146

Property Description
SystemUserPwd Choose the password for the LoadRunner Enterprise Windows systemuser.
Note:
l If the installer uses the default user (for example, when the valuefor property 'SystemUserName' is empty), the password propertywill be ignored and the installer will use the default password(‘P3rfoRm@1nceCen1er’).
l A password cannot include the following characters < > | & " ^ orspace.
l A password cannot be empty. If this field is left empty, the systemwill use the default password (‘P3rfoRm@1nceCen1er’).
l If using an existing user for the ‘SystemUserName’ property, thepassword must match the password used by the existing user.
4. For LoadRunner Enterprise Host only:
Property Description
LRASPCHOST=1 Add this property to install LoadRunner as a LoadRunnerEnterprise Host.
IMPROVEMENTPROGRAM=0 The option to participate in the VuGen improvementprogram is enabled by default. Add this property if youwant to disable it. For details, see VuGen improvementprogram.
5. Save the UserInput.xml file.
6. Specify the location of the saved file when running the silent installation command.
Silently install LoadRunner Enterprise server and hosts
This section describes how to run the silent installation of the LoadRunner Enterprise server andLoadRunner Enterprise hosts on a Windows platform.
The silent installation is followed by the silent configuration which calls the UserInput.xml file forconfiguration parameters. You can customize the parameters in this file for the LoadRunnerEnterprise server configuration. For details, see "Customize silent installation" on page 55.
You can perform a silent installation of LoadRunner Enterprise using one of the options below.
Note: If you are installing Network Virtualization (NV), you must disable WindowsSmartScreen before proceeding with the silent installation. To do so, open HKEY_LOCAL_
Installation GuideChapter 3: Install LoadRunner Enterprise
LoadRunner Enterprise (2020) Page 57 of 146

MACHINE\SOFTWARE\Microsoft\Windows\CurrentVersion\Explorer in the RegistryEditor, and change the Value data for "SmartScreenEnabled" to "Off".
Option 1: Install the prerequisite software and the LoadRunner Enterprisecomponent
1. Install the prerequisite software. For details, see "Prerequisite software for silent installation"on page 54.
Note: If you are prompted to restart the computer after installing the prerequisitesoftware, you must do so before continuing with the installation.
2. After you have installed all the prerequisite software, install the LoadRunner Enterprisecomponent by running the appropriate command from the command line.
LoadRunner Enterprise Server:
Silent installationwith defaultproperties
msiexec /i <Installation_Disk_Root_Directory>\Setup\Install\Server\LRE_Server.msi
INSTALLDIR="<Target Installation Directory>" NVINSTALL=Y/qnb /l*vx "<Path to log file>"
Silent installationwith customizedUserInput.xml
msiexec /i <Installation_Disk_Root_Directory>\Setup\Install\Server\LRE_Server.msi
USER_CONFIG_FILE_PATH="<Full path to UserInput file>"INSTALLDIR="<Target Installation Directory>" NVINSTALL=Y/qnb /l*vx "<Path to log file>"
Where <Full path to UserInput file> is the path to your customized UserInput.xml file,<Target Installation Directory> is the directory in which to install the LoadRunner Enterpriseserver, and <Path to log file> is full path to the installation log file.
NVINSTALL indicates whether to launch the NV installation in silent mode, once theLoadRunner Enterprise installation is done (by default, NV is not installed in silent mode).
Note: Restarting the machine is required in order for NV to function properly.
LoadRunner Enterprise Host:
msiexec /i <Installation_Disk_Root_Directory>\Setup\Install\Host\LoadRunner_x64.msi
Installation GuideChapter 3: Install LoadRunner Enterprise
LoadRunner Enterprise (2020) Page 58 of 146

USER_CONFIG_FILE_PATH="<Full path to UserInput file>" [optional installerproperties - see list below] /qn /l*vx "<Path to log file>"
Where <Full path to UserInput file> is the path to your customized UserInput.xml file,<Target Installation Directory> is the directory in which you want to install the LoadRunnerEnterprise host, and <Path to log file> is full path to installation log file.
NVINSTALL indicates whether to launch the NV installation in silent mode, once theLoadRunner Enterprise installation is done (by default, NV is not installed in silent mode).
Note: Restarting the machine is required in order for NV to function properly.
Option 2: Install the prerequisite softwares together with the LoadRunnerEnterprise components
You can also install in silent mode using the setup.exe file from the LoadRunner Enterpriseinstallation directory. This enables you to install the prerequisites in silent mode automaticallybefore running the MSI installation in silent mode. Using this option also invokes the correct MSIfile depending on the operating system platform.
Server installation:
<Installation_Disk_Root_Directory>\Setup\En\setup_server.exe /s USER_CONFIG_FILE_PATH="<Full path to UserInput file>" INSTALLDIR="<Target InstallationDirectory>" NVINSTALL=Y
Host installation:
<Installation_Disk_Root_Directory>\Setup\En\setup_host.exe /sINSTALLDIR="<Target Installation Directory>" USER_CONFIG_FILE_PATH="<Full pathto UserInput file>" NVINSTALL=Y
Where <Full path to UserInput file> is the path to your customized UserInput.xml file and<Target Installation Directory> is the directory in which to install the LoadRunner Enterpriseserver or host.
When using the setup.exe file, the installation log will be created under the user's temp directory.
Host installation: %temp%\LREHost.log
Server installation: %temp%\LREServer.log
Installation GuideChapter 3: Install LoadRunner Enterprise
LoadRunner Enterprise (2020) Page 59 of 146

Where <Full path to UserInput file> is the path to your customized UserInput.xml file, <TargetInstallation Directory> is the directory in which you want to install the LoadRunner Enterprisehost, and <Path to log file> is full path to installation log file.
NVINSTALL indicates whether to launch the NV installation in silent mode, once the LoadRunnerEnterprise installation is done (by default, NV is not installed in silent mode).
Note: Restarting the machine is required in order for NV to function properly.
Install standalone components (Windows)You can install standalone components that provide advanced features for working withLoadRunner Enterprise.
To install a load generator on Linux, see "Install Load Generator on Linux" on page 64.
Note: For all standalone applications, you must first manually install the prerequisiteapplications. For details, see "Prerequisite software for silent installation" on page 54
This section includes:
l "Available standalone components for Windows" below
l "Install standalone components" on the next page
l "Silently install standalone applications" on page 62
Available standalone components for Windows
The following standalone components are available. To install these components, see "Installstandalone components" on the next page.
Installation GuideChapter 3: Install LoadRunner Enterprise
LoadRunner Enterprise (2020) Page 60 of 146

Component Description
LoadGenerator
Instead of installing a LoadRunner Enterprise Host and then configuring it as aload generator, you can install a standalone version of the load generator. Thishost can behave only as a load generator, unlike the LoadRunner Enterprisehost, which can also be configured as a Controller or data processor. You canuse a local or a cloud-based machine to host your load generator.
Note: If you know in advance that a particular host machine is to be used as aload generator only, we recommend that you install the standalone LoadGenerator for the following reasons:
l The installation requires less disk space
l Moving the Load Generator's setup files is less time consuming than movingthe setup files of the LoadRunner Enterprise Host.
Virtual UserGenerator
Virtual User Generator (VuGen) generates virtual users, or Vusers, by recordingactions that typical end-users would perform on your application. VuGen recordsyour actions into automated Vuser scripts which form the foundation of yourperformance tests.
LoadRunnerAnalysis
Analysis provides graphs and reports with in-depth performance analysisinformation. Using these graphs and reports, you can pinpoint and identify thebottlenecks in your application and determine what changes need to be made toyour system in order to improve its performance.
TruClient TruClient is a browser-based testing technology for creating test scripts that canthen be used in performance testing or monitoring web applications. TruClientrecords your actions as you navigate through your business process. It creates ascript from your actions—which you then run in performance testing.
MI Listener The MI Listener is one of the components needed to run Vusers and monitorapplications over a firewall. To install, run SetupMIListener.exe. For details aboutfirewalls in LoadRunner Enterprise, see "Working with firewalls" on page 99.
MonitorOverFirewallAgent
Used to monitor servers that are located over a firewall. For details aboutfirewalls in LoadRunner Enterprise, see "Working with firewalls" on page 99.
Install standalone components
This section describes the installation process for standalone components.
To install any of the standalone components:
Installation GuideChapter 3: Install LoadRunner Enterprise
LoadRunner Enterprise (2020) Page 61 of 146

1. From the LoadRunner Enterprise installation directory, run setup.exe. The setup programdisplays the installation menu page.
2. Select one of the following options: Load Generator, VuGen, Analysis, TruClient, MI Listener,or Monitors Over Firewall. For details, see the LoadRunner Installation Guide available fromthe LoadRunner Professional Help Center.
Note:
l During the installation of Load Generator Standalone, MI Listener, or Monitorsover Firewall components, the setup wizard prompts you to select the mode forrunning the installed agent. Select LoadRunner Enterprise mode.
The agent runs as a service under a special account named IUSR_METRO. This is alocal Windows account, created during the installation process (some additionalLoadRunner Enterprise configuration is also added on the load generator).
You can delete the IUSR_METRO account only if the LoadRunner Enterprisesystem user was configured to a different Windows account; otherwise the hostwill not function correctly.
l If you attempt to install standalone components on a system drive other than thedefault C drive, you will get a warning that you are out of disk space on yoursystem drive even though you are not installing there. This is because the installer,while installing the components to the drive as specified by the user, still needs touse the Windows temporary file locations during installation.
Workaround: Free up space on your C system drive.
3. MI Listener/Monitors Over Firewall installations only: Follow the instructions in theinstallation wizard. After installation, the configuration wizard opens, requesting the name ofthe product you are working with. Select LoadRunner Enterprise.
Silently install standalone applications
This section describes how to perform a silent installation of the standalone applications.
Note: For instructions on installing the Load Generator silently on Linux, see theLoadRunner Installation Guide available from the LoadRunner Professional Help Center.
Choose one of the following options:
Option 1: Install the prerequisite software and the application separately
1. Install required prerequisite software. For details, see "Prerequisite software for silentinstallation" on page 54.
Installation GuideChapter 3: Install LoadRunner Enterprise
LoadRunner Enterprise (2020) Page 62 of 146

2. Extract the Load Generator installation files to a local directory:
a. Select an application from the <Installation_Disk_Root_Directory>\StandaloneApplications folder.
b. Extract the .msi file from the .exe application to the installation folder.
3. Run one of the following commands from the command line:
l Load Generator:
msiexec /i "<Installation_Folder>\LoadGenerator_x64.msi" /qb/l*vx "<Path to log file>" IS_RUNAS_SERVICE=1 START_LGA="1"
l VuGen Standalone:
msiexec /i "<Installation_Folder>\VuGen_x64.msi" /qb /l*vx"<Path to log file>"
l Analysis Standalone:
msiexec /i "<Installation_Folder>\Analysis_x64.msi" /qb /l*vx"<Path to log file>"
where <Installation_Folder> is the local directory where you saved the installation files, and<Path to log file> is the full path to the installation log file.
Note: You can install the Load Generator component on a Linux platform to runvirtual users. The Linux virtual users interact with the Controller, installed on aWindows machine. For details on installing the Load Generator on Linux, see theLoadRunner Installation Guide available from the LoadRunner ProfessionalHelp Center.
Option 2: Install the prerequisite software and the application together
1. Select an application from the <LoadRunner Enterprise installation directory>\AdditionalComponent\Applications folder.
2. Run one of the following commands from the command line:
l Load Generator:
SetupLoadGenerator.exe /s /a IS_RUNAS_SERVICE=1 START_LGA=”1” /s
l VuGen Standalone:
Installation GuideChapter 3: Install LoadRunner Enterprise
LoadRunner Enterprise (2020) Page 63 of 146

SetupVuGen.exe /s /a /s
l Analysis Standalone:
SetupAnalysis.exe /s /a /s
Install Load Generator on LinuxYou can install the Load Generator component on a Linux platform to run virtual users. The Linuxvirtual users interact with the Controller, installed on a Windows machine. For details on installingthe Load Generator on Linux, see the LoadRunner Installation Guide available from theLoadRunner Professional Help Center.
Deploy dockerized load generators on LinuxThis section describes how to run a dockerized load generator on a Linux distribution.
Docker is a platform that allows you to develop, ship, and run applications via a container. Fordetails regarding Docker, see https://docs.docker.com.
Prerequisites
l Install Docker on the target machine, along with its dependencies, and set up the targetmachine environment as required. Currently, only the 64-bit version is supported. Forinstallation details, see https://docs.docker.com/install/.
l Obtain the predefined load generator Docker image:
l Pull from the Docker hub, Linux Dockerized Load Generator(https://hub.docker.com/r/performancetesting/load_generator_linux/), using the followingcommand and appropriate <tag version number>, for example, 20.20:
docker pull performancetesting/load_generator_linux:<tag versionnumber>
l Use the image provided in the LoadRunner Enterprise installation package (in the InsDatafolder of the ISO file). Import the image from the tar archive using the following command:
docker load < load_generator.tar
Run a dockerized load generator using the predefined image
Use the ready-to-use image to run a load generator on Docker for Linux.
Installation GuideChapter 3: Install LoadRunner Enterprise
LoadRunner Enterprise (2020) Page 64 of 146

Note: If you need customization for your container, for example, for proxy servers, see"Run a dockerized load generator using a custom image" below.
To run a dockerized load generator:
Run the load generator container using the following command:
docker run -id -p <host_port>:54345 performancetesting/load_generator_linux:<tag version number>
Note: Check that the <host_port> on the Linux machine is available and allows incomingrequests. You will specify this port on the Controller side when connecting to this loadgenerator.
Example using SSH
The following gives a simple C# code example for running multiple load generator containersusing SSH. There are container orchestrator tools which do the same, for example, Kubernetes,OpenShift, Docker Swarm, and more.
using (var client = new SshClient(dockerHost, dockerHostUserName,dockerHostPasswd)){client.Connect();for (int i =0; i > numOfContainers; i++){
string command = "docker run -id -p " + lgInitialPort + i) + ":54345performancetesting/load_generator_linux:<tag version number>";
var terminal = client.RunCommand(command);if (terminal.ExistStatus != 0){throw new Exception("Failed to create new Docker container");}Console.WriteLine("Docker LG with external port" + lgInitialPort + i +
"created.");}client.Disconnect();
}
Run a dockerized load generator using a custom image
If your environment requires customized settings for running the container, for example for proxyservers, you can create a Dockerfile to build a custom image.
Installation GuideChapter 3: Install LoadRunner Enterprise
LoadRunner Enterprise (2020) Page 65 of 146

Note: Another alternative for customized settings: Start the container; once it is running,set up the load generator environment variables, then start the load generator manuallyinside the container.
To run a custom dockerized load generator:
1. Create a new folder, and within it create a file named dockerfile. Paste the FROM line, plus therequired customization lines, into the file, using the appropriate LoadRunner Enterpriseversion for the <tag version number>:
Note: This customization example is for proxy: It defines an environment variable forthe proxy server host and port in the target image.
FROM performancetesting/load_generator_linux:<tag version number>ENV http_proxy http://my_proxy_name:port
Note: The above customization example is for a proxy. It defines an environmentvariable for the proxy server host and port in the target image.
2. Save the Dockerfile.
3. Open a command line at the dockerfile folder path and run the following command, using thename you want for your custom image:
docker build -t <custom dockerfile name> .
4. Create a container for each load generator you want to use, by running the followingcommand:
docker run -id -p <host_port>:54345 <custom image name>
If the custom image in step 3 was built with a tag then include it in the command:
docker run -id -p <host_port>:54345 <custom image name>:<tagversion number>
Note: Check that the <host_port> on the Linux machine is available and allowsincoming requests. You will specify this port on the Controller side when connectingto this load generator.
Installation GuideChapter 3: Install LoadRunner Enterprise
LoadRunner Enterprise (2020) Page 66 of 146

After running the load generator containers
Add the load generators containers to your tests.
l For elastic hosts, see Set up elastic hosts on Windows or Linux containers in the LoadRunnerEnterprise Help Center.
l For manually configure dockerized load generators, see Add dockerized hosts to your tests inthe LoadRunner Enterprise Help Center.
Build a custom Dockerfile image
Use the sample Dockerfile content provided below as a basis for your custom file, and edit to fityour specific needs. Once you have the file, follow these steps to build a Docker image:
1. Place your Dockerfile and the load generator installation folder, VM (containing inst64.bin,unzip, and installer.sh), together in the same folder.
2. Switch to root user. Make sure you have Internet access and the ability to installdependencies.
3. In the directory which contains the Dockerfile, type:
docker build -t load_generator ./
Sample Dockerfile Content
The following example shows how to build a Linux image. It sets a proxy enabling the container toconnect to the Internet and then installs the load generator prerequisites. It then copies the loadgenerator installation files to the container and installs it silently. Lastly, it sets an ENTRYPOINTwhich tells the container what to execute when starting.
Note: The selected base operating system must be one of the supported Linuxdistributions in the system requirements of the LoadRunner Enterprise version beingused.
# sudo docker build -t load generator /
# Set the base image
FROM ubuntu:14.04
# Set the proxy
# ENV http_proxy http://my_proxy_name:port
# Install prerequisites for Load Generator
Installation GuideChapter 3: Install LoadRunner Enterprise
LoadRunner Enterprise (2020) Page 67 of 146

RUN dpkg --add-architecture i386
RUN apt-get update && apt-get install -y libc6-i386 lib32stdc++6lib32ncurses5 libkeyutils1:i386 libglib2.0-0:i386 libidn11:i386
# Copy the Load Generator installation files to a temporary folder
RUN mkdir /opt/tmp_LG
ADD VM /opt/tmp_LG
# Install the Load Generator
RUN /bin/bash -c "cd /opt/tmp_lg; source ./installer.sh -i silent"
# Remove the installation files
RUN rm -R /opt/tmp_LG
#Start the container. If you need entry to the container, add --entrypoint to overwrite the ENTRYPOINT. If you do not need entry tothe container, use "-id" to start the container.
ENTRYPOINT ["/bin/bash","-c","cd /opt/MF/MF_LoadGenerator/; sourceenv.sh; cd bin/; ./m_daemon_setup -install; while true; do cat; done"]
Tips and guidelines
l Dockerized load generators, run from the predefined image, are not supported when runningover a firewall. (Workaround for advanced users: You can develop your own Docker image withMI Listener support.)
l Use docker ps to list the containers that are running.
l To stop the load generator service:
l Use docker stop <load generator container name or ID> if you want to reuse the sameload generator.
l Use docker rm -f <load generator container name or ID> in order to remove the loadgenerator container.
l The Dockerfile container has an ENTRYPOINT section. The container first runs the commandsin ENTRYPOINT. It sets up the environment and then starts the load generator. The commanduses a While loop to wait for input, in order to keep the container from exiting. This behaviorprevents you from accessing the container while it is running. Make sure to add -i while startingthe container; otherwise the While loop will consume an excessive amount of CPU.
l If you need entry into the container, add an argument such as --entrypoint=/bin/bashwhenstarting the container. After entering the container, set the load generator environments andstart the load generator. You can then switch to the host using CTRL+p and CTRL+q while
Installation GuideChapter 3: Install LoadRunner Enterprise
LoadRunner Enterprise (2020) Page 68 of 146

keeping the container running in the background. To access the container again, use thedocker attach container_id command.
l To access the host network directly, use --net=host in place of -p <host_port>:54345. Werecommend you use this flag if the AUT generates a lot of network activity.
Deploy dockerized load generators or Controllers onWindowsThis section describes how to run a dockerized load generator or Controller on a Windowsplatform.
Docker is a platform that allows you to develop, ship, and run applications via a container. Fordetails regarding Docker, see https://docs.docker.com.
Note:
l The load generator for Docker on Windows feature is provided as a tech previewversion, for Web - HTTP/HTML and Java protocols.
l Support for elastic Controllers is provided as a tech preview feature.
Prerequisites
l Install Docker on the target machine, along with its dependencies, and set up the targetmachine environment as required. Currently, only the 64-bit version is supported. Forinstallation details, see https://docs.docker.com/install/.
l Pull the Windows load generator Docker image (tech preview version) from the Docker hub,Windows Dockerized Load Generator (https://hub.docker.com/r/performancetesting/load_generator_windows/), using the following command and appropriate <tag version number>,for example, 20.20:
docker pull performancetesting/load_generator_windows:<tag versionnumber>
l Pull the Controller Docker image (tech preview version) from the Docker hub, Windowsdockerized Controller (https://hub.docker.com/r/performancetesting/host/), using thefollowing command and appropriate <tag version number>, for example, 20.20:
docker pull performancetesting/host:<tag version number>
Installation GuideChapter 3: Install LoadRunner Enterprise
LoadRunner Enterprise (2020) Page 69 of 146

Run a dockerized load generator or Controller using the predefinedimage
Use the ready-to-use image to run a load generator or Controller on Docker for Windows.
Note: If you need customization for your container, for example, for Java or to run under aspecific user, see "Run a dockerized load generator using a custom image" below.
To run a dockerized load generator:
Run the load generator container using the following command:
docker run -id -p <host_port>:54345 performancetesting/load_generator_windows:<tag version number>
Note: Check that the <host_port> on the machine is available and allows incomingrequests. You will specify this port on the Controller side when connecting to this loadgenerator.
To run a dockerized Controller:
Run the Controller container using the following command:
docker run -id -p <host_port1>:8731 -p <host_port2>:8086performancetesting/host:<tag version number>
where <host_port1> is the port that is mapped to the Docker container for the performancetesting service, and <host_port2> is the port that is mapped to the Influx database server.
Note: Check that the host ports are available and allow incoming requests.
Run a dockerized load generator using a custom image
If your environment requires customized settings for running the container, you can create aDockerfile to build a custom image for Docker on Windows.
Examples for custom images:
l To use a specific user account for the processes under which the Vusers are running, to providesupport for accessing network resources like script parameter files. After running, the containershould be able to verify the user.
Installation GuideChapter 3: Install LoadRunner Enterprise
LoadRunner Enterprise (2020) Page 70 of 146

l To run Java protocols on Windows load generator containers.
l To define environment variables for proxy server host and port.
To run a custom dockerized load generator:
1. Create a new folder, and within it create a file named dockerfile. Paste the following FROMline into the file, using the appropriate LoadRunner Enterprise version for the <tag versionnumber>, and add the relevant customization lines:
FROM performancetesting/load_generator_windows:<tag version number><Customization lines>
For customization examples, see "Examples of customized content for Dockerfiles " on thenext page
Tip: For information on commands that can be used in Docker files, seehttps://docs.docker.com/engine/reference/builder/.
2. Save the Dockerfile.
3. Open a command line at the dockerfile folder path and run the following command, using thename you want for your custom image:
docker build -t <custom dockerfile name> .
4. Run a container for each load generator you want to use, by running the following command,or use any Docker orchestrator tool for running containers (to deploy elastic load generators,you must provide the custom image name in the Swarm orchestrator):
docker run -id -p <host_port>:54345 <custom image name>
If the custom image in step 3 was built with a tag then include it in the command:
docker run -id -p <host_port>:54345 <custom image name>:<tagversion number>
Note: Check that the <host_port> on the machine is available and allows incomingrequests. You will specify this port on the Controller side when connecting to this loadgenerator. This is not relevant when using elastic load generators, since this ismanaged by the orchestrator.
Installation GuideChapter 3: Install LoadRunner Enterprise
LoadRunner Enterprise (2020) Page 71 of 146

Examples of customized content for Dockerfiles
Example for Vusers under a specified user account
The following gives an example of dockerfile content for running the Vusers under a specifieduser account with network access to shared locations. Replace the values between <> withcredentials for a valid user account in your environment, with network access to the sharedresources.
Example:
#escape=`FROM performancetesting/load_generator_windows:<tag version number>RUN c:\LG\launch_service\bin\magentservice.exe -removeRUN c:\LG\launch_service\bin\magentservice -install <domain>\<user name><password>
Example for running Java protocols
The following gives an example of dockerfile content to run Java protocols:
Example:
#escape=`FROM performancetesting/load_generator_windows:<tag version number>COPY .\<folder contains JDK> <target path in the container>
The path to the target JDK directory defined in the COPY line for the <target path in thecontainer> must also be added to the Java VM runtime settings page:
Note: For Java 64-bit protocol testing, include the following command line in thedockerfile, in order to add the path to the bin folder for the JDK 64-bit to the machinePATH environment variable:
RUN powershell [Environment]::SetEnvironmentVariable(\"Path\", $env:Path +\";<target JDK path in the container>\bin\",[EnvironmentVariableTarget]::Machine)
After running the load generator containers
Add the load generators containers to your tests.
Installation GuideChapter 3: Install LoadRunner Enterprise
LoadRunner Enterprise (2020) Page 72 of 146

l For elastic hosts, see Set up elastic hosts on Windows or Linux containers in the LoadRunnerEnterprise Help Center.
l For manually configure dockerized load generators, see Add dockerized hosts to your tests inthe LoadRunner Enterprise Help Center.
Note: This is not relevant when using orchestrators.
Tips and guidelines
l Dockerized load generators, run from the predefined image, are not supported when runningover a firewall.
l Use docker ps to list the containers that are running.
l To stop the load generator service:
l Use docker stop <load generator container name or ID> if you want to reuse the sameload generator.
l Use docker rm -f <load generator container name or ID> in order to remove the loadgenerator container.
l To access the host network directly, use --net=host in place of -p <host_port>:54345. Werecommend you use this flag if the AUT generates a lot of network activity.
Install additional componentsYou can install additional components that provide advanced features for working withLoadRunner Enterprise. You install these components from the Additional Components directory,located in the root directory of the installation directory. The following components are available:
Component Description
Agent forCitrix Server
Installs an optional component on the server machine that enhances VuGen'scapabilities in identifying Citrix client objects.
Agent forMicrosoftTerminalServer.
Used for extended RDP protocol record-replay. This component runs on theserver side, and is used to create and run enhanced RDP scripts.
Applications This folder contains the setup files for following standalone applications:Analysis, Virtual User Generator (VuGen), Load Generator, TruClient, MIListener, and Monitors Over Firewall.
Run the relevant application's setup program and follow the wizard'sinstructions. For details, see "Applications " on page 11.
Installation GuideChapter 3: Install LoadRunner Enterprise
LoadRunner Enterprise (2020) Page 73 of 146

Component Description
AssemblyCrawler forAnalysis API
Installs a command-line utility to build a .NET configuration file for aLoadRunner Analysis API application. For details, refer to the Analysis APIReference.
IDE Add-ins Installs add-ins for Visual Studio or Eclipse, enabling you to create NUnit orJUnit tests in your standard development environment using the LoadRunnerAPI.
PAL DataSet Creator
This tool enables you to create production data sets. After creating the datasets, you can upload them from PAL and use them in your reports. You cancreate Microsoft IIS W3C Extended Log Format, Google Analytics, andWebtrends datasets. For details, see the PAL section in the LoadRunnerEnterprise Help Center.
SAP Tools The following SAP tools are available:
l SAPGUI Spy. Examines the hierarchy of GUI Scripting objects, on openwindows of SAPGUI Client for Windows.
l SAPGUI Verify Scripting. Verifies that the SAPGUI Scripting API is enabled.
ThirdParties
Includes the source code for open source packages that are incorporated intoLoadRunner Enterprise, and which have licenses with source distributionclauses.
VirtualTableServer
Virtual Table Server (VTS) is a web-based application that works with Vuserscripts. VTS offers an alternative to standard parameterization.
Two versions of VTS are available: 32-bit and 64-bit. You can install 32-bit VTSon both 32-bit and 64-bit operating systems; 64-bit VTS can be installed onlyon 64-bit operating systems.
VuGenScriptConverter
Installs the VuGen Script Converter that enables converting NUnit/JUnit teststo VuGen scripts in order to run them in LoadRunner Enterprise.
Deploy LoadRunner Enterprise on the cloudLoadRunner Enterprise is certified to be installed and run under Amazon Web Services (AWS),using a BYOL (Bring Your Own License) model.
Requirements for deploying LoadRunner Enterprise on the cloud:
l All components of the cloud computing environment follow the system requirements specifiedin this document.
Installation GuideChapter 3: Install LoadRunner Enterprise
LoadRunner Enterprise (2020) Page 74 of 146

l The required ports are open for communication. For the required posts, see "Communicationpaths" on page 12.
Note:
l Cloud load generators can be provisioned using the built-in functionality ofLoadRunner Enterprise. For details, see Manage Load Generators on the Cloud in theLoadRunner help and Provision cloud load generators in the LoadRunner EnterpriseHelp Center. All other components must be manually installed and configured by theuser.
l To improve performance, it is preferable to deploy the LoadRunner Enterprise serverand hosts, and the database in the same region. Consult AWS for best practices aboutnetwork performance.
l Cloud load generator ports are configurable. When all the components are in the cloud,the ports to use are defined by the cloud provider (they are not based on internal ITpolicies).
Uninstall LoadRunner Enterprise server and hostsYou can uninstall LoadRunner Enterprise servers and hosts using the LoadRunner EnterpriseSetup Wizard or using the silent commands.
Note:
l When uninstalling earlier versions of LoadRunner Enterprise, the NetworkVirtualization components installed during the installation will be automaticallyuninstalled.
l For cluster environments: Uninstall LoadRunner Enterprise from all nodes.
To uninstall LoadRunner Enterprise components using the setup wizard:
1. From the Windows Control Panel, open the Add/Remove Programs dialog box.
2. From the list of currently installed programs, select Micro Focus LoadRunner Enterprise2020 (for LoadRunner Enterprise server) and Micro Focus LoadRunner 2020 (forLoadRunner Enterprise hosts) and click Remove.
3. Follow the instructions in the wizard to complete the uninstall process.
To uninstall LoadRunner Enterprise components silently:
Run the applicable command from the command line.
Installation GuideChapter 3: Install LoadRunner Enterprise
LoadRunner Enterprise (2020) Page 75 of 146

l LoadRunner Enterprise Server:
msiexec.exe/uninstall "<Installation_Disk_Root_Directory>\Setup\Install\Server\LRE_Server.msi" /qnb
l LoadRunner Enterprise Host:
msiexec.exe/uninstall "<Installation_Disk_Root_Directory>\Setup\Install\Host\LoadRunner_x64.msi" /qnb
Uninstall Load Generator from LinuxYou can use the Load Generator Setup Wizard to uninstall the load generator. For details, see theLoadRunner Installation Guide available from the LoadRunner Professional Help Center.
Installation GuideChapter 3: Install LoadRunner Enterprise
LoadRunner Enterprise (2020) Page 76 of 146

Chapter 4: Post installation verificationThis section describes how to verify that the installation of the LoadRunner Enterprise server andhosts was successful. The environment for this process should be a staging environment,including a LoadRunner Enterprise server and two to three LoadRunner Enterprise hosts.
Note: You can run a full validation on your LoadRunner Enterprise system fromLoadRunner Enterprise Administration, in the System Health page's Check System tab.For details, see Maintain system health in the LoadRunner Enterprise Help Center.
Administrator workflow
This section describes the workflow for the LoadRunner Enterprise administrator.
1. Log onto LoadRunner Enterprise Administration.
For details, see Log onto LoadRunner Enterprise Administration in the LoadRunnerEnterprise Help Center.
2. Create a project administrator user.
For details, see Create a new user in the LoadRunner Enterprise Help Center.
3. Create a domain.
For details, see Create a domain in the LoadRunner Enterprise Help Center.
4. Create a new project.
Follow the steps to create the project in Create a project in the LoadRunner Enterprise HelpCenter, and:
a. In the Domain Name list, select the domain you just created.
b. Skip the Main Details for now (you will define them after adding a host and host pool instep 9).
c. Assign the project administrator user you created above to the Users list.
5. Assign more project administrators to the project - optional.
a. Select Management > Projects, and in the projects list, click the name of project youcreated to display the project details.
b. In the right lower pane, click the Users tab, and assign another project administrator user.
6. Verify the LoadRunner Enterprise configuration.
On the LoadRunner Enterprise Administration sidebar,
l Under Configuration, select Servers and verify that the LoadRunner Enterprise Server islisted.
l Under Configuration, select Licenses and verify the license details.
7. Define additional hosts for the staging environment.
LoadRunner Enterprise (2020) Page 77 of 146

For the staging environment, you should have two to three LoadRunner Enterprise hosts,where at least one host purpose is configured as Controller, and at least one host purpose isconfigured as Load Generator.
Note: When adding hosts, fields in red marked with an asterisk (*) are mandatory. Makesure to include the operating system type, and the purpose of the host. For details, seeManage hosts in the LoadRunner Enterprise Help Center.
a. On the LoadRunner Enterprise Administration sidebar, under Maintenance, select Hosts.
b. Click the Create New Host button, and define the host details.
8. Create host pools.
a. On the LoadRunner Enterprise Administration sidebar, select Maintenance > Hosts, andclick the Pools tab.
b. Click the Add New Pool button. The New Pool page opens, enabling you to define anew host pool.
c. Add a name and description (optional) for the host pool.
d. In the Linked Hosts grid, select the hosts to add to the pool, and click Assign. Theselected hosts are added to the pool.
9. Define project settings.
a. On the LoadRunner Enterprise Administration sidebar, select Management > Projects.
b. Under the Project Name column, click the project to display the project details.
c. In the Main Details tab, finish defining the project's settings. In particular, set the Vuserlimit, Host limit, and Concurrent run limit. Also, select the host pool you created above forthe project.
Installation GuideChapter 4: Post installation verification
LoadRunner Enterprise (2020) Page 78 of 146

Chapter 5: LoadRunner Enterprise configurationoptionsThe LoadRunner Enterprise system comes with default configuration settings. These settingsenable you to use LoadRunner Enterprise for its intended purpose. This chapter describesadditional tuning and configuration to help you get the most out of your LoadRunner Enterprisesystem.
Note: Not all the procedures in this chapter are suitable for all usage scenarios. You shouldassess which procedures are suitable to your system's needs.
This chapter includes:
• Configure IIS on LoadRunner Enterprise machines to use SSL 80• Configure LoadRunner Enterprise to support SSL 82• Configure secure communication with LoadRunner components using TLS (SSL) 91• Working with the LoadRunner Enterprise agent 91• LoadRunner Remote Management Agent 92• Recommended configuration for Linux load generators 93• Recommended change to the TEMP folder used by the load generator 93• Enable downloading standalone applications 94• Enable MS-SQL Windows authentication 95• Configure SSL for load generators 95
LoadRunner Enterprise (2020) Page 79 of 146

Configure IIS on LoadRunner Enterprise machines touse SSLIIS (Microsoft Internet Information Server) is a prerequisite software for the LoadRunnerEnterprise servers. You can configure the IIS LoadRunner Enterprise virtual directories(LoadRunner Enterprise server and host) to use SSL (Secure Socket Layer).
This section describes how to configure IIS LoadRunner Enterprise virtual directories to use SSL.
It includes:
l "Before you configure IIS" below
l "Configure the LoadRunner Enterprise server backend behind IIS reverse proxy" below
l "Configuring IIS to work over SSL" on page 82
Before you configure IIS
IIS uses port 443 to work over SSL. However, certain LoadRunner Enterprise components mayalso be configured to use this port. Therefore, you need to ensure that port 443 is available foruse by IIS. Make sure to configure the LoadRunner Enterprise components to use a port otherthan 443.
Note: The Remote Management agent may be configured to use port 443.
Change the port on the Remote Management agent
Using the Network and Security Manager tool, you can change the port being used by theRemote Management agent for over firewall communication. For details on the Network andSecurity Manager tool, see the LoadRunner Professional Help Center.
Configure the LoadRunner Enterprise server backend behindIIS reverse proxy
To enhance the security of your LoadRunner Enterprise deployment, it is recommended to placethe LoadRunner Enterprise server behind a secure reverse proxy to hide the server backend.
If this is done, port 5876 only needs to be open to outgoing traffic on the LoadRunner Enterpriseserver; nothing is required on the LoadRunner Enterprise host.
To configure the IIS web server to use a reverse proxy:
1. Using Server Manager, install the IIS server using default settings. You do not need to enableany other extensions.
2. Install the Application Request Routing (ARR) for IIS from
Installation GuideChapter 5: LoadRunner Enterprise configuration options
LoadRunner Enterprise (2020) Page 80 of 146

https://www.iis.net/downloads/microsoft/application-request-routing
3. Configure ARR as a proxy
a. Open IIS Manager and expand the nodes in the Connections pane.
b. Right-click Server Farm and then click Create Server Farm.
c. Enter the name LREBackend.
4. Add a server
a. In the Add Servers step, add localhost as the server name.
b. In the Advanced Settings enter 5876 as the port.
5. Create routing rules for your farm
In Routing Rules, add the following to the Requests with the following patterns are notforwarded box:
/loadtest, /loadtest/*, /admin, /admin/*, /pcs, /pcs/*, /lre,/lre/*
6. Make sure you can access both /admin, /loadtest and that calling the host name opens theSwagger UI.
7. Close the backend API
a. Open the <LoadRunner Enterprise installation directory>\lre_backend\appsetting.jsonfile.
b. Go to the LRECore: PortConfiguration: ListenOnlyOnLocalhost section, and set it to true.
"PortConfiguration": {"ListenOnlyOnLocalhost": true,
"ServicePort": 5876,"WorkerProcessPort": 5878
}
c. In the <LoadRunner Enterprise installation directory\dat\pcs.config file, add the flagisReverseProxy and set it to true:
<PCSSettings isReverseProxy="true" />
d. Restart the LoadRunner Backend Service.
e. Restart IIS on the LoadRunner Enterprise server.
f. Reconfigure all your hosts if they have already been added to LoadRunner EnterpriseAdministration (this will configure the backend URL without the port).
Installation GuideChapter 5: LoadRunner Enterprise configuration options
LoadRunner Enterprise (2020) Page 81 of 146

Configuring IIS to work over SSL
This section describes the basic steps involved in setting up IIS on the LoadRunner Enterpriseserver machine to use SSL.
For LoadRunner Enterprise host, the root certificate of the CA should appear in the MicrosoftManagement Console under Certificates (Local Computer) > Trusted Root CertificationAuthorities.
Configure IIS to use SSL on the LoadRunner Enterprise server machine
To configure IIS to use SSL on the LoadRunner Enterprise server machine:
1. Obtain a server certificate issued to the fully qualified domain name of your LoadRunnerEnterprise server.
2. Configure IIS to work over with SSL. For information, see https://docs.microsoft.com/en-us/iis/manage/configuring-security/how-to-set-up-ssl-on-iis.
3. If your are using a secure connection for the internal URL of the LoadRunner Enterpriseserver, you need to establish trust to the Certificate Authority (CA) that issued yourLoadRunner Enterprise server certificate.
Note: Internal URL is defined when the LoadRunner Enterprise server is configured inLoadRunner Enterprise Administration.
This trust must be established on each LoadRunner Enterprise host.
4. (Optional) Configure IIS to use a reverse proxy as described below.
Configure LoadRunner Enterprise to support SSLThe following section describes how to enable SSL to ensure secure communication onLoadRunner Enterprise. You can configure both the LoadRunner Enterprise server and host.
Tip: For additional information (and examples) on how to configure securecommunication on the various LoadRunner Enterprise components, see our blog series:
l Configure LoadRunner Enterprise Server to support SSL
l Configure LoadRunner Enterprise Host to support SSL
Installation GuideChapter 5: LoadRunner Enterprise configuration options
LoadRunner Enterprise (2020) Page 82 of 146

To configure secure communication on a LoadRunner Enterprise server forincoming requests from the LoadRunner Enterprise server and hosts:
1. Configure the port that will be used to ensure secure communication on the LoadRunnerEnterprise server.
Note that the port used by IIS for the SSL binding is 443. However, by default, theLoadRunner Remote Management Agent Service is using port 443. Either change theservice's port or configure IIS to use a port other than 443 for the SSL binding.
2. Update the web.config file located in the <Install path>\PCS directory. Perform the followingsteps:
a. Create a backup copy of the web.config file and save it in a different folder.
b. To update the web.config file, you can replace it with the predefined web.config-for_sslfile. See step 2d below.
If you have manual changes you want to preserve in the web.config file, you can manuallymodify the file. See step 2c below.
c. Edit the web.config file. Under the <system.servicemodel><services> tag, there are eightareas where the following comment appears: Uncomment to enable SSL. Uncomment theXML lines which appear thereafter, and comment the non-SSL settings as shown in theexample below.
Example: Before
<endpoint binding="basicHttpBinding"contract="HP.PC.PCS.ILabService"><identity><dns value="localhost"/></identity></endpoint><endpoint address="mex" binding="mexHttpBinding"contract="IMetadataExchange"/><!- Uncomment to enable SSL -><!-- endpoint binding="basicHttpBinding"bindingConfiguration="BasicHttpBinding_TransportSecurity"contract="HP.PC.PCS.ILabService"><identity><dns value="localhost"/></identity></endpoint -->
Example: After
<!--<endpoint binding="basicHttpBinding"contract="HP.PC.PCS.ILabService"><identity><dns value="localhost"/></identity></endpoint><endpoint address="mex" binding="mexHttpBinding"contract="IMetadataExchange"/> -->
<!-- Uncomment to enable SSL --><endpoint binding="basicHttpBinding"
Installation GuideChapter 5: LoadRunner Enterprise configuration options
LoadRunner Enterprise (2020) Page 83 of 146

bindingConfiguration="BasicHttpBinding_TransportSecurity"contract="HP.PC.PCS.ILabService"><identity><dns value="localhost"/></identity></endpoint>
Under the <system.servicemodel><behaviors> tag, there are seven areas where you needto change the httpGetEnabled parameter to false, and the httpsGetEnabled parameterto true.
Example: Before
<serviceMetadata httpGetEnabled="true" httpsGetEnabled="false" />
Example: After
<serviceMetadata httpGetEnabled="false" httpsGetEnabled="true" />
d. To replace web.config with the predefined web.config-for_ssl file, copy web.config-for_ssl from the <install path>\conf\httpsConfigFiles directory and place it under the<install path>\PCS directory.
Rename web.config-for_ssl to web.config.
3. Restart IIS.
4. Update the Internal URL attribute to connect to LoadRunner Backend Service through asecure port:
internalUrl="https://<lre-dns-name>:444"
To configure secure communication on a LoadRunner Enterprise host forincoming requests from LoadRunner Enterprise servers:
1. The default port used by a LoadRunner Enterprise host service is 8731. To configure SSL ona host for port 8731, refer to the Microsoft Web Site: How To Configure a Port with an SSLCertificate, using the following URL: http://msdn.microsoft.com/en-us/library/ms733791.aspx.
Below are examples of the steps described in the above link.
a. Check that the port is not configured:
Example:
C:\Users\Demo>netsh http show sslcert ipport=0.0.0.0:8731
Installation GuideChapter 5: LoadRunner Enterprise configuration options
LoadRunner Enterprise (2020) Page 84 of 146

SSL Certificate bindings:
-------------------------
The system cannot find the file specified.
b. Run the netsh command:
You can use the command below (where certhash is the certificate thumbprint and theappid parameter is a GUID that can be used to identify the owning application. You canuse any valid GUID. There are many tools that can generate a GUID).
Example:
C:\Users\Demo>netsh http add sslcert ipport=0.0.0.0:8731certhash=1b337c1f17e0f96b09f803fs0c2c7b3621baf2bb appid={114F6E0C-EB01-4EE9-9CEF-3D1A500FD63F}
SSL Certificate successfully added
c. Check that the port is now configured:
Example:
C:\Users\Demo>netsh http show sslcert ipport=0.0.0.0:8731
SSL Certificate bindings:
-------------------------
IP:port : 0.0.0.0:8731
Certificate Hash :1b337c1f17e0f94b09f803ff0c2c7b7621baf2bb
Application ID : {114f6e0c-eb01-4ee9-9cef-3d1a500fd63f}
Certificate Store Name : (null)
Verify Client Certificate Revocation : Enabled
Verify Revocation Using Cached Client Certificate Only : Disabled
Usage Check : Enabled
Installation GuideChapter 5: LoadRunner Enterprise configuration options
LoadRunner Enterprise (2020) Page 85 of 146

Revocation Freshness Time : 0
URL Retrieval Timeout : 0
Ctl Identifier : (null)
Ctl Store Name : (null)
DS Mapper Usage : Disabled
Negotiate Client Certificate : Disabled
2. Perform the following steps to update the LTOPSvc.exe.config file:
a. Create a backup copy of the LtopSvc.exe.config file located under the <install path>\bindirectory, and save it in a different folder.
b. To update the LtopSvc.exe.config file, you can replace it with the predefinedLTOPSvc.exe.config-for_ssl file. See step 2d below.
If you have manual changes you want to preserve in the LTOPSvc.exe.config file, you canmanually modify the file. See step 2c below.
c. Under the <system.servicemodel><bindings><basicHttpBinding> tag, there are twoareas where the following comment appears: Uncomment to enable SSL. Uncomment theXML lines which appear thereafter.
Example: Before
<binding name="BasicHttpBinding_ILoadTestingService"closeTimeout="00:10:00"
openTimeout="00:01:00" receiveTimeout="00:20:00"sendTimeout="00:10:00"
allowCookies="false" bypassProxyOnLocal="false"hostNameComparisonMode="StrongWildcard"
maxBufferSize="2147483647"maxBufferPoolSize="2147483647" maxReceivedMessageSize="2147483647"
messageEncoding="Text" textEncoding="utf-8"transferMode="Buffered"
useDefaultWebProxy="true">
Installation GuideChapter 5: LoadRunner Enterprise configuration options
LoadRunner Enterprise (2020) Page 86 of 146

<readerQuotas maxDepth="2147483647"maxStringContentLength="2147483647" maxArrayLength="2147483647"
maxBytesPerRead="2147483647"maxNameTableCharCount="2147483647" />
<!-- Uncomment to enable SSL -->
<!--<security mode="Transport">
<transport clientCredentialType="None"/>
</security>-->
</binding>
Example: After
<binding name="BasicHttpBinding_ILoadTestingService"closeTimeout="00:10:00"
openTimeout="00:01:00" receiveTimeout="00:20:00"sendTimeout="00:10:00"
allowCookies="false" bypassProxyOnLocal="false"hostNameComparisonMode="StrongWildcard"
maxBufferSize="2147483647"maxBufferPoolSize="2147483647" maxReceivedMessageSize="2147483647"
messageEncoding="Text" textEncoding="utf-8"transferMode="Buffered"
useDefaultWebProxy="true">
<readerQuotas maxDepth="2147483647"maxStringContentLength="2147483647" maxArrayLength="2147483647"
maxBytesPerRead="2147483647"maxNameTableCharCount="2147483647" />
<!-- Uncomment to enable SSL -->
Installation GuideChapter 5: LoadRunner Enterprise configuration options
LoadRunner Enterprise (2020) Page 87 of 146

<security mode="Transport">
<transport clientCredentialType="None"/>
</security>
</binding>
Under the <system.servicemodel><services> tag, switch between the non-secured andsecured endpoints and base addresses.
Example: Before
<endpoint contract="HP.PC.LTOP.Services.ILoadTestingService"address="LoadTestingService" name="basicHttp"binding="basicHttpBinding" bindingConfiguration="BasicHttpBinding_ILoadTestingService"/>
<!-- Use the first endpoint for regular communication and thesecond endpoint for SSL -->
<endpoint contract="IMetadataExchange"binding="mexHttpBinding" name="mex" />
<!--<endpoint contract="IMetadataExchange"binding="mexHttpsBinding" name="mex" />-->
<host>
<baseAddresses>
<!-- Use the first address for regular communication andthe second address for SSL -->
<addbaseAddress="http://localhost:8731/LTOP/LoadTestingService"/>
<!--<addbaseAddress="https://localhost:8731/LTOP/LoadTestingService"/>-->
</baseAddresses>
</host>
Installation GuideChapter 5: LoadRunner Enterprise configuration options
LoadRunner Enterprise (2020) Page 88 of 146

</service>
Example: After
<service name="HP.PC.LTOP.Services.LoadTestingService"behaviorConfiguration="CommonBasicHTTPBehavior">
<endpoint contract="HP.PC.LTOP.Services.ILoadTestingService"address="LoadTestingService" name="basicHttp"binding="basicHttpBinding" bindingConfiguration="BasicHttpBinding_ILoadTestingService"/> <!-- Use the first endpoint for regularcommunication and the second endpoint for SSL -->
<!-- <endpoint contract="IMetadataExchange"binding="mexHttpBinding" name="mex" />-->
<endpoint contract="IMetadataExchange"binding="mexHttpsBinding" name="mex" />
<host>
<baseAddresses>
<!-- Use the first address for regular communication andthe second address for SSL -->
<!--<addbaseAddress="http://localhost:8731/LTOP/LoadTestingService"/>-->
<addbaseAddress="https://localhost:8731/LTOP/LoadTestingService"/>
</baseAddresses>
</host>
</service>
Under the<system.servicemodel><behaviors><serviceBehaviors><behaviorname="CommonBasicHTTPBehavior"> tag, change the httpGetEnabled parameter to false, and thehttpsGetEnabled parameter to true.
Installation GuideChapter 5: LoadRunner Enterprise configuration options
LoadRunner Enterprise (2020) Page 89 of 146

Example: Before
<serviceMetadata httpGetEnabled="true" httpsGetEnabled="false" />
Example: After
<serviceMetadata httpGetEnabled="false" httpsGetEnabled="true" />
d. To replace LTOPSvc.exe.config with the predefined LTOPSvc.exe.config-for_ssl file, copyLTOPSvc.exe.config-for_ssl from the <install path>\conf\httpsconfigfiles directory andplace it under the <install path>\bin directory.
Rename LTOPSvc.exe.config-for_ssl to LTOPSvc.exe.config.
3. Restart the Windows service "LoadRunner Load Testing Service".
Note: If the "LoadRunner Load Testing Service" does not start after configuring theLoadRunner Enterprise host to listen on HTTPS, see Software Self-solve knowledgebase article KM03101264.
4. Update the LoadRunner Enterprise servers to ensure that the communication with the host issecure.
Edit the PCS.config file, located in the <install path>\dat path, as follows: Change the valueof the ItopIsSecured parameter to true.
Example: Before
<PCSSettings ltopPortNumber="8731" ltopIsSecured="false"StartRunMaxRetry="3" DataProcessorPendingTimeoutMinutes="2880"/>
Example: After
<PCSSettings ltopPortNumber="8731" ltopIsSecured="true"StartRunMaxRetry="3" DataProcessorPendingTimeoutMinutes="2880"/>
5. Restart IIS on the LoadRunner Enterprise servers.
Installation GuideChapter 5: LoadRunner Enterprise configuration options
LoadRunner Enterprise (2020) Page 90 of 146

Configure secure communication with LoadRunnercomponents using TLS (SSL)You must update CA and TLS certificates if they were created with LoadRunner tools (Controller,MI Listener, Load Generators, Monitors Over Firewall) or they do not contain the requiredextension information for the CA certificate being used.
For LoadRunner Enterprise, in addition to these steps, you also need to update CA and TLScertificates for the LoadRunner Enterprise server which communicates with load generators forLAB-related operations. These certificates are located in the <LoadRunner Enterprise serverinstallation folder>\dat\cert folder.
For details on how to obtain the required certificates, see Secure Communication with TLS (SSL)in the LoadRunner Professional Help Center.
Note: After configuring secure communication with TLS, you need to restart the services.To do so, you can either:
l Run LoadRunner Agent Service and LoadRunner Remote Management Agent Service.
l Alternatively, run the following command:
lr_agent_settings.exe -restart_agent
Working with the LoadRunner Enterprise agentThe LoadRunner Enterprise agent runs on the load generators and enables communicationbetween the Controller, Load Generators, and MI Listeners (in over firewall configurations). Theagent receives instructions from the Controller to initialize, run, pause, and stop Vusers. At thesame time, the agent also relays data on the status of the Vusers back to the Controller.
Run the LoadRunner Enterprise agent as a process
In some cases, running GUI Vusers on remote machines, or terminal sessions, the LoadRunnerEnterprise Agent must run as a process.
To change the LoadRunner Enterprise Agent from a service to a process:
On the host machine, select Start > Programs > Micro Focus > LoadRunner > Tools > AgentRuntime Settings Configuration, and select Manual log in to this machine.
Run the LoadRunner Enterprise agent as a service
In most cases, the LoadRunner Enterprise Agent runs as a service.
To change the LoadRunner Enterprise Agent from a process to a service:
Installation GuideChapter 5: LoadRunner Enterprise configuration options
LoadRunner Enterprise (2020) Page 91 of 146

On the host machine, select Start > Programs > Micro Focus > LoadRunner > Tools > AgentRuntime Settings Configuration, and select Allow virtual users to run on this machine withoutuser login, and enter a valid user name and password.
Configure the agent on load generator machines
When working with protocols that use network files or Web protocol Vusers that access theInternet through a proxy server, the Load Generator agent must have network privileges. Notethat the default user created by LoadRunner Enterprise, System, does not have networkprivileges.
By default, the agent runs as a service on the Load Generator machines. You can either run theagent as a process or you can continue running the agent as a service. To continue running it as aservice, configure it to run the session using the local system account or another user accountwith network access privileges.
Map network drives when running the agent as service
For all Windows platforms, when the user is logged off, the service cannot resolve the mapping ofnetwork drives. In cases when the service cannot work with mapped network drives, use the fullpath to the directory, for example, <\\<machine-name>\<directory>\>.
LoadRunner Remote Management AgentThe LoadRunner Remote Management Agent Service enables you to manage remote machinesfrom LoadRunner Enterprise Administration.
The agent is hosted on a Windows-based operating system, and is run as a service under a LocalSystem account which has extensive privileges. If you want to run the service with the minimalpermissions required for its operation, see the section below.
Change user under which the services are running
To run the agent service with a less-privileged user, change the user under which the service isrunning. To do so, configure a limited user account with restricted privileges (such as a Windowsservice account), that allows the user to perform only the necessary actions required by thesystem.
When creating a limited user account for running the agent service, we recommend using aStandalone Load Generator. Otherwise you will have to reconfigure the service to run under thisuser account each time the LoadRunner Enterprise server or host are reconfigured (since theprocess recreates the LoadRunner Remote Management Agent Service with the default LocalSystem account privileges).
Note: Remote rebooting of hosts and installing of patches is not supported when the
Installation GuideChapter 5: LoadRunner Enterprise configuration options
LoadRunner Enterprise (2020) Page 92 of 146

Remote Management Agent service is running under a non-admin user account.
Recommended configuration for Linux load generatorsYou can increase the number of file descriptors, process entries, and amount of swap space byconfiguring the kernel.
For details and recommendations on improving Linux Load Generator performance, see theLoadRunner Installation Guide available from the LoadRunner Professional Help Center.
Recommended change to the TEMP folder used by theload generatorThis section describes how to manually change the default TEMP folder used by the loadgenerator to store data during a test run. The TEMP folder is predefined, and is based on the loadgenerator installation folder.
Why change the location of the folder?
l The TEMP folder also contains the script. Depending on the machine and the script, this pathcan get very long, and exceed the character limitation set by Windows.
l You want to use a different folder or drive instead of the default one.
Note: You cannot change the TEMP folder location if your load generator is configuredover a firewall (whether the firewall is enabled or disabled).
Before changing the TEMP folder
Note the following before changing the TEMP folder used by the load generator:
l The change will actually be made on the LoadRunner Enterprise Host that is serving as aController. Therefore, such change would only apply to the load generators using thisController.
l If you are using the same load generators with a new Controller, you will need to reapply thischange on the new Controller.
To change the TEMP folder:
1. Log onto the LoadRunner Enterprise Host machine.
2. Verify that the Wlrun.exe process is down.
3. Open <LG installation folder>\config\Wlrun7.ini in a text editor.
Installation GuideChapter 5: LoadRunner Enterprise configuration options
LoadRunner Enterprise (2020) Page 93 of 146

4. Add the line "UserRemoteTmpDir=<Custom temp location>" under the '[Host]' section
5. Save the change.
Enable downloading standalone applicationsThis section explains the steps necessary to enable you to download standalone applications fromthe Download Applications window.
To enable downloading standalone applications:
1. Navigate to the <LoadRunner Enterprise installation directory>\Additional Componentsfolder. This directory contains the applications' execution (.exe) files.
Note: The necessary .exe files for downloading VuGen, Analysis, Standalone LoadGenerator, Monitor over Firewall, and MI Listener, are located in the Applicationsdirectory, which is contained within the Additional Components directory.
2. On the LoadRunner Enterprise server, navigate to the Downloads directory, which is locatedin <LoadRunner Enterprise server installation directory>\PCWEB\Downloads.
3. To enable downloading an application, copy the relevant execution file (.exe) from the<LoadRunner Enterprise installation directory>\Additional Components folder to theDownloads directory on the LoadRunner Enterprise server.
Note: You may need to refresh the Download Applications window for the changes totake effect.
Customize the Download Applications window
You can edit and customize the appearance of the Downloads Applications window. To customizethe window, edit the downloads.xml file located in the Downloads directory on the LoadRunnerEnterprise server.
The following tags in the downloads file control the following features on the window. Edit thetags as desired to change the appearance of the window.
l App Name. The name of the application.
l Image. Whether the application's icon appears to the left or to the right of the name.
l File Name. If you changed the name of the application's execution file, you must update thissection so that it matches the new name of the execution file.
l Description. The application's description.
Installation GuideChapter 5: LoadRunner Enterprise configuration options
LoadRunner Enterprise (2020) Page 94 of 146

Enable MS-SQL Windows authenticationThis section describes how to configure an MS-SQL database with Windows authentication.
Note: The procedure below requires you to make changes to the MS-SQL database. It isstrongly recommended that you make these changes using the SQL Server ManagementStudio tool.
To enable Windows authentication:
1. Verify that the LoadRunner Enterprise server and database server all belong to the samedomain, and that there is a domain user with administrator privileges common to all themachines.
2. Change users to domain users using the System Identity Utility. For details, see Change theLoadRunner Enterprise system user in the LoadRunner Enterprise Help Center.
3. Download the SQL Server Management Studio tool from the Microsoft Download Center(http://www.microsoft.com/downloads/en/default.aspx).
4. In SQL Server Management Studio, perform the following actions:
a. In the Object Explorer pane, expand the Security folder.
b. Right-click Logins and select New Login.
c. Enter the domain user in the Login name box, and make sure that WindowsAuthentication is selected.
Note: Verify that the domain user is assigned the same Server Roles as thedatabase administrative user (td_db_admin).
5. Make sure that the relevant project is created in LoadRunner Enterprise Administration withthe MS-SQL (Win Auth) database type. For details, see the LoadRunner Enterprise HelpCenter.
Configure SSL for load generatorsThis section describes how to configure SSL communication to the load generators. It describeshow to create and install a Certification Authority and a Client Certificate for working with SSL tosecure communication to your load generators. It also describes how to enable SSL fromLoadRunner Enterprise Administration.
Create and copy digital certificates
1. Create a Certification Authority (CA)
Installation GuideChapter 5: LoadRunner Enterprise configuration options
LoadRunner Enterprise (2020) Page 95 of 146
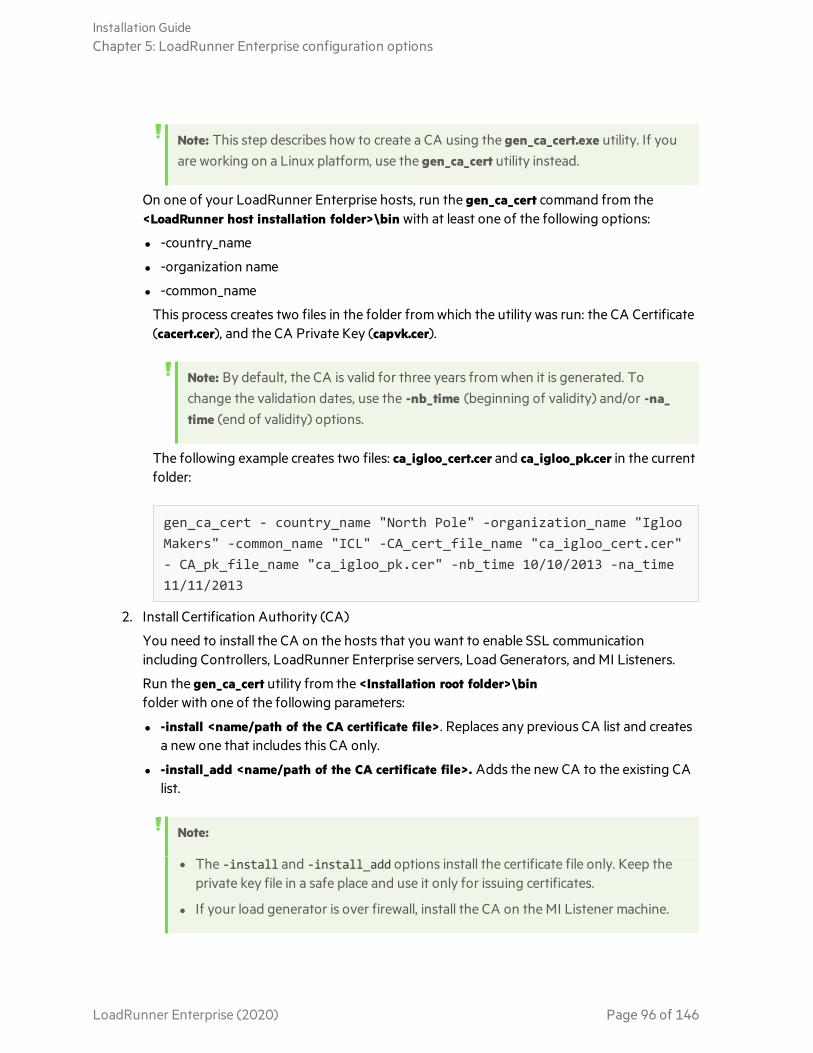
Note: This step describes how to create a CA using the gen_ca_cert.exe utility. If youare working on a Linux platform, use the gen_ca_cert utility instead.
On one of your LoadRunner Enterprise hosts, run the gen_ca_cert command from the<LoadRunner host installation folder>\bin with at least one of the following options:
l -country_name
l -organization name
l -common_name
This process creates two files in the folder from which the utility was run: the CA Certificate(cacert.cer), and the CA Private Key (capvk.cer).
Note: By default, the CA is valid for three years from when it is generated. Tochange the validation dates, use the -nb_time (beginning of validity) and/or -na_time (end of validity) options.
The following example creates two files: ca_igloo_cert.cer and ca_igloo_pk.cer in the currentfolder:
gen_ca_cert - country_name "North Pole" -organization_name "IglooMakers" -common_name "ICL" -CA_cert_file_name "ca_igloo_cert.cer"- CA_pk_file_name "ca_igloo_pk.cer" -nb_time 10/10/2013 -na_time11/11/2013
2. Install Certification Authority (CA)
You need to install the CA on the hosts that you want to enable SSL communicationincluding Controllers, LoadRunner Enterprise servers, Load Generators, and MI Listeners.
Run the gen_ca_cert utility from the <Installation root folder>\binfolder with one of the following parameters:
l -install <name/path of the CA certificate file>. Replaces any previous CA list and createsa new one that includes this CA only.
l -install_add <name/path of the CA certificate file>. Adds the new CA to the existing CAlist.
Note:
l The -install and -install_add options install the certificate file only. Keep theprivate key file in a safe place and use it only for issuing certificates.
l If your load generator is over firewall, install the CA on the MI Listener machine.
Installation GuideChapter 5: LoadRunner Enterprise configuration options
LoadRunner Enterprise (2020) Page 96 of 146

3. Create a Client Certificate
Note: This step describes how to create a client certificate using the gen_cert.exeutility. If you are working on a Linux platform, use the gen_cert utility instead.
On one of your LoadRunner Enterprise hosts, run the gen_cert command from the<LoadRunner Enterprise host root folder>\bin folder with at least one of the followingoptions:
o -country_nameo -organization_nameo -organization_unit_nameo -eMailo -common_name
It is important to note the following:
l The CA Certificate and the CA Private Key files are necessary for the creation of thecertificate. By default, it is assumed that they are in the current folder, and are namedcacert.cer and capvk.cer respectively. In any other case, use the -CA_cert_file_name and -CA_pk_file_name options to give the correct locations.
l The certificate file is created in the folder from which the utility was run. By default, the filename is cert.cer.
4. Install a Client Certificate
You need to install the client certificate on the hosts that you want to enable SSL includingLoadRunner Enterprise hosts (used as Controllers), LoadRunner Enterprise servers, LoadGenerators, and MI Listeners.
Run the gen_cert utility from the <LoadRunner Enterprise host root folder>\bin folder withthe following parameter:
-install <name/path of the client certificate file>
Note: Steps 3 and 4 describe how to install the same client certificate. Alternatively,you can create a new client certificate on each machine.
5. On the load generator machines, open LoadRunner Enterprise Agent Configuration and clickOK to restart the agent configuration. On the MI Listener machines, open AgentConfiguration and click OK to restart the agent configuration.
Installation GuideChapter 5: LoadRunner Enterprise configuration options
LoadRunner Enterprise (2020) Page 97 of 146

Enable SSL communication for load generators in LoadRunnerEnterprise Administration
1. Log onto LoadRunner Enterprise Administration. For details, see "Log on to LoadRunnerEnterprise Administration" on page 52.
2. On the LoadRunner Enterprise Administration sidebar, under Maintenance select Hosts.
3. Under the Host Name column, click the name of an existing host or load generator over afirewall host.
Alternatively, click New Testing Host to create a new host.
4. In the Host Details or New Host page, select Enable SSL.
Installation GuideChapter 5: LoadRunner Enterprise configuration options
LoadRunner Enterprise (2020) Page 98 of 146

LoadRunner Enterprise (2020) Page 99
Part 4: Working with firewalls

Chapter 6: Using firewallsYou can set up your LoadRunner Enterprise system to run Vusers and monitor servers over afirewall.
This chapter includes:
• About using firewalls in LoadRunner Enterprise 101• Example of over firewall deployment 103• Set up the system to use firewalls: basic steps 103• Install over firewall components 105• Initial configuration of the over firewall system 106• Specify MI Listeners 109
LoadRunner Enterprise (2020) Page 100 of 146

About using firewalls in LoadRunner EnterpriseWorking with a firewall means that you can prevent unauthorized access to or from a privatenetwork, on specific port numbers.
For example, you can specify that no access is allowed to any port from the outside world, with theexception of the mail port (25), or you can specify that no outside connection is allowed from anyports to the outside except from the mail port and WEB port (80). The port settings areconfigured by the system administrator.
In a regular performance test (not over a firewall), the Controller has direct access to theLoadRunner Enterprise agents running on remote machines. This enables the Controller toconnect directly to those machines.
When running Vusers or monitoring applications over a firewall, this direct connection is blockedby the firewall. The connection cannot be established by the Controller, because it does not havepermissions to open the firewall.
LoadRunner Enterprise solves this problem by using a communication configuration based onHTTPS or secured TCP/IP. This configuration uses the standard SSL port on the firewall (port443). For details on HTTPS and TCP/IP system configuration, see "Set up your deployment (TCPor HTTPS)" on page 106.
A LoadRunner Enterprise agent is installed on Load Generators running Vusers over a firewall,and on Monitor Over Firewall machines that monitor the servers that are located over a firewall.The agent communicates with the MI Listener machine through port 443 in the firewall.
The MI Listener is a component that serves as router between the Controller and the LoadRunnerEnterprise agent.
Installation GuideChapter 6: Using firewalls
LoadRunner Enterprise (2020) Page 101 of 146

When the LoadRunner Enterprise agent connects to the MI Listener, the MI Listener keeps alisting of the connection to the agent using a symbolic name that the agent passed to it.
When the Controller connects to the MI Listener, it communicates to the MI Listener through port50500.
The Controller uses a symbolic name for the agent, and provides the MI Listener machine's name.If there has been a connection from the agent with the same symbolic name to this MI Listener,the connection is made between the Controller and the agent. After you have a connection withthe agent, you can run Vusers over firewall or monitor AUT machines behind the firewall.
Installation GuideChapter 6: Using firewalls
LoadRunner Enterprise (2020) Page 102 of 146

Example of over firewall deploymentThe following diagram is a basic example of a LoadRunner Enterprise deployment over a firewall.
As explained in the previous section, the LoadRunner Enterprise agent is installed on both theLoad Generator machine and the Monitor Over Firewall machine. During installation, theLoadRunner Enterprise agent is added as a Windows service.
The MI Listener serves as a router between:
l The agent on the Load Generator machine and the Controller, enabling the Controller to runVusers over a firewall.
l The agent on the Monitor Over Firewall machine and the Controller, enabling the Controller tomonitor the servers that are located over a firewall.
Set up the system to use firewalls: basic stepsSetting up the system to use firewalls involves the following stages of configuration:
Stage Description
Installationand initialconfiguration
Install the necessary components and perform initial configuration settings.For details, see "Install over firewall components" on page 105, and "Initialconfiguration of the over firewall system" on page 106.
Installation GuideChapter 6: Using firewalls
LoadRunner Enterprise (2020) Page 103 of 146

Stage Description
EnablingrunningVusers over afirewall
When there is a firewall between the Controller and Load Generator hostmachines, set up the system to run Vusers over the firewall. For details, see"Run Vusers over a firewall" on page 111.
Enablingmonitoringover afirewall
Set up your system to monitor the application under test (AUT) when there isa firewall between the Controller and the AUT. For details, see "Monitor over afirewall" on page 116.
CheckingConnectivity
After installing and configuring all the necessary components, check that youare able to establish a connection between the LoadRunner Enterprise agent,the MI Listener, and the Controller machine. For details, see "Checkconnectivity" on page 128.
The following flow chart provides a general outline of the steps that you need to perform to setup your system to work with firewalls.
Installation GuideChapter 6: Using firewalls
LoadRunner Enterprise (2020) Page 104 of 146

Install over firewall componentsTo enable over firewall communication, ensure that you have installed the following LoadRunnerEnterprise components:
Component Description
MI Listener Serves as a router between the Controller and the LoadRunner Enterpriseagent. You install the MI Listener component on a dedicated machine. Forinstallation instructions, see "Install standalone components (Windows)" onpage 60.
For instructions on configuring the MI Listener machine, see "Configure the MIListener" on page 108.
Installation GuideChapter 6: Using firewalls
LoadRunner Enterprise (2020) Page 105 of 146

Component Description
MonitorOverFirewallcomponent
Used to monitor the servers that are located over a firewall. You install theMonitors over Firewall component on a dedicated machine. For installationinstructions, see "Install standalone components (Windows)" on page 60.
For information about configuring the Monitor Over Firewall machine, see"Monitor over a firewall" on page 116.
Initial configuration of the over firewall systemAfter you have installed the necessary components, you are ready to configure your over firewallsystem.
To perform initial configuration of your over firewall system:
1. Configure the system according to TCP or HTTPS.
See "Set up your deployment (TCP or HTTPS)" below.
2. Modify the firewall settings to enable communication between the machines on either sideof the firewall.
See "Configure the firewall to allow agent access" on page 108.
3. Configure the MI Listener.
See "Configure the MI Listener" on page 108.
Set up your deployment (TCP or HTTPS)
To run Vusers or monitor servers over the firewall, configure your system according to one of thefollowing configurations. Note that these configurations contain a firewall on each LAN. Theremay also be configurations where there is a firewall for the Over Firewall LAN only.
Installation GuideChapter 6: Using firewalls
LoadRunner Enterprise (2020) Page 106 of 146

l TCP Configuration
The TCP configuration requires every LoadRunner Enterprise agent machine behind thecustomer's firewall to be allowed to open a port in the firewall for outgoing communication.
l HTTPS Configuration
In the HTTPS configuration, only one machine (the proxy server) is allowed to open a port inthe firewall. Therefore it is necessary to tunnel all outgoing communications through the proxyserver.
Installation GuideChapter 6: Using firewalls
LoadRunner Enterprise (2020) Page 107 of 146

Configure the firewall to allow agent access
You modify your firewall settings to enable communication between the machines inside thefirewall and machines outside the firewall.
TCP configuration
The LoadRunner Enterprise agent attempts to establish a connection with the MI Listener usingport 443, at intervals specified in the Connection Timeout field in the Agent Configuration dialogbox. To enable this connection, allow an outgoing connection for HTTPS service on the firewallfor port 443. The agent initiate the connection and the MI Listener communicates with the LoadGenerator through the connection.
HTTPS configuration
The LoadRunner Enterprise agent attempts to establish a connection with the MI Listener, usingthe proxy port specified in the Proxy Port field, and at intervals specified in the ConnectionTimeout field in the Agent Configuration dialog box. When the connection to the proxy server isestablished, the proxy server connects to the MI Listener. To enable this connection, allow anoutgoing connection for HTTPS service on the firewall for port 443. The proxy server can thenconnect to the MI Listener, and the MI Listener can connect back to the agent through the proxyserver. From this point on, the agent listens to commands from the MI Listener.
Local System account configuration
If you intend to start the LoadRunner Agent Service from the Local System account, you need togrant it permissions. If you do not provide permissions, the monitor graph will not display anydata.
To grant it permissions, add a local user on the AUT machine with the same name and passwordas the local user on Agent machine. Add the AUT local user to the Performance Monitor Usersgroup and restart the Agent process.
Configure the MI Listener
To enable running Vusers or monitoring over a firewall, you need to install the MI Listener on oneor more machines in the same LAN as the Controller outside the firewall. For installationinstructions, see, "Install standalone components (Windows)" on page 60.
To configure the MI Listener:
1. On the MI Listener server, open port 443 for the incoming traffic.
2. Select Start > Administrative Tools > Services, and stop LoadRunner Agent Service.
3. Select Start > All Programs > Micro Focus > LoadRunner > Advanced Settings > MI ListenerConfiguration, or run
Installation GuideChapter 6: Using firewalls
LoadRunner Enterprise (2020) Page 108 of 146

<LoadRunner root folder>\launch_service\bin\MILsnConfig.exe
4. Set each option as described in the following table:
Option Description
Check ClientCertificates
Select True to request that the client send an SSL certificate whenconnecting, and to authenticate the certificate.
Default value: False
Private KeyPassword
The password that may be required during the SSL certificateauthentication process.
Default value: none
Click OK to save your changes or Use Defaults to use the default values.
5. Select Start > Administrative Tools > Services. To restart the LoadRunner Agent Service,select Start > All Programs > Micro Focus > LoadRunner > Advanced Settings > AgentService.
6. Make sure that no Web Servers are running on the MI Listener or Monitor over Firewallmachine. These servers use port 443 and will not allow the access required by the listeningand monitoring processes
Specify MI ListenersIn LoadRunner Enterprise Administration, you specify one or more MI Listeners to enable runningVusers or monitoring data over a firewall.
To add an MI Listener:
1. On the LoadRunner Enterprise Administration sidebar, under Maintenance > Hosts, selectMI Listeners.
2. In the MI Listeners tab, click the Add New MI Listener button. The New MI Listener pageopens.
Installation GuideChapter 6: Using firewalls
LoadRunner Enterprise (2020) Page 109 of 146

3. Enter the following details:
Field Description
MI ListenerName
The host name of the MI Listener.
Note: If you have two different IP addresses for the same MI Listener—onefor internal communication with the Controller and a second for publiccommunication with a Load Generator located over a firewall—enter theinternal IP address here. Enter the public IP address in the Public IP field(see below).
Description A description of the MI Listener.
Public IP The public IP address of the MI Listener.
Note:
If you have two different IP addresses for the same MI Listener, one forpublic communication with a Load Generator located over a firewall and asecond for internal communication with the Controller, enter the public IPaddress here. Enter the internalIP address in the MI Listener Name field (seeabove).
Purpose The role designated to the MI Listener:
l Diagnostics data collection over a firewall
l Monitoring over a firewall
l Running Vusers over a firewall
4. Click Save. The MI Listener is added to the grid.
Installation GuideChapter 6: Using firewalls
LoadRunner Enterprise (2020) Page 110 of 146

Chapter 7: Run Vusers over a firewallYou can set up LoadRunner Enterprise to run Vusers over a firewall.
This chapter includes:
• Run Vusers over a firewall: basic steps 112• Configure hosts to run Vusers over a firewall 113
LoadRunner Enterprise (2020) Page 111 of 146

Run Vusers over a firewall: basic steps
Note: Before you configure your system to run Vusers over the firewall, ensure that youhave completed the configuration steps described in "Initial configuration of the overfirewall system" on page 106.
To run Vusers over a firewall:
1. In LoadRunner Enterprise Administration, specify the details of the MI Listener that will beused to run Vusers over the firewall. For details, see "Specify MI Listeners" on page 109.
2. Configure the LoadRunner Enterprise agent on each Load Generator machine that will runover a firewall to communicate with the MI Listener.
For information on how to configure the LoadRunner Enterprise agent, see "Configure theLoadRunner Enterprise agent" on page 123.
Note: After you configure the LoadRunner Enterprise agent on the Load Generatormachine, you can edit the configuration settings from LoadRunner EnterpriseAdministration. For details, see Manage hosts in the LoadRunner Enterprise HelpCenter.
3. In LoadRunner Enterprise Administration, configure the relevant Load Generator hosts torun over a firewall. For details, see "Configure hosts to run Vusers over a firewall" on the nextpage.
Installation GuideChapter 7: Run Vusers over a firewall
LoadRunner Enterprise (2020) Page 112 of 146

Configure hosts to run Vusers over a firewallTo use a LoadRunner Enterprise host to run Vusers over a firewall, you need to configure therelevant hosts as Load Generators in LoadRunner Enterprise Administration.
Part of the process of configuring a LoadRunner Enterprise host involves selecting a location foryour host. For example, locations can be defined according to physical areas. The location alsodetermines whether the host is located over a firewall.
Before you configure the host, you need to ensure that you have added a location over a firewall.When you are configuring a host to operate over a firewall, you select a location that is locatedover a firewall.
This section describes the basic steps of how to add a host as a Load Generator for runningVusers over a firewall. For detailed information about adding hosts in LoadRunner Enterprise,refer to the LoadRunner Enterprise Administration Guide.
To configure a host to run Vusers over a firewall:
1. Add the location that is over a firewall.
a. In LoadRunner Enterprise Administration, select Maintenance > Hosts and click theLocations tab.
b. Click Add New Location . The New Location dialog box opens.
c. Enter the following details:
Field Description
LocationName
The name of the host location. The name should have a logicalconnection to the host location.
Description A description of the host location.
OverFirewall
Indicates whether the host location is over a firewall.
2. Add the over firewall host.
a. On the LoadRunner Enterprise Administration sidebar, select Maintenance > Hosts.
b. Select the Hosts tab, and then click Create New Host .
c. In the New Host dialog box, enter the following details:
Installation GuideChapter 7: Run Vusers over a firewall
LoadRunner Enterprise (2020) Page 113 of 146

Field Description
Host Name The fully qualified domain name or IP address of the host that is assignedwhen creating the host.
Description A description of the host.
Purpose Select a purpose for the host. Note that a host over a firewall can onlyhave a Load Generator purpose.
Source Select the host's source: Local if the host exists in your testing lab, orCloud if the host was provisioned from a cloud provider.
Priority A rank assigned to the host. The higher the priority you give the host, themore likely the host will be allocated to a test. There are a number ofcriteria to consider when assigning priority. The main considerations arewhether the host is a dedicated machine or a shared resource, and thetype of hardware installed on the machine.
Status Indicate the current status of the host.
Location The location of the host that is over the firewall.
Installation Select the installation type of the host.
For a standalone installation of the Load Generator, select WindowsStandalone LG.
MI Listener Enter the IP address or host name of the MI Listener that enables datacollection.
Enable SSL Indicates whether the Load Generator is to communicate with theController via SSL (Secure Socket Layer) or not. This option is availablewhen the Load Generator is located over a firewall.
Note: The Load Generator uses SSL to communicate with theController during runtime only. For non runtime functionality(including collating results), the Load Generator does not use SSLas the communication protocol.
Installation GuideChapter 7: Run Vusers over a firewall
LoadRunner Enterprise (2020) Page 114 of 146
Field Description
Belongs toPools
The host pools to which the host is assigned.
Host pools enable you to control which hosts are allocated to whichprojects.
HostAttributes
Attributes of the host.
Example: Memory, strength, installed components
Installation GuideChapter 7: Run Vusers over a firewall
LoadRunner Enterprise (2020) Page 115 of 146

Chapter 8: Monitor over a firewallYou can set up LoadRunner Enterprise to monitor servers over a firewall.
This chapter includes:
• Monitor over a firewall: basic steps 117• Configure monitor settings 118• Configure the project to receive monitor over firewall information 121• Edit monitor over firewall machines during a test run 122
LoadRunner Enterprise (2020) Page 116 of 146

Monitor over a firewall: basic steps
Note: Before you configure your system to monitor servers over a firewall, ensure that youhave completed the configuration steps described in "Initial configuration of the overfirewall system" on page 106.
To set up your system to monitor servers over a firewall:
1. In LoadRunner Enterprise Administration, specify the details of the MI Listener that will beused to monitor servers over the firewall. For details, see "Specify MI Listeners" on page 109.
2. Configure the LoadRunner Enterprise agent on each Monitor Over Firewall machine tocommunicate with the MI Listener.
For details, see "Configure the LoadRunner Enterprise agent" on page 123.
3. Use the Monitor Configuration tool to configure the servers to monitor and define specificmeasurements that LoadRunner Enterprise collects for each monitored server.
For details, see "Configure monitor settings" on the next page.
4. In the relevant project, establish a connection between the tests you are running and theMonitor Over Firewall machines.
For details, see "Configure the project to receive monitor over firewall information" onpage 121.
Installation GuideChapter 8: Monitor over a firewall
LoadRunner Enterprise (2020) Page 117 of 146

Configure monitor settingsYou configure the monitor settings from the Monitor Over Firewall machine, using the MonitorConfiguration tool. You select the type of monitors to run and the server whose resources youwant to monitor, add the measurements to monitor for each server, and specify the frequency atwhich the monitored measurements are to be reported.
To configure monitor settings:
1. On the Monitor Over Firewall machine, choose Start > Programs > Micro Focus > LoadRunner> Advanced Settings > Monitor Configuration. For machines without the completeLoadRunner Enterprise installation, choose Start > Programs > Server Monitor > MonitorConfiguration. The Monitor Configuration dialog box opens.
2. Click the Add Server button . The New Monitored Server Properties dialog box opens.
Installation GuideChapter 8: Monitor over a firewall
LoadRunner Enterprise (2020) Page 118 of 146

3. In the Monitored Server box, type the name or IP address of the server whose resources youwant to monitor.
Note: To add several servers simultaneously, you can specify IP ranges, or separate
the server names or IP ranges with commas. For example, 255.255.255.0-255.255.255.5, or server1, server2.
4. From the Available Monitors list, select the monitors suitable for the server being monitored.
5. Click OK to close the New Monitored Server Properties dialog box. The Monitored Servers listis displayed in the Monitor Configuration dialog box.
Default measurements are displayed for some of the monitors in the Measurements to beMonitored section. You can specify the frequency at which to report the measurements in theMeasurement Properties section.
6. To add additional monitored servers to the list, repeat the steps above.
7. To edit the monitor configuration properties for a server, click the Edit button . TheMonitored Server Properties dialog box opens enabling you to edit the monitors for theserver whose resources you are monitoring.
8. Click Apply to save your settings.
Installation GuideChapter 8: Monitor over a firewall
LoadRunner Enterprise (2020) Page 119 of 146

Clone a monitored server's properties
To monitor the same properties on different server machines, you can clone a selected server'sproperties using the Clone Monitored Server Properties dialog box.
To clone a monitored server's properties:
1. Open the Monitor Configuration dialog box.
2. Right-click the server you want to clone, and select Clone. The Clone Monitored ServerProperties dialog box opens.
3. In the Monitored Server box, type the name or IP address of the cloned server you want tocreate.
Tip: To create several cloned servers simultaneously, you can specify IP ranges, or
separate the server names or IP ranges with commas. For example, 255.255.255.0-255.255.255.5, or server1, server2.
4. The Available Monitors list displays the monitors that were selected for the server beingcloned. Select additional suitable monitors for the cloned server.
5. Click OK to close the Clone Monitored Server Properties dialog box. The cloned server isdisplayed in the Monitored Servers list.
6. Click Apply to save your settings.
Add and remove measurements
After you configure one or more server machines to monitor, you add measurements to monitorfor each server. If LoadRunner Enterprise added default measurements, you can edit them as
Installation GuideChapter 8: Monitor over a firewall
LoadRunner Enterprise (2020) Page 120 of 146

required.
To add a measurement to monitor:
1. Open the Monitor Configuration dialog box.
2. Select a server from the Monitored Servers list.
3. Click the Add Measurement button . Select the appropriate monitor. A dialog box opens,enabling you to choose measurements for the monitor you selected.
4. Select the measurements that you want to monitor, and click OK.
5. Click Apply to save your settings.
To remove a measurement from the measurements list:
1. Select the measurement, and click the Delete button .
2. Click Apply to save your settings.
Configure measurement frequency
After you have configured monitor measurements, you set a schedule for reporting eachmeasurement.
To configure measurement frequency:
1. In the Monitor Configuration dialog box, under the Measurement Properties section, selectthe configured server measurement you want to schedule.
2. Specify the frequency at which you want LoadRunner Enterprise to report the measurement.
3. Click Apply to save your settings.
Configure the project to receive monitor over firewallinformationAfter you configure the monitors, you configure the project to receive Monitor Over Firewallinformation during performance test runs.
Note: The steps in the section are described in more detail in the section about monitorprofiles in the LoadRunner Enterprise User Guide.
To configure the project to receive Monitor Over Firewall information:
Installation GuideChapter 8: Monitor over a firewall
LoadRunner Enterprise (2020) Page 121 of 146

1. Add a monitor over firewall which can be accessed by performance tests in this project.
a. From the LoadRunner Enterprise navigation toolbar, click and select Monitors (underAssets).
b. Click New Monitor Over Firewall.
c. Enter a name, the machine key, and select the MI Listener with which the monitor is toconnect.
2. Select the Monitor Over Firewall agent to use in a specific performance test.
a. In the Test Plan module, select a performance test, and click Edit Test to open the test inthe Performance Test Designer window.
b. In the Monitors tab, select the Monitor Over Firewall agent.
Edit monitor over firewall machines during a test runWhile a performance test is running, you can change the status of a Monitor Over Firewall agentor add another monitor to the test.
To modify the Monitor Over Firewall machines:
1. On the Test Run page, click the Monitors button and select Monitors Over Firewall.The Monitors Over Firewall dialog box opens.
2. You can view the Monitor Over Firewall agents that are monitoring the test, as well as theirconnection status.
l To connect or disconnect a Monitor Over Firewall agent, click the Connect/Disconnectbutton.
l To add a Monitor Over Firewall agent to the test, select it from the Add Monitor OverFirewall list.
Installation GuideChapter 8: Monitor over a firewall
LoadRunner Enterprise (2020) Page 122 of 146

Chapter 9: Configure the LoadRunner EnterpriseagentYou can set up your LoadRunner Enterprise system to run Vusers and monitor servers over afirewall. As part of the process of setting up your LoadRunner Enterprise system to work overfirewalls, you configure the LoadRunner Enterprise agent.
This chapter includes:
• Configure LoadRunner Enterprise agents over the firewall: basic steps 124• Configure the Windows LoadRunner Enterprise agent 124• Configure and run the Linux LoadRunner Enterprise agent 125• Agent configuration settings 126• Check connectivity 128
LoadRunner Enterprise (2020) Page 123 of 146

Configure LoadRunner Enterprise agents over thefirewall: basic stepsFor LoadRunner Enterprise to work over firewalls, you need to configure the LoadRunnerEnterprise agent on each Load Generator machine that will be running over a firewall and on eachMonitor Over Firewall machine.
You configure the LoadRunner Enterprise agent to communicate with the MI Listener. TheMI Listener serves as a router between the LoadRunner Enterprise agent and the Controller.
Configure the Windows LoadRunner Enterprise agentThis section describes how to configure the LoadRunner Enterprise Agent on Windows machinesto communicate with the MI Listener.
To configure the LoadRunner Enterprise agent on Windows machines:
1. Select Start > Programs > Micro Focus > LoadRunner > Advanced Settings >LoadRunner Enterprise Agent Configuration, or run<LoadRunner Enterprise root>\launch_service\bin\AgentConfig.exe.
The Agent Configuration dialog box opens.
2. Select Enable Firewall Agent.
3. Click Settings. The Agent Configuration dialog box displays a list of settings.
Installation GuideChapter 9: Configure the LoadRunner Enterprise agent
LoadRunner Enterprise (2020) Page 124 of 146

4. Set each option as described in "Agent configuration settings " on the next page. Pay carefulattention to the first three settings.
5. Click OK to save your changes.
6. When prompted, click OK to restart the LoadRunner Enterprise agent.
7. Check the connection status between the LoadRunner Enterprise agent and the MI Listener.
a. Change the Agent Runtime settings to run as a process and check the status. For details,see "Run the LoadRunner Enterprise agent as a process" on page 91.
b. If the status is OK, revert back to running it as a service. For details, see "Run theLoadRunner Enterprise agent as a service" on page 91.
Notes:
o When you configure the LoadRunner Enterprise agent on Windows machines,the Remote Management agent is automatically configured with the samesettings. The Remote Management agent enables you to manage remotemachines from LoadRunner Enterprise Administration.
o After you have configured the LoadRunner Enterprise agent on the LoadGenerator machine, you can edit the configuration settings from LoadRunnerEnterprise Administration. For details, see the Help Center.
Configure and run the Linux LoadRunner EnterpriseagentLoad Generator hosts can be installed on Linux machines. This section describes how to configureand run LoadRunner Enterprise agents on Linux machines.
Note: As part of the process of configuring the LoadRunner Enterprise Agent on Linuxmachines, you also need to configure the Remote Management agent. The RemoteManagement agent enables you to manage remote machines from LoadRunner EnterpriseAdministration.
To configure the LoadRunner Enterprise Agent on Linux machines:
1. Activate the firewall service for the LoadRunner Enterprise agent:
a. Open <LoadRunner Enterprise root folder>/dat/br_lnch_server.cfg in a text editor.
b. In the Firewall section, set FireWallServiceActive to 1 and save your changes.
2. Activate the firewall service for the Remote Management agent:
a. Open <LoadRunner Enterprise root folder>/al_agent/dat/br_lnch_server.cfg in a text editor.
Installation GuideChapter 9: Configure the LoadRunner Enterprise agent
LoadRunner Enterprise (2020) Page 125 of 146

b. In the Firewall section, set FireWallServiceActive to 1 and save your changes.
3. Run agent_config from the <LoadRunner Enterprise root folder>/bin directory and enter theagent configuration settings (see "Agent configuration settings " below).
Note: When you set the agent configuration settings, they are applied to both theLoadRunner Enterprise and Remote Management agents.
4. Restart the LoadRunner Enterprise agent for the configuration changes to take effect.
5. Restart the Remote Management agent for the configuration changes to take effect.
a. To stop the Remote Management agent, run the following command from the<LoadRunner Enterprise root folder>/al_agent/bin directory:
al_daemon_setup -remove
b. To start the Remote Management agent, run the following command from the<LoadRunner Enterprise root folder>/al_agent/bin directory:
al_daemon_setup -install
Agent configuration settingsThe following table provides an explanation of the agent configuration settings:
SettingDefaultValue Description
MI Listenername
none The host name, fully qualified domain name, or IP address of the MIListener.
LocalMachineKey
none A symbolic string identifier used to establish a unique connectionbetween the Controller host and the agent machine, via the MIListener machine.
When configuring a Monitor Over Firewall agent, you can enter anylogical name, using lowercase letters only.
When configuring the agent on a load generator to run Vusers over afirewall, you must use the format hostname_locationnamewhere:
l hostname is the name of the host as found in LoadRunnerEnterprise Administration's Hosts page.
l locationname is the name of the host location as found inLoadRunner Enterprise Administration's Host Locations page.
Installation GuideChapter 9: Configure the LoadRunner Enterprise agent
LoadRunner Enterprise (2020) Page 126 of 146

SettingDefaultValue Description
ConnectionTimeout(seconds)
20seconds
The length of time you want the agent to wait before retrying toconnect to the MI Listener machine. If zero, the connection is keptopen from the time the agent is run.
MI ListenerUser Name
none The user name needed to connect to the MI Listener machine.
MI ListenerPassword
none The password needed to connect to the MI Listener machine.
ServerDomain
none The domain name needed to connect to the MI Listener machine. Thisfield is required only if NTLM is used.
ConnectionType -TCP/HTTP
TCP Select either TCP or HTTP, depending on the configuration you areusing.
ConnectionType -HTTPProxyName
none The name of the proxy server. This field is mandatory if theConnection Type setting is HTTP.
ConnectionType -HTTPProxy Port
none The proxy server connection port. This field is mandatory if theConnection Type setting is HTTP.
ConnectionType -HTTPProxy UserName
none The user name of a user with connection rights to the proxy server.
ConnectionType -HTTPProxyPassword
none The password of the user with connection rights to the proxy server.
Installation GuideChapter 9: Configure the LoadRunner Enterprise agent
LoadRunner Enterprise (2020) Page 127 of 146

SettingDefaultValue Description
ConnectionType -HTTPProxyDomain
none The user's domain if defined in the proxy server configuration. Thisoption is required only if NTLM is used.
Use SecureConnection(SSL)
disabled Enable to connect using the Secure Sockets Layer protocol.
Use SecureConnection(SSL) -CheckServerCertificates
none Authenticates the SSL certificates that are sent by the server. SelectMedium to verify that the server certificate is signed by a trustedCertification Authority. Select High to verify that the sender IPmatches the certificate information. This setting is available only if UseSecure Connection is set to True.
Use SecureConnection(SSL) -PrivateKeyPassword
none The password that might be required during the SSL certificateauthentication process. This option is relevant only if the ClientCertificate Owner option is enabled.
Check connectivityTo run Vusers or monitor servers over a firewall, you must be able to establish a connectionbetween the LoadRunner Enterprise agent, MI Listener, and the Controller machine.
If you encounter connectivity problems after installing and configuring all the necessarycomponents, check the table below for troubleshooting tips.
Installation GuideChapter 9: Configure the LoadRunner Enterprise agent
LoadRunner Enterprise (2020) Page 128 of 146

Check Solution
To check that theFirewall service wasactivated on theagent machine:
l Windows Installation:
a. Change the Agent Runtime settings to run as a process and checkthe status. For details, see "Run the LoadRunner Enterprise agentas a process" on page 91.
b. If the status is OK, revert back to running it as a service. For details,see "Run the LoadRunner Enterprise agent as a service" onpage 91.
Otherwise, you need to reconfigure the LoadRunner EnterpriseAgent on your Windows machine. For details, see "Configure theWindows LoadRunner Enterprise agent" on page 124.
l Linux Installation:
In the temporary directory of the LoadRunner Enterprise Agentmachine, locate the <local_machine_key>_connected_to_MI_Listenerfile. If the file is missing, this indicates that the FirewallServiceActive=1is not set in the [FireWall] section of the Agent Settings. For details, see"Configure and run the Linux LoadRunner Enterprise agent" onpage 125.
To check that port443 is open:
On the agent machine, open a command prompt window, and type thefollowing:telnet <MI_Listener_IP> 443.
Example: telnet 111.111.111.1111 443
If port 443 is open, a new Telnet window opens. If port 443 is not open,contact your network administrator.
To check that port443 is available:
If a web server is running on the MI Listener or Monitor Over Firewallmachine, port 443 does not allow the access required by the listening andmonitoring processes. Contact your network administrator to change theweb server port.
Installation GuideChapter 9: Configure the LoadRunner Enterprise agent
LoadRunner Enterprise (2020) Page 129 of 146

Check Solution
To checkconnectivitybetween the agentand the MIListener, whenrunning theLoadRunnerEnterprise Agentas a service:
When running the LoadRunner Enterprise Agent as a service, do thefollowing:
l Check that port 443 is open. See " To check that port 443 is open: " onthe previous page.
l Check that the Agent Settings and Agent Configuration are correctlyset. For details, see "Configure LoadRunner Enterprise agents over thefirewall: basic steps" on page 124.
l Run the agent as a process by launching <Installation>\Launch_service\bin\magentproc.exe. If you are successful, this indicates anauthentication issue with the LoadRunner Agent Service. Browse tothe Administrative Tools > Services > LoadRunner Agent Service andchange the properties of this service to System User Account, orprovide the username and password of a user who has administrativeprivileges on this machine.
Installation GuideChapter 9: Configure the LoadRunner Enterprise agent
LoadRunner Enterprise (2020) Page 130 of 146

LoadRunner Enterprise (2020) Page 131
Part 5: Troubleshooting
Chapter 10: Troubleshooting installation issuesThis chapter provides troubleshooting for issues that arise when installing LoadRunnerEnterprise components and during initial configuration.
This chapter includes:
• Unable to load Windows 8 Explorer shell after installing LoadRunner Enterprise host 133• Host silent installation stops after installing .NET Framework 4.8 133• Working with LoadRunner Enterprise when Windows Firewall is enabled 133• LoadRunner Enterprise uninstall fails or freezes 135• Cannot log in to LoadRunner Enterprise via the client machine: JavaScript Error 135• Initializing Run page does not load when starting a test run 136• Unable to run the LoadRunner Enterprise component installation from a network drive 136• Unable to install LoadRunner Enterprise components from the installation directory 137• Unable to install a LoadRunner Enterprise component if the default port is in use 138• Unable to use non-default ports in Microsoft SQL 140• No error message when a test fails to start 141• Unable to display online topology monitors 141• Unable to configure LoadRunner Enterprise server or host when the process is used by anotherprocess 142• LoadRunner Enterprise configuration host fails to start the 'LoadRunner Center Data Service' 142• Configure LoadRunner Enterprise to work with secure cookies over a secure connection 142• Unable to log on to the database server 143• Incorrect time range displayed in online graph 144• Unable to install Network Virtualization (NV) components 144
LoadRunner Enterprise (2020) Page 132 of 146

Unable to load Windows 8 Explorer shell after installingLoadRunner Enterprise host
Problem description
After installing LoadRunner Enterprise host on Windows 8 and rebooting the machine, theWindows Explorer shell fails to load.
Troubleshooting
UAC is enabled on your machine. To disable, perform the following steps:
1. Choose Start > Run.
2. To open the registry editor, type Regedit in the Run dialog box.
3. Disable UAC and restart your machine. For details on how to disable UAC, see:http://gallery.technet.microsoft.com/Registry-Key-to-Disable-UAC-45d0df25.
Host silent installation stops after installing .NETFramework 4.8
Problem description
Running the Host installation in silent mode using setup_host.exe /s fails to complete theinstallation. The installation process stops after installing .NET Framework 4.8.
Troubleshooting
.NET Framework 4.8 replaces the .NET Framework 4.6.2 and earlier files. If there are anyapplications that are using the .NET Framework 4.6.2 or earlier files and are running during theinstallation of .NET Framework 4.8, you may need to restart your machine. If you are prompted torestart the machine, restart it before continuing the installation. For details, seehttp://msdn.microsoft.com/en-us/library/hh527997%28v=vs.110%29.aspx.
Working with LoadRunner Enterprise when WindowsFirewall is enabled
Problem description
To work with LoadRunner Enterprise, we recommend that you disable the Windows Firewall on allhost machines. To enable LoadRunner Enterprise to work with the Windows Firewall enabled, theWindows Firewall must be reconfigured.
Installation GuideChapter 10: Troubleshooting installation issues
LoadRunner Enterprise (2020) Page 133 of 146

Troubleshooting
The Windows Firewall must be configured to allow inbound and outbound communication onspecific ports used by LoadRunner Enterprise.
The following configurations are required for all LoadRunner Enterprise machines in the system(servers and hosts), except for SiteScope and Diagnostics.
LoadRunner Enterprise server:
Process / Service Direction ProtocolLocalPort Remote Port Path
Datacollectionagent.exe Inbound TCP 3333 Any <LoadRunner
Enterprise Server install
dir>\bin
\datacollectionagent.exe
World Wide Web Services
(HTTP Traffic-In)
Inbound TCP 80 Any Service
LoadRunner Remote
Management Agent
Service
Inbound TCP 54245 Any <LoadRunner
Enterprise Server install
dir> \al_agent\bin
\alagentservice.exe
ALWrapperServer.exe Outbound TCP Any 54245 <LoadRunner
Enterprise Server install
dir>\bin
\ALWrapperServer.exe
w3wp.exe Outbound TCP Any 8080, 8731, 1433,
3333
(Use 1433 for MS
SQL Server, and
1521 for Oracle)
Hosts:
Process / Service Direction ProtocolLocalPort
RemotePort Path
Datacollectionagent.exe Inbound TCP 3333 Any <Host install dir>\bin
\datacollectionagent.exe
Installation GuideChapter 10: Troubleshooting installation issues
LoadRunner Enterprise (2020) Page 134 of 146

Process / Service Direction ProtocolLocalPort
RemotePort Path
LoadRunner Remote
Management Agent Service
Inbound TCP 54245 Any <Host install dir> \al_agent\bin
\alagentservice.exe
LoadRunner Agent Service Inbound TCP 54345,
50500
Any <Host install dir>\ launch_
service \bin\magentservice.exe
System Inbound TCP 8731 Any
LTOPSvc.exe Outbound TCP Any 80,
8080
<Host install dir>\bin
\LTOPSvc.exe
LoadRunner Enterprise uninstall fails or freezes
Problem description
This error may present itself in various ways:
l Uninstall of LoadRunner Enterprise did not complete successfully.
l Uninstall of LoadRunner Enterprise is taking a long time and seems to have frozen.
l When trying to uninstall LoadRunner Enterprise again, LoadRunner Enterprise is not found inAdd/Remove Programs.
Troubleshooting
l Reboot the machine and uninstall again (unless LoadRunner Enterprise no longer appears inAdd/Remove Programs).
l Alternatively, you can:
a. Open a command prompt and run:
<Host installation path>\bin\HP.PC.PCS.Configurator.exe/CFG:..\dat\setup\lts\xml\Configurator.xml /G:Uninstall
b. Delete LoadRunner Enterprise Host from Start menu > Programs > Micro Focus.
c. Delete the product from the MSI manager using the Windows Installer CleanUp Utility(http://www.windows-installer-cleanup-utility.com/).
Cannot log in to LoadRunner Enterprise via the clientmachine: JavaScript Error
Problem description
Login to LoadRunner Enterprise fails, and the following error is displayed:
Installation GuideChapter 10: Troubleshooting installation issues
LoadRunner Enterprise (2020) Page 135 of 146

JavaScript is not installed or is disabled in your browser.
Troubleshooting
This problem is related to running JavaScript in your browser.
To resolve this issue:
1. In Internet Explorer, select Tools > Internet options >Security.
2. Select Internet zone.
3. Click Custom Level.
4. Make sure that Active Scripting is enabled.
5. Enable the following items under ActiveX controls and Plug-ins:
l Automatic prompting for ActiveX controls
l Binary and script behaviors
l Run ActiveX controls and plugins
l Script ActiveX controls marked safe for scripting
Initializing Run page does not load when starting a testrun
Problem description
When starting a test run, the host is added, but the Initializing Run page does not load.
Troubleshooting
The client machine needs to have access to the machine. For example, if the Administratorinserted the machine name without the domain, you might need to add the IP address andmachine name to the host file (C:\WINDOWS\system32\drivers\etc\hosts) on the client machine.
Unable to run the LoadRunner Enterprise componentinstallation from a network drive
Problem description
Cannot run the setup (LoadRunner Enterprise server or host) when attempting to run it from anetwork drive.
Installation GuideChapter 10: Troubleshooting installation issues
LoadRunner Enterprise (2020) Page 136 of 146

Troubleshooting
To run setup.exe from a network location, you need to add the network server location to yourTrusted Sites, and then run setup.exe again.
To add the network server to your Trusted Sites in Internet Explorer:
1. Open Tools > Internet Options.
2. Select the Security tab and click Trusted Sites:
3. Click Sites.
4. In the Trusted Sites dialog box, add the location of the network server where theLoadRunner Enterprise component setup file is located, to the list of trusted sites.
Unable to install LoadRunner Enterprise componentsfrom the installation directory
Problem description
Nothing happens when clicking the installation option from the LoadRunner Enterpriseinstallation directory.
Installation GuideChapter 10: Troubleshooting installation issues
LoadRunner Enterprise (2020) Page 137 of 146

Troubleshooting
1. Make sure the user running the installation has sufficient permissions to launch executablefiles.
2. Restart the machine and try again.
Unable to install a LoadRunner Enterprise component ifthe default port is in use
Problem description
The installation cannot use a default port because it is already in use.
Troubleshooting
If the installation cannot use a default port because it is already in use, change the port as per theinstructions in the following table:
Component How to change the port
LoadRunner EnterpriseServer IIS
To change this port, seehttp://support.microsoft.com/kb/149605.
LoadRunner Enterprise host To change port 8731 to a different port:
1. On each LoadRunner Enterprise host, openLTOPSvc.exe.config (located in <Host Installationdirectory>\bin\) and change all four occurrences of 8731to a new port number. Restart the LoadRunner LoadTesting Service.
2. On the LoadRunner Enterprise server, open pcs.config(located in <LoadRunner Enterprise server installationdirectory>\dat\). Under PCSSettings, changeltopPortNumber to the new port number.
Installation GuideChapter 10: Troubleshooting installation issues
LoadRunner Enterprise (2020) Page 138 of 146

Component How to change the port
MI Listener To change port 443 to a different port, perform the followingsteps on the following machines:
l Controller machine (if used as MI Listener)
l Load Generator machine
l MI Listener
To change port 443:
1. Open <Component installation directory>\launch_service\dat\mdrv.dat. and locate the [launcher] section.
2. Add OFWPort=<port>, where <port> is the new portnumber.
3. Go to <Component installation directory>\launch_service\dat\channel_configure.dat and locate the[General] section.
4. Add OFWPort=<port>, where <port> is the new portnumber.
5. Restart the agent.
Note: There is no support for changing port 50500.
LoadRunner Agent Changing the port for a Controller machine:
1. Stop 'LoadRunner Agent Service'.
2. Open for edit the file: <Install folder\dat\merc_agent.cfg
3. Under the [Attributes] section, add the line:"AgentPort=<New Port Value>"
4. Restart the service.
Changing the port for a Load Generator machine:
1. Stop 'LoadRunner Agent Service'.
2. Open for edit the file: <Install folder\launch_service\dat\merc_agent.cfg
3. Under the [Attributes] section, add the line:"AgentPort=<New Port Value>"
4. Restart the service.
Installation GuideChapter 10: Troubleshooting installation issues
LoadRunner Enterprise (2020) Page 139 of 146

Component How to change the port
Autolab Agent(RemoteManagementAgent)
This service is used to perform administration tasks on allLoadRunner Enterprise machines. By default, Autolab Agent isusing port 54245. The port number can be changed. However,the new value must be configured on each machine (server,host, Load Generator).
To change the port:
1. Stop 'RemoteManagementAgent'.
2. Open <Install folder>\launch_service\al_agent\dat\merc_agent.cfg
3. Under the [Attributes] section, add the line:"AgentPort=<New Port Value>“
4. Restart the service.
SiteScope (Topology) In LoadRunner Enterprise, change the port of the Topologyentity to the same port as that defined during the SiteScopeconfiguration.
SiteScope (Topology) - SSL In LoadRunner Enterprise, change the port of the Topologyentity to the same port as that defined during the SiteScopeconfiguration.
SiteScope (Monitor Profiles) In LoadRunner Enterprise, change the port of the MonitorProfile entity to the same port as that defined during theSiteScope configuration.
Diagnostics Server In Lab Management, change the port of the Diagnostics Serverentity to the same port as that defined during the DiagnosticsServer configuration.
Diagnostics Server - SSL In Lab Management, change the port of the Diagnostics Serverentity to the same port as that defined during the DiagnosticsServer configuration.
Unable to use non-default ports in Microsoft SQL
Problem Description
LoadRunner Enterprise does not work on non-default ports in Microsoft SQL.
Installation GuideChapter 10: Troubleshooting installation issues
LoadRunner Enterprise (2020) Page 140 of 146

Troubleshooting
The Microsoft SQL instance must use a static port. The correct port must be defined in theconnection string.
No error message when a test fails to start
Problem description
An error message is not issued when a performance test fails to start.
Troubleshooting
This problem is possibly caused by the configuration process. Validate the following:
l The LoadRunner Load Testing Service in running on the host machine under the systemaccount.
l The LoadRunner Enterprise user (IUSR_METRO) exists.
l In the wlrun7.ini, under the %systemroot% folder, make sure that IsOrchid and IsOrchid10 areboth set to 1. For details, see Software Self-solve knowledge base article KM1098097.
Unable to display online topology monitors
Problem description
When running a performance test that contains topology, the topology monitors data is notshown. You may get the following error when clicking the topology tab view: This node does nothave a monitor.
Troubleshooting
1. On the Host machine, validate that EnableInUi is set to 1 in <install folder> dat\online_graphs\online_resource_graphs.rmd
2. In Sitescope, set the monitor frequency value (by default it is set to 10 minutes). Make sure itis set for less than 10 seconds.
Installation GuideChapter 10: Troubleshooting installation issues
LoadRunner Enterprise (2020) Page 141 of 146

Unable to configure LoadRunner Enterprise server orhost when the process is used by another process
Problem description
After running the LoadRunner Enterprise Server Configuration wizard, the following error isdisplayed in the log file:
"The process cannot access the file'C:\Windows\Microsoft.NET\Framework\v4.0.30319\config\machine.config' because it is beingused by another process."
This problem occurs when the configuration updates the .NET machine.config file while it is in useby another process (for example, IIS). When the file is in use, the update fails.
Troubleshooting
Restart the machine and start the LoadRunner Enterprise Server Configuration wizard.
LoadRunner Enterprise configuration host fails to startthe 'LoadRunner Center Data Service'
Problem description
After running the LoadRunner Enterprise Host Configuration wizard, the following error isdisplayed in the log file: "Failed starting service 'LoadRunner Data Service'"
This problem occurs if the influxdb.exe process and the LoadRunner Enterprise HostConfiguration wizard are running at the same time.
Troubleshooting
Make sure the influxdb.exe process is not running before you run the LoadRunner EnterpriseHost Configuration wizard.
Configure LoadRunner Enterprise to work with securecookies over a secure connection
Problem description
By default, the LoadRunner Enterprise environment works with a cookie over both HTTP andHTTPS. For requests over HTTPS only, you need to configure LoadRunner Enterprise andLoadRunner Enterprise Administration to secure the cookie.
Installation GuideChapter 10: Troubleshooting installation issues
LoadRunner Enterprise (2020) Page 142 of 146

Troubleshooting
Setting secure cookies on LoadRunner Enterprise web pages
1. Log onto the LoadRunner Enterprise server machine.
2. Open the <Installation folder>\PCWEB\web.config file for editing.
3. Search for ‘requireSSL’ in the file (there should be two occurrences), and set the requireSSLattribute to true.
4. Save the file.
5. Repeat steps 1-4 for each LoadRunner Enterprise server in the same environment.
Setting secure cookies on LoadRunner Enterprise Administration web pages
1. Log onto the LoadRunner Enterprise server machine.
2. Open the <Installation folder>\PCWEB_ADMIN\web.config file for editing.
3. Search for the section 'httpCookies'.
l If it exists, set the value of the requireSSL attribute to true.
l If the section does not exist, add the following element under the <system.web> XMLelement:
<httpCookies httpOnlyCookies="true" requireSSL="true" />4. Save the file.
5. Repeat steps 1-4 for each LoadRunner Enterprise server in the same environment.
Unable to log on to the database server
Problem description
You receive the following error message: Problem encountered when application tried to connectto database.
Troubleshooting
Verify that the database server host name, type, username, and password are correct. Consultyour database administrator if you are unsure.
Installation GuideChapter 10: Troubleshooting installation issues
LoadRunner Enterprise (2020) Page 143 of 146

Incorrect time range displayed in online graph
Problem Description
Changing the time zone on the LoadRunner Enterprise Server or any external analysis database,results in the incorrect time range being displayed when running a performance test in the onlinegraph.
Troubleshooting
To ensure the correct time range for running the performance test is displayed in the onlinegraph, verify the time zone is synchronized on the LoadRunner Enterprise Server and anyexternal analysis database servers.
Unable to install Network Virtualization (NV)components
Problem Description
Windows SmartScreen prevented NVinstaller.exe from running. As a result, NV Componentscould not be installed.
Troubleshooting
Disable Windows SmartScreen before proceeding with the NV installation.
1. Open HKEY_LOCAL_MACHINE\SOFTWARE\Microsoft\Windows\CurrentVersion\Explorer inthe Registry Editor.
2. Change the Value data for SmartScreenEnabled to "Off".
Installation GuideChapter 10: Troubleshooting installation issues
LoadRunner Enterprise (2020) Page 144 of 146

Send Us FeedbackLet us know how we can improve your experience with the Installation Guide.Send your email to: [email protected]
Installation Guide
LoadRunner Enterprise (2020) Page 145 of 146
