location-based auto-tagging
TRANSCRIPT
Location-Based Auto-Tagging For SharePoint 2010
Manual v1.0
Before installation
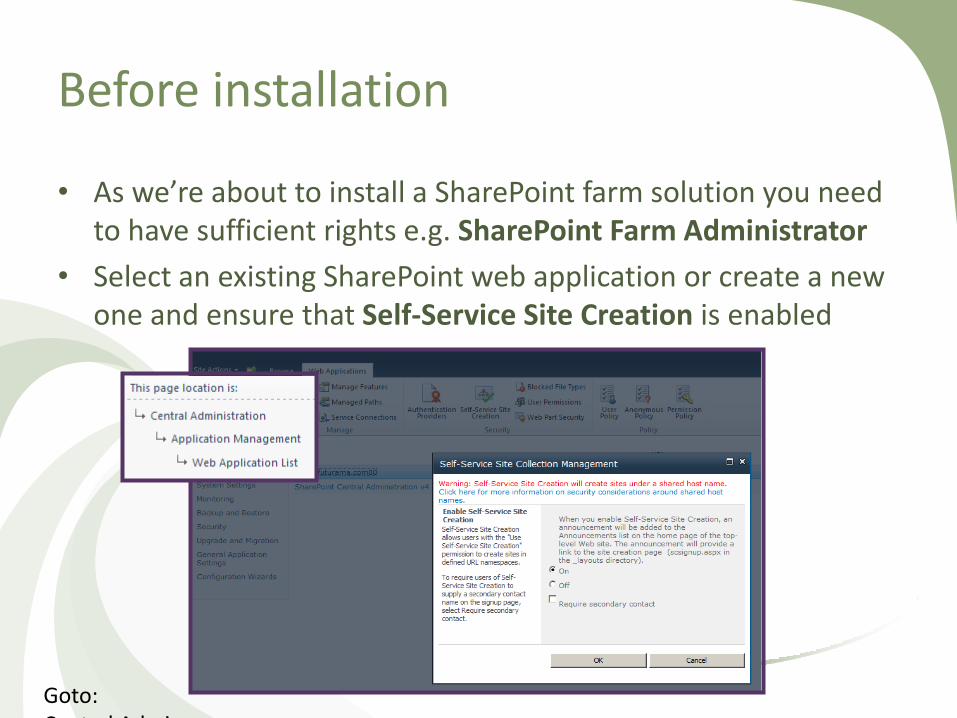
• As we’re about to install a SharePoint farm solution you need to have sufficient rights e.g. SharePoint Farm Administrator
• Select an existing SharePoint web application or create a new one and ensure that Self-Service Site Creation is enabled
Goto: Central Admin

Installation with PowerShell Script
• Copy both files to your SharePoint server into the same location
• Open install.ps1 in an editor e.g. Notepad and replace demo.futurama.com80 on line 67 with the name of your Web Application according to the web application list in the Central Administration
• Right-Click install.ps1
and then Run with
PowerShell
Create the Central Workspaces List
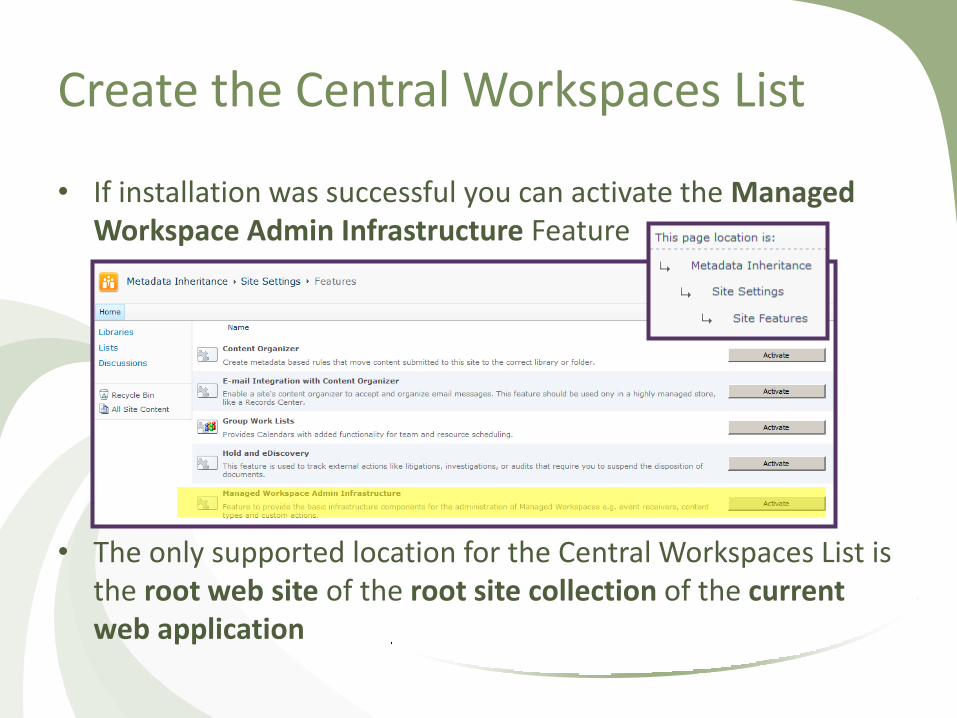
• If installation was successful you can activate the Managed Workspace Admin Infrastructure Feature
• The only supported location for the Central Workspaces List is the root web site of the root site collection of the current web application
Verify the installation
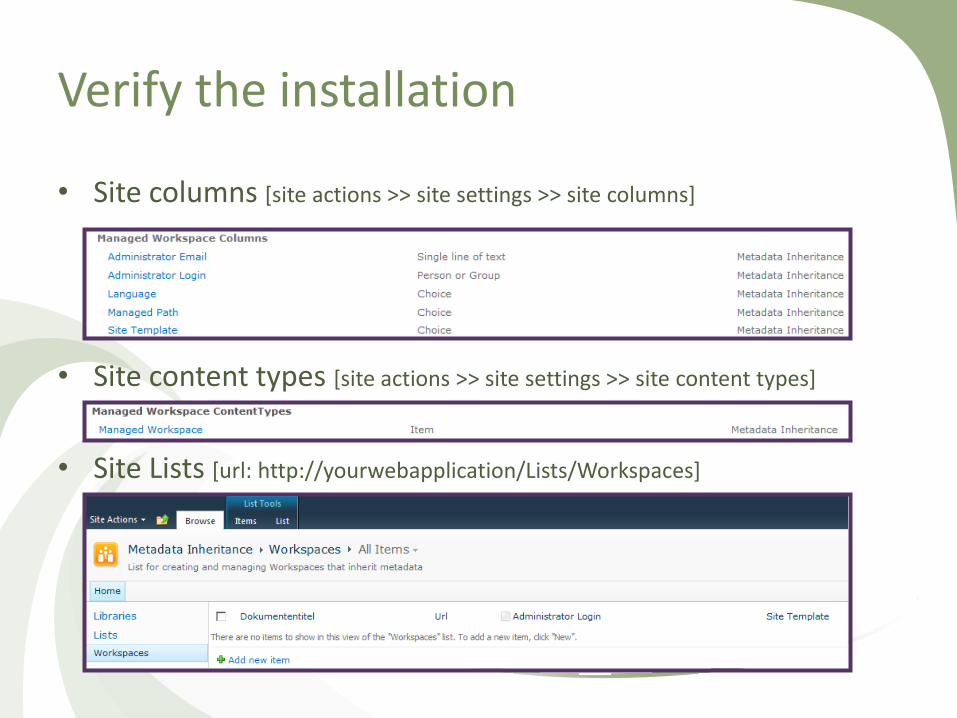
• Site columns [site actions >> site settings >> site columns]
• Site content types [site actions >> site settings >> site content types]
• Site Lists [url: http://yourwebapplication/Lists/Workspaces]
Prepare for first time use
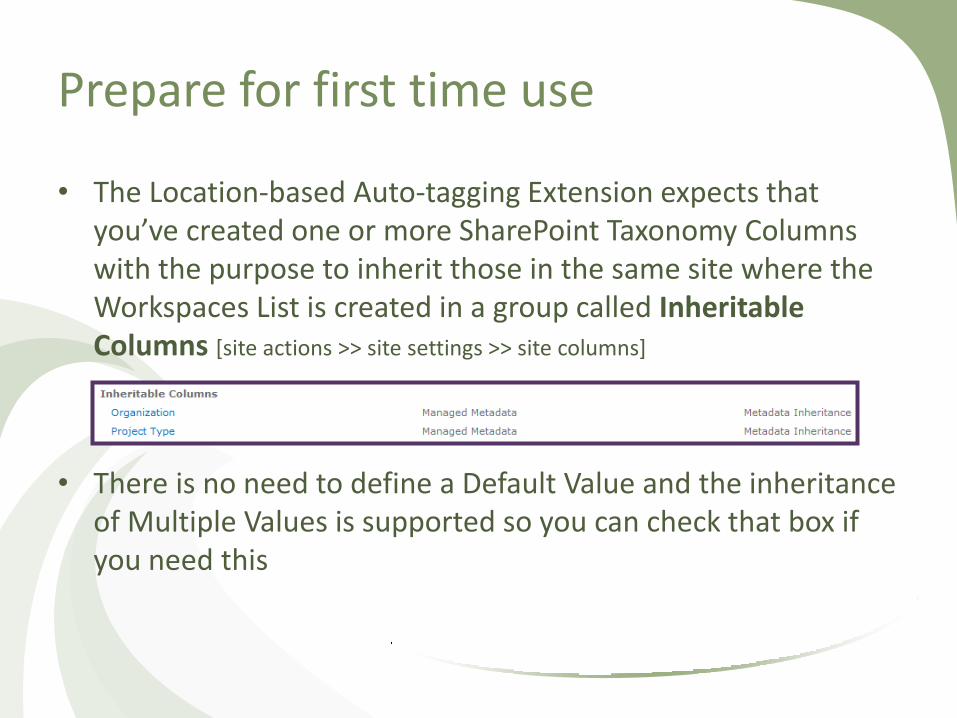
• The Location-based Auto-tagging Extension expects that you’ve created one or more SharePoint Taxonomy Columns with the purpose to inherit those in the same site where the Workspaces List is created in a group called Inheritable Columns [site actions >> site settings >> site columns]
• There is no need to define a Default Value and the inheritance of Multiple Values is supported so you can check that box if you need this

First time use – Reset (1/2)
• Before you can start using the application you need to «reset» it by clicking the Reset-Button in the Workspaces List Ribbon
• This will add the previously created Taxonomy Columns
• Also make sure you check Workspaces only to avoid adding Site Collections that were not created by this application to our list
• Click Run

First time user – Reset (2/2)
• If something went wrong you may see an error, for example when no Taxonomy Columns were created
• If everything went okay, you’ll see a similar message as follows (more likely 0 entries were added ...)

First time use – Settings (1/2)
• Before you can start using the application you need to configure two settings to influence its behaviour
• Check Update list items if you want the application to update existing list items in (all sites in the) Site Collection(s) being updated when you change its settings in this list
First time use – Settings (2/2)
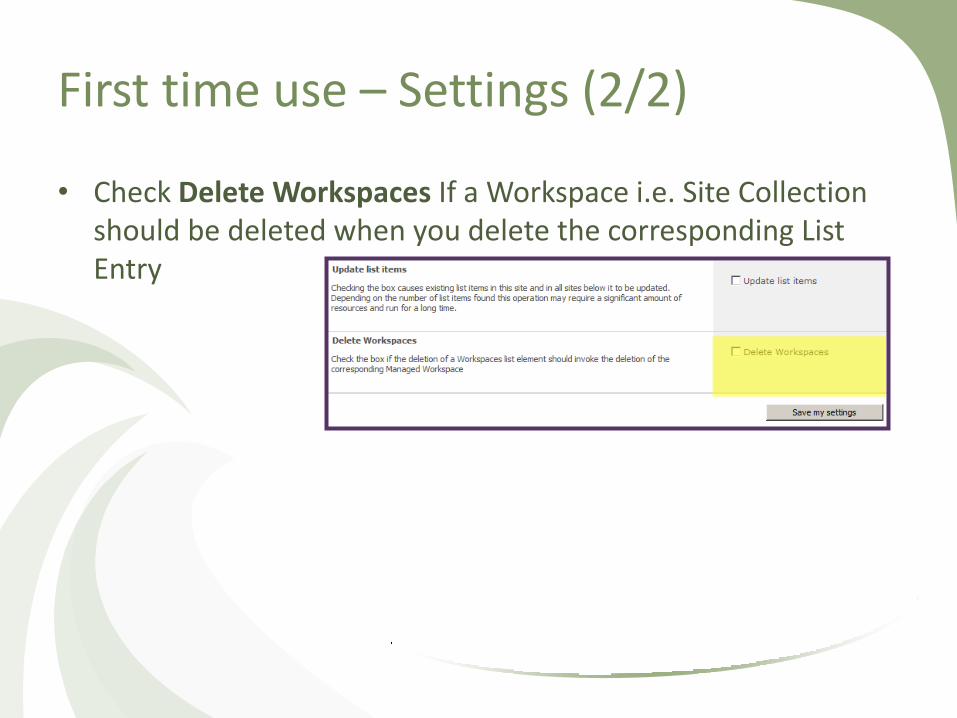
• Check Delete Workspaces If a Workspace i.e. Site Collection should be deleted when you delete the corresponding List Entry
Create a Workspace
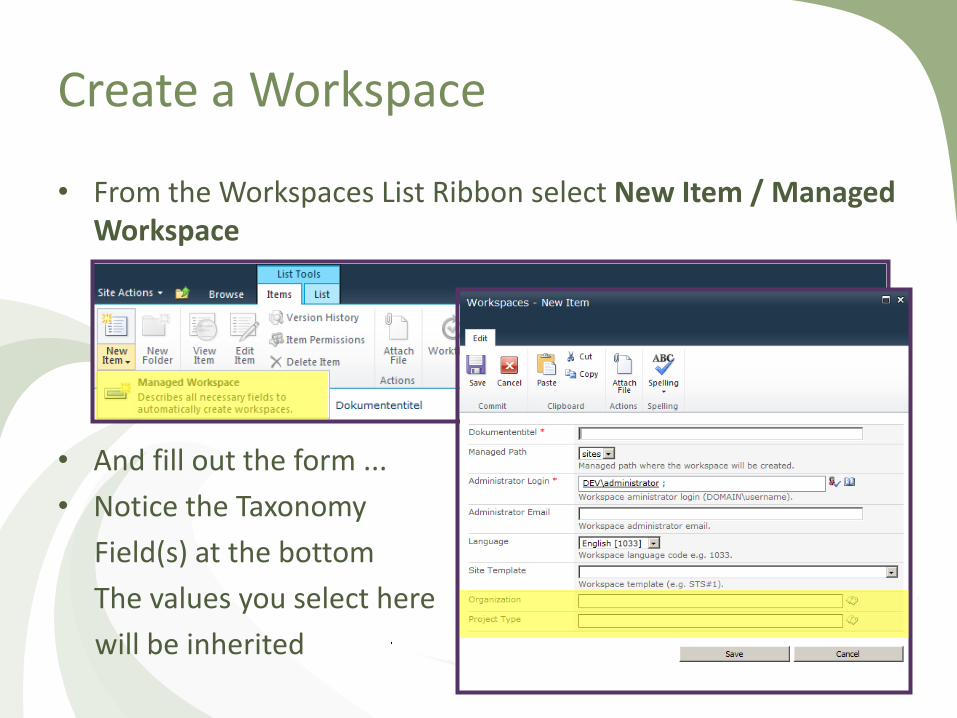
• From the Workspaces List Ribbon select New Item / Managed Workspace
• And fill out the form ...
• Notice the Taxonomy
Field(s) at the bottom
The values you select here
will be inherited

Summary of New Item Form fields
Field name Usage
Title * Will be used to set the title of the Root Site of the new Site Collection that will be created
Managed Path * The Managed Path used to create the new Site Collection at
Administrator Login * The network logon of the envisioned Site Collection Administrator in the form «DOMAIN\Logon»
Administrator E-Mail E-Mail address of the new Site Collection Administrator
Language * Base language of the Root Site in the Site Collection
Template * Web template used to create the Root Site in the Site Collection in the form (Language) Display Name [SharePoint Short Code]
Taxonomy columns Here you should all Taxonomy Columns that you’ve previously created as Site Columns in a Site Columns Group named «Inheritable Columns» and you select the value you want all Sites in the new Site Collection to inherit – The colums will still be created in the target Site Collection if no value is selected
Verify Workspace creation
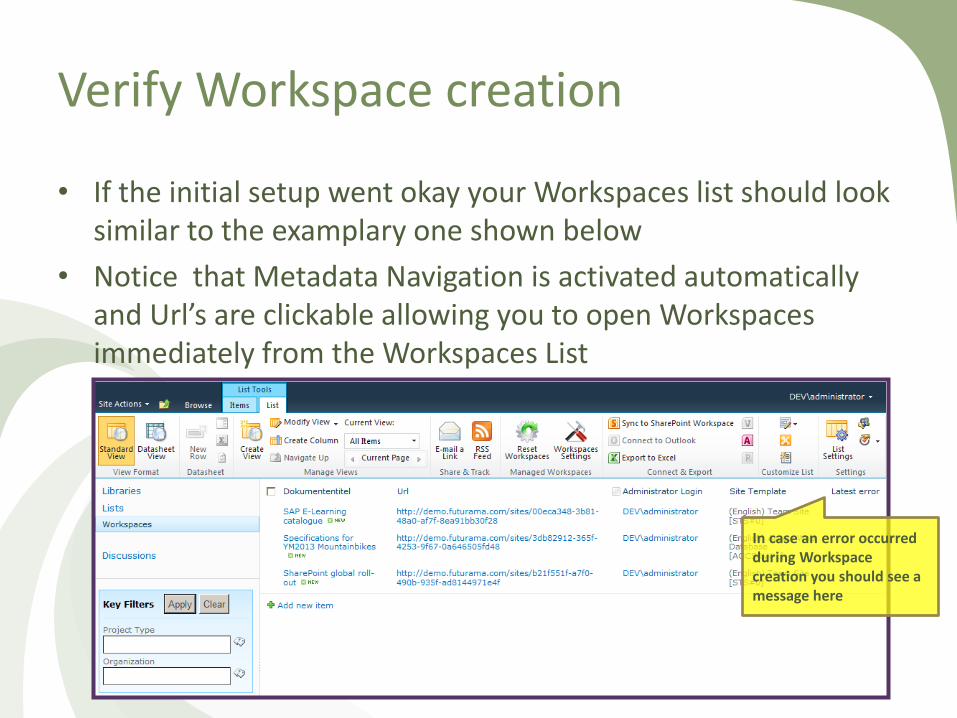
• If the initial setup went okay your Workspaces list should look similar to the examplary one shown below
• Notice that Metadata Navigation is activated automatically and Url’s are clickable allowing you to open Workspaces immediately from the Workspaces List
In case an error occurred during Workspace creation you should see a message here
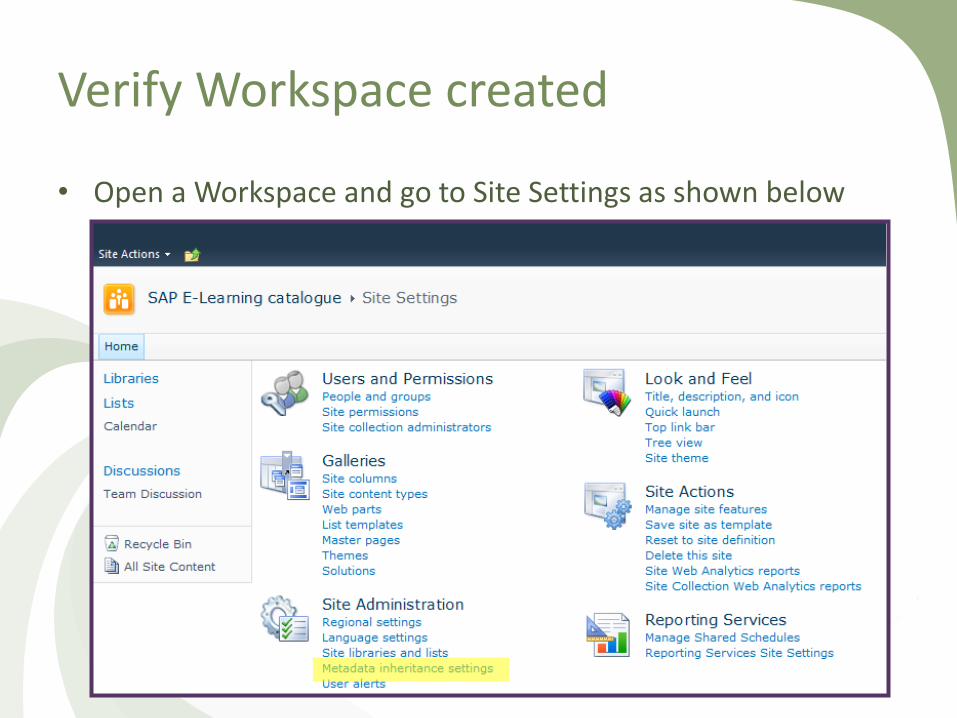
Verify Workspace created
• Open a Workspace and go to Site Settings as shown below
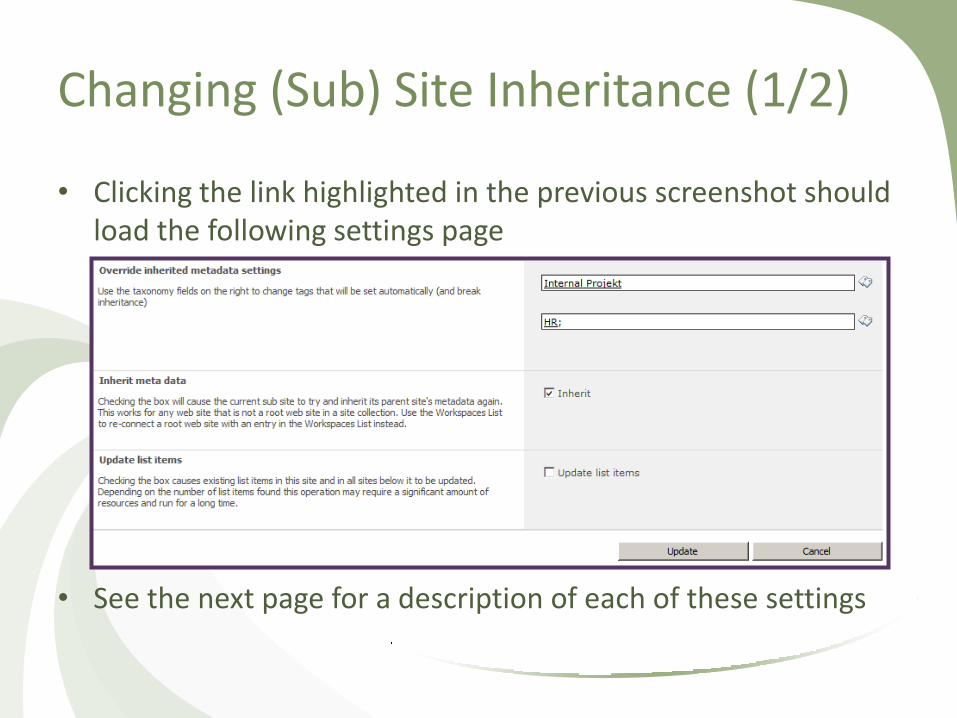
Changing (Sub) Site Inheritance (1/2)
• Clicking the link highlighted in the previous screenshot should load the following settings page
• See the next page for a description of each of these settings

Changing (Sub) Site Inheritance (2/2)
Field name Usage
Override inherited metadata settings Here you can select new values for inherited metadata columns – doing so will automatically break inheritance and as such the current (Sub) Site and all of its ancestors will no longer inherit from the parent of the current (Sub) Site but instead will now be updated with the new metadata
Inherit meta data Uncheck to break inheritance or check to re-establish inheritance meaning that the (Sub) Site will try and inherit from its parent again or if there is not parent (because the current Site is the Root Site in the Site Collection) it will wait for the next update made through the Workspaces List
Update list items Use this setting to control whether you want list items in this site and all sites below it to be updated when metadata is changed
Updates are always recursively i.e. when a Site below another Site has disabled inheritance the update process for that specific site and all sites below that specific site will stop however for all other sites it will still continue
More information
SharePoint Consultant .CH
Represented by
Marco van Wieren
Senior SharePoint Consultant
Internet: http://www.sharepointconsultant.ch/