mamod scale thresher - traction enginemamod scale thresher by elaine massey well here it is! my...
TRANSCRIPT
MAMOD SCALE THRESHER By Elaine Massey
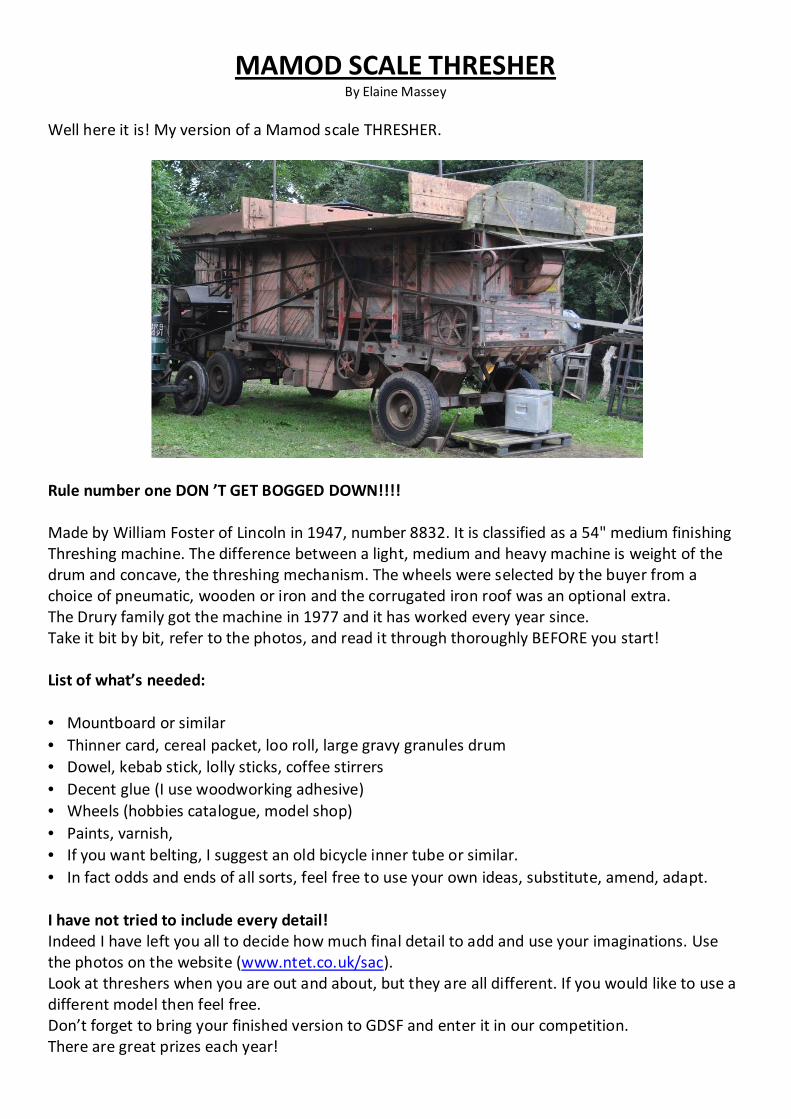
Well here it is! My version of a Mamod scale THRESHER.
Rule number one DON ’T GET BOGGED DOWN!!!!
Made by William Foster of Lincoln in 1947, number 8832. It is classified as a 54" medium finishing
Threshing machine. The difference between a light, medium and heavy machine is weight of the
drum and concave, the threshing mechanism. The wheels were selected by the buyer from a
choice of pneumatic, wooden or iron and the corrugated iron roof was an optional extra.
The Drury family got the machine in 1977 and it has worked every year since.
Take it bit by bit, refer to the photos, and read it through thoroughly BEFORE you start!
List of what’s needed:
• Mountboard or similar
• Thinner card, cereal packet, loo roll, large gravy granules drum
• Dowel, kebab stick, lolly sticks, coffee stirrers
• Decent glue (I use woodworking adhesive)
• Wheels (hobbies catalogue, model shop)
• Paints, varnish,
• If you want belting, I suggest an old bicycle inner tube or similar.
• In fact odds and ends of all sorts, feel free to use your own ideas, substitute, amend, adapt.
I have not tried to include every detail!
Indeed I have left you all to decide how much final detail to add and use your imaginations. Use
the photos on the website (www.ntet.co.uk/sac).
Look at threshers when you are out and about, but they are all different. If you would like to use a
different model then feel free.
Don’t forget to bring your finished version to GDSF and enter it in our competition.
There are great prizes each year!
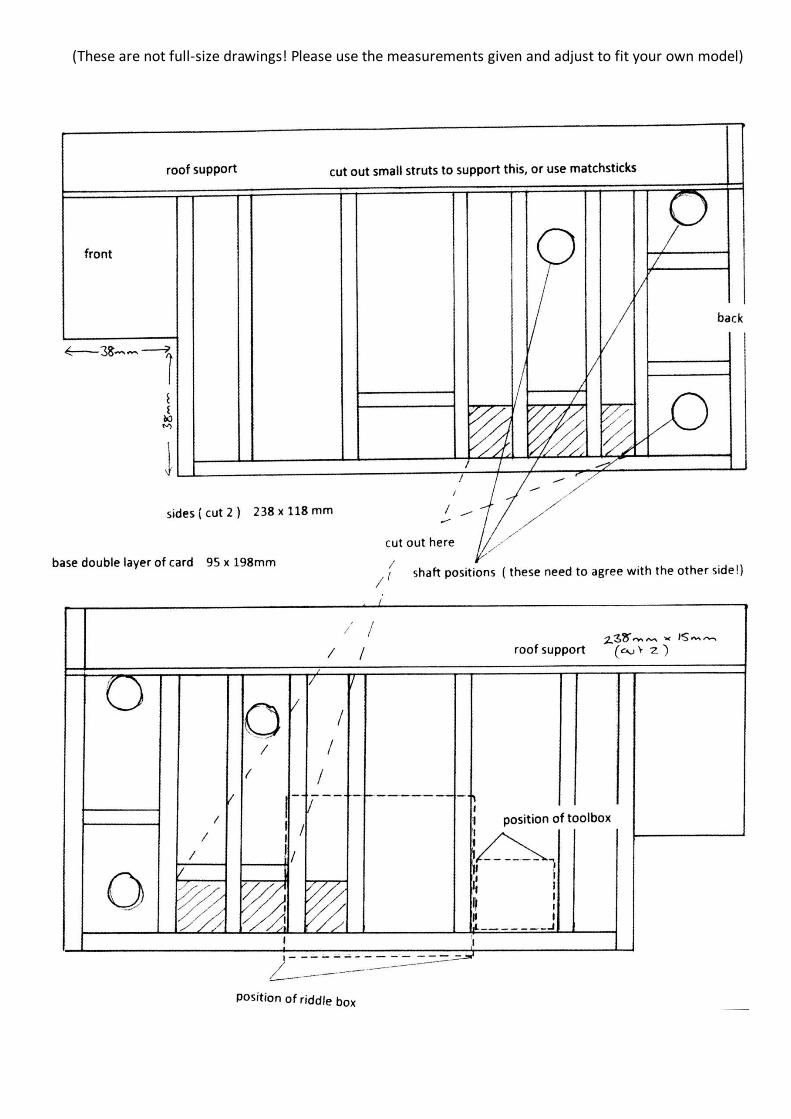
(These are not full-size drawings! Please use the measurements given and adjust to fit your own model)

(These are not full-size drawings! Please use the measurements given and adjust to fit your own model)
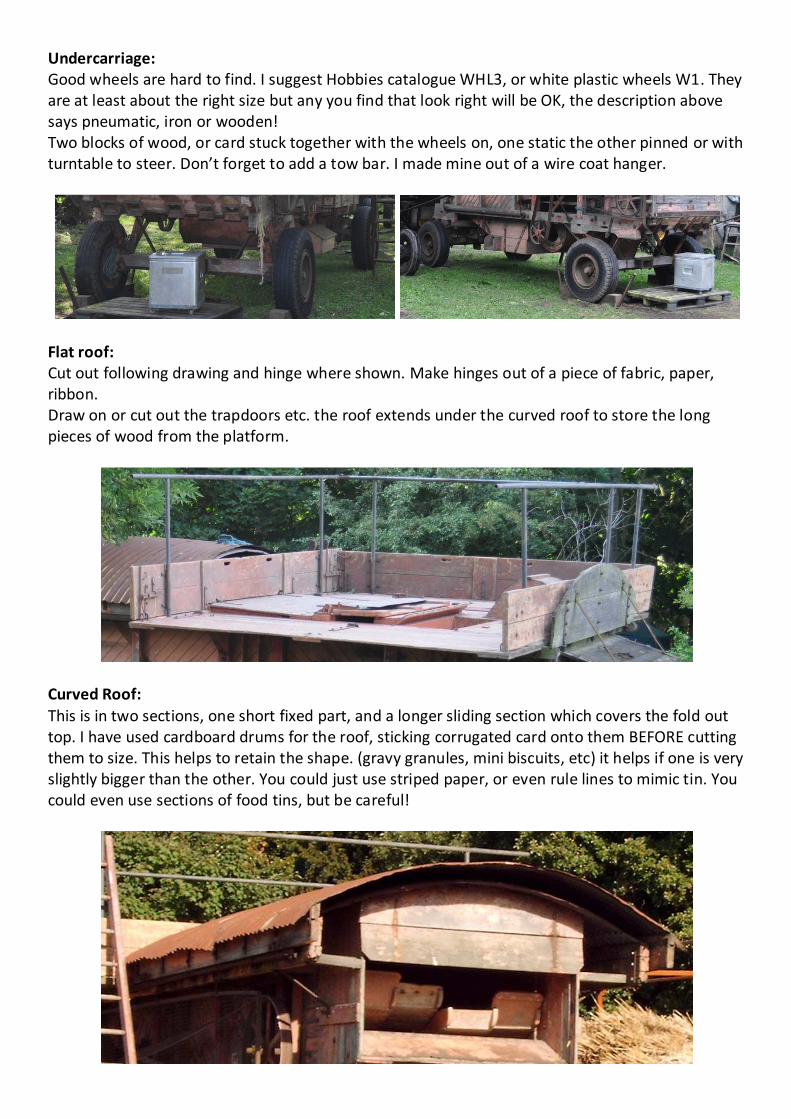
Undercarriage:
Good wheels are hard to find. I suggest Hobbies catalogue WHL3, or white plastic wheels W1. They
are at least about the right size but any you find that look right will be OK, the description above
says pneumatic, iron or wooden!
Two blocks of wood, or card stuck together with the wheels on, one static the other pinned or with
turntable to steer. Don’t forget to add a tow bar. I made mine out of a wire coat hanger.
Flat roof:
Cut out following drawing and hinge where shown. Make hinges out of a piece of fabric, paper,
ribbon.
Draw on or cut out the trapdoors etc. the roof extends under the curved roof to store the long
pieces of wood from the platform.
Curved Roof:
This is in two sections, one short fixed part, and a longer sliding section which covers the fold out
top. I have used cardboard drums for the roof, sticking corrugated card onto them BEFORE cutting
them to size. This helps to retain the shape. (gravy granules, mini biscuits, etc) it helps if one is very
slightly bigger than the other. You could just use striped paper, or even rule lines to mimic tin. You
could even use sections of food tins, but be careful!
Base:
This is not really visible but needs to be strong, so cut 2 pieces of mount board and glue them
together, put under a weight to keep them flat and leave to dry.
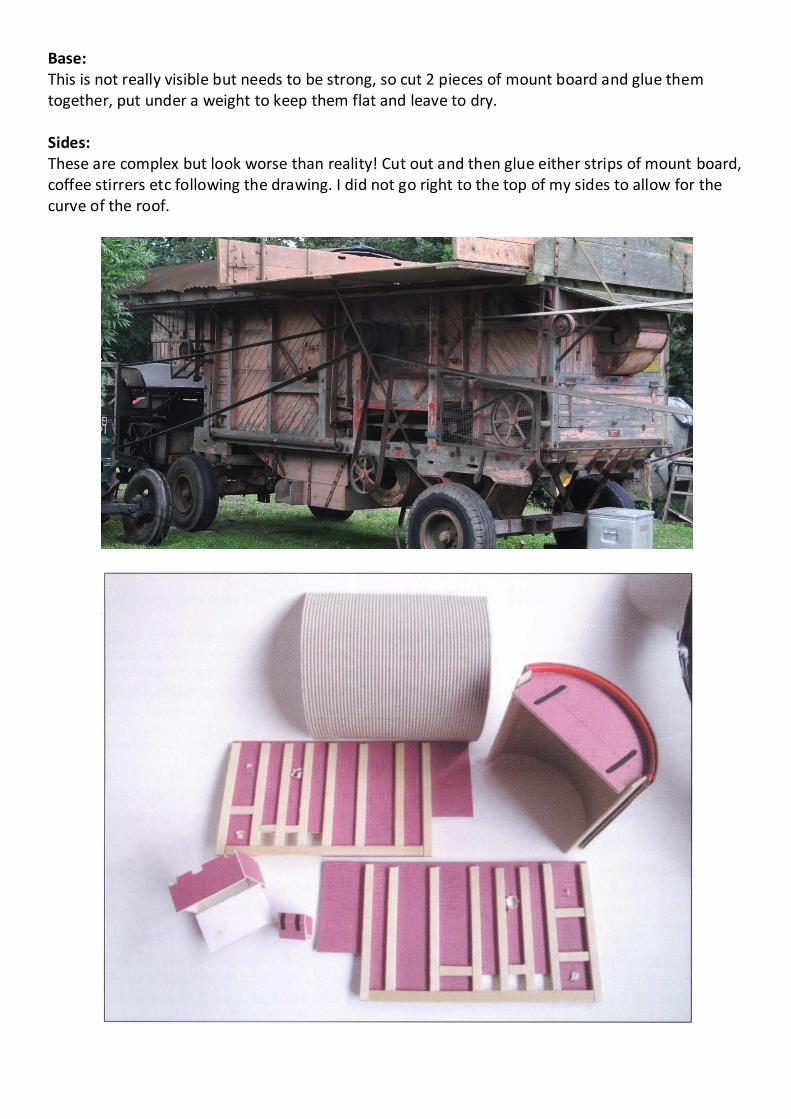
Sides:
These are complex but look worse than reality! Cut out and then glue either strips of mount board,
coffee stirrers etc following the drawing. I did not go right to the top of my sides to allow for the
curve of the roof.
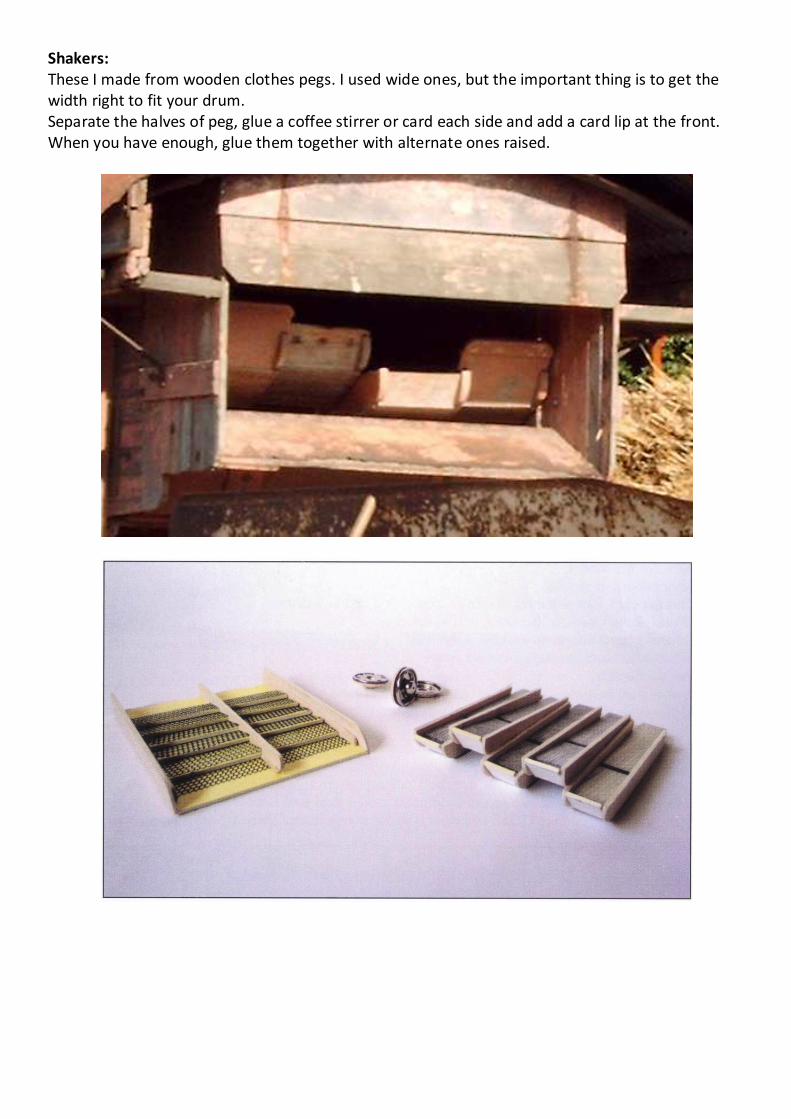
Shakers:
These I made from wooden clothes pegs. I used wide ones, but the important thing is to get the
width right to fit your drum.
Separate the halves of peg, glue a coffee stirrer or card each side and add a card lip at the front.
When you have enough, glue them together with alternate ones raised.
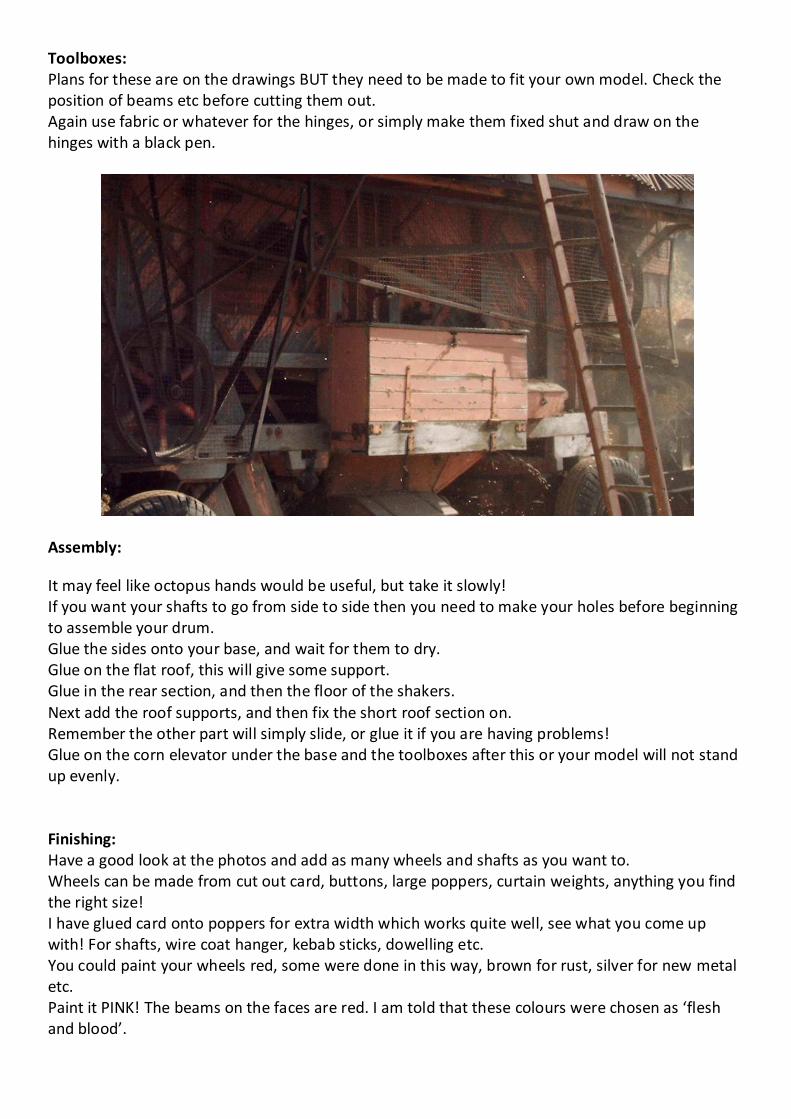
Toolboxes:
Plans for these are on the drawings BUT they need to be made to fit your own model. Check the
position of beams etc before cutting them out.
Again use fabric or whatever for the hinges, or simply make them fixed shut and draw on the
hinges with a black pen.
Assembly:
It may feel like octopus hands would be useful, but take it slowly!
If you want your shafts to go from side to side then you need to make your holes before beginning
to assemble your drum.
Glue the sides onto your base, and wait for them to dry.
Glue on the flat roof, this will give some support.
Glue in the rear section, and then the floor of the shakers.
Next add the roof supports, and then fix the short roof section on.
Remember the other part will simply slide, or glue it if you are having problems!
Glue on the corn elevator under the base and the toolboxes after this or your model will not stand
up evenly.
Finishing:
Have a good look at the photos and add as many wheels and shafts as you want to.
Wheels can be made from cut out card, buttons, large poppers, curtain weights, anything you find
the right size!
I have glued card onto poppers for extra width which works quite well, see what you come up
with! For shafts, wire coat hanger, kebab sticks, dowelling etc.
You could paint your wheels red, some were done in this way, brown for rust, silver for new metal
etc.
Paint it PINK! The beams on the faces are red. I am told that these colours were chosen as ‘flesh
and blood’.