managing communications using intouch -...
TRANSCRIPT

applicable to 7.144 onwards
Managing Communications using InTouch

Capita SIMS, Franklin Court, Priory Business Park, Cardington, Bedfordshire MK44 3JZ Tel: 01234 838080 Fax: 01234 832036 Email: [email protected] Web: www.capita-cs.co.uk
Revision History
Version Change Description Date
7.144 - 1.0 Initial release. 25/01/2012
7.144 - 1.1
Changes made to the following topics:
Selecting All People of a Role as Recipients of a Message and Enhancements to the School Messages Queue in the Introduction to InTouch chapter
Sending an Alert Regarding Incomplete Marksheet Results in the Sending General Messages chapter
Sending an Alert Regarding Pupil/Student Exam Attendance, Sending an Alert to Designated Persons if a Behaviour Type is Recorded and Sending a Message for Attendance Late Marks in the Managing System Generated Messages chapter
What Happens if SIMS Cannot Immediately Send a Message to an External Source in the Additional Information chapter.
20/02/2012
7.144 – 1.2 Clarification of the report output in Sending a Pupil/Student Exam Timetable Message on page 94
01/05/2012
© Capita Business Services Ltd 2011. All rights reserved. No part of this publication may be reproduced, photocopied, stored on a retrieval
system, translated or transmitted without the express written consent of the publisher. Microsoft® and Windows® are either registered trademarks or trademarks of Microsoft
Corporation in the United States and/or other countries.
Capita Doc Ref: SS_COMMS7144/HBK/200212/NR
Providing Feedback on Documentation
We always welcome comments and feedback on the quality of our documentation including online help files and handbooks. If you have any comments, feedback or
suggestions regarding the module help file, this handbook (PDF file) or any other aspect of our documentation, please email:
Please ensure that you include the module name, version and aspect of documentation on which you are commenting.

C|Contents 01| Introduction to InTouch ................................................ 1
Introduction ................................................................................... 1
Understanding General Messages ........................................... 2
Understanding System Generated Messages........................... 2
Understanding Emergency Alerts............................................ 4
What’s New in this Release? ........................................................... 4
Licensing Information..................................................................... 6
Important Note Regarding the Setting Up of InTouch..................... 6
Permissions Required ..................................................................... 7
Where to Find More Information..................................................... 7
02| Updating Primary Contact Details.................................. 9
Introduction ................................................................................... 9
Enabling Contact via SIMS InTouch ................................................ 9
Updating Pupil/Student Contact Details ....................................... 12
Updating Applicant Contact Details............................................... 14
Updating Pupil/Student Details .................................................... 16
03| Setting up Message Templates .................................... 19
Introduction ................................................................................. 19
General Message................................................................... 19
System Generated Message .................................................. 20
Viewing Message Templates ......................................................... 20
Adding a Message Template.......................................................... 21
Copying a Message Template........................................................ 22
Editing a Message Template.......................................................... 24
Setting a System Generated Message Template as the Default..... 26
Activating and De-activating a Message Template ........................ 27
Deleting a Message Template ....................................................... 28
04| Sending General Messages .......................................... 29
Introduction ................................................................................. 29

General Message................................................................... 29
System Generated Message .................................................. 29
Accessing the Messaging Facility .................................................. 30
General Messages ................................................................. 31
Pupil/Student General Messages .......................................... 31
Applicant General Messages.................................................. 33
SEN Messages ....................................................................... 34
Sending SEN Reminder Messages ......................................... 36
Behaviour Messages ............................................................. 37
Exclusion Messages .............................................................. 38
Class Register Messages ....................................................... 40
Sending a General Message .......................................................... 41
Selecting the Recipient(s) of the Message ............................ 42
Entering a Subject Heading................................................... 45
Selecting a Template for the Message................................... 45
Entering the Text of the Message.......................................... 46
Formatting Message Text...................................................... 48
Inserting a Hyperlink into the Message Text......................... 49
Adding an Image into a Message .......................................... 51
Attaching Files to the Message.............................................. 51
Changing the Message Type.................................................. 52
Setting the Importance of a Message.................................... 52
Previewing a Message........................................................... 52
Sending the Message ............................................................ 53
Sending an Emergency Alert ......................................................... 54
05| Viewing Your Messages ............................................... 55
Introduction ................................................................................. 55
Viewing Received Messages.......................................................... 56
Viewing Message Attachments.............................................. 57
Adding a Message to the Communication Log ....................... 58
Replying to a Message .......................................................... 59
Forwarding a Message .......................................................... 60
Previewing a Message........................................................... 60

Deleting a Message ............................................................... 61
Creating a SEN Event from a Message................................... 61
Viewing SEN Pupil/Student Information on the Pupil (or Student) Teacher View.......................................................... 65
Managing Your Messages.............................................................. 66
06| Managing System Generated Messages ....................... 69
Introduction ................................................................................. 70
Sending a Message for Unexplained Absences .............................. 70
Applying Incoming Message Text to Event Comments, Take Register and Edit Marks ........................................................ 74
Recording Attendance Marks using InTouch ......................... 76
Sending a Behaviour Incident Message ........................................ 77
Sending an Achievement Award Message ..................................... 77
Sending a Pupil/Student Profile Message ..................................... 78
Sending a Not Approved Pupil/Student Profile Message............... 79
Sending an Exceptional Circumstance Message ............................ 80
Sending a School Event Message or Staff Training Day Message .. 82
Sending a Missing Register Message............................................. 83
Sending a Percentage Attendance Notification Message............... 83
Sending an Achievement Notification Message ............................. 85
Sending a Behaviour Notification Message ................................... 88
Sending a Pupil/Student Timetable Message................................ 91
Sending a Staff Timetable Message .............................................. 92
Sending a Pupil/Student Detention Message ................................ 93
Sending a Pupil/Student Exam Timetable Message ...................... 94
Selecting Individual Pupil/Students ..................................... 96
Selecting Pupil/Students Students of a Year Group .............. 97
Selecting Pupil/Students of a Registration Group................. 98
Selecting Pupil/Students of a House..................................... 99
Sending a Message for Attendance Late Marks ............................. 99
Sending an Alert Regarding Incomplete Marksheet Results........ 102
Sending an Alert to Designated Persons if a Behaviour Type is Recorded .................................................................................... 106
Sending an Alert Regarding Pupil/Student Exam Attendance ..... 111

07| Setting Up Emergency Alert Notifications, the Default Communication Method and SMS Matching .................... 115
Setting Up the Emergency Alert Notification............................... 115
Setting Default Communication Methods .................................... 118
Enabling the Matching of an Incoming SMS Message with the Original Message ........................................................................ 120
08| Producing Reports in SIMS InTouch .......................... 123
Introduction ............................................................................... 123
Producing the Failed Outbound Messages Report ....................... 123
Producing the Message Audit Report .......................................... 125
Running a Screen Based Report.................................................. 132
09| Additional Information .............................................. 135
Viewing the Communication Log................................................. 135
Setting Up Message Options ....................................................... 137
What Happens if SIMS Cannot Immediately Send a Message to an External Source?......................................................................... 137
Index ............................................................................. 139

01| Introduction to InTouch
Managing Communications using InTouch 1
01|Introduction to InTouch
In This Chapter
Introduction .................................................................................... 1
What’s New in this Release?............................................................ 4
Licensing Information...................................................................... 6
Important Note Regarding the Setting Up of InTouch...................... 6
Permissions Required ...................................................................... 7
Where to Find More Information...................................................... 7
Introduction
SIMS InTouch enables the sending of messages between your school and any person recorded in your SIMS system, e.g. members of staff, parents, contacts, etc. This functionality provides for a better flow of information between your school and any of its contacts in an efficient manner.
The messaging facility provided by SIMS InTouch currently enables communication via the following methods:
SIMS internal messaging system
Short Message Service (SMS).
NOTE: Where an SMS contains more than 160 characters, the message is split into multiple messages, each of which is chargeable.
Three types of message can be sent in SIMS:
General Message
System Generated Message
Emergency Alerts.
Messages sent from one user to one or more other users through SIMS InTouch are known as General Messages. Messages that are sent from 'your school' to one or more recipients are known as System Generated Messages.
Messages that have been sent and received are viewed and managed via the My Messages and School Messages panels on the SIMS Home Page (via Focus | Home Page).

01| Introduction to InTouch
2 Managing Communications using InTouch
Understanding General Messages
General messages can be sent from a number of areas in SIMS InTouch and can be broken down into message sub-types. The type of general message generated is determined by the area of SIMS selected when the messaging functionality is triggered. The following table introduces the types of General Message that can be created and indicates where in SIMS that type of General Message can be created.
Message Type Accessible Via
General Message Focus | InTouch | Send Message
Pupil/Student General Focus | Pupil (or Student) | Pupil (or Student) Details (Links panel)
Applicant General Focus | Admission | Application
Focus | Pupil (or Student) | Special Educational Needs
Focus | Pupil (or Student) | Pupil (or Student) Details | Fees Details
SEN Message Focus | Pupil (or Student) | Special Educational Needs
SEN Reminder Message On the SIMS Home Page, click a SEN reminder in the My Reminders panel.
Behaviour Message Focus | Behaviour Management | Pupil (or Student) Behaviour
Exclusion Message Focus | Pupil (or Student) | Exclusions
Fees Communication Message Focus | Pupil (or Student) | Pupil (or Student) Details (Links panel)
NOTE: A Fees Communication message can be sent only if the Fees licence has been applied.
More Information: Sending General Messages on page 29
Understanding System Generated Messages
System generated messages can be sent when specific conditions relating to the data in SIMS are met. For example, your school can send a communication requesting a reason from a parent/guardian for a pupil/student’s absence following the recording of an unexplained absence mark in the register. Subsequently, the parent/guardian’s response can be recorded and saved against the pupil/student’s attendance record. This process provides an efficient method of contacting appropriate contacts and requesting information. Any messages sent from an external source by a contact of the school are managed using the School Messages panel on the SIMS Home Page (via Focus | Home Page).

01| Introduction to InTouch
Managing Communications using InTouch 3
The following types of message can be sent under the conditions indicated:
Message Type Purpose
Unexplained Absence Sends a message to a parent/guardian, explaining that their pupil/student has an unexplained absence. They are asked to provide a reason for the pupil/student’s absence.
Behaviour Incident Message Sends a message to a parent/guardian, explaining that their pupil/student has been involved in a behaviour incident.
Achievement Award Message Sends a message to a parent/guardian, explaining that their pupil/student has been given an achievement award.
Pupil/Student Profile Message Once a pupil/student profile has been generated, a message is sent to class teachers, parents, pupil/students, etc. informing them that the pupil/student report is available.
Missing Register Sends a message to a class teacher, informing them that the register has not yet been taken.
Not Approved Pupil/Student Profile
Sends a message to a class teacher, informing them that a section of a pupil/student profile has not yet been approved and that the profile needs to be revised.
Exceptional Circumstance Message
Sends a message to a parent/guardian, pupil/student, etc. informing them of an exceptional circumstance at your school, e.g. a school closure.
SEN Event Sends a reminder message to all interested parties that a SEN event is taking place.
School Event Message Sends a message to all interested parties regarding a school event recorded in the School Diary.
Staff Training Day Message Sends a message to all interested parties regarding a staff training day recorded in the School Diary.
Percentage Attendance Message Sends a message to parental contacts and other interested contacts regarding a pupil/student’s school attendance.
More Information: Managing System Generated Messages on page 69

01| Introduction to InTouch
4 Managing Communications using InTouch
Understanding Emergency Alerts
It may be necessary for a class teacher to request immediate assistance as a result of an emergency in the classroom. The use of emergency alerts in SIMS InTouch enables a class teacher to request assistance from anywhere in SIMS, both quickly and efficiently.
Prior to this functionality being available, you must select the members of staff who will be notified immediately in the event of an emergency, together with the preferred method of contacting them.
More Information: Setting Up Emergency Alert Notifications, the Default Communication Method and SMS Matching on page 115
What’s New in this Release?
The following changes have been made in this release.
Sending a Pupil/Student Exam Timetable Message
Individual pupil/student exam timetables can now be sent electronically (via email) for the exam season marked as default in Examinations Organiser.
More Information: Sending a Pupil/Student Exam Timetable Message on page 94
Sending an Alert Regarding Incomplete Marksheet Results
It is now possible to send a reminder to members of staff who have not yet completed the entering of results in a SIMS Assessment marksheet.
More Information: Sending an Alert Regarding Incomplete Marksheet Results on page 102
Sending an Alert Regarding Pupil/Student Exam Attendance
It is now possible to send a reminder to pupil/students of a forthcoming examination.
More Information: Sending an Alert Regarding Pupil/Student Exam Attendance on page 111
Sending an Alert to Designated Persons if a Behaviour Type is Recorded
If a behaviour type is recorded against a pupil/student, it is now possible to send an alert to all associated designated persons.
More Information: Sending an Alert to Designated Persons if a Behaviour Type is Recorded on page 106
Sending a Message for Attendance Late Marks
It is now possible to send a message to designated persons relating to pupil/students who have been marked as late and have minutes late recorded in Attendance/Lesson Monitor.
More Information: Sending a Message for Attendance Late Marks on page 99

01| Introduction to InTouch
Managing Communications using InTouch 5
Defining the Default Method of Communication for Key Message Types
When you create a message and select the intended recipients, their default method of communication is selected automatically. The default method of communication for messages can be set using the InTouch Setup page (via Tools | InTouch | Module Setup).
It is now possible to individually set the default method of communication for each of the following message types:
Behaviour Notification
Exam & Student Timetable
Unexplained Absence
Late Notification
Exam Reminder
More Information: Setting Default Communication Methods on page 118
Selecting All People of a Role as Recipients of a Message
When selecting the recipients of a message, it is now possible to select by role (e.g. Registration Tutor, Joint Main Supervisor, Mother, etc.), rather than select each recipient individually. This functionality is available when sending the following types of message:
Pupil/Student General Messages
Applicant General Messages
SEN Messages
Behaviour Messages
Exclusion Messages
Class Register Messages
More Information: Pupil/Student General Messages on page 31 Applicant General Messages on page 33 SEN Messages on page 34 Behaviour Messages on page 37 Exclusion Messages on page 38 Class Register Messages on page 40

01| Introduction to InTouch
6 Managing Communications using InTouch
Updating the Priority of a Contact in Primary Contact Details
In addition to amending the primary telephone number and email address of all pupil/student and applicant contacts, and enabling communication between the school and a pupil/student or applicant contact, it is now possible to update the Priority of a contact (i.e. the order in which contacts are alerted in the event of an accident or incident concerning the associated pupil/student or applicant) on the Primary Contact Details for Contacts of Students page (Tools | Housekeeping | Primary Contact Details | Contacts of Students) and the Primary Contact Details for Contacts of Applicants page (Tools | Housekeeping | Primary Contact Details | Contacts of Applicants).
More Information: Updating Pupil/Student Contact Details on page 12 Updating Applicant Contact Details on page 14
Display of Service Version Number on the Service Setup Screen
Service version numbers are now displayed in the Results panel on the InTouch Service Setup page (Tools | InTouch | Service Setup) when the Test is run.
This is particularly useful in the case of an issue with your upgrade because it identifies which service has not upgraded successfully.
School Messages Queue
It is now possible to view examionation reminders and incomplete marksheet messages that have not yet been sent via the School Messages (InTouch) panel on the SIMS Home Page, so that their status can be monitored.
More Information: What Happens if SIMS Cannot Immediately Send a Message to an External Source? on page 137
Licensing Information
The messaging functionality available in SIMS InTouch is determined by your licence. If you have applied the InTouch licence, all areas of functionality described in this handbook are available. For those schools without the full InTouch licence, only internal messaging is available.
Important Note Regarding the Setting Up of InTouch
This handbook assumes that the setup process for SIMS InTouch has already been completed successfully and that the InTouch licence has been applied (if appropriate).

01| Introduction to InTouch
Managing Communications using InTouch 7
Permissions Required
Please see your System Administrator/Manager if you are not sure whether you have the required permissions.
Additional Resources:
System Manager handbook
For a list of the permissions available for each release, please refer to the appropriate permissions spreadsheet, which can be found on our SupportNet website (http://support.capitaes.co.uk/) by entering PERMLIST in the Site Search field on the SupportNet Home page then clicking the Go button.
Where to Find More Information
A wide range of documentation is available from within SIMS via the Documentation Centre. This documentation includes handbooks, help sheets, mini guides, quick reference sheets, etc. and can be accessed by clicking the Documentation button on the SIMS Home Page. Once open, click the Handbooks button, select the required category then select the required handbook from the Handbooks page. References to any other documents mentioned in this handbook can be accessed from the Documentation Centre unless otherwise specified. Online help can be accessed by pressing F1 or clicking the applicable Help button.

01| Introduction to InTouch
8 Managing Communications using InTouch

02| Updating Primary Contact Details
Managing Communications using InTouch 9
02|Updating Primary Contact Details
In This Chapter
Introduction .................................................................................... 9
Enabling Contact via SIMS InTouch ................................................. 9
Updating Pupil/Student Contact Details ........................................ 12
Updating Applicant Contact Details................................................ 14
Updating Pupil/Student Details ..................................................... 16
Introduction
In order to communicate with a contact via SIMS InTouch, a number of criteria must be met.
The InTouch Communication check box must be selected in the contact's record.
The person must have a telephone number and/or email address marked as Primary.
The person must not currently be the subject of a Court Order.
This section describes how SIMS can be set up to enable communication between your school and a contact via SIMS InTouch. It also describes how primary contact details can be updated, in bulk, for pupil/students, pupil/student contacts and applicant contacts. This is an effective method of updating contact details for all pupil/students because it can be done from one screen.
IMPORTANT NOTE: The use of the Primary field should not be confused with that of the Main field. You should continue to use the Main field as it was originally intended.
Enabling Contact via SIMS InTouch
1. Select Focus | Pupil (or Student) | Pupil (or Student) Details to display the Find Student browser.
2. Search for then select the pupil/student for whom you wish to edit contact details.

02| Updating Primary Contact Details
10 Managing Communications using InTouch
3. Click the Family/Home hyperlink to display the Family/Home panel.
4. Highlight the required person in the Contacts table then click the Open button to display the Edit Contact dialog.

02| Updating Primary Contact Details
Managing Communications using InTouch 11
5. In the Relationship Details panel, select the InTouch Communication check box to enable communication between your school and the selected contact.
IMPORTANT NOTE: If the Court Order check box in the Relationship Details panel is selected, communication between your school and the selected contact will not be permitted, regardless of the setting of the InTouch Communication check box.
6. From the Telephones\Fax Numbers table in the Telephones and Email Addresses panel, highlight the telephone number you wish to use for communications then click the Set Primary button. Alternatively, click the Open button to display the Edit Telephone\Fax dialog.
7. Indicate that this is the Primary phone number by selecting Yes from the drop-down list. Only one number per contact can be set as Primary.
8. Click the OK button to return to the Edit Contact dialog, where the updated information is displayed in the Telephones and Email Addresses panel.

02| Updating Primary Contact Details
12 Managing Communications using InTouch
9. From the Email Addresses table in the Telephones and Email Addresses panel, highlight the email address you wish to use for communications then click the Set Primary button. Alternatively, click the Open button to display the Edit Email dialog.
10. Indicate that this is the Primary email address by selecting Yes from the drop-down list. Only one email address per contact can be set as Primary.
11. Click the OK button to return to the Edit Contact dialog, where the updated information is displayed in the Telephones and Email Addresses panel.
12. Click the Save button then click the OK button to return to the Student Details page.
13. Click the Save button to save the changes.
Updating Pupil/Student Contact Details
This process enables you to amend the primary telephone number and email address of all pupil/student contacts and enables communication between the school and a pupil/student contact.
1. Select Tools | Housekeeping | Primary Contact Details | Contacts of Students to display the Find Students browser.

02| Updating Primary Contact Details
Managing Communications using InTouch 13
2. Search for the pupil/student whose contact(s) you wish to update to display their details on the Primary Contact Details for Contacts of Students page.
3. The Filter panel displays any search criteria selected. To change the filter, click the Browse button then repeat step 2 to achieve the correct filter.
The Student Contacts panel displays any pupil/student(s) who meet the search criteria selected, together with contact names and methods of contacting them. The InTouch Communication column enables you to indicate whether they can be contacted via SIMS InTouch.
The Action button enables you to change the sort order of the Student Contacts table and to select the fields you wish to display in the table. Highlight the cell by which you wish to sort the table, click the Action button then select Sort by this column (<Column Name>). To sort by any other column, click the Action button, select Sort by then the required field name.
To change the fields displayed in the Student Contacts table, perhaps to ensure the correct contact is selected, click the Action button, select Display then select an additional field to display. You can sort the Student Contacts table on any displayed field.
NOTE: All of the functionality provided by the Action button is also available by right-clicking a contact then selecting from the drop-down list.
4. If you are uncertain whether the contact details you are about to edit are for the correct pupil/student contact, highlight their name then click the Student button to display the Student Details page. Once you have checked that the correct pupil/student has been selected, click the Close button to return to the Primary Contact Details for Contacts of Students page.

02| Updating Primary Contact Details
14 Managing Communications using InTouch
It is also possible to check whether you are about to edit the correct contact by highlighting their name then clicking the Contact button to display the Contact details page.
5. Select the contact's Priority from the drop-down list. The priority indicates the order in which contacts are alerted in the event of an accident or incident concerning the associated pupil/student.
6. Select whether you wish to enable contact via your school and a pupil/student contact by selecting Yes or No from the InTouch Communication column. Selecting Yes updates the InTouch Communication check box in the Relationship Details panel of the contact record.
7. To change the primary Telephone Number of a contact, click in the required cell then select a number from the drop-down list. Please note that telephone numbers available from the drop-down list are restricted to those assigned to the contact in the Telephones and Email Addresses panel of the Contact details page (please see Enabling Contact via SIMS InTouch on page 9). Selecting a number from the drop-down list marks it as the Primary number automatically.
If the drop-down list does not display a telephone number then no number is recorded against the contact. A number can be added by selecting Add from the drop-down list to display the Add Telephone\Fax dialog.
8. Repeat step 7 to record a primary Email Address. If the drop-down list does not display an email address then no address is recorded against the contact. An address can be added by selecting Add from the drop-down list to display the Add Email dialog.
9. Once the contact details have been updated, click the Save button to save the changes.
Updating Applicant Contact Details
This process enables you to amend the primary telephone number and email address of all applicant contacts and enables communication between the school and an applicant contact.
1. Select Tools | Housekeeping | Primary Contact Details | Contacts of Applicants to display the Find Applicants browser.

02| Updating Primary Contact Details
Managing Communications using InTouch 15
2. Search for the applicant whose contacts you wish to update to display their details on the Primary Contact Details for Contacts of Applicants page.
3. The Filter panel displays any search criteria selected. To change the filter, click the Browse button then repeat step 2 to achieve the correct filter.
The Applicant Contacts panel displays any applicant(s) who meet the search criteria selected, together with contact names and methods of contacting them. The InTouch Communication column enables you to indicate whether they can be contacted via SIMS InTouch.
The Action button enables you to change the sort order of the Applicant Contacts table and to select the fields you wish to display in the table. Highlight the cell by which you wish to sort the table, click the Action button then select Sort by this column (<Column Name>). To sort by any other column, click the Action button, select Sort by then the required field name.
To change the fields displayed in the Applicant Contacts table, perhaps to ensure the correct contact is selected, click the Action button, select Display then select an additional field to display. You can sort the Applicant Contacts table on any displayed field.
NOTE: All of the functionality provided by the Action button is also available by right-clicking a contact then selecting from the drop-down list.
4. If you are uncertain whether the contact details you are about to edit are for the correct applicant contact, highlight their name then click the Applicant button to display the Application page. Once you have checked that the correct applicant has been selected, click the Close button to return to the Primary Contact Details for Contacts of Applicants page.
It is also possible to check whether you are about to edit the correct contact by highlighting their name then clicking the Contact button to display the Contact details page.
5. Select the contact's Priority from the drop-down list. The priority indicates the order in which contacts are alerted in the event of an accident or incident concerning the associated applicant.

02| Updating Primary Contact Details
16 Managing Communications using InTouch
6. Select whether you wish to enable contact via your school and a pupil/student contact by selecting Yes or No from the InTouch Communication column. Selecting Yes updates the InTouch Communication check box in the Relationship Details panel of the contact record.
7. To change the primary Telephone Number of a contact, click in the required cell then select a number from the drop-down list. Please note that telephone numbers available from the drop-down list are restricted to those assigned to the contact in the Telephones and Email Addresses panel of the Contact details page (please see Enabling Contact via SIMS InTouch on page 9). Selecting a number from the drop-down list marks it as the Primary number automatically.
If the drop-down list does not display a telephone number then no number is recorded against the contact. A number can be added by selecting Add from the drop-down list to display the Add Telephone\Fax dialog.
8. Repeat step 7 to record a primary Email Address. If the drop-down list does not display an email address then no address is recorded against the contact. An address can be added by selecting Add from the drop-down list to display the Add Email dialog.
9. Select whether you wish to enable contact via your school and an applicant contact by selecting Yes or No from the InTouch Communication column. Selecting Yes updates the InTouch Communication check box in the Relationship Details panel of the contact record.
10. Once the contact details have been updated, click the Save button to save the changes.
Updating Pupil/Student Details
This process enables you to amend the primary telephone number and email address of all pupil/students and enables communication between the school and the pupil/student.
1. Select Tools | Housekeeping | Primary Contact Details | Students to display the Find Students browser.

02| Updating Primary Contact Details
Managing Communications using InTouch 17
2. Search for the pupil/student whose details you wish to update to display their details on the Primary Contact Details for Students page.
3. The Filter panel displays any search criteria selected. To change the filter, click the Browse button then repeat step 2 to achieve the correct filter.
The Student panel displays any pupil/student(s) who meet the search criteria selected, together with their contact details.
The Action button enables you to change the sort order of the Student Contacts table and to select the fields you wish to display in the table. Highlight the cell by which you wish to sort the table, click the Action button then select Sort by this column (<Column Name>). To sort by any other column, click the Action button, select Sort by then the required field name.
To change the fields displayed in the Students table, perhaps to ensure the correct contact is selected, click the Action button, select Display then select an additional field to display. You can sort the Students table on any displayed field.
NOTE: All of the functionality provided by the Action button is also available by right-clicking a pupil/student then selecting from the drop-down list.
4. If you are uncertain whether the details you are about to edit are for the correct pupil/student, highlight their name then click the Student button to display the Student Details page. Once you have checked that the correct pupil/student has been selected, click the Close button to return to the Primary Contact Details for Students page.
5. To change the primary Telephone Number of a pupil/student, click in the required cell then select a number from the drop-down list. Please note that telephone numbers available from the drop-down list are restricted to those assigned to the pupil/student in the Telephones and Email Addresses panel of the Student Details page (please see Enabling Contact via SIMS InTouch on page 9). Selecting a number from the drop-down list marks it as the Primary number automatically.

02| Updating Primary Contact Details
18 Managing Communications using InTouch
If the drop-down list does not display a telephone number then no number is recorded against the pupil/student. A number can be added by selecting Add from the drop-down list to display the Add Telephone\Fax dialog.
6. Repeat step 5 to record a primary Email Address. If the drop-down list does not display an email address then no address is recorded against the pupil/student. An address can be added by selecting Add from the drop-down list to display the Add Email dialog.
7. Once the contact details have been updated, click the Save button to save the changes.

03| Setting up Message Templates
Managing Communications using InTouch 19
03|Setting up Message Templates
In This Chapter
Introduction .................................................................................. 19
Viewing Message Templates .......................................................... 20
Adding a Message Template........................................................... 21
Copying a Message Template......................................................... 22
Editing a Message Template........................................................... 24
Setting a System Generated Message Template as the Default...... 26
Activating and De-activating a Message Template ......................... 27
Deleting a Message Template ........................................................ 28
Introduction
Message templates are used to define the presentation of messages sent from SIMS. Templates can be used to define the default message font, character alignment and any default text that will be displayed in a message.
There are two categories of messages that can be sent from SIMS: General Messages and System Generated Messages. Message templates can be set up for each type of message in each of these categories. Once message templates are set up, they can be applied to messages sent from SIMS.
General Message
These are messages that are sent manually by SIMS users. General, Pupil/Student General, SEN, Behaviour, Exclusion and Fees Communication messages can be sent and templates can be created for each of these message types.
NOTE: Fees Communication messages can be sent only if you have applied the Fees licence.

03| Setting up Message Templates
20 Managing Communications using InTouch
System Generated Message
These are messages that are sent by SIMS under specific circumstances. Message templates for Unexplained Absence, Behaviour Incident, Achievement Award, Pupil/Student Profile, Not Approved Pupil/Student Profile, Exceptional Circumstance, School Event, Staff Training Day and Percentage Attendance are provided as part of the installation process. Templates provided by SIMS cannot be edited directly. Instead, they can be copied and you can edit the copy of the template, if required. Alternatively, you can create your own system generated message templates for any of the message types. If you mark a System Generated Message template as the default, SIMS uses the selected template automatically when a message of that type is created.
IMPORTANT NOTE: Once a message template has been edited and saved, the changes cannot be undone.
You can make a copy of an existing template and then use it to form the basis of a new template, meaning you do not have to create similar templates from scratch.
Viewing Message Templates
1. Select Tools | InTouch | Templates Setup to display the Template Manager page.
The panel on the left-hand side of the page provides access to the message templates. The templates are either provided as part of the installation process or created by users in your establishment.
2. Click a message type and then a template name in either the General Message or System Generated Message sections to view the associated message template.

03| Setting up Message Templates
Managing Communications using InTouch 21
Where more than one message template exists in a General Message category, all of them are available to users when they create a message of that type. Where more than one message template exists for a category, one of them must be marked as default. The message template marked as default will be selected automatically when SIMS creates a message of that type, although the template can be changed when a message is created.
Adding a Message Template
1. Select Tools | InTouch | Templates Setup to display the Template Manager page.
2. In either the General Message or System Generated Message list in the panel on the left-hand side of the page, click the type of message template you wish to create, e.g. Pupil/Student General.
On the right-hand side of the screen, the top panel displays all message templates recorded in SIMS for the selected template category.
3. Click the New button to add a new template for the selected category.
The new template is given a default name of New Template and is indented to indicate that it is the currently selected template.

03| Setting up Message Templates
22 Managing Communications using InTouch
4. Click anywhere in the line that reads New Template, enter an appropriate name for the new template then press Enter.
The order in which the templates are displayed in this list reflects the order in which they will be displayed when a user elects to apply a template to a specific type of message.
5. Click the Move Up and Move Down arrow buttons to move the template to the required position in the list.
NOTE: It is advisable to place the most commonly used template at the top of the list to facilitate selection.
Move Up button
Move Down button
6. With the newly created template highlighted, click the Edit button to enable its editing in the panel at the bottom of the Template Manager page.
7. Click the Save button.
The new message template is now ready to be applied to a message created in the selected category.
More Information: Editing a Message Template on page 24
Copying a Message Template
You can make a copy of an existing template and then edit it to form the basis of a new template, reducing the need to create similar templates from scratch.
Once a message template has been copied, it can be renamed, edited and saved as a new template.
NOTE: A message template can be copied within a message type only. It is not possible to copy a template from one message type to another.
1. Select Tools | InTouch | Templates Setup to display the Template Manager page.

03| Setting up Message Templates
Managing Communications using InTouch 23
2. In either the General Message or System Generated Message list in the panel on the left-hand side of the page, click the category of message template that contains the message template you wish to copy, e.g. Pupil/Student General.
On the right-hand side of the screen, the top panel displays all message templates recorded in SIMS for the selected template category.
3. In the top panel on the right-hand side of the page, highlight the message template you wish to copy.
4. Click the Copy button to create a copy of the highlighted message template. The name of the new template is prefixed with Copy of.
5. With the new message template highlighted, click the Edit button.
6. Click anywhere in the name of the new message template (prefixed with Copy of), enter an appropriate name then press Enter.
The order in which the templates are displayed in this list reflects the order in which they will be displayed when a user elects to apply a template to a specific type of message.
7. Click the Move Up and Move Down arrow buttons to move the template to the required position in the list.

03| Setting up Message Templates
24 Managing Communications using InTouch
Move Up button
Move Down button
NOTE: It is advisable to place the most commonly used template at the top of the list to facilitate selection.
8. Highlight the new message template then click the Edit button to enable its editing in the panel at the bottom of the Template Manager page.
9. Click the Save button.
The new message template is now ready to be applied to a message created in the selected category.
More Information: Editing a Message Template on page 24
Editing a Message Template
NOTE: It is not possible to edit message templates provided by SIMS.
1. Select Tools | InTouch | Templates Setup to display the Template Manager page.
2. In either the General Message or System Generated Message list, in the panel on the left-hand side of the page, click the category of message template that contains the message template you wish to edit, e.g. Pupil/Student General.
On the right-hand side of the screen, the top panel displays all message templates recorded in SIMS for the selected template category.

03| Setting up Message Templates
Managing Communications using InTouch 25
3. In the top panel on the right-hand side of the page, highlight the message template you wish to edit then click the Edit button to enable its editing in the panel at the bottom of the Template Manager page.
NOTE: Prior to clicking the Edit button, ensure that the newly created template is highlighted. It is not possible to edit the template unless it is highlighted in the list.
4. In the Subject line, enter any default text that you wish to include in the Subject line of any message created from this template.
NOTE: When a message is created from this template, the default Subject line can be edited, if required.
5. In the Message box, enter any default text you wish to include in the main body of any message created from this template.
NOTE: When a message is created from this template, the default Message text can be edited, if required.
6. The default font, font size, font colour, etc. can be set for a template using the formatting toolbar.
The functionality available on the formatting toolbar varies according to the type of message template selected.
Images can also be included as part of a message template or a message.
7. Once the appropriate content has been entered and the formatting applied, click the Save button.
The message template is now ready to be applied to a message of the type selected. For example, a General Message template can be applied to any message that has a type of General Message (via Focus | InTouch).
More Information: Formatting Message Text on page 48 Inserting a Hyperlink into the Message Text on page 49 Adding an Image into a Message on page 51
03| Setting up Message Templates
26 Managing Communications using InTouch
Setting a System Generated Message Template as the Default
Applicable to System Generated message templates only
Any number of System Generated messages can be defined for a single message category. If more than one System Generated message exists for a category, you must set one of them as the default. If you create a range of System Generated messages and wish to use one of them instead of the one provided as part of the SIMS installation, you can make your own message the default then de-activate the SIMS supplied one.
The default message template is used when a message of that type is generated by SIMS.
If only one System Generated message for a category exists, it is set as the default template automatically.
NOTE: System Generated message templates are created in exactly the same was as General Messages templates.
1. Select Tools | InTouch | Templates Setup to display the Template Manager page.
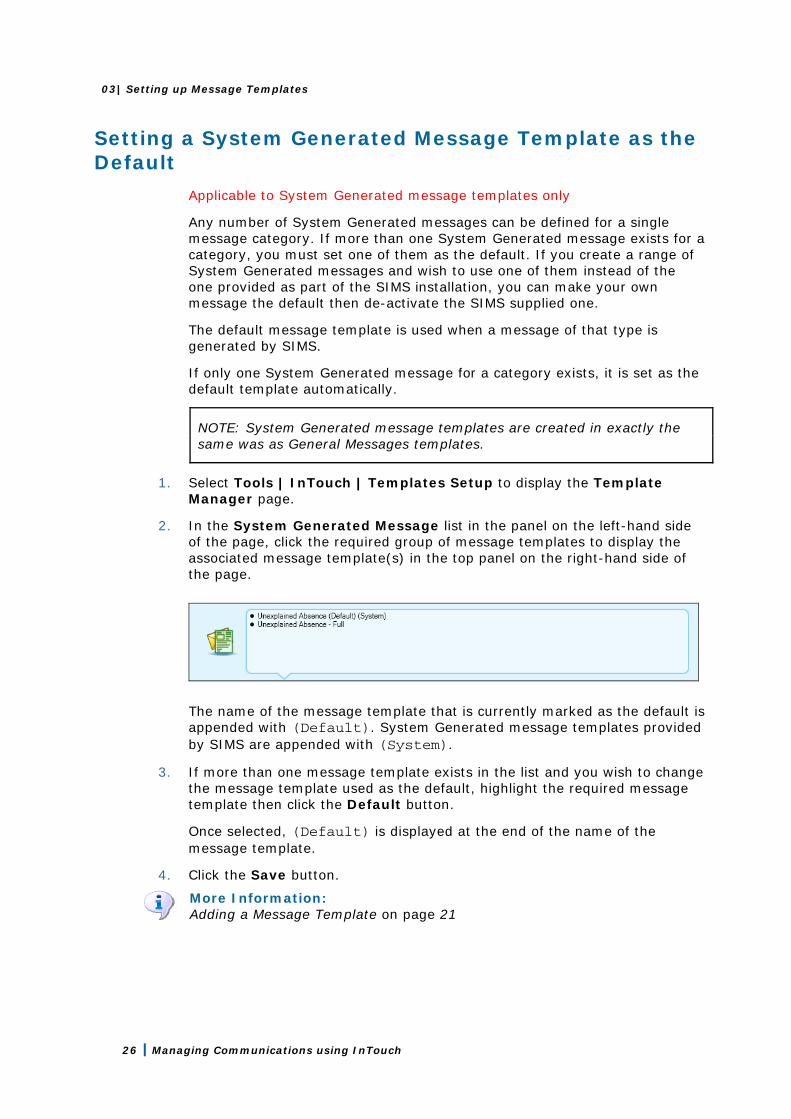
2. In the System Generated Message list in the panel on the left-hand side of the page, click the required group of message templates to display the associated message template(s) in the top panel on the right-hand side of the page.
The name of the message template that is currently marked as the default is appended with (Default). System Generated message templates provided by SIMS are appended with (System).
3. If more than one message template exists in the list and you wish to change the message template used as the default, highlight the required message template then click the Default button.
Once selected, (Default) is displayed at the end of the name of the message template.
4. Click the Save button.
More Information: Adding a Message Template on page 21

03| Setting up Message Templates
Managing Communications using InTouch 27
Activating and De-activating a Message Template
Once a message template is created, it is activated automatically so that it is accessible by all users. If you no longer want a message template to be used (either temporarily or permanently), it can be made inactive.
If you create a range of System Generated message templates and wish to use one of them instead of the one provided as part of the SIMS installation, you can make your own message the default (please see Setting a System Generated Message Template as the Default on page 26) then de-activate the SIMS supplied one. SIMS supplied System Generated message templates cannot be deleted.
If you are certain you will never want to use the message template again, you may instead choose to delete it.
To make a message template inactive:
1. Select Tools | InTouch | Templates Setup to display the Template Manager page.
2. In either the General Message or System Generated Message list in the panel on the left-hand side of the page, click the group of message templates that contains the message template you wish to make inactive, e.g. General Message.
On the right-hand side of the screen, the top panel displays all message templates recorded in SIMS for the selected template category.
3. In the top panel on the right-hand side of the page, highlight the message template you wish to make inactive.
4. Click the Deactivate button then click the Save button. The template name is now suffixed with (Inactive).
The message template remains highlighted and the Deactivate button is renamed to Activate.
5. To re-activate the message template, highlight the inactive message template, click the Activate button then click the Save button.
More Information: Deleting a Message Template on page 28

03| Setting up Message Templates
28 Managing Communications using InTouch
Deleting a Message Template
If you are certain you never want to use a message template again, you may wish to delete it.
NOTE: It is not possible to delete a System Generated message template provided by SIMS. It is not possible to delete the default System Generated message template. To delete a System Generated message template currently marked as default, you must first make another message template the default.
Instead of deleting a message template however, you may wish to make it inactive. This retains the template on your system but it becomes unavailable for selection when creating a message. Any template set as inactive can be activated at any time.
1. Select Tools | InTouch | Templates Setup to display the Template Manager page.
2. In either the General Message or System Generated Message list in the panel on the left-hand side of the page, click the group of message templates that contains the message template you wish to delete, e.g. General Message.
On the right-hand side of the screen, the top panel displays all message templates recorded in SIMS for the selected template category.
3. In the top panel on the right-hand side of the page, highlight the message template you wish to delete.
4. Click the Delete button. The template name is now displayed in strikethrough text (a horizontal line across its name) to indicate that it is marked for deletion and the button label is renamed Un Delete.
NOTE: At this point, the message template is just marked for deletion; it has not yet been deleted so it can still be retrieved.
5. Confirm the deletion by clicking the Save button. Alternatively, cancel the deletion by highlighting the template then clicking the Un Delete button.
When the template is deleted, its name is removed from the list in the top panel and is no longer available for selection when creating a message.
More Information: Setting a System Generated Message Template as the Default on page 26 Activating and De-activating a Message Template on page 27

04| Sending General Messages
Managing Communications using InTouch 29
04|Sending General Messages
In This Chapter
Introduction .................................................................................. 29
Accessing the Messaging Facility ................................................... 30
Sending a General Message ........................................................... 41
Sending an Emergency Alert .......................................................... 54
Introduction
There are two categories of messages that can be sent from SIMS: General Message and System Generated Message. Once the appropriate message templates have been set up, they can be applied to messages sent from SIMS.
General Message
These are messages that are sent manually by SIMS users. General, Pupil/Student General, Applicant General, SEN, SEN Reminder, Behaviour, Exclusion and Fees Communication messages can be sent and templates can be created for each of these message types.
NOTE: Fees Communication messages can be sent only if you have applied the Fees licence.
System Generated Message
These are messages that can be sent by SIMS under specific circumstances. Message templates for Unexplained Absence, Behaviour Incident, Achievement Award, Pupil/Student Profile, Not Approved Pupil/Student Profile, Exceptional Circumstance, School Event, Staff Training Day and Percentage Attendance are provided as part of the installation process.
Associated message templates are provided as part of the installation process.
More Information: Managing System Generated Messages on page 69

04| Sending General Messages
30 Managing Communications using InTouch
Accessing the Messaging Facility
General messages can be sent from a number of areas in SIMS. The type of general message generated is determined by the area of SIMS selected when the messaging functionality is triggered. Once the appropriate SIMS menu route has been selected, the method of preparing and sending a message is very similar for all types of messages. Additional functionality is available for some types of message. The following table introduces the types of General Message that can be created and indicates where in SIMS that type of general message can be created.
Message Type Accessible Via
General Message Focus | InTouch | Send Message
Pupil/Student General Focus | Pupil (or Student) | Pupil (or Student) Details (Links panel)
Applicant General Focus | Admission | Application
Focus | Pupil (or Student) | Special Educational Needs
Focus | Pupil (or Student) | Pupil (or Student) Details | Fees Details
SEN Message Focus | Pupil (or Student) | Special Educational Needs
SEN Reminder Message On the SIMS Home Page, click a SEN reminder in the My Reminders panel.
Behaviour Message Focus | Behaviour Management | Pupil (or Student) Behaviour
Exclusion Message Focus | Pupil (or Student) | Exclusions
Fees Communication Message Focus | Pupil (or Student) | Pupil (or Student) Details (Links panel)
NOTE: A Fees Communication message can be sent only if the Fees licence has been applied.
NOTE: Accessing the messaging functionality using one of the menu routes described in the table enables you to change to any of the other message types, if required. The only exception is a General Message (Focus | In Touch | Send Message), where the type of message cannot be changed.
When you are preparing a message to be sent, the intended recipients can be selected, files can be attached and a wide range of text and paragraph formatting can be applied.

04| Sending General Messages
Managing Communications using InTouch 31
General Messages
A General Message should be created if its subject matter is general in nature and is not linked directly to any of the other message types. When selecting the intended recipients, the search criteria Category defaults to show all people who are currently associated with your school (Current).
In the case where a pupil/student has one or more siblings currently attending your school, SIMS InTouch identifies whether a General Message would ordinarily be sent to a recipient more than once. If a recipient would ordinarily receive the message more than once (e.g. they would receive the same message three times if they have three children at your school), only a single message is now sent. This reduces the number of messages sent to a pupil/student contact and therefore reduces the cost of doing so.
Select Focus | InTouch | Send Message to display the Send General Message page.
More Information: Sending a General Message on page 41
Pupil/Student General Messages
A Pupil/Student General Message can be created from the Pupil (or Student) Details page and is therefore linked automatically to the selected pupil/student’s record. When selecting the intended recipients, the search criteria Category defaults to show all people who are currently associated with the selected pupil/student (Linked Adults), including parental contacts, registration tutors and teachers.
1. Select Focus | Pupil (or Student) | Pupil (or Student) Details to display the Find Student browser.

04| Sending General Messages
32 Managing Communications using InTouch
2. Search for then select the required pupil/student to display their details on the Pupil (or Student) Details page.
3. In the Links panel on the right-hand side of the page, click the Send Message hyperlink to display the Search browser.
4. To facilitate the selection of a group of people in the Linked Adults panel, click the Filter button to display all of the roles represented in the Linked Adults panel.
Filter button
5. Select or deselect the appropriate check box(es), leaving selected only the check box of the role(s) you wish to select from. Deselect the Select All check box to deselect all of the check boxes.

04| Sending General Messages
Managing Communications using InTouch 33
The instructions in the section referenced in the table (below) relate to sending a General Message, but they are relevant for all types of message that can be sent manually (apart from step 1, which is redundant when sending a Pupil/Student General Message).
More Information: Sending a General Message on page 41
Applicant General Messages
An Applicant Message can be created from a number of areas in SIMS and is therefore linked automatically to the selected pupil/student’s record. When selecting the intended recipients, the search criteria Category defaults to show all people who are currently associated with the selected pupil/student (Linked Adults), including parental contacts, registration tutors and teachers.
1. An Applicant Message can be sent by clicking the Send Message hyperlink in the Links panel on any of the following pages in SIMS:
Application page (via Focus | Admission | Application).
Student SEN details page (via Focus | Pupil (or Student) | Special Educational Needs).
Fees Details page (via Focus | Pupil (or Student) | Pupil (or Student) Details | Fees Details).
2. Search for then select the required pupil/student to display their details on the Application page, Student SEN details page or the Fees Details page.
3. In the Links panel on the right-hand side of the page, click the Send Message hyperlink to display the Search browser.
4. To facilitate the selection of a group of people in the Linked Adults panel, click the Filter button to display all of the roles represented in the Linked Adults panel.
Filter button

04| Sending General Messages
34 Managing Communications using InTouch
5. Select or deselect the appropriate check box(es), leaving selected only the check box of the role(s) you wish to select from. Deselect the Select All check box to deselect all of the check boxes.
The instructions in the section referenced in the table (below) relate to sending a General Message, but they are relevant for all types of message that can be sent manually (apart from step 1, which is redundant when sending an Applicant Message).
More Information: Sending a General Message on page 41
SEN Messages
A SEN Message can be created from the Pupil (or Student) SEN Details page and is therefore linked automatically to the selected SEN pupil/student’s record but it is not linked to a specific SEN Event. When selecting the intended recipients, the search criteria Category defaults to show all people who are currently associated with the selected pupil/student (Linked Adults), including parental contacts, registration tutors and teachers.
1. Select Focus | Pupil (or Student) | Special Educational Needs to display the Find SEN Pupil (or Student) browser.

04| Sending General Messages
Managing Communications using InTouch 35
2. Search for then select the required pupil/student to display their details on either the Pupil (or Student) SEN details page.
3. In the Links panel on the right-hand side of the page, click the Send Message hyperlink to display the Search browser.
4. To facilitate the selection of a group of people in the Linked Adults panel, click the Filter button to display all of the roles represented in the Linked Adults panel.
Filter button
5. Select or deselect the appropriate check box(es), leaving selected only the check box of the role(s) you wish to select from. Deselect the Select All check box to deselect all of the check boxes.

04| Sending General Messages
36 Managing Communications using InTouch
The instructions in the section referenced in the table (below) relate to sending a General Message, but they are relevant for all types of message that can be sent manually (apart from step 1, which is redundant when sending a SEN Message).
More Information: Sending a General Message on page 41
Sending SEN Reminder Messages
A SEN reminder message can be sent to all internal contacts. A message created in this way cannot be sent to external contacts (e.g. parent/guardians, agents, etc.). This functionality can be used only if you have elected to receive reminders/alerts for SEN via Focus | Alerts | Setup Reminders.
To send a SEN Reminder message:
1. On the SIMS Home Page, click a SEN reminder in the My Reminders panel to display the Read Reminder dialog.
2. Select the check box adjacent to the required event.
3. Click the Send Messages button to display the Search browser.
More Information: Sending a General Message on page 41

04| Sending General Messages
Managing Communications using InTouch 37
Behaviour Messages
A Behaviour Message can be created from the Behaviour Management page and is therefore linked automatically to the selected pupil/student’s record. When selecting the intended recipients, the search criteria Category defaults to show all people who are currently associated with the selected pupil/student (Linked Adults), including parental contacts, registration tutors and teachers.
1. Select Focus | Behaviour Management | Student Behaviour to display the Find Behaviour Management Student browser.
2. Search for then select the required pupil/student to display their details on the Behaviour Management page.
3. In the Links panel on the right-hand side of the page, click the Send Message hyperlink to display the Search browser.

04| Sending General Messages
38 Managing Communications using InTouch
4. To facilitate the selection of a group of people in the Linked Adults panel, click the Filter button to display all of the roles represented in the Linked Adults panel.
Filter button
5. Select or deselect the appropriate check box(es), leaving selected only the check box of the role(s) you wish to select from. Deselect the Select All check box to deselect all of the check boxes.
The instructions in the section referenced in the table (below) relate to sending a General Message, but they are relevant for all types of message that can be sent manually (apart from step 1, which is redundant when sending a Behaviour Message).
More Information: Sending a General Message on page 41
Exclusion Messages
An Exclusion Message can be created from the Exclusion Details page and is therefore linked automatically to the selected pupil/student’s record. When selecting the intended recipients, the search criteria Category defaults to show all people who are currently associated with the selected pupil/student (Linked Adults), including parental contacts, registration tutors and teachers.
1. Select Focus | Pupil (or Student) | Exclusions to display the Find Exclusions Student browser.

04| Sending General Messages
Managing Communications using InTouch 39
2. Search for then select the required pupil/student to display their details on the Exclusion Details page.
3. In the Links panel on the right-hand side of the page, click the Send Message hyperlink to display the Search browser.
4. To facilitate the selection of a group of people in the Linked Adults panel, click the Filter button to display all of the roles represented in the Linked Adults panel.
Filter button
5. Select or deselect the appropriate check box(es), leaving selected only the check box of the role(s) you wish to select from. Deselect the Select All check box to deselect all of the check boxes.

04| Sending General Messages
40 Managing Communications using InTouch
The instructions in the section referenced in the table (below) relate to sending a General Message, but they are relevant for all types of message that can be sent manually (apart from step 1, which is redundant when sending an Exclusion Message).
More Information: Sending a General Message on page 41
Class Register Messages
A Class Register Message can be created from the Take Register page and is therefore linked automatically to the selected pupil/student’s record. When selecting the intended recipients, the search criteria Category defaults to show all people who are currently associated with the selected pupil/student (Linked Adults), including parental contacts, registration tutors and teachers.
1. Select Focus | Attendance (or Lesson Monitor) | Take Register to display the Select Class browser.
2. Select the required register to display it on the Take Register page.
3. Highlight the pupil/student(s) regarding whom you wish to send a general message.
4. In the Links panel on the right-hand side of the page, click the Send Message hyperlink to display the Search browser.
5. To facilitate the selection of a group of people in the Linked Adults panel, click the Filter button to display all of the roles represented in the Linked Adults panel.
Filter button

04| Sending General Messages
Managing Communications using InTouch 41
6. Select or deselect the appropriate check box(es), leaving selected only the check box of the role(s) you wish to select from. Deselect the Select All check box to deselect all of the check boxes.
The instructions in the section referenced in the table (below) relate to sending a General Message, but they are relevant for all types of message that can be sent manually (apart from step 1, which is redundant when sending a Class Register Message).
More Information: Sending a General Message on page 41
Sending a General Message
1. Select Focus | InTouch | Send Message or click the Send Message button on the toolbar to display the Send General Message page.
Send Message button
2. Select or enter the required recipient(s) of the message (please see Selecting the Recipient(s) of the Message on page 42).
3. Enter a subject heading (please see Entering a Subject Heading on page 45).
4. Select a template for the message (please see Selecting a Template for the Message on page 45).
5. Enter the body text of the message (please see Entering the Text of the Message on page 46).
6. Format the message text (please see Formatting Message Text on page 48).
7. Add any attachments to the message, if required (please see Attaching Files to the Message on page 51).

04| Sending General Messages
42 Managing Communications using InTouch
8. Set the importance of the message (please see Setting the Importance of a Message on page 52).
9. Preview the message, if required (please see Previewing a Message on page 52).
10. Send the message (please see Sending the Message on page 53).
Selecting the Recipient(s) of the Message
People recorded as being contactable via SIMS internal message, email or SMS can be selected as a message recipient. If a person’s contact details are not recorded in SIMS, or if you want to send a message to a person not recorded in SIMS, this can also be achieved by entering a mobile telephone number or email address directly. If no method of communication is selected for a category of person, their name is displayed in the list but they cannot be added as a message recipient.
1. From the appropriate Send Message page, click the To button to display the Search browser.
This page facilitates the search for the intended recipient(s).
2. The default Category of person is set to Current. This can be changed by selecting from the drop-down list, e.g. Employee, Linked Adults, etc.
3. Enter all of part of the intended recipient’s Name in the adjacent field.

04| Sending General Messages
Managing Communications using InTouch 43
4. Click the Search button to search for all the people who match the search criteria entered.
5. The default view displays the category of people found, e.g. Current, Employee, Linked Adults, etc. To expand the view to show the names of the people in each category, click the adjacent arrow button(s).
Expand View button
To contract the view again, click the down arrow button.
Contract View button

04| Sending General Messages
44 Managing Communications using InTouch
The icons in the column header indicate the method by which each person displayed in the browser can be contacted.
Email icon
Internal Message icon
SMS icon
NOTE: A tick button is displayed adjacent to a person only if they have a mobile phone number or email address recorded, or if they are a SIMS user.
The default method of communication for each person is indicated by the selection of check boxes in the browser.
6. Select the preferred method(s) of communication for each intended recipient by selecting or deselecting the required check boxes.
7. Individual people can be selected as a message recipient by selecting the check box to the left of their name.
To select every person within a category (e.g. all Employees), select the check box on the left-hand side of the category name.
All people currently displayed in the browser can be added as recipients by selecting the All Results check box directly above the search results.
8. If somebody has been added as a recipient in error, they can be removed by deselecting the check box adjacent to their name.
To remove every person within a category, deselect the check box on the left-hand side of the category name.
9. Click the OK button to confirm the recipients of the message. To cancel the process without selecting any recipients, click the Cancel button.
10. The selected recipients are displayed in the To field. Additional recipients (details of whom are recorded in SIMS) can be added by clicking the To button and repeating the process. Alternatively, enter a mobile telephone number or email address directly in the To field for any intended recipient who is not currently recorded in SIMS.

04| Sending General Messages
Managing Communications using InTouch 45
NOTE: A recipient added in error can also be removed from any of the Send Message pages by right-clicking their name in the To field then selecting Remove Recipient(s) from the pop-up menu.
More Information: Setting Default Communication Methods on page 118
Entering a Subject Heading
Enter a Subject heading for the message, if required. The text entered should provide the recipient(s) with an indication as to the content of the message. If the template on which the message is based contains default text in the Subject line, the text can be edited if required.
IMPORTANT NOTE: If you enter a Subject heading or Message text then change the template you wish to associate with the message, any text entered will be replaced with the default text of the newly selected template.
Selecting a Template for the Message
Templates enable you to alter the look and feel of your messages. A range of templates can be selected to cater for your individual needs. If you have the appropriate permissions, it is possible to create your own templates.
Select the template you wish to apply to the message (if required) by clicking the Templates button then selecting the required template from the pop-up menu.

04| Sending General Messages
46 Managing Communications using InTouch
NOTE: The option to select an alternative template is available only if more than one template for this message type has been defined. If only one template exists for a message type, it will be selected by default.
IMPORTANT NOTE: If you enter a Subject heading or Message text then change the template you wish to associate with the message, any text entered will be replaced with the default text of the newly selected template.
More Information: Setting up Message Templates on page 19
Entering the Text of the Message
Enter the text of the Message in the bottom panel of the Send Message page.
NOTE: At least one character must be entered in the Message text before the message can be sent.
The text entered can be formatted using the toolbar at the top of the Message panel.
TIP: If you make a mistake when entering text, the standard Microsoft® Word undo (Ctrl + Z) and redo (Ctrl + Y) can be used to make corrections.
IMPORTANT NOTE: If you enter a Subject heading or Message text then change the template you wish to associate with the message, any text entered will be replaced with the default text of the newly selected template.
More Information: Formatting Message Text on page 48
Selecting Data Fields
A range of pupil/student, school, etc. related data can be extracted from the SIMS database and included as part of your message text.
For example, instead of repeatedly entering your school name in each message, you can insert the <SchoolName> tag. When the message is sent, SIMS replaces the tag with the appropriate data stored in the database (e.g. Green Abbey School).

04| Sending General Messages
Managing Communications using InTouch 47
School Data Items button
Pupil/Student Data Items button
The following school data fields are available when sending a General Message, Pupil/Student General Message, SEN Message, Behaviour Message, Exclusion Message and Fees Communication Message.
<SchoolName> <SchoolAddress> <SchoolTelephone>
<SchoolFax> <SchoolEmail> <HeadTeacherName>
<SentByLoginName> <SentByFullName> <TextStudent>
<TextStudents> <TextYearGroup> <TextRegGroup>
<RecipientName> <RecipientSalutation>
The following pupil/student data fields are available when sending a Pupil/Student General Message.
<ParentalSalutation> <PreferredName> <PreferredForename>
<PreferredSurname> <LegalForename> <LegalSurname>
<DateOfBirth> <AdNo> <YearGroup>
<RegGroup> <House> <RegTutor>
<HeadOfYear> <he/she> <He/She>
<him/her> <his/her> <His/Her>
<son/daughter>
The following pupil/student data fields are available when sending a SEN Message.
<ParentalSalutation> <PreferredName> <PreferredForename>
<PreferredSurname> <LegalForename> <LegalSurname>
<DateOfBirth> <AdNo> <YearGroup>
<RegGroup> <House> <RegTutor>
<HeadOfYear> <he/she> <He/She>
<him/her> <his/her> <His/Her>
<son/daughter> <SENStatus> <SENStartDate>

04| Sending General Messages
48 Managing Communications using InTouch
<SENDescriptions> <CurriculumTeaching Methods>
<GroupingSupport>
<Advice Assessment>
<Specialised Resources>
<GiftedTalented Notes>
<GiftedTalentedStartDate> <GiftedTalentedEnd Date>
The following pupil/student data fields are available when sending a Behaviour Message , an Exclusion Message and a Fees Communication Message.
<ParentalSalutation> <PreferredName> <PreferredForename>
<PreferredSurname> <LegalForename> <LegalSurname>
<DateOfBirth> <AdNo> <YearGroup>
<RegGroup> <House> <RegTutor>
<HeadOfYear> <he/she> <He/She>
<him/her> <his/her> <His/Her>
<son/daughter>
Formatting Message Text
A number of formatting options are available, enabling you to change the look and feel of a message.
Change the font (select the required text then select a font from the drop-down list).
Change the font size (select the required text then select a font size from the drop-down list).
Embolden text (select the required text then click the Bold button to toggle between normal and emboldened text).
Bold button
Italicise text (select the required text then click the Italicise button to toggle between normal and italicised text).
Italicise button
Underline text (select the required text then click the Underline button to toggle between normal and underlined text).
Underline button

04| Sending General Messages
Managing Communications using InTouch 49
If the message includes a list, you may wish to convert the list into a bulleted or numbered list. Place the cursor onto the line you wish to add bullets or numbering then click the Bullet List button or the Number List button.
Alternatively, apply a bulleted or numbered list to multiple paragraphs of text by selecting the required text then clicking the Bullet List or Number List button.
Bullet List button
Number List button
Subsequent bulleted or numbered items can be added by pressing Enter at the end of the line to continue the formatting to the next paragraph.
Text can be left-aligned, centred or right-aligned across the page. Place the cursor onto the appropriate line then click the Left Align, Centre or Right Align button.
Alternatively, apply the appropriate alignment to multiple paragraphs of text by selecting the required text then clicking the Bullet List or Number List button.
Left Align button
Centre button
Right Align button
Inserting a Hyperlink into the Message Text
Hyperlinks can be inserted into the message text, particularly useful if you wish to provide a link the school website. A hyperlink can be applied in two ways.
Applying a Hyperlink to Existing Text
1. Enter the text you wish to use as the hyperlink text.
2. Highlight the entered text, ensuring you do not select any additional trailing spaces or the ‘invisible’ paragraph (if the required text is at the end of a paragraph).
3. Click the Hyperlink button to display the Insert Hyperlink dialog then complete the process (please see Creating a Hyperlink as you Type on page 50).

04| Sending General Messages
50 Managing Communications using InTouch
Creating a Hyperlink as you Type
1. Place the cursor where you want the hyperlink to be displayed then click the Hyperlink button to display the Insert Hyperlink dialog.
NOTE: When using this method, the hyperlink text is added via the Insert Hyperlink dialog. If you highlight text prior to clicking the Hyperlink button, the text will be replaced with the content entered in the Insert Hyperlink dialog.
Hyperlink button
2. Enter the Text you wish to display in the message to represent the hyperlink.
3. Enter the URL that the text represents.
4. Click the OK button to return to the message. The Text displayed will be displayed in blue and it will be underlined.
IMPORTANT NOTES: You must enter http://, \\ or file:// as part of the URL. Failure to enter this text will prevent you from applying the hyperlink to the message. Careful consideration should be given to the intended recipient of a message containing a hyperlink. For example, if a message is being sent to an external recipient and it contains a UNC path, they may not be able to access this path remotely.
When a recipient reads a message that includes a hyperlink, clicking the hyperlink displays the website in a web browser.
NOTE: If you send an Internal Message (e.g. a message to another SIMS user) containing a hyperlink, only the detail of the hyperlink is displayed when the message is viewed in SIMS. It is not possible to access the location of the hyperlink by clicking the hyperlink text in an Internal Message

04| Sending General Messages
Managing Communications using InTouch 51
Adding an Image into a Message
Images can be added to a message. To insert an image, open it in your image editing software and copy the content. Return to your message then select Edit | Paste to insert the image.
IMPORTANT NOTE: The size of a message, including any file attachments or images, must not exceed 4MB.
If an attachment or an image has been added to the message, the current size of the message is displayed above the Message panel.
An image can be removed from a message by clicking it then clicking the Delete key.
Attaching Files to the Message
One or more files can be added to a message and sent to each recipient.
IMPORTANT NOTE: The size of a message, including any file attachments or images, must not exceed 4MB.
1. Click the Attach Files button to display the Windows® Open dialog.
2. Navigate to the location of the required file.
3. Highlight the file(s) you wish to include as an attachment.
4. Click the Open button.
The selected file is displayed in the Attached panel, which is located between the Subject panel and the Message panel. This panel is visible only if an attachment has been added to a message.

04| Sending General Messages
52 Managing Communications using InTouch
If an attachment or an image has been added to the message, the current size of the message is displayed above the Message panel.
To remove an attachment added in error, right-click the file then select Remove attachment from the pop-up menu.
The attached file(s) are sent to all recipients as part of the message.
Changing the Message Type
Not applicable to General Messages
Regardless of how the messaging functionality was opened, the message type can be edited by selecting the appropriate option from the Set Type pop-up menu.
Setting the Importance of a Message
A level of importance can be set for each message. This does not determine the speed at which a message is delivered, but it provides an indication to the recipient(s) as to the importance of the message.
The default importance is Normal and this is indicated on the button label.
1. To change the importance of a message, click the Normal button then select the appropriate setting from the pop-up menu. The button label changes according to the selection made.
High Importance indicator
Normal Importance indicator
Low Importance indicator
2. To change the importance again, click the same button (named differently to Normal, if the importance has already been changed) and repeat the selection process.
Previewing a Message
Applicable to all message types
It is possible to preview a message, perhaps to check that any pupil/student data fields inserted into the message text are displayed correctly.
1. Click the Print Preview button to display the Print Preview page.
2. Use the controls in the top left-hand corner of the page to change the display properties and to print the message, if required.

04| Sending General Messages
Managing Communications using InTouch 53
3. Click the Close button to close the window and return to the Review a Message page.
Sending the Message
Once the required recipients have been selected, the message text has been entered and formatted and any files have been added as attachments, the message is ready to be sent.
Click the Send button to send the message to the selected recipients, via the selected communication method(s).
If SIMS detects that a message is being sent to an international mobile telephone number (i.e. it has a different country code to that defined for the school), the International Number Warning dialog is displayed.
Click the Print button to print this list, if required.
To send the message to all international numbers in the list, click the OK button. To cancel the sending of the message to all intended recipients (not only those with an international number), click the Cancel button to return to the appropriate Send Message page and amend the list of intended recipients (please see Selecting the Recipient(s) of the Message on page 42).
Messages are viewed by the recipients via the My Messages panel on the SIMS Home Page (via Focus | Home Page).
More Information: Viewing Your Messages on page 55

04| Sending General Messages
54 Managing Communications using InTouch
Sending an Emergency Alert
It may be necessary for a class teacher to request immediate assistance as a result of an emergency in the classroom. The use of emergency alerts in SIMS enables a class teacher to request assistance from anywhere in SIMS, both quickly and efficiently.
Prior to this functionality being available, you must select the members of staff who will be notified immediately in the event of an emergency, together with the preferred method of contacting them (please see Setting Up the Emergency Alert Notification on page 115).
Once the intended recipients of emergency alerts have been selected, they will receive a message via the preferred communication method (SMS message, email message or via the My Messages panel on the SIMS Home Page). Careful consideration should be given to the selection of intended recipients for an emergency alert.
Once opened, the message displays the following predefined text. This text is read-only.
Teacher <Class Teacher Name>, in Room <Class Room Name> with <Class Name>, needs urgent assistance!
The <Class Teacher Name>, <Class Room Name> and <Class Name> tags are populated automatically by SIMS once the emergency alert message is sent. This information is extracted from your SIMS database, preventing the need to enter it manually.
1. Click the Emergency Alert button on the main SIMS toolbar, which is available from anywhere in SIMS.
Send Emergency Alert button
A confirmation message is displayed, indicating that the Emergency Alert has been sent.
2. Click the OK button to continue.
A message is sent immediately, via the selected communication method(s), to those people that have been selected as a recipient for an Emergency Alert.

05| Viewing Your Messages
Managing Communications using InTouch 55
05|Viewing Your Messages
In This Chapter
Introduction .................................................................................. 55
Viewing Received Messages........................................................... 56
Managing Your Messages............................................................... 66
Introduction
Any internal messages sent to you are accessible from the My Messages panel on the SIMS Home Page (via Focus | Home Page).
Any messages sent to your school from an external source (e.g. a parent) are accessible from the School Messages panel on the SIMS Home Page. These might include messages that cannot be matched to a message sent previously from SIMS, or responses to Unexplained Absences, Pupil/Student Profiles or Exceptional Circumstances messages.
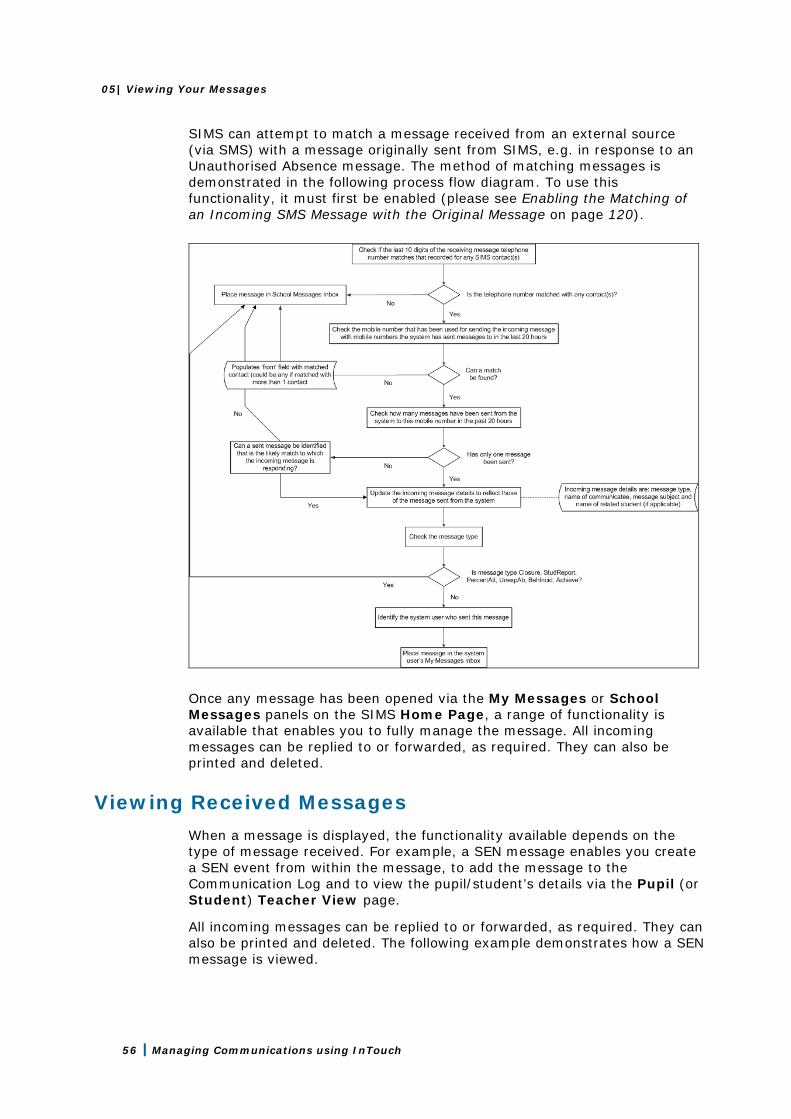
05| Viewing Your Messages
56 Managing Communications using InTouch
SIMS can attempt to match a message received from an external source (via SMS) with a message originally sent from SIMS, e.g. in response to an Unauthorised Absence message. The method of matching messages is demonstrated in the following process flow diagram. To use this functionality, it must first be enabled (please see Enabling the Matching of an Incoming SMS Message with the Original Message on page 120).
Once any message has been opened via the My Messages or School Messages panels on the SIMS Home Page, a range of functionality is available that enables you to fully manage the message. All incoming messages can be replied to or forwarded, as required. They can also be printed and deleted.
Viewing Received Messages
When a message is displayed, the functionality available depends on the type of message received. For example, a SEN message enables you create a SEN event from within the message, to add the message to the Communication Log and to view the pupil/student’s details via the Pupil (or Student) Teacher View page.
All incoming messages can be replied to or forwarded, as required. They can also be printed and deleted. The following example demonstrates how a SEN message is viewed.

05| Viewing Your Messages
Managing Communications using InTouch 57
In the My Messages panel on the Home Page, click the required message to display the Review a Message page.
The top part of the screen provides information on the message Type, who the message is From and who it has been sent To, the Date on which the message was sent, the Delivery Status and the message Importance.
If a message contains a Subject line, this is also displayed. If a message contains an attachment, this is displayed beneath the Subject line (marked as Attachment).
The bottom part of the Review a Message page displays the text of the message.
Viewing Message Attachments
Applicable to all message types
A message can contain one or more attachments. These are indicated by a line labelled Attachment, displayed beneath the Subject line in the top panel of the page.
NOTES: The Attachments panel is displayed only if the message contains an attachment. It is not possible to remove an attachment from a received message.
If a message contains an attachment, click the attachment to open it. Depending on the type of attachment, it may be possible to save it to your hard drive.

05| Viewing Your Messages
58 Managing Communications using InTouch
Adding a Message to the Communication Log
Applicable to all message types
This adds a record to a pupil/student’s communication log, which can be viewed from the Pupil (or Student) Details page (via Focus | Pupil (or Student) | Pupil (or Student) Details then clicking the Communication Log hyperlink in the Links panel).
Adding a message to a log keeps a permanent record in SIMS of the information contained in the email, enabling you to maintain a full and complete pupil/student record.
1. Click the Add to Log button to display the Save to Pupil/Student’s Communication Log dialog.
2. Select the radio button relating to the sensitivity of the information you are saving to the log.
Public – the content of the log is available to all users with sufficient permissions.
Private – the content of the log is available only to you.
Confidential – the content of the log is available to SIMS users with School Administrator or Senior Management Team permissions.
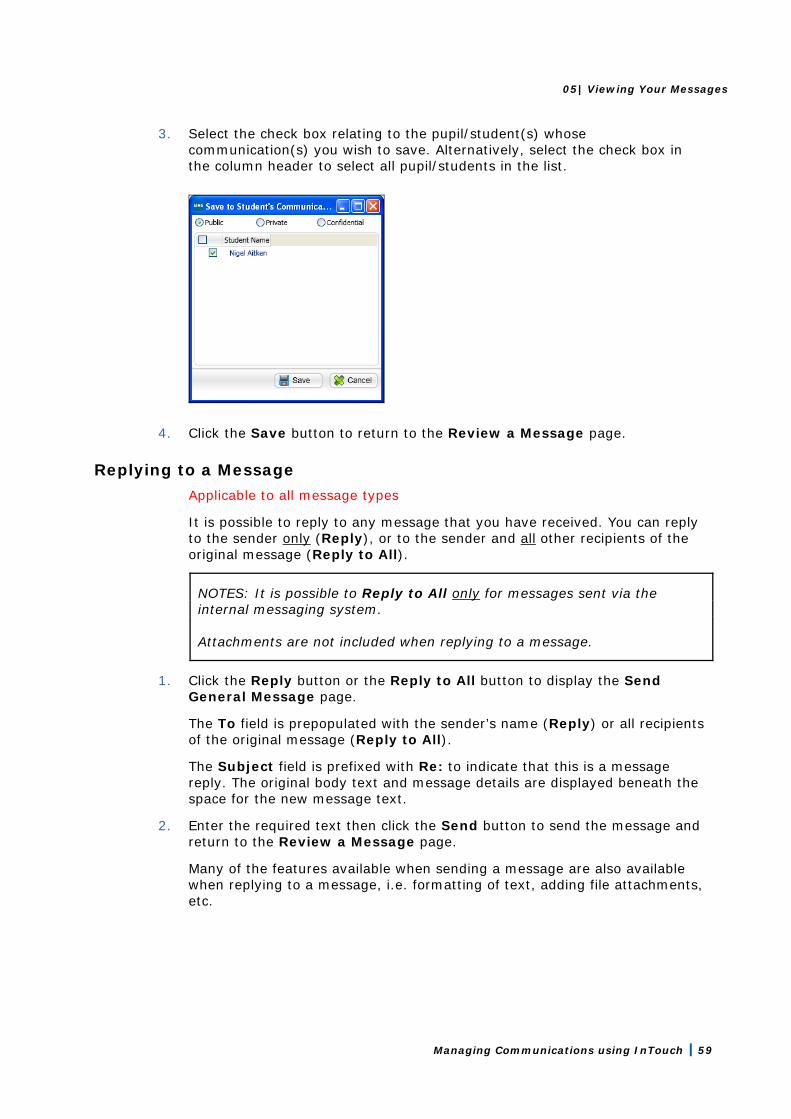
05| Viewing Your Messages
Managing Communications using InTouch 59
3. Select the check box relating to the pupil/student(s) whose communication(s) you wish to save. Alternatively, select the check box in the column header to select all pupil/students in the list.
4. Click the Save button to return to the Review a Message page.
Replying to a Message
Applicable to all message types
It is possible to reply to any message that you have received. You can reply to the sender only (Reply), or to the sender and all other recipients of the original message (Reply to All).
NOTES: It is possible to Reply to All only for messages sent via the internal messaging system. Attachments are not included when replying to a message.
1. Click the Reply button or the Reply to All button to display the Send General Message page.
The To field is prepopulated with the sender’s name (Reply) or all recipients of the original message (Reply to All).
The Subject field is prefixed with Re: to indicate that this is a message reply. The original body text and message details are displayed beneath the space for the new message text.
2. Enter the required text then click the Send button to send the message and return to the Review a Message page.
Many of the features available when sending a message are also available when replying to a message, i.e. formatting of text, adding file attachments, etc.

05| Viewing Your Messages
60 Managing Communications using InTouch
More Information: Selecting the Recipient(s) of the Message on page 42 Entering a Subject Heading on page 45 Selecting a Template for the Message on page 45 Entering the Text of the Message on page 46 Formatting Message Text on page 48 Attaching Files to the Message on page 51 Setting the Importance of a Message on page 52 Previewing a Message on page 52 Sending the Message on page 53
Forwarding a Message
Applicable to all message types
It is possible to forward any message that you have received, perhaps for information purposes. Any files attached to the original message are also forwarded.
1. Click the Forward button to display the Send General Message page.
The Subject field is prefixed with Fw: to indicate that this is a forwarded message. The original body text and message details are displayed beneath the space for the new message text.
2. Select the intended recipient(s) of the message by clicking the To button and selecting from the Search browser or by entering contact details manually.
3. Enter any additional body text, if required, then click the Send button to send the message.
Many of the features available when sending a message are also available when forwarding a message, i.e. formatting of text, adding file attachments, etc.
More Information: Selecting the Recipient(s) of the Message on page 42 Entering a Subject Heading on page 45 Selecting a Template for the Message on page 45 Entering the Text of the Message on page 46 Formatting Message Text on page 48 Attaching Files to the Message on page 51 Setting the Importance of a Message on page 52 Previewing a Message on page 52 Sending the Message on page 53
Previewing a Message
Applicable to all message types
It is possible to preview a message, perhaps to check that any pupil/student data fields inserted into the message text are displayed correctly.
1. Click the Print Preview button to display the Print Preview page.
2. Use the controls in the top left-hand corner of the page to change the display properties and to print the message, if required.

05| Viewing Your Messages
Managing Communications using InTouch 61
3. Click the Close button to close the window and return to the Review a Message page.
Deleting a Message
Applicable to all message types
Once a message has been actioned or if you no longer wish to retain it, the message can be deleted.
WARNING: Once a message is deleted, it cannot be retrieved.
1. Click the Delete button.
2. Confirm that you wish to delete the message by clicking the Yes button or click the No button to cancel the deletion.
NOTE: Messages can also be deleted from the My Messages and School Messages panels on the SIMS Home Page.
Creating a SEN Event from a Message
Applicable to SEN message type only
When viewing a SEN pupil/student message, you can record a variety of information relating to the associated pupil/student’s SEN record. This functionality provides an efficient method of recording SEN information from a related message.
The following information can be recorded in SIMS from a SEN message:
SEN Event
SEN Provision
SEN Review

05| Viewing Your Messages
62 Managing Communications using InTouch
Recording a SEN Event
An Event is any specific and identifiable occurrence that takes place in the course of a pupil/student’s history and is associated with their Special Educational Needs.
Click the Create SEN Event button then select SEN Event from the pop-up menu to display the Add/Edit SEN Event dialog.
The Comments field in the Event panel is populated with the body text of the message.
Additional Resources:
Step 4 onwards of Adding/Editing Events in the Managing Pupil/Students with Special Educational Needs chapter of the Special Educational Needs in SIMS handbook
Recording a SEN Provision
The term Provisions covers a wide range of resources from financial help through to special equipment or the professional services of an Educational Psychologist. Schools must record details of all provisions that have been made for each pupil/student. Not only must the type of provision be identified, its use must be described in terms of frequency. Provisions are linked directly to a pupil/student’s review and represent the decisions taken at the review and an historical record is maintained.

05| Viewing Your Messages
Managing Communications using InTouch 63
Click the Create SEN Event button then select SEN Provision from the pop-up menu to display the Add/Edit SEN Provision dialog.
The Comments field in the Provision panel is populated with the body text of the message.
Additional Resources:
Step 4 onwards of Adding/Editing a Provision in the Managing Pupil (or Students) with Statements and IEPs chapter of the Special Educational Needs in SIMS handbook

05| Viewing Your Messages
64 Managing Communications using InTouch
Recording a SEN Review
Reviews are the key element to the entire Special Educational Needs process and without them occurring, it would be very difficult to formalise the special needs of a pupil/student.
Click the Create SEN Event button then select SEN Review from the pop-up menu to display the Add/Edit SEN Review dialog.
The Comments field in the Outcome panel is populated with the body text of the message.
Additional Resources:
Step 4 onwards of Adding/Editing a Review in the Managing Pupil/Students with Special Educational Needs chapter of the Special Educational Needs in SIMS handbook

05| Viewing Your Messages
Managing Communications using InTouch 65
Viewing SEN Pupil/Student Information on the Pupil (or Student) Teacher View
Applicable to SEN message type only
It is possible to access a SEN pupil/student’s information directly from a SEN message. Click the Pupil (or Student) Details button to display their Pupil (or Student) Teacher View page.
The Pupil (or Student) Teacher View page enables applicable staff members to quickly view a summary of information relating to any pupil/students.
It displays various types of read-only information relating to the selected pupil/student for the current academic year, linking to more information if required. The information displayed includes:
Basic Details
Emergency Contacts
Key Indicators
Quick Note
Timetable (Secondary schools only)
Attendance
Behaviour
Achievements
Assessment
SEN Needs

05| Viewing Your Messages
66 Managing Communications using InTouch
Classes
Additional Resources:
Using the Pupil/Student Teacher View chapter of the Managing Pupil/Students in SIMS handbook
Managing Your Messages
Any messages sent to you are accessible from the My Messages panel on the SIMS Home Page (via Focus | Home Page).
Any messages sent to your school from an external source (e.g. a parent) are accessible from the School Messages panel on the SIMS Home Page.
If the number of messages in your inbox exceeds the amount of space available in either of these panels, all recorded messages can be viewed by clicking the More hyperlink. This unpins the School Messages or My Messages panel and displays it in full screen mode. In full screen mode, all messages that you have sent can also be viewed. When panels are displayed in full screen mode, they are removed from the SIMS Home Page display.

05| Viewing Your Messages
Managing Communications using InTouch 67
The Inbox and Sent panels display received and sent messages. The previous graphic shows the expanded My Messages panel from the SIMS Home Page, but the display is identical when viewing the expanded School Messages panel.
The Subject, date and time of the message (Received), message Type, indication of any Attachments and the Importance are displayed.
Double-click the required message to display it or highlight a message then click the Open button.
A message can be deleted by highlighting the required one then clicking the Delete button.
Click the Restore button to reduce the panel back to a panel on the SIMS Home Page.
Restore button

05| Viewing Your Messages
68 Managing Communications using InTouch

06| Managing System Generated Messages
Managing Communications using InTouch 69
06|Managing System Generated Messages
In This Chapter
Introduction .................................................................................. 70
Sending a Message for Unexplained Absences............................... 70
Sending a Behaviour Incident Message ......................................... 77
Sending an Achievement Award Message ...................................... 77
Sending a Pupil/Student Profile Message ...................................... 78
Sending a Not Approved Pupil/Student Profile Message................ 79
Sending an Exceptional Circumstance Message ............................. 80
Sending a School Event Message or Staff Training Day Message ... 82
Sending a Missing Register Message.............................................. 83
Sending a Percentage Attendance Notification Message................ 83
Sending an Achievement Notification Message .............................. 85
Sending a Behaviour Notification Message .................................... 88
Sending a Pupil/Student Timetable Message................................. 91
Sending a Staff Timetable Message ............................................... 92
Sending a Pupil/Student Detention Message ................................. 93
Sending a Pupil/Student Exam Timetable Message ....................... 94
Sending a Message for Attendance Late Marks .............................. 99
Sending an Alert Regarding Incomplete Marksheet Results......... 102
Sending an Alert to Designated Persons if a Behaviour Type is Recorded ..................................................................................... 106
Sending an Alert Regarding Pupil/Student Exam Attendance ...... 111

06| Managing System Generated Messages
70 Managing Communications using InTouch
Introduction
System generated messages can be created and sent (with 'your school' rather than an individual user as the sender) to one or more recipients. For example, your school can send a communication requesting a reason from a parent/guardian for a pupil/student’s absence following the recording of an unexplained absence mark (N) in the register. Subsequently, the parent/guardian’s response can be recorded and saved against the pupil/student’s attendance record. This process provides an efficient method of contacting appropriate contacts and requesting information. Any messages sent from an external source by a contact of the school are managed using the School Messages panel on the SIMS Home Page (via Focus | Home Page).
The following sections describe the types of system generated messages that can be sent by SIMS, together with the circumstances under which the messages can be sent.
Sending a Message for Unexplained Absences
A message can be sent to parent/guardians following an instance of unexplained absence being recorded for their child at school. The message can also be sent to the pupil/student, if required. This method of communication facilitates the flow of information to parent/guardians and pupil/students in a time efficient manner and reduces the amount of manual administration that would otherwise be required. It also provides parent/guardians with important information regarding their child’s absence from class as soon as the register is taken.
Additionally, the parental contact may be asked to respond to the message, providing information about the absence. The information provided in this reply can then be used to update the pupil/student’s attendance record.
An Unexplained Absence message can be sent if an N mark (No reason yet provided for absence) is recorded in Take Register (via Focus | Attendance (or Lesson Monitor) | Take Register).
A pupil/student’s attendance record can be updated with a reason for absence following a response to an unexplained absence message being received.
1. Select Focus | Attendance (or Lesson Monitor) | Deal with Unexplained Absences (InTouch) to display the Unexplained Absence Management page.
2. Specify the date range for which you wish to search for unexplained absences by either entering a Period From and Period To date or clicking the appropriate Calendar button then selecting the required date.
NOTE: The dates selected must fall within the current academic year.
3. From the drop-down list, select whether you wish to deal with Session attendance or Session & Lesson attendance.

06| Managing System Generated Messages
Managing Communications using InTouch 71
NOTE: This option is available only if the SIMS Lesson Monitor licence has been applied.
4. If you wish to review absences that have already been resolved by this process, select the Resolved Only check box.
The Send Message and Apply to Attendance buttons remain disabled at this point.
5. Filter the search by selecting from the Select Group Type drop-down list, e.g. by Year Group. With the appropriate group type selected, click the required group (e.g. Year 8). Multiple groups can be selected using Ctrl + click or Shift + click.
6. Click the Search button to display all the pupil/students against whom an unexplained absence has been recorded over the selected timeframe.
For each pupil/student displayed in the browser, information relating to their unexplained absence is displayed, including the periods they have missed (From and To), any recorded Events, their current Mark in the register for this absence and their expected return date (Exp. Return, which is editable). The date on which the most recent message regarding this absence is also displayed (Last Msg Sent), together with the date on which the message was replied to (Responded).

06| Managing System Generated Messages
72 Managing Communications using InTouch
7. Select the check box adjacent to the pupil/student(s) about whom you wish to send a message. Alternatively, select the check box in the column header to select all pupil/student(s) in the table.
8. To optionally include the pupil/student as a message recipient, click the Message Recipients icon then select the required method of communication for the Student. To send a message to the selected recipients, click the Send Message button to display the Send Unexplained Absence Message page.
Message Recipients icon
If any of the intended recipients do not have the appropriate contact details recorded, the Notification dialog is displayed.

06| Managing System Generated Messages
Managing Communications using InTouch 73
9. Click the Print button to print the details, if required, then click the Ok button to continue.
The importance is set automatically to High and the default Unexplained Absence template is selected. The Message text displayed is the message text contained in the template.
The To field is populated with the pupil/student’s name.
10. To view the contact(s) to whom the message will be sent, click the View Contacts icon adjacent to the pupil/student’s name to display the Recipients panel.
View Contacts icon
11. Select the appropriate check box(es) of the required recipient(s) to indicate the method of communication then click anywhere outside the Recipients panel to minimise it.
12. Send the message (please see Sending a General Message on page 41).

06| Managing System Generated Messages
74 Managing Communications using InTouch
13. When the message is sent, if no contact details are recorded for one or more of the intended recipients, the following message is displayed.
14. Click the Yes button to send the message to the remaining recipients. Alternatively click the No button to cancel the message, enabling you to record any missing contact details.
Applying Incoming Message Text to Event Comments, Take Register and Edit Marks
When a message is received from an external source (via SMS or email) in response to an Unexplained Absence message sent from your school, the content of the message text can be applied to the corresponding event. The content can also be made visible in Take Register and Edit Marks.
1. On the Unexplained Absence Management page, highlight the required pupil/student to display, in the panel at the bottom of the screen, all responses sent from an external source regarding the unauthorised absence.

06| Managing System Generated Messages
Managing Communications using InTouch 75
2. Click the Show button adjacent to the required message to display the content of the message. The original message regarding the absence, originally sent by your school, is also displayed.
3. To apply the message text so that they are visible in the unexplained absence Events section, click the Apply button in the Apply to Comments column. To subsequently view these comments, click the drop-down button in the Events column to display the Events window.

06| Managing System Generated Messages
76 Managing Communications using InTouch
4. To apply the message text so that they can be viewed in Take Register (via Focus | Attendance (or Lesson Monitor) | Take Register) and Edit Marks (via Focus | Attendance (or Lesson Monitor) | Edit Marks), click the Apply to Attendance button. When using Take Register or Edit Marks, comments added in this way are indicated by a red triangle in the top right-hand corner of a cell.
Recording Attendance Marks using InTouch
Once you receive a reply from a parent/guardian regarding the reason for the unexplained absence (via the School Messages panel on the Home Page), their attendance mark can be updated via the Unexplained Absence Management page.
1. Search for all unexplained absences.
2. Expand the Code panel by clicking the View Attendance Codes button. The panel can be minimised by clicking the Hide Attendance Codes button.
View Attendance Codes button
Hide Attendance Codes button
3. Highlight the pupil/student whose attendance mark you wish to amend.
4. Double-click the attendance code that indicates the reason for the unexplained absence. The new code is displayed in the Mark column for the selected pupil/student, replacing the existing N mark.
5. Repeat steps 3 to 4 for any other pupil/students whose attendance mark you wish to update.

06| Managing System Generated Messages
Managing Communications using InTouch 77
Once an attendance mark has been changed using this method, the Apply to Attendance button becomes enabled.
6. Click the Apply to Attendance button to update the attendance record of each of the pupil/students whose mark has been amended.
Any pupil/student whose marks have been amended are now resolved and their names are removed from the page. All unexplained absences that have now been resolved can be viewed by selecting the Resolved Only check box then clicking the Search button.
Sending a Behaviour Incident Message
Behaviour Management in SIMS is used to record and monitor pupil/student behaviour. Specifically, the behaviour area relates to the recording of incidences of pupil/student misbehaviour, such as bullying, insolence and fighting.
When a pupil/student is involved in a behaviour incident, you may wish to inform their parent/carers. By providing an automated approach to communicating, details of the incident can be disseminated quickly and easily, as well as raising awareness with the parent/carers of their child’s conduct.
To send a Behaviour Incident message:
1. Select Focus | Pupil (or Student) | Pupil (or Student) Details to display the Find Student browser.
2. Search for then select the pupil/student for whom you wish to record a behaviour incident.
3. Click the Behaviour Management hyperlink in the Links panel to display the Behaviour Management page.
4. In the Behaviour panel, click the New button to create a new behaviour incident record or highlight an existing behaviour incident and click the Open button to display the Add (or Edit) Behaviour dialog.
5. Enter or edit any required details then click the Send button.
6. Confirm that you wish to save and continue by clicking the Yes button to display the Search browser.
More Information: Sending a General Message on page 41
Sending an Achievement Award Message
Behaviour Management in SIMS is used to record and monitor pupil/student behaviour. Specifically, the achievement area relates to the recording of pupil/student awards, such as academic achievements or sporting accolades. An achievement can be assigned either to an individual pupil/student or to a number of pupil/students involved in a commendable activity or event.

06| Managing System Generated Messages
78 Managing Communications using InTouch
When a pupil/student is commended with an achievement award, you may wish to inform their parent/carers. By providing an automated approach to communicating, details of the award can be disseminated quickly and easily, as well as raising awareness with the parent/carers of their child’s conduct.
To send an Achievement Award message:
1. Select Focus | Pupil (or Student) | Pupil (or Student) Details to display the Find Student browser.
2. Search for then select the pupil/student for whom you wish to record an achievement award.
3. Click the Behaviour Management hyperlink in the Links panel to display the Behaviour Management page.
4. In the Achievement panel, click the New button to create a new achievement record or highlight an existing achievement and click the Open button to display the Add (or Edit) Achievement dialog.
5. Enter or edit any required details then click the Send button.
6. Confirm that you wish to save and continue by clicking the Yes button to display the Search browser.
More Information: Sending a General Message on page 41
Sending a Pupil/Student Profile Message
Pupil/student profile reports are generally compiled by class teachers on a termly or annual basis. The reports detail the pupil/student’s progress in the various subjects they are currently studying. Once profile reports have been generated, it is possible to communicate their availability to parent/guardians, other teachers and pupil/students.
Once profile reports have been generated, an internal message, email or SMS (depending on the intended recipient’s default method of communication) can be sent to a pupil/student’s parent/guardian(s).
To send a Pupil/Student Profile message:
1. Select Focus | Profiles | Pupil (or Student) Profiles to display the Find Session browser.
2. Generate the required pupil/student profile(s) by selecting the required pupil/students then clicking the Generate button.
3. Click the Send button to display the Send Pupil (or Student) Profile Message page.

06| Managing System Generated Messages
Managing Communications using InTouch 79
4. If any of the parent/guardians of the affected pupil/students do not have the appropriate contact details recorded, the Notification dialog is displayed.
5. Click the Print button to print the details, if required, then click the Ok button to continue.
The To list is populated with the names of all the affected pupil/students.
6. To view the contact(s) to whom the message will be sent, click the View Contacts icon adjacent to the pupil/student’s name to display the Recipients panel.
View Contacts icon
7. Select the appropriate check box(es) of the required recipient(s) to indicate the method of communication then click anywhere outside the Recipients panel to minimise it.
More Information: Sending a General Message on page 41
Sending a Not Approved Pupil/Student Profile Message
Pupil/student profile reports are generally compiled by class teachers on a termly or annual basis. The reports detail the pupil/student’s progress in the various subjects they are currently studying. Before profile reports can be generated, members of the Senior Leadership Team must approve the various sections of the report. Members of the Senior Leadership Team responsible for approving the report sections are:
Head of Year
Head of House
Head of Faculty

06| Managing System Generated Messages
80 Managing Communications using InTouch
Head Teacher
Other members of the Senior Leadership Team
A Not Approved Pupil/Student Profile message can sent as part of the profile review process. If a profiles report has been marked as Not Approved by a member of the Senior Leadership Team, a message can be sent to the class teacher, informing them that one or more sections have not been approved.
To send a Not Approved Pupil/Student Profile message:
1. Select Focus | Profiles | Review Profiles to display the Review Profiles browser.
2. Highlight the required session then double-click a pupil/student whose profile you wish to mark as not approved.
3. For either a comment or an entire area, select Not Approved from the drop-down list.
4. Click the Save button to display the following message.
5. To send a message to the appropriate teacher, click the Yes button to display the Send Not Approved Profile Message page. Alternatively, click the No button to cancel the process.
More Information: Sending a General Message on page 41
Sending an Exceptional Circumstance Message
A message can be sent as part of the set up of an exceptional circumstance. The message can be sent to all parent/guardians with the appropriate contact details recorded, together with pupil/students and members of staff. An example of its use would be in the event of a school closure and you want to inform all interested parties.
NOTE: An Exceptional Circumstance message can be sent only from a saved exceptional circumstance record.
1. Select Focus | Attendance (or Lesson Monitor) | Exceptional Circumstances to display the Find an Exceptional Circumstance browser.
2. Either create a new record then re-open it, or open an existing exceptional circumstance to display its details on the View/Edit Exceptional Circumstance page.
3. Click the Send button to display the Send Exceptional Circumstance Message page.

06| Managing System Generated Messages
Managing Communications using InTouch 81
If any of the parent/guardians of the affected pupil/students do not have the appropriate contact details recorded, the Notification dialog is displayed.
4. Click the Print button to print the details, if required, then click the Ok button to continue.
The To list is populated with the names of all the affected pupil/students.
5. To view the contact(s) to whom the message will be sent, click the View Contacts icon adjacent to the pupil/student’s name to display the Recipients panel.
View Contacts icon
6. Select the appropriate check box(es) of the required recipient(s) to indicate the method of communication then click anywhere outside the Recipients panel to minimise it.

06| Managing System Generated Messages
82 Managing Communications using InTouch
More Information: Sending a General Message on page 41
Sending a School Event Message or Staff Training Day Message
A message can be sent regarding a school event (e.g. Staff Training Day, Parent Consultation Evening, etc.) recorded in the School Diary (via Focus | School | School Diary). If a reminder has been added to the school event, a message will be displayed in the My Reminders panel on the SIMS Home Page. From this message, a personal task is created and a message can be sent to all interested parties (members of staff, parent/guardians and other contacts) to remind them of the event.
1. When recording an event on the School Diary, ensure that the Reminder check box is selected and that you select the Days in Advance (then enter the number of days in advance you want the reminder to be sent), 1 Week Before or Fortnight Before check box.
2. If a reminder has been requested for a school event recorded on the School Diary, the reminder will be sent at the defined time. When the requested reminder is sent, it is displayed in the My Reminders panel on the SIMS Home Page.

06| Managing System Generated Messages
Managing Communications using InTouch 83
3. Click the required message to display its details in the Edit Personal Task dialog.
4. Edit any of the details, if required.
5. To send a message to other members of staff associated with the task, click the Send Message button to display the Send School Event Message page.
More Information: Sending a General Message on page 41
Sending a Missing Register Message
A message can be sent to any teacher who has not completed their register on time.
To send a Missing Register message:
On the SIMS Home Page, select the check box adjacent to the required Missing Register Notification then click the Send Message button.
A Missing Register message is sent to the appropriate teacher. The message is displayed in the My Messages panel of the teacher’s Home Page.
Sending a Percentage Attendance Notification Message
Messages can be sent to parental contacts and other interested contacts regarding a pupil/student’s school attendance. This enables your school to increase awareness among parental contacts of their child’s attendance.
Messages can be sent in praise of a child’s attendance, e.g. they have attended 100% of their sessions this term, or to inform a parental contact of unacceptable levels of absenteeism by pupil/students with a poor attendance record.

06| Managing System Generated Messages
84 Managing Communications using InTouch
To send a Percentage Attendance Notification message:
1. Select Focus | Attendance (or Lesson Monitor) | Send Percentage Attendance Notifications (InTouch) to display the Search Attendance page.
2. Select the Percentage Range by selecting the appropriate radio button then entering the required figure. The options are:
Any – selecting this option produces a list pupil/student attendance. This option is selected as default.
At Least – selecting this option enables you to specify the minimum percentage attendance that must be achieved for a pupil/student to be included. Enter the figure in the adjacent field.
Between – selecting this option enables you to specify the percentage range of attendance that must be achieved for a pupil/student to be included. Enter the figures in the two adjacent fields.
Less Than – selecting this option enables you to specify a percentage figure of attendance, with any pupil/students falling below this level being included. Enter the figure in the adjacent field.
3. Select the date range over which you wish to gather attendance information by entering dates in the From and To fields, or by clicking the respective Calendar buttons then selecting the required dates. The dates entered must fall within a single academic year.
The From date defaults to either the start date of the current academic year or one month ago, whichever is the most recent. The To date defaults to yesterday’s date.

06| Managing System Generated Messages
Managing Communications using InTouch 85
4. Select the scope from the Select Group Type drop-down list, e.g. Whole School, Year Group, etc. The option selected determines the display of the following table.
5. Highlight the appropriate option(s) in the table to indicate the required group(s).
6. Select either the Sessions or Lessons radio button.
7. Click the Search button to display in the panel at the bottom of the page, all pupil/students who match the search criteria entered.
8. Select the check box of each pupil/student for whom you wish to send a message. Alternatively, select the check box in the column header to select all pupil/students displayed in the list.
9. Click the Send Message button to display the Send Percentage Attendance Notification Message page.
More Information: Sending a General Message on page 41
Sending an Achievement Notification Message
Messages can be sent to parental contacts and other interested contacts when a pupil/student has been commended with an achievement award. For example, you may wish to send a message to a parent/guardian or other contact if a pupil/student achieves 10 achievement points. This enables your school to increase awareness among parental contacts of their child’s conduct.

06| Managing System Generated Messages
86 Managing Communications using InTouch
To send an Achievement Notification message:
1. Select Focus | Behaviour Management | Achievement Notifications (InTouch) to display the Select Achievements page.
2. Choose the required Search Condition by selecting the appropriate radio button then entering or selecting the required details.
Achievement Types
Highlight the achievement type(s) for which you wish to search.
Points

06| Managing System Generated Messages
Managing Communications using InTouch 87
Select the points score for which you wish to search by selecting the appropriate radio button then entering the required figure. The options are:
Any – selecting this option produces a list pupil/student with any achievements recorded. This option is selected as default.
At Least – selecting this option enables you to specify the minimum number of achievement points that must be achieved for a pupil/student to be included. Enter the figure in the adjacent field.
Between – selecting this option enables you to specify the achievement points range that must be achieved for a pupil/student to be included. Enter the figures in the two adjacent fields.
Less Than – selecting this option enables you to specify an achievement points figure, with any pupil/students falling below this level being included. Enter the figure in the adjacent field.
Award Types
Highlight the award type(s) for which you wish to search.
3. Select the date range over which you wish to gather achievement information by entering dates in the From and To fields, or by clicking the respective Calendar buttons then selecting the required dates. The dates entered must fall within a single academic year.
The From date defaults to either the start date of the current academic year or one month ago, whichever is the most recent. The To date defaults to yesterday’s date.
4. Select the scope from the Select Group Type drop-down list, e.g. Whole School, Year Group, etc. The option selected determines the display of the following table.

06| Managing System Generated Messages
88 Managing Communications using InTouch
5. Highlight the appropriate option(s) in the table to indicate the required group(s).
6. Click the Search button to display in the panel at the bottom of the page, all pupil/students who match the search criteria entered.
7. Select the check box of each pupil/student for whom you wish to send a message. Alternatively, select the check box in the column header to select all pupil/students displayed in the list.
8. Click the Send Message button to display the Send Achievement Message page.
More Information: Sending a General Message on page 41
Sending a Behaviour Notification Message
Messages can be sent to parental contacts and other interested contacts when a pupil/student has been involved in a behaviour incident. For example, you may wish to send a message to a parent/guardian or other contact if a pupil/student accumulates a total of 10 behaviour points. This enables your school to increase awareness among parental contacts of their child’s conduct.
To send a Behaviour Notification message:
1. Select Focus | Behaviour Management | Behaviour Notifications (InTouch) to display the Behaviour Notifications page.
2. Choose the required Search Condition by selecting the appropriate radio button then entering or selecting the required details.

06| Managing System Generated Messages
Managing Communications using InTouch 89
Behaviour Types
Highlight the behaviour type(s) for which you wish to search.
Points
Select the points score for which you wish to search by selecting the appropriate radio button then entering the required figure. The options are:
Any – selecting this option produces a list of pupil/students with any behaviour incidents recorded. This option is selected as default.
At Least – selecting this option enables you to specify the minimum number of behaviour incident points that must be recorded for a pupil/student to be included. Enter the figure in the adjacent field.
Between – selecting this option enables you to specify the behaviour points range that must be recorded for a pupil/student to be included. Enter the figures in the two adjacent fields.
Less Than – selecting this option enables you to specify a behaviour points figure, with any pupil/students falling below this level being included. Enter the figure in the adjacent field.

06| Managing System Generated Messages
90 Managing Communications using InTouch
Action Types
Highlight the action type(s) for which you wish to search.
3. Select the date range over which you wish to gather behaviour information by entering dates in the From and To fields, or by clicking the respective Calendar buttons then selecting the required dates. The dates entered must fall within a single academic year.
The From date defaults to either the start date of the current academic year or one month ago, whichever is the most recent. The To date defaults to yesterday’s date.
4. Select the scope from the Select Group Type drop-down list, e.g. Whole School, Year Group, etc. The option selected determines the display of the following table.
5. Highlight the appropriate option(s) in the table to indicate the required group(s).
6. Click the Search button to display in the panel at the bottom of the page, all pupil/students who match the search criteria entered.
7. Select the check box of each pupil/student for whom you wish to send a message. Alternatively, select the check box in the column header to select all pupil/students displayed in the list.
8. Click the Send Message button to display the Send Behaviour Incident Message page.

06| Managing System Generated Messages
Managing Communications using InTouch 91
Sending a Pupil/Student Timetable Message
Individual pupil/student timetables for the timetable cycle can be sent electronically to a range of recipients, including the pupil/student and their parent/guardians.
1. Select Reports | Timetables | Student Timetable(s) to display the Select Students dialog.
IMPORTANT NOTE: This report is also available from the Student Details page (Focus | Student | Student Details) by clicking the Timetable hyperlink in the Links panel then clicking the Preview button.
2. Enter or select the required options then click the OK button to display the report output on the Student Timetable page. For full instructions on running this report, please refer to the Producing Student List, Student Analysis and Timetable Reports handbook.
The report layout can now be modified.
3. Click the Send button to display the Send a Student Timetable Message dialog.
4. Specify the preferred layout option by selecting the appropriate radio button.

06| Managing System Generated Messages
92 Managing Communications using InTouch
Use a predefined layout
The Default Layout is selected and cannot be edited.
Supply your own layout
This option is available for schools that prefer a report layout that is different to the default layout available in SIMS. Before selecting this option, an .XSL or .XSLT file (recommended for the production of a printed output from .XML) must have been created.
Click the Browse button to display the Select a layout file dialog, navigate to the required location, highlight the required .XSL file then click the Open button to return to the Run a Screen Based Report dialog. Alternatively, enter the path and filename manually.
5. In the Output Options panel, select the type(s) of person to whom you wish to send the timetable by selecting the appropriate check box(es).
6. Click the OK button to display the Send Student Timetable Message page. The pupil/student's timetable is attached to the message automatically.
More Information: Sending a General Message on page 41
Sending a Staff Timetable Message
Individual staff timetables can be sent electronically to a member of staff.
1. Select Reports | Timetables | Staff Timetable(s) to display the Select Students dialog.
IMPORTANT NOTE: This report is also available from the Employee Details page (Focus | Person | Staff) by clicking the Staff Timetable hyperlink in the Links panel then clicking the Preview button.
2. Enter or select the required options then click the OK button to display the report output on the Staff Timetable page. For full instructions on running this report, please refer to the Producing Student List, Student Analysis and Timetable Reports handbook.
The report layout can now be modified.

06| Managing System Generated Messages
Managing Communications using InTouch 93
3. Click the Send button to display the Send a Staff Timetable Message dialog.
4. Specify the preferred layout option by selecting the appropriate radio button.
Use a predefined layout
The Default Layout is selected and cannot be edited.
Supply your own layout
This option is available for schools that prefer a report layout that is different to the default layout available in SIMS. Before selecting this option, an .XSL or .XSLT file (recommended for the production of a printed output from .XML) must have been created.
Click the Browse button to display the Select a layout file dialog, navigate to the required location, highlight the required .XSL file then click the Open button to return to the Run a Screen Based Report dialog. Alternatively, enter the path and filename manually.
5. Click the OK button to display the Send Staff Timetable Message page. The staff member's timetable is attached to the message automatically.
More Information: Sending a General Message on page 41
Sending a Pupil/Student Detention Message
If a pupil/student has been given a detention, a message can be sent to their parent/guardians to inform them.
1. Select Focus | Behaviour Management | Maintain Detentions to display the Find Detentions page.
2. Select the required detention details then click the Search button to display the Detention Details page. For full instructions on recording detention details, please refer to the Recording Detentions chapter of the Managing Pupil/Students handbook.
3. In the Linked Students panel, click the Send button to display the Search browser.
More Information: Sending a General Message on page 41

06| Managing System Generated Messages
94 Managing Communications using InTouch
Sending a Pupil/Student Exam Timetable Message
You can send an email message to examination candidates, containing their exam timetables. The message can also be sent to any InTouch contact, together with their Head of House, Head of Year and Registration Tutor.
The exam timetable produced includes details about the candidate, the examination title and the date and time on which it will be held and resembles the Candidate Timetable - Default report available in Examinations Organiser (via Reports | Entries | Candidate Timetables - Default).
The Priority of this type of message is 1 and the Importance is Medium.
1. Select Reports | Timetables | Send Student Exam Timetable to display the Select Students dialog.
2. Select the Season for which you want to send exam timetables from the drop-down list. This defaults to the season marked as Current in Examinations Organiser but any future exam season can be selected. Selecting a season populates the Available Students panel with the names of all exam candidates who are in the cohort of the exam season and who are taking at least one examination in the selected season.
There are a number of methods of selecting the pupil/students to whom you want to send exam timetables:
Select individual pupil/students (please see Selecting Individual Pupil/Students on page 96).
Select pupil/students of a specified year group (please see Selecting Pupil/Students Students of a Year Group on page 97).

06| Managing System Generated Messages
Managing Communications using InTouch 95
Select pupil/students of a specified registration group (please see Selecting Pupil/Students of a Registration Group on page 98).
Select pupil/students of a specified house (please see Selecting Pupil/Students of a House on page 99).
IMPORTANT NOTE: The addition of Selected Students is a cumulative process. For example, selecting an individual pupil/student, adding pupil/students from a year group then adding pupil/students from a registration group will display in the Selected Students panel the pupil/students from the three selections.
3. Once the required pupil/students are selected, click the OK button to display the Send a Student Exam Timetable Message dialog.
4. Specify the preferred layout option by selecting the appropriate radio button.
Use a predefined layout
The Student Exam timetable layout is selected automatically and cannot be edited.
Supply your own layout
This option is available for schools that prefer a report layout that is different to the default layout available in SIMS. Before selecting this option, an .XSL or .XSLT file (recommended for the production of a printed output from .XML) must have been created.
Click the Browse button to display the Select a layout file dialog, navigate to the required location, highlight the required .XSL file then click the Open button to return to the Send a Student Exam Timetable Message dialog. Alternatively, enter the path and filename manually.
5. In the Output Options panel, select the type(s) of person to whom you wish to send the exam timetable by selecting the appropriate check box(es). The check box(es) selected by default are the roles defined in the Defaults - Exam & Student Timetable panel on the InTouch Setup page (via Tools | InTouch | Module Setup).

06| Managing System Generated Messages
96 Managing Communications using InTouch
6. Click the Preview button to display the output in your web browser, if required.
7. Click the OK button to display the Send Student Exam Timetable Message page. The pupil/student's exam timetable is attached to the message automatically.
More Information: Sending a General Message on page 41
Selecting Individual Pupil/Students
In the Available Students panel, highlight the pupil/students to whom you want to send exam timetables then click the Select Single button to move them to the Selected Students panel. All pupil/students can be moved by clicking the Select All button.
One or more pupil/students can be removed from the selected panel using the same selection method then clicking either the Remove Single or Remove All button.
Select Single button
Select All button
Remove Single button
Remove All button
If many pupil/students are displayed, you may wish to search for the required person by entering the first few characters of their surname in the Search by Name field. Only the pupil/student(s) who match the search criteria entered are displayed on the screen as you type.
NOTE: Pupil/students can also be added using the filter buttons available on the right-hand side of the screen. Pupil/students can be filtered by year group, registration group and house.

06| Managing System Generated Messages
Managing Communications using InTouch 97
Selecting Pupil/Students Students of a Year Group
This filter enables you to select all pupil/students who are assigned to the selected year group(s).
1. Click the Year(s) button to display the Year(s) dialog.
2. Highlight the required year group then click the OK button to confirm the selection.
If you have a long list of year groups, you may wish to search for the required one by entering the first few characters of its description in the Search by description field. Any year groups matching the search criteria entered are filtered on the screen as you type.

06| Managing System Generated Messages
98 Managing Communications using InTouch
Selecting Pupil/Students of a Registration Group
This filter enables you to select all pupil/students who are in the selected registration group(s).
1. Click the Registration Group(s) button to display the Registration Group(s) dialog.
2. Highlight the required registration group then click the OK button to confirm the selection.
If you have a long list of registration groups, you may wish to search for the required one by entering the first few characters of its description in the Search by description field. Any registration groups matching the search criteria entered are filtered on the screen as you type.
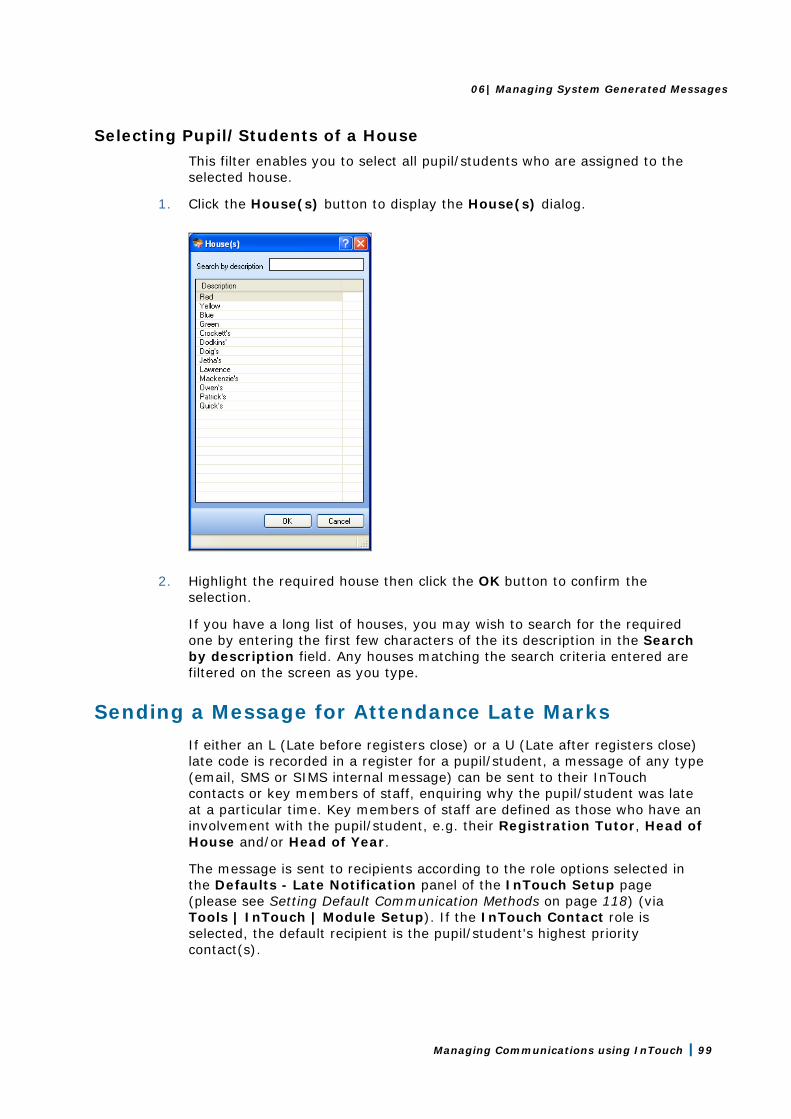
06| Managing System Generated Messages
Managing Communications using InTouch 99
Selecting Pupil/Students of a House
This filter enables you to select all pupil/students who are assigned to the selected house.
1. Click the House(s) button to display the House(s) dialog.
2. Highlight the required house then click the OK button to confirm the selection.
If you have a long list of houses, you may wish to search for the required one by entering the first few characters of the its description in the Search by description field. Any houses matching the search criteria entered are filtered on the screen as you type.
Sending a Message for Attendance Late Marks
If either an L (Late before registers close) or a U (Late after registers close) late code is recorded in a register for a pupil/student, a message of any type (email, SMS or SIMS internal message) can be sent to their InTouch contacts or key members of staff, enquiring why the pupil/student was late at a particular time. Key members of staff are defined as those who have an involvement with the pupil/student, e.g. their Registration Tutor, Head of House and/or Head of Year.
The message is sent to recipients according to the role options selected in the Defaults - Late Notification panel of the InTouch Setup page (please see Setting Default Communication Methods on page 118) (via Tools | InTouch | Module Setup). If the InTouch Contact role is selected, the default recipient is the pupil/student's highest priority contact(s).

06| Managing System Generated Messages
100 Managing Communications using InTouch
WARNING: The wider the search parameters entered on this screen (e.g. searching for late marks across the Whole School over the course of a month), the longer the search will take. To facilitate the search for late marks, you are strongly advised to search for smaller group sizes over a shorter date range.
1. Select Focus | Attendance (or Lesson Monitor) | Send Late Notifications to display the Late Notifications page.
2. Select the date range over which you wish to gather attendance information by entering dates in the From and To fields, or by clicking the respective Calendar buttons then selecting the required dates. The dates entered must fall within a single academic year.
The From date defaults to either the start date of the current academic year or one month ago, whichever is the most recent. The To date defaults to yesterday’s date.
3. From the drop-down list, select whether you wish to deal with Session & Lesson, Session or Lesson. The options available depend on whether the SIMS Lesson Monitor licence has been applied.
4. Select the scope from the Select Group Type drop-down list, e.g. Whole School, Year Group, etc. then click the Refresh button. The option selected determines the display of the following table.
5. Highlight the appropriate option(s) in the table to indicate the required group(s).

06| Managing System Generated Messages
Managing Communications using InTouch 101
6. On the Number of Lates tab of the adjacent panel, select the number of late marks that must be accrued before a message will be sent. The options are:
At Least – selecting this option enables you to specify the minimum number of late marks that must be recorded for a pupil/student to be included. Enter the figure in the adjacent field.
Between – selecting this option enables you to specify the range of late marks that must be recorded for a pupil/student to be included. Enter the figures in the two adjacent fields.
Less Than – selecting this option enables you to specify a number of late marks, with any pupil/students falling below this number being included. Enter the figure in the adjacent field.
7. On the Total Minutes Late tab, enter in the At Least field the minimum, cumulative number of minutes a pupil/student must have been late (over the selected date range) that must be recorded for them to be included.
IMPORTANT NOTE: Entering figures on both the Number of Lates and Total Minutes Late tabs will search for pupil/students who match all of the criteria entered.
8. Click the Search button to display in the panel at the bottom of the page, all pupil/students who match the search criteria entered.
9. Select the check box of each pupil/student for whom you wish to send a message. Alternatively, select the check box in the column header to select all pupil/students displayed in the list.
10. Click the Send Message button to display the Send Late Notification Message page.
More Information: Sending a General Message on page 41

06| Managing System Generated Messages
102 Managing Communications using InTouch
Sending an Alert Regarding Incomplete Marksheet Results
You can send a message to members of staff, reminding them that they have not yet completed the entering of results in a SIMS Assessment marksheet. This functionality can be used for any marksheet where results are due.
Missing marksheet alerts can be sent by email or SIMS internal message only. If the preferred method of communication for a member of staff is set to SMS messaging, both an email and a SIMS internal message will be sent. For all users who have specified either email or SIMS internal message, the message will be conveyed to them in their preferred format.
WARNING: Alert messages are triggered and generated by the first SIMS user who logs into SIMS on the Alert Date specified. The messages are sent to all the owners of marksheets specified in the alert. Messages are sent for information purposes only so the recipient is advised not to reply to the message (this advice is included as part of the message text if you are using the system template, where this text is included by default). If you reply to an alert message, the reply is sent to the user who triggered the message and not necessarily the user who set up the alert.
The intended recipients of the alert are calculated when the alert date is reached. The messages produced are sent to the marksheet owner. If a marksheet selected in an alert has no owner, a message will not be sent.
Alert definitions can be set up for the next academic year. If you choose to do this, please be aware that in the time between now and when the alert is due to be sent, group memberships and the content of marksheets may change.
Additional Resources:
For information on ascertaining whether staff members have completed the entry of results in all their marksheets, please refer to Missing Results Report in the Individual Reports chapter of the Assessment handbook.
WARNING: Selecting a large number of result sets may return a large number of marksheets, leading to a reduction in performance of your SIMS system. If you wish to send reminders about a large number of results, you are strongly advised to create multiple alert definitions with each definition dealing with a small number of result sets.

06| Managing System Generated Messages
Managing Communications using InTouch 103
1. Select Tools | InTouch | Missing Marksheets Alerts Setup to display the Browse Missing Marksheet Alerts Definitions browser.
2. Search for an existing alert definition by entering a Description then clicking the Search button to display all definitions that enter the search criteria entered. Click the Search button without entering any criteria to display all alert definitions.
Alternatively, click the New button to display the View Missing Marksheet Alert Definition page, which is used to create a new alert definition.
3. Enter a Description for the definition.

06| Managing System Generated Messages
104 Managing Communications using InTouch
4. In the Result Sets panel, select the check box adjacent to the Result Sets associated with the marksheets for which you want to set up the alert.
5. Click the Browser button adjacent to the Group Filter field to display the Group Browser dialog, if required, to further filter the marksheets that will be returned.
6. Click the Apply button to return to the View Missing Marksheet Alert Definition page, where the selected Group Filter (if selected) is displayed.

06| Managing System Generated Messages
Managing Communications using InTouch 105
7. Click the Refresh Marksheets button to display in the Marksheets panel, all marksheets associated with the selected Result Sets and the Group Filter (if selected).
8. In the Marksheets panel, select the check box adjacent to the marksheet(s) for which you want to send the alert.
9. Set the date on which you want to send the alert by clicking the New button to display the Add/Edit an Alert Date dialog.
10. Enter the Alert Date, or click the Calendar button then select the required date.

06| Managing System Generated Messages
106 Managing Communications using InTouch
11. Click the OK button to return to the View Missing Marksheet Alert Definition page, where the Alert Date is displayed.
12. Click the Save button to save the alert definition.
On the date of the alert, an email or SIMS internal message (or both, where the intended recipient has recorded SMS message as their preferred method of communication) is sent to the owner of the marksheet.
Sending an Alert to Designated Persons if a Behaviour Type is Recorded
An automated message of any type (email, SMS or SIMS internal message) can be sent to key members of staff, and/or to any specified employee, as soon as an incident associated with a particular behaviour type is recorded in SIMS (e.g from Take Register), to assist with the efficient monitoring of behaviour at your school. Key members of staff are defined as those who have an involvement with the pupil/student, e.g. their Registration Tutor, Head of House and/or Head of Year.
NOTE: Where an SMS contains more than 160 characters, the message is split into multiple messages, each of which is chargeable.

06| Managing System Generated Messages
Managing Communications using InTouch 107
Only behaviour incidents where pupil/student details have been recorded can trigger the sending of this message.
1. Select Tools | InTouch | Behaviour Incident Alerts Setup to display the Find Behaviour Incident Alert Definition browser.
2. Search for an existing alert definition by entering a Description and/or selecting the associated Behaviour Type from the drop-down list, then clicking the Search button to display all definitions that match the search criteria entered. Click the Search button without entering any criteria to display all alert definitions.

06| Managing System Generated Messages
108 Managing Communications using InTouch
Alternatively, click the New button to display the Behaviour Incident Alert Definition Detail page, which is used to create a new alert definition.
3. In the Basic Details panel, enter a Description for the definition.
4. If you wish to send another message to the intended recipients when the behaviour incident record is updated, select the Resend On Update check box. This would be particularly useful if you later record additional pupil/students as being involved in the incident as it may broaden the number of staff members who are made aware of the incident.
5. In the Behaviour Types panel, select the behaviour types for which you want to send an alert message by selecting the appropriate check boxes. Select all behaviour types by clicking the Check All button. If you make a mistake, all check boxes can be deselected by clicking the Uncheck All button.

06| Managing System Generated Messages
Managing Communications using InTouch 109
NOTES: Only behaviour types whose status is set to Active (via Tools | Setups | Behaviour Type) are available for selection. If a behaviour type is set to Inactive after the alert definition has been set up, the behaviour will be removed from the definition automatically. For incidents involving bullying, only the Bullying behaviour type can be added to the alert definition. The bullying roles are not available for selection.
6. In the Recipient Roles panel, for each type of intended recipient to whom you wish to send an alert (Registration Tutor, Head of House and/or Head of Year) select the check box(es) that indicate the required method of communication for this alert.
WARNING: If a member of staff is set up to receive behaviour alerts but then their email address or mobile phone number changes from being Primary, they will not receive an alert. If any changes are made to the staff member's Primary contact method, you will have to reconfigure the alert accordingly.
7. To select recipients by name rather than by role, click the Add button in the Recipients panel to display the Find Recipients browser.
8. Enter either all or part of the their Surname, Forename or Staff Code (if known). To search for a member of staff by Role, select from the drop-down list.
9. Click the Search button to list all members of staff who match the search criteria specified.
10. Highlight the required member(s) of staff. Use Ctrl + click or Shift + click to select multiple pupil/students.

06| Managing System Generated Messages
110 Managing Communications using InTouch
11. Click the OK button to return to the Behaviour Incident Alert Definition Detail page, where the intended recipients are displayed in the Recipients panel.
12. Select the check box relating to the communication method(s) you wish to use for this message. Check boxes are selected by default according to the options defined in the Defaults - General panel of the InTouch Setup page (please see Setting Default Communication Methods on page 118) via Tools | InTouch | Module Setup.
13. Intended recipients can be removed from the alert definition by highlighting their name then clicking the Remove button.
14. Click the Save button to save the alert definition.
When a behaviour incident relating to a behaviour type that has been defined in the alert definition is recorded in SIMS, reminder messages are sent to the intended recipients.

06| Managing System Generated Messages
Managing Communications using InTouch 111
Sending an Alert Regarding Pupil/Student Exam Attendance
You can send an SMS or email message to internal examination candidates who are scheduled for an exam, reminding them of a forthcoming examination. The message can also be sent to any linked person marked as a Priority 1 contact, if required.
NOTE: Where an SMS contains more than 160 characters, the message is split into multiple messages, each of which is chargeable.
WARNING: Alert messages are triggered and generated by the first SIMS user who logs into SIMS on the date indicated in the Days In Advance field. The messages are sent to all the recipients specified in the alert. Messages are sent for information purposes only so the recipient is advised not to reply to the message (this advice is included as part of the message text if you are using the system template, where this text is included by default). If you reply to an alert message, the reply is sent to the user who triggered the message and not necessarily the user who set up the alert.
IMPORTANT NOTE: Each exam reminder alert definition will run only once for any given date. If you want to send two reminders, one of which is seven days in advance and the other is two days in advance of the exam, you will need to create two alert definitions.
1. Select Tools | InTouch | Exam Reminder Alerts Setup to display the Find Exam Reminder Alert Definition browser.
2. Search for an existing alert definition by entering a Description then clicking the Search button to display all definitions that enter the search criteria entered. Click the Search button without entering any criteria to display all alert definitions.

06| Managing System Generated Messages
112 Managing Communications using InTouch
Alternatively, click the New button to display the Exam Reminder Alert Definition Detail page, which is used to create a new alert definition.
3. In the Basic Details panel, enter a Description for the definition.
4. From the drop-down list, select the number of Days In Advance of the examination (up to seven, including Saturday and Sunday) that you want the reminder to be sent.
5. Select the intended Recipients of the reminder by clicking the Add button to display the Find Students dialog.

06| Managing System Generated Messages
Managing Communications using InTouch 113
The pupil/students available for selection are those with an examination scheduled today or at any point in the future, including in future academic years.
6. Enter either all or part of the pupil/student Surname and/or Forename.
7. Select applicable values from the various drop-down lists to further restrict the list of pupil/students returned.
8. Click the Search button to list all pupil/students who match the search criteria specified.
9. Highlight the required pupil/student(s). Use Ctrl + click or Shift + click to select multiple pupil/students.
10. Click the OK button to return to the Exam Reminder Alert Definition page, where the intended recipients are displayed in the Recipients panel.
11. Select the check box relating to the communication method(s) you wish to use for this message. The presence of the Student Email, Student SMS, Contact Email and Contact SMS check boxes are determined by the data stored against the appropriate person. Check boxes are selected by default according to the options defined in the Defaults - Exam Reminder panel of the InTouch Setup page (please see Setting Default Communication Methods on page 118) via Tools | InTouch | Module Setup.
12. Intended recipients can be removed from the alert definition by highlighting their name then clicking the Remove button.
13. The Alerts Forecast panel provides information on the total number of SMS Alerts and Email Alerts that will be sent when the reminder message is sent. In the previous example, only two Student Email messages will be sent so the Email Alerts field displays 2.

06| Managing System Generated Messages
114 Managing Communications using InTouch
NOTE: Please note that the Alerts Forecast assumes that only one SMS is required to send each message.
14. Click the Save button to save the alert definition.
On the date of the alert, reminder emails and SMS messages are sent to the intended recipients.

07| Setting Up Emergency Alert Notifications, the Default Communication Method and SMS Matching
Managing Communications using InTouch 115
07|Setting Up Emergency Alert Notifications, the Default Communication Method and SMS Matching
In This Chapter
Setting Up the Emergency Alert Notification................................ 115
Setting Default Communication Methods ..................................... 118
Enabling the Matching of an Incoming SMS Message with the Original Message ......................................................................... 120
Setting Up the Emergency Alert Notification
It may be necessary for a class teacher to request immediate assistance as a result of an emergency in the classroom. The use of emergency alerts in SIMS enables a class teacher to request assistance from anywhere in SIMS, both quickly and efficiently.
Prior to using this functionality, you must select the member(s) of staff who will be notified immediately in the event of an emergency, together with the preferred method of contacting them.
Once the intended recipients of emergency alerts have been selected, they will receive an internal message (accessible via the My Messages panel on the SIMS Home Page). Careful consideration should be given to the selection of intended recipients for an emergency alert.
Once opened, the message displays the following predefined text. This text is read-only.
Teacher <Class Teacher Name>, in Room <Class Room Name> with <Class Name>, needs urgent assistance!
The <Class Teacher Name>, <Class Room Name> and <Class Name> tags are populated automatically by SIMS once the emergency alert message is sent. This information is extracted from your SIMS database, preventing the need to enter it manually.

07| Setting Up Emergency Alert Notifications, the Default Communication Method and SMS Matching
116 Managing Communications using InTouch
1. Select Tools | Setups | Emergency Alert to display the Emergency Alert Configuration page.
2. If you wish to make use of the emergency alert functionality, select the Use Emergency Alert check box in the General Settings panel.
NOTE: It is possible to use this functionality only if the Use Emergency Alert check box is selected.

07| Setting Up Emergency Alert Notifications, the Default Communication Method and SMS Matching
Managing Communications using InTouch 117
3. Select the member(s) of staff you wish to notify each time an emergency alert is triggered by clicking the Add button in the Selected Staff panel to display the Find Recipients dialog.
4. Enter the intended recipient’s Surname, Forename and/or Staff Code.
5. Select their staff Role from the drop-down list.
6. Select the type of search you wish to carry out by clicking the drop-down arrow adjacent to the Search button then making your selection, e.g. Names Begin With or Names Sound Like.
The default option is Names Begin With, so if you wish to use this option click the Search button.
Alternatively click the Search button without entering search criteria to display all members of staff recorded in SIMS.
7. Highlight the required intended recipient(s) then click the OK button to return to the Emergency Alert Configuration panel, where the selected recipient is displayed in the Selected Staff panel.
8. Repeat steps 3 to 7 to add more recipients of an emergency alert, if required.

07| Setting Up Emergency Alert Notifications, the Default Communication Method and SMS Matching
118 Managing Communications using InTouch
9. Any members of staff added in error can be removed by highlighting their name then clicking the Remove button.
10. Select the preferred method of communication for each recipient of an emergency alert by selecting the appropriate check boxes. The options are:
Internal Messaging – this option is available only if the person is recorded as being a SIMS user.
Email – this option is available only if an email address is recorded against the person and the address has been marked as Home/Main or Work/Main.
SMS – this option is available only if a mobile phone number is recorded against the person and the number has been marked as their Main number.
NOTE: More than one method of communication can be selected, if required.
11. The Message panel displays the text that will be sent to the selected recipients each time an emergency alert is sent. This text is read-only.
12. Once the required information has been selected, click the Save button to save your changes.
More Information: Sending an Emergency Alert on page 54
Setting Default Communication Methods
When you create a message and select the intended recipients, their default method of communication is selected automatically. This section describes how to set the default method of communication for each role in the school using the Defaults - General panel.
The following panels on the InTouch Setup page enable you to define separate communication defaults for the corresponding message types:
Defaults - Behaviour Notification
Defaults - Exam & Student Timetable
Defaults - Unexplained Absence
Defaults - Late Notification
Defaults - Exam Reminder

07| Setting Up Emergency Alert Notifications, the Default Communication Method and SMS Matching
Managing Communications using InTouch 119
Where a particular message type enables you to define separate defaults, the options selected in these panels take precedence over those selected in the Defaults - General panel. For example, if you indicate in the Defaults - General panel that Staff should receive correspondence via Internal Messaging but in the Defaults - Unexplained Absence panel you indicate that they should receive Email correspondence, the option(s) selected in the Defaults - Unexplained Absence panel takes precedence for this message type only. Therefore an email will be sent for this message type. For all other message types, unless over-ridden by the settings in the five additional panels named above bottom five panels of this page, the default communication method is taken from the Defaults - General panel.
1. Select Tools | InTouch | Module Setup to display the InTouch Setup page.
2. Click the Default Communication Methods hyperlink to display the Default Communication Methods panel.
3. For each staff Role, select the radio button that indicates the default method of communication you wish to use.

07| Setting Up Emergency Alert Notifications, the Default Communication Method and SMS Matching
120 Managing Communications using InTouch
If a mistake is made while defining the default communication methods, click the Undo button to revert to the settings as they were the last time this page was saved.
4. For the remaining panels on this page (the names of which are listed at the top of this section), select the check box relating to the preferred method(s) of communication for messages of that type.
5. Once the required communication methods have been set, click the Save button to save the changes.
Enabling the Matching of an Incoming SMS Message with the Original Message
Any messages sent to your school from an external source (e.g. a parent) are accessible from the School Messages panel on the SIMS Home Page. These might include messages that cannot be matched to a message sent previously from SIMS, or responses to Unexplained Absences, Pupil/Student Profiles or Exceptional Circumstances messages.
SIMS can attempt to match a message received from an external source (via SMS) with a message originally sent from SIMS, e.g. in response to an Unauthorised Absence message. To use this functionality, it must first be enabled.
1. Select Tools | InTouch | Module Setup to display the InTouch Setup page.

07| Setting Up Emergency Alert Notifications, the Default Communication Method and SMS Matching
Managing Communications using InTouch 121
2. Click the SMS Messaging hyperlink to display the SMS Messaging panel.
3. Select the Enable SMS Matching check box then click the Save button to save the changes.
More Information: Introduction on page 55

07| Setting Up Emergency Alert Notifications, the Default Communication Method and SMS Matching
122 Managing Communications using InTouch

08| Producing Reports in SIMS InTouch
Managing Communications using InTouch 123
08|Producing Reports in SIMS InTouch
In This Chapter
Introduction ................................................................................ 123
Producing the Failed Outbound Messages Report ........................ 123
Producing the Message Audit Report ........................................... 125
Running a Screen Based Report................................................... 132
Introduction
SIMS InTouch provides two predefined reports regarding your school’s messaging activity.
Failed Outbound Messages report
Message Audit report.
Producing the Failed Outbound Messages Report
The Failed Outbound Messages report provides information on any messages sent to external sources (SMS or email) that have failed to send or are pending transmission (i.e. they are currently in a queue).
A message will typically be included on this report if an incorrect mobile telephone number or email address has been selected or entered, or if the network is busy and therefore the message has failed to send after a period of four hours.
The report enables you to enter or select the date range over which you wish to run the report. The report output provides information on the intended recipient (this will be a mobile telephone number or email address if the intended recipient is not recorded in SIMS), their role (if they are recorded in SIMS), the date and time the message was created and transmitted, the message status and the user who created the message.

08| Producing Reports in SIMS InTouch
124 Managing Communications using InTouch
1. Select Reports | InTouch | Failed Outbound Messages to display the Criteria for Failed Outbound Messages Report dialog.
2. Select the Start Date and End Date for the report by clicking each Calendar button then selecting the required dates, or enter the dates manually.
Alternatively, diary dates (e.g. academic year start/end dates, term start/end dates) can be used as start and end dates for the report by clicking the appropriate Browser button adjacent to the required date to display the Select Curriculum Diary Date dialog.
3. The Academic Year defaults to the current academic year but can be edited by selecting from the drop-down list.
4. With the correct academic year selected, highlight the appropriate diary date then click the OK button to return to the Criteria for Failed Outbound Messages Report dialog.

08| Producing Reports in SIMS InTouch
Managing Communications using InTouch 125
5. Once the appropriate dates have been selected, click the Continue button to display the Run a Screen Based Report dialog.
More Information: Running a Screen Based Report on page 132
Producing the Message Audit Report
The Messaging Audit report provides details of all messages sent to, and received by, SIMS. A number of report filters are provided, enabling you to determine the communication methods on which you wish to report, the users who sent messages, etc.
This report can be produced in two formats:
Summary
This is the default report format and it provides information on the total number of sent and received messages, together with the total number of credits used for SMS messages (applicable to the Sent Messages Audit Type only).
Detailed
This report format provides a detailed breakdown of all sent and received messages, including message content, if required. Selecting the Detailed report format also produces the information provided by the Summary report.

08| Producing Reports in SIMS InTouch
126 Managing Communications using InTouch
The following graphic is a sample report output for the Sent Messages section.
The following graphic is a sample report output for the Received Messages section.

08| Producing Reports in SIMS InTouch
Managing Communications using InTouch 127
1. Select Reports | InTouch | Messaging Audit to display the Criteria for Messaging Audit Report dialog.
2. Select the Start Date and End Date for the report by clicking each Calendar button then selecting the required dates, or enter the dates manually.
Alternatively, diary dates (e.g. academic year start/end dates and term start/end dates) can be used as start and end dates for the report by clicking the appropriate Browser button adjacent to the required date to display the Select Curriculum Diary Date dialog.
3. The Academic Year defaults to the current academic year but can be edited by selecting from the drop-down list.

08| Producing Reports in SIMS InTouch
128 Managing Communications using InTouch
4. Select the type of report you wish to produce by selecting either the Summary or Detailed radio button in the Report Type panel.
5. Select the type of audit you wish to carry out by selecting the required option from the drop-down list in the Audit Type panel. The options are Sent messages, Received messages or Sent and received messages.
6. The Filters panel enables you to select the status for each filter condition. The currently selected status for each filter is displayed adjacent to the filter name, e.g. All, Disabled, etc.
Communication Methods
The communication methods available in SIMS InTouch are Email, Internal Messaging and SMS. The default setting is to report on All communication methods.
a. To change the communication method(s) on which you wish to report, click the Edit button to display the Communication Methods dialog.
b. Deselect the check box of the communication method(s) on which you do not wish to report. Select the check box(es) again to include them in the report.
Alternatively, click the Check All or Uncheck All buttons to facilitate selection.
NOTE: Only communication methods with any auditable activity are displayed, i.e. only if a communication of a certain type has been sent between the selected Start Date and End Date will it be displayed.
c. Click the OK button to return to the Criteria for Messaging Audit Report dialog.

08| Producing Reports in SIMS InTouch
Managing Communications using InTouch 129
Message Types
The report can be produced for any number of message types. The message types available in SIMS InTouch are General Message, Student Profile Message, Percentage Attendance Message, Unexplained Absence Message and Achievement Award. The default setting is to report on All message types.
a. To change the message type(s) on which you wish to report, click the Edit button to display the Message Types dialog.
b. Deselect the check box of the message type(s) on which you do not wish to report. Select the check box(es) again to include them in the report.
Alternatively, click the Check All or Uncheck All buttons to facilitate selection.
NOTE: Only message types with any auditable activity are displayed, i.e. only if a message of a certain type has been sent between the selected Start Date and End Date will it be displayed.
c. Click the OK button to return to the Criteria for Messaging Audit Report dialog.
Users
The report can be produced for any SIMS users who have sent or received a message. The default setting is to report on All users.

08| Producing Reports in SIMS InTouch
130 Managing Communications using InTouch
a. To change the user(s) on whom you wish to report, click the Edit button to display the Users dialog.
b. Deselect the check box of the user(s) on whom you do not wish to report. Select the check box(es) again to include them in the report.
Alternatively, click the Check All or Uncheck All buttons to facilitate selection.
NOTE: Only users with any auditable activity are displayed, i.e. only if a user has sent, or has been sent, a message between the selected Start Date and End Date will they be displayed. To enable messages sent to the School Messages inbox to be included in this report, a new ‘user’ named School is available for selection in this dialog. Select its check box to report on messages sent to the School Messages inbox.
c. Click the OK button to return to the Criteria for Messaging Audit Report dialog.
Recipients/Senders
The report can be produced for any recipient or sender of a message. The default setting is to report on All recipients and senders. For recipients or senders whose contact details are not stored in SIMS, their email address or mobile telephone number is available for selection.
To facilitate selection, the recipients and senders are displayed in categories, e.g. Ad Hoc (for people whose contact details are not recorded in SIMS), Employee, Contact, etc.

08| Producing Reports in SIMS InTouch
Managing Communications using InTouch 131
a. To change the recipient(s) or sender(s) on whom you wish to report, click the Edit button to display the Recipients/Senders dialog.
b. Deselect the check box of the recipient(s) or sender(s) on whom you do not wish to report. Select the check box(es) again to include them in the report.
Alternatively, click the Check All or Uncheck All buttons to facilitate selection.
NOTE: Only recipients or senders with any auditable activity are displayed, i.e. only if a somebody has received or sent a message between the selected Start Date and End Date will they be displayed.
c. Click the OK button to return to the Criteria for Messaging Audit Report dialog.
Students
The report can be produced for any pupil/student about whom a message has been sent or received. The default setting is Disabled therefore this information will not be reported unless you select to do so.

08| Producing Reports in SIMS InTouch
132 Managing Communications using InTouch
a. To change the pupil/student(s) regarding whom you wish to report, click the Edit button to display the Students dialog.
b. To enable the reporting of messages regarding specific pupil/students, select the Enabled check box to activate the list on the right-hand side.
c. Deselect the check box of the pupil/student(s) on whom you do not wish to report. Select the check box(es) again to include them in the report.
Alternatively, click the Check All or Uncheck All buttons to facilitate selection.
NOTE: Only pupil/students with any auditable activity are displayed, i.e. only if a pupil/student about whom a message has been received or sent between the selected Start Date and End Date will they be displayed.
d. Click the OK button to return to the Criteria for Messaging Audit Report dialog.
7. With the correct academic year selected, highlight the appropriate diary date then click the OK button to return to the Criteria for Messaging Audit Report dialog.
8. Once the appropriate report criteria have been selected, click the Continue button to display the Run a Screen Based Report dialog.
Running a Screen Based Report
The Run a Screen Based Report dialog enables you to select the layout and output options for the selected report and is displayed once you have selected the appropriate report criteria.
The Use a predefined layout and Output to a web browser options are selected by default.

08| Producing Reports in SIMS InTouch
Managing Communications using InTouch 133
1. Specify the preferred layout option by selecting the appropriate radio button.
Use a predefined layout
The Default Layout is selected and cannot be edited.
Supply your own layout
This option is available for schools that prefer a report layout that is different to the default layout available in SIMS. Before selecting this option, an .XSL file (recommended for the production of a printed output from .XML) must have been created.
Click the Browse button to display the Select a layout file dialog, navigate to the required location, highlight the required .XSL file then click the Open button to return to the Run a Screen Based Report dialog. Alternatively, enter the path and filename manually.
Output raw XML
This option outputs raw .XML data, which is stored in the SIMS database. This can then be imported into another application, e.g. Microsoft® XL, and formatted to your school’s requirements.

08| Producing Reports in SIMS InTouch
134 Managing Communications using InTouch
2. Specify the preferred output option by selecting the appropriate radio button.
Output to a web browser
The default option produces a report in HTML format and displays it in your default web browser.
Output to a file
This option produces a report in .XML format to the location specified.
Enter the location where you want to save the .XML file.
Alternatively, click the Browser button to display the Save As dialog. Navigate to the required location and enter a File name. Click the Save button to return to the Run a Screen Based Report dialog.
3. Click the OK button to produce the report.

09| Additional Information
Managing Communications using InTouch 135
09|Additional Information
In This Chapter
Viewing the Communication Log.................................................. 135
Setting Up Message Options ........................................................ 137
What Happens if SIMS Cannot Immediately Send a Message to an External Source?.......................................................................... 137
Viewing the Communication Log
1. Select Focus | Pupil (or Student) | Pupil (or Student) Details to display the Find Student browser.
2. Search for then select the pupil/student whose communication log you wish to view.
3. In the Links panel on the right-hand side of the page, click the Communication Log hyperlink to display the Communication Log browser.
This page displays all of the messages relating directly to the selected pupil/student.
4. Search for the required log entry by selecting a Period and a Context (the type of message) from the drop-down lists then clicking the Search button.

09| Additional Information
136 Managing Communications using InTouch
5. Highlight the required log entry then click the Open button to display its details on the Communication Details page, which displays information regarding the communication.
6. To view the content of the original message, click the View button to display the Review a Message page.
More Information: Viewing Received Messages on page 56

09| Additional Information
Managing Communications using InTouch 137
Setting Up Message Options
1. Select Tools | Setup Message Options to display the Setup Message Options page.
2. If you wish to Display an alert when a new message is received, select the check box in the Options for high priority messages panel.
3. Enter the amount of time, in seconds, that you want the alert to be displayed in the The pop-up alert will be displayed for field.
4. If you wish to Play a sound alarm when a high priority message is received, select the check box.
What Happens if SIMS Cannot Immediately Send a Message to an External Source?
Messages that cannot be sent immediately, perhaps because of a failure in the messaging service, can be queued and re-sent automatically when the issue is resolved. SIMS attempts to resend a queued message every five minutes until it is sent or until the message expires.
If an email or SMS message cannot be sent, the following message is displayed in SIMS.
If you wish to queue the message for delivery, click the Yes button. Click the No button if you wish to cancel the sending of the message.

09| Additional Information
138 Managing Communications using InTouch
If you have any messages queued, they are accessible via the Outbox panel on the maximised My Messages panel and the School Messages panel on the SIMS Home Page (the panel on which the message is displayed is determined by the message type). This panel is displayed between the Inbox and Sent panels.
NOTE: The Outbox panel is displayed only if you have one or more queued messages.
A queued message can be opened in read-only mode by highlighting it then clicking the Open button, from where you can attempt to resend it manually.
A queued message can be deleted by highlighting it then clicking the Delete button.
If you attempt to close SIMS with one or more messages still queued, you will be asked to confirm that you wish to exit.
Messages that remain queued past midnight will become expired. Expired messages remain in the Outbox, from where you can attempt to resend it manually. Resending a message manually will queue the message again and if it still cannot be sent, it will expire again at midnight. Alternatively, you can delete an expired message by highlighting it then clicking the Delete button.

I| Index
Managing Communications using InTouch 139
Index
A
absences
unexplained, sending a message......... 70
accessing
communication log ......................... 135
achievement awards
sending a message ........................... 77
achievement notification
sending a message ........................... 85
activating
message templates........................... 27
adding
image to a message.......................... 51
message templates........................... 21
message to communication log........... 58
SEN event from messages ................. 61
SEN provision from message.............. 62
SEN review from message ................. 64
alerts
emergency, setting up .................... 115
sending for an emergency.................. 54
setting up notifications for alerts....... 115
altering
message templates........................... 24
applicant contact details
updating ......................................... 14
applicant general messages .................. 33
applying
incoming message text to event comments, Take Register and Edit Marks........................................... 74
attaching
files to a message............................. 51
attachments
viewing ........................................... 57
attendance late marks
sending a message ........................... 99
attendance marks
recording......................................... 76
awards
achievement, sending a message........ 77
B
behaviour incident
sending a message ........................... 77
behaviour messages ............................ 37
behaviour notification
sending a message ........................... 88
behaviour type recorded
sending a message ......................... 106
C
changing
message importance ......................... 52
message templates ........................... 24
message type................................... 52
circumstances
exceptional, sending a message.......... 80
class register messages........................ 40
cloning
message templates ........................... 22
communication log
adding messages to .......................... 58
view ............................................. 135
communication methods

I| Index
140 Managing Communications using InTouch
default, setting............................... 118
configuring
default communication method......... 118
emergency alert notifications ........... 115
message options ............................ 137
contact details
updating applicant ............................ 14
updating contacts' ............................ 12
updating primary................................ 9
updating pupil/student ...................... 16
copying
message templates........................... 22
creating
message templates........................... 21
SEN event from message................... 61
SEN provision from message.............. 62
SEN review from message ................. 64
D
data fields
selecting recipients ........................... 46
de-activating
message templates........................... 27
default communication methods
setting .......................................... 118
defaults
setting ............................................ 26
deleting
message templates........................... 28
messages........................................ 61
E
Edit Marks
applying incoming message text ......... 74
editing
message templates ........................... 24
emergency alert notifications
setting up...................................... 115
emergency alerts
sending ........................................... 54
setting up notifications .................... 115
understanding ....................................4
enabling
communication with a contact ..............9
matching of incoming SMS with original message.......................... 120
entering
message text ................................... 46
subject heading................................ 45
event comments
applying incoming message text ......... 74
events
school, sending a message................. 82
exceptional circumstances
sending a message ........................... 80
exclusion messages ............................. 38
external messages
failing to send ................................ 137
F
failed outbound messages report
producing ...................................... 123
files
attaching to a message...................... 51
formatting
message text ................................... 48
forwarding
messages ........................................ 60

I| Index
Managing Communications using InTouch 141
G
general messages ............................... 31
sending........................................... 41
understanding.................................... 2
H
headings
entering for a message...................... 45
housekeeping
managing your messages .................. 66
hyperlinks
inserting ......................................... 49
I
images
adding to a message......................... 51
importance
setting for a message........................ 52
incidents
behaviour, sending a message ........... 77
incoming message text
applying to event comments, Take Register and Edit Marks .................. 74
incomplete marksheet results
sending a message ......................... 102
inserting
hyperlinks ....................................... 49
image into a message ....................... 51
InTouch
enabling communication with a contact........................................... 9
introduction ....................................... 1
setting up.......................................... 6
introduction.......................................... 1
L
licensing information..............................6
log
adding messages to .......................... 58
viewing communication ................... 135
M
marks
attendance, recording ....................... 76
matching
incoming SMS with original message, enabling ..................................... 120
message attachments
viewing ........................................... 57
message audit report
producing ...................................... 125
message options
setting up...................................... 137
message sending failure
what to do next .............................. 137
message templates
activating and de-activating ............... 27
adding ............................................ 21
copying ........................................... 22
deleting........................................... 28
editing ............................................ 24
setting a default for system generated messages....................... 26
viewing ........................................... 20
message type
changing ......................................... 52
messages
adding to communication log.............. 58
applicant ......................................... 33

I| Index
142 Managing Communications using InTouch
attaching files .................................. 51
behaviour........................................ 37
behaviour type recorded.................. 106
changing message type ..................... 52
class register ................................... 40
creating SEN event from.................... 61
deleting .......................................... 61
entering text.................................... 46
exclusion......................................... 38
formatting text................................. 48
forwarding....................................... 60
general ........................................... 31
inserting an image............................ 51
managing........................................ 66
previewing ...................................... 52
pupil/student exam attendance ........ 111
pupil/student general ........................ 31
replying .......................................... 59
selecting a template.......................... 45
selecting recipients ........................... 42
SEN................................................ 34
SEN reminder .................................. 36
sending........................................... 53
sending achievement notification ........ 85
sending attendance late marks ........... 99
sending behaviour notification ............ 88
sending for achievement awards......... 77
sending for behaviour incident............ 77
sending for exceptional circumstances ............................... 80
sending for missing register ............... 83
sending for not approved pupil/student profile ....................... 79
sending for pupil/student profile ......... 78
sending for school event .................... 82
sending for staff training days ............ 82
sending for unexplained absences ....... 70
sending general................................ 41
sending incomplete marksheet results........................................ 102
sending percentage attendance notification.................................... 83
sending pupil/student detention.......... 93
sending pupil/student exam timetable .................................. 2, 94
sending pupil/student timetable .......... 91
sending staff timetable ...................... 92
setting the importance ...................... 52
viewing ........................................... 56
missing register
sending a message ........................... 83
N
not approved pupil/student profiles
sending a message ........................... 79
notifications
achievement, sending a message........ 85
behaviour, sending a message............ 88
emergency alert, setting up.............. 115
percentage attendance, sending a message....................................... 83
setting up, emergency alerts ............ 115
O
opening
message attachments ....................... 57
P
percentage attendance notification
sending a message ........................... 83

I| Index
Managing Communications using InTouch 143
permissions.......................................... 7
previewing
a message....................................... 52
primary contact details
updating ........................................... 9
print preview
messages........................................ 52
printing
previewing messages ........................ 52
producing
failed outbound messages report ...... 123
message audit report ..................... 125
profiles
not approved pupil/student, sending a message .................................... 79
pupil/student, sending a message....... 78
Pupil Teacher View
viewing SEN details .......................... 65
pupil/student contact details
updating ......................................... 16
pupil/student contacts' details
updating ......................................... 12
pupil/student detention
sending a message ........................... 93
pupil/student exam attendance
sending a message ......................... 111
pupil/student exam timetable
sending a message ....................... 2, 94
pupil/student general messages ............ 31
pupil/student profile
sending a message ........................... 78
pupil/student timetable
sending a message ........................... 91
R
received messages
viewing ........................................... 56
recipients
selecting for message........................ 42
recording
attendance marks ............................. 76
SEN provision from message .............. 62
SEN review from message.................. 64
registers
missing, sending a message ............... 83
removing
message templates ........................... 28
messages ........................................ 61
replying
to messages .................................... 59
reports
failed outbound messages, producing 123
message audit, producing ................ 125
running screen based ...................... 132
responding
to messages .................................... 59
running
screen based report ........................ 132
S
school events
sending a message ........................... 82
screen based report
running ......................................... 132
selecting
data fields ....................................... 46
message recipients ........................... 42

I| Index
144 Managing Communications using InTouch
message template ............................ 45
SEN details
viewing ........................................... 65
SEN events
creating from message...................... 61
SEN messages .................................... 34
SEN provisions
recording ........................................ 62
SEN reminder messages....................... 36
SEN reviews
recording ........................................ 64
sending
achievement award message ............. 77
achievement notification message....... 85
attendance late marks message.......... 99
behaviour incident message ............... 77
behaviour notification message........... 88
behaviour type recorded message..... 106
emergency alert ............................... 54
exceptional circumstance message...... 80
general messages............................. 41
incomplete marksheet results message..................................... 102
message for unexplained absences ..... 70
messages........................................ 53
missing register message .................. 83
not approved pupil/student profile message....................................... 79
percentage attendance notification message....................................... 83
pupil/student detention message ........ 93
pupil/student exam attendance message..................................... 111
pupil/student exam timetable......... 2, 94
pupil/student profile message............. 78
pupil/student timetable message ........ 91
school event message ....................... 82
staff timetable message..................... 92
staff training day message ................. 82
sending messages
what happens if a message fails to send? ......................................... 137
setting
default communication method......... 118
default message template for system generated messages....................... 26
message importance ......................... 52
setting up
emergency alert notifications............ 115
InTouch.............................................6
message options............................. 137
staff timetable
sending a message ........................... 92
staff training days
sending a message ........................... 82
Student Teacher View
viewing SEN details........................... 65
subject headings
entering .......................................... 45
system generated messages
setting a default template .................. 26
understanding ....................................2
T
Take Register
applying incoming message text ......... 74
templates
activating and de-activating ............... 27

I| Index
Managing Communications using InTouch 145
adding message ............................... 21
copying........................................... 22
deleting .......................................... 28
editing ............................................ 24
selecting for a message..................... 45
setting a default for system generated messages ...................... 26
viewing message .............................. 20
text
entering for a message...................... 46
training days
staff, sending a message ................... 82
U
understanding
emergency alerts................................ 4
general messages............................... 2
system generated messages ................ 2
unexplained absences
sending a message ........................... 70
updating
applicant contact details .................... 14
primary contact details........................ 9
pupil/student contact details .............. 16
pupil/student contacts' details ............ 12
V
viewing
communication log ......................... 135
message attachments ....................... 57
message templates........................... 20
received messages ........................... 56
SEN details ...................................... 65
W
what to do if SIMS cannot send a message to an external source ......... 137
where to find more information ...............7