mis 201 web design 1. website planning before even considering the practical aspects of creating a...
TRANSCRIPT

MIS 201
Web Design
1
Website PlanningBefore even considering the practical aspects of creating a website, there are some important fundamental questions
you need to ask yourself first What are we hoping to achieve? Who's our target audience? What catergory, if any, does our site fall into:
ecommerce, informational, educational, social networking, etc.
How visually exciting does it need to be to be effective?
What tone do we want our content to convey, could it be serious or witty, complex or simple?
2

Site Content & Information StructureProbably the most important aspect of website
'structural design' is how you breakdown the content into logical sections (Main Areas, Pages, Headers, Sub-Headers, Lists, etc). You need to create a strong hierarchy for the site and breakdown content into small units.
It is a good idea to create a graphical schema/flowchart/sitemap for the site. This can help you visualise a logical hierarchy.
3

4

Create a folder on your computer called website1 to hold all web pages and graphics.
Optional: inside of the website1 folder create a folder called images to hold your graphics.
All folders, webpages, and graphic names must be lowercase, no spaces, and no special characters for ease of linking later.
Getting Start
5

Launch Dreamweaver Select HTML
6

New Page Appears
7
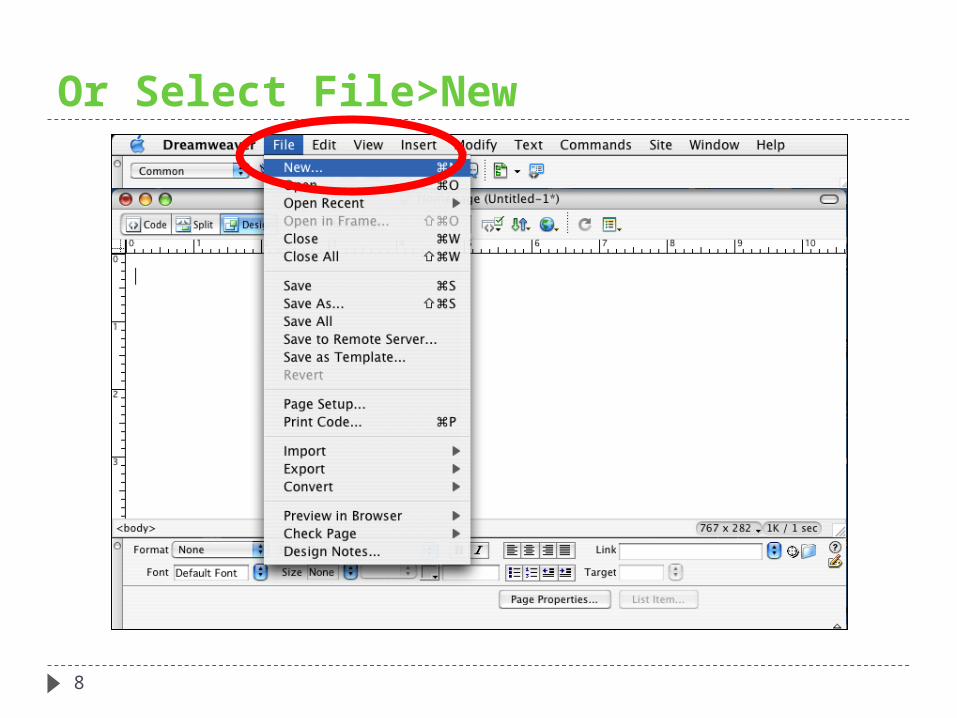
Or Select File>New
8
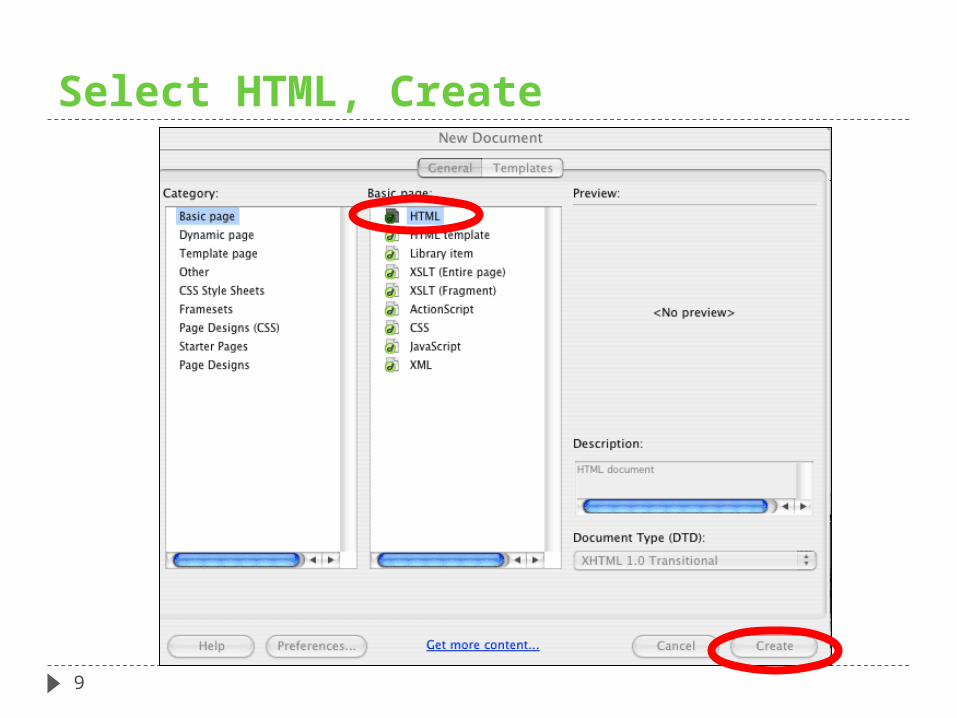
Select HTML, Create
9

Window>Insert, Properties, Files Have a Check Mark When Active
10

Setting Up a New Website
Window>Files Checked You Will See The Files Palette on the Right
11

From the Pop Up Files Palette Window: Select Manage Sites
12
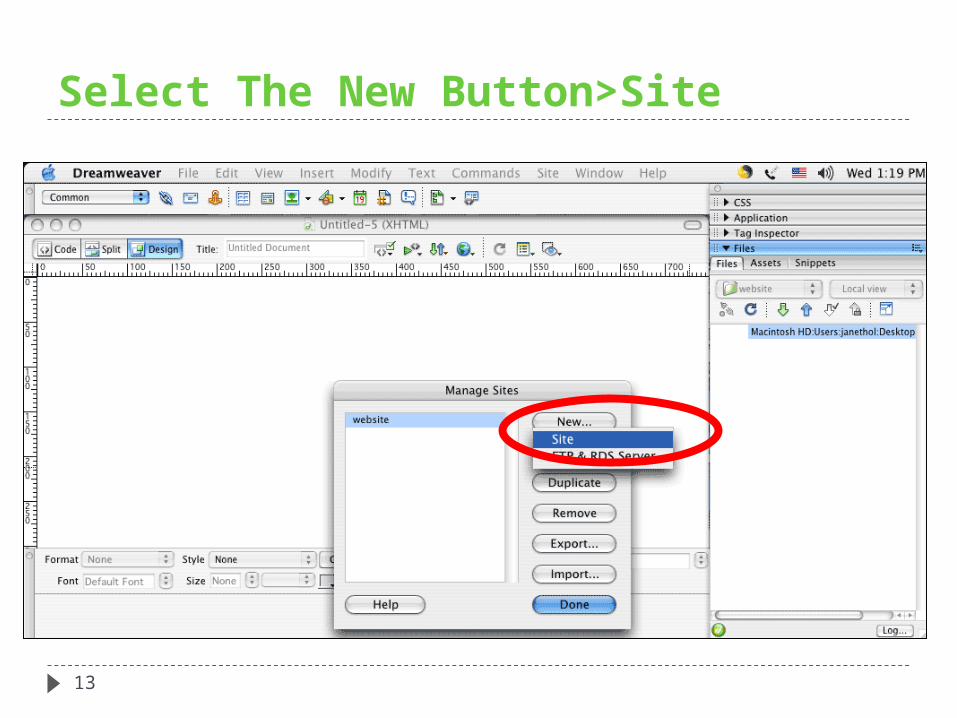
Select The New Button>Site
13

Set the New Site Definitions1. Name Your Webpage
2. Click on the Folder Icon & Locate the website1 folder
3. Click on the Folder Icon & Locate the images folder inside of the website1 folder
12
3
4
14

The File Structure You Created
15

Begin Creating the index.html main webpage
16

Modify>Page Properties
17

Appearance, Set Font, Text, Background Color
18

Links, Set Link, Visited Link Colors
19

Click the Curser on the Page, Select Alignment, Type in Text
Window> Properties
Center Alignment Button
20

Highlight Text, Select Ariel Font
Window> Properties
Font Pop-up Menu
21
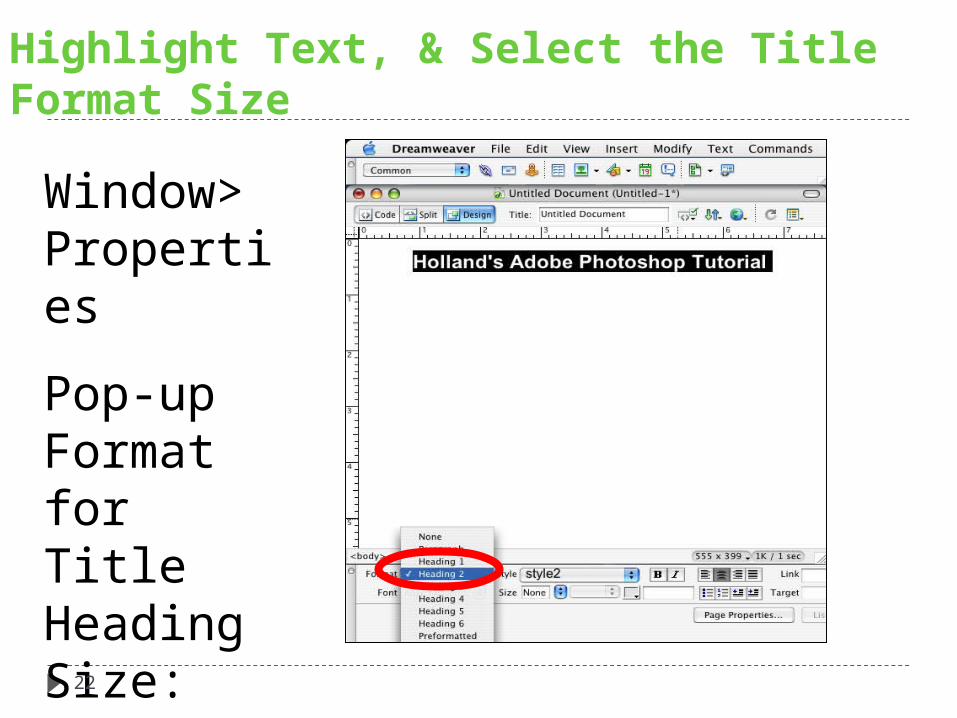
Highlight Text, & Select the Title Format Size
Window> Properties
Pop-up Format for Title Heading Size: Example 2
22

Or to Create a Title With a Graphic: Insert>Table or Select Table Icon
Tables control object placement
23

Set Row, Column, Table Width, Border, OK
Title Example:
1 Row
2 Columns
24

Adjust Column Widths
Drag Table Column Line Left or Right to Adjust the Width
25

Before Adding Graphic Images go to File>Save As>name your file( index.html)
Remember to use all lowercase letters, no spaces or special characters in your page name
26

Click in the Left Cell, Insert>Image, or use the Image Icon, Locate.gif or .jpg File
27
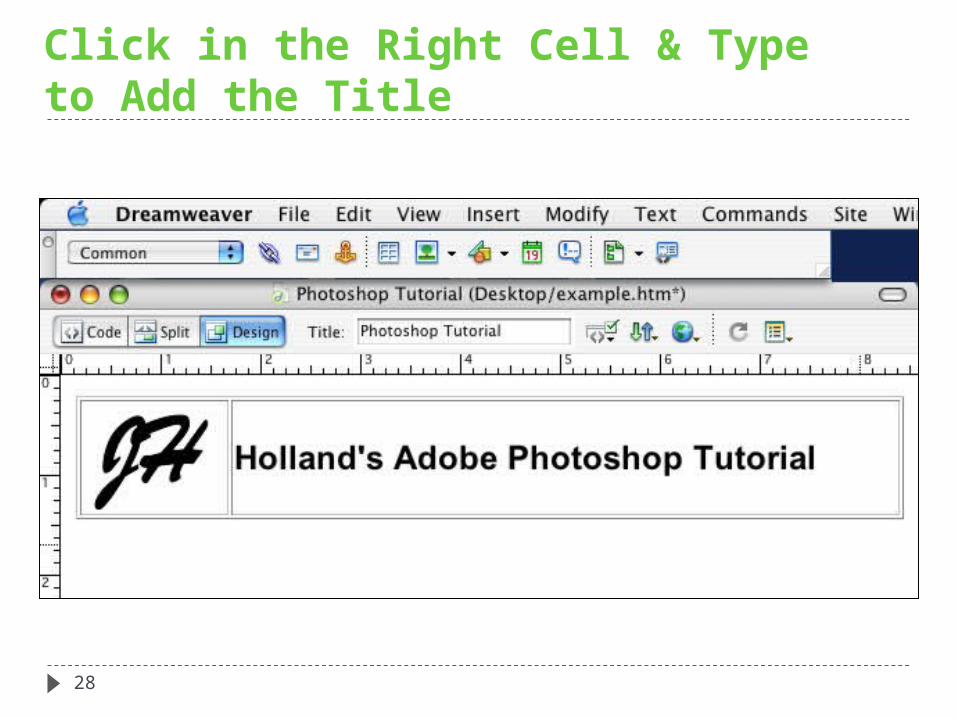
Click in the Right Cell & Type to Add the Title
28

Select the Table, Select BG to Add a Background Cell Color
Window> Properties Menu
29
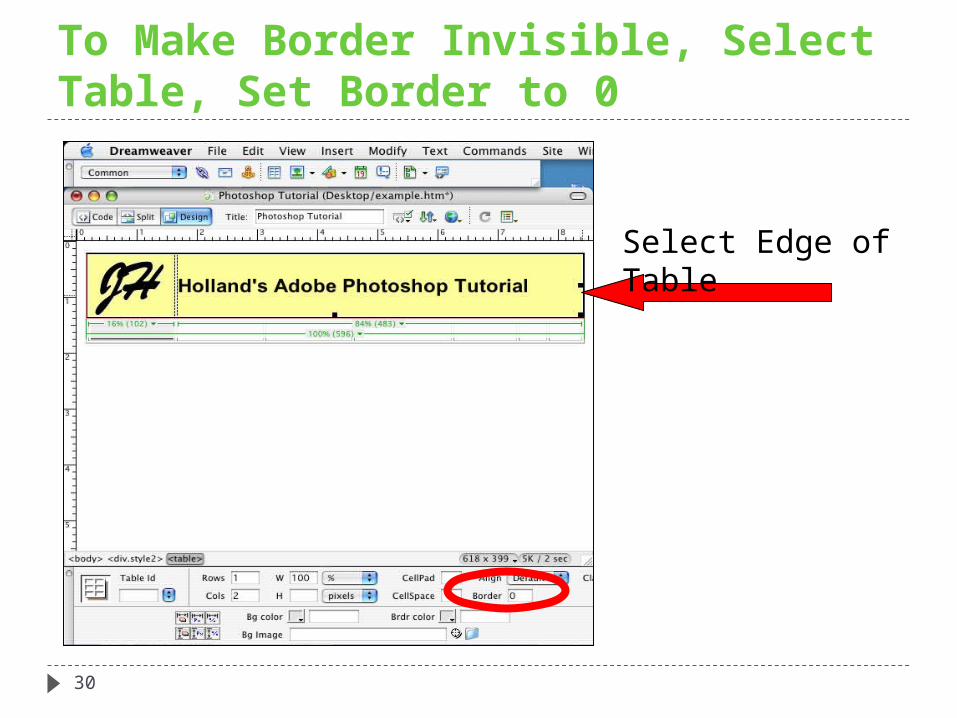
To Make Border Invisible, Select Table, Set Border to 0
Select Edge of Table
30

To Add Navigation Table, Insert>Table or Table Icon
1 Row
7 Columns Maximum
31

Click Inside of the First Cell to Add a Flash Navigation Button
32

Insert>Media>Flash Button
33

Button Settings: Style, Text, Font, Link, Size, Apply, OK
Remember when uploading your website to the server to add your .swf Flash buttons you created
34

Repeat to Add All Buttons
If you need to edit the button after has been created or to check the links just double click on the button again, change the features, Apply, OK. 35

Example of Completed Title & Navigation Buttons
You May Have Different Titles For Your Navigation Buttons
36

External Links: Type Text & Highlight, Type in Link URL & Press Return Key
http://www.google.com
37
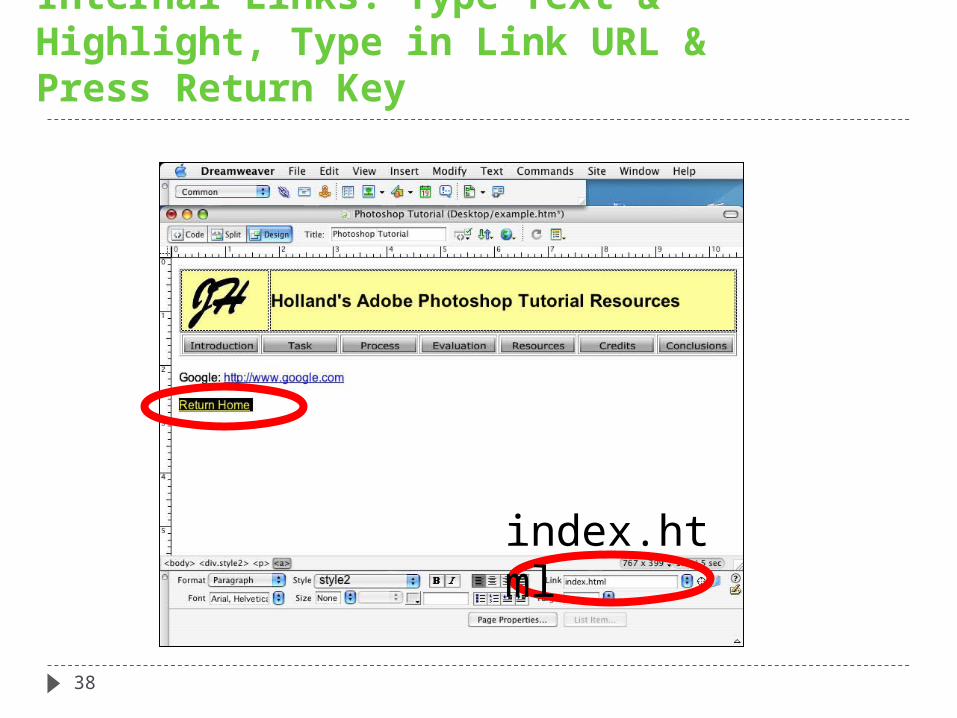
Internal Links: Type Text & Highlight, Type in Link URL & Press Return Key
index.html
38

E-Mail Links: Type Text & Highlight, Type in Link URL & Press Return Key
mailto:[email protected]:[email protected]
39
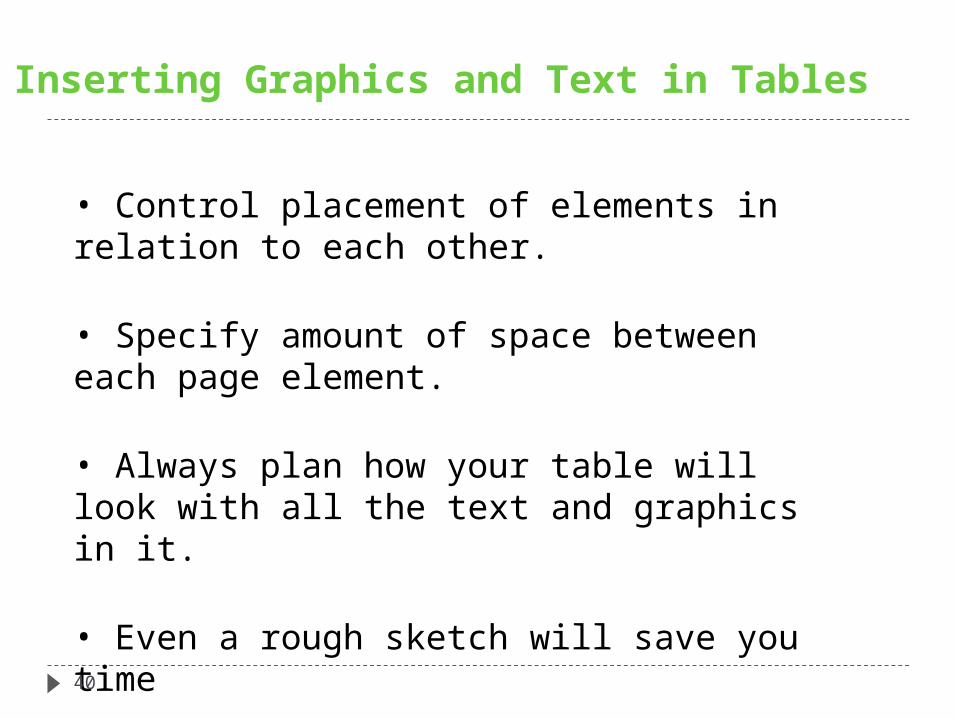
Inserting Graphics and Text in Tables
• Control placement of elements in relation to each other.
• Specify amount of space between each page element.
• Always plan how your table will look with all the text and graphics in it.
• Even a rough sketch will save you time
40

Click in the Left Cell, Select Insert>Image or Image Icon
Locate Graphic Image:
.gif
.jpg
Choose
41

Click in the Right Cell & Add Your Text
May Need to Adjust Column Width
Adjust Font to Ariel
42

Anchors Are Used to Jump Down on a Long Page of Text
43

Highlight Word, In the Link Box Type in #name
#august44

Highlight Text to Link To, Insert>Named Anchor
45
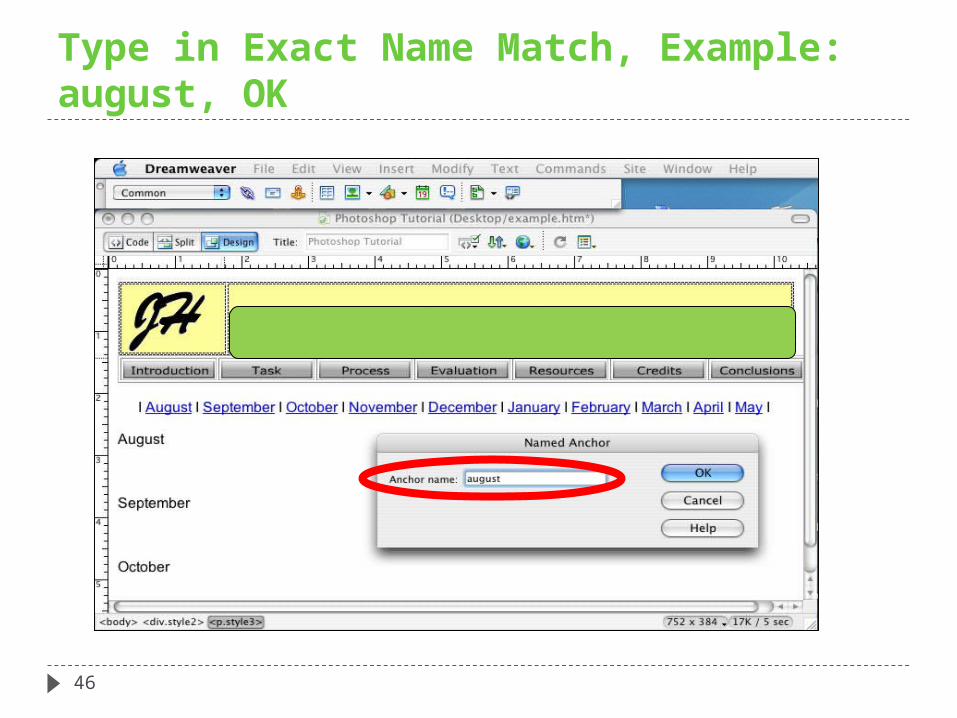
Type in Exact Name Match, Example: august, OK
46

Notice the Yellow Anchor,This Will Not Show When Posted
47

Can Duplicate Pages
Once the index.html page is set up as desired with the logo, header, and navigation buttons it can serve as a template for creating new pages.
Just save the current page(index.html) as a new filename, then edit the new page to suit.
48

File>Preview in Browser>Select the desired browser
49

Notice How the Browser Opens in Front To Preview What it Will Look Like When Uploaded to the Server
When Finished Viewing Browser Red Button Close
50

Optional: File>Preview in Browser>Edit Browser List
51
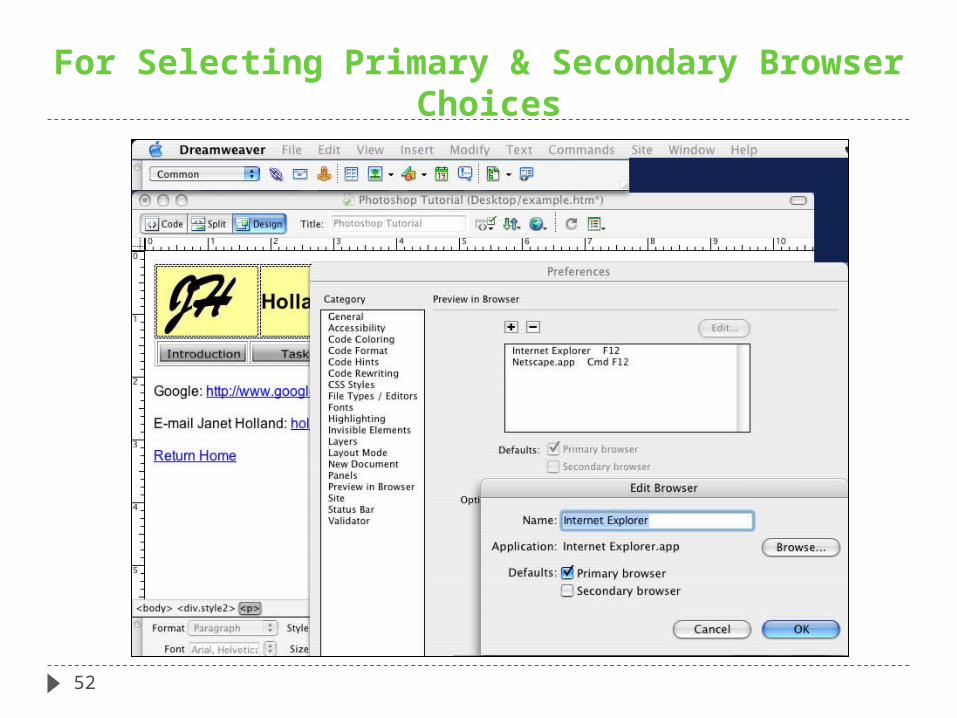
For Selecting Primary & Secondary Browser Choices
52

Viewing Options: HTML Code
53
Viewing Options: Split Code & Design
You Can Highlight Areas in Design Mode & See It in Code
54

Viewing Options: DesignFor Creating & Editing Web Pages
55

http://macromedia-dreamweaver.soft32.com/
56