mis 213 project guides - csbapp.uncw.edu
TRANSCRIPT

MIS 213 Project Guides
Guide #1 – Starting New Homework Project Files and Uploading
on your machine or introduction to using Horizon for those
without Access on their machine
Introduction to Information Systems and Technology (MIS 213)
Guides for Hands-on Tutorials and Cases
Judith Gebauer, Kevin D. Matthews, Thomas Janicki
Information Systems
This course notes package is the intellectual property of the Condon School of Supply Chain, Business Analytics & Information Systems
Cameron School of Business
and is licensed to students in MIS 213: Introduction to Information Systems and Technology
for their personal, individual use.

Guide 1 - 2
©2015, 2021 – Congdon School of Supply Chain, Business Analytics and Information Systems, Cameron School of Business and University of North Carolina Wilmington
MIS 213 Student Project Guides (a series of PDF files to assist you in successful completion of your projects)
Guide #1 - Starting New Homework Project Files and Uploading On your personal machine or using a Cloud Based Solution for MAC and other users without
Access on their machine
Starting and Saving Microsoft Access Guide.1.1 - Starting and Saving Access on your own machine ....................... Guide 1-3 Guide 1.2 – Starting and Saving Access using Horizon .................................. Guide 1-5
Uploading a file to Entropy Guide 1.3 - Uploading from your machine ....................................................... Guide 1-9 Guide 1.4 - Uploading from Horizon .............................................................. Guide 1-10
Other Guides in Series:
Access Tutorial and Cases
A. Access Tutorial: Employees and Compensation ...................................... Guide A
B. Access Case: University Course Registrations ................................. Guide B
Excel Tutorial and Cases
E. Excel Refresher: Vintage Record Store ............................................. Guide E
F. Scenario Tutorial: Mobile Phone Plans .............................................. Guide F
G. Scenario Case: Car Lease versus Buy ............................................. Guide G
H. Solver Tutorial: Wilmington Custom Furniture ................................... Guide H
I. Solver Case: Beach Town Lifeguards ................................................ Guide I
J. Decision Support: Seating for a Baseball Stadium ............................ Guide J

Guide 1 - 3
©2015, 2021 – Congdon School of Supply Chain, Business Analytics and Information Systems, Cameron School of Business and University of North Carolina Wilmington
Guide 1.1 Starting and Saving Access on your own Machine
If you have Access on your machine, then the following instructions will help you start a new database. Instructions for opening Access on Horizon are in the next section 1. To create a new database file, start by starting Access. Your opening screen is shown below: Note:
the naming shown in these examples refer to the file you will build for the Access Tutorial Assignment. Modify file names based on the descriptions in later tutorials and cases.
Figure 1: Starting Screen in Access
2. Click on “Blank Database”. Your next screen will ask you for the name of the database and its location. Click the file folder to change the location. We recommend that you save the file in your Documents (or My Documents) folder and name the database YourLastNameEmpCompensation (again this is the name for the first Access Tutorial) Finally hit “Create”.
Figure 2: Saving your database by providing a location and name to the database

Guide 1 - 4
©2015, 2021 – Congdon School of Supply Chain, Business Analytics and Information Systems, Cameron School of Business and University of North Carolina Wilmington
Figure 3: Starting template for a blank database file in Access
3. Once Access has created your file, you will see a screen as shown in Figure-3. (These screens were created using Access 2019. If you have a different version of Access, your screens might be slightly different).
4. Initially, Access will give a “starting Table”, but it is recommended that you close this table by clicking on the “X” on the tab labeled Table1 or right click and select CLOSE (on older versions of Access) (Figure 4).
Figure 4: Closing a table
At this point jump to the separate PDF for the specific database assignment.
Guide 1 - 5
©2015, 2021 – Congdon School of Supply Chain, Business Analytics and Information Systems, Cameron School of Business and University of North Carolina Wilmington
Guide 1.2. Starting and Saving Access using HORIZON.
If you do not have Access on your machine, then you can find Access in UNCW’s Horizon System. The key is to remember that the file is stored in Horizon and NOT on your personal machine. 5. These instructions will facilitate UNCW students who use Microsoft Access through UNCW Horizon
Cloud Application and need to upload their Access file to the Entropy grading system.
6. These instructions apply to both MAC computers and PCs without a installation of Microsoft Access on your machine. These instructions will work either via HawkWIFI or your personal home Internet
7. Note: if you are using UNCW PCs on Campus (e.g., desktops in the library or labs), you are NOT recommended to follow these instructions. UNCW lab and library computers have Microsoft Access installed and you should follow the instructions in the Introduction 1.1 section.
8. To gain access to the UNCW Horizon Cloud application (which contains Access as one of it
applications), open your browser to: https://horizon.uncw.edu.
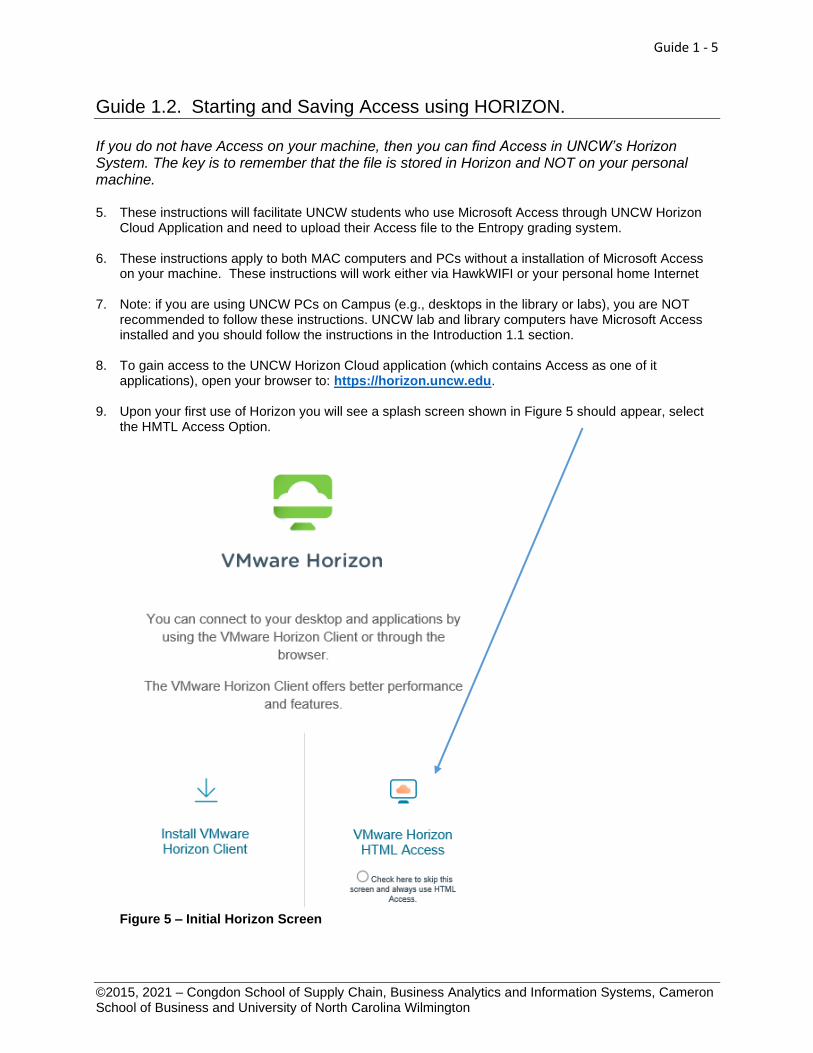
9. Upon your first use of Horizon you will see a splash screen shown in Figure 5 should appear, select the HMTL Access Option.
Figure 5 – Initial Horizon Screen

Guide 1 - 6
©2015, 2021 – Congdon School of Supply Chain, Business Analytics and Information Systems, Cameron School of Business and University of North Carolina Wilmington
10. Enter your UNCW email and password as shown in Figure 6. Be patient the first time you will login, as the system will be building a ‘desktop’ with icons for you to use
Figure 6 – Login Screen
11. Select Access from the initial Icon screen presented, and as shown in Figure 7. Again please be
patient.
Figure 7 – Select the Access application.

Guide 1 - 7
©2015, 2021 – Congdon School of Supply Chain, Business Analytics and Information Systems, Cameron School of Business and University of North Carolina Wilmington
12. Select the Blank (starting Database option) as shown in Figure 8.
Figure 8: Blank (starting Database) Icon in Horizon Note: the naming shown in these examples refer to the file you will build for the Access Tutorial Assignment. Modify the file name based on the descriptions in later tutorials and cases.
13. Your next screen will ask you for the name of the database and its location. Click the file folder to change the location. We recommend you save the file in the Documents folder (or My Documents) and name the database YourLastNameEmpCompensation. Finally hit “Create”.
Figure 9: Select the documents folder and name the database.
14. Note: When you return to Access your previous file will show in the list of recent files (or you can point to the ‘Documents’ folder and find your prior database).

Guide 1 - 8
©2015, 2021 – Congdon School of Supply Chain, Business Analytics and Information Systems, Cameron School of Business and University of North Carolina Wilmington
Figure 10: Starting template for a blank database file in Access
15. Initially, Access will give a “starting Table”, but it is recommended that you close this table by clicking on the “X” on the tab labeled Table1 (Figure 11) or right click and click CLOSE.
Figure 11: Closing a table
At this point jump to the separate PDF for your specific database assignment.

Guide 1 - 9
©2015, 2021 – Congdon School of Supply Chain, Business Analytics and Information Systems, Cameron School of Business and University of North Carolina Wilmington
Guide 1.3 Uploading a file to Entropy that is saved on your machine. 1. Make sure your database is closed. Access should not be open when you upload it to Entropy.
2. Open a web browser.
3. Go to Entropy (https://csbapp.uncw.edu/Entropy/). Enter your Entropy UserID and Password and
select the appropriate class.
4. Click the Upload Assignment option.
Figure 12: Entropy, starting the process to upload an assignment
5. Find the correct assignment you wish to upload. The name may vary based on your instructor.
6. Click Upload Now beside the appropriate assignment.
Figure 12: Entropy, upload an assignment
7. Entropy will respond with a listing of all files uploaded and their date/time. If you upload a file for the same assignment more than once, you will see both uploads listed but only the most recent upload will be kept and graded.
Figure 13: Summary of files uploaded
NOTES: You should check your file size: If it is small (under 500KB or zero), there’s a good chance that you either left the database open when you attempted to upload it or you uploaded a shortcut link to your database.. Make sure that you have closed the file and then attempt your upload again.
8. Be sure to save a copy of your database onto a permanent storage device. You will need this
database for multiple assignments, so please save it so you can retrieve it later! The recommended storage area is your OneDrive storage area via your Email account.
Guide 1 - 10
©2015, 2021 – Congdon School of Supply Chain, Business Analytics and Information Systems, Cameron School of Business and University of North Carolina Wilmington
Guide 1.4 Uploading your file to Entropy from Horizon
1. Make sure your database is closed. Access should not be open when you upload it to Entropy.
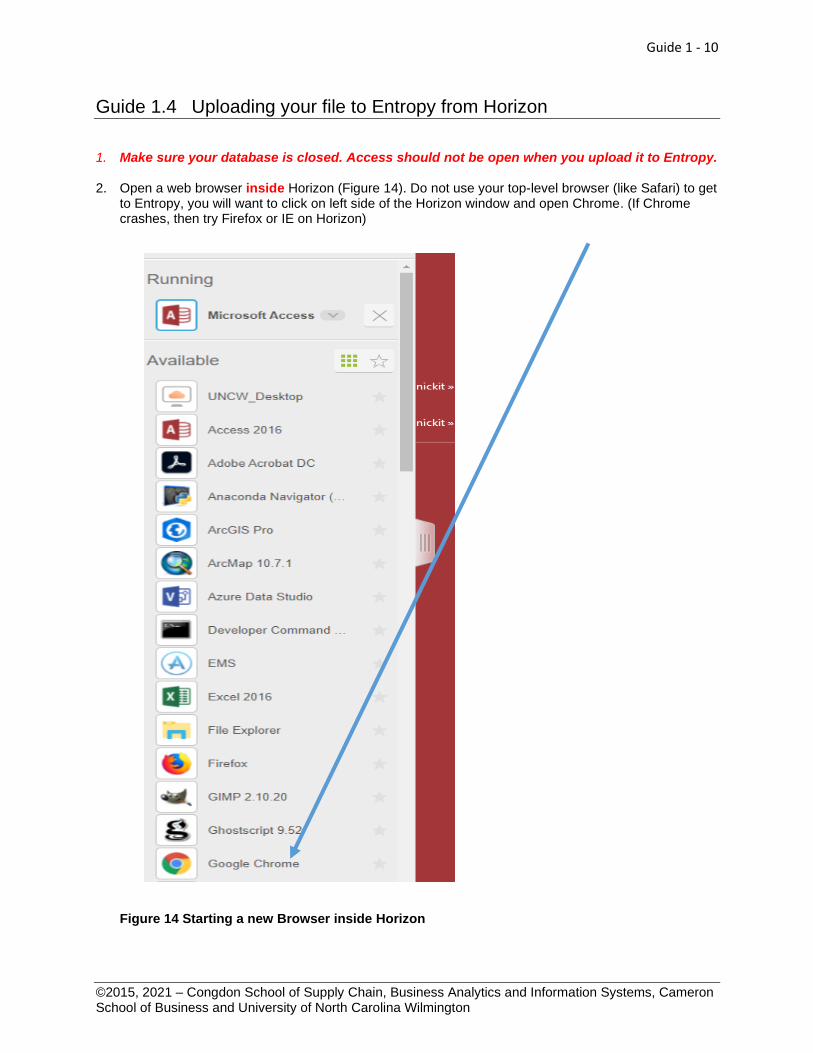
2. Open a web browser inside Horizon (Figure 14). Do not use your top-level browser (like Safari) to get
to Entropy, you will want to click on left side of the Horizon window and open Chrome. (If Chrome crashes, then try Firefox or IE on Horizon)
Figure 14 Starting a new Browser inside Horizon

Guide 1 - 11
©2015, 2021 – Congdon School of Supply Chain, Business Analytics and Information Systems, Cameron School of Business and University of North Carolina Wilmington
Figure 15: Notice you have a new browser inside HORIZON.
3. In this new browser go to Entropy (https://csbapp.uncw.edu/Entropy/). Enter your Entropy UserID and Password and select the appropriate class.
4. Click the Upload Assignment option.
Figure 16: Entropy, starting the process to upload an assignment
5. Click Upload Now beside the appropriate assignment.
Figure 17: Entropy, upload an assignment
6. Once you click upload, Entropy will ask you for the location/filename for the upload. Select Choose
File.
Figure 18 – Entropy beginning upload process

Guide 1 - 12
©2015, 2021 – Congdon School of Supply Chain, Business Analytics and Information Systems, Cameron School of Business and University of North Carolina Wilmington
7. Find the correct assignment you wish to upload. From the left menu in Horizon click on File Explorer Icon (you can access the left menu by sliding it out from the left margin).
Figure 19: Opening the File Explorer folder to find your Access/Excel Assignment 8. Be patient the first time and click on the Documents folder to find your specific Access or Excel file to
be uploaded.
Figure 20: Selecting the Documents folder and then your specific file for upload

Guide 1 - 13
©2015, 2021 – Congdon School of Supply Chain, Business Analytics and Information Systems, Cameron School of Business and University of North Carolina Wilmington
9. Once you have selected the file, click UPLOAD Assignment in the Entropy upload screen.
10. Once uploaded Entropy will respond with a listing of all files uploaded and their date/time. If you upload a file to the same assignment more than once, you will see both uploads listed but only the most recent upload will be kept and graded.
Figure Introduction 21: Summary of files uploaded
NOTE: You should check your file size: If it is small (under 500KB or zero), there’s a good chance that you either left the database open when you attempted to upload it or you uploaded a shortcut link to your database.. Make sure you have closed the file and then attempt your upload again.
As you are working on Horizon, be sure to save a copy of your database onto a permanent storage device. You may need this database for multiple assignments.
11. To save to your OneDrive Area, we will use the same Chrome browser you used to get to Entropy on
Horizon. Replace the Entropy URL in the browser INSIDE horizon with https://mail.uncw.edu
12. Sign into your email account and click the top left 9 squares to access the Microsoft Applications, and
then click on OneDrive
Figure 22: Selecting your OneDrive Cloud storage
13. As shown in Figures 19 and 20, locate your Access (or Excel) file, and then click COPY and then
PASTE into your OneDrive area.
14. Should you need to retrieve the file later, repeat the steps to get to your OneDrive Cloud Storage and them copy and paste into your ‘Documents’ folder in Horizon.