mobile phone tm320 izy - befuzze.com
TRANSCRIPT
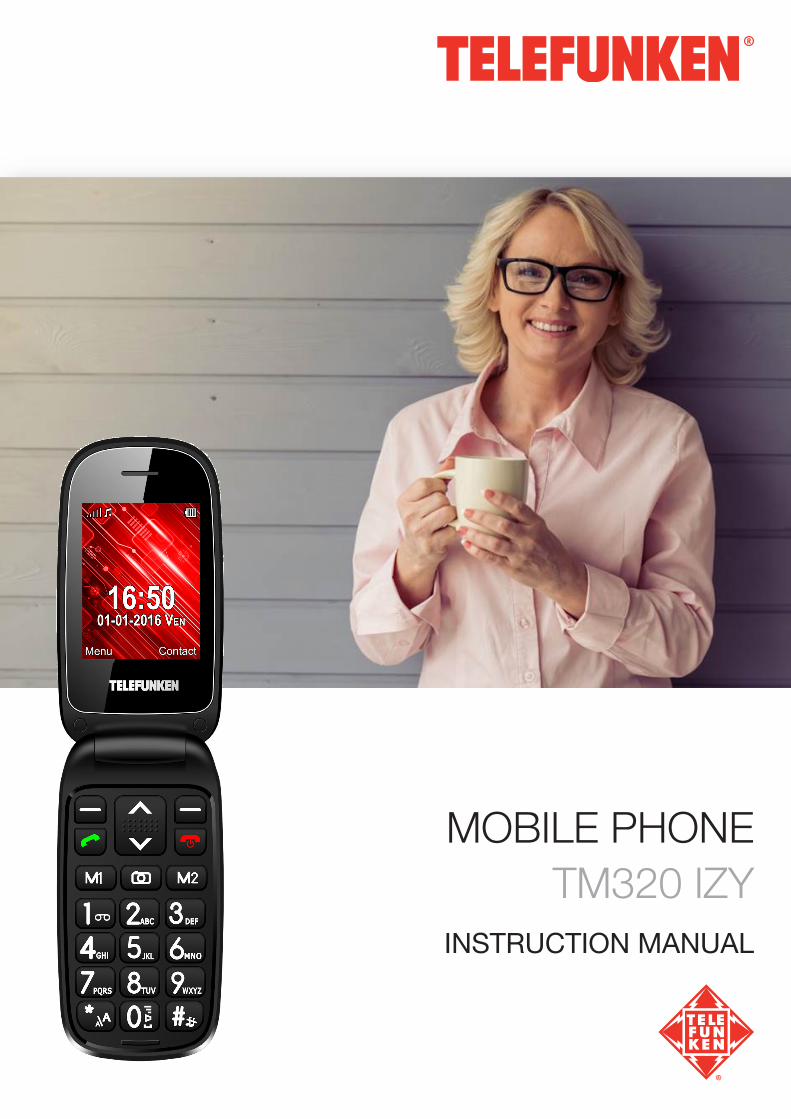
MOBILE PHONETM320 IZY
INSTRUCTION MANUAL
2
ENGLIS
H
DEAR CUSTOMER,Thank you for choosing our mobile phone. By reading this instruction manual before using this product you will have an overall knowledge of its simple but outstanding functions.
This product is designed for GSM/GPRS networks. On top of basic functions, it enables you to use phone book, ringtones, clock/alarm, calendar, calculator, audio player, camera, sound recorder and other functions. It serves your work and leisure time.
Our phone set meets the GSM/GPRS standard and has the qualification from related organizations worldwide.
We reserve the right to modifying the content of this instruction manual without prior notice.
TABLE OF CONTENTS 1. SAFETY INSTRUCTIONS ...................................................................................................3
2. SCOPE OF DELIVERY .......................................................................................................6
3. CONTROL ELEMENTS ......................................................................................................7
4. GETTING STARTED ...........................................................................................................9
5. NAVIGATING MAIN MENU ..............................................................................................12
6. SOS MODE FUNCTION ..................................................................................................14
7. BASIC FUNCTIONS .........................................................................................................15
8. USING ADDITIONAL TOOLS ...........................................................................................32
9. USING THE TORCH .........................................................................................................36
10. SETTINGS GUIDE ............................................................................................................36
11. CLEANING INSTRUCTIONS ............................................................................................39
12. TECHNICAL DATA ...........................................................................................................39
13. DISPOSAL INSTRUCTIONS ............................................................................................40
14. WARRANTY AND AFTER-SALES SERVICE ....................................................................40

3
ENGLISH
1. SAFETY INSTRUCTIONSRead this instruction manual carefully before use. It contains important information for your safety as well as operating and maintenance advices.
Observe all safety instructions to avoid damage through improper use!
Keep this instruction manual for future use. If this phone should be passed on to a third party, then this instruction manual must be included.
1.1 Mobile phone � Please use only original accessories or accessories approved by the phone manufacturer. Using any unauthorised accessories can affect the performance of your mobile phone, cause damage or bodily harm and violate local regulations related to telecom terminals.
� Turn off your phone before cleaning it. Use a damp or anti-static cloth to clean the phone. Do not use dry cloth or conductive fabric. Do not use chemical or abrasive cleaners, which might damage the mobile phone.
� Your mobile phone can produce an electromagnetic field; so do not place it near magnetic items such as computer disks.
� Using the phone near electrical appliances such as a TV, telephone, radio or computer can cause interferences.
� Do not expose your mobile phone to direct sunlight or leave it in hot areas. High temperatures can shorten the life span of electronic devices.
� Keep your phone dry; any liquid could damage your phone. � Do not bang or drop your phone. Rough handling could break internal circuit boards. � Do not connect the phone with any incompatible equipment. � Do not attempt to disassemble the mobile phone or battery. � Do not store the phone with flammable or explosive products. � Do not charge the mobile phone without the battery.
1.2 Network services and costs � This mobile phone is approved for use on the GSM 850/900/1800/1900 MHz and W900/W2100 networks. To use the device, you should subscribe to the services of a mobile service provider. The use of such services can generate data transfer costs. Several device features may require network support, so a subscription is necessary.
1.3 Radio wave exposure � You mobile device is a radio receiver and transmitter. Please refer to the Specific Absorption Rate (SAR) section for more information about the exposure level for this device.
� During use, the actual SAR values for this device are usually below the indicated values. The better your network reception, the lower the wave emission of your phone (therefore, the operating power of your phone is automatically decreased). Try to make phone calls when your network coverage is 3 or 4 bars (indicated at top left).
� The hands-free kit provided with the device can also help to reduce your radio wave exposure. Privilege the use of your hands-free kit when making phone calls.
� With a headset, pregnant women are advised to keep the phone away from the belly and teenagers away from the lower abdomen.
4
ENGLIS
H
1.4 Precautions for use while driving � Road safety is your priority. Check the laws and regulations concerning the use of mobile phones at the wheel in the areas where you drive. Always obey them.
� Use the hands-free function of the phone, if available. Pull off the road and park before making or answering calls if conditions so require.
1.5 Medical devices/pacemakers � When using your phone near pacemakers, please stay a minimum distance of more than 6 inches away from the pacemaker when the phone is switched on.
� Do not carry your phone in your breast pocket. Use the ear opposite the pacemaker to minimise the potential for interference and remember to switch off the mobile phone if necessary.
� If you use any other personal medical device, please consult the manufacturer of your device to find out whether it is adequately shielded from radio frequency energy.
� In facilities with special rules, such as hospitals or health care facilities, please comply with the restrictions on the use of mobile phones. Switch off your phone if required.
1.6 Hearing protection � This device has been successfully tested to comply with the Sound Pressure Level requirement according to the applicable standard EN 50332-1:2013.
WARNING: Excessive exposure to loud sounds can cause hearing damage. Exposure to loud sounds while driving may distract your attention and cause an accident. Set your headset at a moderate level and do not hold your device near your ear when the loudspeaker is turned on.
1.7 Precautions for use in potentially explosive atmospheres � Switch off your phone prior to entering any area with potentially explosive atmospheres, such as fuelling areas, or fuel or chemical storage or transfer facilities. Do not remove, install, or charge batteries in such areas.
� Sparks in a potentially explosive atmosphere can cause an explosion or fire resulting in bodily harm or death. To avoid possible interference with detonators, switch off your phone when you are near electric blasting caps, a blasting area, or in areas where “Turn off electronic devices” is posted. Always obey signs and instructions.
1.8 Precautions for electronic devices � Some electronic devices are susceptible to electromagnetic interferences from mobile phones if inadequately shielded, such as the electronic system of vehicles; please consult the manufacturers of devices before using the phone, if necessary.
1.9 Safety and general use in vehicles � The safety airbag, brakes, speed control system and injection system shouldn’t be affected by wireless transmission. If you encounter problems with the elements above, please contact your car dealer.
� Do not place your phone in the area over an airbag or in the airbag deployment area. Airbags inflate with a force that is proportional to the intensity of the collision. If a phone is placed in the airbag deployment area and the airbag inflates, the phone can be forcefully propelled and cause serious injury to occupants of the vehicle.
� Please turn off your mobile phone in service stations.
5
ENGLISH
1.10 Aircraft safety � Please turn off your mobile phone before the airplane takes off. In order to protect the airplane communication system from interference, it is forbidden to use mobile phones during flight.
� Safety regulations require permission from a crewmember for the use of phones while the plane is on the ground. If your mobile phone has the automatic power-on function, please ensure that it is turned off before the flight.
1.11 Battery use � Do not short-circuit the battery as this can cause the unit to overheat or ignite. � Do not store battery in hot areas or throw it into fire. Otherwise, it may cause an explosion.
� Do not try to disassemble or reassemble the battery as this might cause fluid leakage, overheating, explosion or igniting of the battery.
� Please store the battery in a cool, dry place if you do not use it for long periods. The battery can be recharged hundreds of times, but it is subject to normal wearing. When the operating time (talking time and standby time) is noticeably shorter than normal, it is time to replace it.
� Please stop using the charger and battery if they are damaged or show obvious signs of ageing. Please use the original battery or a battery approved by the phone manufacturer. Using any unauthorised battery can affect the performance of your device or cause a risk of explosion, etc.
� WARNING: if the battery is damaged, do not discard it. In case of a leak and the battery fluid comes in contact with the eyes or skin, wash thoroughly with clear water and consult a doctor.
WARNING: If the battery is damaged, do not discard it. In case of a leak and the battery fluid comes in contact with the eyes or skin, wash thoroughly with clear water and consult a doctor.
1.12 Power adaptor � When charging this phone with power adaptor only use provided power adaptor or power adaptor with identical specifications.
� Danger of electric shock! Do not attempt to repair this power adaptor yourself. In case of malfunction, repairs are to be conducted by qualified personnel only.
� This power adaptor can only be used in dry indoor locations. � This power adaptor is not waterproof. Do not handle it with wet hands or in humid locations.
� Disconnect power adaptor from electrical outlet when not in use and before cleaning. � Provided power adaptor is classified as protection class II and must not be connected to a protective ground.

6
ENGLIS
H
2. SCOPE OF DELIVERYRemove all packaging and dispose of accordingly. Carefully check below listed package content. If anything is missing, contact immediately your retailer.
1. TM320 Mobile Phone
2. Hands-free Kit
3. Rechargeable Li-ion Battery
4. Charger
5. USB charging cable
6. Cradle
7. User manual
8. EU Declaration of Conformity

7
ENGLISH
3. CONTROL ELEMENTS
*/Symbol keyIn text editing mode:f Press to access list of special
symbols
Voicemail Keyf Press and hold to
access voicemail
Earpiece
Display screen
Contacts/Back key:fBack keyfPhonebook accessfMute a call
Up and Down Direction Keysf Navigate menu.f Press to access
shortcut featuref Press to access
shortcut feature
Call End/Power on/off keyf Hold down to power on
or offfPress to end a call
Direct memory/Right keyf Press to dial assigned
numberf In menu, used as right
direction key
#/Input method keyOn a main screen:f Press and hold to switch between
currently set, Vibration and Silent sound profile
In text editing mode:f Press to change text input
method (Abc, abc, ABC, 123) and select writing language
Menu/OK Key:fOK keyfMain menu keyfAnswer a call
Call Key:fDial a numberfAnswer a callfShow call history
Photo capture/OK keyf Access camera modef In camera mode, press
to take a photo
Direct memory/Left keyf Press to dial assigned
numberf In menu, used as left
direction key
0/Space/Flash light keyIn text editing mode:f Press to add space between wordsf From main screen, press and hold
to open or close the flash.

8
ENGLIS
H
3. CONTROL ELEMENTS
Cradle charging connector
Speaker Emergency SOS button
Charging cradle
Battery compartment cover
Torch switch key
Torch
Volume keys (up/down)
Charging indicatorUnread message
indicator
Camera lens
Camera flash
Wrist Strap Eyelet
Earphone jack

9
ENGLISH4. GETTING STARTED
Prepare your phone, battery, SIM card, memory card (this is a must for camera and multimedia functions) and the charger.
WARNING: � The device and accessories contain small parts. Keep all the equipment out of the reach of children.
� The mains adaptor is the cutoff system for electrical supply to the device. The wall socket must be close to the device and easily accessible.
4.1 Installing the SIM card (not supplied)To use all your mobile phone services, you must subscribe to a mobile network system that will provide you with a SIM card assigned with a unique mobile number.
WARNING: Do not bend or scratch the SIM card or let it gather dust, and avoid exposure to humidity and static electricity. If you lose the card, contact your network operator immediately.
1. Turn off the phone. 2. Remove the back cover. 3. Install a SIM card inside the SIM card slot.
Make sure that the SIM card contacts are facing downwards and the bevelled edge is facing upwards.
10
ENGLIS
H
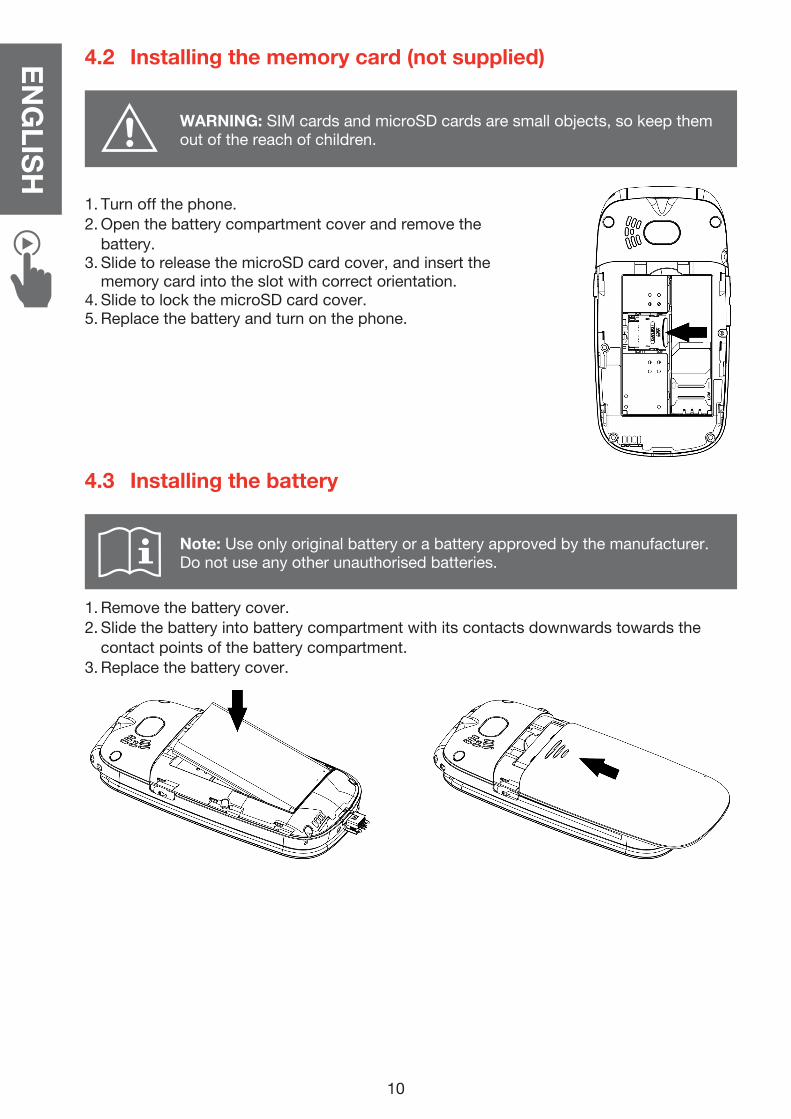
4.2 Installing the memory card (not supplied)
WARNING: SIM cards and microSD cards are small objects, so keep them out of the reach of children.
1. Turn off the phone. 2. Open the battery compartment cover and remove the
battery.3. Slide to release the microSD card cover, and insert the
memory card into the slot with correct orientation. 4. Slide to lock the microSD card cover. 5. Replace the battery and turn on the phone.
4.3 Installing the battery
Note: Use only original battery or a battery approved by the manufacturer. Do not use any other unauthorised batteries.
1. Remove the battery cover. 2. Slide the battery into battery compartment with its contacts downwards towards the
contact points of the battery compartment. 3. Replace the battery cover.
11
ENGLISH
4.4 Charging the battery
WARNING: When a travel charger and its accessories are used to charge the battery, check first whether they have been made or approved by the manufacturer. Using other accessories can damage your mobile phone and present a risk.
Note: � The battery comes partially charged. � Charge the battery only indoors and in dry locations. � Insert the Micro-USB plug carefully. It only fits one way. � Normal charge time takes 3-4 hours. � Do not leave the phone charging for more than 12 hours. � To maximise battery life, limit multimedia functions. � Charge the battery between 0°C and 45°C. Charge the battery promptly when flat.
� With poor network conditions (less than 2 bars) battery life is reduced. � When not using the phone for long periods remove the battery.
1. Connect the provided charger to a suitable power outlet.2. Plug the other end with micro-USB plug to phone's charging port. The charging
indicator starts to flash.3. Once the battery is fully charged, the charging indicator stops flashing. 4. Once phone has been fully charged, disconnect the charger from phone's charging port
and from the power outlet.
For charging alternatively use provided charging cradle.
4.5 Turning on the phonePress and hold the red key for three seconds to turn the phone on or off. If no SIM card is inserted or if the SIM card is damaged the screen indicates “Insert SIM”.
4.6 First time setup
1. Turn on the phone.
2. If a SIM card is inserted, the phone will detect the card and request PIN code. To input the PIN code, use the keypad to input numbers, then press the left or key to confirm.
3. To select a language for on-screen display, press the / key to select your language from the language list then press the left or key to confirm.
4. If a SIM card is inserted, time and date will be automatically updated through your mobile network. Otherwise, you are prompted to set date and time manually. To manually set date and time, go to MENU > Settings > Phone settings > Time & date. Then use the / key to select the time or date field, and use the numeric keys to input values. To select a digit position, press the / key.
Your phone is now ready to be used.
12
ENGLIS
H
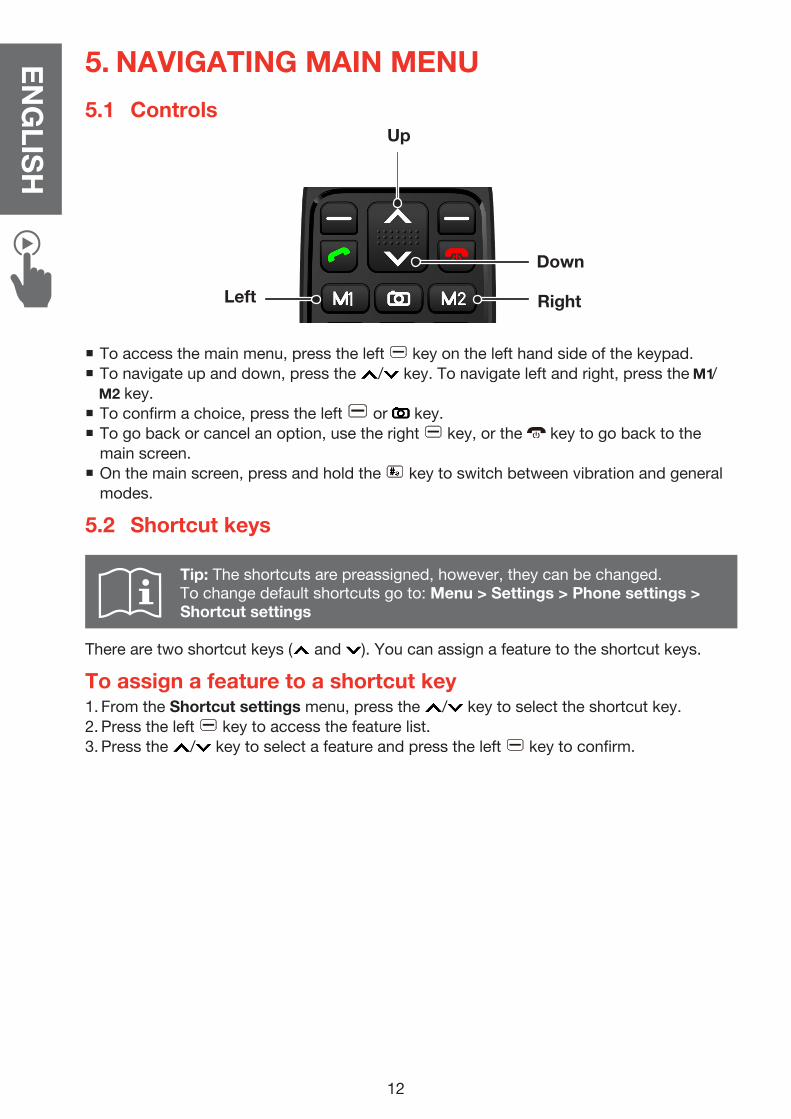
5. NAVIGATING MAIN MENU
5.1 Controls
Left Right
Up
Down
� To access the main menu, press the left key on the left hand side of the keypad. � To navigate up and down, press the / key. To navigate left and right, press the /
key. � To confirm a choice, press the left or key. � To go back or cancel an option, use the right key, or the key to go back to the main screen.
� On the main screen, press and hold the key to switch between vibration and general modes.
5.2 Shortcut keys
Tip: The shortcuts are preassigned, however, they can be changed.To change default shortcuts go to: Menu > Settings > Phone settings > Shortcut settings
There are two shortcut keys ( and ). You can assign a feature to the shortcut keys.
To assign a feature to a shortcut key1. From the Shortcut settings menu, press the / key to select the shortcut key. 2. Press the left key to access the feature list. 3. Press the / key to select a feature and press the left key to confirm.

13
ENGLISH
5.3 Understanding icons
Icon Description
Signal Strength for SIM
Missed Call
Roaming. Different rates apply, check with your
service provider
New SMS Message
New MMS Message
Message Inbox is Full
Silent Mode/Meeting Mode
Vibration Mode
New Voicemail
Icon Description
Bluetooth® Enabled
Alarm is set
Low battery
Earphones connected (headset mode)
SOS activated
Clock
No SIM card
Fly mode activated

14
ENGLIS
H
6. SOS MODE FUNCTION The SOS function is designed to contact your relatives or other persons in case of an emergency. The SOS and SMS functions are deactivated by default. When these functions are activated, you can make an emergency call and send a customized SOS message.
6.1 Activating the SOS function1. Go to Menu > SOS > Status. 2. Press the left key. 3. Press the / key to select On and press the left key to confirm.
6.2 Adding emergency contacts You can add up to five emergency contacts (your relatives, friends, special services, etc.). The phone number list from 1 to 5 indicates the calling priority. Remember to inform these contacts that they are on your emergency list. 1. Go to Menu > SOS > Telephone number. 2. Press the left key. 3. Select 1 as top calling priority and press the left key, then select Edit by pressing the
left key4. You can use the left key “Contacts” to add a contact from the phonebook, or you
can enter directly the phone number by using the keypad. Then press the left key to confirm.
� Remove an entry using the right key. � Exit the entry using the key.
5. Repeat the procedure above to set more emergency numbers.
6.3 Making an SOS callPress and hold the SOS button on the back of your phone for 3-5 seconds. � The phone will emit an audible alarm (if activated), and send a customized SOS message (if activated).
� Then the phone will call the numbers on the list one after the other, five times. If the call is not answered within 20 seconds, the phone will call the next number.
6.4 Activating the SMS function1. Go to Menu > SOS > SMS Setting. 2. Press the left key. 3. Press the / key to select On and press the left key to confirm.
6.5 Editing the SMS messageThe SOS message is sent to emergency contacts, when you launch the SOS call. By default, the SOS message is "I need your help!". 1. Go to Menu > SOS > Edit SMS. 2. Press the left key. 3. Enter the message using the keypad. 4. Press the left key to confirm.
6.6 Setting the SOS alarm sound 1. Go to Menu > SOS > SOS Alarm Sound. 2. Press the left key. 3. Press the / key to select On and press the left key to confirm.

15
ENGLISH
7. BASIC FUNCTIONS
7.1 Making a callThere are five ways to make a call. Choose one way as shown below, then press the key to launch the call. � From the main screen, enter the number directly using the keypad. � Press the key to access call logs and select the number to call. � Go to Menu -> Contacts. Select a contact. � From the main screen, press the right key to access quick dial contacts. For more information, see "To make a quick call" on page 17.
� From the main screen, press the or key or hold down a numeric key (2 to 9) to make a direct call. For more information, see "To make a direct call" on page 18.
To end a call, press the key or close the flip cover.
Tip: To adjust the volume during call, press the "+" or "-" key on the left side of the phone.
7.2 Answering an incoming call There are three key ways to answer a call: � Open the flip cover. � Press the key to answer a call. � Press the left key.
To end a call, press the key or close the flip cover.
Tip: To mute incoming call without rejecting it, press the right key.
From the calling interface, you can access to these options. Press the , , and direction keys to select an option and press the key to confirm. � Contacts Access the phonebook. � Dialpad Access the keypad to enter a phone number. � Hold Put the current call on hold. Use the navigation keys ( / /
/M2) to select Hold, then press the key to confirm. To re-connect the call which is put on hold, select Unhold then press the key.
� Record Record current call. During the call, press the direction keys to select Record and press the key to start recording. To stop the recording, select Record and press the key. The recorded file will be stored in memory card or the phone. To play back the recorded file, go to Multimedia > Audio player > Options > Music list.
� Mute Turn on or off the microphone. � Speaker Enter into or cancel speaker mode.
16
ENGLIS
H
During a call, press the left key to see available options. Press the / key to select an option and press the key to access the selected option: � Connect to BT Connect to a Bluetooth® device. � Adjust volume Press the button to increase the volume.
Press the button to decrease the volume. � Contacts Access the phonebook. � Call logs Access call history. � Messaging Access the Messaging menu. Edit and send a message.
7.3 Using voicemail1. To add voicemail contact number, go to Menu > Messaging > Voice mail server. 2. Press the left key to edit voicemail name and number. Press the left key to
confirm. 3. To use a voicemail service, from the main screen press and hold the "1" numeric key.
7.4 Using call logs
In this menu you can browse all the calls: Missed calls, Dialled calls, Received calls and Rejected calls. You can also delete all call logs and check the Call timers.
h When in Missed calls, Dialled calls, Received calls and Rejected calls menu, press the left key to see the call list and press the key again to see available options:
� Details View name, number, time and type (voice call) of a call. � Call Call the selected number. � Write message Send SMS/MMS message to the selected number. � Add to contacts Save the number to a new or existing contact. For more
information, see "To add a call log to a new or existing contact" on page 17.
� Add to blacklist Add the number to the blacklist. When this number calls, it will be rejected automatically. For more information, see "To add a call log to the blacklist" on page 17. To remove the number from the black list, see "10. SETTINGS GUIDE" on page 36.
� Delete Delete the selected number from call logs. � Delete all Delete all call logs.
Tip: Call logs can be also directly accessed by pressing the key. In this case missed, dialled, received and rejected calls will be all mixed up.
17
ENGLISH
To view call logs1. From the main screen, press the left key. 2. Press the / key to select Call logs, then press the left key. 3. Press the / key to select Missed calls, Dialed calls, Received calls, or Rejected
calls. 4. Press the left key to view the list of missed calls, dialed calls, received calls, or
rejected calls respectively.
To add a call log to a new or existing contact1. From the Missed calls, Dialled calls, Received calls and Rejected calls list, select the
number that you want to save. 2. Select Options > Add to contacts, and press the left key. 3. Select Add to new contact or Add to existing contacts, then press the left key. � Add to new contact Press the / key to select the storage: Phone or SIM.
Edit contact information and save it. � Add to existing contact Select a contact and press the left key. Select Mobile
or Home number (available only for phone memory) to save as a mobile number or a home number. Save the change.
To add a call log to the blacklist1. From the Missed calls, Dialled calls, Received calls and Rejected calls list, select the
number that you want to save to the blacklist. 2. Select Options > Add to blacklist. 3. Press the left key to confirm.
7.5 Making a quick callAccess the quick dial contacts, then press only a numeric key (1-8) to call directly. Up to eight phone numbers can be set as quick dial.
To set quick dial contacts1. On the main screen, press the right key to enter quick dial contacts.
Eight head pictures numbered 1 to 8 respectively are displayed.2. Press the left key to access the contact thumbnail. 3. Press the / key to select a head picture. 4. Select Options > Manually or Choose from Phonebook. � Manually The contact editing interface is displayed. Enter
name, phone number and other information, and select Options -> Save to save the contact.
� Choose from Phonebook Simply select an existing contact and select OK to confirm.
5. Repeat the steps above to set more quick dial contacts.
To make a quick call1. On the main screen, press the right key to enter quick dial contacts. 2. Press a numeric key (1-8) which has been set with a desired phone number.3. Press the key to make a call.

18
ENGLIS
H
To delete a quick dial contact1. Enter quick dial contacts to access a numbered thumbnail. 2. Select Edit and press the / key to select a contact. 3. Select Options -> Delete.
7.6 Making a direct callYou can assign a favourite phone number to the following keys respectively: , and numeric keys 2 to 9.
To set direct call contacts1. Go to Menu > Contacts.2. Select Options > Others > Speed dial and press the left key.3. Press the / key to select a key ( , , 2-9 keys). 4. Select Options > Edit. 5. Enter the phone number or press the left key to select a phone number from the
phonebook.
To make a direct call � From the main screen, press briefly the or key to call the assigned phone number. � From the main screen, press and hold one of the numeric keys 2 to 9 to call the assigned phone number.
7.7 Using the phonebook (Contacts menu)
You can store contacts information in the phonebook. Contacts can be saved both on the SIM card and the phone. The phone memory can hold up to 1000 contacts.
To access the phonebook1. Enter the main menu and select Contacts. 2. Press the left key to see available options: � View contact Display name and number of selected contact. � New Add new number to contact list via saved in the phone or SIM
card. � Edit Edit the selected contact. � Write message Send a SMS or MMS message to the selected contact. � Call Call the selected contact. � Delete Delete the selected contact from contact list. � Delete multiple Mark several contacts to delete them at once.

19
ENGLISH
� Import/Export Copy contacts from memory card to the phone. Import and export the marked contacts from and to an SD card or the phone storage.
� Others Access the speed dial number settings and check memory status.
To search a contact1. Go to Menu > Contacts.2. Press any numeric key of 2 - 9, the cursor is highlighted in the search box.3. Use the keypad to input the keywords for searching. The relevant contacts will be listed
on the screen.
To add a new contact1. Go to Menu > Contacts.2. Select Options > New. 3. Press the left key to confirm. 4. Choose where to store your contact (SIM card or phone memory), then press the left
key to confirm. 5. In the New contact interface, modify the contact icon and enter name, phone number
and other information.6. Select Options -> Save by pressing the left key to save the new contact information.
To view contact information1. Go to Menu > Contacts. 2. Press the / key to select a contact. 3. Select Options > View contact. 4. Press the left key to view the contact information.
To edit contact information1. Go to Menu > Contacts.2. Press the / key to select a contact. 3. Select Options > Edit, and press the left key. 4. Edit the contact information. 5. Select Options -> Save by pressing the left key to save the changes.
To send a SMS/MMS message to a contact1. Go to Menu > Contacts.2. Press the / key to select a contact. 3. Select Options > Write message > SMS or MMS. 4. Press the left key to enter the Write message interface. 5. When you complete the message, select Options > Send and press the left key.
For more information about writing SMS and MMS messages, see "To send text messages" on page 22 and "To send multimedia messages" on page 23.
Tip: Through Options, you can also access the following operations: Insert template, Add contact info, Save as draft, and Exit.
20
ENGLIS
H
To call a contact1. Go to Menu > Contacts.2. Press the / key to select a contact. 3. Select Options > Call and press the left key.
To delete a contact1. Go to Menu > Contacts.2. Press the / key to select a contact. 3. Select Options > Delete and press the left key.
A confirmation message appears. 4. Press the left key to confirm.
To delete multiple contacts1. Go to Menu > Contacts.2. Press the / key to select a contact. 3. Select Options > Delete multiple and press the left key.
The contact list appears. 4. Mark a contact or all contacts by these ways: � Search or select a contact and press the key to mark the contact. � Press the left key, then press the / key to select Mark all, and press the left key to confirm.
5. When you complete marking the contacts, press the left key. A confirmation message appears.
6. Press the left key to confirm the deletion.
To copy contacts from SIM card to the phone and vice versa1. Go to Menu > Contacts.2. Press the / key to select a contact.3. Select Options > Import/Export > Copy and press the left key.4. Specify the copy source.
Press the / key to select Copy from, then press the key to enter the Copy from setting. Press the / key to select Phone or SIM, then press left key to confirm.
5. Repeat the similar operations in Step 3 to specify the copy destination. 6. Select the contacts to copy.
In the Copy contact setting, press the left key to enter the contact list. Mark the contact or mark all contacts by pressing the key.
7. When you complete marking the contacts, press the left key twice to complete the copy.
To import phone contacts1. Go to Menu > Contacts.2. Press the / key to select a contact.3. Select Options > Import/Export > Import contact and press the left key.4. Specify the source where you import phone contacts.
Press the / key to select the phone directory. 5. Press the key to access the directory. 6. Press the / key to select the file to import, then press the key to confirm. 7. Press the left key to import the contact file to the phone memory.
21
ENGLISH
To export phone contacts1. Go to Menu > Contacts.2. Press the / key to select a contact.3. Select Options > Import/Export > Export contact and press the left key.4. Select the contacts to export. � Search for a contact. � Press the / key to select a contact and press the key to confirm. � Select Options > Mark all to select all contacts.
5. Press the left key twice to complete the export operation.
To set speed dial number1. Go to Menu > Contacts.2. Select Options > Others > Speed dial and press the left key.3. Press the / key to select a key ( , , 2-9 keys). 4. Select Options > Edit. 5. Enter the phone number or press the left key to select a contact. 6. Press the left key to confirm.
To check memory status1. Go to Menu > Contacts.2. Select Options > Others > Memory status and press the left key.3. Check the memory status of the SIM card and the phone.
7.8 Sending messages
You can send text messages (SMS) and multimedia messages (MMS) to a contact. You can view received, sent, draft messages. The phone provides text templates and you can edit your own text templates. You can insert text template into a message. The phone also provide settings, including message validity period, preferred storage, etc.In the Messaging menu, you can see the following options: � Write message Write SMS and MMS messages. � Inbox View received messages. � Outbox View the messages that the phone is sending out. � Drafts View the drafted messages. � Sentbox View the sent messages.
22
ENGLIS
H
� Templates View and edit text templates. � Voice mail server View and edit voicemail contact number. � Settings Manage SMS and MMS messages. � Memory status View memory status.
To send text messages1. Go to Menu > Messaging > Write message > New SMS.2. In the text writing interface, complete the followings. � On the first line, input the phone numbers. � On the first line, you can also insert existing contacts. Press the key to access the contacts list, and select a contact using the / key. Press the key, then select Options -> OK.
� After the phone number input, press the key to move the cursor down to the text input field. Enter your text using the keypad.
3. After the text input, select Options -> Send, or directly press the key. There are other options:
� Insert template Insert a predefined message. You can add or edit templates at: Menu > Messaging > Templates.
� Add contact info Access the phonebook to select and insert a contact number into the content of the message.
� Save as draft Save message in the Drafts folder and send it later. � Exit Exit the Write message screen. The system prompts to save the
message.
How to type using keypad
� The letters of the alphabet are arranged on numeric keys from 2 to 9. � Whenever you are in text entry mode, to enter a name, send a message or write a schedule, mobile phone will automatically change to letter mode.
� The letters written on numeric keys are entered depending on how many times you press the key. This is called multi-tap mode.
� For example, to write name John, press:> 5 key once for J,> 6 key three times for O,> 4 key twice for H, and> 6 key twice for N
� To insert a space press the 0 key. � If you have made a mistake and want to delete letter(s) press the right key. � Press the 1 key repeatedly for common punctuation marks. � Press the * key to access soft keyboard of special characters, press the / key to select the desired character and press the left key to confirm.
Tip: In multi-tap mode if next letter is on the same key, wait 1 second or press down direction key ( ).
23
ENGLISH
How to select input method (abc, Abc & ABC) � In the text editing interface, press the # key and select 4 available input methods, press the / key to select the input mode and press the left key to confirm. You can also press 1-4 numeric key to switch the input mode.
1. Abc2. abc3. ABC4. 123
h To select text language, press the 5 numeric key or press the key to select Writing language and press the left key to access the language selection screen. Use the /
key to select a language and then press the left key to confirm.
To send multimedia messagesPicture, audio, video and slideshow can be sent as an attachment in a message.
Note: Sending MMS is similar to SMS. The main difference is adding media. Use MMS to send attachments such as pictures or music files.
1. Go to Menu > Messaging > Write message > New MMS, and press the left key to enter the MMS screen. In the MMS screen, you see these input boxes. The Contacts input box is selected by default.
2. Press the / key to select an input box and complete attaching media files. � Contacts Select one or more recipients. Press the key to enter the Recipients
screen. Set the recipient by typing in numbers directly or access the contact list by pressing the key. In the contact list, use the key to select the contacts you need, then select Options -> OK to confirm.
� Theme Type in the subject content. Press the key to edit the subject content. When finished, press the left key.
� Text Type in text content. Press the key to edit the text content. When finished, press the left key.
� Photo Attach a photo file. Press the key to access the photo list. Press the / key to select a photo file and press the left key.
� Music Attach a music file. Press the key to access the audio list. Press the / key to select a music file and press the left key.
� More Attach other media files. Press the key to access the media type list. Press the / key to select a media type and press the left key. Select a media file and press the left key.
3. Select Options -> Send, or directly press the key. There are other options.
� Preview Preview the multimedia message. � Add new recipient Add one or more recipients. � Add Add more multimedia files. � Delete Delete current message page or audio files. � Save as draft Save the message as draft. � Set slide time Set the slide time in the range of 1 second to 60 seconds. � Text layout Set the text layout.
24
ENGLIS
H
To manage messagesWhen you receive a new message, an alert is displayed on the main screen. Go to Menu > Messaging > Inbox to open a message. Press the left key to see available options:
� Delete Delete selected message. � Reply Reply SMS or MMS to the sender. � Forward Forward received message to another person. � Call Give a call to the sender. � Add sender to Save the sender number to new contact or existing contact. � Details Review such information as sender number, date, time and
storage place.
7.9 Using sound profiles
The sound Profiles menu allows to personalize the ring tone, key tone and dial tone. You can also set the ring type, adjust ring volume and turn on & off low battery alert etc.
To set and edit sound profiles, go to Menu > Settings > Profiles and press the left key to access available options: � Ring settings Set ring tone of calls and messages. Select Caller ringtone or
Message ringtone and press the left key. Fixed ringtones is selected, press the left key to select one from the phone ringtone list. To select audio files stored in your SD card as ring tone, in the options scroll down to select More ringtones and press the left key.
� Adjust volume Adjust volume of incoming call ringtone and message ringtone and call speech. Select an option and press the left key. Use the and keys or "+" and "-" keys to adjust the volume.
� Ring type Choose alert type of incoming calls, message, alarm & calendar remind. Select an option and press the left key. Select an alert type and press the left key.
� Other alert rings Set battery low alert, dial tone and flip tone. Select an option and press the left key. Select an alert type and press the left key.
Tip: On the main screen, you can press and hold the key to switch between vibration and general mode.
25
ENGLISH
7.10 Using multimedia
Note: A memory card is required to use the multimedia functions. Up to 32 GB micro SD card is supported.
h Multimedia section acts as an access hub to below phone tools: � Camera See "To use camera" on page 25. � DV (video) See "To assign a feature to a shortcut key" on page 12. � Audio player See "To use audio player" on page 27. � Video player See "To use video player" on page 28. � Recorder See "To use sound recorder" on page 29. � Image See "To use image viewer" on page 30.
To use cameraThis phone is equipped with 0.3 MP built-in camera. It can be accessed from main screen by pressing the key. Once in Camera menu, press again the key to take a picture. You can also go to Menu > Multimedia and select Camera to access the camera.When in Camera mode, press the left key to see available options:
� Images Display and manage all pictures saved on phone and memory card.
� DV mode Access to video recording mode. � Effect Select the colour tones and moods of a picture. � Contrast Adjust the difference between the darkest and brightest area of
an image using the / key. � Brightness Increase or decrease the screen brightness using the / key. � White balance Select the right type of white balance to make the colours
of a subject appear more natural under the type of lighting environment.
� Settings Change various camera settings: Flash (Off/Activate/Auto), Size (480x640/240x320), Quality (Low/Normal/Advanced), Banding (50Hz/60Hz), Shutter sound (Activate/Off), Auto save (Activate/Off), Preferred storage (Phone/SD card) and Cont. shot (Disable/3 shots/6 shots).
26
ENGLIS
H
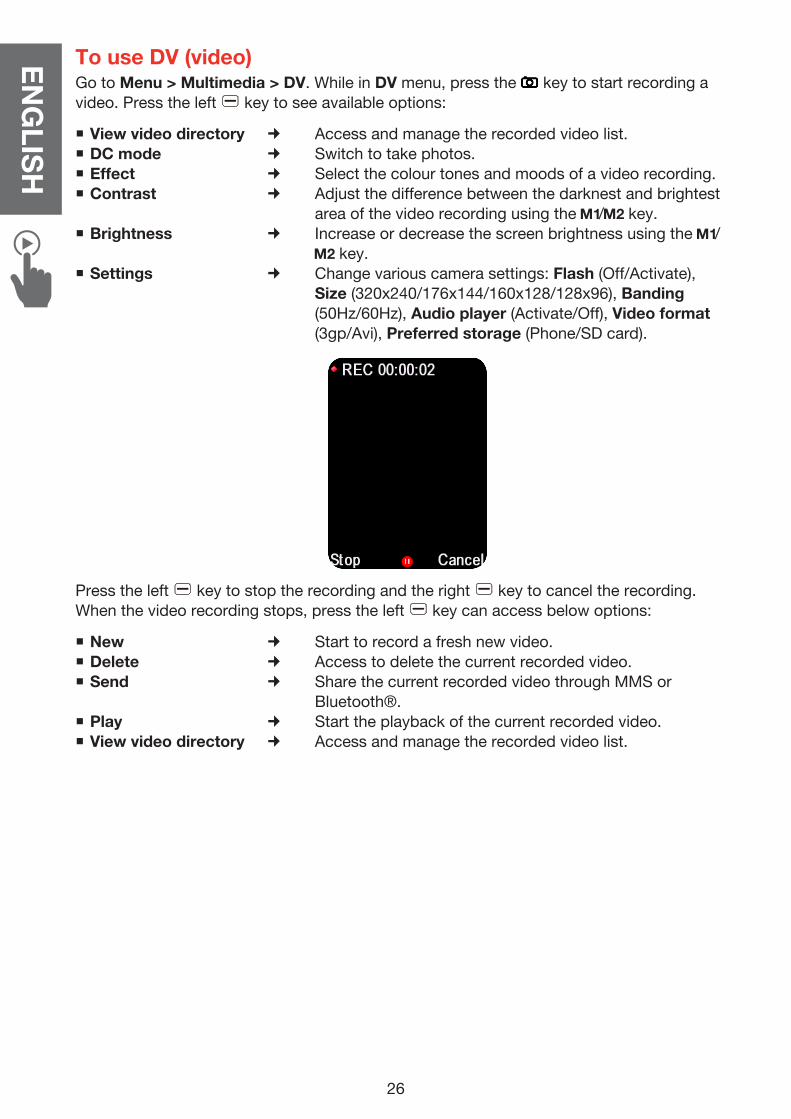
To use DV (video)Go to Menu > Multimedia > DV. While in DV menu, press the key to start recording a video. Press the left key to see available options:
� View video directory Access and manage the recorded video list. � DC mode Switch to take photos. � Effect Select the colour tones and moods of a video recording. � Contrast Adjust the difference between the darknest and brightest
area of the video recording using the / key. � Brightness Increase or decrease the screen brightness using the /
key. � Settings Change various camera settings: Flash (Off/Activate),
Size (320x240/176x144/160x128/128x96), Banding (50Hz/60Hz), Audio player (Activate/Off), Video format (3gp/Avi), Preferred storage (Phone/SD card).
Press the left key to stop the recording and the right key to cancel the recording. When the video recording stops, press the left key can access below options:
� New Start to record a fresh new video. � Delete Access to delete the current recorded video. � Send Share the current recorded video through MMS or
Bluetooth®. � Play Start the playback of the current recorded video. � View video directory Access and manage the recorded video list.
27
ENGLISH
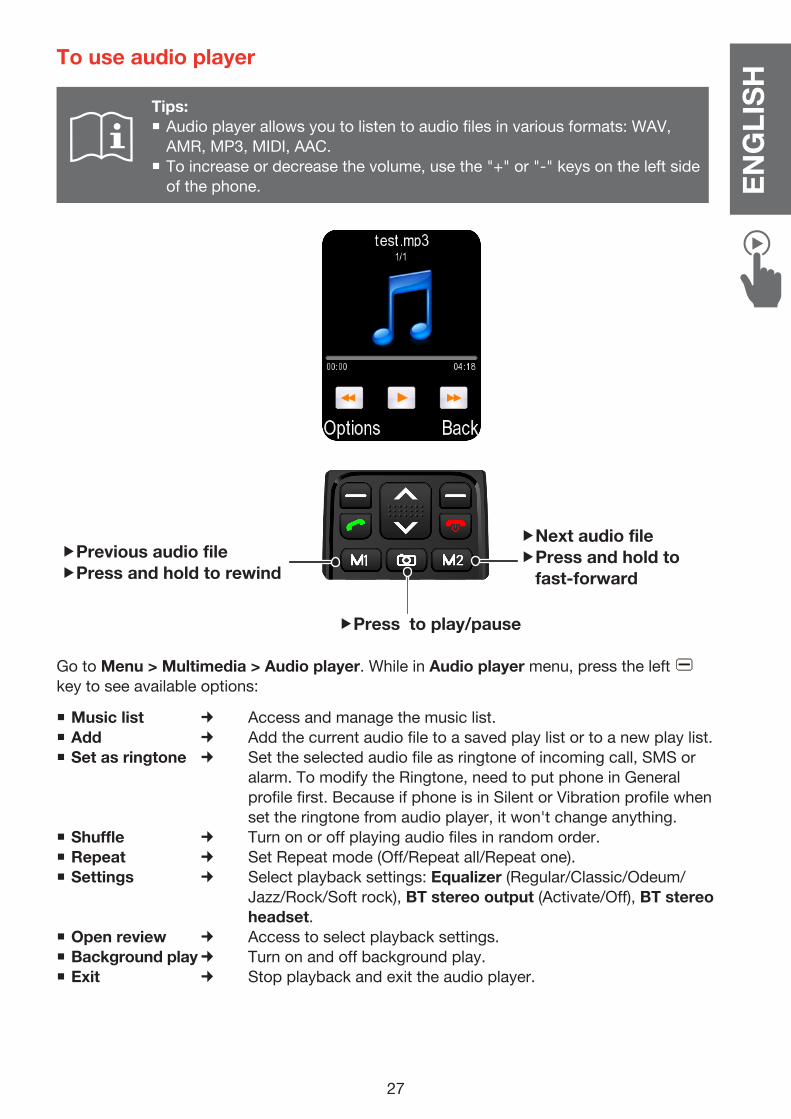
To use audio player
Tips: � Audio player allows you to listen to audio files in various formats: WAV, AMR, MP3, MIDI, AAC.
� To increase or decrease the volume, use the "+" or "-" keys on the left side of the phone.
fNext audio filef Press and hold to
fast-forward
fPress to play/pause
fPrevious audio filefPress and hold to rewind
Go to Menu > Multimedia > Audio player. While in Audio player menu, press the left key to see available options:
� Music list Access and manage the music list. � Add Add the current audio file to a saved play list or to a new play list. � Set as ringtone Set the selected audio file as ringtone of incoming call, SMS or
alarm. To modify the Ringtone, need to put phone in General profile first. Because if phone is in Silent or Vibration profile when set the ringtone from audio player, it won't change anything.
� Shuffle Turn on or off playing audio files in random order. � Repeat Set Repeat mode (Off/Repeat all/Repeat one). � Settings Select playback settings: Equalizer (Regular/Classic/Odeum/
Jazz/Rock/Soft rock), BT stereo output (Activate/Off), BT stereo headset.
� Open review Access to select playback settings. � Background play Turn on and off background play. � Exit Stop playback and exit the audio player.
28
ENGLIS
H
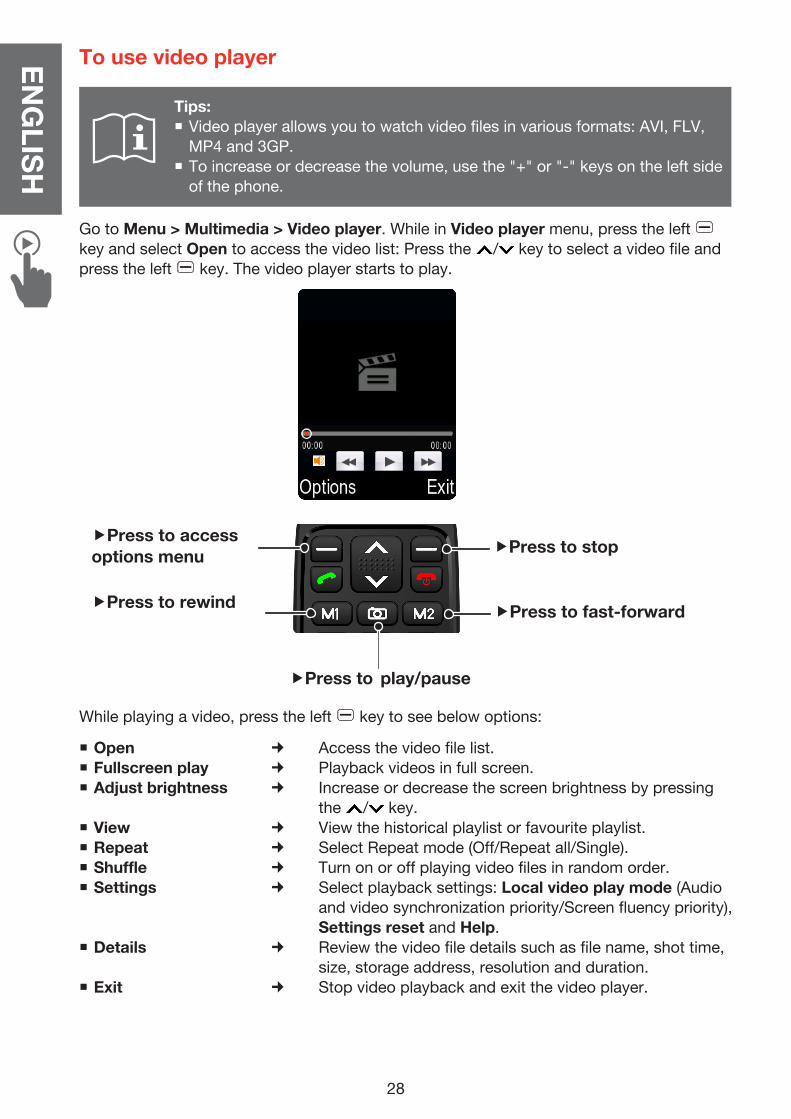
To use video player
Tips: � Video player allows you to watch video files in various formats: AVI, FLV, MP4 and 3GP.
� To increase or decrease the volume, use the "+" or "-" keys on the left side of the phone.
Go to Menu > Multimedia > Video player. While in Video player menu, press the left key and select Open to access the video list: Press the / key to select a video file and press the left key. The video player starts to play.
fPress to rewind
fPress to play/pause
fPress to fast-forward
fPress to stopfPress to access options menu
While playing a video, press the left key to see below options:
� Open Access the video file list. � Fullscreen play Playback videos in full screen. � Adjust brightness Increase or decrease the screen brightness by pressing
the / key. � View View the historical playlist or favourite playlist. � Repeat Select Repeat mode (Off/Repeat all/Single). � Shuffle Turn on or off playing video files in random order. � Settings Select playback settings: Local video play mode (Audio
and video synchronization priority/Screen fluency priority), Settings reset and Help.
� Details Review the video file details such as file name, shot time, size, storage address, resolution and duration.
� Exit Stop video playback and exit the video player.
29
ENGLISH
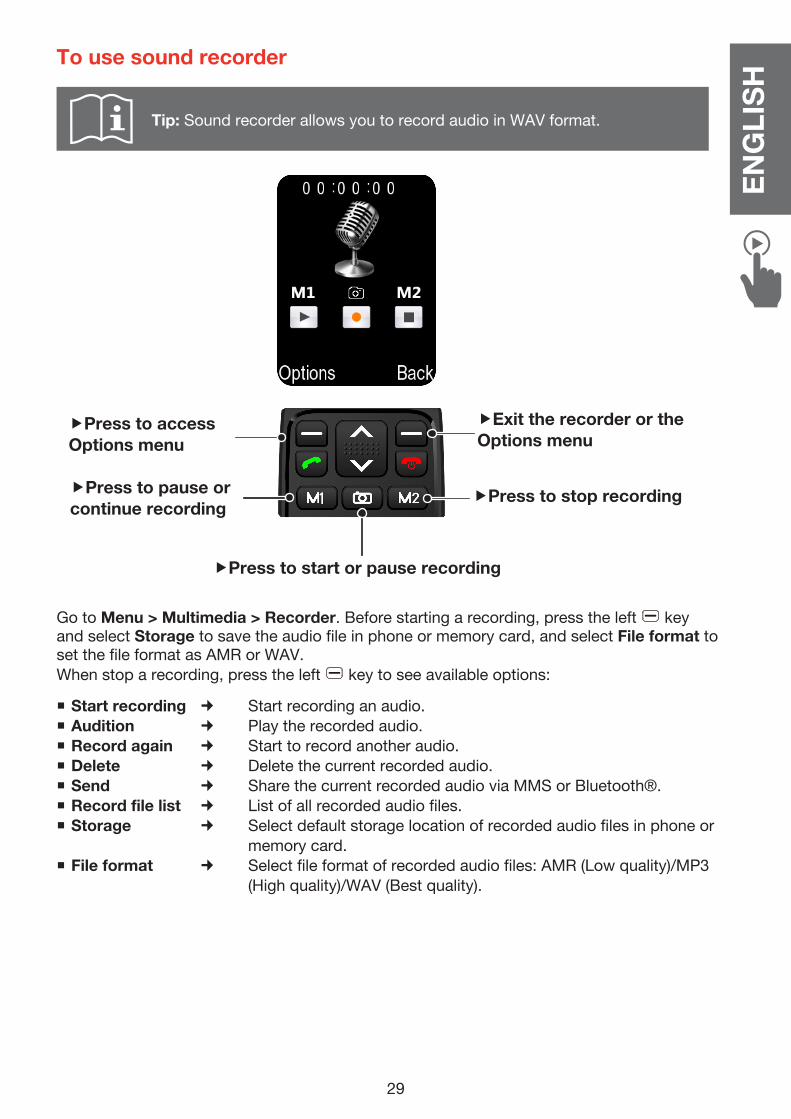
To use sound recorder
Tip: Sound recorder allows you to record audio in WAV format.
fPress to pause or continue recording
fPress to stop recording
fExit the recorder or the Options menu
fPress to access Options menu
fPress to start or pause recording
Go to Menu > Multimedia > Recorder. Before starting a recording, press the left key and select Storage to save the audio file in phone or memory card, and select File format to set the file format as AMR or WAV. When stop a recording, press the left key to see available options:
� Start recording Start recording an audio. � Audition Play the recorded audio. � Record again Start to record another audio. � Delete Delete the current recorded audio. � Send Share the current recorded audio via MMS or Bluetooth®. � Record file list List of all recorded audio files. � Storage Select default storage location of recorded audio files in phone or
memory card. � File format Select file format of recorded audio files: AMR (Low quality)/MP3
(High quality)/WAV (Best quality).

30
ENGLIS
H
To use image viewer
Go to Menu > Multimedia > Image. Image viewer allows you to view photos in JPG format. Photos are displayed in thumbnail. � Press the / / / key to select a photo. � Press the left key to view the photo in full screen. � Press the left key to return to the thumbnail mode.
Press the left key to view the Options menu. Available options vary with the thumbnail and full screen modes. Press the right key to exit the Options menu.
h In thumbnail mode: � View View the selected picture in full screen. � Delete Delete a selected picture. � Mark Access to select multiple or all photos to be deleted
or for slide play. � Rename Change the name of a selected photo. � Slide Play View a slide of all the pictures. � Details View details of selected picture.
h In full screen mode � Set as wallpaper Select a picture to set as wallpaper. � Set as Phone book icon Access to search a contact and change its head
picture with the selected photo. � Delete Delete a selected picture. � Share Send the selected photo to your friends via MMS or
Bluetooth®. � Rename Change the name of a selected photo. � Slide Play View a slide of all the pictures. � Details View details of selected picture.
31
ENGLISH
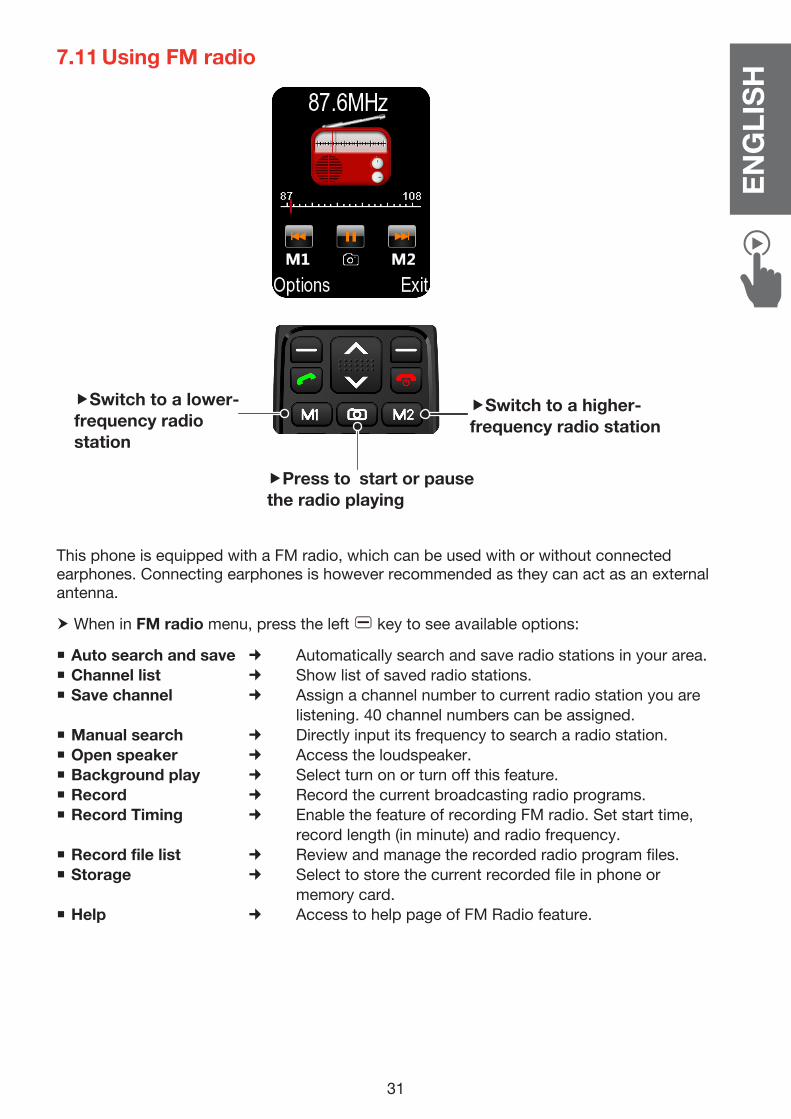
7.11 Using FM radio
fSwitch to a lower- frequency radio station
fPress to start or pause the radio playing
fSwitch to a higher-frequency radio station
This phone is equipped with a FM radio, which can be used with or without connected earphones. Connecting earphones is however recommended as they can act as an external antenna.
h When in FM radio menu, press the left key to see available options:
� Auto search and save Automatically search and save radio stations in your area. � Channel list Show list of saved radio stations. � Save channel Assign a channel number to current radio station you are
listening. 40 channel numbers can be assigned. � Manual search Directly input its frequency to search a radio station. � Open speaker Access the loudspeaker. � Background play Select turn on or turn off this feature. � Record Record the current broadcasting radio programs. � Record Timing Enable the feature of recording FM radio. Set start time,
record length (in minute) and radio frequency. � Record file list Review and manage the recorded radio program files. � Storage Select to store the current recorded file in phone or
memory card. � Help Access to help page of FM Radio feature.

32
ENGLIS
H
7.12 Connecting to PC/MACConnect the USB cable to a computer port first, and then connect the micro USB to the phone charging port. Once connected, a pop-up menu prompts for user to select 2 options:
� "Charging" - use for charging. Access to media is possible only via phone itself. � "U Disk" - use for copying/deleting action from computer. Access to media is possible only via computer.
� "PC connecting" - use for charging purpose and as U disk. Access media via phone and computer.
Note: Phone is also being charged when it is connected to PC/MAC.
8. USING ADDITIONAL TOOLS
Tool Name Description
Calendar
Note: � Day marked by blue square is today's date. � Day(s) marked by orange triangle is a day(s) with existing event.
h To navigate in Calendar, press the / / / key.
h When in the Calendar menu, press the left key to see available options.
� Add new schedule Add a new schedule of a day. � View schedules Check the schedules of the selected day. To
do that, you need to select a day first (the selected day is highlighted in green).
� All schedules Access all schedules displayed on scroll-down list.
� Clear today's tasks Clear all tasks of current day. � Clear all Delete all schedules of all days. � Go to date Go to a wanted date in the calendar. To
move the cursor, press the / key. Press the / key to select the numbers or use the numeric keypad to input numbers directly. Finally press the left key.
� Weekly Change to the weekly view. � Daily Change to the daily view.

33
ENGLISH
Tool Name Description
Alarm
With this phone you can activate up to 3 different alarms. When phone is off, alarm can still be activated if battery is sufficiently charged.
h Select an alarm from Alarm 1, Alarm 2, and Alarm 3. Use the left key to turn on or off the selected alarm. When an alarm is activated, a check is showed at the right. Press the key to access the following options:
� Message Edit the alarm message content. � Time Set alarm time. Use the keypad to enter
numbers. � Ringtone Select alarm ringtone from local
ringtones, stored audio files or a real time FM radio program. You can also record a ringtone by using Recording ringtone.
� Snooze time Select the snooze time. � Alarm ring volume Select the alarm ring volume. � Repeat mode Three options are available:
Once - Alarm rings only once. Daily- Alarm rings every day at set time. Working days - Alarm rings on working
days at set time.
h When alarm is on, press the left key to turn off the alarm or press the right key to snooze the alarm.
Calculator
� Press direction keys ( , , , and ) to use these functions: "+", "-", "x", "/" and "=".
� Use the numeric keypad to enter numbers. � Press the * key to input a decimal point before a number. � Press the # key to input a minus before a number. � Press the right key to delete entries. � Press the left key to access more functions (M+, M-, MR and MC) and to clear the calculation result.

34
ENGLIS
H
Tool Name Description
Bluetooth®
� You can establish a Bluetooth®® connection with another Bluetooth®® device in order to transfer files or play music via external Bluetooth®® speaker.
� This mobile phone is equipped with Bluetooth®® version 2.1 and can therefore encounter some difficulties connecting to other peripheral devices with a higher version.
Available options: � Bluetooth®® To activate/deactivate Bluetooth®®.
Bluetooth®® connection must be activated in order to connect phone to other peripheral devices.
� Bluetooth® visibility When Bluetooth® is activated, select to show or hide this device. Press the left key to activate the visibility, the phone can be searched out by other devices. Press the key again to deactivate the visibility. Other devices cannot detect this phone, but this phone can still search and pair with other devices.
� Paired device To search and pair with new device. The paired devices are listed up and down.
� Transferring files When the Bluetooth pairing is successful, files can be transferred between this phone and the paired device.
� Shared folder settings To set shared folder permissions and shared folders. In Shared folder permissions menu, select Full control or Read only. In Shared folder menu, select all folders on the Phone or Memory Card, or a specific folder by accessing Select directory.
� Device name To set the name of this phone shown in other device.
� Bluetooth® file storage Select to store the shared files in the phone or in the memory card.
� Help Access to help page of Bluetooth® feature.
Tip: Deactivate Bluetooth®® connection when not in use to protect your phone privacy and save battery life.
35
ENGLISH
Tool Name Description
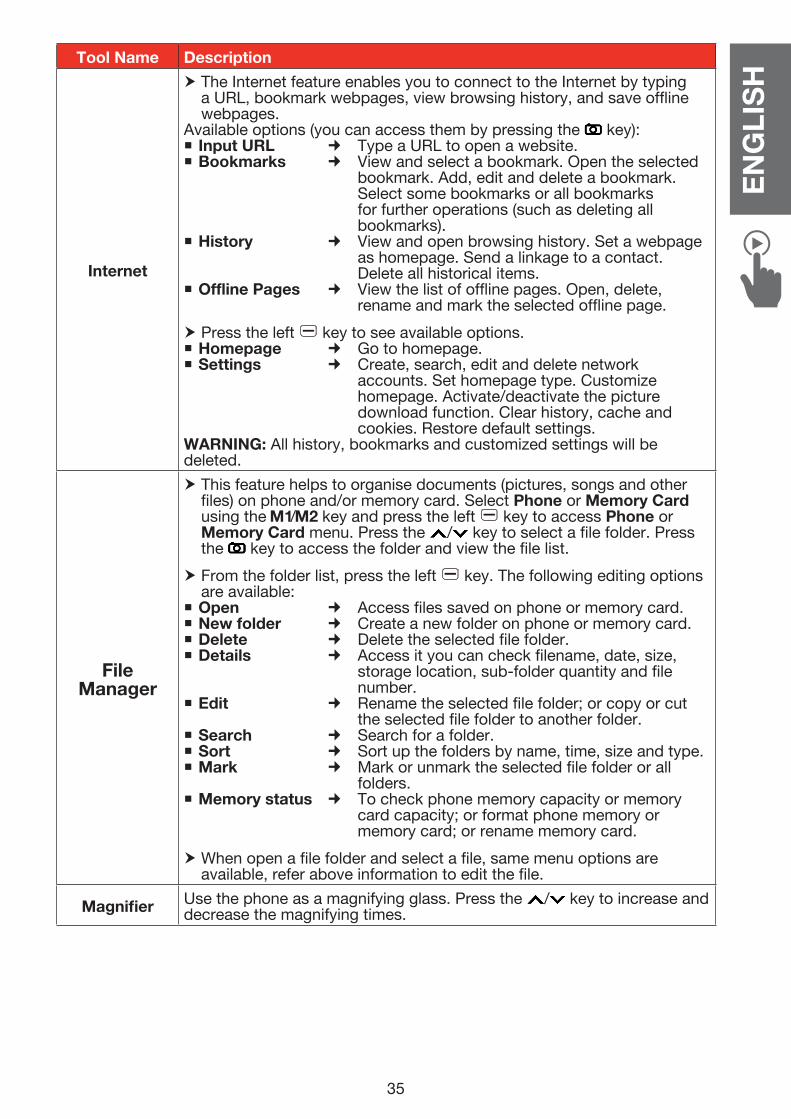
Internet
h The Internet feature enables you to connect to the Internet by typing a URL, bookmark webpages, view browsing history, and save offline webpages.
Available options (you can access them by pressing the key): � Input URL Type a URL to open a website. � Bookmarks View and select a bookmark. Open the selected
bookmark. Add, edit and delete a bookmark. Select some bookmarks or all bookmarks for further operations (such as deleting all bookmarks).
� History View and open browsing history. Set a webpage as homepage. Send a linkage to a contact. Delete all historical items.
� Offline Pages View the list of offline pages. Open, delete, rename and mark the selected offline page.
h Press the left key to see available options. � Homepage Go to homepage. � Settings Create, search, edit and delete network
accounts. Set homepage type. Customize homepage. Activate/deactivate the picture download function. Clear history, cache and cookies. Restore default settings.
WARNING: All history, bookmarks and customized settings will be deleted.
File Manager
h This feature helps to organise documents (pictures, songs and other files) on phone and/or memory card. Select Phone or Memory Card using the / key and press the left key to access Phone or Memory Card menu. Press the / key to select a file folder. Press the key to access the folder and view the file list.
h From the folder list, press the left key. The following editing options are available:
� Open Access files saved on phone or memory card. � New folder Create a new folder on phone or memory card. � Delete Delete the selected file folder. � Details Access it you can check filename, date, size,
storage location, sub-folder quantity and file number.
� Edit Rename the selected file folder; or copy or cut the selected file folder to another folder.
� Search Search for a folder. � Sort Sort up the folders by name, time, size and type. � Mark Mark or unmark the selected file folder or all
folders. � Memory status To check phone memory capacity or memory
card capacity; or format phone memory or memory card; or rename memory card.
h When open a file folder and select a file, same menu options are available, refer above information to edit the file.
Magnifier Use the phone as a magnifying glass. Press the / key to increase and decrease the magnifying times.

36
ENGLIS
H
9. USING THE TORCHTo activate or deactivate the torch, slide the torch key located on the right side of the telephone upwards or downwards.
10. SETTINGS GUIDE
Setting Name Description
Call settings
Flip to answerSet whether the phone answers incoming calls by opening the flip.
Call divert Forward incoming calls to another number.
Call waiting
If you are already during a call, you hear pips to indicate another incoming call. To switch to the second call, press the left key and select Switch to hold the call. To release it, press the left key again and select Switch again. Go to Call waiting, you can activate or deactivate this feature. However, this feature can be available or not, it depends also on the Network operator and type of subscription.
Call barring
Set to bar certain types of calls from being made from the phone. When you set or cancel barring certain types of calls, you need to enter the password. The default password is 0000. You can change the password.
Hide IDSet whether the phone's ID should be hidden, displayed by the phone's real ID or by network.
Flight mode
Activate & deactivate this feature. � If "Select when power on" is selected, when turn on the phone, "Flight mode" menu prompts, you can deactivate or activate this feature.
37
ENGLISH
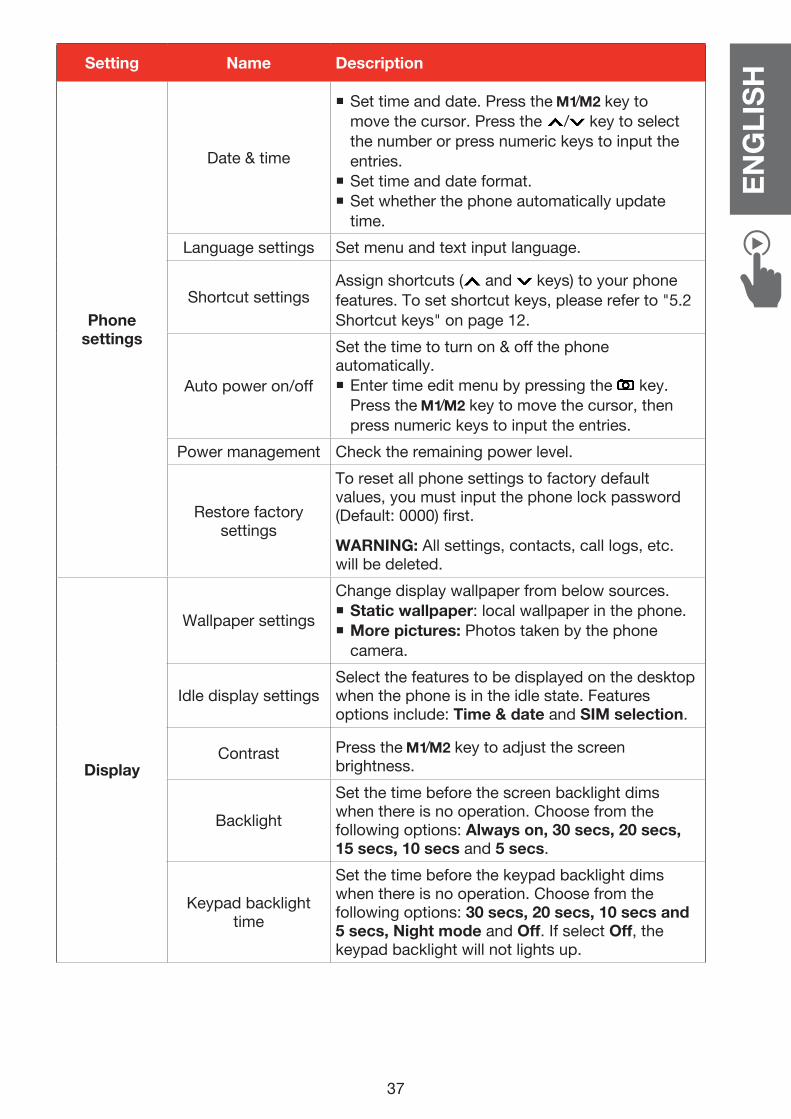
Setting Name Description
Phone settings
Date & time
� Set time and date. Press the / key to move the cursor. Press the / key to select the number or press numeric keys to input the entries.
� Set time and date format. � Set whether the phone automatically update time.
Language settings Set menu and text input language.
Shortcut settingsAssign shortcuts ( and keys) to your phone features. To set shortcut keys, please refer to "5.2 Shortcut keys" on page 12.
Auto power on/off
Set the time to turn on & off the phone automatically. � Enter time edit menu by pressing the key. Press the / key to move the cursor, then press numeric keys to input the entries.
Power management Check the remaining power level.
Restore factory settings
To reset all phone settings to factory default values, you must input the phone lock password (Default: 0000) first.
WARNING: All settings, contacts, call logs, etc. will be deleted.
Display
Wallpaper settings
Change display wallpaper from below sources. � Static wallpaper: local wallpaper in the phone. � More pictures: Photos taken by the phone camera.
Idle display settingsSelect the features to be displayed on the desktop when the phone is in the idle state. Features options include: Time & date and SIM selection.
Contrast Press the / key to adjust the screen brightness.
Backlight
Set the time before the screen backlight dims when there is no operation. Choose from the following options: Always on, 30 secs, 20 secs, 15 secs, 10 secs and 5 secs.
Keypad backlight time
Set the time before the keypad backlight dims when there is no operation. Choose from the following options: 30 secs, 20 secs, 10 secs and 5 secs, Night mode and Off. If select Off, the keypad backlight will not lights up.
38
ENGLIS
H
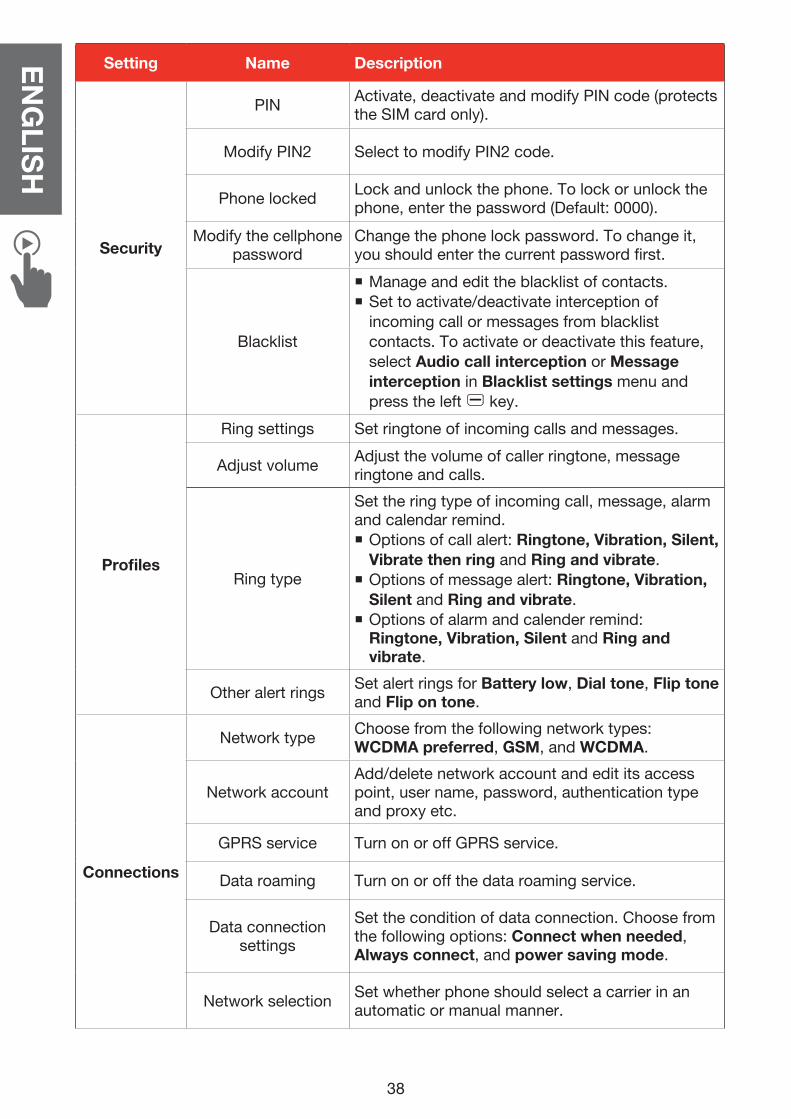
Setting Name Description
Security
PINActivate, deactivate and modify PIN code (protects the SIM card only).
Modify PIN2 Select to modify PIN2 code.
Phone lockedLock and unlock the phone. To lock or unlock the phone, enter the password (Default: 0000).
Modify the cellphone password
Change the phone lock password. To change it, you should enter the current password first.
Blacklist
� Manage and edit the blacklist of contacts. � Set to activate/deactivate interception of incoming call or messages from blacklist contacts. To activate or deactivate this feature, select Audio call interception or Message interception in Blacklist settings menu and press the left key.
Profiles
Ring settings Set ringtone of incoming calls and messages.
Adjust volumeAdjust the volume of caller ringtone, message ringtone and calls.
Ring type
Set the ring type of incoming call, message, alarm and calendar remind. � Options of call alert: Ringtone, Vibration, Silent, Vibrate then ring and Ring and vibrate.
� Options of message alert: Ringtone, Vibration, Silent and Ring and vibrate.
� Options of alarm and calender remind: Ringtone, Vibration, Silent and Ring and vibrate.
Other alert ringsSet alert rings for Battery low, Dial tone, Flip tone and Flip on tone.
Connections
Network typeChoose from the following network types: WCDMA preferred, GSM, and WCDMA.
Network accountAdd/delete network account and edit its access point, user name, password, authentication type and proxy etc.
GPRS service Turn on or off GPRS service.
Data roaming Turn on or off the data roaming service.
Data connection settings
Set the condition of data connection. Choose from the following options: Connect when needed, Always connect, and power saving mode.
Network selectionSet whether phone should select a carrier in an automatic or manual manner.
39
ENGLISH11. CLEANING INSTRUCTIONS
� Disconnect the power adaptor from electrical outlet and switch phone off before cleaning.
� Use damp or anti-static cloth for cleaning. � Do not use dry cloth or conductive fabrics. Do not use chemical or abrasive cleaners.
� This phone and its accessories (including power adaptor) are not waterproof. Do not clean this phone under running water, or immerse it in water or any other liquids.
� Clean charging port regularly as accumulated dust and lint could affect charging process.
� When not in use, store phone and its battery in its original packaging, out of reach of children and pets.
12. TECHNICAL DATANetwork: 2G: Quad band GSM 850 MHz - 900 MHz - 1800 MHz - 1900 MHz 3G: W900 – W2100Dimensions: 104 x 52 x 19.3 mmWeight: 88g (include battery)Battery: Li-ion Battery, 3.7V/ 1000mAh/3.7 Wh (Limited charge voltage: 4.2V)Memory card: Mini-SD, Max. 32 GBAudio formats: WAV, AMR, MP3, MIDI, AAC (recording format: AMR, MP3)Picture format: JPG, GIF, PNG, ICOVideo format: AVI,FLV,MP4,3GPStandby time: Up to 240 hoursTalk time: Up to 10 hours
Power adaptor (charger)Input: 100-240V, 50/60 Hz 0.15A Output: 5.0V DC, 500mA
Specific Absorption Rate (SAR) This device complies with international safety standards for exposure to radio waves. The value recorded for the TELEFUNKEN TM320 IZY is 0.767 W/kg for Body and 0.590 W/kg for Head (average measurement for 10g of organic tissue). The maximum limit according to the WHO is 2 W/kg (average measurement for 10g of organic tissue).
This device complies with international safety standards for exposure to radio waves. The value recorded for the TELEFUNKEN TM320 IZY is 2.682 W/kg for extremity. The maximum limit according to the WHO is 4 W/kg for distance 0 mm extremity SAR.
This device meets RF exposure guidelines when used against the head or when positioned at least 0.5 cm away from the body. If a carrying case, belt clip or other device holder is used to carry the device on the body, it must not contain any metal and must provide at least the separation distance indicated above between device and the body.
Bluetooth® is a trademark of Bluetooth SIG, Inc. TELEFUNKEN and the TELEFUNKEN logos are trademarks of TELEFUNKEN Licenses GmbH.

40
ENGLIS
H
13. DISPOSAL INSTRUCTIONS
Correct battery recycling(Applicable in the European Union and other European countries with selective waste collection systems) This symbol on the battery and product manual indicates that at the end of life the battery of this product should not be discarded with other household waste.To protect natural resources and to promote material reuse, separate batteries from other types of waste and recycle them through your local, free battery return system.
Recycling end-of-life electrical equipment and electronicsUsed electrical and electronic devices must not be discarded with ordinary household waste. The presence of this symbol on the product or its packaging serves as a reminder of this.Some materials constituting this product may be recycled if you take them to an appropriate recycling centre. By reusing the components and raw materials of used devices, you contribute significantly to protecting the environment. For further information on collection sites for used equipment, you can enquire at your town council, the waste treatment department, or the shop where you purchased the product.
14. WARRANTY AND AFTER-SALES SERVICEThis telephone comes with a 24-month warranty, starting from the purchase date. For more information on the applicability of this warranty, please refer to our website at www.befuzze.com, or contact our after-sales service:
After-sales Service Information:In the event of a technical problem, please contact our after-sales service: [email protected]
Manufacturer InformationBEFUZZE SARoute de Lully 5C1131 TolochenazSwitzerlandEmail: [email protected]