model hd99 - assets.homedepot-static.com
TRANSCRIPT
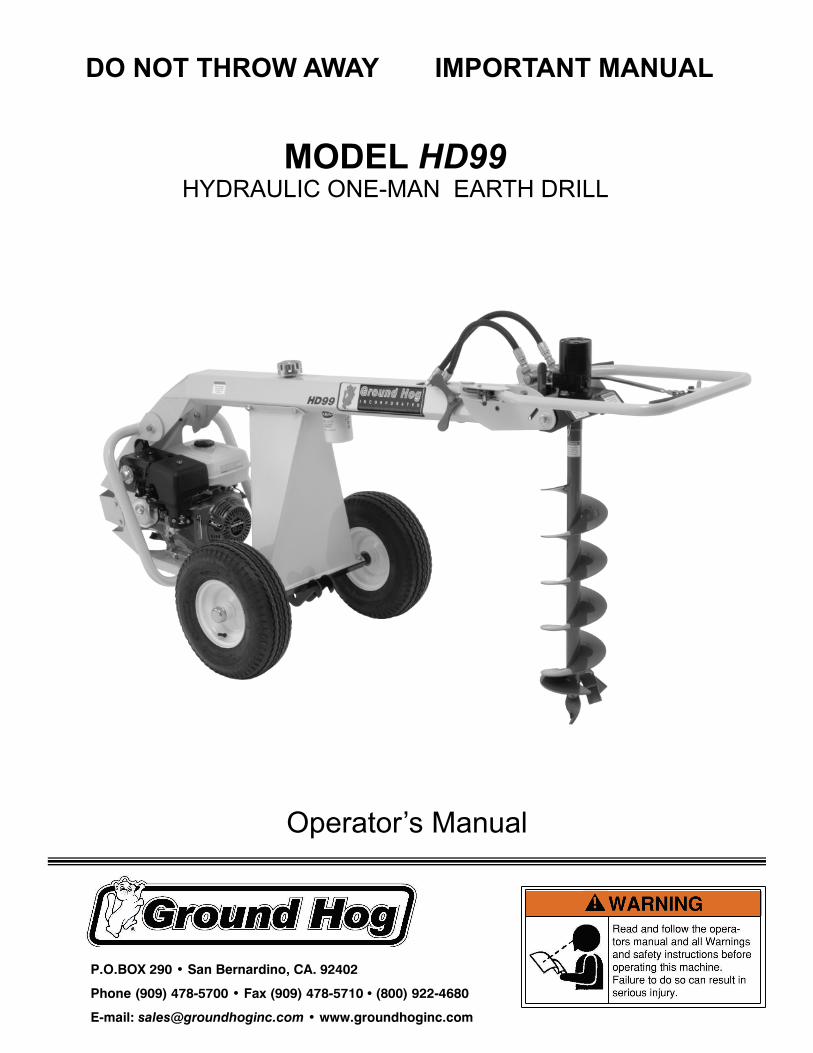
IMPORTANT MANUAL DO NOT THROW AWAY
MODEL HD99 HYDRAULIC ONE-MAN EARTH DRILL
Operator’s Manual
P.O.BOX 290 • San Bernardino, CA. 92402
Phone (909) 478-5700 • Fax (909) 478-5710 • (800) 922-4680
E-mail: [email protected] • www.groundhoginc.com

WARNINGS AND SAFETY INSTRUCTIONS
This tool can cause serious injury to the operator and bystanders. The warning and safety instructions in this manual must be followed to provide reasonable safety and efficiency in using and storing this earth drill. The operator is responsible for following the warnings and instructions in this manual and the earth drill. Read the entire Operator’s Manual before using this earth drill! Restrict the use of this earth drill to persons who read, under-stand, and follow the warnings and instructions in this manual and on the earth drill. If you have not read and understand the warnings and instructions in this manual and on the earth drill, you are not qualified to operate this earth drill!
This product contains and/or emits chemicals known to the State of California to cause cancer, birth defects or other reproductive harm. This statement is made in compliance to California Proposition 65.
This symbol means DANGER, WARNING or CAUTION. Personal injury and/or property damage may occur unless instructions are followed carefully.
WARNING ~ THIS POWER TOOL CAN BE DANGEROUS!
DANGER • Keep body parts, foreign objects and clothing clear of rotating auger. • Always use part # 1300 auger attachment pin for attaching auger bit to
earth drill. • Coming into contact with buried utilities while digging can cause severe
injuries or DEATH. • Contact appropriate utility representatives to determine if/where electrical
cables, gas lines, water lines, etc. are buried BEFORE operation.
Page 1
®
HD99
WARNING • Comply with local state and highway regulations when
towing. • Check that ball is completely inserted into coupler socket
before towing. • Check that the underjaw is securely closed around bot-
tom of ball. • Always secure this earth drill with tie downs or similar re-
straints when transporting in a truck or trailer. • Avoid excessive speeds while towing.

WARNINGS AND SAFETY INSTRUCTIONS cont’d...
1. Always wear the proper clothing and protec-tive gear for the job. Eye and ear protection, hard hat, boots, gloves and dust masks are some of the items that may be required.
2. Keep hair, fingers, and all other body parts away from openings and moving parts. Always wear, long pants, boots, and gloves. Do not wear loose clothing, jewelry, short pants, san-dals or go barefoot. Secure hair so it is above shoulder length.
3. Do not operate this earth drill indoors. For out-door use only.
4. Do not operate this tool when you are tired, ill, or under the influence of alcohol, drugs, or medication.
5. Always assume the digging location contains underground utilities or obstructions. Contact appropriate utility company to determine if/where electrical cables, gas lines, water lines, etc. are buried BEFORE operation.
6. Always use extreme caution while operating this tool. Be sure of your footing and physical capabilities.
1. Always assume the digging location contains buried underground utilities or obstructions. Call 811 to determine if/where electrical ca-bles, gas lines, water lines, etc. are buried BE-FORE operation.
2. Always be sure that the area you are going to drill in is clear of potential hazards, such as pipes, rocks, wire, boards or any other materials that could possibly entangle itself around the auger bit or cause unstable footing before using the earth drill.
3. Keep others including children, animals, by-standers and helpers outside a 15 foot hazard zone from the earth drill.
4. Hold the earth drill handle bar firmly with both hands.
5. Keep firm footing and balance. Do not over-reach.
6. Keep all parts of your body and clothing away from the auger bit and other moving parts.
7. Inspect the digging site. Soil conditions, job specifications and operator experience may dictate that a different earth drill or method be used to do the job.
8. Do not leave holes open or unmarked.
1. Maintain this earth drill according to recom-mended procedures included in this manual.
2. Disconnect the spark plug wire before per-forming maintenance. See engine manual.
3. Stop engine before removing fuel cap. 4. Use only genuine replacement parts as rec-
ommended by Ground Hog or the engine manufacturer.
1. Inspect the entire earth drill before each use. Replace damaged or worn parts.
2. Check for fuel leaks and make sure all fasten-ers are in place and securely fastened. Repair or replace as needed.
3. Replace auger blades that are severely worn, missing or damaged in any way before using this tool.
4. Use only the # 1300 auger attachment pin and make sure that it is properly attached.
5. Be sure the auger bit stops turning when you release the throttle.
6. Use only accessories or parts as recom-mended by Ground Hog, Inc.
1. Refuel outdoors only and where there are no sparks and flames.
2. Store fuel in a container approved for gaso-line.
3. Do not smoke or allow smoking near fuel or the earth drill or while using the earth drill.
4. Clean up all fuel spills before starting engine. 5. Move at least 10 feet away from fueling site
before starting engine. 6. Stop engine before removing fuel cap. 7. Store the earth drill and fuel in an area where
fuel vapors cannot reach sources of combus-tion like water heaters, electric motors, switches, furnaces, etc.
1. Always shut off the fuel valve and engine be-fore transporting or storing.
2. Always allow the engine to cool before trans-porting or storing.
3. Store earth drill and fuel in an area where fuel vapors cannot reach sources of combustion like, water heaters, electric motors, switches, furnaces, etc.
4. Always secure this earth drill with tie downs or similar restraints when transporting.
5. Properly attach and inspect the towbar to the earth drill before towing.
6. Always check that the ball is completely in-serted into the coupler socket and that the underjaw is securely closed around the bottom of the ball.
7. Always check that the coupler handle is prop-erly locked before towing.
OPERATOR SAFETY DIGGING SAFETY
TOOL SAFETY
FUEL SAFETY
MAINTENANCE SAFETY
TRANSPORTATION AND STORING SAFETY
Page 2
®
HD99

INTRODUCTION
It is your responsibility as the operator of this piece of equipment to know what specific requirements, precautions and work hazards exist. You must read, understand and follow all of the information contained in this operator’s manual and inform any person who might be assisting you.
The HD99 one-man earth drill is a unique tool. By separating the engine from the
auger with the use of hydraulics, the digging torque or “kick back” normally associated with hand operated earth drills is greatly reduced, making for a more comfortable tool to use. However, it is a tool that can cause injury to the operator or bystanders if it is not properly maintained or if it is misused. You must be sure that you, as the operator, understand the use of the tool and the risks involved.
NOTE: This machine is designed to drill holes in soil. It is not intended for any other purpose.
The rotation of the auger or drill bit on any type of earth drill will cause a counter
rotation of the handle bars while drilling a hole. The force exerted on the operator will vary according to the type of soil, the diameter of the auger and the condition of the machine.
In the event that the auger should encounter an object that stops the rotation suddenly, the digging force could be transmitted directly to the operator. Eventhough the force is absorbed by the wheel assembly, there is the possibility that the handle bars could be jerked from the operator’s hands. For this reason, the operator must have secure footing and control of the machine. The operator must also be both mentally and physically prepared to react to this force.
Because the HD99 is a hand operated, portable type machine, it is limited in what it
is capable of doing. The job site, soil conditions, job specifications and operator experience may dictate that a different tool or method be used to do the job.
NOTE: It is not recommended that engines of higher horsepower be installed on this machine. Consult the factory before making any modifications.
Page 3
®
HD99

KEY POINTS OF THE HD99
Up Close Digging and Towing Handlebar Position
Normal Digging Handlebar Position
Handlebar Control Lever
Forward Reverse
Latch Lever Latch Lever
Pivot Plate Lock
Swivel Lock
...OR...
Stop Switch Swivel Lock
Latch Lever Latch Lever
Control Lever
Reverse Forward
Handlebar
Pivot Plate Lock
Stop Switch
Page 4
®
HD99

TOWING AND TRANSPORTATION
ATTACHING THE TOWBAR TO THE HD99
Move the earth drill into position as shown below placing towbar on the ground under the axle.
STEP 1
STEP 2
Towbar attachment stem
Towbar attachment plates Towbar
Move handlebar to transporting position.
WARNING • Comply with local state and highway regulations when towing. • Read and follow all instructions in this manual. • Check that ball is completely inserted into coupler socket before towing. • Check that underjaw is securely closed around bottom of ball. • Always secure this earth drill with tie downs or similar when transporting in a truck or trailer. • Properly attach the towing chains
Page 5
®
HD99

Attach the towbar to the axle tow tabs as shown below.
TOWING AND TRANSPORTATION cont’d... ATTACHING THE TOWBAR TO THE HD99 cont’d...
Lower the earth drill until towbar attachment stem rests in-between the towbar attach-ment plates .
STEP 3
Towbar
Axle tow tabs
Insert the hitch pin all the way through the holes on the towbar stem and attachment plates.
STEP 4
STEP 5
Hitch pin
Hitch pin retainer
Page 6
®
HD99

TOWING AND TRANSPORTATION cont’d...
WARNING Failure to obey these rules can cause trailer to detach while towing which may
cause SERIOUS INJURY OR DEATH!
• Never exceed weight capacity of ball or load limits stamped on coupler. • Always use safety chains. • Always use correct size ball shown by stamp on coupler • Always check that the ball is completely inserted into coupler socket and that underjaw is securely
closed around the bottom of the ball. • Always check that the coupler handle is properly locked before towing. • Always examine coupler and ball for damage before towing. Replace if damaged. • Avoid sharp turns and steep vertical angles when towing which may bend or damage coupler or
its components.
Key points of the hitch coupler Handle Open Position Handle
Locked Position
Coupler Ball Socket
Hitch
Locknut
Tension Spring
Underjaw
Coupler Operating Instructions Adjust coupler locking pressure on ball before use. Place handle in locked position with ball in cou-pler. Tighten locknut against tension spring so that coupler is not loose on ball. Correct adjustment will allow handle to be released with moderate pressure applied to handle. To open, pull up on coupler handle and rotate forward. Place coupler on ball. When ball is completely nested in ball socket, rotate coupler handle backward until handle is in locked position. After towing for 50 miles, check coupler for tightness on ball. Always check tightness before towing. Be sure coupler handle is in locked position when towing.
ATTACHING THE TOWBAR TO THE HD99 cont’d...
Page 7
®
HD99
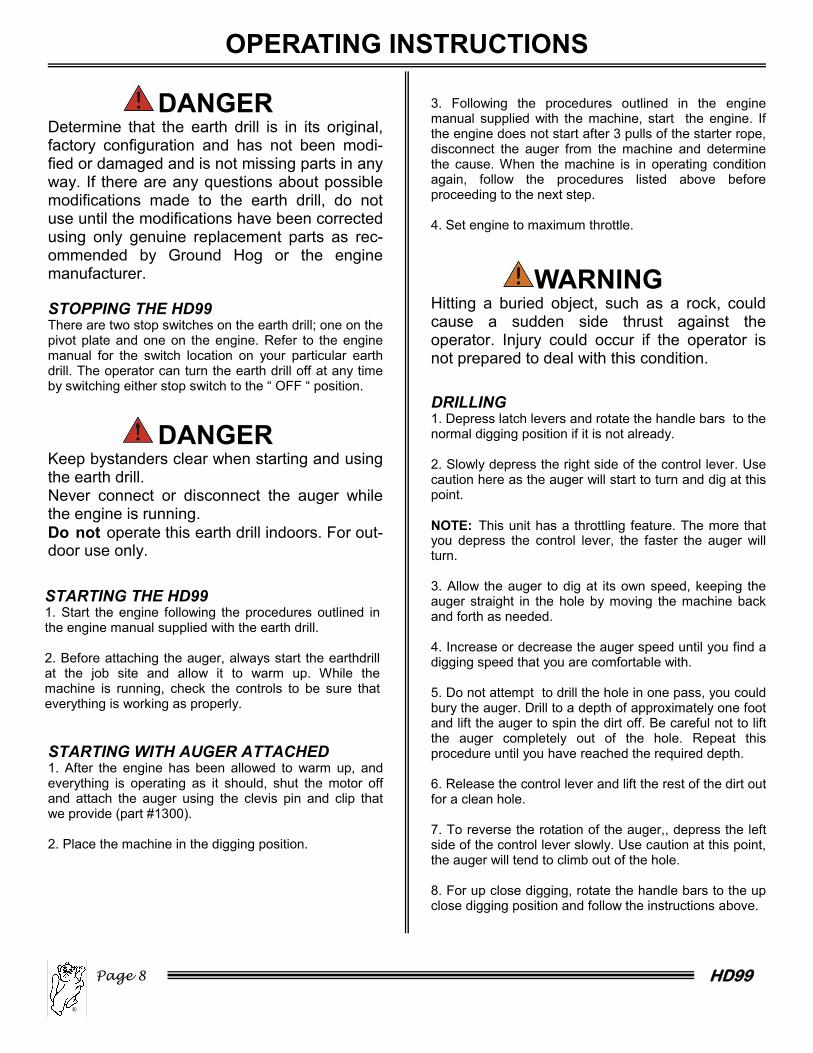
OPERATING INSTRUCTIONS
DRILLING 1. Depress latch levers and rotate the handle bars to the normal digging position if it is not already. 2. Slowly depress the right side of the control lever. Use caution here as the auger will start to turn and dig at this point. NOTE: This unit has a throttling feature. The more that you depress the control lever, the faster the auger will turn. 3. Allow the auger to dig at its own speed, keeping the auger straight in the hole by moving the machine back and forth as needed. 4. Increase or decrease the auger speed until you find a digging speed that you are comfortable with. 5. Do not attempt to drill the hole in one pass, you could bury the auger. Drill to a depth of approximately one foot and lift the auger to spin the dirt off. Be careful not to lift the auger completely out of the hole. Repeat this procedure until you have reached the required depth. 6. Release the control lever and lift the rest of the dirt out for a clean hole. 7. To reverse the rotation of the auger,, depress the left side of the control lever slowly. Use caution at this point, the auger will tend to climb out of the hole. 8. For up close digging, rotate the handle bars to the up close digging position and follow the instructions above.
STARTING THE HD99 1. Start the engine following the procedures outlined in the engine manual supplied with the earth drill. 2. Before attaching the auger, always start the earthdrill at the job site and allow it to warm up. While the machine is running, check the controls to be sure that everything is working as properly.
STARTING WITH AUGER ATTACHED 1. After the engine has been allowed to warm up, and everything is operating as it should, shut the motor off and attach the auger using the clevis pin and clip that we provide (part #1300). 2. Place the machine in the digging position.
DANGER Determine that the earth drill is in its original, factory configuration and has not been modi-fied or damaged and is not missing parts in any way. If there are any questions about possible modifications made to the earth drill, do not use until the modifications have been corrected using only genuine replacement parts as rec-ommended by Ground Hog or the engine manufacturer.
STOPPING THE HD99 There are two stop switches on the earth drill; one on the pivot plate and one on the engine. Refer to the engine manual for the switch location on your particular earth drill. The operator can turn the earth drill off at any time by switching either stop switch to the “ OFF “ position.
WARNING Hitting a buried object, such as a rock, could cause a sudden side thrust against the operator. Injury could occur if the operator is not prepared to deal with this condition.
Page 8
®
HD99
3. Following the procedures outlined in the engine manual supplied with the machine, start the engine. If the engine does not start after 3 pulls of the starter rope, disconnect the auger from the machine and determine the cause. When the machine is in operating condition again, follow the procedures listed above before proceeding to the next step. 4. Set engine to maximum throttle.
DANGER Keep bystanders clear when starting and using the earth drill. Never connect or disconnect the auger while the engine is running. Do not operate this earth drill indoors. For out-door use only.

OPERATING INSTRUCTIONS cont’d...
DRILLING WITH EXTENSIONS It is not recommended to dig with extensions longer than three feet long. 1. Following the directions listed under “DRILLING”, dig to the full depth of the auger without using an extension. 2. Stop the engine. Remove the auger from the power unit and connect the extension shaft to the auger using the pins provided (part #1300). 3. Connect the female end extension shaft the power unit and the male end of the extension shaft to the au-ger. 4. Following the instructions outlined in “DRILLING”, drill to the desired depth, adding extensions as needed.
WHEN NOT IN USE • Store the earth drill and fuel in an area where fuel
vapors cannot reach sources of combustion like water heaters, electric motors, switches, furnaces, etc.
• Always shut off the fuel valve and engine before storing or transporting.
• Always shut off the stop switches when not in use. • Keep children, bystanders and animals clear of earth
drill at all times. • Secure the earth drill in a manner that will not allow
it fall, tip over or roll. • Always place the earth drill on level ground and use
wheel chalks to prevent the earth drill from rolling when not in use.
• Always remove the auger bit from the earth drill when not in use.
The earth drill shall be stored in a manner that prevents it from falling, rolling or tipping over. The picture below shows the proper position of the earth drill when not in use. This position is acceptable with or without the towbar.
WARNING Never connect or disconnect the auger or au-ger extensions while the engine is running.
WARNING The earth drill shall be stored in a manner that prevents it from falling, rolling or tipping over.
Page 9
®
HD99
DRILLING cont’d... NOTE: Allow the auger to dig at its own speed. Attempting to force the auger into hard ground and through buried objects could result in the auger becoming locked in the hole. If the auger bit should get locked in a hole, slowly engage the valve control lever in reverse to unlock the auger bit. 9. For digging on uneven terrain, rotate the boring head to the desired angle. Some digging conditions may or may not require you to tighten the swivel lock.