moxa softnvr-ia™ ip surveillance software user’s manual · system intelligence. most of...
TRANSCRIPT

Moxa SoftNVR-IA™ IP Surveillance Software User’s Manual
First Edition, February 2010
www.moxa.com/product
© 2010 Moxa Inc. All rights reserved. Reproduction without permission is prohibited.

Moxa SoftNVR™ IP Surveillance Software Quick Installation Guide
The software described in this manual is furnished under a license agreement and may be used only in accordance with the terms of that agreement.
Copyright Notice
Copyright © 2010 Moxa Inc. All rights reserved.
Reproduction without permission is prohibited.
Trademarks
MOXA is a registered trademark of Moxa Inc. All other trademarks or registered marks in this manual belong to their respective manufacturers.
Disclaimer
Information in this document is subject to change without notice and does not represent a commitment on the part of Moxa.
Moxa provides this document “as is,” without warranty of any kind, either expressed or implied, including, but not limited to, its particular purpose. Moxa reserves the right to make improvements and/or changes to this manual, or to the products and/or the programs described in this manual, at any time.
Information provided in this manual is intended to be accurate and reliable. However, Moxa assumes no responsibility for its use, or for any infringements on the rights of third parties that may result from its use.
This product might include unintentional technical or typographical errors. Changes are periodically made to the information herein to correct such errors, and these changes are incorporated into new editions of the publication.

Table of Contents Chapter 1 Product Information
Overview ................................................................................................... 1-2 Features...................................................................................................... 1-2
OPC Communication ................................................................... 1-2 Live View....................................................................................... 1-2 Video Record................................................................................. 1-2 Playback and Search .................................................................... 1-3 Schedule......................................................................................... 1-3 Alarm Event .................................................................................. 1-3 System............................................................................................ 1-3
Recommended System Requirements........................................................ 1-3 Video performance reference..................................................................... 1-4 SoftNVR-IA Package Contents.................................................................. 1-5 Release Notes............................................................................................. 1-5
Chapter 2 SoftNVR-IA Installation Before Installing the Software ................................................................... 2-6 Starting the Installation .............................................................................. 2-6 USB KEY Pro............................................................................................ 2-5
Chapter 3 SoftNVR-IA Live Viewer SoftNVR-IA Live Viewer .......................................................................... 3-6 Tool bar...................................................................................................... 3-6 System information.................................................................................... 3-2 Camera List................................................................................................ 3-2 PTZ Control Panel ..................................................................................... 3-3 Alarm History ............................................................................................ 3-4 Live Video Display .................................................................................... 3-4 Menu…...................................................................................................... 3-6
Chapter 4 SoftNVR-IA Playback SoftNVR-IA Playback ............................................................................. 4-17 Tool bar.................................................................................................... 4-17 Search the Recorded Videos .................................................................... 4-18 Calendar Control...................................................................................... 4-18 Playback Control ..................................................................................... 4-19 Timeline Control...................................................................................... 4-19
Chapter 5 OPC Communications OPC Tags ................................................................................................. 5-21
NVR information ........................................................................ 5-21 Each channel information.......................................................... 5-21 Event trigger operation .............................................................. 5-22
OPC Trigger with Video Pop-up.............................................................. 5-23

1-2
11 Chapter 1 Product Information
Overview SoftNVR-IA is a 32-channel IP surveillance software for industrial applications. The key feature of SoftNVR-IA is built in OPC server, which can direct communicate with industrial automation system, such as SCADA, HMI, etc.. The video recording and alarm handling are not only able to be triggered by the events being supported by SoftNVR-IA (ex. Digital Input, Video Loss), but also the events in automation system, which enhances the system intelligence. Most of important, it provides the unlimited capability for the integration of IP surveillance system with automation system for the industrial system integrator.
Features
OPC Communication Can receive event tags sent from the automation system to trigger video recording and other actions Can send event tags to the automation system with system information and the status of each channel
Live View Supports 1, 4, 6, 9, 10, 13, 16, 25, 32 live display, as well as video rotate and full screen display Supports MJPEG, MPEG4, and H.264 video streams (only supports VPort models, excluding the VPort
2000 series and VPort 3310) Supports up to 32 channels in the camera list Easy-to-use with drag and drop video display selection Can provide snapshot images in JPEG format Supports image tuning, including brightness, saturation, contrast, and hue Supports 2-way audio for voice communication between field sites and the control center Supports dual monitor and full screen display Supports display screen rotation Supports the PTZ control panel defined in VPort products
Video Record Video recording can be triggered manually or by event Video files are in AVI format, and can be played back on all popular media players (requires SoftNVR-IA
codec) Supports the FIFO recycle function for long time video recording Can configure the number of days recorded video files will be stored

1-3
Supports pre-event video recording for up to 30 seconds The storage hard disk can be selected from network hard drives
Playback and Search Can play back up to 4 recorded videos simultaneously Supports timeline selection when in video playback mode Supports stop, speed up, slow down, rewind frame-by-frame, and forward frame-by-frame Search video records by camera, time, or event Can take snapshot images when in video playback mode
Schedule Can set up a weekday schedule Schedule settings can be based on camera and event
Alarm Event
arm events: Digital input and Video Loss
Can accept events from the automation system via OPC communication Alarm triggered actions: popup display, go preset, play sound, trigger DO (relay)
System Automatically search or manually detect the IP address of a video device on the LAN Can configure the server name• Can configure multiple email addresses for receiving alarm messages Folder and file names of snapshot images can be customized Language version: English, Traditional Chinese, Simplified Chinese
Recommended System Requirements Intel Core 2 Duo QX6700 or above 2GB RAM or above Windows XP with SP3 Motherboard: Intel 945 or 965 chip, Intel chipset recommended• Display card: nVIDIA GeForce GT210 or above (dual monitor requires 2 output)

1-4
Video performance reference Based on the above recommended system requirment, we provide the video performance we tested in our lab for the reference. The total FPS dispalyed (frames per second) means the total FPS we tested in the given video channels, which each video channel is in 30FPS video streams, and monitor display. For the video recording, all the video streams are still in 30FPS, but the display capability is infludenced by the PC recource limitation.
Total FPS displayed in Full D1 (720x480) resolution
Total FPS displayed in CIF (352x240) resolution
Video Channels
Monitor Display
MPEG4 H.264 MPEG4 H.264 Single Monitor 440 330 480 400 16
channels Dual Monitor 440 300 460 400 Single Monitor 525 325 600 515 20
channels Dual Monitor 455 365 580 485 Single Monitor 750 650 25
channels Dual Monitor 715 635 Single Monitor 885 800 32
channels Dual Monitor
Not recommend
Not recommend
805 775
NOTE The system requirements listed above are the recommendation for running Softener-IA smoothly. For better video performance, such as when viewing and recording video images, use a hardware environment with a better video card, more memory, and better computing power.
NOTE It is not recommended to display the full D1 (720x480 or 720x576) in 25 or 32 channels simultaneously. If to display the 25 or 32 channels video simultaneously in Full D1 resolution is a must, it is required to low down the FPS of each VPort, or the video display will be abnormal. For example, if there are 25-channel videos need to be displayed in the same time with Full D1 resolution, each video stream must be down to 455÷25 ≒ 18 FPS or below.

1-5
SoftNVR-IA Package Contents Software CD (inlcudes user’s manual) USB Key Pro
Release Notes SoftNVR-IA Version 1.0 Date 2010/2/28 Release Note
Newly released

2-6
22 Chapter 2 SoftNVR-IA™ Installation
Before Installing the Software 1. Make sure your PC has DirectX 9.0C or above installed.
Starting the Installation Step 1: Insert the Installation CD.
Step 2: Run SoftNVR-IA_Vxx.exe from the CD-ROM directory to install. A Language Selection table will pop up. Select the language you want to install for SoftNVR.
ATTENTION SoftNVR-IA V1.0 supports 3 languages, including English, Traditional Chinese, and Simplified Chinese. If there is any other language requirement, please contact with Moxa’s sales representative.
Step 3: Select “I accept the terms of the license agreement” and click Next to continue.

2-2
Step 4: Select the installation folder.
Step 5: Click on the Install to start the installation.

2-3
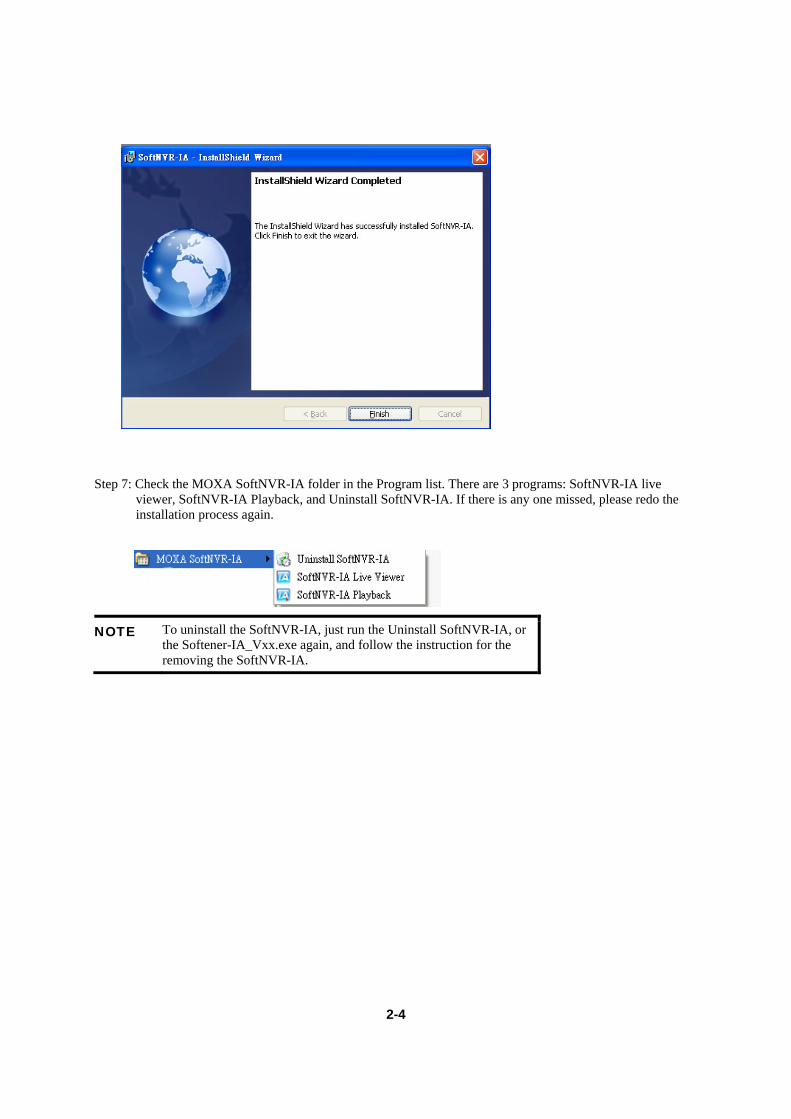
Step 6: Finish the installation process by clicking the Finish
2-4
Step 7: Check the MOXA SoftNVR-IA folder in the Program list. There are 3 programs: SoftNVR-IA live viewer, SoftNVR-IA Playback, and Uninstall SoftNVR-IA. If there is any one missed, please redo the installation process again.
NOTE To uninstall the SoftNVR-IA, just run the Uninstall SoftNVR-IA, or the Softener-IA_Vxx.exe again, and follow the instruction for the removing the SoftNVR-IA.

2-5
USB KEY Pro
The “Key Pro” located in your CD box must be plugged into your computer’s USB port to enable SoftNVR-IA to operate correctly. The driver is automatically installed when installing SoftNVR-IA.
NOTE The USB Key Pro protects the SoftNVR-IA license and does not influence the normal function of the PC or server.
NOTE If there is no USB Key Pro being used with SoftNVR-IA, then it will be closed after 3-hour execution.

3-6
33 Chapter 3 SoftNVR-IA™ Live Viewer
SoftNVR-IA Live Viewer
Tool bar Live video display control
Dual monitor control
Video record control Take snapshot image Open playback window Start OPC server
Open E-map
(supported after V1.1) Enable audio
(supported after V1.1)

3-2
NOTE Here is an example to show how the Rotate function works: When there is 7 videos, 1-screen display: 1 2 3 4 5 6 7 1 2 3…. 4-screen display: 1+2+3+4 5+6+7 1+2+3+4 5+6+7 …. 6-screen display: 1+2+3+4+5+6 7 1+2+3+4+5+6 7 …. 9-screen display: 1+2+3+4+5+6+7 1+2+3+4+5+6+7 …
System information
Camera List
System Time
The storage space left for video recording
Alarm Service
Schedule Service
Rotate
Videos being displayed in 2nd monitor Videos being displayed in 1st monitor
OPC Server

3-3
There are maximum 32 cameras can be listed in the camera list.
Move the mouse curser to the selected camera, and then a tooltip will be showed with model name, IP address, channel number and stream type.
PTZ Control Panel SoftNVR-IA’s PTZ control commands are as same as VPort’s PTZ control commands.
PTZ control with extra commands

3-4
PTZ control with custom commands
Alarm History
This alarm history shows the events SoftNVR-IA has. The maximum number of events in this alarm history is 500. Click on the right button of mouse will popup a menu for clearing all the alarms (Clear All) and showing the latest 50 alarms (Show Latest 50 Records).
Live Video Display To display the video on the live video display area, just drag & drop the selected camera from the camera list.
Image Caption
Device Connection
In recording
Enable 2-way audio
Device Name
Enable schedule

3-5
Popup menu
Right click on the image, a menu will be popup.
– Full Screen: Change to full screen display
– 2-Way Audio: enable the 2-way audio
– Snapshot: take the snapshot image
– Connect: when the retry connection is failed after 5 times retry, select this function will re-start the retry connection.
– Manual Record: enable or disable the video recording manually. But once the schedule is enabled, the Manual Record will not be used..
– Alarm Confirmed: Once an alarm is happened, then the image frame will be flashed in red. Use this Alarm Confirmed to manually stop the event alarm and also the flash red frame.
NOTE Once an alarm is happened in SoftNVR-IA, it can only be disabled viaAlarm Confirmed function.
Dual Monitor Display SoftNVR-IA supports the dual monitor display for different video applications purpose. The user can click on the Dual Monitor Editor button in the Tool Bar to edit the 2nd monitor’s video display. Use he drag & drop to configure the video cameras being displayed in the 2nd monitor.
Times for retry connection
Connecting status

3-6
Menu Project
– Logout: logout the SoftNVR-IA (supported after V1.1)
– Exit: close SoftNVR-IA
View
Show or hide the Tool Bar, Status Bar, System Information, Device List, PTZ Control and Alarm History

3-7
Settings
Camera Setting To add, delete and edit the device list.
– Search and Manual Detect the device and camera: to add a camera, use the Search or Manual Detect button to detect the VPort devices in the LAN.
NOTE The SoffNVR-IA only supports Moxa VPort series product, but notinclude VPort 2110, Vprot 2310, VPort 2140, VPort 2141 and VPort3310.
– Video preview and PTZ control: Select one VPort device in the device list or the device being searched or manually detected, then its video can be previewed here and the PTZ control can also be tested.
– Device/ Camera List: this list shows the devices or cameras in the device list. Click on each camera’s + , the device’s model name, IP address, channel number and streaming type will be showed.
Search/ Manual Detect the device and camera
Video preview and PTZ controlDevice Setting,
Image Setting and PTZ Setting
Device/ CameraList

3-8
– Device Setting, Image Setting and PTZ Setting:
Device Setting: These settings are as same as VPort’s settings, which means the VPort device’s settings will be updated once you modify these settings.
Image Setting: These settings are as same as VPort’s settings, which means the VPort device’s
settings will be updated once you modify these settings.

3-9
PTZ Setting: These settings are as same as VPort’s settings, which means the VPort device’s settings will be updated once you modify these settings.
General Setting

3-10
- Host name: the server name of SoftNVR-IA, which will be shown on the caption of main
screen window.
- Startup: the system startup condition Auto start: once the server is boot up, the SoftNVR-IA will start the execution automatically.
Auto login: Once the SoftNVR-IA is executing, it will automatically login in the user name and password being listed below.
Note: This function will be supported after V1.1
- Email: setup the email system to receive the system or alarm message.
Mail Server: the mail server name.
Sender’s Address: the sender’s email address for sending the message.
Recipient’s Address: maximum 30 recipient’s email can be setup to receive the message.
- Rotation Duration: the duration that the camera rotates to next position. - Auto Reconnect: the times of reconnection can be setup in given number or unlimited. - Snapshot: the snapshot image’s configurations

3-11
File name: setup the file name in default name or user-defined name with time tag or not. The file name format example will be listed in below .
File name explanation : CH00001_20091210_140235_IVN.jpg
CH00001= Channel 1
20091210 = Year 2009, December, 10th.
140235= 14 o’clock, 02 minutes, 35 seconds
IVN = user-defined name.
Location: the storage folder of the snapshot images
- Storage Setting: setup the storage settings.
Path list: the storage folder path list Add : add the storage folder path to the list Delete: delete the storage folder path from the list Disk Safe Space: setup the storage disk safe space (MB) for making sure the storage system is run stably. Disk Recycle: setup the storage disk in recycle mode to let the latest recorded video files can be stored once the storage disk is full. The oldest file will be deleted. Keep Days: setup the days for keeping the recorded video files in the system. The video files over this Keep Days will be deleted automatically. The maximum days is 7. Pre-Record: setup the pre-record video before an event with the given time (sec.). The time period can be setup from 5 to 30 seconds.

3-12
Schedule Setting
- Setup a schedule
Step 1: select a device/ camera from the device list
Step 2: setup the weekly schedule
Step 3: setup the record setting
Step 4: click Add/Modify to add the schedule to the right list
- Weekly Schedule

3-13
Color A: Always record Color B: record by event Color C: mark area to add/delete/modified schedule Color D: drag & drop the color C again to erase marked area
- Setting
Always Record: always do the video recording Record by Event: the video recording is triggered by events Schedule List: list the schedule that this camera is setup. Click on the Add/ Modify to add a new schedule.
Click on Delete to delete a selected schedule.
Color A
Color B
Color C
Color D

3-14
Event/ Alarm
- Setup an Event/ Alarm
Step 1: select a device/ camera from the device list
Step 2: setup the event/ Alarm type
Step 3: setup the event/ Alarm action
Step 4: click on OK to save the event/ alarm
- Event Type and Action

3-15
Digital Input: setup the digital input trigger condition Video Loss: once the video signal is lost, the event is triggered Pop Up display: the video of selected camera will be pop up to full window screen once an
event is triggered Go to preset: the camera will be moved to the preset position being selected once an event is
triggered. Play sound: the PC or server will play the sound being selected once an event is triggered. Send Email: an email will be sent to the given email addresses being selected from the
recipients’ email list once an event is triggered. The subject, attached snapshot images, and message can be edited
DO1 & DO2: the DO (Relay output) will be activated once an event is triggered. Emap setting (not available currently)
Display

3-16
Show or hide the control or information window.
Service
- Start Alarm: enable or disable the event/ alarm detections and actions.
- Start Schedule: enable or disable the schedule
- Start OPC Server: enable or disable the OPC Server communication.
Help
Shows the version number, company information
-

4-17
44 Chapter 4 SoftNVR-IA™ Playback
SoftNVR-IA Playback
Tool bar Playback video display control
Event Search
Full Screen Display Take snapshot image

4-18
Search the Recorded Videos Click on Event Search button, and the Event search window will be popup.
Step 1: Setup the Start Date and Start Time
Step 2: Setup the End Date and End Time
Step 3: Select the Channel for searching the recorded videos based on the camera
Step 4: Select the Event Type for searching the recorded videos based on the event
Step 5: Click on Event Search button, then the search result will be listed in the right
Step 6: Double click on one recorded video being searched, and the video will be showed on the playback main screen
Calendar Control
This calendar is for the information that which days have the recorded videos after the search. The user can select the day to show the recorded videos in the Timeline Control area. The date with bold word means there is recorded videos in this date, and the date with red frame means it is today. Take below’s calendar as an example, it shows the 2nd, 4th, 5th, 6th, 7th and 8th of December have the recorded videos, and today is 8th, December.

4-19
Playback Control
This playback control is for playing the recorded videos.
Timeline Control
The timeline control is for using the mouse to control the playback.
Time of recorded video
Speed in playback: 2x / 4x / 8x / 16x
Speed up the playback
Slow down the playback
Step to the last frame
Step to the next frame
Play or pause Stop the playback
Event Color Bar table
The time tuning of slider in timeline (5 minutes to 2 days, 26 kinds of slider)
Device list area Next event
Last Event
Slider Pointer
Event Color Bar

4-20
Click the right button of mouse in the event color bar will show the event information.
Drag the Slider Pointer in the time line will show the time of this point.
Scroll the mouse’s scroller will tune the display ratio of time line.
Each kind of event will have different color being showed in time line.
Playback Display Screen
Click on the mouse’s right button, a menu will be showed.
-Remove Playback: remove the camera/ device in the playback
-Full Screen: Full screen display with 1 channel or 4 channels.
-Snapshot: capture the current video image in BMP format.
Time tooltip
Event information
Slider Pointer

5-21
55 Chapter 5 OPC Communications
SoftNVR-IA is built-in OPC server for communicating with automation system for the device’s status and event handling.
OPC Tags
NVR information Status of SoftNVR-IA’s main program (All Read-Only)
Tag Name Type Internal Name Description NVR-IA.Name String eNVR_NAME SoftNVR-IA HostName NVR-IA.IPAddress String eNVR_IPADDRESS Host’s IP Address NVR-IA.TotalCH INT eNVR_TOTALCHANNEL Number of current display
hannels NVR-IA.IsSchedule BOOL eNVR_IsSCHEDULE Schedule is enabled or
disable NVR-IA.IsAlarm BOOL eNVR_IsALARM Alarm is enabled or disabled NVR-IA.IsDualMonitor
BOOL eNVR_IsDUALMONITOR Dual monitor is enabled or disabled
NVR-IA.Version String eNVR_VERSION Version number
Each channel information The status of each channel in the device list (All Read-Only)
Tag Name Type Internal Name Description NVR-IA.CHxx .Index
INT eCAM_CAMERAINDEX Channel index
NVR-IA.CHxx .Device_Name
String eCAM_DEVICENAME Device Name
NVR-IA.CHxx .Connect_Status
INT eCAM_CONNECT_STATUS connect status 0:connecting 1:connected 2:connect fail 3:disconnect
NVR-IA.CHxx. DI1_Status
INT eCAM_DI1_STATUS Di1 status
NVR-IA.CHxx. DI2_Status
INT eCAM_DI2_STATUS Di2 status
NVR-IA.CHxx. DI3_Status
INT eCAM_DI3_STATUS Di3 status
NVR-IA.CHxx. DI4_Status
INT eCAM_DI4_STATUS Di4 status

5-22
NVR-IA.CHxx. DI5_Status
INT eCAM_DI5_STATUS Di5 status
NVR-IA.CHxx. DI6_Status
INT eCAM_DI6_STATUS Di6 status
NVR-IA.CHxx. DI7_Status
INT eCAM_DI7_STATUS Di7 status
NVR-IA.CHxx. DI8_Status
INT eCAM_DI8_STATUS Di8 status
NVR-IA.CHxx. DO1_Status
INT eCAM_DO1_STATUS Do1 status
NVR-IA.CHxx. DO2_Status
INT eCAM_DO2_STATUS Do2 status
NVR-IA.CHxx. DO3_Status
INT eCAM_DO3_STATUS Do3 status
NVR-IA.CHxx. DO4_Status
INT eCAM_DO4_STATUS Do4 status
NVR-IA.CHxx. Video_Loss
INT eCAM_VIDEO_LOSSs Video loss
NVR-IA.CHxx.FPS INT eCAM_FPS Frame per seconds NVR-IA.CHxx. Stream_Type
INT eCAM_STREAM_TYPE The type of video stream (H.264, MJPEG or MPEG4)
NVR-IA.CHxx .Server_Channel
INT eCAM_SERVER_CH_ID, Video Encoder’s Channel ID
NVR-IA.CHxx. IsAudioPost
BOOL eCAM_IsAUDIOPOST, Audio post is enabled or disabled
NVR-IA.CHxx. IsRecord
BOOL eCAM_IsRECORD, Video recording is enabled or disabled.
NVR-IA.CHxx. IPAddress
String eCAM_IPADDRESS, VPort’s IP address
NVR-IA.CHxx. Username
String eCAM_USERNAME, VPort’s connection’s Username
NVR-IA.CHxx. Password
String eCAM_PASSWORD, VPort’s Connection’s Password
NVR-IA.CHxx. Reserved1
String eCAM_RESERVED1, reserved
NVR-IA.CHxx. Reserved2
String eCAM_RESERVED2, reserved
NVR-IA.CHxx. Reserved3
String eCAM_RESERVED3, reserved
NVR-IA.CHxx. Reserved4
String eCAM_RESERVED4, reserved
Event trigger operation Trigger actions and messages of each channel from OPC client (Read/write)
Tag Name Type Internal Name Description NVR-IA.CHxx. Event.Trigger
INT eEVENT_TYPE Trigger video recording 0:stop 1:rec+pop up

5-23
2:rec 3:pop up
NVR-IA.CHxx Message
String eEVENT_DESCRIPTION description
OPC Trigger with Video Pop-up
Step by Step for Video pop-up trigger by OPC client
Step 1: Enable Build-in OPC Server
Once the OPC server is enabled, the OPC in the system information will be highlighted.
Step 2: OPC Client Tag Trigger
Set NVR-IA.CH01.Event.Message = ”From OPC Tag Trigger test”

5-24
Set NVR-IA.CH01.Event.Trigger = 1
Step 3: Once SoftNVR-IA receives a trigger from OPC Client, the SoftNVR-IA will be changed to 1 camera video screen and the target video will be pop-up in the screen when in multiple video screen display. The caption will be flashed in a red frame with the OPC Trigger word.
Step 4: In alarm history, this OPC event will be added to the list with time, and the video recording

5-25
action will also be enabled for the configured video channels.
Step 5: To disable this OPC Trigger, click on the mouse’s right button on the video image and select the “Alarm Confirmed” in the this menu.
Step 6: the video recording action can also be stopped by un-checking “Manual Record” item.