msca safety manual for mechanical service technicians
TRANSCRIPT

MSCA Safety Manual for Mechanical Service Technicians Fourth Edition – 2021
ii
Table of Contents
Emergency Response/First Aid .................................... iv Adult CPR/AED ............................................................. vi Conscious Choking ..................................................... viii Hypothermia ..................................................................x Heat Stroke ................................................................... xi Heat Exhaustion .......................................................... xii Burns .......................................................................... xiii OSHA ........................................................................... xv OSHA Job Safety & Health Protection Poster ............ xvi Mechanical Service Technician Responsibilities ....... xvii Mechanical Service Technician Orientation Statement ................................................. xix Aerial Lifts ..................................................................... 1 Arc Flash & Electrical Shock Protection ....................... 3 Asbestos ....................................................................... 6 Bloodborne Pathogens ................................................. 8 Carbon Monoxide ......................................................... 9 Common Chemical Substances ................................. 10 Compressed Air .......................................................... 11 Compressed Gas Cylinders ........................................ 12 Confined Spaces ........................................................ 14 Cranes & Derricks....................................................... 16 Damaged Equipment .................................................. 18 Electrical Safe Work Practices ................................... 19 Fall Prevention & Protection ....................................... 23 Fire Prevention & Protection ....................................... 26 Flammable/Combustible Liquids/Materials ................. 29 Grinding ...................................................................... 32 Hand & Power Tools ................................................... 34 Hazard Communication .............................................. 36

iii
Hexavalent Chromium ................................................ 39 Housekeeping ............................................................. 40 Ladders ....................................................................... 41 Liquefied Petroleum (LP) Gas .................................... 43 Lockout/Tagout ........................................................... 44 Manganese ................................................................. 45 Noise ........................................................................... 46 Personal Protective Equipment .................................. 48 Pneumatic Tools ......................................................... 52 Refrigerants ................................................................ 53 Rigging & Materials Handling ..................................... 56 Signs, Signals & Barricades ....................................... 63 Vehicle Safety ............................................................. 65 Welding, Cutting & Heating ........................................ 69 Zinc ............................................................................. 73

iv
Emergency Response/First Aid 1. Carefully survey the scene and call for help.
• Look for hazards that could harm you and other responders, such as caved-in excavations, exposed power lines, confined spaces, or fire.
2. Do not approach the victim unless it is safe to do so.
3. Send someone to call Emergency Medical Services (EMS) immediately.
• Send a second person to call directly after the first.
4. Protect yourself with medical exam gloves and safety goggles before approaching the victim.
• This equipment, as well as a CPR breathing barrier, can be found in first aid kits for bloodborne pathogen protection.
• A CPR breathing barrier contains a one-way valve and is designed to prevent the rescuer from encountering the victim’s bodily fluids.
5. Do not move the victim unless necessary. • Moving the victim can cause additional harm.
Move the victim only if you cannot provide care in the current position/location or if the scene is unsafe.

v
6. Check the victim for consciousness and breathing. • Open the victim’s airway by tilting the head back
and lifting the chin. • Bend down over the victim’s mouth, facing his
chest. Look, listen and feel for breathing for 5 to 10 seconds.
7. If the victim is not breathing, begin CPR (see next page for CPR instructions).
• Continue CPR until an automated external defibrillator (AED) and trained operator arrive, the victim begins to move, or EMS responders arrive.
8. If the victim is breathing, check for severe bleeding. • Scan the victim from head to toe, looking for signs
of severe bleeding.
9. Apply direct pressure to wounds to slow the loss of blood.
• Apply direct pressure with a clean dressing or any clean material until bleeding stops, then wrap with a bandage to keep dressing in place.
10. Treat for shock. • Lay the victim flat on his back and keep his body
temperature in the normal range. You may have to cover the person with a coat or jacket.
• Keep the victim comfortable and do not give him anything to eat or drink.

vi
Adult CPR/AED If you are NOT trained in CPR
1. Make sure the area around the victim is safe.
2. Check the victim for responsiveness.
3. If the victim is not responsive, call 911 for help. • Specifically request an AED.
4. Check for signs of breathing.
5. If the victim is not breathing normally or is just gasping: • Send someone for an AED if one is available. • Open clothing. • Place the heel of one hand in the center of the
chest and the heel of the other hand on top of and parallel to the first hand.
6. Give 30 chest compressions • Press down at least 2 inches with each one at the
rate of 100 to 120 compressions per minute (just more than 1½ compressions per second).
7. Continue compressions until the AED arrives. • 100 to 120 compressions per minute (just more
than 1 ½ compressions per second.
8. Turn on the AED and follow the instructions carefully.

vii
If You Are Trained in CPR
1. Make sure the area around the victim is safe.
2. Check the victim for responsiveness.
3. If the victim is not responsive, call 911 for help. • Specifically request an AED.
4. Check for signs of breathing.
5. If the victim is not breathing normally: • Send someone for an AED if one is available. • Open clothing and give 30 chest compressions,
pressing down at least 2 inches with each one at the rate of 100 to 120 compressions per minute (just more than 1½ compressions per second).
6. Tilt the head back to open the airway. • Look in the mouth to see if there is an object that
can be safely removed. If so, remove the object. • Give two breaths watching for the chest to rise
and resume compressions.
7. Give 30 more chest compressions.
8. Continue with two breaths and 30 compressions until the AED arrives.
9. Turn on the AED and follow the instructions carefully.

viii
Conscious Choking
1. Call Emergency Medical Services (EMS). • Send someone to call EMS immediately.
2. Approach the victim. • Ask the victim if he is choking. If the victim nods
“yes” or can’t speak, take immediate action.
3. Prepare to give abdominal thrusts. • If the victim cannot speak or cough, stand behind
him with one foot between his legs. • Reach around the victim’s abdomen and place
your fist, thumb inside, just above the navel but below the ribs. Cover your fist with your opposite hand. (If the victim is pregnant or obese, place your hands in the center of the chest, rather than the abdomen).

ix
4. Administer abdominal thrusts. • Thrust inward and upward firmly and quickly. This
puts pressure on the victim’s diaphragm, helping to force the obstruction out.
5. Continue abdominal thrusts. • Continue giving abdominal thrusts until the object
is expelled or the victim loses consciousness.
6. Begin CPR. • If the victim loses consciousness, begin CPR
immediately.

x
Hypothermia
Hypothermia occurs when a person’s core body temperature drops well below normal. Symptoms may include uncontrolled shivering, slowed speech, slurred speech, memory lapse and blue lips.
1. Call Emergency Medical Services (EMS).
• As soon as you notice these symptoms, immediately call EMS.
2. Begin warming the victim. • Take the victim to a sheltered area and remove
any wet clothing. Cover the victim with dry clothing, blankets, or other insulating materials.
3. Maintain warmth. • Insulate the victim’s head, underarms, and groin. If
available, place a warm hat on the victim’s head.
4. Give the victim liquids. • If the victim is conscious, sitting up and able to
drink, give him warm, non-alcoholic liquids.
5. Monitor the victim. • Carefully monitor the victim’s breathing and be
prepared to administer CPR.
xi
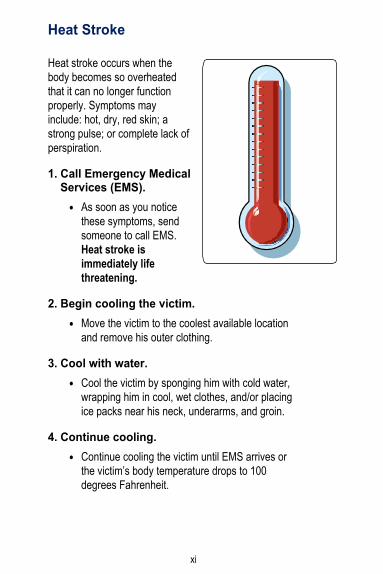
Heat Stroke
Heat stroke occurs when the body becomes so overheated that it can no longer function properly. Symptoms may include: hot, dry, red skin; a strong pulse; or complete lack of perspiration.
1. Call Emergency Medical Services (EMS).
• As soon as you notice these symptoms, send someone to call EMS. Heat stroke is immediately life threatening.
2. Begin cooling the victim. • Move the victim to the coolest available location
and remove his outer clothing.
3. Cool with water. • Cool the victim by sponging him with cold water,
wrapping him in cool, wet clothes, and/or placing ice packs near his neck, underarms, and groin.
4. Continue cooling. • Continue cooling the victim until EMS arrives or
the victim’s body temperature drops to 100 degrees Fahrenheit.

xii
Heat Exhaustion Heat exhaustion occurs when an individual is extremely overheated but does not yet have heat stroke. Symptoms may include: heavy perspiration, pale clammy skin, weakness, nausea and headache. If not cared for early, heat exhaustion can lead to heat stroke.
1. Begin cooling the victim. • Move the victim to a shady, cool place and loosen
any tight clothing. Apply cool, wet cloths to the skin. If available, place ice packs in the underarms and groin area.
2. Continue cooling. • Fan the victim; if he is conscious and upright, give
him cool water to drink.
3. Monitor the victim. • Watch the victim closely and be prepared to call
Emergency Medical Services (EMS) if his condition doesn’t quickly improve.

xiii
Burns First-degree Burn The least serious burn, similar to a sunburn.
• No emergency medical treatment required.
Second-degree Burn Skin is swollen, intensely red, and may have blotches or weeping blisters. Significantly painful.
• Cool burned skin with room-temperature water for about 10 minutes.
• If necessary, place a wet cloth over the burned skin.
• Promptly remove items such as jewelry and tight clothing that may constrict the area when it starts to swell.
• Cover the burn with a loose dressing. • Get medical treatment for large burn areas or
burns on the face, genitals, hands, or feet.
Third-degree Burn Charred or white, leather-like skin. Victim may show symptoms of shock.
• Call Emergency Medical Services (EMS). • Promptly remove items such as jewelry or tight
clothing that may constrict the area when it starts to swell.
• Watch for signs of shock. • Monitor the victim’s breathing and be prepared to
administer CPR.

xiv
Chemical Burn Chemical substance on victim’s skin causes a burning sensation.
• Wear gloves to protect yourself from contact with the substance.
• Brush dry chemicals off the skin surface. • Move the victim away from the spill and wash the
burned areas with running water for at least 20 minutes.
• Remove any jewelry or tight clothing that may constrict the area.
• Call for EMS if the victim has signs of shock or the burn occurred on the eyes, hands, feet, face, groin, or buttocks.

xv
OSHA In 1970, Congress passed the Occupational Safety and Health Act to protect workers from occupational safety and health hazards. The Act created the Occupational Safety and Health Administration (OSHA), a federal agency established to create and enforce safety and health standards and regulations. The Act also gave employers and employees certain rights and responsibilities regarding workplace safety and health.
Twenty-six states and two U.S. territories have obtained approval from OSHA to establish their own occupational safety and health enforcement agencies. These states are referred to as state plan states, and they are required to establish standards and regulations that are at least as stringent as those established by federal OSHA. Several of these states have implemented standards and regulations that are even more stringent than those established by federal OSHA. The states with OSHA-approved state plans are listed below (CT, IL, ME, NJ, NY, and Virgin Island plans cover state and local governments only). All other states fall under federal OSHA jurisdiction.
Alaska Arizona California Connecticut Hawaii Illinois Indiana
Iowa Kentucky Maine Maryland Michigan Minnesota Nevada
New Jersey New Mexico New York North Carolina Oregon Puerto Rico South Carolina
Tennessee Utah Vermont Virgin Islands Virginia Washington Wyoming
“Competent Person” Definition: The OSHA “competent person” is an individual who is knowledgeable of applicable standards, able to identify workplace hazards related to the specific operation and has the authority to take appropriate corrective action when necessary.
xvi
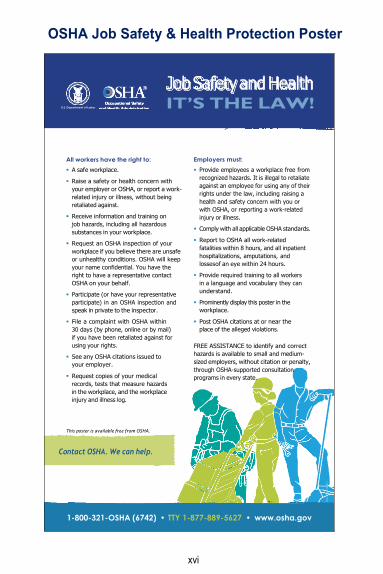
OSHA Job Safety & Health Protection Poster
U.S. Department of Labor
Job Safety and Health IT’S THE LAW!
All workers have the right to: A safe workplace.
Raise a safety or health concern with your employer or OSHA, or report a work- related injury or illness, without being retaliated against.
Receive information and training on job hazards, including all hazardous substances in your workplace.
Request an OSHA inspection of your workplace if you believe there are unsafe or unhealthy conditions. OSHA will keep your name confidential. You have the right to have a representative contact OSHA on your behalf.
Participate (or have your representative participate) in an OSHA inspection and speak in private to the inspector.
File a complaint with OSHA within 30 days (by phone, online or by mail) if you have been retaliated against for using your rights.
See any OSHA citations issued to your employer.
Request copies of your medical records, tests that measure hazards in the workplace, and the workplace injury and illness log.
Employers must: Provide employees a workplace free from
recognized hazards. It is illegal to retaliate against an employee for using any of their rights under the law, including raising a health and safety concern with you or with OSHA, or reporting a work-related injury or illness.
Comply with all applicable OSHA standards.
Report to OSHA all work-related fatalities within 8 hours, and all inpatient hospitalizations, amputations, and losses of an eye within 24 hours.
Provide required training to all workers in a language and vocabulary they can understand.
Prominently display this poster in the workplace.
Post OSHA citations at or near the place of the alleged violations.
FREE ASSISTANCE to identify and correct hazards is available to small and medium- sized employers, without citation or penalty, through OSHA-supported consultation programs in every state.
This poster is available free from OSHA.
Contact OSHA. We can help.
1-800-321-OSHA (6742) • TTY 1-877-889-5627 • www.osha.gov
OSHA
316
5-04
R 20
15
xvii
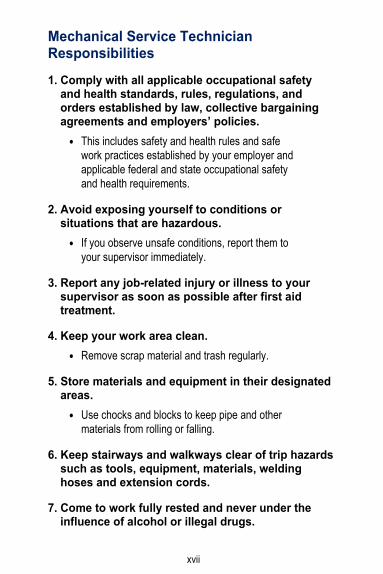
Mechanical Service Technician Responsibilities 1. Comply with all applicable occupational safety
and health standards, rules, regulations, and orders established by law, collective bargaining agreements and employers’ policies.
• This includes safety and health rules and safe work practices established by your employer and applicable federal and state occupational safety and health requirements.
2. Avoid exposing yourself to conditions or situations that are hazardous.
• If you observe unsafe conditions, report them to your supervisor immediately.
3. Report any job-related injury or illness to your supervisor as soon as possible after first aid treatment.
4. Keep your work area clean. • Remove scrap material and trash regularly.
5. Store materials and equipment in their designated areas.
• Use chocks and blocks to keep pipe and other materials from rolling or falling.
6. Keep stairways and walkways clear of trip hazards such as tools, equipment, materials, welding hoses and extension cords.
7. Come to work fully rested and never under the influence of alcohol or illegal drugs.

xviii
8. If you intend to work while under the influence of prescription drugs, inform your supervisor before starting work.
• Working while under the influence of prescription drugs is acceptable only if: • Your health care provider is fully aware of the
potential job hazards you will face and authorizes you to perform the work while under the influence of the drug(s).
• Your supervisor authorizes you to work under these conditions. You must provide your supervisor with written authorization from your health care provider.

Mechanical Service Technician Orientation Statement
Company Name
I (Print Employee Name) have received the MSCA Safety Manual for Mechanical Service Technicians and agree to:
• Read the MSCA Safety Manual for Mechanical Service Technicians in its entirety
• Ask my supervisor about anything in the manual that is confusing or unclear
• Comply with all safety and health work practices referenced in the manual
• Immediately report any unsafe and/or unhealthful jobsite work practices, conditions, or situations to my supervisor
• Immediately inform my supervisor of any workplace injuries that I sustain
I understand that this manual does not cover every conceivable workplace hazard and occupational safety and health rule, standard or regulation. Therefore, I agree to comply with occupational safety and health work practices and applicable safety and health rules, standards and/or regulations that are not addressed in this manual to protect myself from workplace hazards.
Employee Signature
Date
xix

1
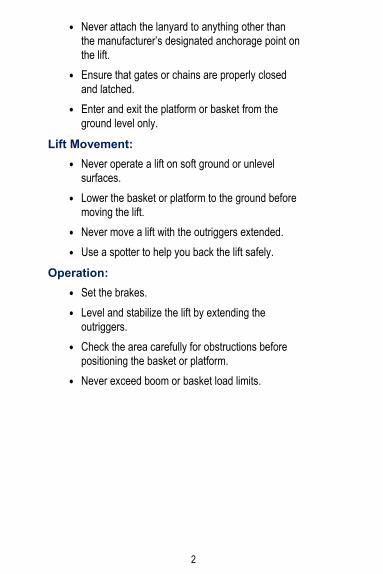
Aerial Lifts Aerial lifts are devices used to elevate workers to areas that cannot be reached from walking/ working surfaces. They include, but are not limited to, scissors lifts, extensible boom platforms, articulating boom platforms and vertical towers.
Safe Work Practices General:
• Never operate a lift until you have received the proper training.
• Obey operating instructions, warnings and cautions for each lift.
• Visually inspect the lift before using it and test the controls to ensure that it is in good condition and functioning properly.
• Never use a ladder, bucket, or other objects to extend your reach.
• Never step up on the mid-rail or top-rail to extend your reach.
• Always keep both feet planted firmly on the floor of the basket.
• Use a personal fall restraint system whenever the manufacturer recommends it. The system should include a full-body harness and lanyard.
2
• Never attach the lanyard to anything other than the manufacturer’s designated anchorage point on the lift.
• Ensure that gates or chains are properly closed and latched.
• Enter and exit the platform or basket from the ground level only.
Lift Movement: • Never operate a lift on soft ground or unlevel
surfaces. • Lower the basket or platform to the ground before
moving the lift. • Never move a lift with the outriggers extended. • Use a spotter to help you back the lift safely.
Operation: • Set the brakes. • Level and stabilize the lift by extending the
outriggers. • Check the area carefully for obstructions before
positioning the basket or platform. • Never exceed boom or basket load limits.

3
Arc Flash & Electrical Shock Protection An arc flash is an explosion that occurs in electrical equipment when electricity takes an unintended path. Electrical shock is the potentially dangerous physiological effect of electrical current passing through the body on its way to ground.
General: • Make sure you have the required safety training
before working near energized electrical conductors or circuit parts.
• For protection from arc flash and electrical shock, maintain flash protection and shock protection boundaries of at least 5 feet from all units or systems pushing 480 volts or less, unless you’re wearing all necessary personal protective equipment.
• The shock protection boundary includes any conductive objects you might be carrying. Conductive objects that you’re carrying should never come closer to a unit or system than the established shock protection boundary allows.
• If you will be working on units or systems pushing more than 480 volts, check with your supervisor about arc flash and shock protection boundaries before starting work.
Troubleshooting: • When troubleshooting a unit or system pushing
480 volts or less, wear the following personal protective equipment at a minimum: • 8-calorie arc-rated long-sleeved shirt and pants. • 8-calorie arc-rated balaclava. • Safety glasses.

4
• Class E hardhat. • 8-calorie arc-rated face shield. • Class 00 rubber insulated gloves. • Protective leather gloves over the rubber
gloves. • Earplugs. • Footwear that is leather, dielectric, or properly
tested to demonstrate that it will not ignite, melt, or drip at the minimum arc rating for the respective arc flash PPE category.
• Once you have completed troubleshooting, de-energize the unit and lockout the source of electricity.
• Test the unit or system to be sure the power is off. • Discharge the stored energy, such as the current
in the capacitors. • When all this is done and there are no exposed,
energized parts, you can remove your arc flash and electrical shock personal protective equipment, unless the unit you are working on has a built-in interlocking disconnect.
• When performing any kind of work on units with built-in interlocking disconnects, never remove any of your arc flash and electrical shock personal protective equipment.
• Never remove your safety glasses, no matter what type of unit or system you’re working on.
Re-Energizing: • Once the repairs are completed, be sure to
remove all tools, materials, and equipment from inside the unit or system.

5
• Close or replace any open doors or panels. • Put all the arc flash and electrical shock personal
protective equipment back on. • Remove the lockout device. • Stand to the side of the electrical power source
(e.g., panel box, switch, lever). • Re-energize the unit.

6
Asbestos A
Asbestos is a mineral-based material that is resistant to heat and chemical corrosion. Prior to 1980 it was used in the production of many building materials such as pipe wrap, boiler wrap, ceiling tiles, floor tiles, fireproofing materials, insulation and wallboard. Asbestos can be harmful to workers if it is inhaled or swallowed.
Safe Work Practices General:
• Assume that building materials installed before 1980 contain asbestos.
• When you come across building materials installed before 1980 that would easily crush, crumble, or come apart, sending particles into the air, leave the area immediately and report the situation to your supervisor.

7
Working Around Asbestos: • Before working around suspect building materials,
make sure you have the proper training and respiratory protection.
• Do whatever is necessary (e.g., wet method, respirator use, HEPA ventilation systems) to protect yourself from overexposure.
• Wear coveralls and use the appropriate class and type of respirator while working around suspect building materials, unless your company’s sample tests, or air monitoring results indicate no risk of overexposure.
• Carefully follow the appropriate decontamination procedure before leaving the worksite, including showering, changing clothes, and properly storing contaminated clothing.

8
Bloodborne Pathogens Bloodborne pathogens are microorganisms in human blood and other body fluids that cause diseases such as hepatitis B (HBV) and acquired immunodeficiency syndrome (AIDS).
Safe Work Practices General:
• Be aware of bloodborne pathogen hazards when responding to an injury or working in places where human blood or body fluids might be present, such as health care facilities, nursing homes, dental facilities, funeral homes, and wastewater treatment plants.
• Use the appropriate personal protective equipment (PPE) to prevent human blood and body fluids from contacting your eyes, nose, mouth, or open cuts, punctures, or abrasions in the skin. Wear: • Safety glasses or
goggles. • Medical exam gloves (use latex-free gloves if
you have a latex allergy). • A surgical mask that covers your nose and
mouth, or a face shield. • Thoroughly wash your hands and face with warm,
soapy water immediately after exposure to human blood or body fluids.

9
Carbon Monoxide Carbon monoxide is a colorless, odorless, tasteless gas generated by internal combustion gasoline and diesel engines and some hot work operations such as welding.
General: • When working around sources of carbon
monoxide, ensure that the area is well ventilated. • If the area does not appear to be well ventilated,
leave it immediately and seek fresh air. Your body’s senses cannot help you determine whether carbon monoxide is present.

10
Common Chemical Substances Chemical substances, such as caustics, solvents, paints, glues, adhesives and cements, are used for a variety of work tasks.
General: • Protect yourself from these substances by
ensuring that they do not enter your body. • Use the proper personal protective equipment
such as gloves, goggles, face shields, aprons and, when necessary, respirators to keep from inhaling, ingesting, injecting, or absorbing chemical substances into your body.

11
Compressed Air Compressed air is air forced into containers under extreme pressure.
General: • Before using compressed air for cleaning, ensure
there are no hazardous substances that could become airborne when compressed air is released.
• Reduce the pressure to less than 30 pounds per square inch (psi) before using compressed air for cleaning.
• Wear chip guarding and safety glasses when using compressed air for cleaning.

12
Compressed Gas Cylinders Compressed gas cylinders are containers of gases that have been reduced in volume by pressure. Some common compressed gases in the mechanical construction industry are acetylene, oxygen, nitrogen and propane.
General: • Protect yourself and others
from fire, explosion and struck-by hazards caused by inappropriate use or treatment of compressed gas cylinders.
• Keep compressed gas cylinders secured in an upright position always.
• Close the cylinder valves as soon as work is completed, when cylinders are empty, and before transporting, moving, or storing the cylinders.
• Before transporting, moving, or storing compressed gas cylinders, make sure that the valve protection caps are in place.
Storage: • Store cylinders in a dry, well-ventilated area at
least 20 feet from combustible materials. • Store oxygen cylinders at least 20 feet from fuel
gas cylinders such as acetylene or separate them with a ½-hour non-combustible barrier at least 5 feet high.

13
• Never store cylinders in gang boxes, lockers, or other poorly ventilated areas.
• Store gas hoses in dry, well-ventilated areas.
COperational Use: • Keep cylinders away from ignition sources such as
sparks, hot slag, and flames, or isolate them with fire-resistant shields.
• Also keep cylinders away from all sources of electricity, so they will never become part of an electrical circuit.
• Keep cylinder valve wrenches in place while the valves are open so they can be shut off quickly if necessary.
• Inspect regulators and torches before each use. Do not use them if they appear damaged.
• Do not use regulators or torches that appear to be malfunctioning. Immediately follow your company’s procedure for taking defective equipment out of service.
• Use only friction lighters to ignite torches.

14
Confined Spaces A confined space is any space that can be entered by a worker but is not designed for continuous worker occupancy, and which has limited or restricted entrance and exit ways. Confined spaces include, but are not limited to: pits, process vessels, utility vaults, bins, pipelines, tunnels, shafts, sewers, manholes, boilers and ducts.
General: • Find out who your company has designated as the
“competent person” (see page xv for definition) for the confined space in which you will be working.
• Never enter a confined space until your supervisor authorizes you to do so. The space must be tested to determine whether the atmosphere inside is hazardous. The “competent person” will test for oxygen content, toxic gases, and flammable/explosive atmospheres.
• Never enter a confined space that has a hazardous atmosphere until you have received the proper training and are wearing the proper personal protective equipment (PPE).
• Follow all the safe work practices covered in your training, which include information such as proper use of ventilation systems, air monitoring, monitor alarm systems, PPE, emergency egress equipment and procedures, and confined space attendants.
• Remember that welding, cutting or any kind of hot work inside a confined space can create a hazardous atmosphere. Use an adequate ventilation system and monitor the air to ensure that the atmosphere is not hazardous.

15
• If a co-worker collapses inside a confined space, do not attempt a rescue unless you have received the proper training and have the equipment you need to perform the rescue safely.

16
Cranes & Derricks Cranes and derricks are machines used to lift and move heavy objects. They include, but are not limited to: crawler cranes, truck cranes, tower cranes, overhead gantry cranes and floating derricks.
C
General: • Never operate a crane or derrick without the
proper qualifications/certifications.
Prior to Operation: • Check with the designated “competent person”
(see page xv for definition) to ensure that appropriate ground preparations have been completed before beginning crane operations.
• Make sure that a qualified person has completed the necessary crane or derrick inspections.
• Ensure that the signal person and the riggers you will be working with are properly qualified.
• Verify that the load capacity of the crane or derrick is posted and visible from the operator’s station.
Operation: • Extend the outriggers before lifting a load. • Rope off or barricade the space 360 degrees
around the swing radius of the rotating superstructure.
• Never exceed the load capacity. • Operate the crane or derrick only on firm, level
ground. Use mats whenever necessary, and especially when lifting extremely heavy loads.
• Make sure that the boom point is centered directly over the load for rigging.

17
• Ensure that no part of any crane comes closer than: • 10 feet from a power line rated 50 kilovolts (kV)
or below; and • 10 feet plus 0.4-inch for each kV over 50 kV for
lines rated over 50 kV, or twice the length of the line insulator.

18
Damaged Equipment
Damaged equipment is any equipment that is damaged to the extent that it could cause worker injury or property damage.
General: • Carefully inspect all equipment before each use. • If you don’t see damage, test the equipment to
determine whether it is functioning properly. • If you do see damage, or if the equipment is not
functioning properly, immediately follow your company’s procedure for taking defective equipment out of service.
• Identify it as unsafe to use by locking or tagging out the controls, or by tagging and physically removing the equipment from the jobsite.
Damaged Equipment Tags
CAUTION
DO NOT OPERATE
DANGER
DO NOT START

19
Electrical Safe Work Practices Electrical safe work practices are procedures established to protect workers from electrical shock and arc flash hazards when working with or near sources of electricity, or tools and equipment powered by electricity.
General: • Implement all safe work
practices necessary to protect yourself from electrocution, shock, burns, arc flashes and arc blasts.
Before Starting Work: • Use a ground fault circuit interrupter (GFCI) and/or an
assured equipment grounding conductor program for all 120-volt, single phase, 15- and 20-amp receptacle outlets that are not part of the permanent wiring of the building or structure.
• Make sure your assured equipment grounding conductor program covers all cord sets, receptacles and equipment connected by cords and plugs.
• When using double insulated tools or appliances in place of grounded tools or appliances, make sure they are clearly marked as double insulated. Look for the words “Double Insulated” or the double insulation symbol, which is a small square inside a larger square.

20
• Verify that the extension cord you will be using is rated to accept the maximum current (amps) pulled by the portable power tool you will be operating.
• Carefully inspect all tool and equipment cords, extension cords and plugs for damage and excessive wear such as broken, cut, frayed, or abraded insulation, broken or exposed wires, and missing ground terminals.
• When you come across damaged electrical cords, tools, or equipment, immediately follow your company’s procedure for taking defective equipment out of service.
• Never attempt to repair a damaged cord with electrical tape or any other materials.
• Make sure that portable lights in wet or otherwise conductive locations such as tanks or boilers are protected by a GFCI, or make sure they are pulling no more than 12 volts.
• Do not suspend temporary lights by their cords unless they are designed specifically for that purpose.
While Working: • Protect extension cords and tool and equipment
cords from damage due to vehicle traffic, sharp building materials, pinch points such as doorways, and other potential sources of damage.
• Never attach extension cords to objects with staples, hang them from nails, or suspend them from wire. When you must work near electrical circuits where contact with exposed energized electrical conductors or circuit parts is possible, ensure that

21
the source of electricity has been de-energized and locked out by someone who is qualified to do it safely.
• Make sure you have the required safety training before working near energized electrical conductors or circuit parts.
• For protection from arc flash and electrical shock, maintain flash protection and shock protection boundaries of at least 5 feet from all units or systems pushing 480 volts or less, unless you are wearing all necessary personal protective equipment.
• The shock protection boundary includes any conductive objects that you might be carrying. Conductive objects that you are carrying should never come closer to a unit or system than the established shock protection boundary allows.
• When potential exposure is from circuits pushing 480 volts or less, wear: • 8-calorie arc-rated long-sleeved shirt and pants. • 8-calorie arc-rated balaclava. • Safety glasses. • Class E hardhat. • 8-calorie arc-rated wrap around face shield. • Class 00 rubber gloves. • Protective leather gloves over the rubber
gloves. • Earplugs. • Footwear that is leather, dielectric, or properly
tested to demonstrate that it will not ignite, melt, or drip at the minimum arc rating for the respective arc flash PPE category.

22
• When potential exposure is from circuits pushing more than 480 volts, extensive training and more sophisticated protective measures and protective equipment are necessary. Do not proceed without the proper additional training and authorization from your supervisor.

23
Fall Prevention & Protection Fall prevention refers to systems that prevent workers from falling, such as a railing. Fall protection refers to systems that help protect workers from injury when they do fall, such as a personal fall arrest system or a safety net system.
General: • When you could potentially fall more than 4 feet to
a lower level, make sure you are protected by a guardrail system, personal fall arrest system or hole covers. This 4-foot rule does not apply to ladders or scaffolds.
• Check to ensure that elevated ramps, runways, and other walkways that are 4 feet or more above a lower level have guardrail systems in place.
• Before stepping on elevated walking/working surfaces, make sure they have the strength and structural integrity to support the full weight and force of the workers, equipment and materials that could be placed on them.
Railings: • Make sure that
the top edge members of railings are 42 inches above the walking/working surface.
• Check that intermediate rails are between the top edge members and the walking/working surface.
24
• Make sure that toeboards are installed to keep tools and materials from falling to a lower level.
• Inspect the system to ensure that it can withstand 200 pounds of force in any outward or downward direction.
• When any part of a guardrail system must be removed to facilitate materials handling, and you could potentially fall through the opening by working near it, use a personal fall arrest system.
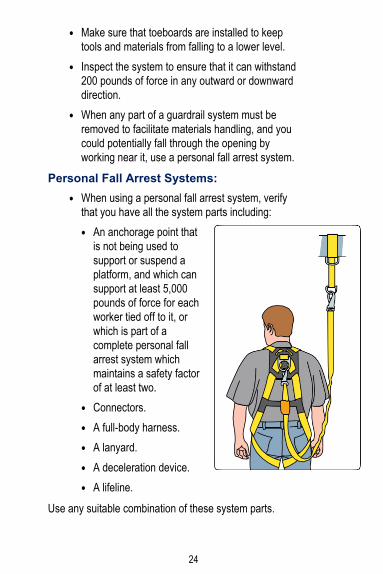
Personal Fall Arrest Systems: • When using a personal fall arrest system, verify
that you have all the system parts including: • An anchorage point that
is not being used to support or suspend a platform, and which can support at least 5,000 pounds of force for each worker tied off to it, or which is part of a complete personal fall arrest system which maintains a safety factor of at least two.
• Connectors. • A full-body harness. • A lanyard. • A deceleration device. • A lifeline.
Use any suitable combination of these system parts.

25
• Only use locking snaphooks. • Get the proper training before using this system.
Hole Covers: • Use hole covers on holes in floors, roofs, and
other walking/working surfaces only when the holes are small enough to be safely covered.
• Make sure hole covers can safely support twice the aggregate weight of the workers, equipment and materials that could be placed on them.

26
Fire Prevention & Protection Fire prevention and protection are safe work practices and procedures to help prevent fires from occurring, and to protect workers and property from unnecessary damage if a fire does occur.
General: • Smoke only in designated smoking areas. • Be familiar with all fire exits and fire alarms. • Remove combustible items from your work area frequently. • Dispose of oily, greasy, or paint-soaked rags or towels only in approved metal containers with self-closing lids.
• Keep solvents and other flammable/combustible materials in approved, properly labeled containers, and store them in a proper location.
• Keep ignition sources such as sparks, flames, and excessive heat away from solvents and other flammable/combustible materials.
• Turn off internal combustion engines used to power vehicles, generators, or other equipment before refueling.
• Report fire hazards to your supervisor immediately.
• Know how to quickly access emergency telephone numbers and the nearest telephone.

27
Fire Protection Equipment:
F
• Make sure that firefighting equipment is easy to locate and readily accessible.
• Ensure that you can quickly and easily access a Class ABC fire extinguisher from all work areas.
• Keep a Class ABC fire extinguisher readily accessible when welding, torch cutting, brazing, soldering, grinding and in other hot work areas.
Multi-Class Fire Extinguishers
Letter Symbol Type of Material Examples of Materials
Common
Combustibles Wood, Paper, Cloth, etc.
Flammable Liquids
and Gases Gasoline, Propane and Solvents
Live Electrical
Equipment Computers, Fax Machines, etc.
Combustible
Metals Magnesium, Lithium, Titanium, Sodium, Aluminum Powder
28
In Case of Fire: • Warn others in the area about the fire. • Attempt to extinguish smaller fires with the proper
fire extinguisher. • If the fire is large, sound the fire alarm immediately
and evacuate the building or structure. • Call the fire department and give accurate
directions to the fire. • Post someone to meet the fire department and
direct them to the fire. • Cut off electrical power, but only if it is safe to do
so.

29
Flammable/Combustible Liquids/Materials Flammable/combustible materials are materials with low flash points that can easily ignite if exposed to an ignition source.
General: • Store flammable/
combustible liquids in approved, properly labeled containers with self-closing lids.
• Never use flammable liquids within 50 feet of an ignition source.
• Never store more than 25 gallons of a flammable/ combustible liquid in a room outside of an approved storage cabinet, and never allow more than three storage cabinets in a single storage area.
• Keep flammable/combustible liquids in closed containers when not in use.
• Store flammable/combustible waste materials in approved containers with self-closing lids, and properly dispose of the waste regularly.
Storage Cabinets: • Use only approved storage
cabinets designed specifically for flammable/combustible liquid storage.
• Make sure that storage cabinets for flammable/ combustible liquids are labeled as follows: “FLAMMABLE – KEEP FIRE AWAY.”

30
• Check the Safety Data Sheets (SDS) to determine whether liquids are potentially flammable or combustible.
• Ensure that no more than 60 gallons of a flammable liquid or 120 gallons of a combustible liquid are stored in a single cabinet.
Inside Storage: • Do not smoke around flammable materials storage
areas. • Before storing flammable/combustible materials
inside a building, make sure the building is fire resistant, has self-closing doors at all openings, and has at least 4-inch-high sills or depressed floors. Also, be sure the electrical wiring and equipment are approved for flammable materials storage areas.
• Make sure the ventilation system is providing complete air exchanges at least 6 times an hour.
Outside Storage: • Ensure that flammable/combustible materials are
stored to allow a 12-foot-wide access way for emergency fire control equipment.
• Do not store flammable/combustible materials near areas used for exits or near stairways.
• Stack combustible materials in piles no more than 20 feet high.
• Make sure outdoor storage containers contain no more than 60 gallons of flammable/combustible liquids and that no more than 1,100 gallons are stored in any one area.

31
• Ensure that stacks of flammable/combustible materials are separated by at least 5 feet and are stored at least 20 feet from a building.
• Make sure that outside storage areas for flammable/combustible liquids are graded or diked so that a spill would be diverted away from the building.
• Do not smoke in outside flammable/combustible storage areas.
Liquefied Petroleum (LP) Gas Storage: • Ensure that “NO SMOKING” signs are displayed
on LP storage tanks. • Turn off equipment before fueling. • Protect LP gas tanks from vehicular traffic. • Ensure that all electrical connections including
pumps and switches are vapor and explosion proof.

32
Grinding
Grinding is the process of removing particles from an object with a powered, rotating abrasive wheel.
General: • Verify that there
are guards in place on your bench and stand grinders before using them.
• Ensure that the adjustable work rest is in place on bench and stand grinders, and the rest adjustment does not exceed a clearance of 1⁄8-inch from the surface of the abrasive wheel.
• Ensure that your portable grinder has guards in place unless the grinding wheel is 2 inches or less or is completely inside the work.
• Ensure that the guards cover spindle ends, nuts, and flange projections.
• Make sure the guards are strong enough to withstand the force of a bursting abrasive wheel by using only those guards provided by the manufacturers.
• Before mounting any abrasive wheel, inspect it carefully and ring test it to ensure that it is not defective.
• Check that abrasive wheels are properly matched to the RPM rating of the grinder, so the wheel or disk does not shatter.
• Wear safety glasses and a face shield when grinding.

33
• Turn off portable grinders and let the moving parts stop before putting the grinder down.

34
Hand & Power Tools Hand and power tools are implements and machines used by workers to complete work tasks.
General: • Never bypass a tool manufacturer’s safety guard
or device. • Carefully follow the tool manufacturer’s
instructions for maintenance and tool repair. • Keep all tools clean and in good condition. • Carefully inspect all tools before using them. • If you see damage, immediately follow your
company’s procedure for taking defective equipment out of service.
• Use only the proper size and type of tool for each job.
• Never use impact tools such as drift pins, wedges, and chisels if they have mushroomed heads.
Power Tools: • Before servicing power tools, make sure to unplug
or otherwise de-energize them. • Do not use electrical cords to raise or lower tools
from one level to another. • Never yank on an electrical cord to unplug it.
Grasp the plug and carefully remove it from the receptacle.
• Ensure that point of operation guards are properly in place before using the tool.

35
• Make sure your tools are properly grounded or double insulated before using them. To determine whether a tool is double insulated, look for the words “Double Insulated” or look for the double insulation symbol, which is a small square inside a larger square.
• Check that the on/off switch is in the “off” position before plugging in any tool.
• Carefully inspect the insulation on electrical cords, including extension cords and welding leads. If insulation is damaged, immediately follow your company’s procedure for taking defective items out of service.
• Use a ground fault circuit interrupter (GFCI) when operating power tools in damp locations.
• Keep moving parts away from your body. • Ensure that your power tool is off and moving
parts have stopped before putting it down.

36
Hazard Communication Hazard communication, also referred to as “Workers’ Right to Know,” is a system established to protect workers from inhaling, swallowing, injecting and absorbing harmful chemicals into their bodies.
General: • Understand that you have the right to know about
hazardous chemicals that you could be exposed to on a jobsite.
• Pay close attention to your hazard communication training so you will know how to work safely around hazardous chemicals.
• Request a copy of your company’s written hazard communication program and read it carefully. Make sure you know where the program is filed on the jobsite and how to access it quickly.
• Know where to quickly access Safety Data Sheets (SDS) on the jobsite and be sure you can find them quickly.
• Learn how to read an SDS. The most important parts of an SDS: • Identify the substance (section 1). • Describe the hazards associated with the
substance (section 2). • Describe first aid procedures in case of
exposure (section 4). • Describe how to protect yourself from the
hazards (section 8). • Learn how to read hazard warning labels.

37
Labeling: • Make sure that all containers are properly labeled. • The only exception to this rule is when you
transfer a chemical substance into a secondary container and the substance will be used immediately and entirely. When in doubt, label the container.
Required Label Safety Components: • Hazard Statement—A hazard statement is a
statement assigned to a specific hazard class and category that describes the nature of the hazard.
• Precautionary Statement—A precautionary statement is a phrase that describes the recommended measures to be taken to minimize or prevent adverse effects resulting from exposure to a chemical, or improper storage or handling of a hazardous chemical.
• Signal Words—A signal word is one word used to indicate the severity of a hazard and alert the reader to the potential hazard. The required signal words are “Danger” or “Warning.” “Danger” is used for more severe hazards. “Warning” is used for less severe hazards.
• Pictograms—A pictogram is a symbol and other graphic elements intended to convey specific information about the hazards of a chemical. There are a total of eight pictograms required for labels by OSHA. The environment pictogram is not required since environmental issues do not fall under OSHA’s jurisdiction.

38
HAZARD COMMUNICATION GHS - Pictograms and Hazards
Prolonged exposure to these chemicals may cause health problems like cancer and birth defects.
• Carcinogen • Mutagenicity • Reproductive Toxicity • Respiratory Sensitizer • Target Organ Toxicity • Aspiration Toxicity
Flammable chemicals that can burst into flame.
• Flammables • Pyrophorics • Self-Heating • Emits Flammable Gas • Self-Reactives • Organic Peroxides
Chemicals that can cause immediate health effects like skin rashes or respiratory irritation.
• Irritant (skin and eye) • Skin Sensitizer • Acute Toxicity • Narcotic Effects • Respiratory Tract Irritation • Hazards to Ozone Layer (Non-
Mandatory)
Corrosion Chemicals that can seriously damage skin and eyes.
• Skin Corrosion/Burns • Eye Damage • Corrosive to Metals
Flame Over Circle Chemicals that cause other materials to catch fire or explode.
• Oxidizers
Gases under pressure which can explode or propel the cylinder if it is heated, ruptured, or leaking.
• Gases Under Pressure
Exploding Bomb Chemicals that can blow up.
• Explosives • Self-Reactives • Organic Peroxides
Skull and Crossbones Chemicals with acute toxicity which could be fatal or toxic.
• Acute Toxicity (fatal or toxic)
MCAA Publication #SE43G
Health Hazards Flame
Exclamation Mark Gas Cylinder
H
39
Hexavalent Chromium Hexavalent chromium is a heavy metal component of stainless steel that can increase the risk of lung cancer if inhaled in significant concentrations. The major concern in the mechanical construction industry is worker overexposure to hexavalent chromium fumes created by welding or torch cutting on stainless steel pipe and ducts.
General: • Get the proper training before working around
hexavalent chromium. • Check with your supervisor before you begin hot
work on stainless steel to ensure that a hexavalent chromium exposure assessment has been completed.
• Use the ventilation that is provided and make sure it is working properly.
• Position your welding hood so welding fumes will not rise under it.
• If respiratory protection is required, be sure you have the required training and proper respirator before starting work.

40
Housekeeping Housekeeping is the process of keeping the work area properly organized and clean.
General: • Keep materials in the work
area properly organized. • Regularly dispose of scrap
materials and trash as the work progresses each day.
• Focus on keeping slip and trip hazards away from stairways, walkways, ladder platforms, scaffolds, and similar areas.
• Do not leave tools lying around. When not using them, put them in your tool belt, bucket, or toolbox.
• Put your tools away in a job box as soon as you are finished with them for the day.
• Whenever possible, keep hoses, power cords, welding leads and other trip hazards from lying across heavily traveled work areas or walkways.
• Regularly dispose of greasy or oily rags and other combustible materials in approved containers with self-closing lids.

41
Ladders Ladders are specially designed equipment used by workers to safely reach overhead work areas that cannot be accessed from the walking/working level.
General: • Get ladder safety training before using any ladder. • Carefully inspect each ladder before use. • If you discover any defects, do not use it.
Immediately follow your company’s procedure for taking defective equipment out of service.
• Never exceed the ladder’s maximum load capacity.
• Always face the ladder when climbing up or down and maintain a constant three-point contact (e.g., two hands and one foot or two feet and one hand on the ladder always).
• Never carry tools, materials or equipment in your hands when climbing up or down a ladder.
• Never reach out too far from a ladder. Get down and move it closer to the work.
• Make sure that all ladders are used only for their intended purpose.
• Use ladders with non-conductive side rails, especially when working near sources of electricity.
• Do not let ladders contact overhead power lines. • Do not use painted ladders—paint can hide ladder
defects. • Protect ladders in doorways and passageways so
they will not get bumped or knocked over.

42
Portable Straight Ladders: • Set straight ladders on a firm, level, and
substantial base. • Secure the ladders in place. • In addition to securing the ladders, use slip-
resistant feet on slippery surfaces. • Ensure that the base (foot) is pitched out from the
vertical plane of its top support ¼ the length of the ladder, measured from the ground at the foot of the ladder to the top support.
• When using a ladder to access an upper level, make sure that it extends at least 3 feet above the landing surface.
• Never climb higher than the third rung from the top of a straight ladder.
Portable Stepladders:
• Open stepladders fully and lock them in the open position before using them.
• Never use a stepladder as a straight ladder.
• Do not climb higher than the second rung from the top of a stepladder.
43
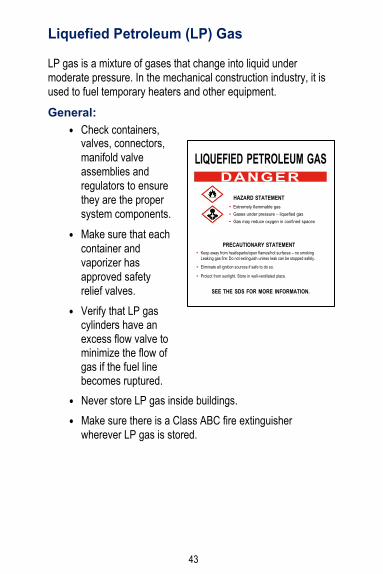
Liquefied Petroleum (LP) Gas
LP gas is a mixture of gases that change into liquid under moderate pressure. In the mechanical construction industry, it is used to fuel temporary heaters and other equipment.
General: • Check containers,
valves, connectors, manifold valve assemblies and regulators to ensure they are the proper system components.
• Make sure that each container and vaporizer has approved safety relief valves.
• Verify that LP gas cylinders have an excess flow valve to minimize the flow of gas if the fuel line becomes ruptured.
LIQUEFIED PETROLEUM GAS
DANGER HAZARD STATEMENT
• Extremely flammable gas • Gases under pressure – liquefied gas • Gas may reduce oxygen in confined spaces
PRECAUTIONARY STATEMENT • Keep away from heat/sparks/open flames/hot surfaces – no smoking
Leaking gas fire: Do not extinguish unless leak can be stopped safely.
• Eliminate all ignition sources if safe to do so.
• Protect from sunlight. Store in well-ventilated place.
SEE THE SDS FOR MORE INFORMATION.
• Never store LP gas inside buildings. • Make sure there is a Class ABC fire extinguisher
wherever LP gas is stored.

44
Lockout/Tagout
Lockout/tagout is a method of controlling hazardous energy during the servicing or maintenance of machines, power tools and equipment. The types of energy that generate hazards in the mechanical construction industry are electrical, mechanical, thermal, pneumatic and chemical.
General: • Make sure that you have the proper training on
lockout/tagout before you use the method, and before you work where others could be using it.
• Lockout sources of uncontrolled energy so they cannot be unexpectedly released when servicing or performing repairs or maintenance work on machines, power tools or equipment.
• On the rare occasion where it is not possible to use a lockout device, use an appropriate warning tag in place of the lock.

45
Manganese Manganese is a metal used in many welding rods. There are higher concentrations of manganese in carbon steel rods than in stainless steel rods, but both types can contain small amounts of the metal. Manganese becomes airborne as a part of the welding fumes where it can be inhaled. Overexposure usually takes place in poorly ventilated areas and can lead to problems in the human nervous system, such as tremors, loss of balance, poor memory, slurred speech and sleep disorders.
General: • Before beginning a welding operation,
always determine whether the welding rods you will be using contain manganese by checking the appropriate Safety Data Sheet (SDS) and looking at the ingredients in Section #3.
Operation: • Make sure the affected work area is well
ventilated. • If necessary, use portable blowers or fans to
improve ventilation in the affected area. • If you can’t get the area properly ventilated, you
may need to wear a respirator. Before starting the work, check with your supervisor to determine whether respiratory protection is needed.
• Before starting to work while wearing a respirator, you will need to pass a medical evaluation, receive proper respiratory protection training, and be fit tested to ensure that the respirator you will be using is sufficiently effective.

46
Noise Too much noise can be harmful if exposure is excessive for a long enough period. Hearing damage is permanent.
General: • When the noise level
exceeds the point that you can’t understand a normal, conversational speaking voice within 3 feet of where you’re working, the noise level may be excessive and potentially harmful.
Operation: • When working with power tools or near equipment
that could generate excessive noise, be sure to use hearing protection, such as earplugs or earmuffs.
• Choose hearing protection that is comfortable to use.
• When using earplugs, make sure they are clean. • Be sure to replace disposable earplugs
immediately after use and replace them with new ones the next time you need them.
• Select hearing protection with a suitable noise reduction rating (NRR), but which does not prohibit you from hearing a warning alarm or another person’s warning shout.
• When choosing hearing protection devices, check the packaging to determine the NRR.

47
• Use a noise level meter or noise dosimeter to determine the noise level.
• If measuring instruments are not available, gauge the noise level based on the noise levels of tools, machinery, or equipment that you are familiar with, such as: • Air Compressors—around 90 decibels. • Circular Saws—around 100 decibels. • Gas Powered Lawnmowers—around 100
decibels. • Gas Powered Chain Saws—around 100
decibels. • Make sure that what you choose will reduce the
noise level to an acceptable range based on the length of time you anticipate being exposed to it.
• Never exceed noise levels based on the following exposure duration information.
Duration Per Day/Hours Sound Level in Decibels
8 90 6 92 4 95 3 97 2 100
1½ 102 1 105 ½ 110
¼ or less 115

48
Personal Protective Equipment Personal protective equipment is designed to protect workers from workplace hazards in situations where engineering controls and other established methods are not feasible or effective.
Body Protection: • Wear flame-
resistant, long-sleeved shirts and pants.
• Wear an approved coverall or apron when welding or flame torch cutting.
• Wear 8-calorie arc-rated clothing, including a balaclava, when working around exposed energized electrical conductors or circuit parts that are pushing 50 to 480 volts.
• When working where voltage exceeds 480 volts, check with your supervisor for additional training and the appropriate personal protective equipment.
Eye and Face Protection: • Wear approved safety glasses or goggles always
on the jobsite unless you are in a trailer or protected office.
• Wear a face shield to protect your face from flying particles, grinding sparks, chemical splashes, and other potential hazards.

49
• Wear an 8-calorie arc-rated wrap around face shield when working around exposed energized electrical conductors or circuit parts that are pushing 50 to 480 volts.
• When working where voltage exceeds 480 volts, check with your supervisor about any additional training or personal protective equipment you may need.
• Always wear safety glasses under your face shield or welding helmet.
• Make sure that you have the properly shaded lens or lenses when exposed to radiant energy (light), such as when welding, torch cutting, soldering, or brazing.
Hand Protection: • Wear the proper gloves when moving materials or
working with sharp objects or material such as sheet metal.
• Wear the proper type of impermeable gloves for work around chemicals.
• Wear Class 00 rubber insulated gloves when working around exposed energized electrical conductors or circuit parts that are pushing 50 to 480 volts. Wear leather protective gloves over the rubber gloves.
• When working where voltage exceeds 480 volts check with your supervisor for additional training and the appropriate personal protective equipment.

50
Foot Protection • Wear leather work boots or work shoes with
protected toes. • Wear footwear that is leather, dielectric, or
properly tested to demonstrate that it will not ignite, melt, or drip at the minimum arc rating for the respective arc flash PPE category when working around exposed, energized electrical conductors or circuit parts that are pushing 50 to 480 volts.
• When working where voltage exceeds 480 volts, check with your supervisor for additional training and the appropriate personal protective equipment.
Head Protection: • Wear a Class E hardhat when working around
exposed energized electrical conductors or circuit parts that are pushing 50 to 480 volts. When working where the voltage exceeds 480 volts, check with your supervisor for additional training and the appropriate personal protective equipment.
Hearing Protection: • Wear approved earplugs or earmuffs whenever
you are exposed to loud noise, and always wear earplugs when you are working around exposed energized electrical conductors or circuit parts pushing 50 to 480 volts. The noise level next to an operating air compressor or circular saw is too loud to safely endure over extended time without hearing protection. If you cannot hear someone speaking in a normal tone 3 feet or less away from you, consider using hearing protection.

51
• If you are unsure about the noise level in your work area, wear the approved hearing protection.
Respiratory Protection: • Ensure you have the proper respiratory protection
training before using any respirator. • Request a copy of your company’s respiratory
protection program and follow it closely. • Participate in the respirator selection process to
ensure you are using the proper type and class of respirator.
• Only use respirators approved by the National Institute for Occupational Safety and Health (NIOSH). Look for “NIOSH” on the respirator.
• Go through a formal respirator fit testing process to select a properly fitting respirator.
• Where applicable, conduct a negative and positive pressure check each time you put on a respirator, and before you enter the contaminated area. If either test fails, do not use the respirator. Report to your supervisor immediately for another formal fit test.

52
Pneumatic Tools Pneumatic tools are tools powered by compressed air.
General: • Check the manufacturer’s safe operating pressure
for each tool or fitting before using it. • Never exceed the established safe operating
pressure for the tool or fitting. • Properly secure the hose to the compressor
before attaching the tool or fitting. • Properly secure tools to their hoses before using
them. • Use safety clips or retainers on pneumatic impact
tools to keep the attachments from being expelled. • Ensure that the system is equipped with a
pressure reduction device at the source of supply or branch line when hoses exceed ½ inch in diameter.

53
Refrigerants
Refrigerants are chemical compounds that absorb and transfer heat, usually with phase changes back and forth between gas and liquid.
General: • Some refrigerants
used in the mechanical service industry are flammable and/or toxic.
• The American Society of Heating, Refrigerating and Air-Conditioning Engineers (ASHRAE) has established a safety group classification system to help you identify hazardous refrigerants. Safety Group Classification System: • Class (A) signifies refrigerants for which toxicity
has not been identified at less than, or equal to, a specified concentration.
• Class (B) signifies refrigerants for which toxicity has been identified at below the same specified concentration.
• Class (1) refrigerants show no flame propagation.
• Class (2) refrigerants show lower levels of flammability. Class (2L) refrigerants show lower levels of flammability, and have a low maximum burning velocity.

54
• Class (3) refrigerants show higher levels of flammability.
• Look for the safety group classification of the refrigerants you’ll be using on the container label or safety data sheet and follow the instructions for safe use.

55
Classifications of Commonly Used Mechanical Service Industry Refrigerants: Low Toxicity – No Flame Propagation (A-1) Refrigerant Classification R-11
R-12
R-22
R-113
R-134A
R-404A
R-407C
R-410A
R-500
R-502
R-507A
R-744A
Low Toxicity – Low Flammability – Low Maximum Burning Velocity (A-2L) Refrigerant Classification R-454A
R-455A
R-1234yf
Low Toxicity – High Flammability (A-3) Refrigerant Classification R-290
R-600A
High Toxicity – No Flame Propagation (B-1) Refrigerant Classification R-123
High Toxicity – Low Flammability – Low Maximum Burning Velocity (B-2L) Refrigerant Classification R-717
56
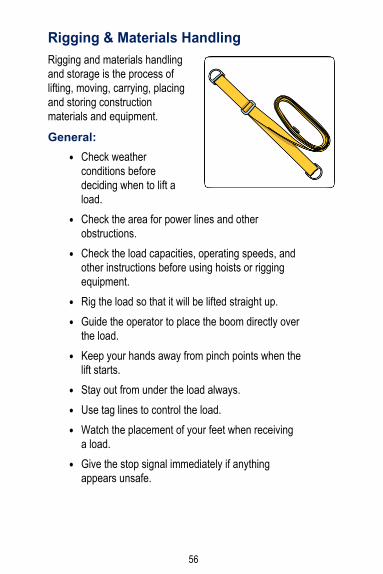
Rigging & Materials Handling Rigging and materials handling and storage is the process of lifting, moving, carrying, placing and storing construction materials and equipment.
General: • Check weather
conditions before deciding when to lift a load.
• Check the area for power lines and other obstructions.
• Check the load capacities, operating speeds, and other instructions before using hoists or rigging equipment.
• Rig the load so that it will be lifted straight up. • Guide the operator to place the boom directly over
the load. • Keep your hands away from pinch points when the
lift starts. • Stay out from under the load always. • Use tag lines to control the load. • Watch the placement of your feet when receiving
a load. • Give the stop signal immediately if anything
appears unsafe.

57
Alloy Steel Chain Slings: • Carefully inspect each sling before use. • If you see stretching, excessive wear, nicks and/or
gouges, immediately follow your company’s procedure for taking defective equipment out of service.
• Look for a permanently attached identification tag on each sling stating the size, grade, rated capacity and the name of the sling manufacturer. If the identification is not attached, immediately follow your company’s procedure for taking defective equipment out of service.
Wire Rope Slings: • Carefully inspect each sling before use. • If you see
signs of wear such as crushed sections, corrosion, kinking and/or an excessive number of broken wires, immediately follow your company’s procedure for taking defective equipment out of service.
• A rope is defective if: • There are 5 or more broken wires in 1 rope lay. • There are 3 or more broken wires in 1 strand of
1 rope lay. • Check the manufacturer’s stated load capacities
before using any sling. • Never exceed the sling’s load capacity. • Install wire rope clips properly.
Stran
d Wire

58
• Use the correct size and number of clips. • Never install U-bolts on the live end of the wire
rope. • The live end is where the saddle goes, so
remember, “Never Saddle a Dead Horse.”
U-Bolts Dead End
Live End
Saddles
Number and Spacing of U-Bolt Wire Rope Clips
Improved plow steel rope diameter (inches)
Number of clips Minimum Spacing (inches) Drop
forged Other material
½ (1.27 cm) 3 4 3 (7.62 cm) 5⁄8 (.625 cm) 3 4 3¾ (8.37 cm) ¾ (.75 cm) 4 5 4½ (11.43 cm) 7⁄8 (.875 cm) 4 5 5¼ (12.95 cm) 1 (2.54 cm) 5 6 6 (15.24 cm)
11⁄8 (2.665 cm) 6 6 6¾ (15.99 cm) 1¼ (2.79 cm) 6 7 7½ (19.05 cm) 13⁄8 (2.915 cm) 7 7 8¼ (20.57 cm)
Natural Rope and Synthetic Fiber Slings: • Carefully inspect each sling before use. • If you see abnormal wear, powdered fibers
between strands, broken fibers, variations in the size of the strands, variations in the roundness of strands, discoloration or rotting, and/or distortion of hardware in the sling, immediately follow your company’s procedure for taking defective equipment out of service.

59
• Check the manufacturer’s stated load capacities before using the slings. Never exceed the sling’s load capacity.
• Ensure that any splices made to rope slings are in complete accordance with the manufacturer’s recommendations.
Synthetic Webbing: • Carefully inspect each sling before use. • If you see acid or caustic burns, melting or
charring of any part, snags, punctures, tears, or cuts, broken, or worn stitches, and/or distortion of fittings, immediately follow your company’s procedure for taking defective equipment out of service.
• Check for marks or codes on each sling that state the name of the manufacturer, its trademark, the rated capacity for the type of hitch, and the type of material.
• If this information is not shown, immediately follow your company’s procedure for taking defective equipment out of service.
continued

60
Sling Angles: • Verify that each sling can
support the load based on the projected horizontal angle of the sling during the lift.
• Calculate the sling tension before the lift to ensure that it can support the load.
Materials Storage: • Make sure that all materials
stored in tiers are secured to prevent sliding, falling or collapse.
• Never store materials in passageways or aisles, or where they could obstruct exits.
• Don’t stack materials so high that they could fall.
• Ensure that pipe that is not on a rack is stacked and blocked so it won’t spread.
• Never place materials within 6 feet of any hoist areas or floor opening, or within 10 feet of an unfinished exterior wall inside unfinished buildings.
• Store materials safely based on their flammability and/or combustibility characteristics.
Manual Material Handling: • Have materials delivered as close to your work
area as possible.
1,000 lbs.
1,000 lbs.
577 lbs. 30˚
707 lbs. 45˚
CALCULATING SLING TENSION
LOAD
Length of Sling A
Height
X
Length of Sling B
= Vertical Component
Y X + Y
= ×
Load Weight
Tension in Sling
Length of Sling Height
×
Vertical Component
Y

61
• Have the materials staged at waist level, to reduce bending.
• Use material moving equipment whenever possible. • Use proper lifting techniques when you must lift
something.
Manual Lifting Techniques: • Start by getting your body as close to the object as
possible. • Position your feet and get a good grip on the
object. • Keep your butt down and your head up to retain
the natural curves of your back.
• Lift straight up with a slow, steady movement, letting your legs do the work.
• Never twist or turn your torso with your feet planted.
• When you turn, move your feet and body without twisting.
• When placing an object, reverse the order, remembering to keep your butt down and your head up.

62

63
Signs, Signals & Barricades Signs, signals and barricades are warning and protective devices used to protect workers from potential hazards and hazardous areas on jobsites and in traffic areas.
General: • Constantly look for warning signs, signals and
barricades while working. • Obey the signs and signals and avoid barricades,
remembering that all are there for your protection. • If you are responsible for installing signs, signals,
or barricades, ensure they are clearly visible and legible.
• Always remember that: • Danger signs refer to
immediate/imminent hazards. • Caution signs refer to potential
hazards or caution you against unsafe work practices.
• Safety instruction signs are there for injury/incident prevention. They are usually placed around jobsites in strategic locations.
• Notice signs are used for instructional purposes and are also placed around jobsites in strategic locations.
• Accident prevention tags are temporary warning tags usually placed on defective tools or equipment, or used to tag out sources of uncontrolled energy
DO NOT OPERATE
DANGER
CAUTION

64
that cannot be locked out.

65
Vehicle Safety
Vehicle safety is the process of reducing the risk of motor vehicle accidents and occupant injuries.
General: • Vehicle safety in the mechanical service industry
addresses: • Vehicle inspections. • Defensive driving. • Seat belt use. • Distracted driving. • Driving under the influence.
Vehicle Inspections: • Always be sure that the vehicle you’re using is in
good, safe operating condition. • Make sure the vehicle receives scheduled
maintenance according to the manufacturer’s recommendations.
66
• Inspect the vehicle yourself on a regular basis. At a minimum, make sure: • Tires are in good condition. • Tires are properly inflated. • Headlights, taillights, brake lights, turn signals,
back up lights and other lights are working properly.
• Windshield wipers are working properly, and wiper blades are in good condition.
• Windshield washer fluid container is full. • Vehicle’s braking system is working properly,
including the parking brake. • Back up alarm and horn are working properly. • Mirrors are in good condition and properly
adjusted. • Any time you find something wrong with the
vehicle, or if it does not appear to be working properly, do not use it. Follow your company’s procedures for having the vehicle repaired.
Defensive Driving: • Be aware of road conditions and the drivers
around you 100% of the time you’re behind the wheel.
• Pay close attention to the type of road surface you’re traveling on, the weather, the amount of light and the amount of traffic.
• Consider the maneuverability of the vehicle you’re driving, including the weight, center of gravity and minimum stopping distance needed based on current road conditions.

67
• Monitor the vehicles around you and the traffic flow, such as the types of vehicles on the road, the time of day, the speed of the traffic in the area, and the distances between vehicles in traffic.
• Think about what is going to occur, or what could occur, as far ahead of the encounter as possible.
• With good road conditions you should be at least 4 seconds behind the vehicle in front of you. Allow more time/distance when road conditions are bad.
• Think about any driving adjustments you may have to make before the anticipated encounter occurs.
• Adjust your lane, speed and following distances accordingly.
• Take whatever action is needed well ahead of time to minimize the need for quick evasive action on the road.
Seat Belt Use: • Make sure you wear your seat belt 100% of the
time regardless of: • How short the distance you must travel. • How slow you will be traveling. • Whether you are the driver or a passenger in
the vehicle.
Distracted Driving: • Refuse to send or receive text messages while
driving. • Never take your eyes off the road to look at a GPS
system’s map or route while driving. • Do whatever it takes to limit cell phone use while
driving.

68
• If you must use your cell phone while driving, use a hands-free device.
• Pre-program your cell phone so that frequently used numbers are on speed dial.
• Do not make calls while driving that require you to write down or memorize information or calls that require a lot of concentration.
• Pre-program vehicle sound systems before starting to drive.
• Don’t try to retrieve a dropped or fallen object while driving, unless it could interfere with your brake pedal, clutch, or accelerator.
Driving Under the Influence: • Before operating a motor vehicle, read the labels
on all over the counter and/or prescription drugs that you’re taking to identify any potential side effects that could affect your ability to drive safely.
• Never combine prescription and/or over-the-counter drugs without first checking with your health care provider or pharmacist. Ask specifically whether you can safely operate a motor vehicle while combining the drugs.
• Be diligent about not operating motor vehicles while under the influence of alcohol, illegal drugs, or over the counter or prescription drugs with potential side effects that could influence your ability to drive safely.
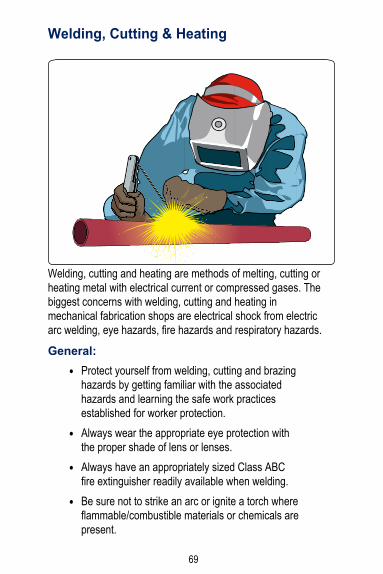
69
Welding, Cutting & Heating
Welding, cutting and heating are methods of melting, cutting or heating metal with electrical current or compressed gases. The biggest concerns with welding, cutting and heating in mechanical fabrication shops are electrical shock from electric arc welding, eye hazards, fire hazards and respiratory hazards.
General: • Protect yourself from welding, cutting and brazing
hazards by getting familiar with the associated hazards and learning the safe work practices established for worker protection.
• Always wear the appropriate eye protection with the proper shade of lens or lenses.
• Always have an appropriately sized Class ABC fire extinguisher readily available when welding.
• Be sure not to strike an arc or ignite a torch where flammable/combustible materials or chemicals are present.

70
Electric Arc Welding and Cutting: • Select cables that are capable of safely handling
the maximum current requirements of the work. • Use only manual electrode holders that are
specifically designed for arc welding and cutting. • Carefully inspect the welding cables, electrode
holders and any other current-carrying parts to ensure that they are properly insulated and in good condition. If any parts are damaged, immediately follow your company’s procedure for taking defective equipment out of service.
• Do not use damaged cables until they have been spliced or repaired by a properly qualified person.
• If a cable has been spliced or repaired, never use it within 10 feet of the electrode holder, unless the material used for the repair has the same or better insulating characteristics than the original insulation.
• Ensure that the ground return cable can safely carry the specified maximum amount of current generated by the arc welding unit.
• Before starting to weld each day, check all ground connections to ensure they are properly connected and have suitable capacity for the specified maximum current.
• Never place an electrode against a cylinder to strike an arc.
• Always attach the work cable directly to the work or work table, and as close to the weld as practical.

71
Gas Welding and Cutting: • Carefully inspect cylinder valves, regulators,
hoses, and torches before making any connections. If you see any damage, immediately follow your company’s procedure for taking defective equipment out of service.
• Inspect hoses and torches at the start of each work shift.
• Before connecting the regulators, stand to the side of the fuel gas cylinder valve, open it, and close it quickly (cracking). Repeat the process with the oxygen cylinder.
• When cracking a fuel gas cylinder or an oxygen cylinder, make sure the escaping gases will not be affected by sparks, flames, or other ignition sources.
• Make sure that you can easily tell the difference between fuel gas hoses and oxygen hoses.
• Ensure that it is physically impossible to connect hoses, regulators, and torches to the incorrect equipment by using incompatible fittings.
• Inspect the regulators, hoses, torches, and all their connections again after they are connected, and the gas has been turned on. Check carefully for leaks and never use leaking equipment.
• Use only friction lighters to light torches.
Ventilation: • Always ensure that the ventilation is adequate
before you start welding or cutting operations.

72
• Use adequate local ventilation and the appropriate respirator when performing hot work on zinc, lead, chromium, cadmium, mercury, beryllium bearing based or coated materials, or stainless steel (hexavalent chromium), unless your company’s risk assessment shows no risk of overexposure.
Inert Gases: • Always ensure that the oxygen content in the work
areas is sufficient when purging a system with inert gases, such as argon and nitrogen.
• Inert gases displace oxygen and can result in asphyxiation, including suffocation.

73
Zinc Zinc is a heavy metal found in galvanized metals. When galvanized metals are heated during hot work operations, fumes containing zinc oxide are generated, become airborne and can be inhaled by anyone in the work area. When zinc oxide is inhaled in large enough concentrations over a long enough period, the illness zinc fume fever (also referred to as metal fume fever) can occur. The symptoms include fever, chills, nausea, dryness in the throat, cough, fatigue, headache and body ache.
General: • When performing hot work on galvanized metals,
be sure to protect yourself from overexposure to zinc oxide.
Operation: • Make sure the work area is well ventilated. • Use a point-of-operation ventilation system, such
as a welding fume extractor, whenever it is available.
• Always position your welding helmet so that the fumes can’t rise underneath it.
• If your company’s zinc oxide exposure assessment shows that you could be overexposed without respiratory protection, be sure to wear an appropriate respirator.
• Before starting to work while wearing a respirator, you’ll need to pass a medical evaluation, receive proper respiratory protection training, and be fit tested to ensure that the respirator you’ll be using is sufficiently effective.

Item Code: MSSE8
Mechanical Contractors Association of America 1385 Piccard Drive | Rockville, MD 20850
301-869-5800 | fax 301-990-9690 | www.mcaa.org