onbase info session - grand valley state university...onbase resources page to search for your...
TRANSCRIPT

OnBase Info Session
https://www.onbase16.gvsu.edu/AppNet/Login.aspx

2
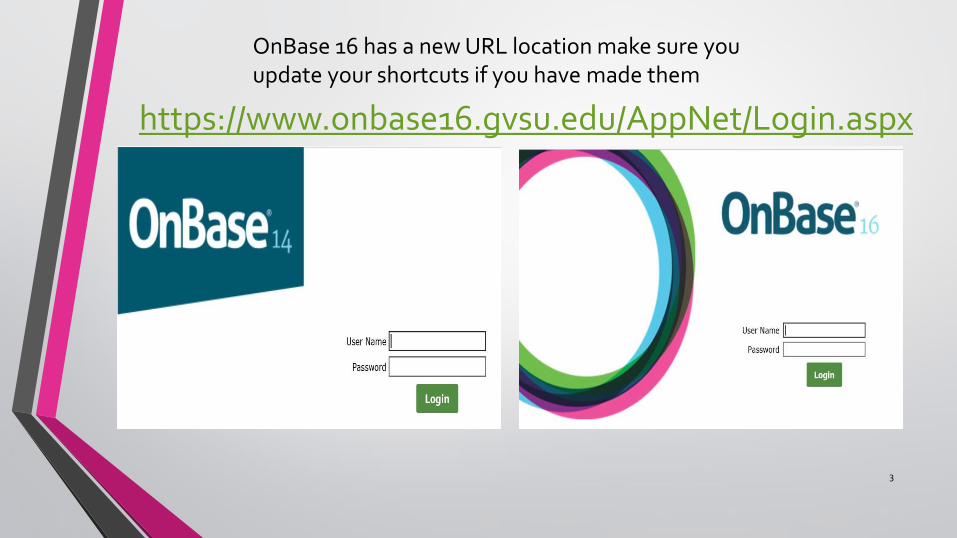
https://www.onbase16.gvsu.edu/AppNet/Login.aspx
3
OnBase 16 has a new URL location make sure you update your shortcuts if you have made them

Reasons to love OnBase16:
▪ Control who and how many people in your
department receive notifications.
▪ All documents are approved the same way.
▪ Runs on all platforms and major web
browsers.
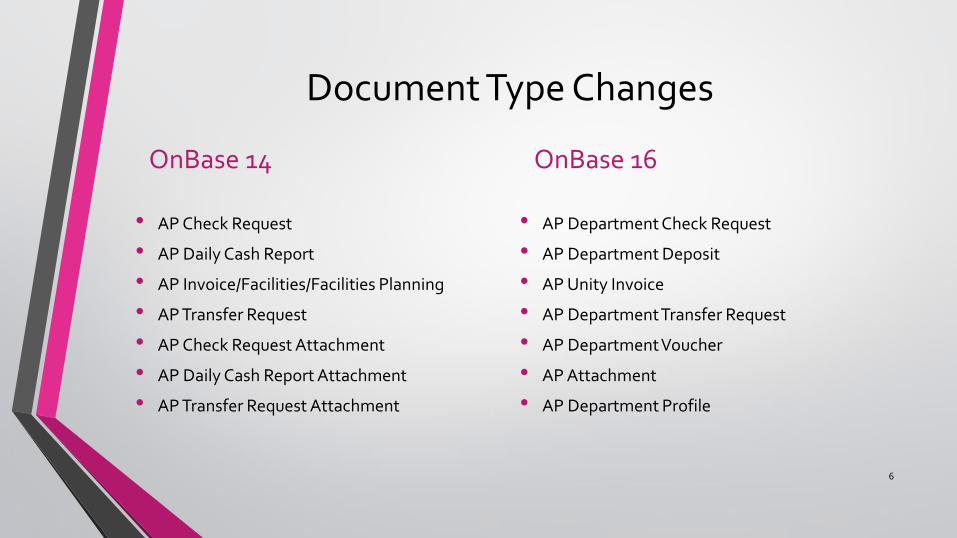
Document Type Changes
OnBase 14
• AP Check Request
• AP Daily Cash Report
• AP Invoice/Facilities/Facilities Planning
• AP Transfer Request
• AP Check Request Attachment
• AP Daily Cash Report Attachment
• AP Transfer Request Attachment
OnBase 16
• AP Department Check Request
• AP Department Deposit
• AP Unity Invoice
• AP Department Transfer Request
• AP Department Voucher
• AP Attachment
• AP Department Profile
6

Workflow Changes
OnBase 14
• AP Invoice Approval
• AP Daily Cash Reports
• AP Transfer Request
OnBase 16
• AP Form Completion
• AP Approval
7
Department Profile
• The Department Profile allows each department the ability to control who receives an email when there is work to complete in the Form Completion Life Cycle
• Each type of document can have different email notifications assigned to them
• Each department can decide how many people receive the email notification
• Each department can change the email notifications when they need to
8

9
Department Profile

10
To create a Department Deposit, Department Check Request or Department Transfer Request you start at the home menu and click on the second drop down arrow and select the option New Form. Select Request New Form from Department Profile.

11
• From the Choose Form drop down box select the form you wish to create. • Click the Department drop down box to select your department name. • Remember that there is a help document on the Business and Finance
OnBase Resources page to search for your department name based on a FOAP.
• Department Check Request• Department Deposit• Department Transfer Request
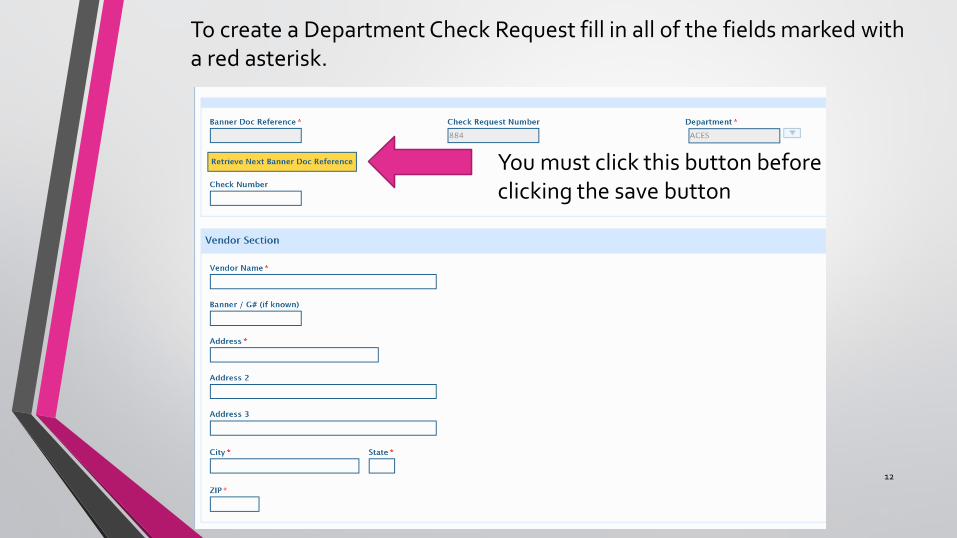
12
You must click this button beforeclicking the save button
To create a Department Check Request fill in all of the fields marked with a red asterisk.
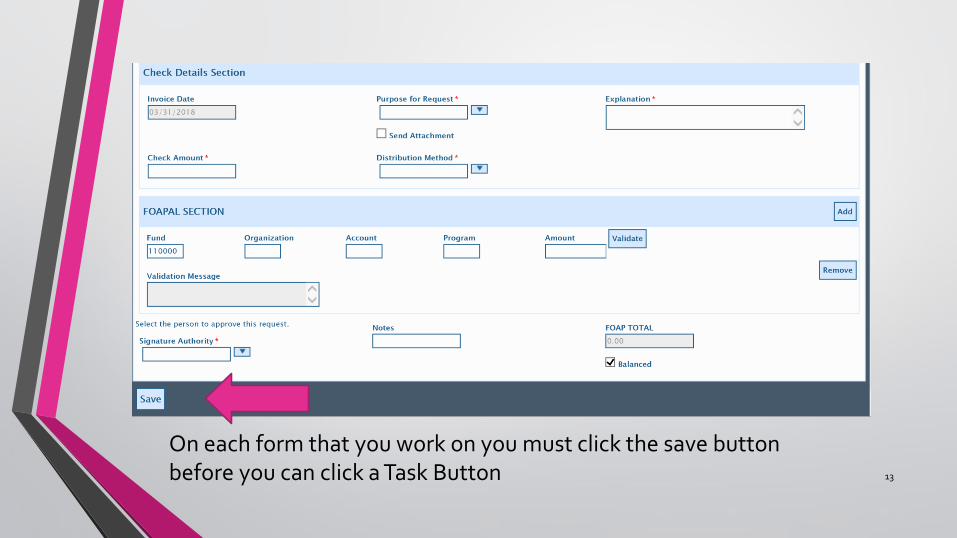
13
On each form that you work on you must click the save button before you can click a Task Button

14
Make sure you complete all of the fields marked with a red asterisk.
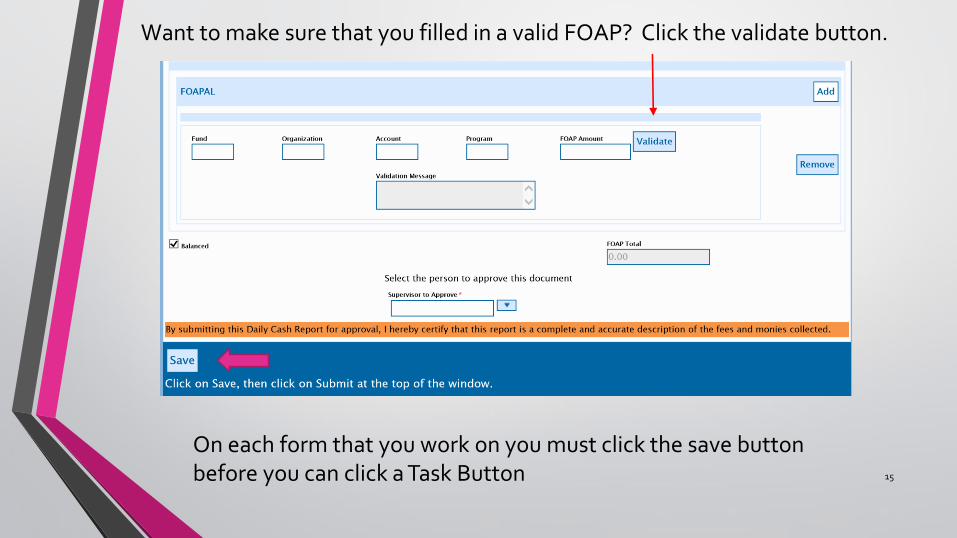
15
On each form that you work on you must click the save button before you can click a Task Button
Want to make sure that you filled in a valid FOAP? Click the validate button.

16
Make sure you complete all of the fields marked with a red asterisk.
The transfer request has boxes that you can check to receive instructions or explanations for the required values.

17
• Select the finalizing department from the drop down list• If the department is going to be the same choose your department again from the
drop down list
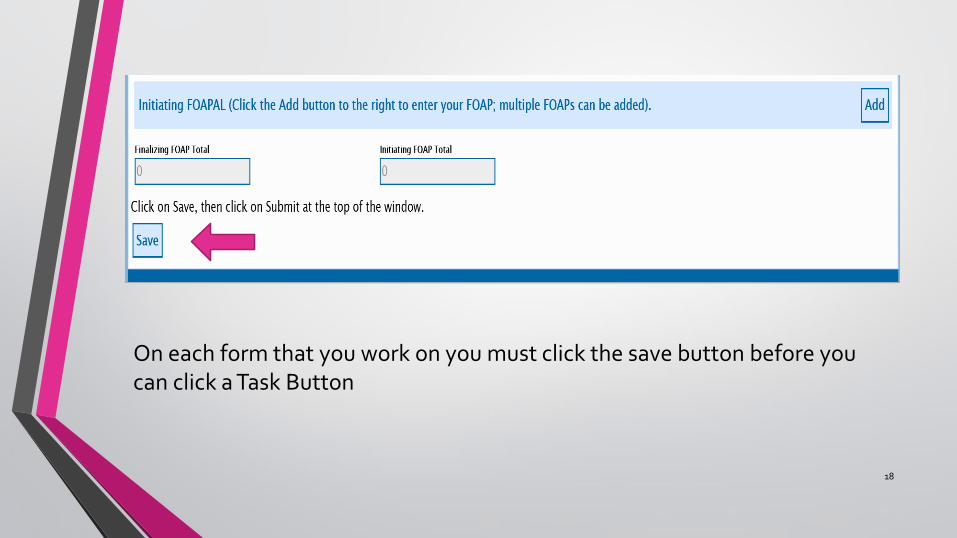
18
On each form that you work on you must click the save button before you can click a Task Button
19
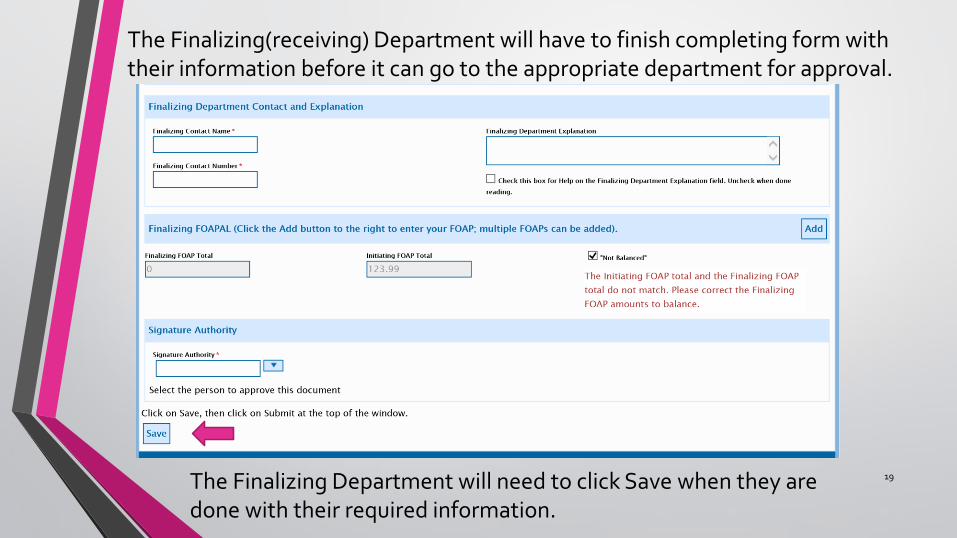
The Finalizing(receiving) Department will have to finish completing form with their information before it can go to the appropriate department for approval.
The Finalizing Department will need to click Save when they are done with their required information.
20
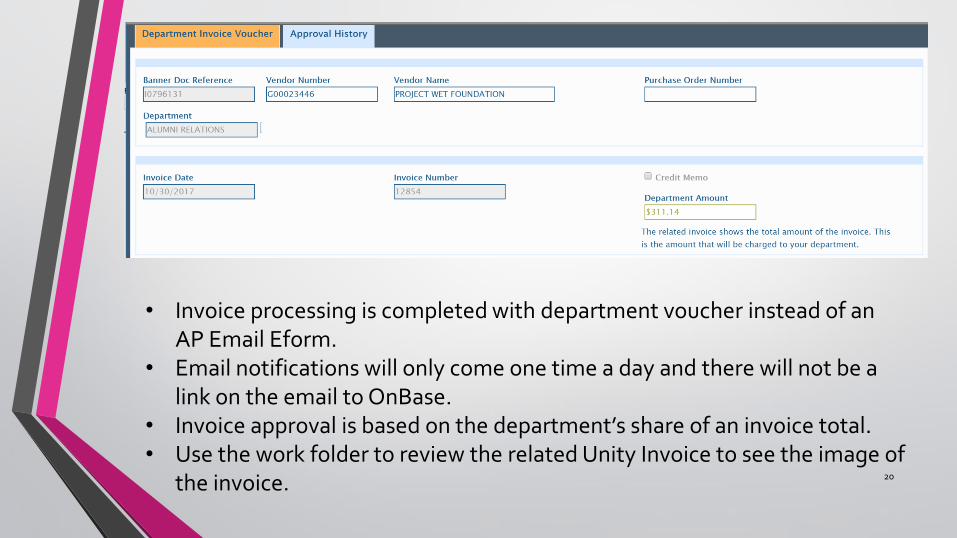
• Invoice processing is completed with department voucher instead of an AP Email Eform.
• Email notifications will only come one time a day and there will not be a link on the email to OnBase.
• Invoice approval is based on the department’s share of an invoice total.• Use the work folder to review the related Unity Invoice to see the image of
the invoice.
21
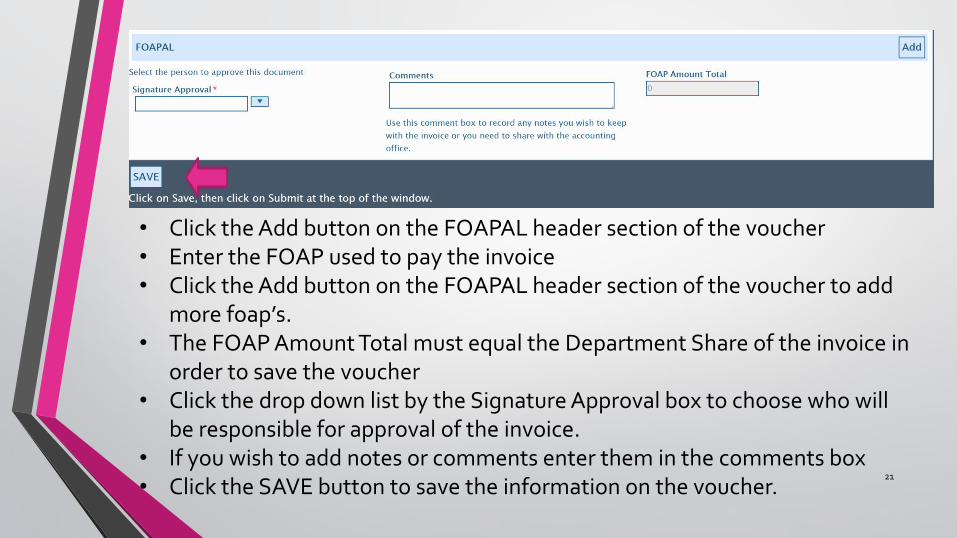
• Click the Add button on the FOAPAL header section of the voucher• Enter the FOAP used to pay the invoice• Click the Add button on the FOAPAL header section of the voucher to add
more foap’s.• The FOAP Amount Total must equal the Department Share of the invoice in
order to save the voucher• Click the drop down list by the Signature Approval box to choose who will
be responsible for approval of the invoice.• If you wish to add notes or comments enter them in the comments box• Click the SAVE button to save the information on the voucher.
22
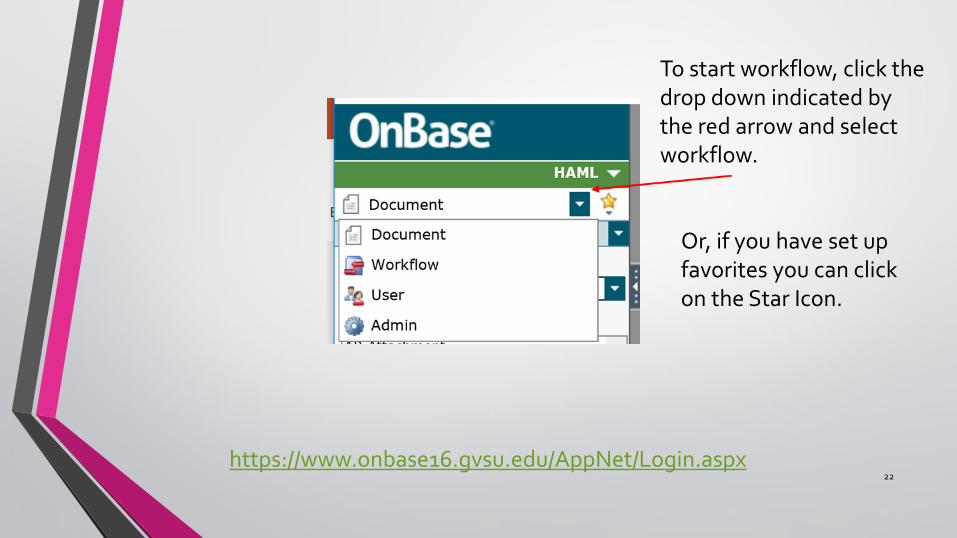
https://www.onbase16.gvsu.edu/AppNet/Login.aspx
To start workflow, click the drop down indicated by the red arrow and select workflow.
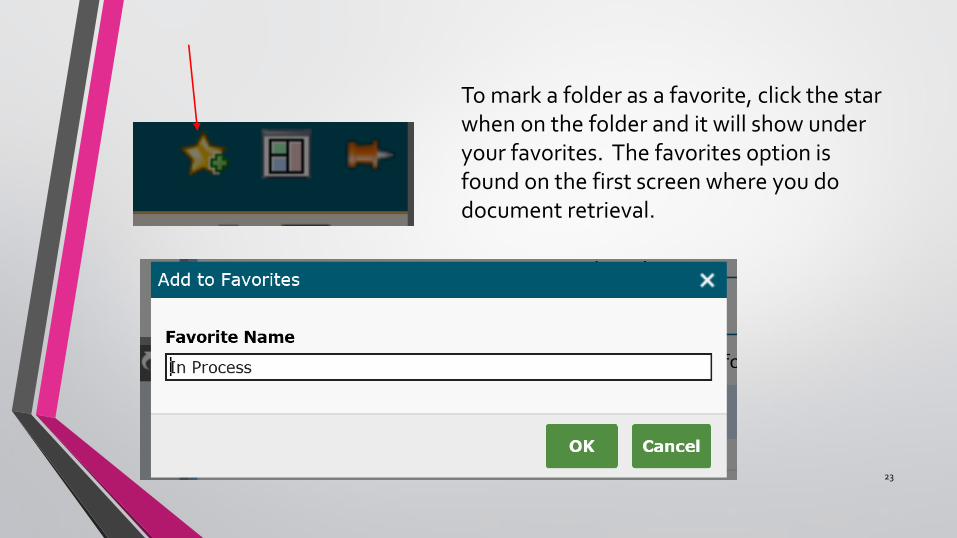
Or, if you have set up favorites you can click on the Star Icon.
23
To mark a folder as a favorite, click the star when on the folder and it will show under your favorites. The favorites option is found on the first screen where you do document retrieval.

24
• If you add a folder to your favorites you can access it from the home menu.
• Click the star Icon and the folders you marked as favorites will display. • Click the link to go directly to that folder.
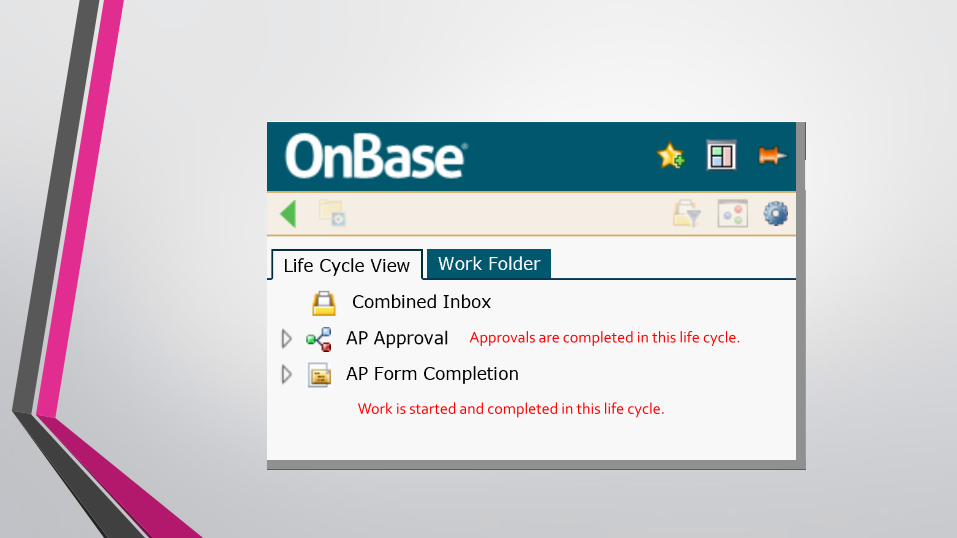
Work is started and completed in this life cycle.
Approvals are completed in this life cycle.
26
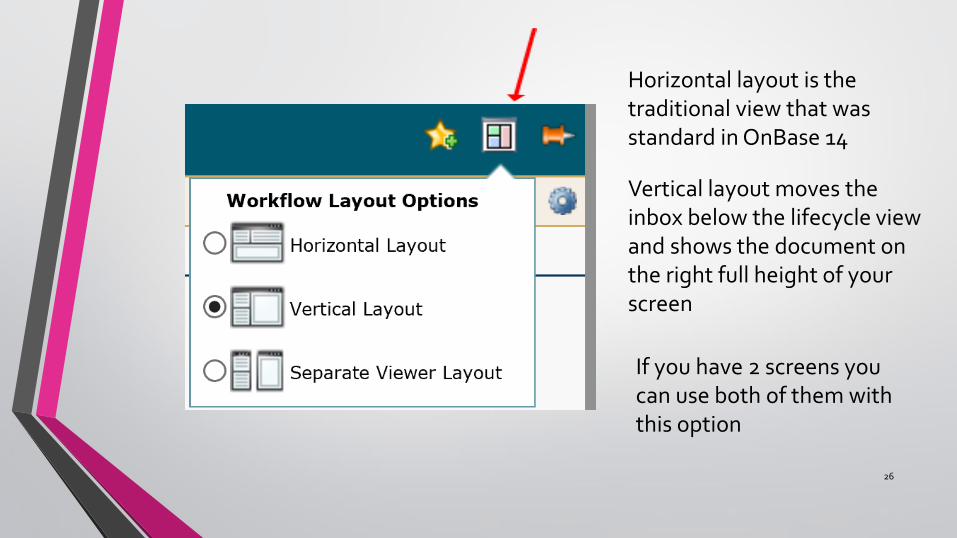
Horizontal layout is the traditional view that was standard in OnBase 14
Vertical layout moves the inbox below the lifecycle view and shows the document on the right full height of your screen
If you have 2 screens you can use both of them with this option

27
Horizontal Layout

28
Vertical Layout
29
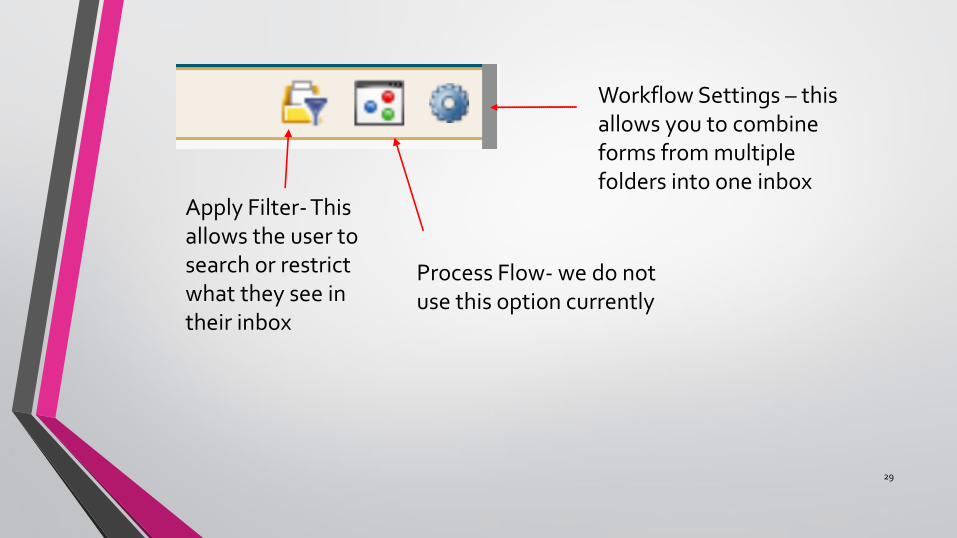
Apply Filter- This allows the user to search or restrict what they see in their inbox
Process Flow- we do not use this option currently
Workflow Settings – this allows you to combine forms from multiple folders into one inbox
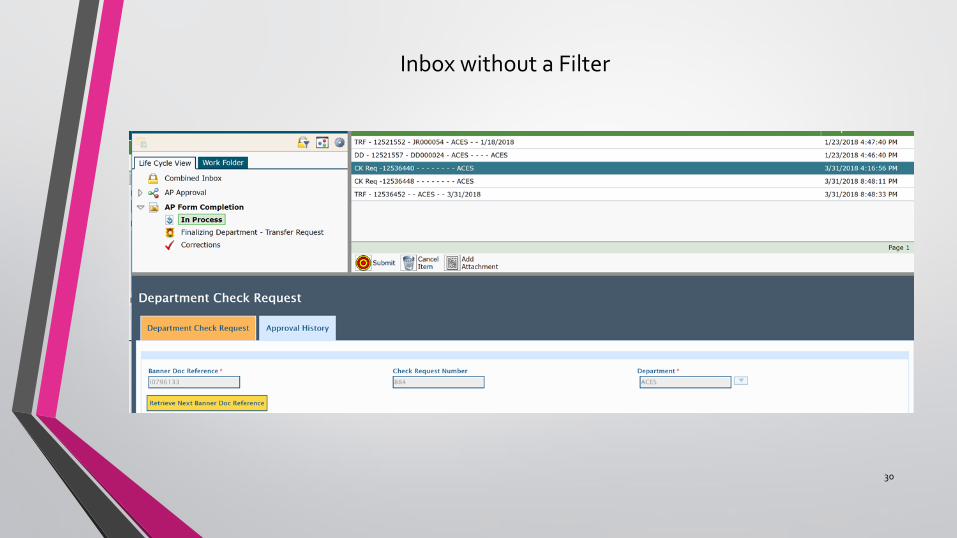
30
Inbox without a Filter
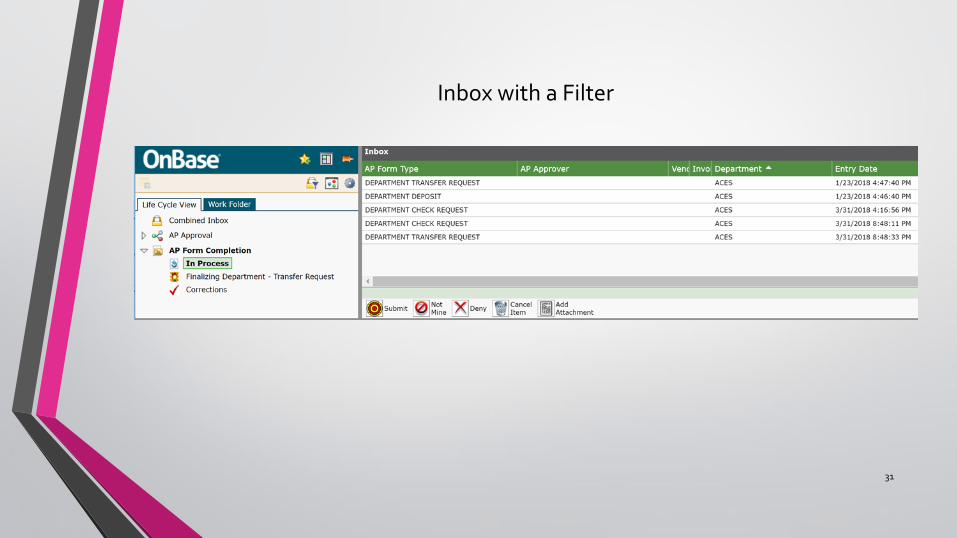
31
Inbox with a Filter

32
TRF – Transfer RequestDD – Department DepositCK Req – Department Check RequestDV – Department Invoice Voucher

33
The Task bar in the Life Cycle AP Form Completion > In Process will have 2 different options based on the form that you click on in your inbox. This is the set that will display if the form is a DV.
• Submit – Sends the form to its next step if all of the required fields are complete
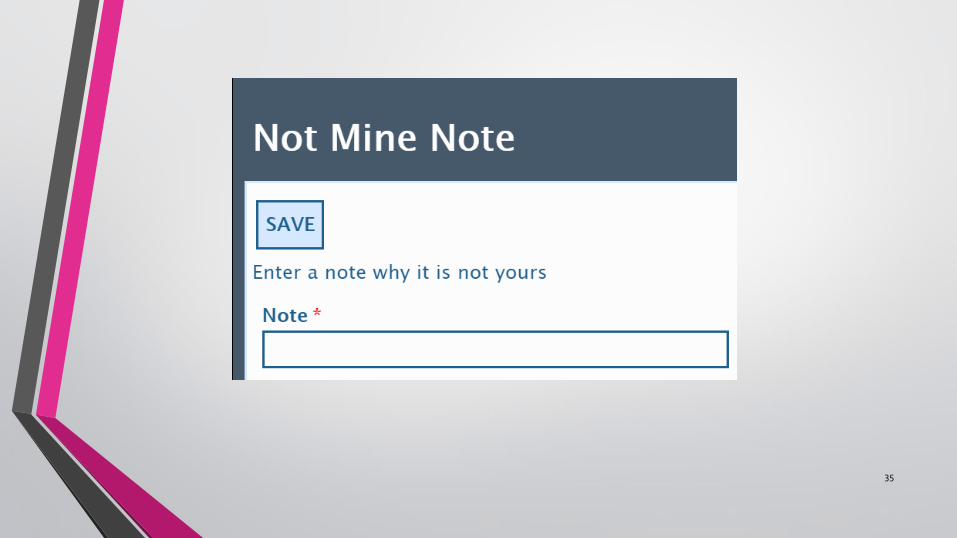
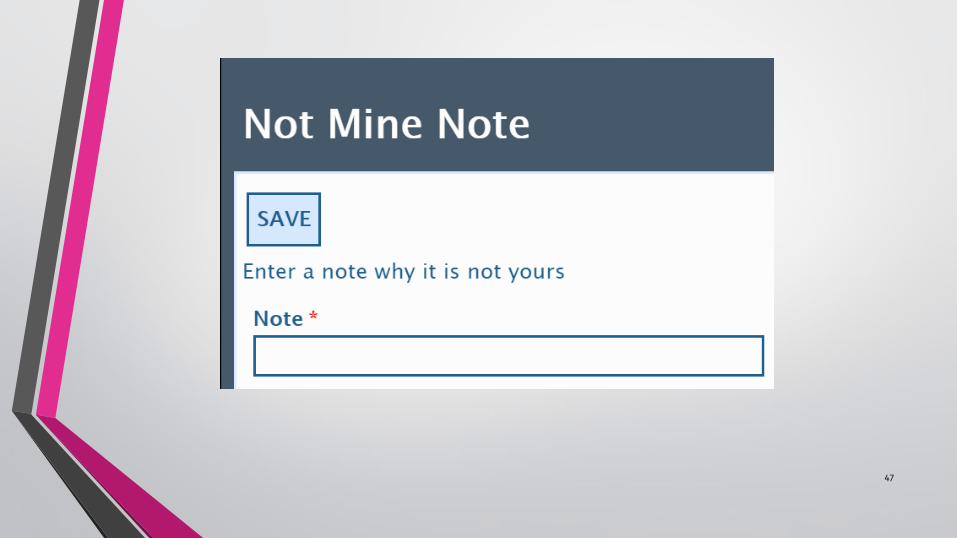
• Not Mine – Returns the Department Voucher (DV) to Accounts Payable
• Deny – Department has a valid reason to deny payment of an invoice• Cancel Item – this does not work on a DV• Add Attachment – Opens a window that allows the user to upload
an electronic document into OnBase
34
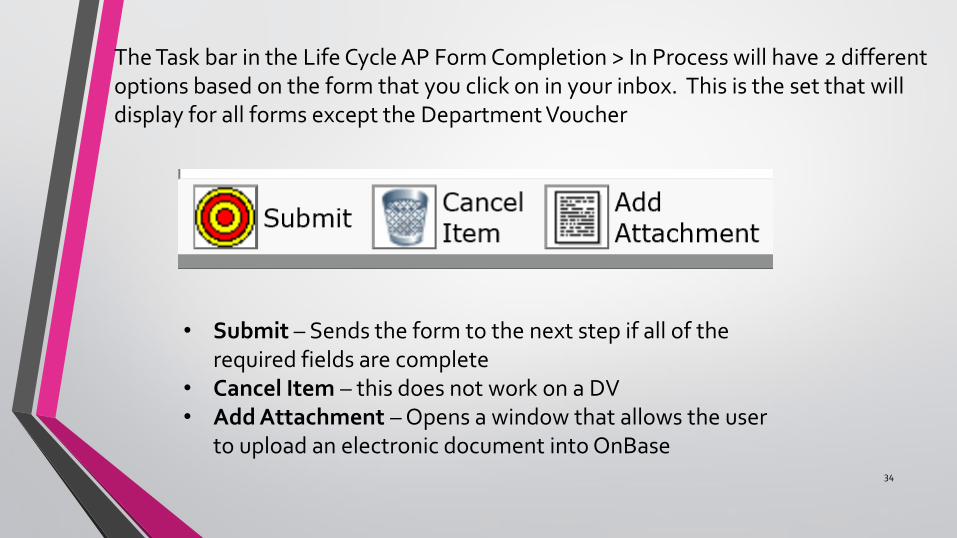
The Task bar in the Life Cycle AP Form Completion > In Process will have 2 different options based on the form that you click on in your inbox. This is the set that will display for all forms except the Department Voucher
• Submit – Sends the form to the next step if all of the required fields are complete
• Cancel Item – this does not work on a DV• Add Attachment – Opens a window that allows the user
to upload an electronic document into OnBase
35

36

37
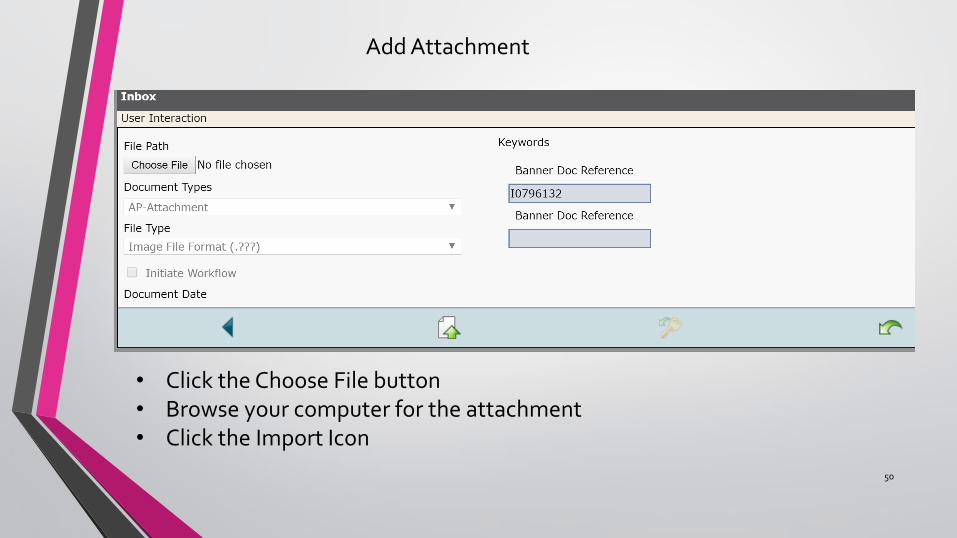
• Click the Choose File button• Browse your computer for the attachment• Click the Import Icon
Add Attachment
38
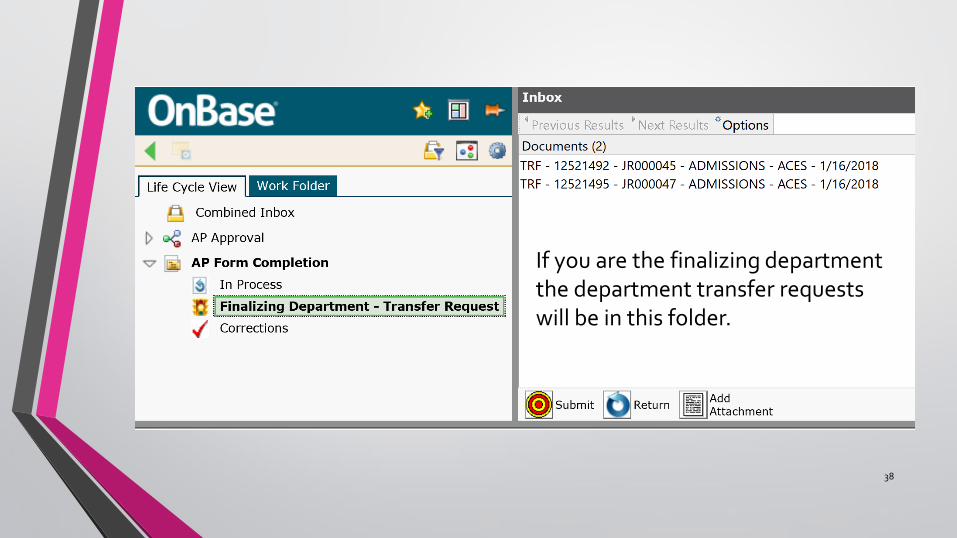
If you are the finalizing department the department transfer requests will be in this folder.

39
The Task bar in the Life Cycle AP Form Completion > Finalizing Department –Transfer Request
• Submit -Sends the form to the next step if all of the required fields are complete
• Return – Sends the Transfer Request back to In Process• Add Attachment - Opens a window that allows the user to upload an
electronic document into OnBase

40
If the FOAP you used for your transaction is not correct the form will be in this folder.
41
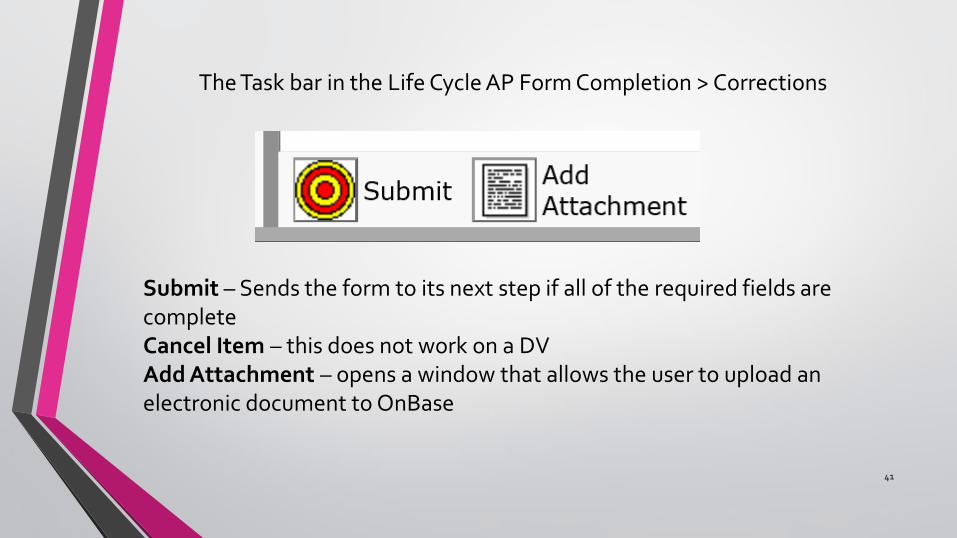
The Task bar in the Life Cycle AP Form Completion > Corrections
Submit – Sends the form to its next step if all of the required fields are completeCancel Item – this does not work on a DVAdd Attachment – opens a window that allows the user to upload an electronic document to OnBase
42
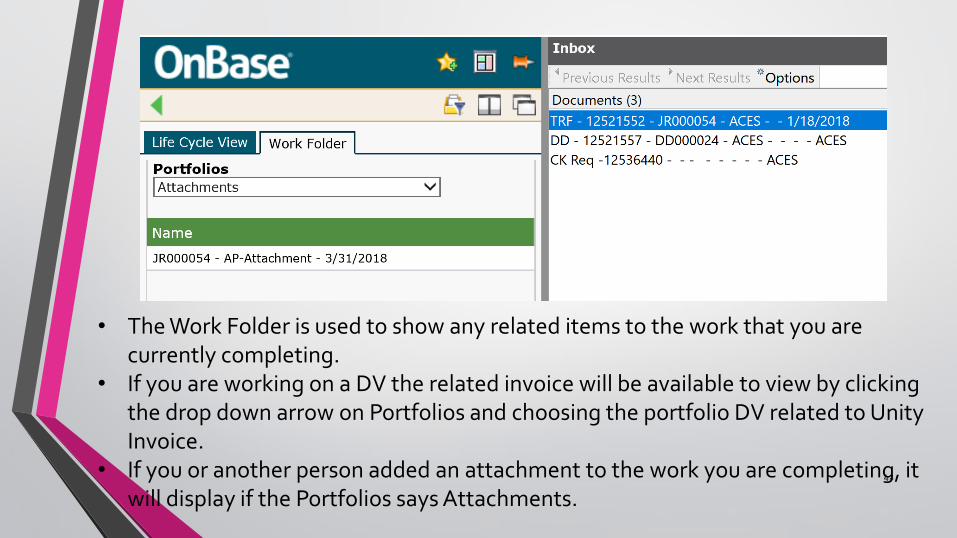
• The Work Folder is used to show any related items to the work that you are currently completing.
• If you are working on a DV the related invoice will be available to view by clicking the drop down arrow on Portfolios and choosing the portfolio DV related to Unity Invoice.
• If you or another person added an attachment to the work you are completing, it will display if the Portfolios says Attachments.
43
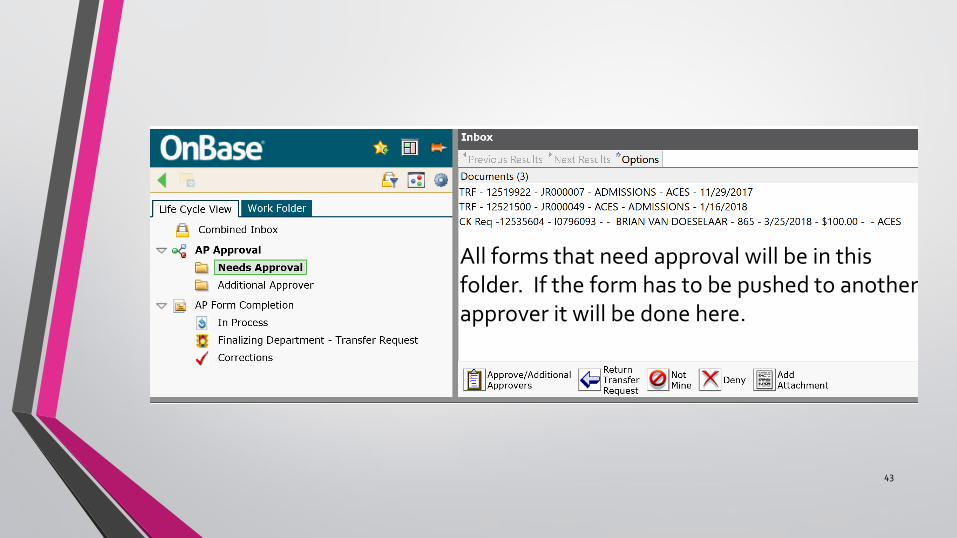
All forms that need approval will be in this folder. If the form has to be pushed to another approver it will be done here.

44
The Task bar options in Life Cycle AP-Approval > Needs Approval
The task bar for a DV and Chk Req have these options
The task bar for a DD has these options
The task bar for a TRF has these options

45
FINALApprove/Needs Additional Approval
APPROVE FORM

46
Approve/Needs Additional Approval
47

48
49
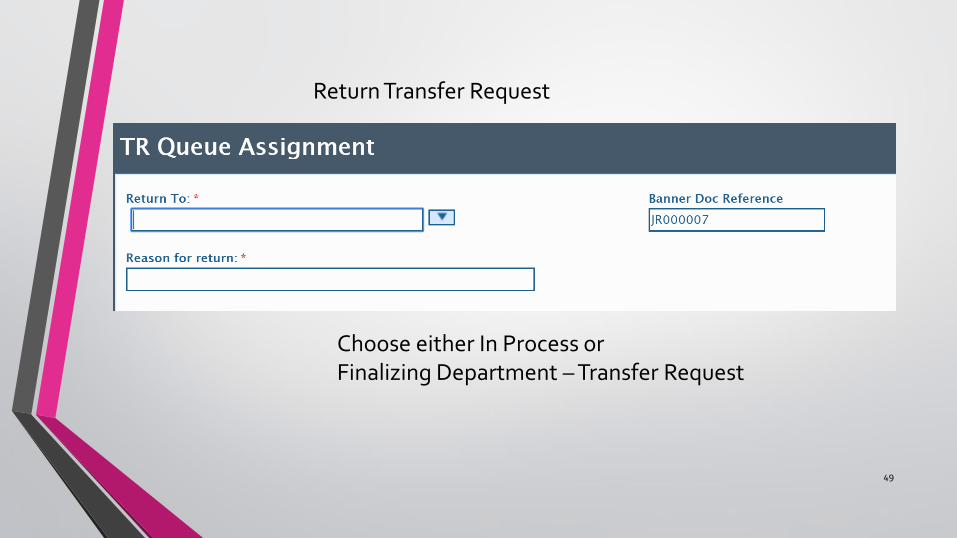
Return Transfer Request
Choose either In Process orFinalizing Department – Transfer Request
50
• Click the Choose File button• Browse your computer for the attachment• Click the Import Icon
Add Attachment
51
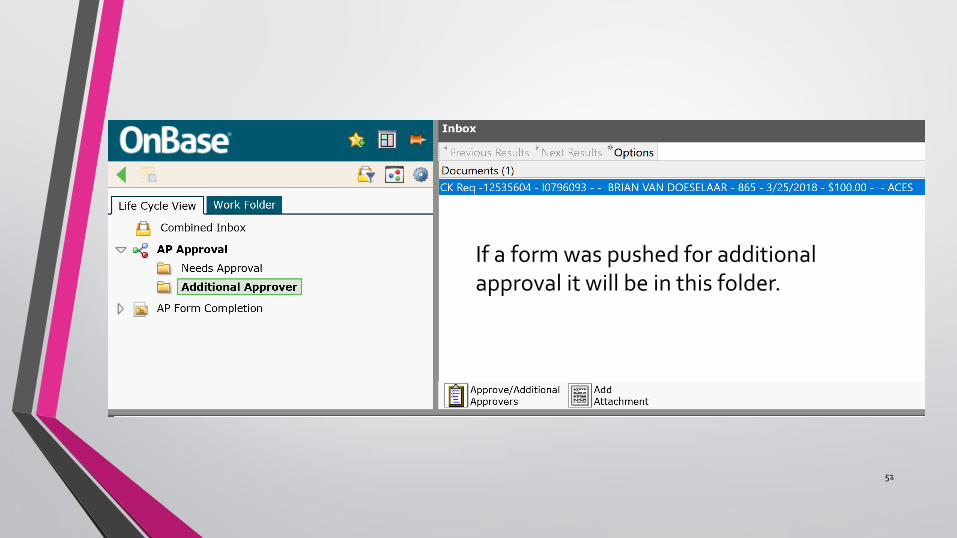
If a form was pushed for additional approval it will be in this folder.

52
The Task bar options in Life Cycle AP-Approval > Additional Approval
The task bar for a DV and Chk Req have these options
The task bar for a DD has these options
The task bar for a TRF has these options

53
FINALApprove/Needs Additional Approval
APPROVE FORM

54
Approve/Needs Additional Approval
55

56
Return Transfer Request
Choose either In Process orFinalizing Department – Transfer Request

57
• Click the Choose File button• Browse your computer for the attachment• Click the Import Icon
Add Attachment

58
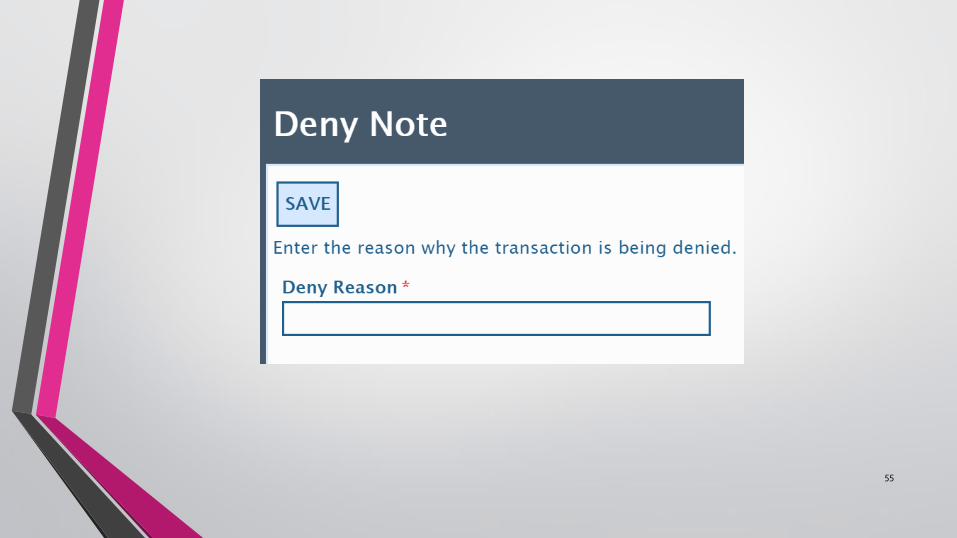
• To add a note right click on your document
• Select Notes from the popup menu
• Select the type of note from drop down arror
• Click Add• Enter Note text in the
Note Text box• Click Save and Close
and the notes window will close
• Click Save to add more notes
• Click Close to close the notes window

59
• Custom Queries are another way to perform document retrieval.
• It is suggested that that users begin to use the custom query function because the information will be found on multiple document types going forward.
• The three custom queries here combine the like document types together to help users find the information regardless of the document type.
60
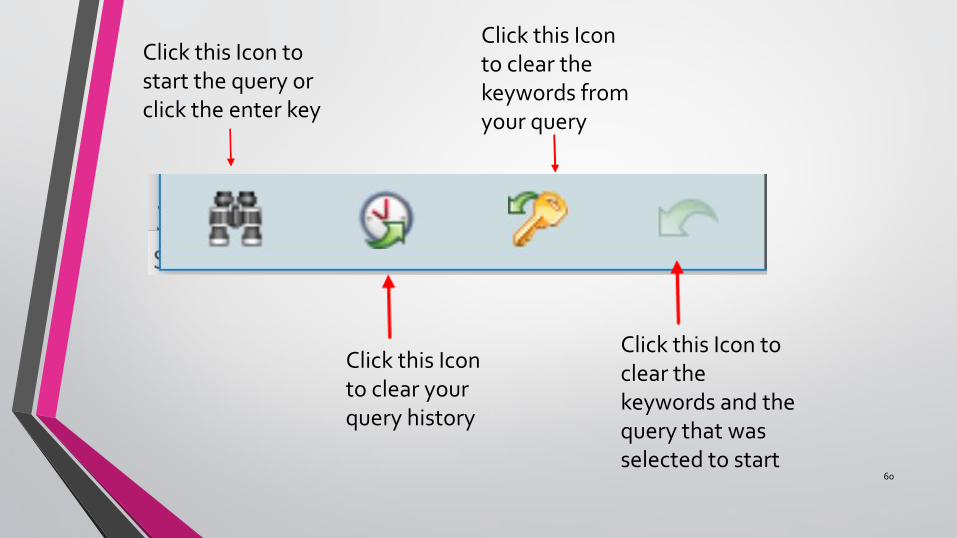
Click this Icon to start the query or click the enter key
Click this Icon to clear your query history
Click this Icon to clear the keywords from your query
Click this Icon to clear the keywords and the query that was selected to start
61
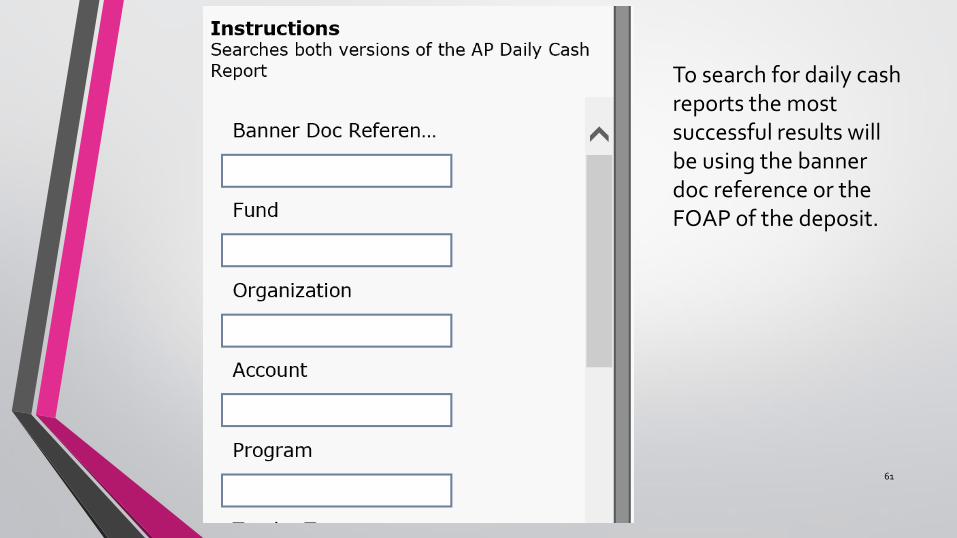
To search for daily cash reports the most successful results will be using the banner doc reference or the FOAP of the deposit.

62
• The most successful searches will be with the Banner Doc Reference or Invoice Number.
• Remember when searching the information entered has to match exactly.
• Use the * as a wild card especially when using the vendor name.
• An employee’s name now will be the full legal name including middle initial
63
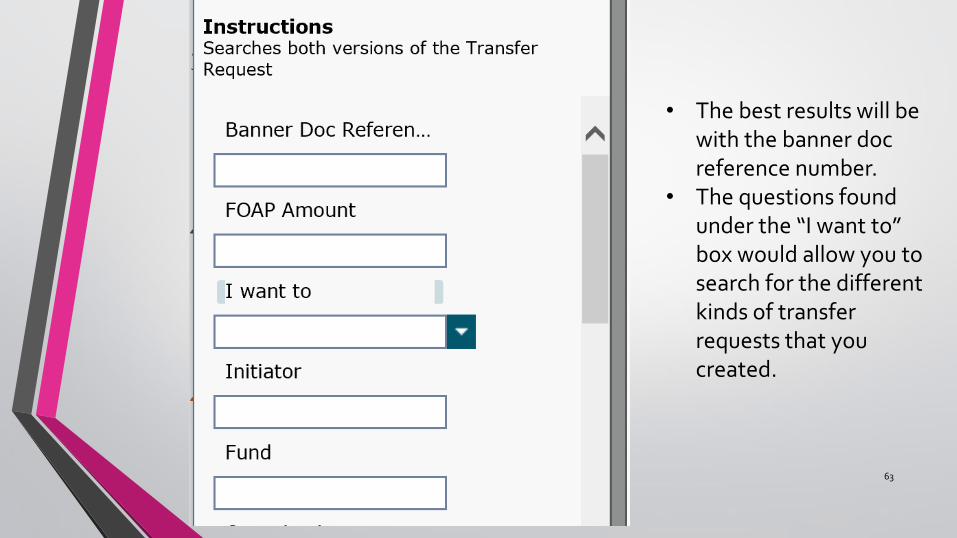
• The best results will be with the banner doc reference number.
• The questions found under the “I want to” box would allow you to search for the different kinds of transfer requests that you created.

64
Add Attachments outside of workflow
• Click the second drop down arrow
• Select Import Document
65
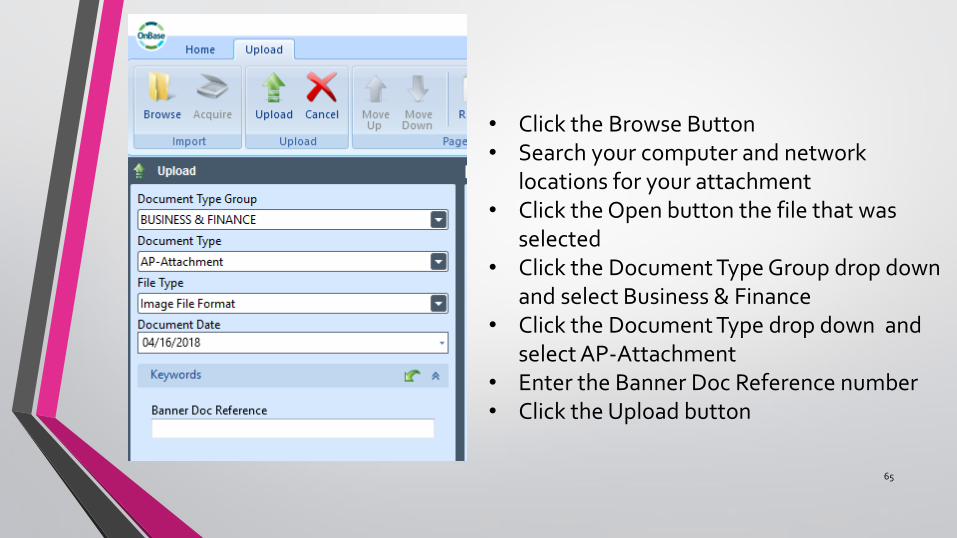
• Click the Browse Button• Search your computer and network
locations for your attachment• Click the Open button the file that was
selected• Click the Document Type Group drop down
and select Business & Finance• Click the Document Type drop down and
select AP-Attachment• Enter the Banner Doc Reference number• Click the Upload button

66
• Click the Choose File button to browse your computer for a file
• Click the drop down arrow on the Document Type Group and select Business & Finance
• The Document Type should read AP-Attachment
• Enter the Banner Doc Reference of the document that needs the attachment
• Click the upload arrow to have the document saved into OnBase
67
• Click the form to have it open in the viewer window• Right Click on the form• Choose the Print option
How to Print a Form
68
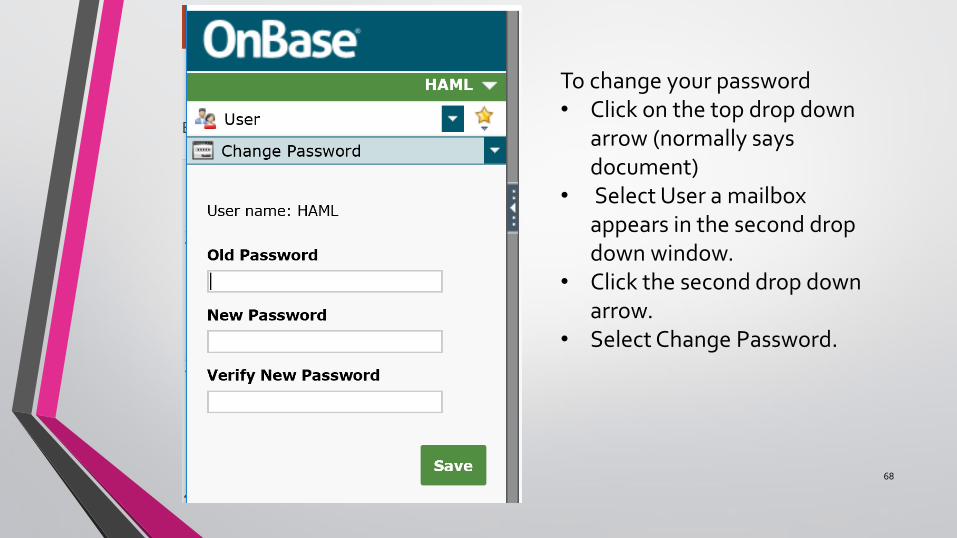
To change your password• Click on the top drop down
arrow (normally says document)
• Select User a mailbox appears in the second drop down window.
• Click the second drop down arrow.
• Select Change Password.
Where can I find more resources?
▪ This is the URL for the OnBase Resource page for Business and Finance: https://www.gvsu.edu/busfin/onbase-41.htm
▪ This presentation and all of the user guides will be available at this link.
▪ There is a training video from the creators of OnBase on how to use the web client located on this page as well.
69

Thanks!
ANY QUESTIONS?
70