operation manual - squarespace · pdf filenotice to ensure the performance of our products and...
TRANSCRIPT

Model
MCS350 Modular Communication System
Document No. 3100807 (01)
Operation Manual


NOTICETo ensure the performance of our products and systems, we may occasionally make tech-nological changes and updates. Therefore, the model number suffixes (A, B, C, etc.)listed in the manual or in the drawings may not always match the model you are using.Unless specifically noted, this will not affect the product or its installation, operation, orservice.
FCC Compliance StatementThis equipment has been tested and found to comply with the limits for a Class A digitaldevice, pursuant to Part 15 of the FCC Rules. These limits are designed to provide rea-sonable protection against harmful interference when the equipment is operated in acommercial environment. This equipment generates, uses, and can radiate radio fre-quency energy and, if not installed and used in accordance with the instruction manual,may cause harmful interference to radio communications. Operation of this equipment ina residential area is likely to cause harmful interference, in which case the user will be re-quired to correct the interference at their own expense.
—WARNING—Changes or modifications not expressly approved
by Dukane could void the user’s authority tooperate the equipment.
Industry Canada Compliance StatementThis digital apparatus does not exceed the Class A limits for radio noise emissions fromdigital apparatus as set out in the interference-causing equipment standard entitled “Digi-tal Apparatus,” ICES-003 of Industry Canada.
Cet appariel numerique respecte les limites de bruits radioelectriques applicable auxappareils numeriques de Classe A prescrites dans la norme sur le materiel bouiller:“Appareils Numeriques,” NMB-003 edictee par le ministre Industrie Canada.
MCS350 Series Operation 3


SECTION 1—GENERAL DESCRIPTION
ACC LCD Display . . . . . . . . . . . . . . . . . . . . . . . . . . . . . . . . . . . . . . . . . . . . . . 1
ACC Keypad . . . . . . . . . . . . . . . . . . . . . . . . . . . . . . . . . . . . . . . . . . . . . . . . . 2
Audio Communication . . . . . . . . . . . . . . . . . . . . . . . . . . . . . . . . . . . . . . . . . . . . 4
Priority Levels . . . . . . . . . . . . . . . . . . . . . . . . . . . . . . . . . . . . . . . . . . . . . . . . 4
Call-In Priority Levels. . . . . . . . . . . . . . . . . . . . . . . . . . . . . . . . . . . . . . . . . 4
Audio Priority Levels . . . . . . . . . . . . . . . . . . . . . . . . . . . . . . . . . . . . . . . . . 5
Intercom Functions . . . . . . . . . . . . . . . . . . . . . . . . . . . . . . . . . . . . . . . . . . . . . . 6
Answering an Incoming Call . . . . . . . . . . . . . . . . . . . . . . . . . . . . . . . . . . . . . 6
Placing a Call On Hold . . . . . . . . . . . . . . . . . . . . . . . . . . . . . . . . . . . . . . . . 6
Displaying Waiting Calls . . . . . . . . . . . . . . . . . . . . . . . . . . . . . . . . . . . . . . . 7
Placing a Call . . . . . . . . . . . . . . . . . . . . . . . . . . . . . . . . . . . . . . . . . . . . . 7
Calling a Room Station . . . . . . . . . . . . . . . . . . . . . . . . . . . . . . . . . . . . 7
Calling an ACC . . . . . . . . . . . . . . . . . . . . . . . . . . . . . . . . . . . . . . . . 8
Last Number Redial . . . . . . . . . . . . . . . . . . . . . . . . . . . . . . . . . . . . . . . . . . 9
Speed Dialing . . . . . . . . . . . . . . . . . . . . . . . . . . . . . . . . . . . . . . . . . . . . . 9
Call Transfer. . . . . . . . . . . . . . . . . . . . . . . . . . . . . . . . . . . . . . . . . . . . . . 9
Main Channel Functions. . . . . . . . . . . . . . . . . . . . . . . . . . . . . . . . . . . . . . . . . . . 10
Emergency Page . . . . . . . . . . . . . . . . . . . . . . . . . . . . . . . . . . . . . . . . . . . 10
Civil Emergency . . . . . . . . . . . . . . . . . . . . . . . . . . . . . . . . . . . . . . . . . . . 10
All-Call Page. . . . . . . . . . . . . . . . . . . . . . . . . . . . . . . . . . . . . . . . . . . . . 11
Zone Page . . . . . . . . . . . . . . . . . . . . . . . . . . . . . . . . . . . . . . . . . . . . . . 11
Time Tone Distribution to All Rooms . . . . . . . . . . . . . . . . . . . . . . . . . . . . . . . . 12
Custodial Call . . . . . . . . . . . . . . . . . . . . . . . . . . . . . . . . . . . . . . . . . . . . 13
Audio Program Distribution . . . . . . . . . . . . . . . . . . . . . . . . . . . . . . . . . . . . . 13
To All Rooms . . . . . . . . . . . . . . . . . . . . . . . . . . . . . . . . . . . . . . . . 13
To Zones . . . . . . . . . . . . . . . . . . . . . . . . . . . . . . . . . . . . . . . . . . . 14
Program Distribution to Selected Rooms . . . . . . . . . . . . . . . . . . . . . . . . . . 14
External Input Function Activation . . . . . . . . . . . . . . . . . . . . . . . . . . . . . . . . . 15
MCS350 Series Operation i
Tableof
Contents

SECTION 2—CONSOLE PROGRAMMING
Console Programming Mode . . . . . . . . . . . . . . . . . . . . . . . . . . . . . . . . . . . . . . . . 17
Clear Queue . . . . . . . . . . . . . . . . . . . . . . . . . . . . . . . . . . . . . . . . . . . . . . . . . 17
View Program . . . . . . . . . . . . . . . . . . . . . . . . . . . . . . . . . . . . . . . . . . . . . . . . 18
Display ACC Number . . . . . . . . . . . . . . . . . . . . . . . . . . . . . . . . . . . . . . . . . . . . 18
Monitor Program . . . . . . . . . . . . . . . . . . . . . . . . . . . . . . . . . . . . . . . . . . . . . . 19
Forward Calls . . . . . . . . . . . . . . . . . . . . . . . . . . . . . . . . . . . . . . . . . . . . . . . . 19
Preset Numbers . . . . . . . . . . . . . . . . . . . . . . . . . . . . . . . . . . . . . . . . . . . . . . . 20
Defeat Tones. . . . . . . . . . . . . . . . . . . . . . . . . . . . . . . . . . . . . . . . . . . . . . . . . 21
SECTION 3—SYSTEM PROGRAMMING
Enter System Programming Mode. . . . . . . . . . . . . . . . . . . . . . . . . . . . . . . . . . . . . . 23
Set Clock. . . . . . . . . . . . . . . . . . . . . . . . . . . . . . . . . . . . . . . . . . . . . . . . . . . 24
Set Day of the Week . . . . . . . . . . . . . . . . . . . . . . . . . . . . . . . . . . . . . . . . . . . . . 25
Select Time Schedule . . . . . . . . . . . . . . . . . . . . . . . . . . . . . . . . . . . . . . . . . . . . 26
Set Call-In Mode. . . . . . . . . . . . . . . . . . . . . . . . . . . . . . . . . . . . . . . . . . . . . . . 26
Set Call-In Mode. . . . . . . . . . . . . . . . . . . . . . . . . . . . . . . . . . . . . . . . . . . . . . . 26
Set Access Code . . . . . . . . . . . . . . . . . . . . . . . . . . . . . . . . . . . . . . . . . . . . . . . 27
SECTION 4—TROUBLESHOOTING
System Error Messages . . . . . . . . . . . . . . . . . . . . . . . . . . . . . . . . . . . . . . . . . . . 29
Data Communications Failure . . . . . . . . . . . . . . . . . . . . . . . . . . . . . . . . . . . . . . . . 30
RDU Communications Failure . . . . . . . . . . . . . . . . . . . . . . . . . . . . . . . . . . . . . . . 30
System Reset. . . . . . . . . . . . . . . . . . . . . . . . . . . . . . . . . . . . . . . . . . . . . . . . . 31
ii MCS350 Series Operation
TableofContents

SECTION 5—MCS350T TELEPHONE OPERATION
Calling a Room . . . . . . . . . . . . . . . . . . . . . . . . . . . . . . . . . . . . . . . . . . . . . . . 33
Calling an ACC . . . . . . . . . . . . . . . . . . . . . . . . . . . . . . . . . . . . . . . . . . . . . . . 33
Answering a Call . . . . . . . . . . . . . . . . . . . . . . . . . . . . . . . . . . . . . . . . . . . . . . 33
Last Number Redial . . . . . . . . . . . . . . . . . . . . . . . . . . . . . . . . . . . . . . . . . . . . . 33
Emergency Page . . . . . . . . . . . . . . . . . . . . . . . . . . . . . . . . . . . . . . . . . . . . . . . 33
Civil Emergency . . . . . . . . . . . . . . . . . . . . . . . . . . . . . . . . . . . . . . . . . . . . . . . 34
Time Tone Distribution . . . . . . . . . . . . . . . . . . . . . . . . . . . . . . . . . . . . . . . . . . . 34
Custodial Call . . . . . . . . . . . . . . . . . . . . . . . . . . . . . . . . . . . . . . . . . . . . . . . . 34
All Call Page. . . . . . . . . . . . . . . . . . . . . . . . . . . . . . . . . . . . . . . . . . . . . . . . . 34
All Zone Page . . . . . . . . . . . . . . . . . . . . . . . . . . . . . . . . . . . . . . . . . . . . . . . . 34
Zone Page . . . . . . . . . . . . . . . . . . . . . . . . . . . . . . . . . . . . . . . . . . . . . . . . . . 34
MCS350 Series Operation iii
Tableof
Contents

iv MCS350 Series Operation

General Description
The MCS350 Modular Communication System is a multifeatured system that provides abroad range of audio communication functions. These functions are initiated from anyone of a number of Administrative Control Consoles (ACCs), and are controlled by aCentral Control Unit (CCU). Two-way voice communication can be initiated from anACC to any remote speaker station or to any other ACC. Announcement and music dis-tribution can also be initiated by an ACC to any one or group of remote stations. Abuilt-in program clock can be programmed to control time tone distribution to any or allremote stations.
The MCS350T Telapex System includes all the functionality of an MCS350, but also al-lows system access from most DTMF telephones or a PBX. Two-way open voice andpaging communication can be initiated from a properly configured DTMF telephone.A number of optional large character remote displays (RDU350) can also be added to dis-play communication and system status to telephone users.
Unless stated otherwise, all references to the MCS350 also apply to the MCS350T system.
ACC LCD DisplayA 16-character alphanumeric liquid crystal display (LCD) informs the user of the currentstatus of the Administrative Control Console at all times. When the ACC is in an idlestate, the display shows the current time.
** 9:30 am
When a call comes in to the ACC, the display shows the room number of the station call-ing in, as well as its position in the ACC’s call-in queue along with the total number ofcalls registered in the queue.
235b 1 of 1
Each ACC has a queue of its own where all call-ins from remote speaker stations andother ACCs are registered. These queues are user programmable, so that any room can beprogrammed to call in to any ACC. This is described under Annunciate Point ProgrammingProcedure in the latest revision of document number 3100806, the MCS350 InstallationManual.
continued
MCS350 Series Operation 1
Section1

A call-in tone accompanies the display update to alert the user that a call has come in.Call-ins are also prioritized so that higher priority calls are registered above lower prior-ity calls within the call-in queue of an ACC. These priorities are user programmable andare described under Annunciate Point Programming Procedure in the latest revision ofdocument number 3100806, the MCS350 Installation Manual..
When an all-call or emergency page is initiated by another ACC, the display shows theinitiating ACC number.
All call AC #1
An accompanying page notification tone accompanies the display update, after which thepage audio is heard at the ACC.
The display also plays an important role when programming the system from an ACC.All programming is menu driven so you can always determine the current level within theprogramming hierarchy. This allows for ease of programming.
ACC KeypadThe keypad is a color-coded membrane keypad that allows the user to initiate any one ofthe various system functions. Key entries are accompanied by both audio and visual feed-back (a key beep and an appropriate message on the display). A brief description of eachkey is given below.
EMERGENCYUsed to initiate an emergency page or emergency tone. An accompanying LED indicatesif the function is active.
CUSTODIANUsed to initiate an unobtrusive periodic tone to alert custodian.
PAGEUsed to initiate a Page message. An accompanying LED indicates if the function is ac-tive.
PROGRAMUsed to initiate Program distribution. An accompanying LED indicates if the function isactive.
DISPLAY CALLSUsed to view calls in the ACC’s call-in queue.
HOLDUsed to put an in-coming call currently in conversation on hold. An accompanying LEDindicates if the function is active.
2 MCS350 Series Operation
ACC Keypad

0 THROUGH 9 AND +Used to enter room, zone and ACC numbers for initiating intercom calls and pages, andfor programming various functions.
SHIFTThe SHIFT key converts the numeric keys into corresponding alpha keys. SHIFT,1 = A,SHIFT, 2 = B, SHIFT, 0 = J
TALKUsed to communicate a page or intercom audio message to remote speaker stations orother ACC’s. The ACC is in “talk” mode when key is depressed and “listen” mode whenkey is released.
CANCELUsed to terminate page or intercom if either is going on. Used to abort a function that hasnot yet been initiated (i.e. if the EMERGENCY key has been pressed inadvertently, willabort the function before it is entered via the ENTER key). Used to clear the display ofany incorrect digits entered at the keypad.
ENTERUsed to initiate a function that has just been keyed in via the keypad such as a page or acall to a remote station.
CONSOLEUsed to enter Console Function Programming mode. An accompanying LED indicates ifin Console Programming mode.
SYSTEMUsed to enter System Function Programming mode. An accompanying LED indicates ifin System Programming mode.
NEXTUsed in either Console or System Programming mode to move to next entry in the pro-gramming menu.
SELECTUsed in either Console or System Programming mode to select a particular entry in themenu for programming.
EXITUsed in either Console or System Programming mode to exit a particular entry in the pro-gramming menu.
F1, F2, F3, F4Used for speed dialing user-programmable room numbers.
F5Used for last number redial.
continued
MCS350 Series Operation 3
ACC Keypad

F6Used to initiate a time tone, activated by pressing <SHIFT>, then.
F7, F8, F9, F10These keys are used to initiate the functions programmed for External Inputs 1 through 4respectively.
Audio CommunicationWhen voicing an intercom or page message, either the handset or the key can be used.The handset is engaged whenever it is in a non-horizontal position, e.g., when holding itin a normal conversational manner. In the case of intercom it uses voice activationthrough the mouthpiece to switch the audio direction automatically. When the handset isnot activated, i.e., lying in a horizontal position such as in its cradle, the built-in micro-phone and speaker are used, while the direction of communication is controlled by thekey. The microphone is active while the key is depressed, and the speaker is active whenreleased. A thumbwheel volume control on the right hand side of the ACC adjusts thevolume of the speaker.
Priority LevelsEvery remote station that calls in to an Administrative Control Console is assigned a par-ticular call-in priority. Higher priority calls are placed ahead of lower priority calls in anACC’s call-in queue. Programming priority levels is explained in the System FunctionProgramming section of the manual. Remote stations can be programmed to call in to anysingle ACC in the system.
Call-In Priority Levels1. Emergency
2. ACC Call-In
3. High Priority
4. Staff
5. Normal
4 MCS350 Series Operation
Audio Communication

When a regular call (priority 2, 3, 4 or 5) is registered at an ACC, it is accompanied by anintercom call-in tone. When an emergency call-in (priority 1) occurs, it is accompaniedby a distinct emergency call-in tone, and a special character on the left of the display willbegin to flash. If the called ACC is currently in an intercom conversation, a differentscreen display and tone are used to indicate calls waiting. Regular calls produce a doublebeep, while emergency call-ins produce a high pitched warble.
In addition to incoming call priorities, a priority scheme also exists to manage the audiochannels in the system. The MCS350 has three communication paths available, one mainchannel and two intercom channels. The main channel is used for paging, time signalingand program distribution to multiple remote stations. The two intercom channels are de-signed to allow two simultaneous intercom conversations at all times. One intercomchannel is used for communication between an ACC and a remote station, while the otheris used for ACC to ACC conversations. The first channel, when not used for remote sta-tion intercoms, can also be used to provide a second ACC to ACC conversation.
The following audio priority scheme is used when several functions are operatingsimultaneously:
Audio Priority Levels1. Emergency Page
2. Civil Emergency Tone
3. Manual Time Tone
4. Event Time Tones
5. Custodial Call
6. All-Call and Zone Page
7. Intercom Conversations
8. Call-In Tones
9. Program Distribution
A lower priority function cannot interrupt a higher priority function, but higher levelfunctions may interrupt lower level functions if necessary. In most cases, the lower prior-ity functions are restored after the higher priority function is over.
An important feature of the MCS350 is its ability to have simultaneous main channel ac-tivity and intercom to remote stations. Pages, time signaling and program distributionneed not interrupt intercom to remote stations or between ACCs.
MCS350 Series Operation 5
Priority Levels

Intercom Functions
Answering an Incoming Call1. The ACC display shows the first call in the queue.
323 1 of 5
If this call is an emergency call-in, a flashing star at the far left of the displayaccompanies the room number.
2. Press ENTER to sound a preannounce tone at the calling station and the ACC andestablish voice communication. The display continues to show the current room andchanges to show the number of waiting calls.
323 4 waiting
3. Press the PUSH TO TALK key or use the handset VOX to control audio direction.Calls from other ACCs are hands-free.
4. Press CANCEL to end the call and display the room number of the next call-inqueued. If no calls waiting, the time of day is displayed.
Placing a Call On Hold1. The ACC displays the call in progress.
323 4 waiting
2. Press HOLD and the LED in the HOLD key lights and the call is put on hold.A flashing “H” appears on the ACC display to indicate that the call to the displayedroom number is on hold. The position of the held call in the queue and the number ofcalls in the queue are also displayed.
H 323 5 of 5
3. Press DISPLAY CALLS to view the queue and answer another call.
4. Press ENTER to end holding the call if the held call is displayed. The preannouncetone sounds and the HOLD key LED goes out. Two-way communication isre-established.
6 MCS350 Series Operation
Intercom Functions

Notes:A called ACC can put a calling ACC on hold, but not the reverse. However, a callingACC put on hold can hang-up to end the call and take itself off hold.
When an ACC puts a call on hold, it is free to place a call to or answer a call fromanother remote station or another ACC. If it calls another ACC, it can again be puton hold.
Displaying Waiting Calls1. Press DISPLAY CALLS to display the next call in the ACC’s queue. Continually
pressing this key scrolls the display from the last call in the queue back to the first.
222 1 of 4
2. Press ENTER to connect to the call on the display. The ACC display changes toindicate the number of calls remaining in the queue.
222 3 waiting
A repetitive call-in beep sounds whenever an ACC has calls waiting in its queue untilall calls have been answered.
Placing a Call
Calling a Room Station1. To call a room station from an ACC, press the keys corresponding to the room
number of the station you wish to call and press ENTER. For example, to call room241 you would press 2, 4, 1, then ENTER. Pressing a number key while pressing theSHIFT dials an alpha character instead of a number. SHIFT and 1 is “A”, SHIFT and2 is “B”, on through SHIFT and 0, which is “J”. For example, to call room 132C youwould press 1, 3, 2, SHIFT and 3, then ENTER.
2. When you press ENTER, the call is placed to the room shown on the ACC displayand the queue status appears. The preannounce tone sounds at the called room, andalso at the calling ACC.
P 241 0 waiting
Pressing CANCEL before you press ENTER lets you re-enter the room number.If the called station’s privacy switch is on, a “P” appears on the ACC display to theleft of the room number, and audio from the room to the ACC is muted.
continued
MCS350 Series Operation 7
Intercom Functions

3. Press the ACC’s PUSH TO TALK key or use the handset VOX (voice activatedswitch) to control the audio direction of the call. If one of these controls is notactivated for a period of 30 seconds, the privacy tone sounds at both room station andthe ACC to indicate that the room is being monitored. This tone repeats every 15seconds until or the PUSH TO TALK key or the VOX is activated, or the call isended.
The privacy tone does not sound if the called room station’s privacy switch is on.
4. Pressing CANCEL ends the call and displays the next call in the ACC’s call-inqueue. The time of day is displayed if there are no calls in the queue.
Calling an ACC1. To call another ACC from an ACC, press the key corresponding to the number of the
ACC you wish to call and press ENTER. ACCS are identified by single digits 1through 4. For example, to call ACC #3 you would press 3 then ENTER.
If you dial an invalid room number, the ACC displays the message shown below.
Invalid room #
If you try to place a call while the intercom channel is busy, the ACC displays themessage shown below.
SYSTEM IS BUSY
2. When the intercom channel is free, the message shown below appears on the ACCdisplay.
Intercom is free
This message is accompanied by an audio beep. This occurs only if a call wasattempted while the intercom channel was busy.
An ACC can engage in an intercom conversation with a room without interrupting a pro-gram that is currently being sent to other room(s), since intercom and program are onseparate channels. Intercom conversation will interrupt program audio in the called room.If another ACC makes an all-call page, this will interrupt the intercom conversation forthe duration of the page. Once the page is over, intercom resumes, and once intercomconversation is over, the program audio is again heard.
8 MCS350 Series Operation
Intercom Functions
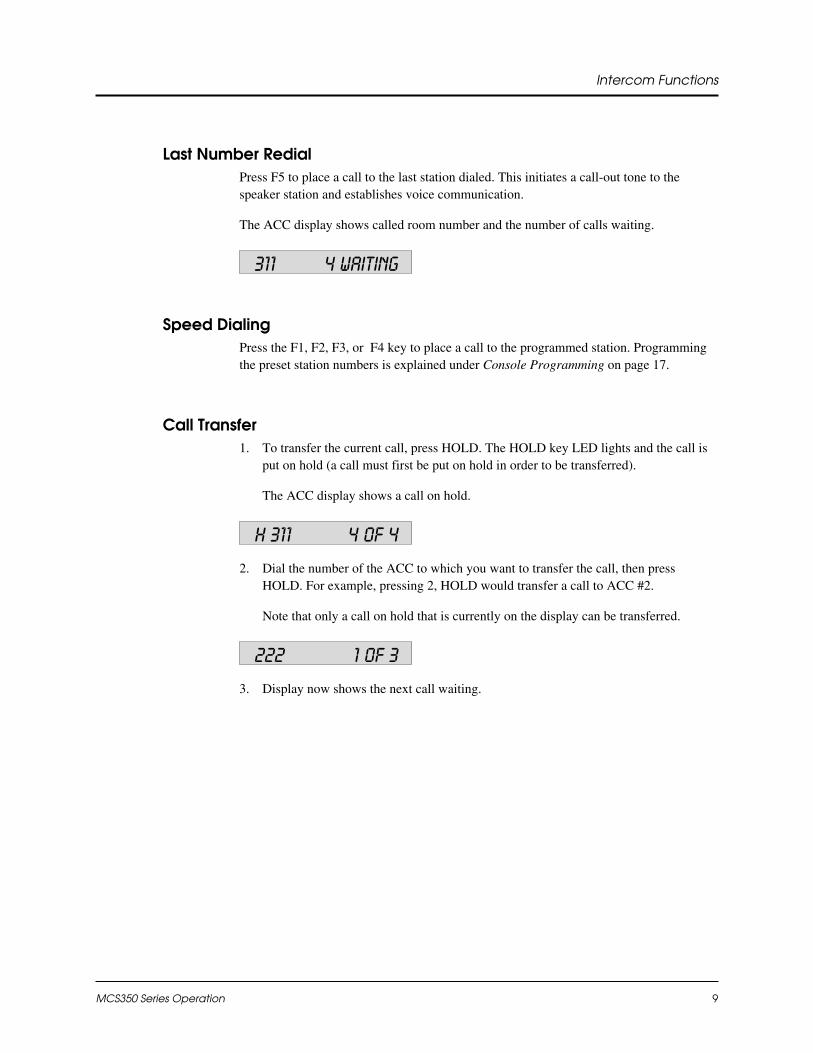
Last Number RedialPress F5 to place a call to the last station dialed. This initiates a call-out tone to thespeaker station and establishes voice communication.
The ACC display shows called room number and the number of calls waiting.
311 4 waiting
Speed DialingPress the F1, F2, F3, or F4 key to place a call to the programmed station. Programmingthe preset station numbers is explained under Console Programming on page 17.
Call Transfer1. To transfer the current call, press HOLD. The HOLD key LED lights and the call is
put on hold (a call must first be put on hold in order to be transferred).
The ACC display shows a call on hold.
H 311 4 of 4
2. Dial the number of the ACC to which you want to transfer the call, then pressHOLD. For example, pressing 2, HOLD would transfer a call to ACC #2.
Note that only a call on hold that is currently on the display can be transferred.
222 1 of 3
3. Display now shows the next call waiting.
MCS350 Series Operation 9
Intercom Functions

Main Channel Functions
Emergency Page1. To place an emergency page, press the EMERGENCY key. The ACC display shows
“EMERGENCY” to indicate emergency key was pressed.
Emergency
Press CANCEL to cancel page before emergency preannounce tone sounds.
2. Press ENTER to sound emergency preannounce tone and open communication pathto all ACCs and speaker stations. The EMERGENCY key LED lights. Theoriginating ACC display indicates emergency page.
Emergency page
The displays of the other ACCs shows the number of the ACC originating theemergency page.
Emergency AC #1
3. Press PUSH TO TALK or speak into the handset to make the emergency pageannouncement.
4. Press CANCEL to end the emergency page. The EMERGENCY key LED goes out.
Civil Emergency1. To sound the civil emergency tone, press the EMERGENCY key, then 0. The ACC
display shows “EMERGENCY 0” to indicate emergency and 0 keys were pressed.
Emergency 0
Press CANCEL to cancel before the civil emergency tone sounds.
2. Press ENTER to sound a continuous civil emergency tone at all remote stations andACCs. and Emergency LED turns on. The EMERGENCY key LED lights. Theoriginating ACC display indicates civil emergency.
Civil Emergency
10 MCS350 Series Operation
Main Channel Functions

The displays of all other ACCs show the originating ACC number.
Emergency AC #3
3. Press CANCEL to end sounding of the civil emergency tone. The EMERGENCYkey LED goes out.
All-Call Page1. To place an all-call page, press the PAGE key. The ACC display shows “PAGE” to
indicate page key was pressed.
PAGE
Press CANCEL to cancel page before all-call preannounce tone sounds.
2. Press ENTER to sound all-call preannounce tone and open communication path to allACCs and speaker stations. The PAGE key LED lights. The originating ACC displayindicates all-call page.
all-call page
The displays of the other ACCs shows the number of the ACC originating the all-callpage.
all-call AC #1
3. Press PUSH TO TALK or speak into the handset to make the all-call pageannouncement.
4. Press CANCEL to end the all-call page. The EMERGENCY key LED goes out.
Zone Page1. To place a zone page, press the PAGE key. The ACC display shows “PAGE” to
indicate page key was pressed.
PAGE
Press CANCEL to cancel page before the preannounce tone sounds.
continued
MCS350 Series Operation 11
Main Channel Functions

2. Enter the desired page zone numbers one at a time, followed by the + key for anyadditional zones. You can enter any number of zones up to eight. For example, topage zones 1, 3, and 5 press 1 + 3 + 5, then ENTER. Use the CANCEL key tore-enter any zone number. Press CANCEL a second time to cancel the all-call page.The ACC display shows the page zone entered.
PAGE 135
3. Press ENTER to sound the preannounce tone and open the communication path tothe room stations assigned to zones 1, 3, and 5. The PAGE key LED lights.
4. Press CANCEL to end the all-call page. The PAGE key LED goes out
5. To page all zones, press PAGE, 9, then ENTER. This initiates a page announcementto all zones (1 through 8). The ACC display indicates page to all zones.
PAGE all zones
Note:This is useful to send a page everywhere except other ACCs.
6. Press CANCEL to end the page to all zones. The PAGE key LED goes out
Time Tone Distribution to All Rooms1. To sound a time tone in all rooms press the SHIFT key to activate function keys F6
to F10. The ACC display shows an up arrow to indicate that the shift key waspressed.
^
Press CANCEL to cancel time tone request.
2. Press F1 to request a time tone. The ACC display prompts you to enter an event tonenumber.
Event tone
3. Press the number key corresponding to the desired tone then press ENTER. Forexample, pressing 5, ENTER sends event tone 5 everywhere except other ACCs.See the System Programming section of the latest revision of Dukane documentnumber 310806, the MCS350 Installation Manual.
12 MCS350 Series Operation
Main Channel Functions

Custodial Call1. To send a custodial call tone to all rooms, press CUSTODIAN. The ACC display
shows custodian to indicate CUSTODIAN key was pressed.
CUSTODIAN
Press CANCEL to cancel custodian tone.
2. Press ENTER to sound the custodian tone (output length programmable) at allremote stations. The CUSTODIAN key LED lights for duration of the tone.
Audio Program DistributionAudio program material can be monitored at an ACC before it is sent to rooms. Beforedistributing audio material, make sure the program source is turned on. See the ConsoleProgramming on page 17 for a description of how to monitor audio programming.
To All Rooms1. To distribute audio programming to all rooms, press PROGRAM. The ACC display
shows PROGRAM.
program
Press CANCEL to cancel program distribution.
2. Press ENTER to distribute audio programming to all remote stations. ThePROGRAM key LED lights. The ACC display indicates program being sent.
Program to all
Program audio is not sent to any ACCs.
3. The ACC display then reverts to showing any calls in the system or the time of day.Calls can be made or answered during this time.
4. Press PROGRAM to cancel program distribution. The PROGRAM key LED goesout.
MCS350 Series Operation 13
Main Channel Functions

To Zones1. To distribute audio programming to all zones, press PROGRAM. The ACC display
shows PROGRAM.
program
Press CANCEL to cancel program distribution.
2. Enter the desired zone numbers one at a time, followed by the + key for anyadditional zones. You can enter any number of zones up to eight. For example, tosend audio programming to zones 2, 4, and 8 press 2 + 4 + 8, then ENTER. Use theCANCEL key to re-enter any zone number. Press CANCEL a second time to cancelthe audio program distribution. The ACC display shows the zones entered.
program 248
3. Press ENTER to send audio programming to zones 2, 4, and 8. The PROGRAM keyLED lights. The ACC display indicates program being sent to selected zones.
Program to zones
To view the selected zone numbers, see Console Programming on page 17.
4. To send audio programming to all zones, press PROGRAM, 9, then ENTER. Thissends audio programming to all zones (1 through 8). The ACC display indicatesprogram to zones.
Program to zones
This will initiate program distribution to all zones.
5, Press PROGRAM to cancel program distribution. The PROGRAM key LED goesout.
Program Distribution to Selected Rooms1. To distribute audio programming to selected rooms, press PROGRAM. The ACC
display shows PROGRAM.
program
Press CANCEL to cancel program distribution.
14 MCS350 Series Operation
Main Channel Functions

2. Enter the desired room numbers one at a time, followed by the + key for anyadditional zones. You can enter any number of rooms up to the maximum in thesystem. For example, to send audio programming to 210 and 121, press 2, 1, 0, +, 1,2, 1, then ENTER. Use the CANCEL key to re-enter any zone number. PressCANCEL a second time to cancel the audio program distribution.
3. Press ENTER to distribute audio programming to the selected rooms. ThePROGRAM key LED lights. The ACC display indicates program being sent. Toview the selected room numbers, see Console Programming on page 17.
Program to rooms
4. Press PROGRAM to cancels audio program distribution to selected rooms. ThePROGRAM key LED goes out.
External Input Function Activation1. To activate an external input function, press SHIFT to activate function keys F6 to
F10. The ACC display shows an up arrow to indicate that the SHIFT key waspressed.
^
Press CANCEL to cancel external input function activation.
2. Press F2 to initiate the function programmed for External Input 1, by simulating amomentary contact at the input.
Refer to the latest revision of Dukane document 310806, the MCS350 InstallationManual, for additional information on external inputs.
MCS350 Series Operation 15
Main Channel Functions

16 MCS350 Series Operation
Notes

Console Programming
Console Programming ModeThere are a number of special functions that can be programmed from any ACC. To acti-vate one of them, you must enter the console programming mode and select the functionto be programmed as follows:
1. Press CONSOLE to enters the console programming mode. The CONSOLE keyLED lights to indicate that the console programming mode is active. The first entryin the console menu is displayed.
2. Press NEXT to advance to next entry in menu.
3. Press SELECT to select a particular function for programming.
4. Press EXIT to exit a selected function and return to the console menu.
5. Press EXIT again to exit the console programming mode. The CONSOLE key LEDgoes out.
Clear QueueThe clear queue function clears all incoming calls from the queue.
1. Enter the console programming mode.
2. Scroll through the menu using the NEXT key until the ACC display shows CLEARQUEUE.
Clear queue
3. Press SELECT to clear all incoming calls in the ACCs call-in queue (except for a callon hold). The ACC display indicates that the call-in queue has been cleared.
Queue cleared
4. Press EXIT to return to the console programming menu.
Section
MCS350 Series Operation 17
2

View ProgramThe view program function lets you review audio program distribution to rooms andzones.
1. Enter the console programming mode.
2. Scroll through the menu using the NEXT key until the ACC display shows VIEWPROGRAM.
View program
3. Press SELECT to show where the Program material is being distributed.
When program material is being sent to particular rooms/zones, those room/zonenumbers are displayed. To scroll through the room numbers, use the NEXT key.If no audio program distribution is programmed, the ACC display shows:
No rooms to View
4. Press EXIT to return to the console programming menu.
Display ACC NumberThe display ACC number shows an ACC’s number.
1. Enter the console programming mode.
2. Scroll through the menu using the NEXT key until the ACC display showsDISPLAY ACC #.
Display acc #
3. Press SELECT to cause the ACC display to show the console number.
Acc number 1
4. Press EXIT to return to the console programming menu.
18 MCS350 Series Operation
View Program

Monitor ProgramThe monitor program function lets an ACC monitor any audio program distribution.
1. Enter the console programming mode.
2. Scroll through the menu using the NEXT key until the ACC display showsMONITOR PROGRAM.
Monitor program
3. Press SELECT to display the status of the audio program monitor function. ACCdisplays:
Monitor on
If audio monitoring is currently active, or
Monitor off
If audio monitoring is currently off.
4. Press NEXT to go from off to on or vice versa.
5. Press EXIT to return to the console programming menu.
Forward CallsThe forward calls allows incoming calls to be forwarded to another ACC.
1. Enter the console programming mode.
2. Scroll through menu using the NEXT key until the ACC display shows FORWARDCALLS.
Forward calls
3. Press SELECT to display the current call forward ACC number. If calls are notcurrently being forwarded, no number is displayed.
Forward to acc#
continued
MCS350 Series Operation 19
Monitor Program

4. Press ENTER and the number key of the ACC you want calls forwarded to. TheACC display shows the ACC number that incoming calls are now forwarded to.
Forward to acc#2
5. Press EXIT to return to the console programming menu. The ACC display nowshows FORWARD CALLS.
Forward calls
6. Press EXIT to exit the console programming menu. The ACC display continues toshow the ACC number that incoming calls are forwarded to.
To cancel Call Forwarding:
1. Enter the console programming mode.
2. Scroll through the menu using the NEXT key until the ACC display showsFORWARD CALLS.
Forward calls
3. Press SELECT. The ACC display shows the current call forward ACC number.
Forward to acc#2
4. Press CANCEL to deactivate call forwarding. The ACC number disappears from thedisplay and call forward is deactivated.
Forward to acc#
5. Press EXIT to return to the console programming menu.
Preset NumbersThe preset numbers function lets you program the four speed dial keys.
1. Enter the console programming mode.
2. Scroll through the menu using the NEXT key until the ACC display shows PRESETNUMBERS.
Preset numbers
20 MCS350 Series Operation
Preset Numbers

3. Press SELECT to display the first of four preset room numbers along with thecorresponding function key number.
Fk#1 RM#101
In the above example, function key 1 (F1) is preset to dial room 101.
4. Press the keys corresponding to the room number you want to speed dial using thisfunction key. For example, press 3, 2, 9, then ENTER to set function key 1 to dialroom 329. The ACC display shows the newly programmed room number.
Fk#1 RM#329
5. Press NEXT to advance to next preset room number. The ACC display shows thenext preset room number.
Fk#2 RM#102
6. Repeat step 4 to program function key 2 (F2) or press EXIT to return to the consoleprogramming menu.
Defeat TonesThe defeat tones function lets you turn call-in tones on or off.
1. Enter the console programming mode.
2. Scroll through the menu using the NEXT key until the ACC display shows DEFEATTONES.
defeat tones
3. Press SELECT to display the status of the defeat tones function. ACC displays:
tones on
If call-in tones are turned on at this ACC, or
tones off
If call-in tones are turned off at this ACC.
4. Press NEXT to go from off to on or vice versa.
5. Press EXIT to return to the console programming menu.
MCS350 Series Operation 21
Defeat Tones

22 MCS350 Series Operation
Notes
System Programming
System programming can be performed at any ACC. An access code is always requiredto enter the system programming mode. No other functions can be performed at an ACCin this mode. Also, other ACCs in the system cannot initiate any functions, with the ex-ception of Emergency Page or Civil Emergency. All current functions, such as pages,intercom communications, and program distribution, must be canceled before the systemprogramming mode can be entered. The only exception is the audio program monitorfunction, which will allow access to the system programming mode while still inprogress.
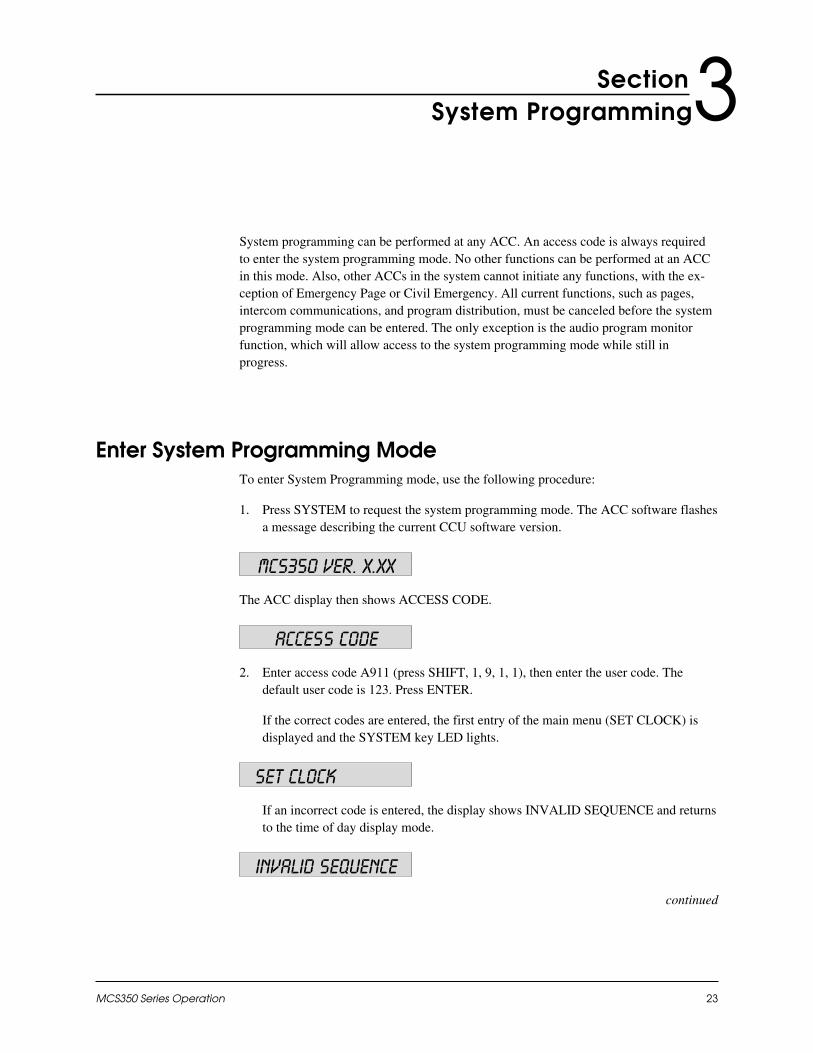
Enter System Programming ModeTo enter System Programming mode, use the following procedure:
1. Press SYSTEM to request the system programming mode. The ACC software flashesa message describing the current CCU software version.
MCS350 VER. X.XX
The ACC display then shows ACCESS CODE.
ACCESS CODE
2. Enter access code A911 (press SHIFT, 1, 9, 1, 1), then enter the user code. Thedefault user code is 123. Press ENTER.
If the correct codes are entered, the first entry of the main menu (SET CLOCK) isdisplayed and the SYSTEM key LED lights.
SET CLOCK
If an incorrect code is entered, the display shows INVALID SEQUENCE and returnsto the time of day display mode.
INVALID SEQUENCE
continued
Section
MCS350 Series Operation 23
3

Once the ACC is in the system programming mode, the following ACC keys are used tomove between menu items:
NEXT—Advances to next menu, function, or attribute.
SELECT—Selects particular menu or function.
EXIT—Exits particular menu or function.
After all programming is completed, press EXIT until the main menu is selected. PressEXIT again to exit out of system programming mode. The SYSTEM key LED turns off.
Set Clock1. Scroll through the menu using the NEXT key until the display shows SET CLOCK.
SET CLOCK
2. Press SELECT to display the current hour mode.
12 Hour mode
Indicates the system clock is in 12-hour mode.
– OR –
24 hour mode
Indicates the system clock is in 24-hour mode.
3. Press NEXT to toggle between the 12- and 24-hour modes.
4. Press SELECT to choose the hour mode currently displayed.
am
– OR –
PM
Appears if 12-hour mode is chosen.
5. Press NEXT to toggle between a.m. and p.m., then press SELECT to enter the time.
hhmm=
24 MCS350 Series Operation
Set Clock

The display is prompting for time to be entered in the format hhmm. HH is the hour andMM the minutes. If 24-hour mode was selected, enter the time in 24-hour format.
6. Set the time. For example to set the system clock for 4:30 (a.m. or p.m., dependingon what was selected), press 0, 4, 3, 0, then ENTER.
hhmm=0430
The display shows the time just entered.
7. Press EXIT to return to the system menu.
Set Day of the Week1. Scroll through the menu using the NEXT key until the display shows SET DAY OF
WEEK.
SET day of week
2. Press SELECT to display the current day.
Day (Sunday=1) 5
Indicates that the system clock is currently set to Thursday (day 5), where Sunday isday 1 and Saturday is day 7.
3. To set the day, press the corresponding number key, then ENTER. For example, toset the day to Friday, press 6 then ENTER.
Day (Sunday=1) 6
The display shows the new day just entered.
4. Press EXIT to return to the system menu.
MCS350 Series Operation 25
Set Day of the Week

Select Time Schedule1. Scroll through the menu using the NEXT key until display shows TIME
SCHEDULE.
Time schedule
2. Press SELECT to display the current time schedule.
Schedule 1
The above example display indicates that the time events in schedule 1 are active.
3. Press NEXT to select another schedule or press a number key to enter the desiredschedule number. There are a total of nine time schedules to choose from (0 through8). Choosing schedule 0 (zero) deactivates all time events.
4. Press EXIT to return to the system menu once the desired schedule is displayed.
Set Call-In ModeThis function lets you choose between receiving call-ins at all ACCs (single queuemode), selected ACCs (multi-queue mode), or automatic timed transfer between the twomodes.
Set Call-In ModeThis allows you to program the choice between receiving call-ins to all ACCs (singlequeue mode) or to selected ACCs.
1. Scroll through the menu using the NEXT key until the display shows CALL-INMODE.
Call-in mode
2. Press SELECT to display the current call-in mode (Selected ACCs, All ACCs orAuto Transfer).
3. Press NEXT to display the desired call-in mode.
4. When the desired call-in mode is displayed, press EXIT to return to the systemmenu.
26 MCS350 Series Operation
Select Time Schedule

Set Access Code1. Scroll through the menu using the NEXT key until the display shows SET ACCESS
CODE.
Set access code
2. Press SELECT to display the current access code. The example below indicates thatthe current access code is 123. Any alphanumeric code between 1 and 4 digits can beentered.
Enter code 123
3. If the access code displayed is correct, press EXIT to return to the system menu.Press EXIT again to exit the system programming mode.
To change the access code, enter the desired code using the ACC key pad. Forexample, pressing 1, 2, SHIFT, 0, ENTER sets the access code to 12J. The ACCdisplay shows the new code just entered:
Enter code 12j
4. Press EXIT to return to the system menu. Press EXIT again to exit the systemprogramming mode.
For additional programming information see System Programming in the latest revisionof Dukane document number 310XXX, the MCS350/MCS350T Installation and ServiceManual.
MCS350 Series Operation 27
Set Access Code

28 MCS350 Series Operation
Notes

Troubleshooting
System Error MessagesThe MCS350 performs self-diagnostic tests for detection of various system errors. Whena system error is detected, a SYSTEM ERROR XX message appears on all ACC dis-plays, where XX is a code from 1 to 15.
Such system errors can only be corrected by qualified personnel from an authorizedDukane Communication System distributor. If a system error message appears, take thefollowing steps:
1. Note the system error code (XX) and the circumstances leading up to the firstdetection of the error message.
2. Reset the MCS350 and check to see if the message is displayed again.
3. Consult the table on the next page for possible action. If the displayed code is notlisted in table, contact your local authorized Dukane Communication Systemsdistributor.
4. Be prepared to provide service personnel with all of the above information. Recordall instances of such errors.
continued
MCS350 Series Operation 29
Section4

Data Communications FailureShould data communications with the CCU fail while operating in normal mode, a mes-sage is displayed on the ACC until communication is re-established.
Check interconnection cables. If the error message is still displayed, contact distributor.
RDU Communications FailureShould data communications between the CCU and the RDU350 fail, a message is dis-played on the RDU350 until communication is re-established.
Check interconnection cables. If the error message is still displayed, contact distributor.
30 MCS350 Series Operation
Data Communications Failure
ERROR CODE PROBLEM ACTION
1 Configuration Error Intermittent connections inside CCU. Contact distributor.
2 Low System Power Check line cord from the CCU and make sure the system isplugged in properly. If there are no problems withneighboring equipment, contact distributor.
4 Program Corruption Enter system programming mode and complete the accesscode. If entry is successful, press EXIT and reset the system.Error is now removed, however, programming may havebeen altered. Reprogram any corrupt data by referring to theprogramming charts in the installation and service manual,then exit the programming mode and reset the system. Ifsystem programming mode entry is unsuccessful, accesscode has been corrupted. Contact distributor.
6 Low System Powerand ProgramCorruption
Low system power has caused program corruption. See errorcodes 2 and 4 for action.
8 CCU RAM Error Contact distributor.
16 UART Error Reset the System and recheck error code display. If the errorcode reappears, contact distributor.
32 RTC Error Reset the System and recheck the error code display. If theerror code reappears, contact distributor.
Table 1: Error Codes

System ResetThe system is reset by depressing the reset button located on the rear upper panel of theCCU in rack systems and on the right hand bottom side of the CCU in wall-mount sys-tems. Press and release this button to reset the system.
MCS350 Series Operation 31
System Reset

32 MCS350 Series Operation
Notes

MCS350T Telephone Operation
Calling a RoomTo call a room, dial the desired room number (2 to 4 alphanumeric characters) and waitfor a connection tone. If the system is busy, a busy tone is heard. Hang-up and try callingagain later. The # key acts as a shift key and can be used to dial room numbers containingletters (for example, pressing #, 2 dials “B”. The System only uses the letters A to J, cor-responding to #, 1 to #, 0.
Calling an ACCTo call an ACC, dial the single digit ACC number and wait for ACC to answer the call.
Answering a CallTo answer an incoming call from a room station or an ACC, lift the handset and dial *, 8.The next call in the queue can be answered by hanging up and dialing again.
Last Number RedialTo redial the last room number, dial *, 7.
Emergency PageDial *, 6 to activate the emergency preannounce tone. When the preannounce tone isover, speak into the handset to make the emergency page announcement. Page audio issent to all speaker stations and ACCs.
MCS350 Series Operation 33
Section5

Civil EmergencyDial *, 5 to sound the civil emergency tone at all speaker stations and ACCs.
Time Tone DistributionDial *, 4, followed by a digit between 1 and 8 corresponding to the event tone to bedistributed. The tone will sound at all speaker stations.
Custodial CallDial *, 3 to sound the custodial call tone at all speaker stations.
All Call PageDial *, 2 to sound the page preannounce tone. When the preannounce tone is over, speakinto the handset to make the page announcement. Page audio is sent to all speaker sta-tions and ACCs.
All Zone PageDial *, 1 to sound the page preannounce tone. When the preannounce tone is over, speakinto the handset to make the page announcement. Page audio is sent to all speaker sta-tions in zones 1 through 8. Page audio is not sent to stations assigned to zone 0 (zero).
Zone PageDial *, 0, followed by a single digit between 1 and 8 corresponding to the number of thezone to be paged. The preannounce tone sounds in the selected zone. When thepreannounce tone is over, speak into the handset to make the page announcement. Pageaudio is sent only to the selected zone. You can only page one zone at a time.
34 MCS350 Series Operation
Civil Emergency


DUKANE COMMUNICATION SYSTEMS
A DIVISION OF EST, INC. — 27545 Diehl Road, Warrenville, Illinois 60555
© 1999–2004. Printed in USA. All specifications subject to change without notice.