operator course. trace sampling equipment overview analysis calibration course overview
TRANSCRIPT

Operator Course
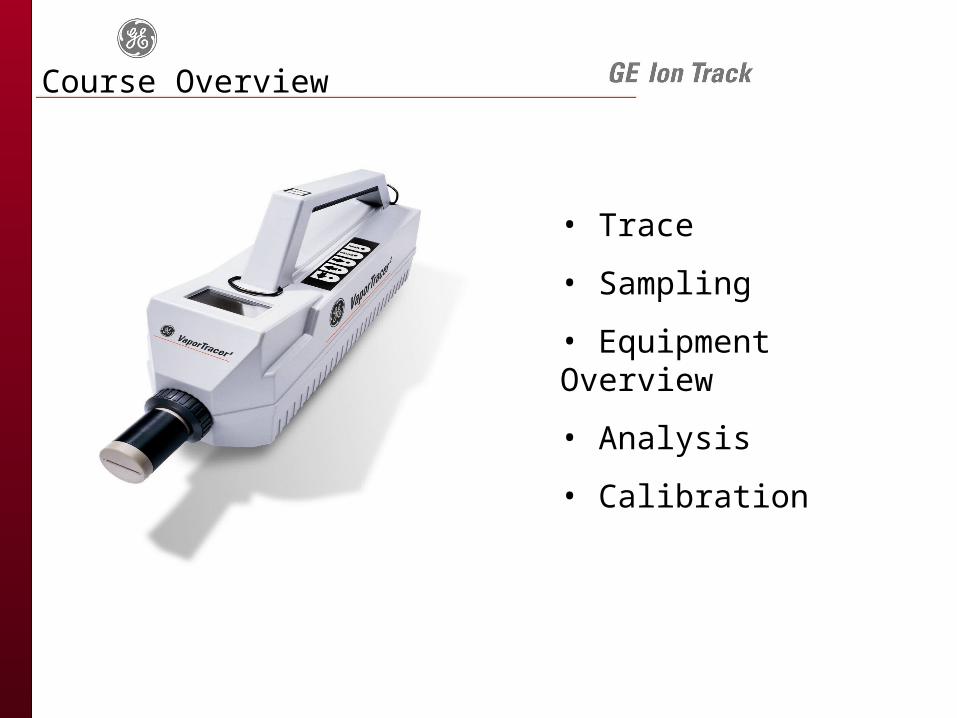
• Trace
• Sampling
• Equipment Overview
• Analysis
• Calibration
Course Overview

Trace
Traces are microscopic amounts of particles and vapors.
Narcotic substances are organic and constantly emit ‘traces’.
The VaporTracer detects traces down to nanogram levels.
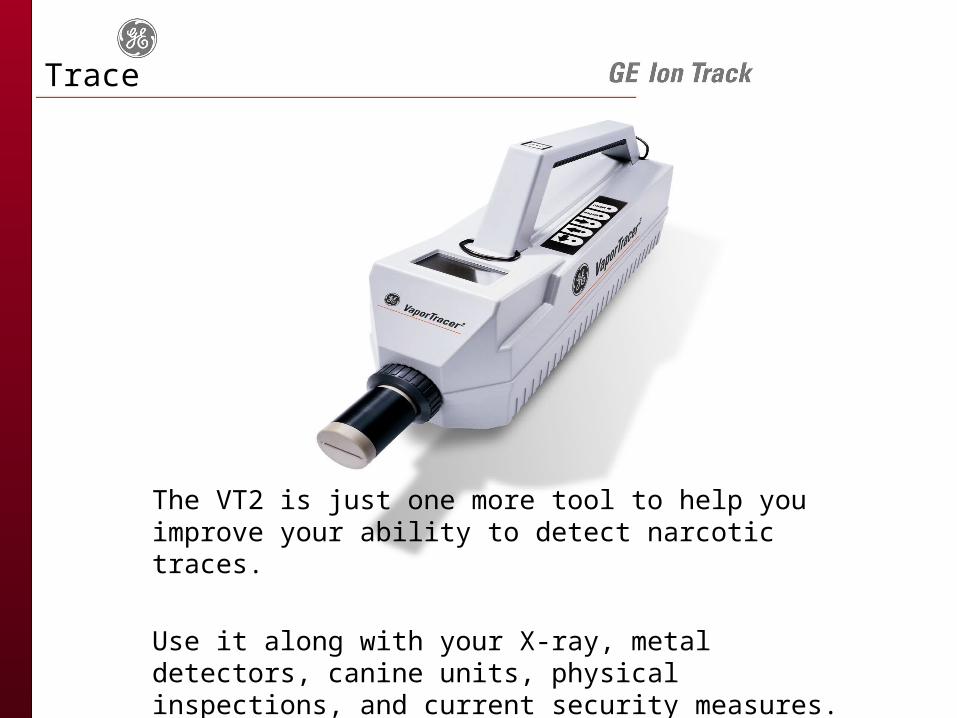
The VT2 is just one more tool to help you improve your ability to detect narcotic traces.
Use it along with your X-ray, metal detectors, canine units, physical inspections, and current security measures.
Trace

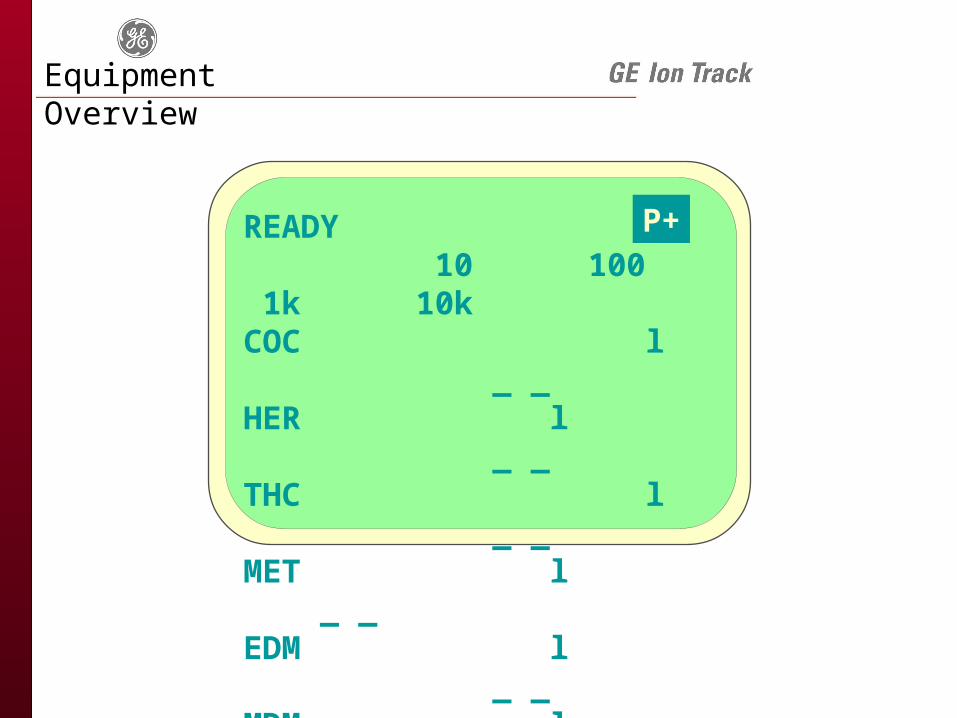
TraceSubstances Detected
READY 10 100 1k 10kCOC l _ _HER l _ _THC l _ _MET l _ _EDM l _ _MDM l _ _
P+

• Traces cling to anything they touch.
• Traces transfer from person to person, person to object, object to object and airborne.
TraceHow Do Traces Get Transferred?

• Cargo, mail, and packages
• Conveyance access - Security access points, border crossings, checkpoints
• Baggage • Facilities protection -
government buildings, correctional institutions
TraceApplications

Gun Radio lined with narcotics Pepper spray Laptop with concealed narcotics Stun gun Narcotics traces on a person’s hands
TraceWhich of the following can be detected with the VT2?

What are some of the traces the VT2 can detect?
What are some things the VT2 cannot detect?
Are narcotics traces illegal?
How are traces transferred?
Trace

· Particle – Most reliable method. Uses a different collection procedure.
· Vapor – Certain substances give off less vapor than others. Temperature is a factor for collecting vapor. Sample vapor release points.
Sampling

Sampling Traps Sampling Wand Gloves Sampling Table or Area Alcohol (isopropyl 70% or greater)
SamplingMaterials and Equipment for Particle Sampling

• Vapor Plate
• White Spacer
• Locking Ring
• Check Sample
SamplingMaterials and Equipment for Vapor Sampling

Person whose item you are sampling should be present.
Sample one item at a time. Use firm pressure. Sample in one direction, one
time. Sample most touched areas
last.
SamplingParticle Sampling Fundamentals

People: Hands Belts Pockets
SamplingParticle Sampling Fundamentals
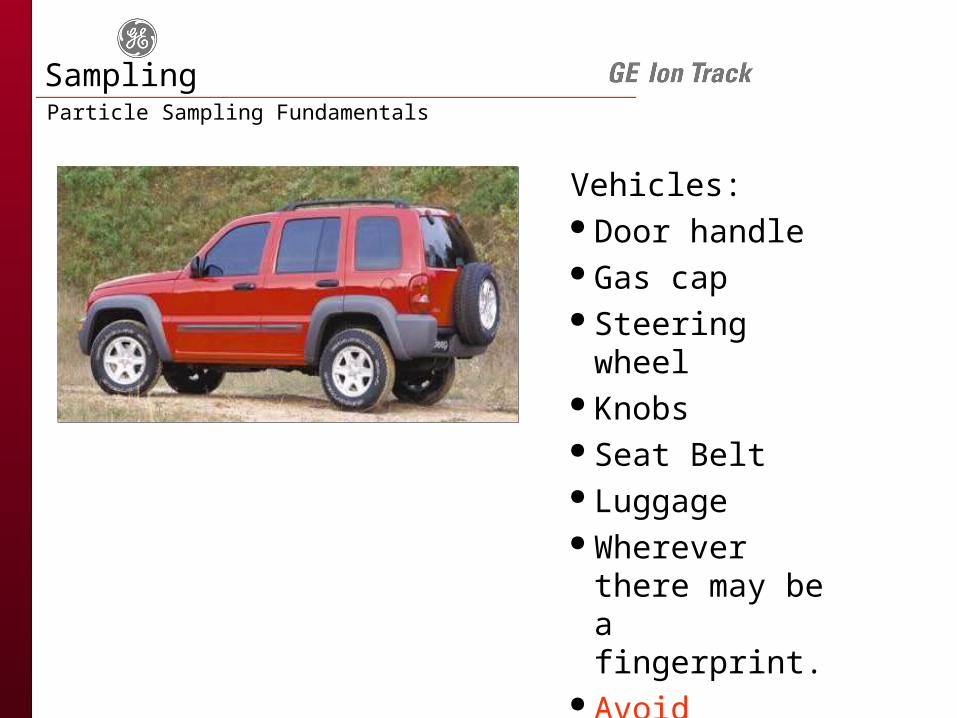
Vehicles: Door handle Gas cap Steering wheel Knobs Seat Belt Luggage Wherever there
may be a fingerprint.
Avoid sampling engine parts.
SamplingParticle Sampling Fundamentals

Luggage/Bags/Briefcases: Handles Straps Zipper tabs Latches Interior seams and linings Commonly touched areas
SamplingParticle Sampling Fundamentals
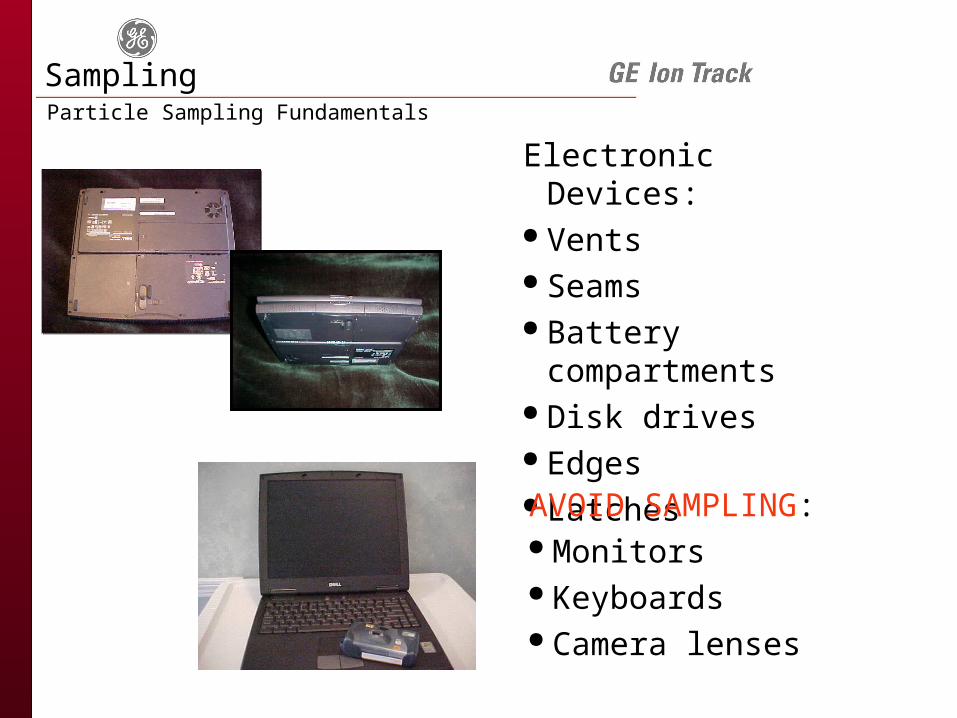
Electronic Devices: Vents Seams Battery compartments Disk drives Edges Latches
AVOID SAMPLING: Monitors Keyboards Camera lenses
SamplingParticle Sampling Fundamentals

Sample vapor release points.
Get as close as possible to the vapor release point without touching it.
Temperature affects vapor samples.
Substances emit different levels of vapor.
SamplingVapor Sampling Fundamentals

What are some particle sampling fundamentals? Vapor?
What areas could we sample on a vehicle? Electronic item? Luggage?
What areas do we avoid sampling? Why?
When do we discard a sample trap?
Sampling

Desorber Start button Navigation buttons Display screen Power switch Power receptacle Battery
Equipment Overview
READY 10 100 1k 10kCOC l _ _HER l _ _THC l _ _MET l _ _EDM l _ _MDM l _ _
P+
Equipment Overview
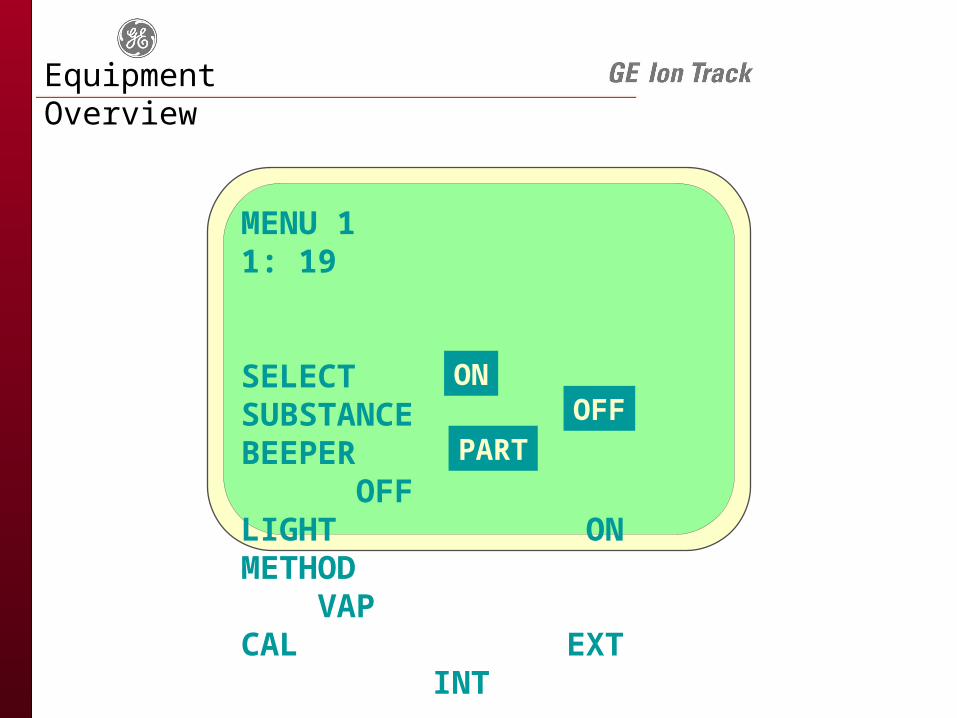
MENU 1 1: 19
SELECT SUBSTANCEBEEPER OFFLIGHT ONMETHOD VAP CAL EXT INT
ONOFF
PART
Equipment Overview
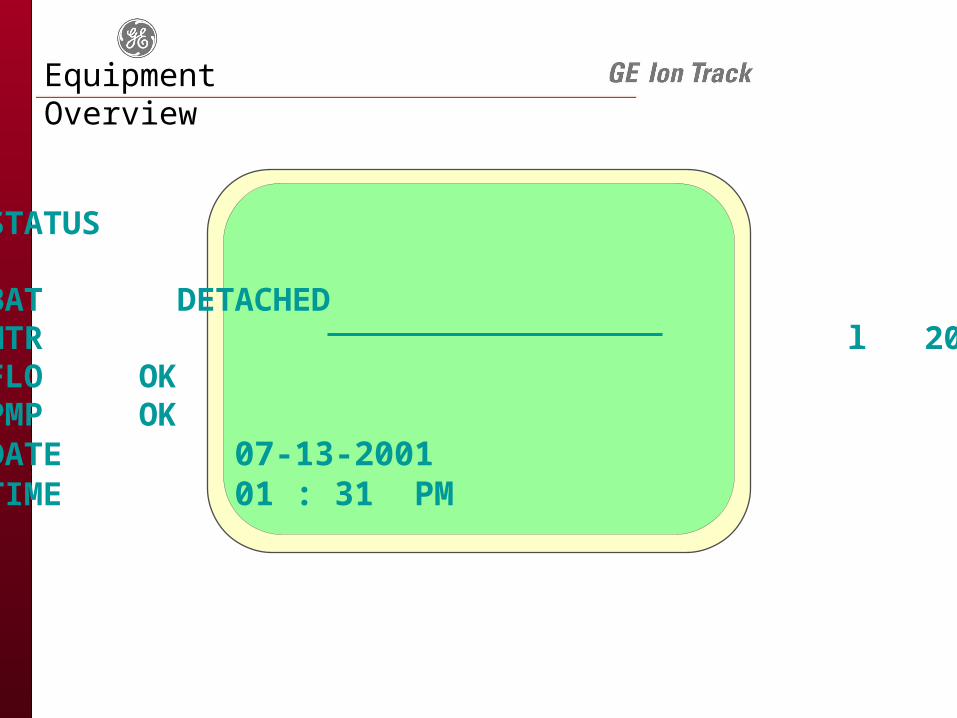
STATUS BAT DETACHEDHTR l 200FLO OKPMP OKDATE 07-13-2001TIME 01 : 31 PM
Equipment Overview

Unit is ready 30 minutes after a cold start.
Unit should be powered-on 24/7.
Default 5 minute warm-up time.
Default 15 minute warm-up time when changing the desorber.
Power down only as directed by pressing the switch to the center position
Equipment Overview

Where is the sampling trap placed?
Which button takes you to other screens?
How long is a cold-start warm up?
When do you shut the unit down?
Equipment Overview

Place the sample trap into the desorber. Press the Start button to begin
analysis. When in Vapor mode, hold the Start button for as long as necessary. Analysis begins when the Start button is released.
Maintain control of the item you are sampling.
Observe Ready or Alarm on the display.
Remove the sampling trap. If Ready, reuse the trap. If Alarm,
discard trap and gloves.
AnalysisProcedures

Resolve the alarm in accordance with current SOP.
Examples: Contact your
supervisor. Maintain control of
item. Let the owner know
that further samples may be necessary.
Decontaminate the work area.
AnalysisAlarm Response
ALARM S-CLR E-SV 10 100 1k 10kCOC l 4.13HER l _ _THC l _ _MET l _ _EDM l _ _MDM l _ _

Save the alarm by pressing ENTER.
Clear the unit after saving by pressing START.
Decontaminate the work area with alcohol only
The unit must be cleared before additional samples can be taken.
AnalysisSaving Alarms

Make sure the alarm was saved. Press the START button when you
see Ready on the display. Insert a new sampling trap and
press START. If the new trap alarms, inform the supervisor.
In most cases the unit will clear after an alarm. Otherwise, maintenance may be necessary.
AnalysisClearing the Unit

What is the indication of an alarm? No alarm?
What button do you press to save an alarm?
What button do you press to clear the unit?
What do you do with the trap after an alarm?
Analysis

• Calibration introduces a known substance into the detector for identification.
• After the VaporTracer2 identifies the calibrant, the software will adjust the positions of all substances.
• The VaporTracer2 must be calibrated for accurate detection.
Why Calibrate?
Calibration

• After powering up• After changing modes• At the beginning of each
shift• When the unit is moved • At higher elevations• When atmospheric
conditions change (humidity, pressure)
When Do You Calibrate?
Calibration

Press to begin calibration.
Procedure
Calibration
CAL REQUIRED MENU TO CONTINUECOC l _ _HER l _ _THC l _ _MET l _ _EDM l _ _MDM l _ _
P+

Use to highlight CAL EXT, , then press ..
MENU 1 SELECT SUBSTANCEBEEPER OFFLIGHT ONMETHOD VAP
INT
ONOFF
CAL EXT
PART
Procedure
Calibration

INSERT CAL TRAP TIME STD LAST 8.469 8.534
-MENU- TO EXIT
-START- TO CAL
Insert the calibration trap into the desorber and then press .
Procedure
Calibration

Press to accept the highlighted peak.
STD 8.46 LAST 8.53 HEIGHT TIME
-ENTER- TO ACCEPTGET EXPANDED LIST
5892 8.454
Procedure
Calibration
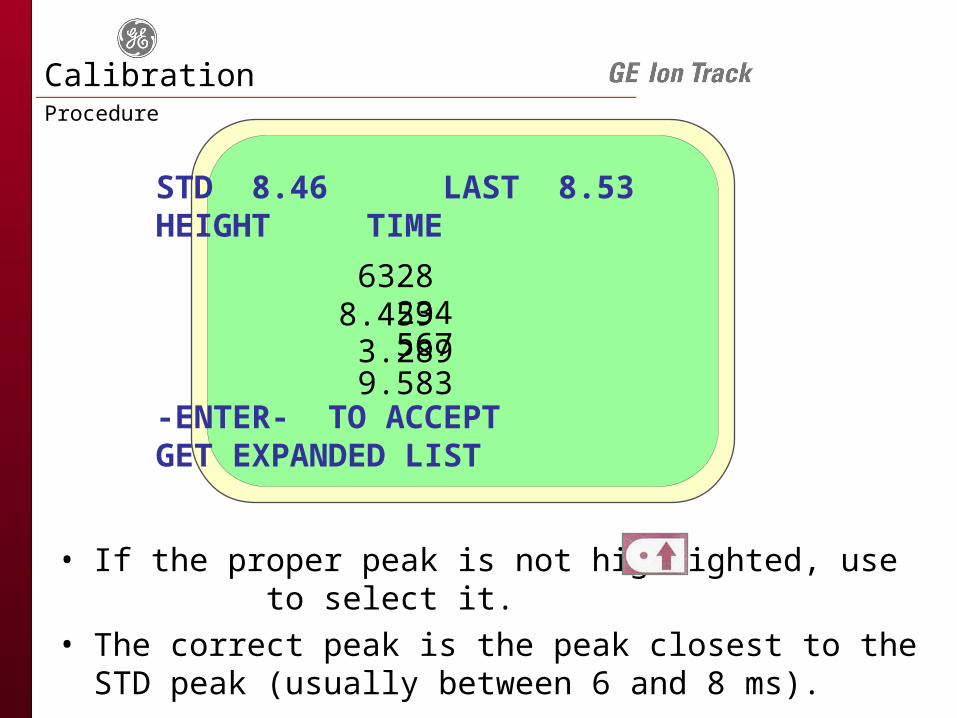
• If the proper peak is not highlighted, use to select it.
• The correct peak is the peak closest to the STD peak (usually between 6 and 8 ms).
STD 8.46 LAST 8.53 HEIGHT TIME
-ENTER- TO ACCEPTGET EXPANDED LIST
6328 8.459 234 3.289 567 9.583
Procedure
Calibration

CALIBRATION DONE
-ENTER- TO CLEAR
Procedure
Calibration
READY 10 100 1k 10kCOC l _ _HER l _ _THC l _ _MET l _ _EDM l _ _MDM l _ _
P+

Why is calibration necessary?
Which menu is used to access calibration?
If a calibration peak is not highlighted, which arrow do you use to select the proper peak?
When do you calibrate?
Calibration