order to cash with tables
TRANSCRIPT
Order to Cash (O2C) cycle With Basic Tables in Oracle Apps R12:
Step-1 Creating Customer
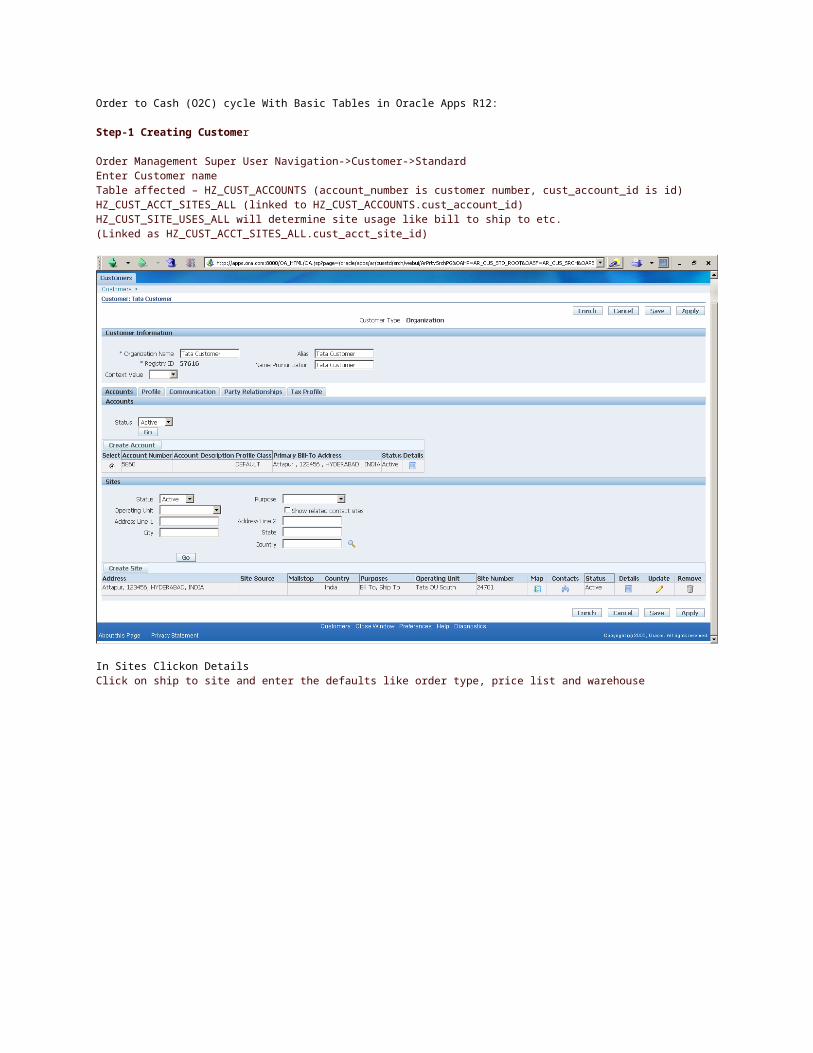
Order Management Super User Navigation->Customer->StandardEnter Customer nameTable affected – HZ_CUST_ACCOUNTS (account_number is customer number, cust_account_id is id)HZ_CUST_ACCT_SITES_ALL (linked to HZ_CUST_ACCOUNTS.cust_account_id)HZ_CUST_SITE_USES_ALL will determine site usage like bill to ship to etc.(Linked as HZ_CUST_ACCT_SITES_ALL.cust_acct_site_id)
In Sites Clickon DetailsClick on ship to site and enter the defaults like order type, price list and warehouse
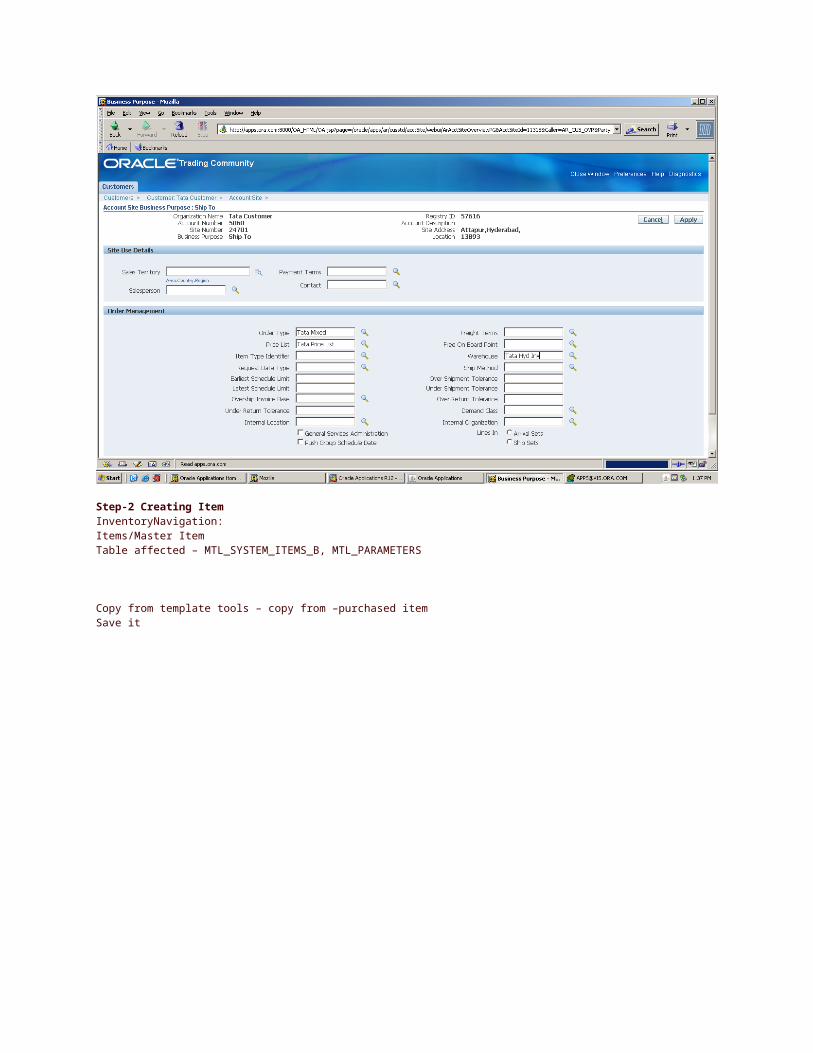
Step-2 Creating ItemInventoryNavigation:Items/Master ItemTable affected – MTL_SYSTEM_ITEMS_B, MTL_PARAMETERS
Copy from template tools – copy from –purchased itemSave it
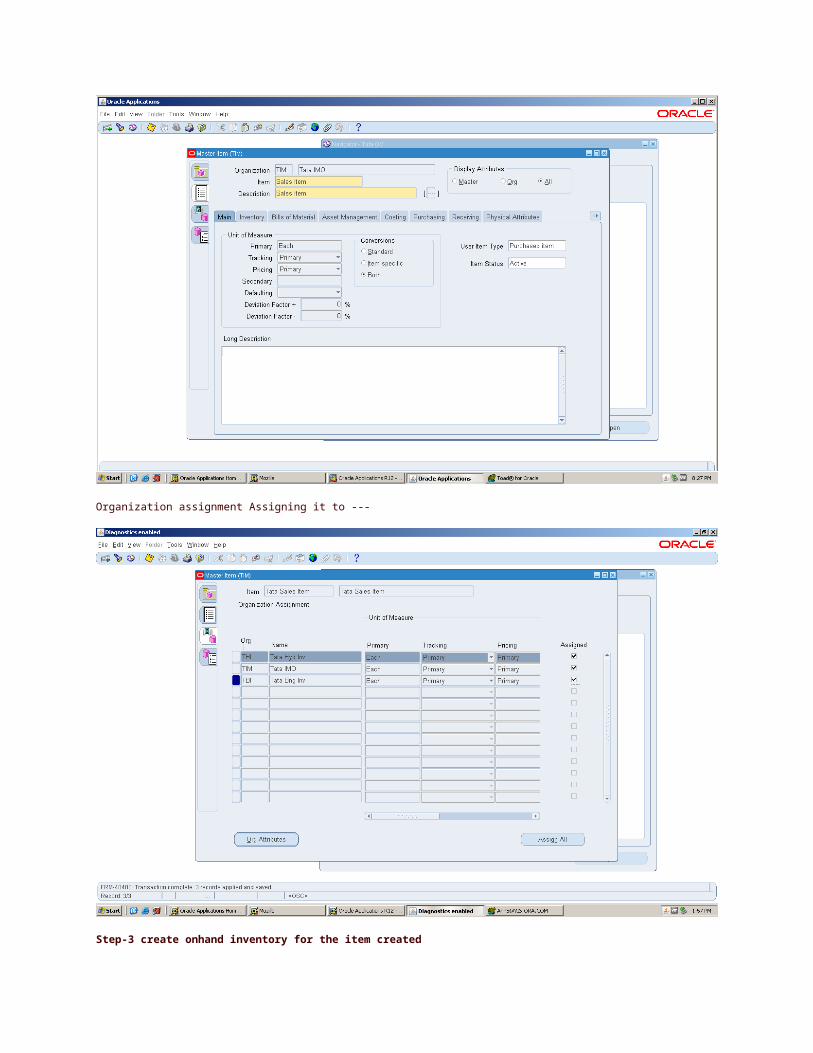
Organization assignment Assigning it to ---
Step-3 create onhand inventory for the item createdInventory Navigation->transactions->Miscellaneous Transaction
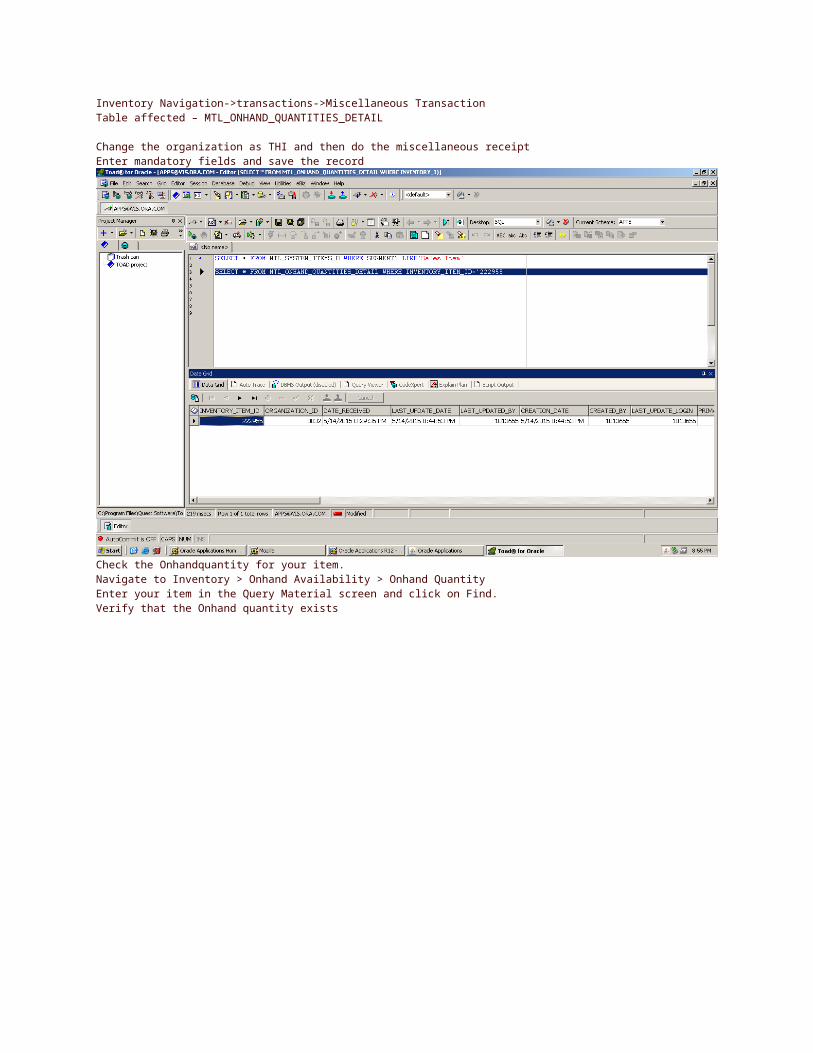
Table affected – MTL_ONHAND_QUANTITIES_DETAIL
Change the organization as THI and then do the miscellaneous receiptEnter mandatory fields and save the record
Check the Onhandquantity for your item.Navigate to Inventory > Onhand Availability > Onhand Quantity Enter your item in the Query Material screen and click on Find.Verify that the Onhand quantity exists
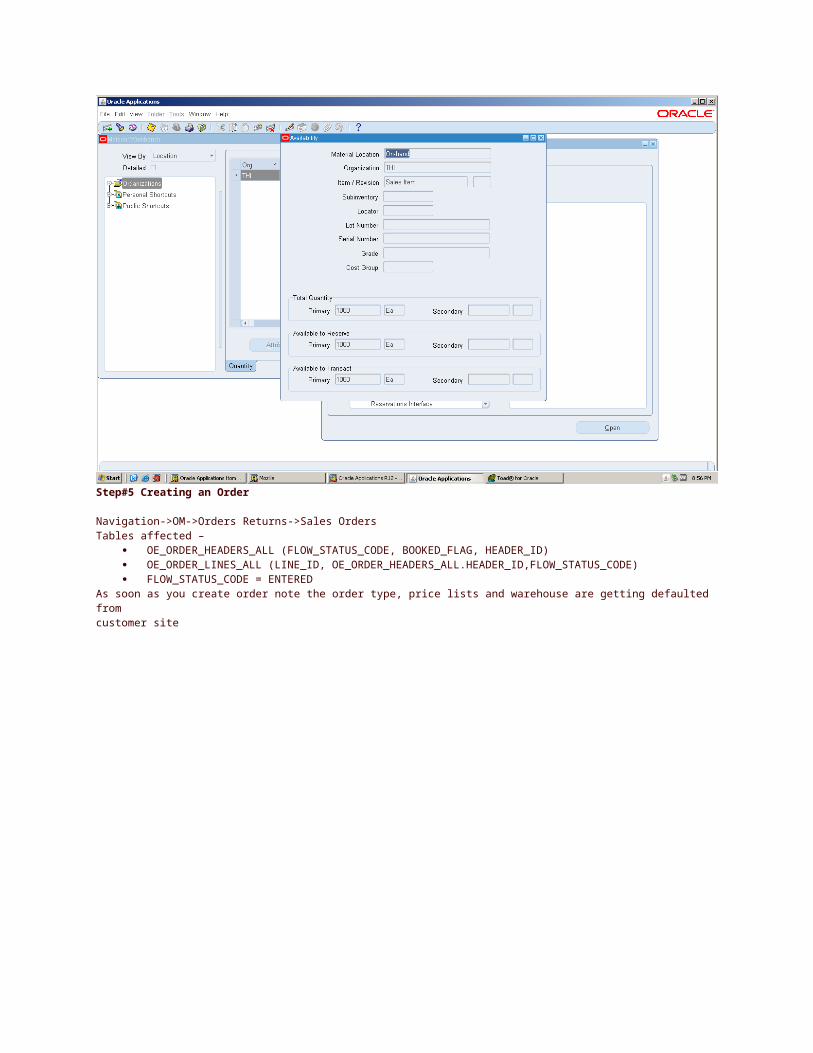
Step#5 Creating an Order
Navigation->OM->Orders Returns->Sales OrdersTables affected –
OE_ORDER_HEADERS_ALL (FLOW_STATUS_CODE, BOOKED_FLAG, HEADER_ID) OE_ORDER_LINES_ALL (LINE_ID, OE_ORDER_HEADERS_ALL.HEADER_ID,FLOW_STATUS_CODE) FLOW_STATUS_CODE = ENTERED
As soon as you create order note the order type, price lists and warehouse are getting defaulted fromcustomer site
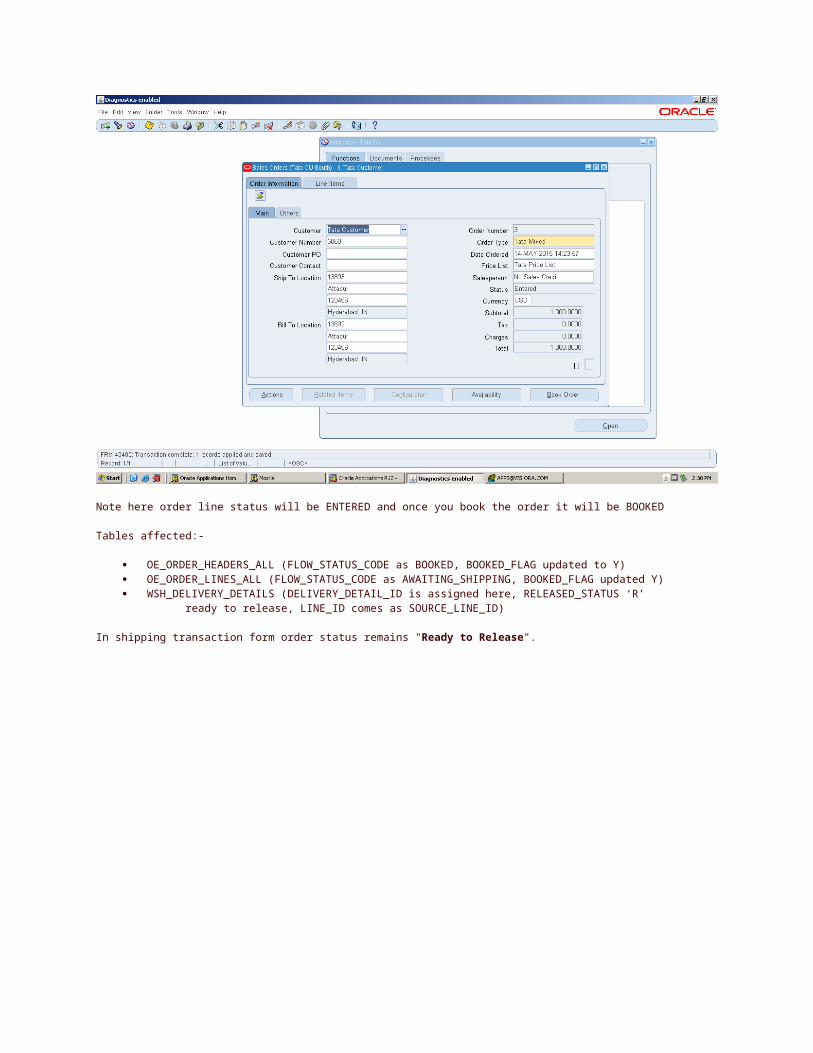
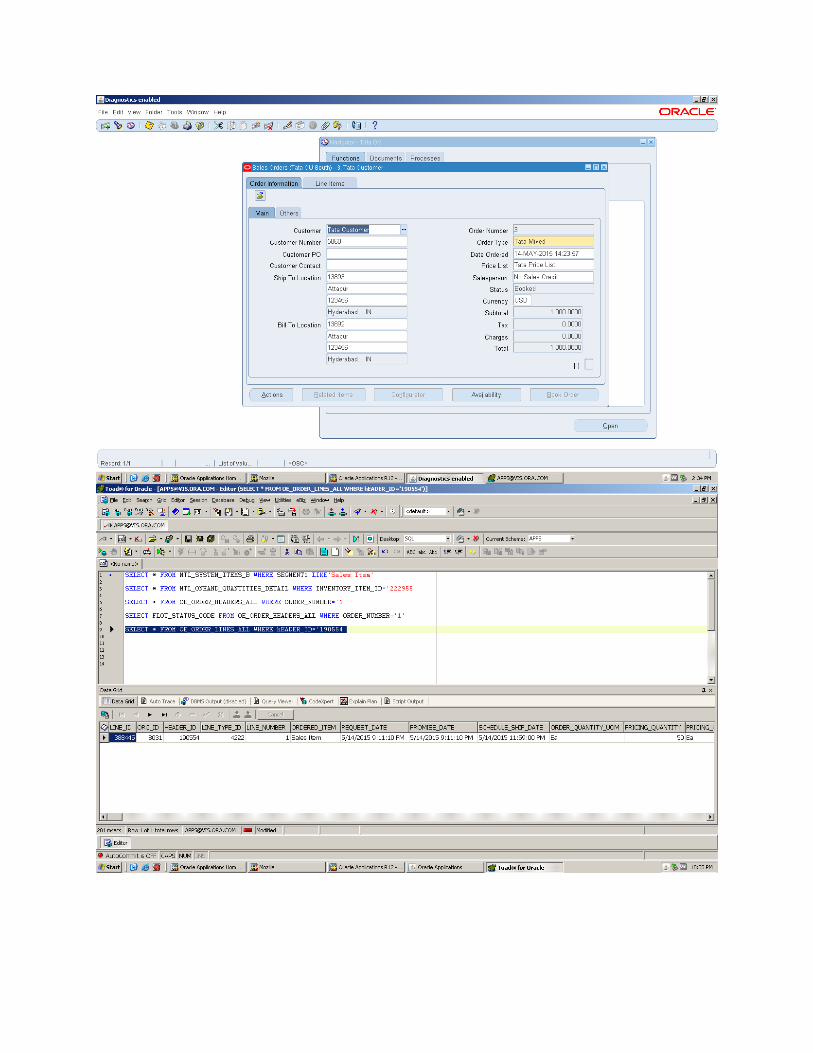
Note here order line status will be ENTERED and once you book the order it will be BOOKED
Tables affected:-
OE_ORDER_HEADERS_ALL (FLOW_STATUS_CODE as BOOKED, BOOKED_FLAG updated to Y) OE_ORDER_LINES_ALL (FLOW_STATUS_CODE as AWAITING_SHIPPING, BOOKED_FLAG updated Y) WSH_DELIVERY_DETAILS (DELIVERY_DETAIL_ID is assigned here, RELEASED_STATUS ‘R’
ready to release, LINE_ID comes as SOURCE_LINE_ID)
In shipping transaction form order status remains "Ready to Release".
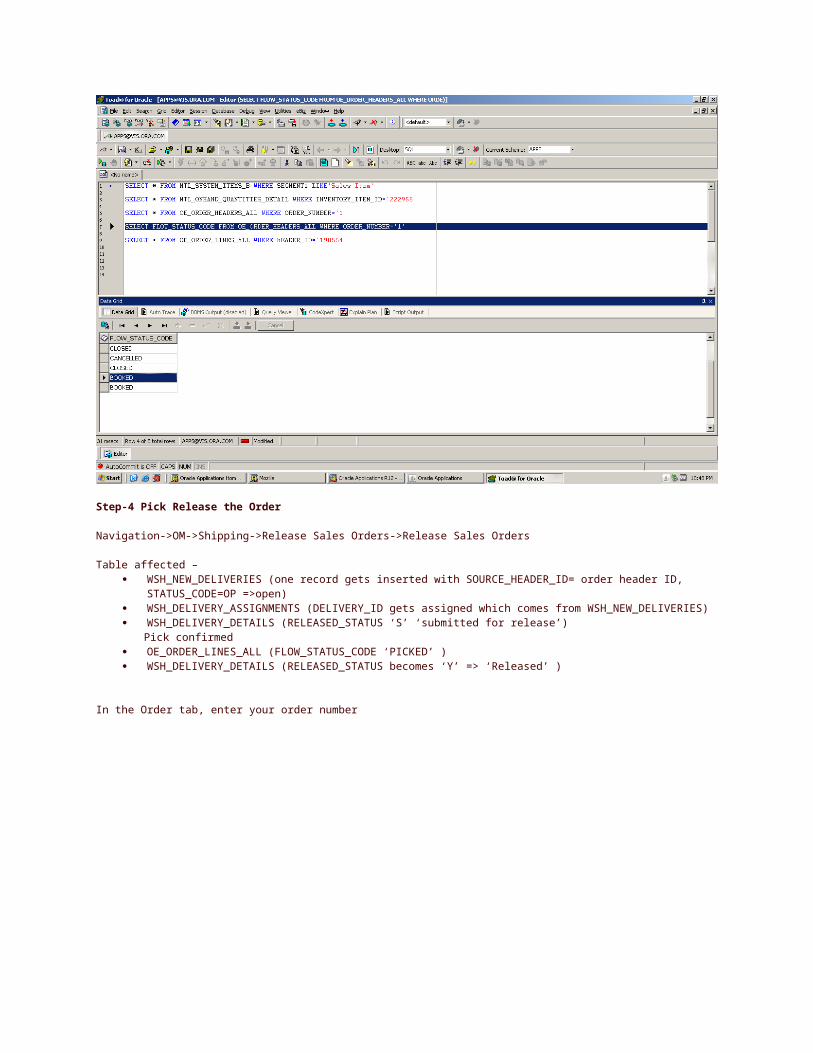
Step-4 Pick Release the Order
Navigation->OM->Shipping->Release Sales Orders->Release Sales Orders
Table affected – WSH_NEW_DELIVERIES (one record gets inserted with SOURCE_HEADER_ID= order header ID,
STATUS_CODE=OP =>open) WSH_DELIVERY_ASSIGNMENTS (DELIVERY_ID gets assigned which comes from WSH_NEW_DELIVERIES) WSH_DELIVERY_DETAILS (RELEASED_STATUS ‘S’ ‘submitted for release’)
Pick confirmed OE_ORDER_LINES_ALL (FLOW_STATUS_CODE ‘PICKED’ ) WSH_DELIVERY_DETAILS (RELEASED_STATUS becomes ‘Y’ => ‘Released’ )
In the Order tab, enter your order number

Click on the Execute Now button.
Check the status Showing Ready To Release
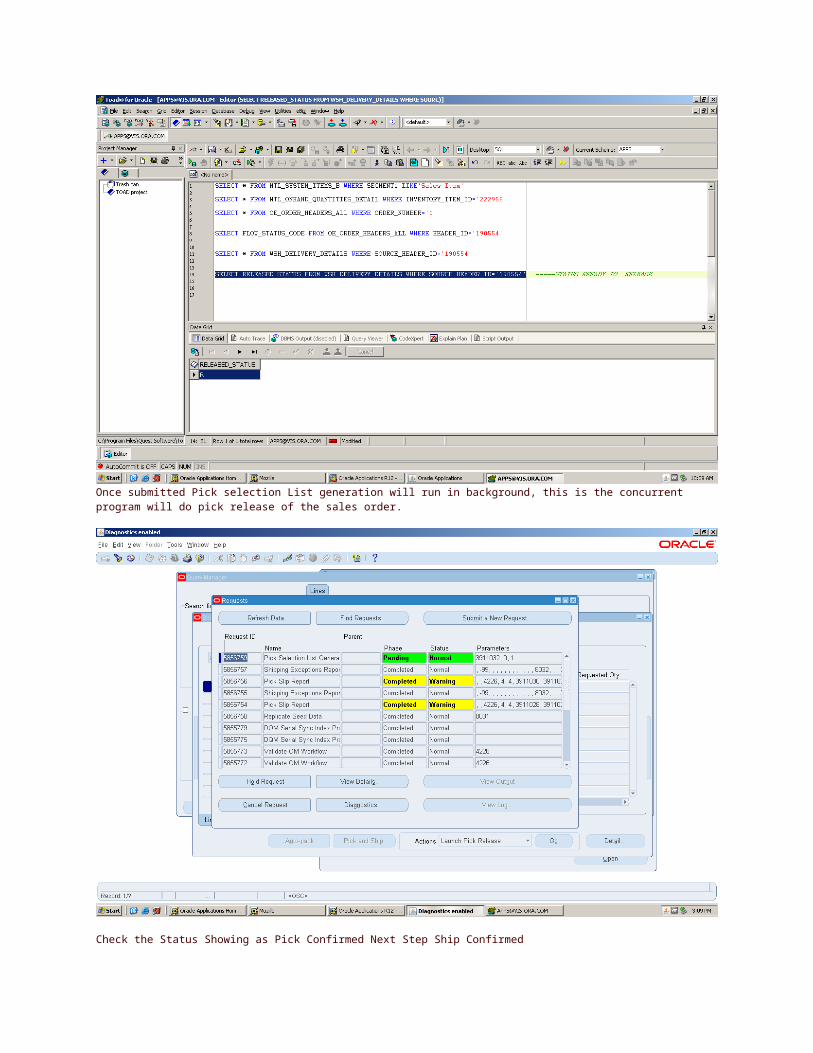
Once submitted Pick selection List generation will run in background, this is the concurrent program will do pick release of the sales order.
Check the Status Showing as Pick Confirmed Next Step Ship Confirmed
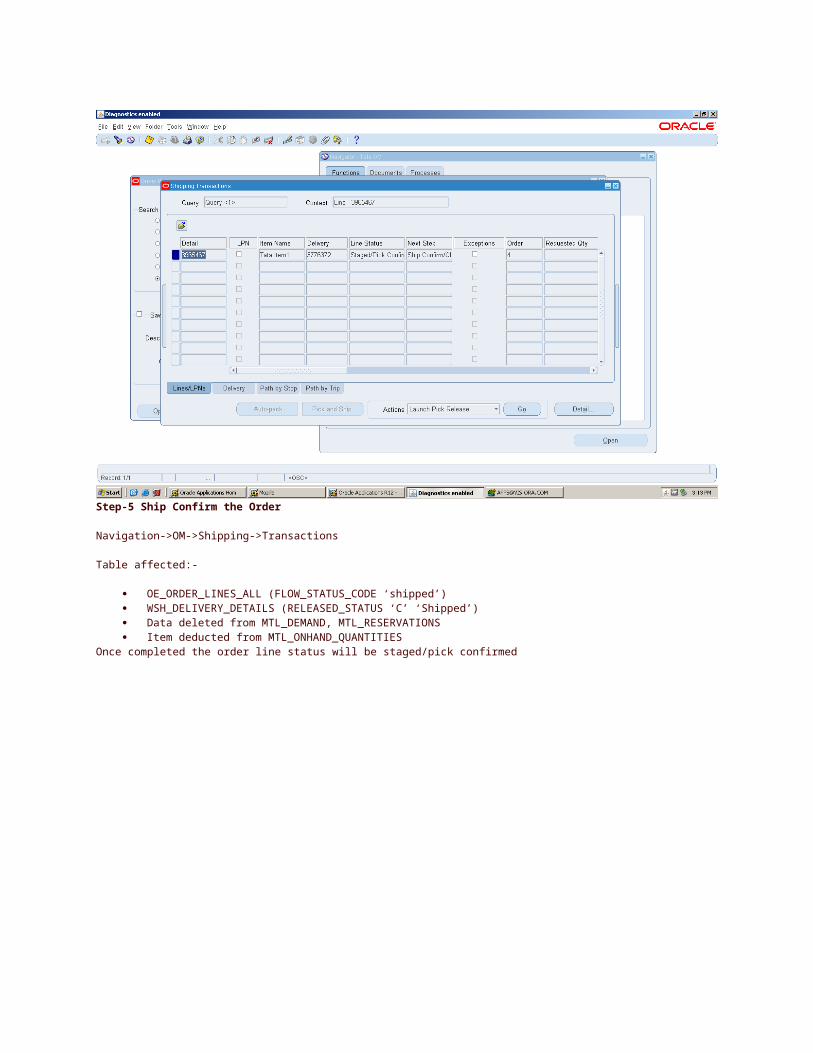
Step-5 Ship Confirm the Order
Navigation->OM->Shipping->Transactions
Table affected:-
OE_ORDER_LINES_ALL (FLOW_STATUS_CODE ‘shipped’) WSH_DELIVERY_DETAILS (RELEASED_STATUS ‘C’ ‘Shipped’) Data deleted from MTL_DEMAND, MTL_RESERVATIONS Item deducted from MTL_ONHAND_QUANTITIES
Once completed the order line status will be staged/pick confirmed
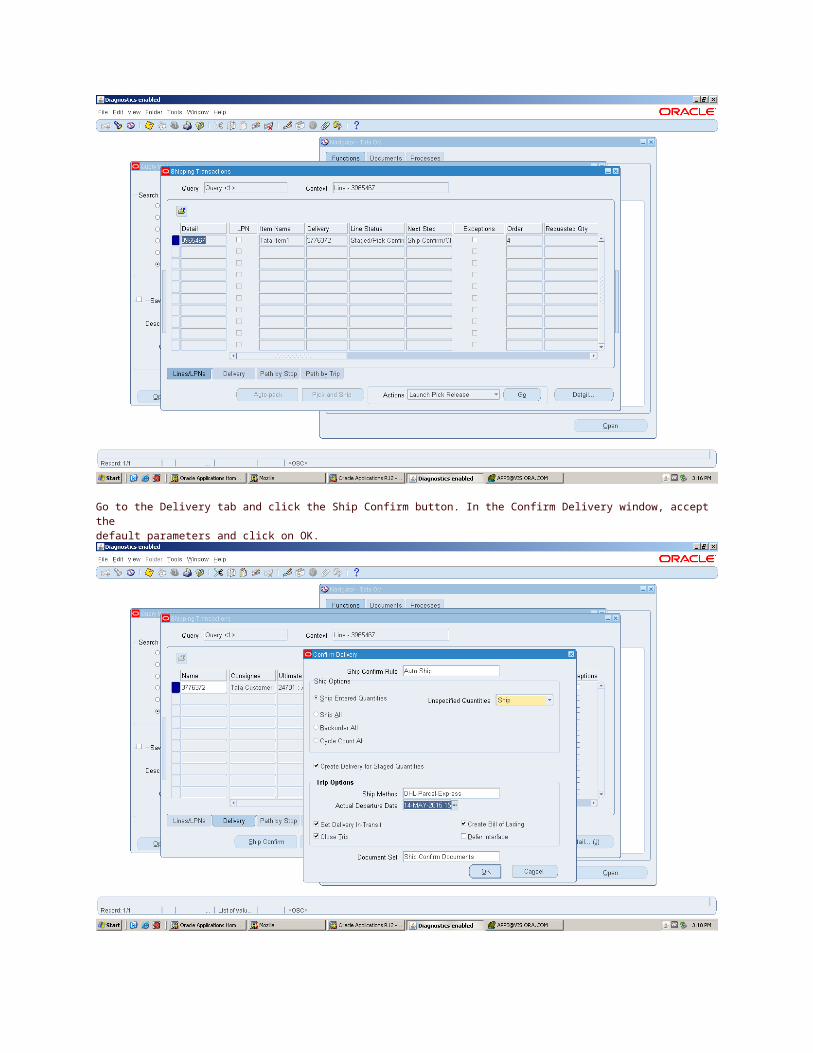
Go to the Delivery tab and click the Ship Confirm button. In the Confirm Delivery window, accept thedefault parameters and click on OK.
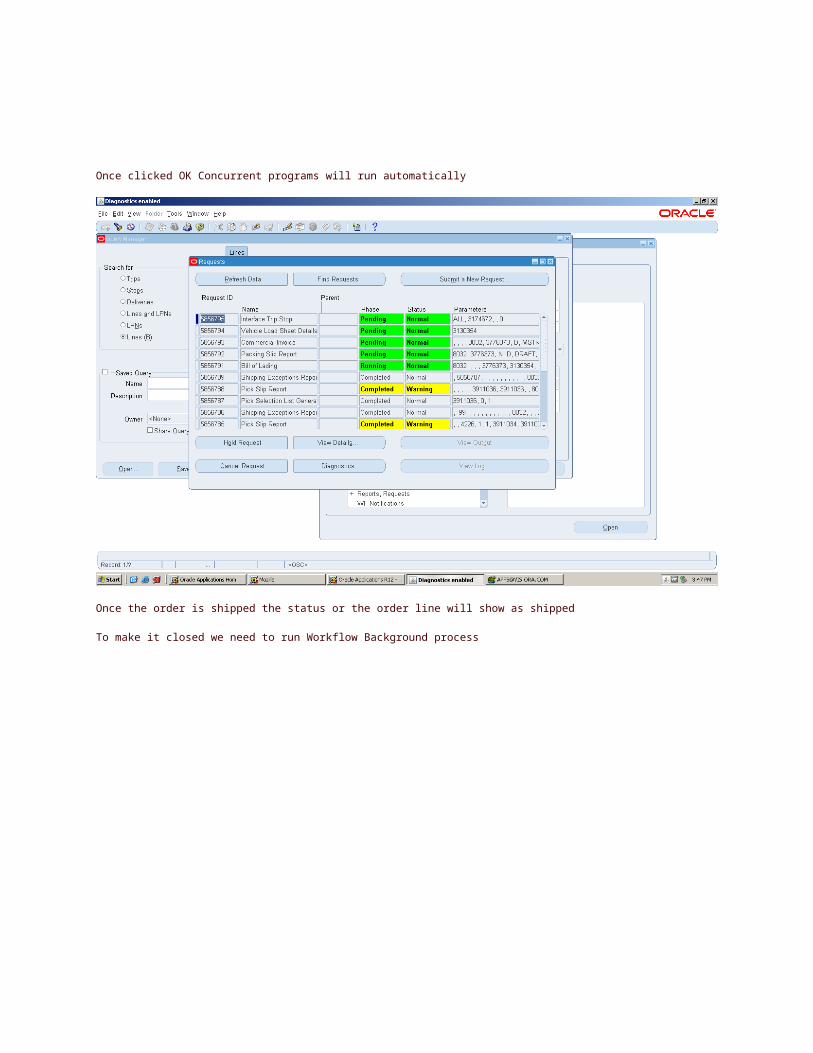
Once clicked OK Concurrent programs will run automatically
Once the order is shipped the status or the order line will show as shipped
To make it closed we need to run Workflow Background process
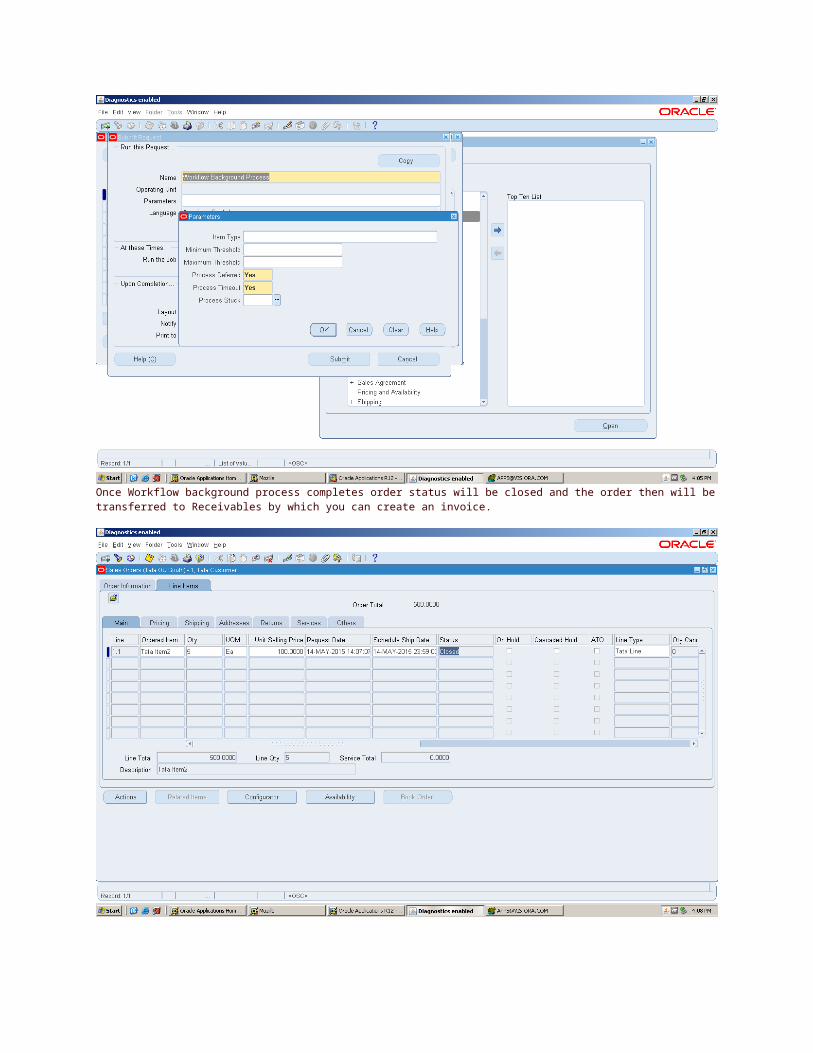
Once Workflow background process completes order status will be closed and the order then will betransferred to Receivables by which you can create an invoice.