original recipe - united notions · original recipe can be found at www ... together on a design...
TRANSCRIPT
Original Recipe can be found at www.modabakeshop.com
Original Recipe
Halloween Wall Hanging

Original Recipe can be found at www.modabakeshop.com
Happy Halloween everyone! Hi, I am Jennifer Overstreet from gh quilting and I whipped up this fun loving banner just in time for the frightening Halloween season. Where did I get the inspiration for this banner? In elementary school of course! My music teacher had this simple little diddy to teach us how to spell Halloween. You'll have to forgive me because I do not remember the whole song. However, I still to this day have the choirs stuck in my head and it simply goes like this: H-A-(double) L-O...W-(double) E-N spells Halloween! And of course repeats itself. Along with ghost and goblins, and pumpkins, and spooky eyes, and scary sites...Oh my!
(1) H "owl"een layer cake designed by Deb Strain for Moda (1/2) yard of Bella Solids Black 9900-00 or optional Bella Solids Black Layer Cake 9900LC-99 (2 1/2) yards of Purple Spiderwebs 19553-16 (1/2) yard of Black White 19557-17 (1) yard of a light fusible interfacing Print out the six pages for the applique and template to go along with the pattern. {You can find the templates in the Printer Friendly Version at the bottom of this post.}
Please read all instructions prior to making this project! *All seams are 1/4" unless noted other wise! Auditioning: is where you match up prints that will work well together ex: what you have in mind of what you think will work together just may not. I ran into this a lot on this project. Best to put them all together on a design wall/floor on how well they will play nicely before cutting and stitching! Part One: Making the background block
• From the H"owl"een layer cake choose six different 10" squares.
• Cut each square into 1/2" x 9 1/2' rectangle. Set aside the left over fabric and save for the applique or the strips for the spiderwebs.
• Next cut six 4 1/2" x 9 1/2" rectangles from the 1/2 yardage or you can pull three 10" squares from the Bella solids black. From the 10" square you will get two cut rectangles measuring 4 1/2" x 9 1/2"
• Once all of your rectangles are cut take one print and one black rectangle, stitch right sides together along the 9 1/2" seam, then press to open.
• Set the six 9 1/2" x 9 1/2" blocks aside.
Part Two: The applique process
• Take the fusible interfacing and any left over material from the printed 10" squares or any random five to six 10 " squares from the H"owl"een layer cake. Fuse the auditioned material by pressing with you hot iron to the interfacing with the material right side up.
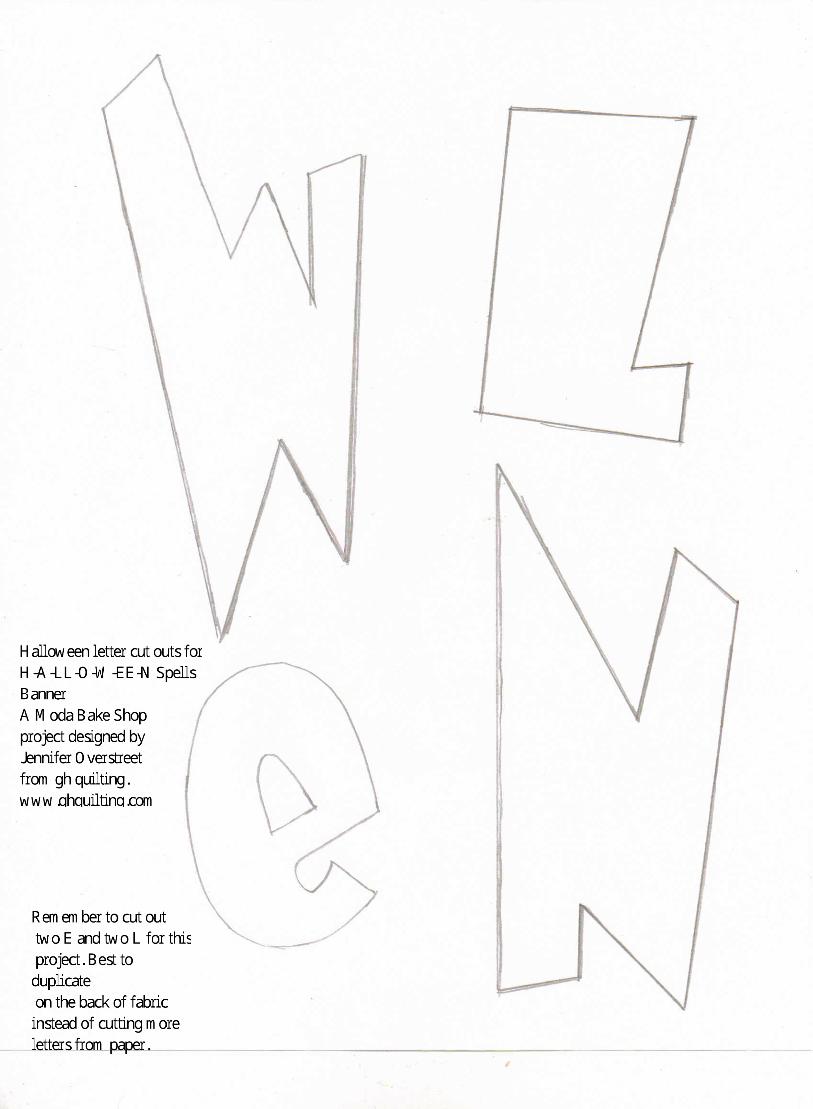
• Once all choice fabric is fused to the interfacing, cut out the templates that printed out in the PFD version of this pattern.
• When all the templates are cut out, trace each of the Halloween letter templates with choice of writing utensil to the interfacing side of each variable 10" square. Be sure to have each letter facing backwards for instance if you want the letter "b" to be read as a letter "b" turn the template over to trace it so it looks like a letter "d" to you. *There is no letter "b" in any of the applique for this project, its just an example!
• After tracing out all the letters for the word Halloween choose which of the 9 1/2" x 9 1/2" block the letters will go with. Keep in mind that each of the printed side of the 9 1/2" blocks will be opposite from each other, while the black side stays in the middle.
• Once you have chosen the arrangement of letter(s) to each 9 1/2" x 9 1/2" block start appliqueing them to the black proportion of each block. *My applique process on this was

Original Recipe can be found at www.modabakeshop.com
to rough edge applique via blanket stitch by machine. Be sure to follow the rhythm of the song for each block as in HA for block one. LL for block two. O for block three. W for block four. EE for block five and N for block six. Each letter can be wonky, straight, or however you see fit to place it! Also when placing any applique pieces to the blocks, be sure that there is a 1/4" on each side so that the applique piece is not accidentally sewn into the seam!
• After appliqueing on the Halloween letters as directed to each block. Start cutting out the facial templates and audition them to any of the left over scrap 10" squares or introduce them to new 10" squares from the H"owl"een layer cake.
• Repete the same process for the Facial templates as stated above for the Halloween letter templates.
• Place each facial applique piece to your liking ( it does not have to be like mine, feel free to place them where you see them to be fit).
• After all the blocks are appliqued, place them aside to start on the spiderwebs.
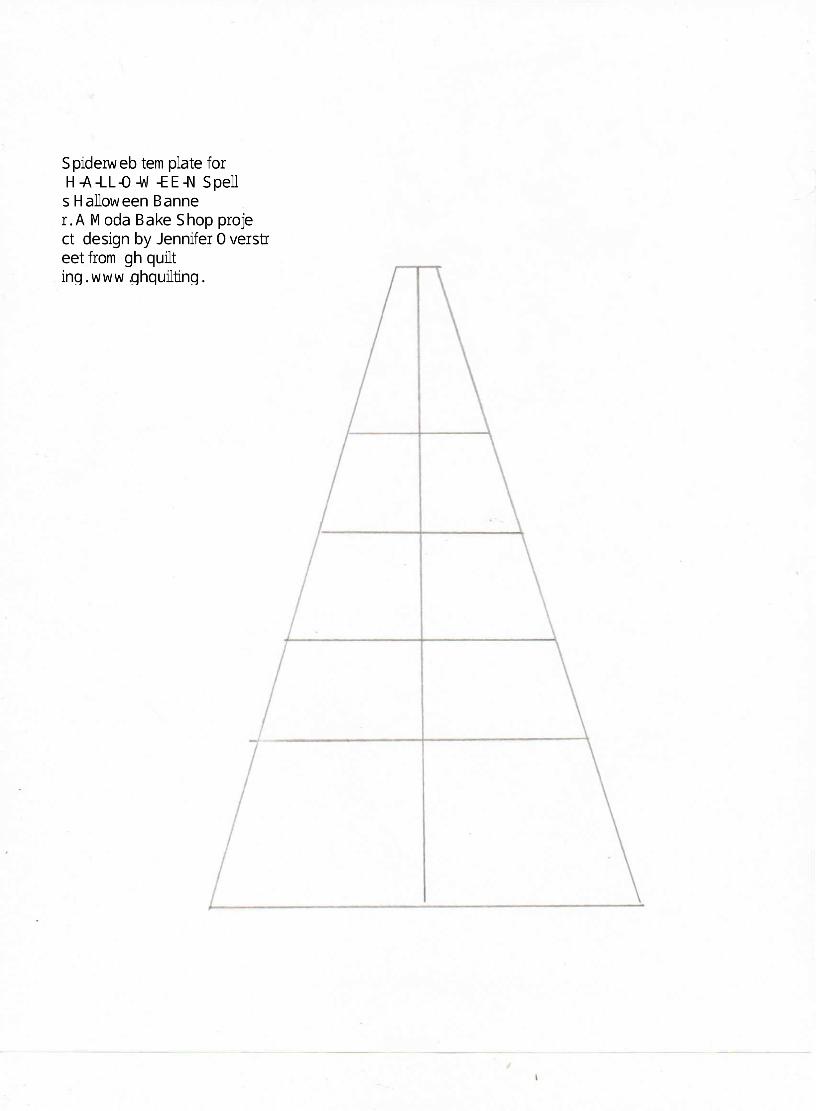
Part Three: Spiderwebs
• From the H"owl"een layer cake you can use any left over pieces from the applique process so as long as they are still 10" or pull few more new 10" squares to start the strip cutting for the spiderwebs.
• From various prints cut (24) strips of 2" x 10" and (36) strips of 1 5/8" x 10".
• Step one: Randomly take (2) 2" x 10" strips and (3) 1 5/8" x 10" strips and sew them together by having the 2" x 10" strips on the out side and the 1 5/8" x 10" on the inside. (12) strip blocks are needed for this process.
• Step two: Cut out the template and place it on top of the strips about 1/4" away from the edge.
• Step three: Place your ruler over the template for rotary cutting. Be sure that the ruler covers over the template so that you do not cut the template size down and make your first cut.
• Step four: Repeat the same process for the other side of the template and save the excess scrap pieces. They will be need for later in the spiderweb process.

Original Recipe can be found at www.modabakeshop.com
• Step five: Turn the template so that the wider side is on top of the strip block
• Step six: Repeat the process as before to make the next cut with the rotary cutter.
• Step seven: Turn the template back to the same position as the first cut and repeat the process of making the final cut in the block. Remember to save the scrap pieces for later.
• Step eight: Randomly select (6) different triangles for the half spiderweb block to achieve a scrappy look. Sew each triangle right sides together until it starts to look like a spiderweb bunting and then press flat to open.
• Repeat the same process for the remaining (5) spiderweb blocks.
Squaring the Spiderweb Block
Original Recipe can be found at www.modabakeshop.com
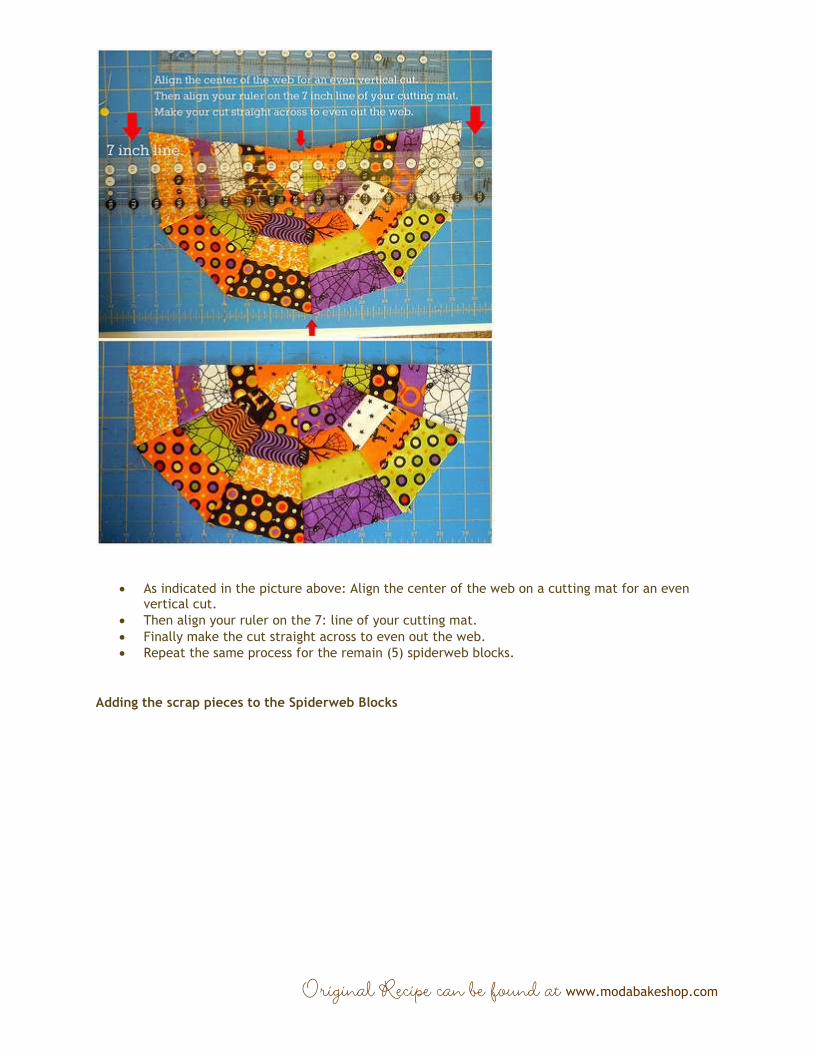
• As indicated in the picture above: Align the center of the web on a cutting mat for an even vertical cut.
• Then align your ruler on the 7: line of your cutting mat.
• Finally make the cut straight across to even out the web.
• Repeat the same process for the remain (5) spiderweb blocks.
Adding the scrap pieces to the Spiderweb Blocks

Original Recipe can be found at www.modabakeshop.com
• Step one: Bring back the scrap pieces from the strip blocks. Place them on theend of the second triangle with the wider end towards the center of the spiderweb
• Step two: With about a 1/2" over hang on each side stitch the scrap piece to the spiderweb block right sides together.
• Step three: Press open to lay flat. *It does not matter if you do this process before or after adding the applique block to the spiderweb block.
Original Recipe can be found at www.modabakeshop.com
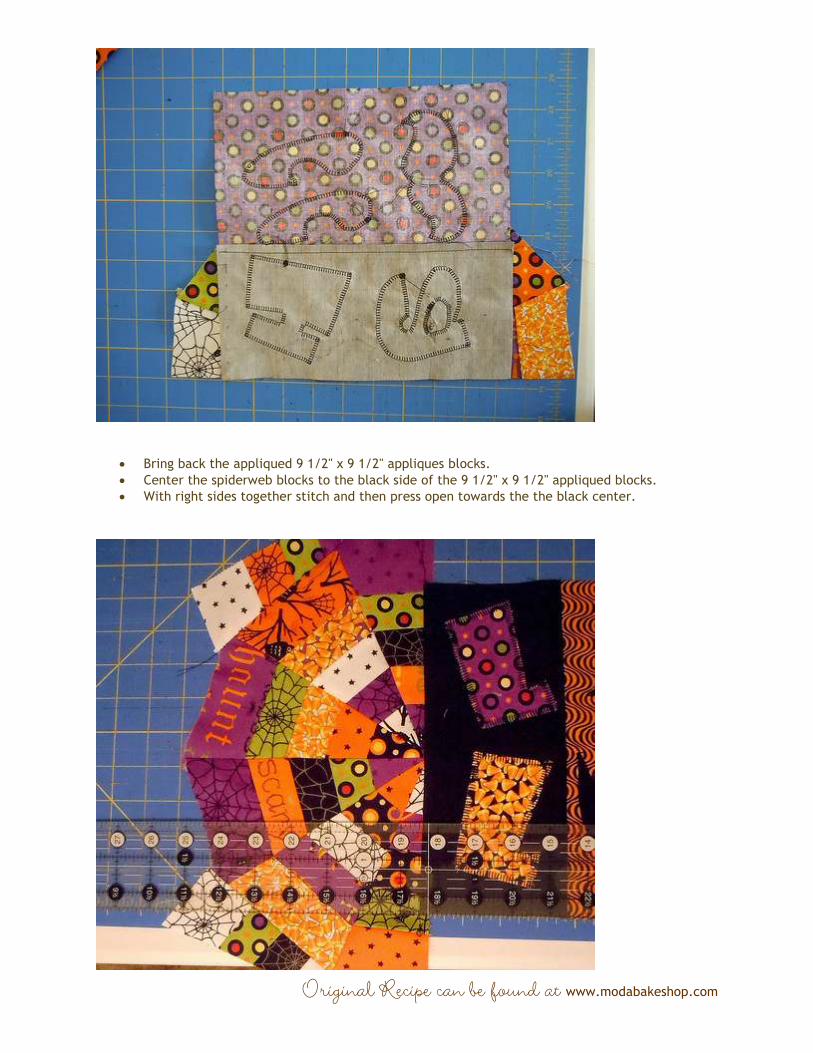
• Bring back the appliqued 9 1/2" x 9 1/2" appliques blocks.
• Center the spiderweb blocks to the black side of the 9 1/2" x 9 1/2" appliqued blocks.
• With right sides together stitch and then press open towards the the black center.

Original Recipe can be found at www.modabakeshop.com
• Once the spiderweb block and the applique block are sewn together align the block on a cutting mat to square off the excess fabric from the top and bottom sides.
• Then measure 5 1/2" away from the connecting seam of the black center and the spiderweb, cut off the excess fabric at 5 1/2". This will be a 9 1/2" x 15 1/2" block in all.
• Repeat the same process for the remaining (5) blocks.
Part Four: Putting it all together!
• Starting piecing the inner banner together with the "HA" block until the banner spells out Halloween. Make sure right sides are together when sewing blocks together.
• Finished inner banner will be 15 1/2" x 57"
Adding the boarder
• From the purple spiderweb fabric cut the top and bottom borders 3" x 20 1/2" and set aside
• Also from the purple spiderweb fabric cut the side borders 3" x LOF or 3" x 54 1/2".
• Add each 3" x 54 1/2" border strip to each of the long sides of the inner banner, square off if needed.
• Then add the 3" x 20 1/2" borders to the top and bottom of the inner banner.
The finally!!!!
• Take the finished banner to your local long arm quilter or quilt it on your own.
• Attach hanging pieces via way of your method of choice to the back of the banner.
• Finish off with the binding
One fun loving spooky kooky 20"x 60" H-A-(double) L-O-W-(double) E-N Spells Halloween Banner
Original Recipe can be found at www.modabakeshop.com
Thank you for stopping by and checking out my project today! Jennifer Overstreet | [email protected]}om {www.ghquilting.com}

,


,

,
,