packet-tracer -- ping - cisco.com · from the ability to simulate real-world traffic by specifying...
TRANSCRIPT

Cisco ASA Seri
C H A P T E R 15
packet-tracer through ping Commands15-1es Command Reference, I through R Commands

Chapter
packet-tracerThe packet-tracer command can be used in privileged EXEC mode to generate a 5-to-6 tuple packet against a firewall’s current configurations. For clarity, the packet-tracer syntax is shown separately for ICMP, TCP/UDP/SCTP, and IP packet modeling.
packet-tracer input ifc_name [vlan-id vlan_id] icmp [inline-tag tag] {sip | user username | security-group {name name | tag tag} | fqdn fqdn_string} icmp_code [icmp_id] [dmac] {dst_ip | security-group {name name | tag tag} | fqdn fqdn_string} [detailed] [xml]
packet-tracer input ifc_name [vlan-id vlan_id] rawip [inline-tag tag] {sip | user username | security-group {name name | tag tag} | fqdn fqdn_string} protocol [dmac] {dst_ip | security-group {name name | tag tag} | fqdn fqdn_string}[detailed] [xml]
packet-tracer input ifc_name [vlan-id vlan_id] {tcp | udp | sctp} [inline-tag tag] {sip | user username | security-group {name name | tag tag} | fqdn fqdn_string} src_port [dmac] {dst_ip | security-group {name name | tag tag} | fqdn fqdn_string} dst_port [{vxlan-inner vxlan_inner_tag icmp inner_src_ip inner_icmp_type inner_icmp_code [inner_icmp_id] inner_dst_ip inner_src_mac inner_dst_mac} | {vxlan-inner vxlan_inner_tag rawip inner_src_ip inner_protocol inner_dst_ip inner_src_mac inner_dst_mac} | {vxlan-inner vxlan_inner_tag {tcp | udp | sctp} inner_src_ip inner_src_port inner_dst_ip inner_dst_port inner_src_mac inner_dst_mac}] [detailed] [xml]
Syntax Description detailed (Optional) Provides detailed trace results information.
dmac Specifies the destination MAC address. It provides a complete picture of the life of a switched packet by displaying the output interface selection and also the packet drop due to the unknown destination MAC address.
dst_ip Specifies the destination IPv4 or IPv6 address for the packet trace.
dst_port Specifies the destination port for a TCP/UDP/SCTP packet trace.
fqdn fqdn_string Specifies the fully qualified domain name of the host, which can be both the source and destination IP address. Supports the FQDN for IPv4 only.
icmp Specifies the protocol to use is ICMP.
icmp_code Specifies the ICMP code for an ICMP packet trace.
icmp_id (Optional.) Specifies the ICMP identifier for an ICMP packet trace.
inner_dst_ip Specifies the destination IPv4 or IPv6 address of the inner packet.
inner_dst_mac Specifies the destination MAC address of the inner packet.
inner_dst_port Specifies the destination port of the inner packet.
inner_icmp_code Specifies the ICMP type code of the inner packet.
inner_icmp_type Specifies the ICMP messages that are identified of the inner packet.
inner_protocol Specifies the protocol number of the inner packet.
inner_src_mac Specifies the spool MAC address of the inner packet.
inner_src_ip Specifies the source IPv4 or IPv6 address for the inner packet.
input ifc_name Specifies the ingress interface of the packet.
inline-tag tag Specifies the security group tag value being embedded in the Layer 2 CMD header. Valid values range from 0 - 65533.
15-2Cisco ASA Series Command Reference, I through R Commands

Chapter
Command Default This command has no default settings.
Command Modes The following table shows the modes in which you can enter the command:
Command History
protocol Specifies the protocol number for raw IP packet tracing, 0-255.
rawip Specifies the protocol to use is raw IP.
sctp Specifies the protocol to use is SCTP.
security-group {name name | tag tag }
Specifies the source and destination security groups based on the IP-SGT lookup for Trustsec. You can specify a security group name or a tag number.
src_port Specifies the source port for a TCP/UDP/SCTP packet trace.
tcp Specifies the protocol to use is TCP.
type Specifies the ICMP type for an ICMP packet trace.
udp Specifies the protocol to use is UDP.
user username Specifies the user identity in the format of domain\user if you want to specify the user as the source IP address. The most recently mapped address for the user (if any) is used in the trace.
vlan-id vlan_id (Optional) Specifies the VLAN identity for the flow. Values range from 1 - 4096.
vxlan-inner vxlan_inner_tag
Specifies the inner packet using VXLAN encapsulation.
xml (Optional) Displays the trace results in XML format.
Command Mode
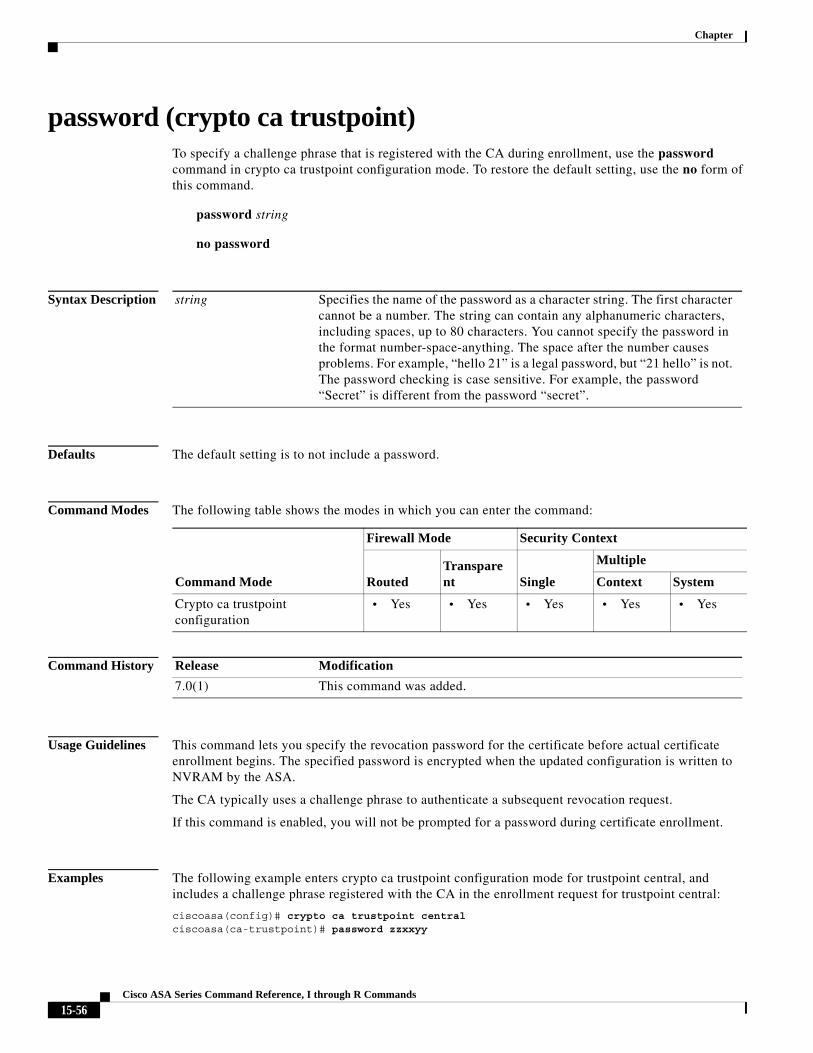
Firewall Mode Security Context
RoutedTransparent Single
Multiple
Context System
Privileged EXEC mode • Yes • Yes • Yes • Yes • —
Release Modification
7.2(1) This command was added.
8.4(2) Two keyword-argument pairs were added: user username and fqdn fqdn_ string. Renamed and redefined several keywords. Added support for IPv6 source addresses.
9.0(1) Support for user identity was added. Only IPv4 fully qualified domain names (FQDNs) are supported.
9.3(1) The inline-tag tag keyword-argument pair was added to support the security group tag value being embedded in the Layer 2 CMD header.
9.4(1) Two keyword-argument pairs were added: vlan-id vlan_id and vxlan-inner vxlan_inner_tag.
9.5(2) The sctp keyword was added.
15-3Cisco ASA Series Command Reference, I through R Commands
Chapter
Usage Guidelines In addition to capturing packets with the capture command, it is possible to trace the lifespan of a packet through the ASA to see if it is behaving as expected. The packet-tracer command enables you to do the following:
• Debug all packet drops in a production network.
• Verify the configuration is working as intended.
• Show all rules applicable to a packet along with the CLI lines that caused the rule addition.
• Show a timeline of packet changes in a datapath.
• Inject tracer packets into the datapath.
• Search for an IPv4 or IPv6 address based on the user identity and the FQDN.
• Debug packets across cluster nodes.
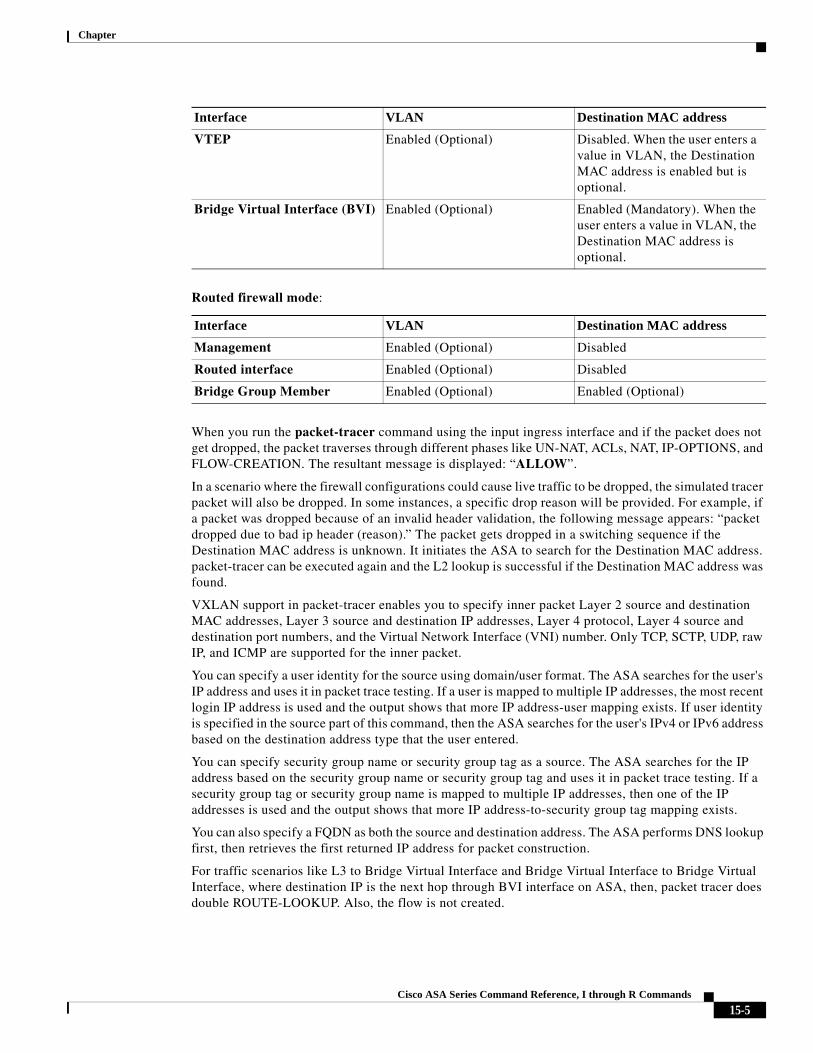
The packet-tracer command provides detailed information about the packets and how they are processed by the ASA. packet-tracer allows a firewall administrator to inject a virtual packet into the security appliance and track the flow from ingress to egress. Along the way, the packet is evaluated against flow and route lookups, ACLs, protocol inspection, and NAT. The power of the utility comes from the ability to simulate real-world traffic by specifying source and destination addresses with protocol and port information.
The optional vlan-id keyword allows packet tracer to enter a parent interface, which is later redirected to a subinterface that matches the VLAN identity. The VLAN identity is an optional entry only for non-sub-interfaces. Management interface is an exception, where a parent management-only interface can only have the management-only sub-interfaces.
The destination MAC address lookup is available.
In transparent firewall mode, when the input interface is VTEP, Destination MAC address is optionally enabled if you enter a value in VLAN. Whereas in the bridge group member interface, Destination MAC address is a mandatory field but is optional if you enter the vlan-id keyword.
In routed firewall mode, when the input interface is bridge group member interface, The vlan-id keyword and dmac argument are optional.
The following tables provide full information pertaining to the interface-dependent behavior of VLAN identity and Destination MAC address in transparent and routed firewall modes respectively.
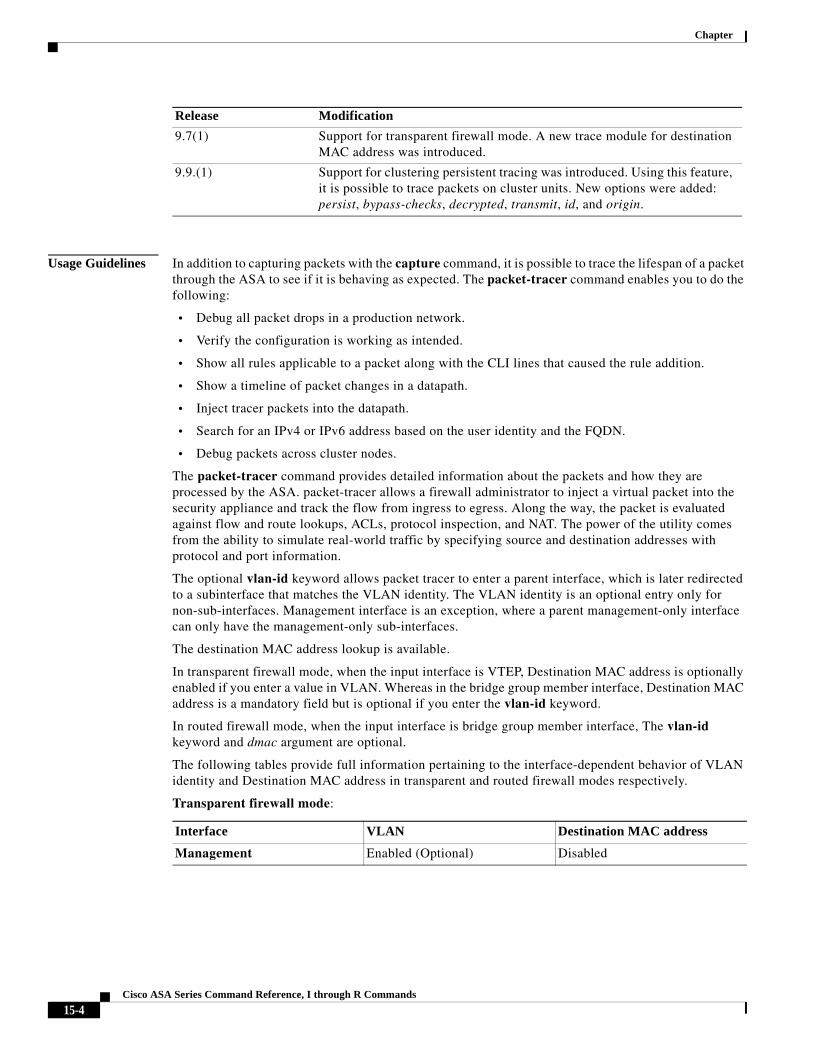
Transparent firewall mode:
9.7(1) Support for transparent firewall mode. A new trace module for destination MAC address was introduced.
9.9.(1) Support for clustering persistent tracing was introduced. Using this feature, it is possible to trace packets on cluster units. New options were added: persist, bypass-checks, decrypted, transmit, id, and origin.
Release Modification
Interface VLAN Destination MAC address
Management Enabled (Optional) Disabled
15-4Cisco ASA Series Command Reference, I through R Commands
Chapter
Routed firewall mode:
When you run the packet-tracer command using the input ingress interface and if the packet does not get dropped, the packet traverses through different phases like UN-NAT, ACLs, NAT, IP-OPTIONS, and FLOW-CREATION. The resultant message is displayed: “ALLOW”.
In a scenario where the firewall configurations could cause live traffic to be dropped, the simulated tracer packet will also be dropped. In some instances, a specific drop reason will be provided. For example, if a packet was dropped because of an invalid header validation, the following message appears: “packet dropped due to bad ip header (reason).” The packet gets dropped in a switching sequence if the Destination MAC address is unknown. It initiates the ASA to search for the Destination MAC address. packet-tracer can be executed again and the L2 lookup is successful if the Destination MAC address was found.
VXLAN support in packet-tracer enables you to specify inner packet Layer 2 source and destination MAC addresses, Layer 3 source and destination IP addresses, Layer 4 protocol, Layer 4 source and destination port numbers, and the Virtual Network Interface (VNI) number. Only TCP, SCTP, UDP, raw IP, and ICMP are supported for the inner packet.
You can specify a user identity for the source using domain/user format. The ASA searches for the user's IP address and uses it in packet trace testing. If a user is mapped to multiple IP addresses, the most recent login IP address is used and the output shows that more IP address-user mapping exists. If user identity is specified in the source part of this command, then the ASA searches for the user's IPv4 or IPv6 address based on the destination address type that the user entered.
You can specify security group name or security group tag as a source. The ASA searches for the IP address based on the security group name or security group tag and uses it in packet trace testing. If a security group tag or security group name is mapped to multiple IP addresses, then one of the IP addresses is used and the output shows that more IP address-to-security group tag mapping exists.
You can also specify a FQDN as both the source and destination address. The ASA performs DNS lookup first, then retrieves the first returned IP address for packet construction.
For traffic scenarios like L3 to Bridge Virtual Interface and Bridge Virtual Interface to Bridge Virtual Interface, where destination IP is the next hop through BVI interface on ASA, then, packet tracer does double ROUTE-LOOKUP. Also, the flow is not created.
VTEP Enabled (Optional) Disabled. When the user enters a value in VLAN, the Destination MAC address is enabled but is optional.
Bridge Virtual Interface (BVI) Enabled (Optional) Enabled (Mandatory). When the user enters a value in VLAN, the Destination MAC address is optional.
Interface VLAN Destination MAC address
Interface VLAN Destination MAC address
Management Enabled (Optional) Disabled
Routed interface Enabled (Optional) Disabled
Bridge Group Member Enabled (Optional) Enabled (Optional)
15-5Cisco ASA Series Command Reference, I through R Commands
Chapter
With ARP and MAC address table entry cleared, the packet tracer always does double ROUTE-LOOKUP and destination MAC address is resolved and stored in database. Whereas this is not the case for any other traffic scenario. Destination MAC address is never resolved and stored in database, when it is a L3 interface. Since the BVI interface is configured with nameif and has L3 properties, the DMAC lookup should not be done.
This behavior is seen only in first attempt when there are no MAC address and ARP entries present. Once the entry is present for DMAC, the packet tracer output is as expected. The flow is created.
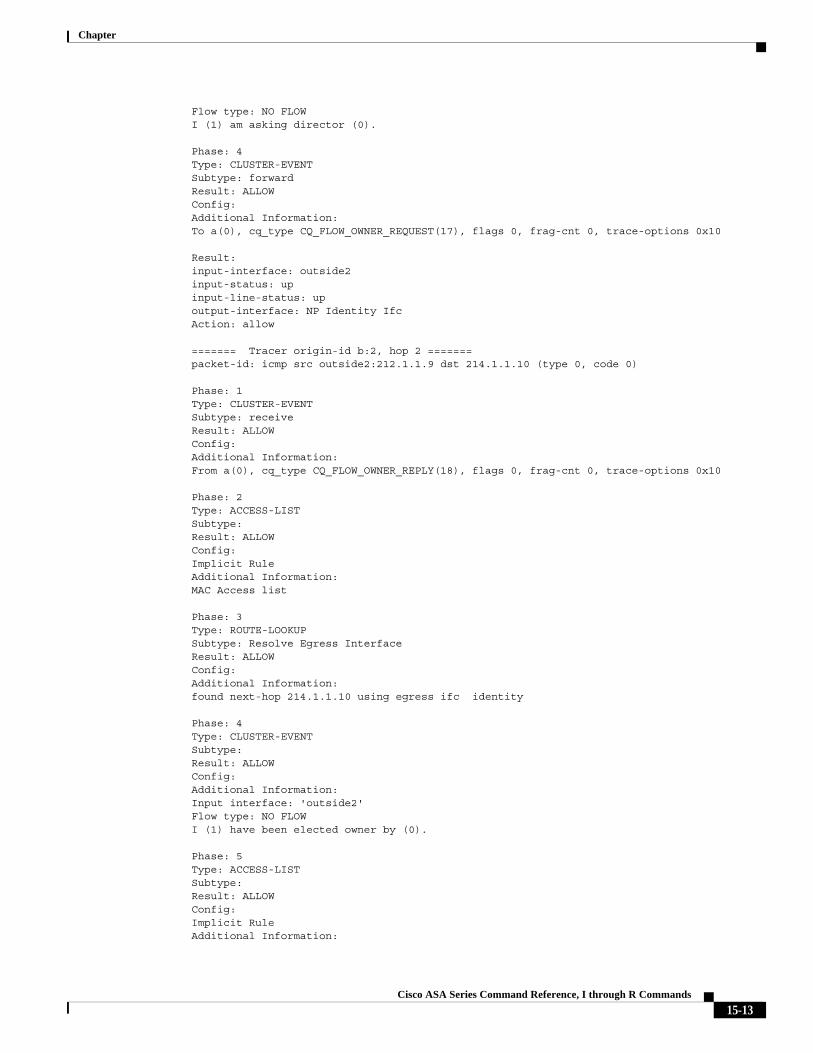
With persistent tracing, it is possible to trace a packet when it passes between cluster units. The packet you want to track across cluster units must be injected using the persist option. The persistent tracing for each packet is equipped with a packet-id and a hop count with which it is possible to determine the injected packet origin and packet hop phases through the cluster nodes. The packet-id is a combination of <node name of the device where the packet originated> and an incremental number. The packet-id is unique for each new packet received for the first time on a node. The hop count populates every time the packet moves from one cluster member to another. For example, packets in clustering arrive to a member based on external load-balancing numbered list. The Host-1 sends a packet to Host-2. The injected packet is redirected between the cluster nodes before it is sent to Host-2. The metadata output displays Tracer origin-id B:7 hop 0, Tracer origin-id B:7 hop 1, and Tracer origin-id B:7 hop 2 respectively. Where B is the name of the cluster node from which the packet originated. And 7 is an incremental number, representing this is the 7th packet originating from this cluster node. This number increases with each new packet originating from this node. “B” and “7” together forms a unique-id to identify a packet. A cluster unit local name is the same for every packet that is passing through this unit. Each packet is differentiated when the global buffer uses the unique-id and the hop count. Once the packets are traced, the persistent traces are available on each node until the time you manually discard them to free up some memory. The enabled persistent traces in a context are stored in a per-context buffer. Use the origin-owner-ID (two values <origin-owner> <id>), to locate the traces in the set.
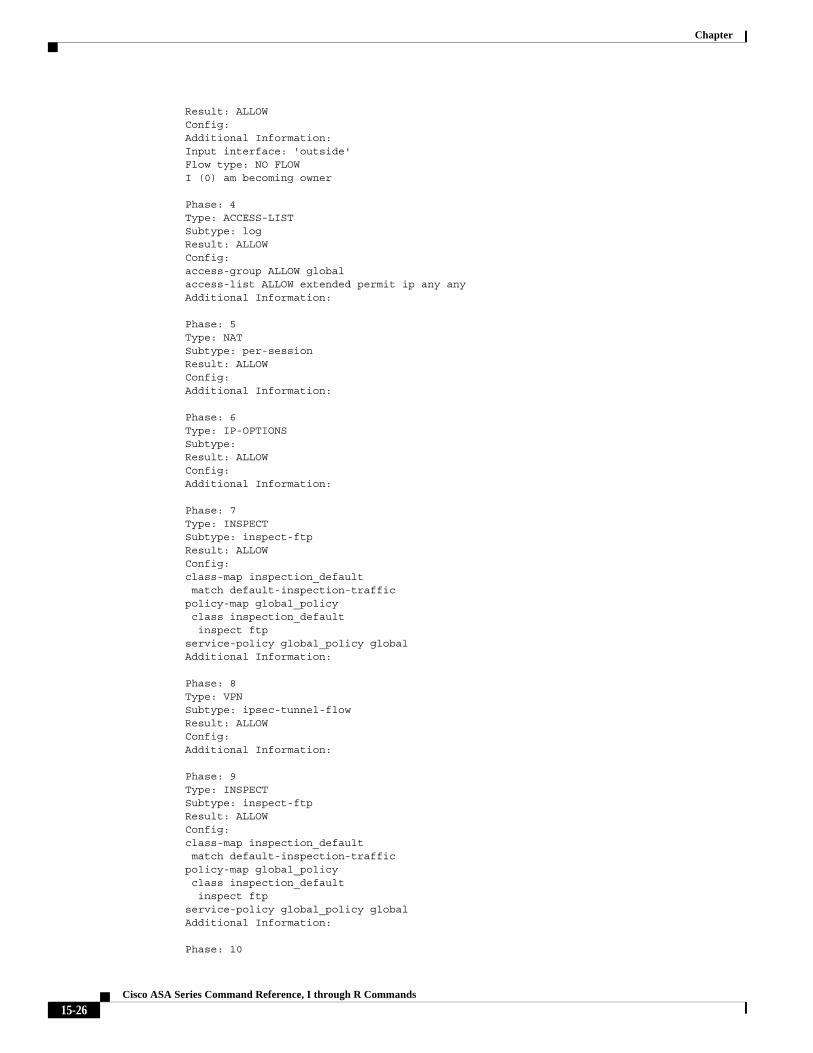
It is possible to allow simulated packets to egress the ASA. Using the transmit option via packet-tracer, you can let the packets be transmitted on the network. By default, the packet-tracer discards the packet before transmitting it. A flow is generated in the flow table once the packets are egressed.
By using the bypass-checks option via packet-tracer, it is possible to bypass ACL, VPN filters, uRPF, and IPsec spoof checks. It applies for both ingress and egress conditions and the simulated IPsec packets are not dropped.
It is possible to inject a decrypted packet in a VPN tunnel, which is generic and applicable for both IPSec and TLS. It is also possible to simulate a packet that comes across a VPN tunnel. The simulated ‘decrypted’ packet would be matched against an existing VPN tunnel and the associated tunnel policies would be applied.
Examples The following example traces a TCP packet for the HTTP port from 201.1.1.1 to 202.1.1.1.
ciscoasa# packet-tracer input inside tcp 201.1.1.1 13 202.1.1.1 324 000c.29a3.b07a detailed
Result:Action: dropDrop-reason: (dst-l2_lookup-fail) Dst MAC L2 Lookup Failed
ciscoasa# packet-tracer input inside tcp 201.1.1.1 13 202.1.1.1 324 000c.29a3.b07a detailed
Phase: 1Type: L2-EGRESS-IFC-LOOKUPSubtype: Destination MAC Address LookupResult: ALLOW
15-6Cisco ASA Series Command Reference, I through R Commands

Chapter
Config:Additional Information:Destination MAC address lookup resulted in egress ifc outside
Phase: 2Type: ACCESS-LISTSubtype:Result: ALLOWConfig:Implicit RuleAdditional Information:Forward Flow based lookup yields rule:in id=0x7fdbe83542f0, priority=1, domain=permit, deny=falsehits=7313, user_data=0x0, cs_id=0x0, l3_type=0x8src mac=0000.0000.0000, mask=0000.0000.0000dst mac=0000.0000.0000, mask=0100.0000.0000input_ifc=inside, output_ifc=any
Phase: 3Type: ACCESS-LISTSubtype: logResult: ALLOWConfig:access-group ALLOW globalaccess-list ALLOW extended permit ip any anyAdditional Information:Forward Flow based lookup yields rule:in id=0x7fdbd94026a0, priority=12, domain=permit, deny=falsehits=8, user_data=0x7fdbf07cbd00, cs_id=0x0, use_real_addr, flags=0x0, protocol=0src ip/id=0.0.0.0, mask=0.0.0.0, port=0, tag=anydst ip/id=0.0.0.0, mask=0.0.0.0, port=0, tag=any, dscp=0x0input_ifc=any, output_ifc=any
Phase: 4Type: NATSubtype: per-sessionResult: ALLOWConfig:Additional Information:Forward Flow based lookup yields rule:in id=0x7fdbd90a2990, priority=0, domain=nat-per-session, deny=falsehits=10, user_data=0x0, cs_id=0x0, reverse, use_real_addr, flags=0x0, protocol=6src ip/id=0.0.0.0, mask=0.0.0.0, port=0, tag=anydst ip/id=0.0.0.0, mask=0.0.0.0, port=0, tag=any, dscp=0x0input_ifc=any, output_ifc=any
Phase: 5Type: IP-OPTIONSSubtype:Result: ALLOWConfig:Additional Information:Forward Flow based lookup yields rule:in id=0x7fdbe8363790, priority=0, domain=inspect-ip-options, deny=truehits=212, user_data=0x0, cs_id=0x0, reverse, flags=0x0, protocol=0 src ip/id=0.0.0.0, mask=0.0.0.0, port=0, tag=anydst ip/id=0.0.0.0, mask=0.0.0.0, port=0, tag=any, dscp=0x0input_ifc=inside, output_ifc=any
Phase: 6Type: NAT Subtype: per-session
15-7Cisco ASA Series Command Reference, I through R Commands

Chapter
Result: ALLOWConfig:Additional Information: Reverse Flow based lookup yields rule:in id=0x7fdbd90a2990, priority=0, domain=nat-per-session, deny=falsehits=12, user_data=0x0, cs_id=0x0, reverse, use_real_addr, flags=0x0, protocol=6src ip/id=0.0.0.0, mask=0.0.0.0, port=0, tag=anydst ip/id=0.0.0.0, mask=0.0.0.0, port=0, tag=any, dscp=0x0
Phase: 7Type: IP-OPTIONSSubtype:Result: ALLOWConfig:Additional Information:Reverse Flow based lookup yields rule:in id=0x7fdbd93dfc10, priority=0, domain=inspect-ip-options, deny=truehits=110, user_data=0x0, cs_id=0x0, reverse, flags=0x0, protocol=0src ip/id=0.0.0.0, mask=0.0.0.0, port=0, tag=anydst ip/id=0.0.0.0, mask=0.0.0.0, port=0, tag=any, dscp=0x0input_ifc=outside, output_ifc=any
Phase: 8Type: FLOW-CREATIONSubtype:Result: ALLOWConfig:Additional Information:New flow created with id 221, packet dispatched to next moduleModule information for forward flow …snp_fp_tracer_dropsnp_fp_inspect_ip_optionssnp_fp_tcp_normalizersnp_fp_translatesnp_fp_tfwsnp_fp_fragmentsnp_ifc_stat
Module information for reverse flow …snp_fp_tracer_dropsnp_fp_inspect_ip_optionssnp_fp_tcp_normalizersnp_fp_translatesnp_fp_tfwsnp_fp_fragmentsnp_ifc_stat
Result:input-interface: insideinput-status: upinput-line-status: upAction: allow118# command exampleciscoasa(config)# command exampleresulting screen display here<Text omitted.>
The following example traces a TCP packet for the HTTP port from 10.100.10.10 to 10.100.11.11. The result indicates that the packet will be dropped by the implicit deny access rule.
ciscoasa(config)# packet-tracer input outside tcp 10.100.10.10 80 10.100.11.11 80
Phase: 1
15-8Cisco ASA Series Command Reference, I through R Commands
Chapter
Type: ROUTE-LOOKUPSubtype: Resolve Egress InterfaceResult: ALLOWConfig:Additional Information:found next-hop 10.86.116.1 using egress ifc outside
Phase: 2Type: ACCESS-LISTSubtype: Result: DROPConfig:Implicit RuleAdditional Information:
Result:input-interface: outsideinput-status: upinput-line-status: upoutput-interface: NP Identity Ifcoutput-status: upoutput-line-status: upAction: dropDrop-reason: (acl-drop) Flow is denied by configured rule
The following example shows how to trace a packet from inside host 10.0.0.2 to outside host 20.0.0.2 with the username of CISCO\abc:
ciscoasa# packet-tracer input inside icmp user CISCO\abc 0 0 1 20.0.0.2
Source: CISCO\abc 10.0.0.2
Phase: 1Type: ROUTE-LOOKUPSubtype: inputResult: ALLOWConfig:Additional Information:in 20.0.0. 255.255.255.0 outside...Result:input-interface: insideinput-status: upinput-line-status: upoutput-interfce: outsideoutput-status: upoutput-line-status: upAction: allow
The following example shows how to trace a packet from inside host 20.0.0.2 with the username of CISCO\abc and display the trace results in XML format:
<Source><user>CISCO\abc</user><user-ip>10.0.0.2</user-ip><more-ip>1</more-ip></Source>
<Phase><id>1</id><type>ROUTE-LOOKUP</type><subtype>input</subtype><result>ALLOW</result><config>
15-9Cisco ASA Series Command Reference, I through R Commands
Chapter
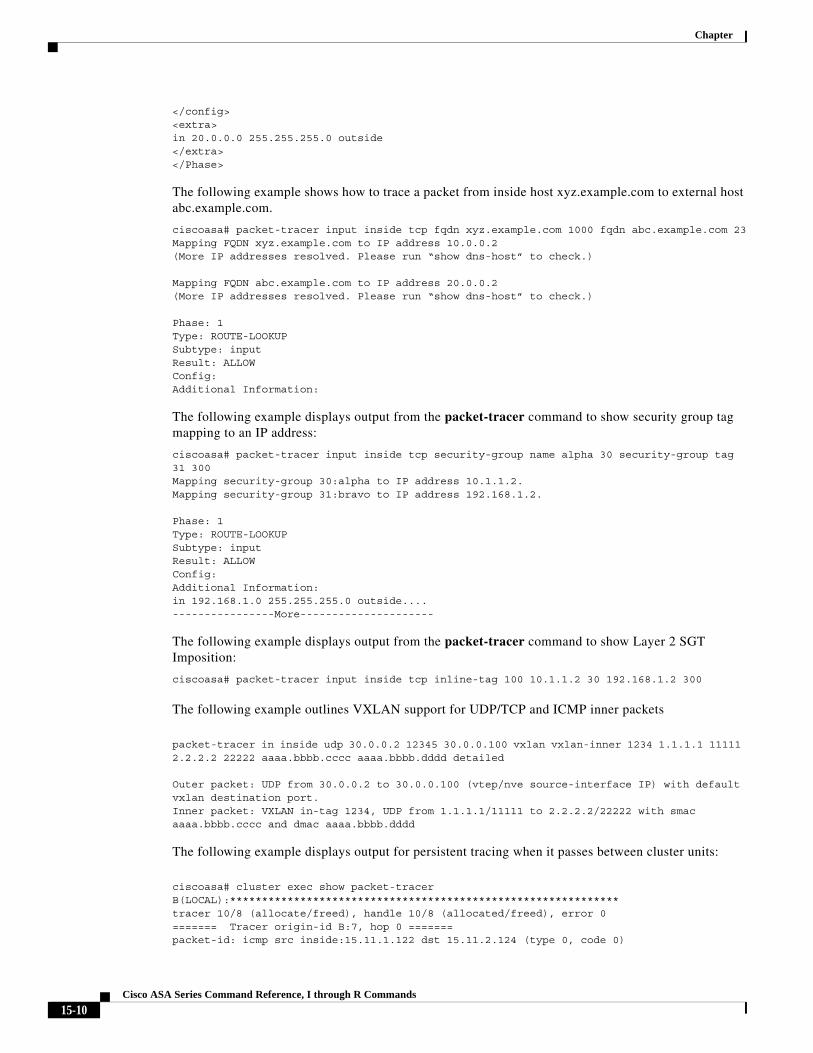
</config><extra>in 20.0.0.0 255.255.255.0 outside</extra></Phase>
The following example shows how to trace a packet from inside host xyz.example.com to external host abc.example.com.
ciscoasa# packet-tracer input inside tcp fqdn xyz.example.com 1000 fqdn abc.example.com 23Mapping FQDN xyz.example.com to IP address 10.0.0.2(More IP addresses resolved. Please run “show dns-host” to check.)
Mapping FQDN abc.example.com to IP address 20.0.0.2(More IP addresses resolved. Please run “show dns-host” to check.)
Phase: 1Type: ROUTE-LOOKUPSubtype: inputResult: ALLOWConfig:Additional Information:
The following example displays output from the packet-tracer command to show security group tag mapping to an IP address:
ciscoasa# packet-tracer input inside tcp security-group name alpha 30 security-group tag 31 300Mapping security-group 30:alpha to IP address 10.1.1.2.Mapping security-group 31:bravo to IP address 192.168.1.2.
Phase: 1Type: ROUTE-LOOKUPSubtype: inputResult: ALLOWConfig:Additional Information:in 192.168.1.0 255.255.255.0 outside....----------------More---------------------
The following example displays output from the packet-tracer command to show Layer 2 SGT Imposition:
ciscoasa# packet-tracer input inside tcp inline-tag 100 10.1.1.2 30 192.168.1.2 300
The following example outlines VXLAN support for UDP/TCP and ICMP inner packets
packet-tracer in inside udp 30.0.0.2 12345 30.0.0.100 vxlan vxlan-inner 1234 1.1.1.1 11111 2.2.2.2 22222 aaaa.bbbb.cccc aaaa.bbbb.dddd detailed
Outer packet: UDP from 30.0.0.2 to 30.0.0.100 (vtep/nve source-interface IP) with default vxlan destination port.Inner packet: VXLAN in-tag 1234, UDP from 1.1.1.1/11111 to 2.2.2.2/22222 with smac aaaa.bbbb.cccc and dmac aaaa.bbbb.dddd
The following example displays output for persistent tracing when it passes between cluster units:
ciscoasa# cluster exec show packet-tracerB(LOCAL):*************************************************************tracer 10/8 (allocate/freed), handle 10/8 (allocated/freed), error 0======= Tracer origin-id B:7, hop 0 =======packet-id: icmp src inside:15.11.1.122 dst 15.11.2.124 (type 0, code 0)
15-10Cisco ASA Series Command Reference, I through R Commands

Chapter
<Snipping phase 1-3: CAPTURE, ACCESS-LIST, ROUTE-LOOKUP>
Phase: 4Type: CLUSTER-EVENTSubtype: Result: ALLOWConfig:Additional Information:Input interface: 'inside'Flow type: NO FLOWI (1) am asking director (0).
Phase: 5Type: CLUSTER-EVENTSubtype: forwardResult: ALLOWConfig:Additional Information:To A(0), cq_type CQ_FLOW_OWNER_REQUEST(17), flags 0, frag-cnt 0, trace-options 0x10
======= Tracer origin-id B:7, hop 2 =======packet-id: icmp src inside:15.11.1.122 dst 15.11.2.124 (type 0, code 0)
<Snipping phase 1-3: CAPTURE, ACCESS-LIST, ROUTE-LOOKUP>
Phase: 1Type: CLUSTER-EVENTSubtype: receiveResult: ALLOWConfig:Additional Information:From A(0), cq_type CQ_FLOW_OWNER_REPLY(18), flags 0, frag-cnt 0, trace-options 0x10
<Snipping phase 2-4: CAPTURE, ACCESS-LIST, ROUTE-LOOKUP>
Phase: 5Type: CLUSTER-EVENTSubtype: Result: ALLOWConfig: Additional Information:Input interface: 'inside'Flow type: NO FLOWI (1) have been elected owner by (0).
<Snipping phase 6-16: ACCESS-LIST, NAT, IP-OPTIONS, INSPECT, INSPECT, FLOW-CREATION, ACCESS-LIST, NAT, IP-OPTIONS, ROUTE-LOOKUP, ADJACENCY-LOOKUP>
A:********************************************************************tracer 6/5 (allocate/freed), handle 6/5 (allocated/freed), error 0======= Tracer origin-id B:7, hop 1 =======packet-id: icmp src inside:15.11.1.122 dst 15.11.2.124 (type 0, code 0)
Phase: 1Type: CLUSTER-EVENTSubtype: receiveResult: ALLOWConfig:Additional Information:From B(1), cq_type CQ_FLOW_OWNER_REQUEST(17), flags 0, frag-cnt 0, trace-options 0x10
<Snipping phase 2-7: CAPTURE, ACCESS-LIST, ROUTE-LOOKUP, ACCESS-LIST, NAT, IP-OPTIONS>
15-11Cisco ASA Series Command Reference, I through R Commands

Chapter
Phase: 8Type: CLUSTER-EVENTSubtype: Result: ALLOWConfig:Additional Information:Input interface: 'inside'Flow type: NO FLOWI (0) am director, not creating dir flow for ICMP pkt recvd by (1).
Phase: 9Type: CLUSTER-EVENTSubtype: forwardResult: ALLOWConfig:Additional Information:To B(1), cq_type CQ_FLOW_OWNER_REPLY(18), flags 0, frag-cnt 0, trace-options 0x10ciscoasa#
The following example displays output when packets are traced using origin and id options from the cluster nodes:
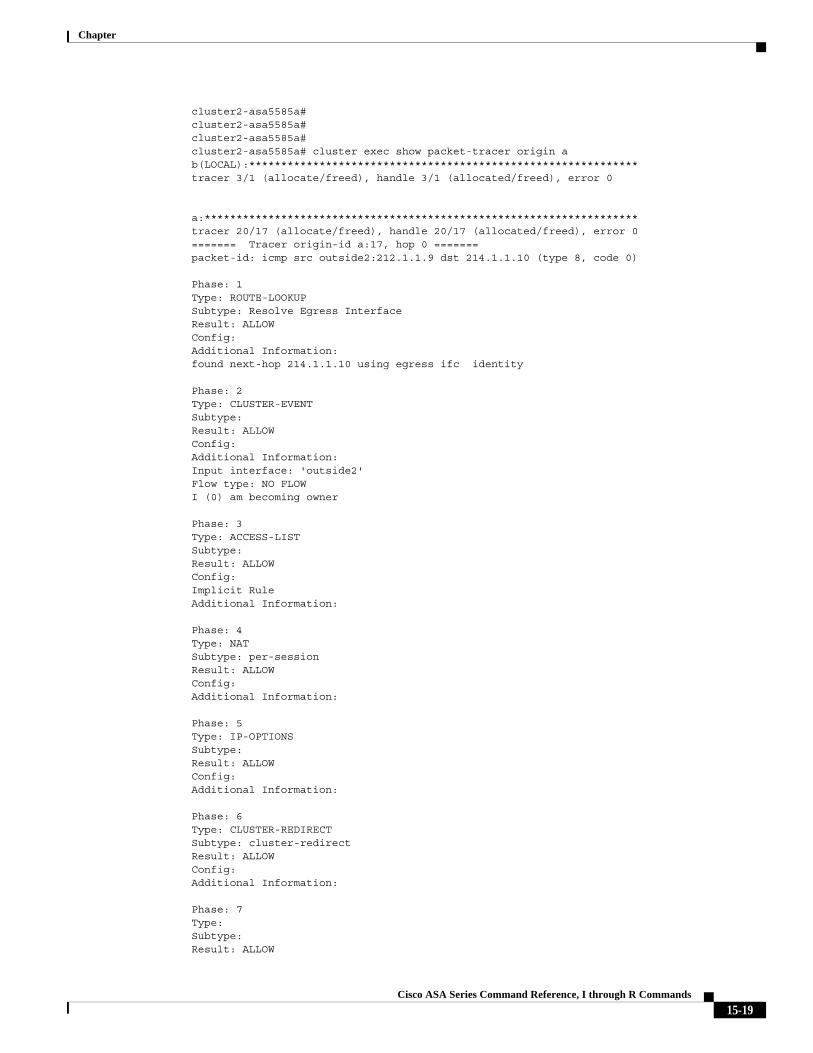
cluster2-asa5585a# cluster exec show packet-tracer | i origin-idb(LOCAL):*************************************************************======= Tracer origin-id b:2, hop 0 ============== Tracer origin-id b:2, hop 2 =======
a:********************************************************************======= Tracer origin-id a:17, hop 0 ============== Tracer origin-id b:2, hop 1 ============== Tracer origin-id b:2, hop 3 =======cluster2-asa5585a# cluster2-asa5585a# cluster exec show packet-tracer ori cluster2-asa5585a# cluster exec show packet-tracer origin b id 2b(LOCAL):*************************************************************tracer 3/1 (allocate/freed), handle 3/1 (allocated/freed), error 0======= Tracer origin-id b:2, hop 0 =======packet-id: icmp src outside2:212.1.1.9 dst 214.1.1.10 (type 8, code 0)
Phase: 1Type: ACCESS-LISTSubtype: Result: ALLOWConfig:Implicit RuleAdditional Information:MAC Access list
Phase: 2Type: ROUTE-LOOKUPSubtype: Resolve Egress InterfaceResult: ALLOWConfig:Additional Information:found next-hop 214.1.1.10 using egress ifc identity
Phase: 3Type: CLUSTER-EVENTSubtype: Result: ALLOW Config:Additional Information:Input interface: 'outside2'
15-12Cisco ASA Series Command Reference, I through R Commands
Chapter
Flow type: NO FLOWI (1) am asking director (0).
Phase: 4Type: CLUSTER-EVENTSubtype: forwardResult: ALLOWConfig:Additional Information:To a(0), cq_type CQ_FLOW_OWNER_REQUEST(17), flags 0, frag-cnt 0, trace-options 0x10
Result:input-interface: outside2input-status: upinput-line-status: upoutput-interface: NP Identity IfcAction: allow
======= Tracer origin-id b:2, hop 2 =======packet-id: icmp src outside2:212.1.1.9 dst 214.1.1.10 (type 0, code 0) Phase: 1Type: CLUSTER-EVENTSubtype: receiveResult: ALLOWConfig:Additional Information:From a(0), cq_type CQ_FLOW_OWNER_REPLY(18), flags 0, frag-cnt 0, trace-options 0x10
Phase: 2Type: ACCESS-LISTSubtype: Result: ALLOWConfig:Implicit RuleAdditional Information:MAC Access list
Phase: 3Type: ROUTE-LOOKUPSubtype: Resolve Egress InterfaceResult: ALLOWConfig:Additional Information:found next-hop 214.1.1.10 using egress ifc identity
Phase: 4Type: CLUSTER-EVENTSubtype: Result: ALLOWConfig:Additional Information:Input interface: 'outside2'Flow type: NO FLOWI (1) have been elected owner by (0).
Phase: 5Type: ACCESS-LISTSubtype: Result: ALLOWConfig:Implicit RuleAdditional Information:
15-13Cisco ASA Series Command Reference, I through R Commands
Chapter
Phase: 6Type: NATSubtype: per-sessionResult: ALLOWConfig: Additional Information:
Phase: 7Type: IP-OPTIONSSubtype: Result: ALLOWConfig:Additional Information:
Phase: 8Type: CLUSTER-REDIRECTSubtype: cluster-redirectResult: ALLOWConfig:Additional Information:
Phase: 9Type: Subtype: Result: ALLOWConfig:Additional Information:
Phase: 10 Type: INSPECTSubtype: np-inspectResult: ALLOWConfig:Additional Information:
Phase: 11Type: INSPECTSubtype: np-inspectResult: ALLOWConfig:Additional Information:
Phase: 12Type: VPNSubtype: ipsec-tunnel-flowResult: ALLOWConfig:Additional Information:
Phase: 13Type: CLUSTER-REDIRECTSubtype: cluster-redirectResult: ALLOW Config:Additional Information:
Phase: 14Type: CLUSTER-EVENTSubtype: Result: ALLOWConfig:Additional Information:Input interface: 'outside2'Flow type: FULL
15-14Cisco ASA Series Command Reference, I through R Commands

Chapter
I (1) am redirecting to (0) due to matching action (1).
Phase: 15Type: CLUSTER-EVENTSubtype: forwardResult: ALLOWConfig:Additional Information:To a(0), cq_type CQ_FLOW(1), flags 0, frag-cnt 0, trace-options 0x10
Result:input-interface: outside2input-status: upinput-line-status: upoutput-interface: NP Identity IfcAction: allow
a:********************************************************************tracer 20/17 (allocate/freed), handle 20/17 (allocated/freed), error 0======= Tracer origin-id b:2, hop 1 =======packet-id: icmp src outside2:212.1.1.9 dst 214.1.1.10 (type 0, code 0)
Phase: 1Type: CLUSTER-EVENTSubtype: receiveResult: ALLOWConfig:Additional Information:From b(1), cq_type CQ_FLOW_OWNER_REQUEST(17), flags 0, frag-cnt 0, trace-options 0x10
Phase: 2Type: ROUTE-LOOKUPSubtype: Resolve Egress InterfaceResult: ALLOWConfig: Additional Information:found next-hop 214.1.1.10 using egress ifc identity
Phase: 3Type: ACCESS-LISTSubtype: Result: ALLOWConfig:Implicit RuleAdditional Information:
Phase: 4Type: NATSubtype: per-sessionResult: ALLOWConfig:Additional Information:
Phase: 5Type: IP-OPTIONSSubtype: Result: ALLOWConfig:Additional Information:
Phase: 6Type: CLUSTER-EVENTSubtype: Result: ALLOW
15-15Cisco ASA Series Command Reference, I through R Commands
Chapter
Config:Additional Information:Input interface: 'outside2'Flow type: NO FLOWI (0) am director, found static rule to classify owner as (253).
Phase: 7Type: CLUSTER-EVENTSubtype: forwardResult: ALLOWConfig:Additional Information:To b(1), cq_type CQ_FLOW_OWNER_REPLY(18), flags 0, frag-cnt 0, trace-options 0x10
Result:input-interface: outside2input-status: upinput-line-status: upoutput-interface: NP Identity IfcAction: allow
======= Tracer origin-id b:2, hop 3 =======packet-id: icmp src outside2:212.1.1.9 dst 214.1.1.10 (type 0, code 0)
Phase: 1Type: CLUSTER-EVENTSubtype: receiveResult: ALLOWConfig:Additional Information:From b(1), cq_type CQ_FLOW(1), flags 0, frag-cnt 0, trace-options 0x10
Phase: 2Type: ACCESS-LISTSubtype: Result: ALLOWConfig:Implicit RuleAdditional Information:MAC Access list
Phase: 3Type: ROUTE-LOOKUPSubtype: Resolve Egress InterfaceResult: ALLOWConfig:Additional Information:found next-hop 214.1.1.10 using egress ifc identity
Phase: 4Type: CLUSTER-EVENTSubtype: Result: ALLOWConfig:Additional Information:Input interface: 'outside2'Flow type: NO FLOWI (0) have been elected owner by (0).
Phase: 5Type: ACCESS-LISTSubtype: Result: ALLOWConfig:
15-16Cisco ASA Series Command Reference, I through R Commands

Chapter
Implicit RuleAdditional Information: Phase: 6Type: NATSubtype: per-sessionResult: ALLOWConfig:Additional Information:
Phase: 7Type: IP-OPTIONSSubtype: Result: ALLOWConfig:Additional Information:
Phase: 8Type: CLUSTER-REDIRECTSubtype: cluster-redirectResult: ALLOWConfig:Additional Information:
Phase: 9Type: Subtype: Result: ALLOWConfig:Additional Information:
Phase: 10Type: INSPECTSubtype: np-inspectResult: ALLOWConfig:Additional Information:
Phase: 11Type: INSPECTSubtype: np-inspectResult: ALLOWConfig:Additional Information:
Phase: 12Type: VPNSubtype: ipsec-tunnel-flowResult: ALLOWConfig:Additional Information:
Phase: 13Type: CLUSTER-REDIRECTSubtype: cluster-redirectResult: ALLOWConfig:Additional Information:
Phase: 14Type: INSPECTSubtype: np-inspectResult: ALLOWConfig:
15-17Cisco ASA Series Command Reference, I through R Commands
Chapter
Additional Information:
Phase: 15Type: INSPECTSubtype: np-inspectResult: ALLOWConfig:Additional Information:
Phase: 16Type: VPN Subtype: ipsec-tunnel-flowResult: ALLOWConfig:Additional Information:
Phase: 17Type: Subtype: Result: ALLOWConfig:Additional Information:
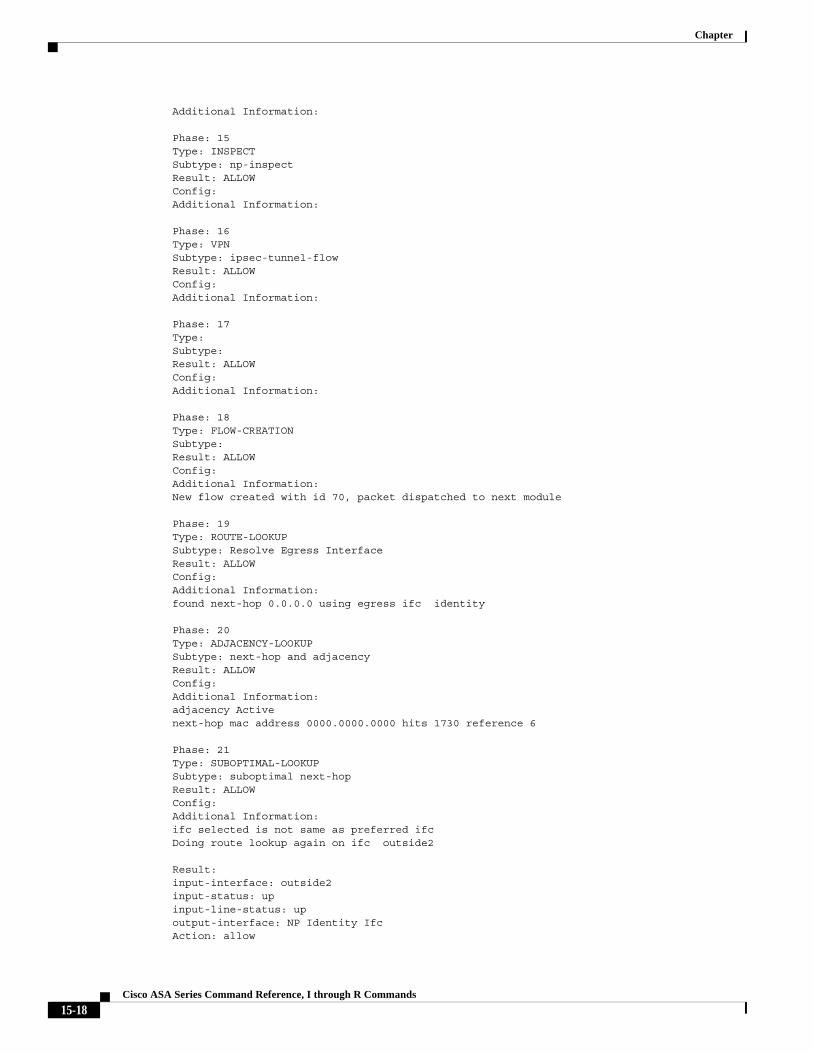
Phase: 18Type: FLOW-CREATIONSubtype: Result: ALLOWConfig:Additional Information:New flow created with id 70, packet dispatched to next module
Phase: 19Type: ROUTE-LOOKUPSubtype: Resolve Egress InterfaceResult: ALLOW Config:Additional Information:found next-hop 0.0.0.0 using egress ifc identity
Phase: 20Type: ADJACENCY-LOOKUPSubtype: next-hop and adjacencyResult: ALLOWConfig:Additional Information:adjacency Activenext-hop mac address 0000.0000.0000 hits 1730 reference 6
Phase: 21Type: SUBOPTIMAL-LOOKUPSubtype: suboptimal next-hopResult: ALLOWConfig:Additional Information:ifc selected is not same as preferred ifcDoing route lookup again on ifc outside2
Result:input-interface: outside2input-status: upinput-line-status: upoutput-interface: NP Identity IfcAction: allow
15-18Cisco ASA Series Command Reference, I through R Commands
Chapter
cluster2-asa5585a# cluster2-asa5585a# cluster2-asa5585a# cluster2-asa5585a# cluster exec show packet-tracer origin a b(LOCAL):*************************************************************tracer 3/1 (allocate/freed), handle 3/1 (allocated/freed), error 0
a:********************************************************************tracer 20/17 (allocate/freed), handle 20/17 (allocated/freed), error 0======= Tracer origin-id a:17, hop 0 =======packet-id: icmp src outside2:212.1.1.9 dst 214.1.1.10 (type 8, code 0)
Phase: 1Type: ROUTE-LOOKUPSubtype: Resolve Egress InterfaceResult: ALLOWConfig:Additional Information:found next-hop 214.1.1.10 using egress ifc identity
Phase: 2Type: CLUSTER-EVENTSubtype: Result: ALLOWConfig:Additional Information:Input interface: 'outside2'Flow type: NO FLOWI (0) am becoming owner
Phase: 3Type: ACCESS-LISTSubtype: Result: ALLOWConfig:Implicit RuleAdditional Information:
Phase: 4Type: NATSubtype: per-sessionResult: ALLOWConfig:Additional Information:
Phase: 5Type: IP-OPTIONSSubtype: Result: ALLOWConfig:Additional Information:
Phase: 6 Type: CLUSTER-REDIRECTSubtype: cluster-redirectResult: ALLOWConfig:Additional Information:
Phase: 7Type: Subtype: Result: ALLOW
15-19Cisco ASA Series Command Reference, I through R Commands

Chapter
Config:Additional Information:
Phase: 8Type: INSPECTSubtype: np-inspectResult: ALLOWConfig:Additional Information:
Phase: 9Type: INSPECTSubtype: np-inspectResult: ALLOW Config:Additional Information:
Phase: 10Type: VPNSubtype: ipsec-tunnel-flowResult: ALLOWConfig:Additional Information:
Phase: 11Type: CLUSTER-REDIRECTSubtype: cluster-redirectResult: ALLOWConfig:Additional Information:
Phase: 12Type: INSPECTSubtype: np-inspectResult: ALLOWConfig:Additional Information: Phase: 13Type: INSPECTSubtype: np-inspectResult: ALLOWConfig:Additional Information:
Phase: 14Type: VPNSubtype: ipsec-tunnel-flowResult: ALLOWConfig:Additional Information:
Phase: 15Type: Subtype: Result: ALLOWConfig:Additional Information:
Phase: 16Type: FLOW-CREATIONSubtype: Result: ALLOWConfig:
15-20Cisco ASA Series Command Reference, I through R Commands

Chapter
Additional Information:New flow created with id 69, packet dispatched to next module
Phase: 17Type: ROUTE-LOOKUPSubtype: Resolve Egress InterfaceResult: ALLOWConfig:Additional Information:found next-hop 0.0.0.0 using egress ifc identity
Phase: 18Type: ADJACENCY-LOOKUPSubtype: next-hop and adjacencyResult: ALLOWConfig:Additional Information:adjacency Activenext-hop mac address 0000.0000.0000 hits 1577 reference 6
Result:input-interface: outside2input-status: upinput-line-status: upoutput-interface: NP Identity IfcAction: allow
cluster2-asa5585a# cluster2-asa5585a# cluster exec show packet-tracer id 17 b(LOCAL):*************************************************************tracer 3/1 (allocate/freed), handle 3/1 (allocated/freed), error 0
a:********************************************************************tracer 20/17 (allocate/freed), handle 20/17 (allocated/freed), error 0======= Tracer origin-id a:17, hop 0 =======packet-id: icmp src outside2:212.1.1.9 dst 214.1.1.10 (type 8, code 0)
Phase: 1Type: ROUTE-LOOKUPSubtype: Resolve Egress InterfaceResult: ALLOWConfig:Additional Information:found next-hop 214.1.1.10 using egress ifc identity
Phase: 2Type: CLUSTER-EVENTSubtype: Result: ALLOWConfig:Additional Information:Input interface: 'outside2'Flow type: NO FLOWI (0) am becoming owner
Phase: 3Type: ACCESS-LISTSubtype: Result: ALLOWConfig:Implicit RuleAdditional Information:
Phase: 4
15-21Cisco ASA Series Command Reference, I through R Commands

Chapter
Type: NATSubtype: per-sessionResult: ALLOWConfig:Additional Information:
Phase: 5Type: IP-OPTIONSSubtype: Result: ALLOWConfig:Additional Information:
Phase: 6 Type: CLUSTER-REDIRECTSubtype: cluster-redirectResult: ALLOWConfig:Additional Information:
Phase: 7Type: Subtype: Result: ALLOWConfig:Additional Information:
Phase: 8Type: INSPECTSubtype: np-inspectResult: ALLOWConfig:Additional Information:
Phase: 9Type: INSPECTSubtype: np-inspectResult: ALLOW Config:Additional Information:
Phase: 10Type: VPNSubtype: ipsec-tunnel-flowResult: ALLOWConfig:Additional Information:
Phase: 11Type: CLUSTER-REDIRECTSubtype: cluster-redirectResult: ALLOWConfig:Additional Information:
Phase: 12Type: INSPECTSubtype: np-inspectResult: ALLOWConfig:Additional Information: Phase: 13Type: INSPECT
15-22Cisco ASA Series Command Reference, I through R Commands
Chapter
Subtype: np-inspectResult: ALLOWConfig:Additional Information:
Phase: 14Type: VPNSubtype: ipsec-tunnel-flowResult: ALLOWConfig:Additional Information:
Phase: 15Type: Subtype: Result: ALLOWConfig:Additional Information:
Phase: 16Type: FLOW-CREATIONSubtype: Result: ALLOWConfig:Additional Information:New flow created with id 69, packet dispatched to next module
Phase: 17Type: ROUTE-LOOKUPSubtype: Resolve Egress InterfaceResult: ALLOWConfig:Additional Information:found next-hop 0.0.0.0 using egress ifc identity
Phase: 18Type: ADJACENCY-LOOKUPSubtype: next-hop and adjacencyResult: ALLOWConfig:Additional Information:adjacency Activenext-hop mac address 0000.0000.0000 hits 1577 reference 6
Result:input-interface: outside2input-status: upinput-line-status: upoutput-interface: NP Identity IfcAction: allow
cluster2-asa5585a#
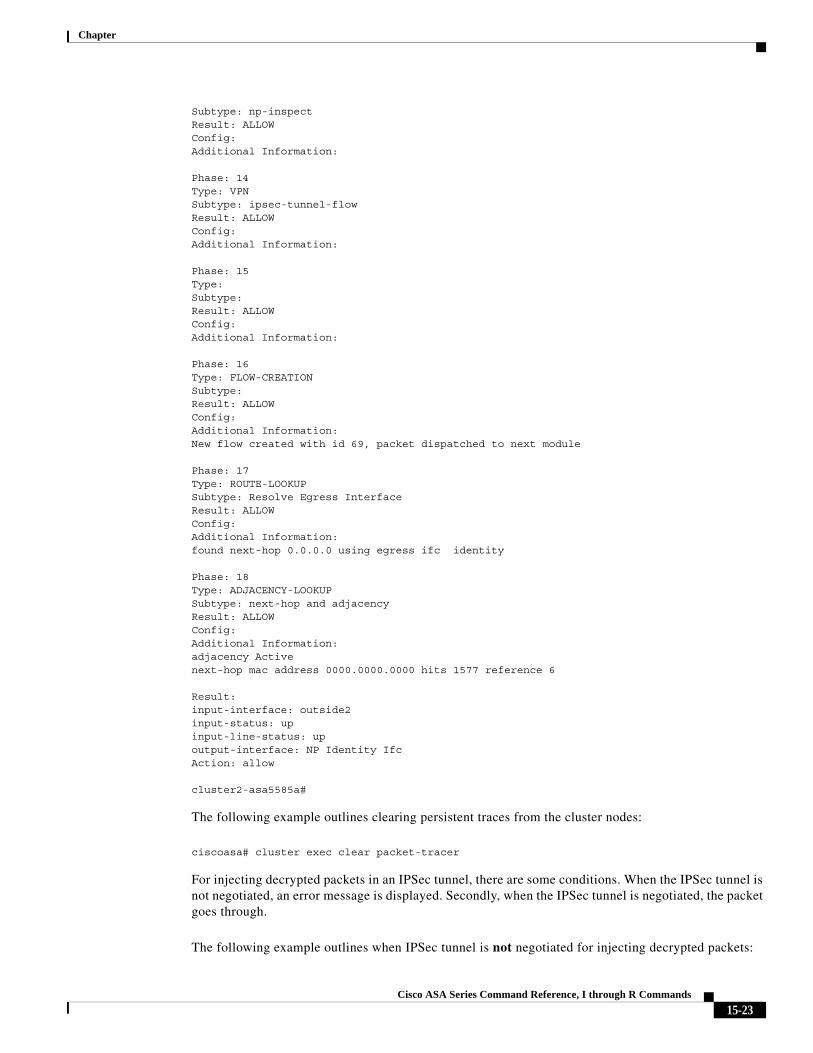
The following example outlines clearing persistent traces from the cluster nodes:
ciscoasa# cluster exec clear packet-tracer
For injecting decrypted packets in an IPSec tunnel, there are some conditions. When the IPSec tunnel is not negotiated, an error message is displayed. Secondly, when the IPSec tunnel is negotiated, the packet goes through.
The following example outlines when IPSec tunnel is not negotiated for injecting decrypted packets:
15-23Cisco ASA Series Command Reference, I through R Commands

Chapter
cluster2-asa5585a(config)# packet-tracer input outside tcp 211.1.1.1 5050 213.1.1.2 21 decrypted
********************************************************************* WARNING: An existing decryption SA was not found. Please confirm the IPsec Phase 2 SA or Anyconnect Tunnel is established. *********************************************************************
Phase: 1 Type: ACCESS-LIST Subtype: Result: ALLOW Config: Implicit Rule Additional Information: MAC Access list
Phase: 2 Type: ROUTE-LOOKUP Subtype: Resolve Egress Interface Result: ALLOW Config: Additional Information: found next-hop 214.1.1.9 using egress ifc outside2
Phase: 3 Type: CLUSTER-EVENT Subtype: Result: ALLOW Config: Additional Information: Input interface: 'outside' Flow type: NO FLOW I (0) got initial, attempting ownership.
Phase: 4 Type: CLUSTER-EVENT Subtype: Result: ALLOW Config: Additional Information: Input interface: 'outside' Flow type: NO FLOW I (0) am becoming owner
Phase: 5 Type: ACCESS-LIST Subtype: log Result: ALLOW Config: access-group ALLOW global access-list ALLOW extended permit ip any any Additional Information:
Phase: 6 Type: NAT Subtype: per-session Result: ALLOW Config: Additional Information:
Phase: 7 Type: IP-OPTIONS
15-24Cisco ASA Series Command Reference, I through R Commands
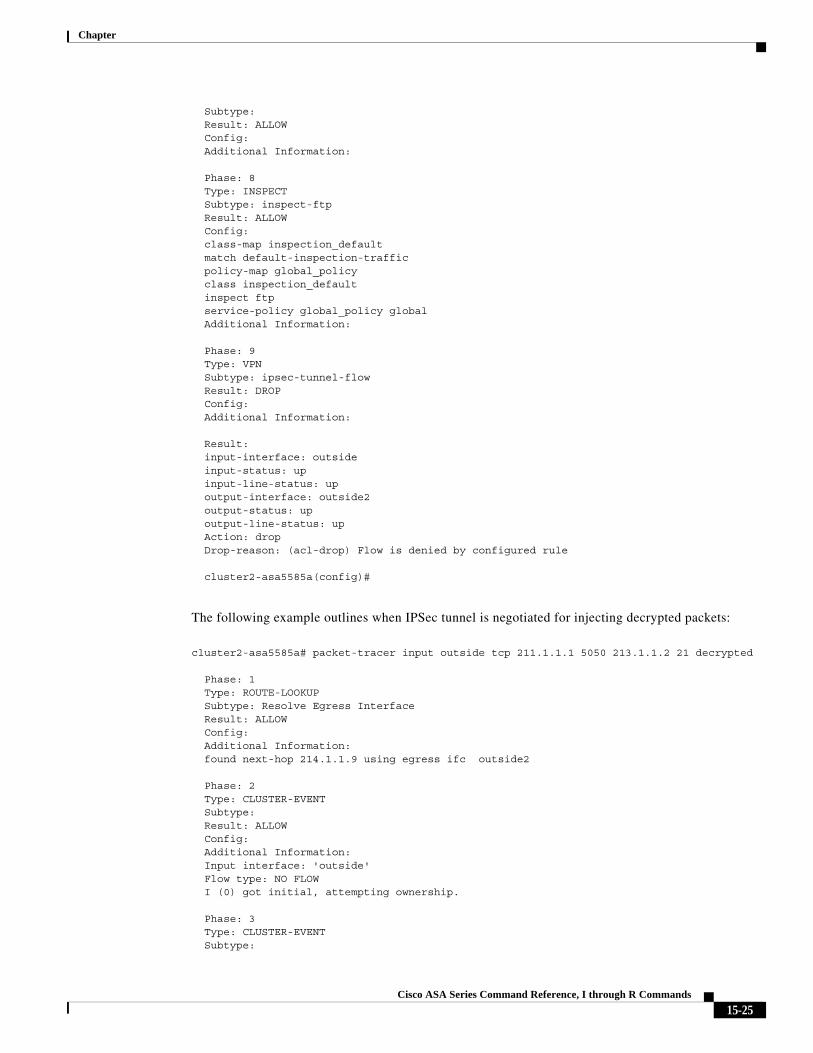
Chapter
Subtype: Result: ALLOW Config: Additional Information:
Phase: 8 Type: INSPECT Subtype: inspect-ftp Result: ALLOW Config: class-map inspection_default match default-inspection-traffic policy-map global_policy class inspection_default inspect ftp service-policy global_policy global Additional Information:
Phase: 9 Type: VPN Subtype: ipsec-tunnel-flow Result: DROP Config: Additional Information:
Result: input-interface: outside input-status: up input-line-status: up output-interface: outside2 output-status: up output-line-status: up Action: drop Drop-reason: (acl-drop) Flow is denied by configured rule
cluster2-asa5585a(config)#
The following example outlines when IPSec tunnel is negotiated for injecting decrypted packets:
cluster2-asa5585a# packet-tracer input outside tcp 211.1.1.1 5050 213.1.1.2 21 decrypted
Phase: 1 Type: ROUTE-LOOKUP Subtype: Resolve Egress Interface Result: ALLOW Config: Additional Information: found next-hop 214.1.1.9 using egress ifc outside2
Phase: 2 Type: CLUSTER-EVENT Subtype: Result: ALLOW Config: Additional Information: Input interface: 'outside' Flow type: NO FLOW I (0) got initial, attempting ownership.
Phase: 3 Type: CLUSTER-EVENT Subtype:
15-25Cisco ASA Series Command Reference, I through R Commands
Chapter
Result: ALLOW Config: Additional Information: Input interface: 'outside' Flow type: NO FLOW I (0) am becoming owner
Phase: 4 Type: ACCESS-LIST Subtype: log Result: ALLOW Config: access-group ALLOW global access-list ALLOW extended permit ip any any Additional Information:
Phase: 5 Type: NAT Subtype: per-session Result: ALLOW Config: Additional Information:
Phase: 6 Type: IP-OPTIONS Subtype: Result: ALLOW Config: Additional Information:
Phase: 7 Type: INSPECT Subtype: inspect-ftp Result: ALLOW Config: class-map inspection_default match default-inspection-traffic policy-map global_policy class inspection_default inspect ftp service-policy global_policy global Additional Information:
Phase: 8 Type: VPN Subtype: ipsec-tunnel-flow Result: ALLOW Config: Additional Information:
Phase: 9 Type: INSPECT Subtype: inspect-ftp Result: ALLOW Config: class-map inspection_default match default-inspection-traffic policy-map global_policy class inspection_default inspect ftp service-policy global_policy global Additional Information:
Phase: 10
15-26Cisco ASA Series Command Reference, I through R Commands

Chapter
Type: VPN Subtype: ipsec-tunnel-flow Result: ALLOW Config: Additional Information:
Phase: 11 Type: VPN Subtype: encrypt Result: ALLOW Config: Additional Information:
Phase: 12 Type: VPN Subtype: encrypt Result: ALLOW Config: Additional Information:
Phase: 13 Type: VPN Subtype: ipsec-tunnel-flow Result: ALLOW Config: Additional Information:
Phase: 14 Type: NAT Subtype: per-session Result: ALLOW Config: Additional Information:
Phase: 15 Type: IP-OPTIONS Subtype: Result: ALLOW Config: Additional Information:
Phase: 16 Type: VPN Subtype: ipsec-tunnel-flow Result: ALLOW Config: Additional Information:
Phase: 17 Type: NAT Subtype: per-session Result: ALLOW Config: Additional Information:
Phase: 18 Type: IP-OPTIONS Subtype: Result: ALLOW Config: Additional Information:
Phase: 19 Type: VPN
15-27Cisco ASA Series Command Reference, I through R Commands
Chapter
Subtype: encrypt Result: ALLOW Config: Additional Information:
Phase: 20 Type: VPN Subtype: encrypt Result: ALLOW Config: Additional Information:
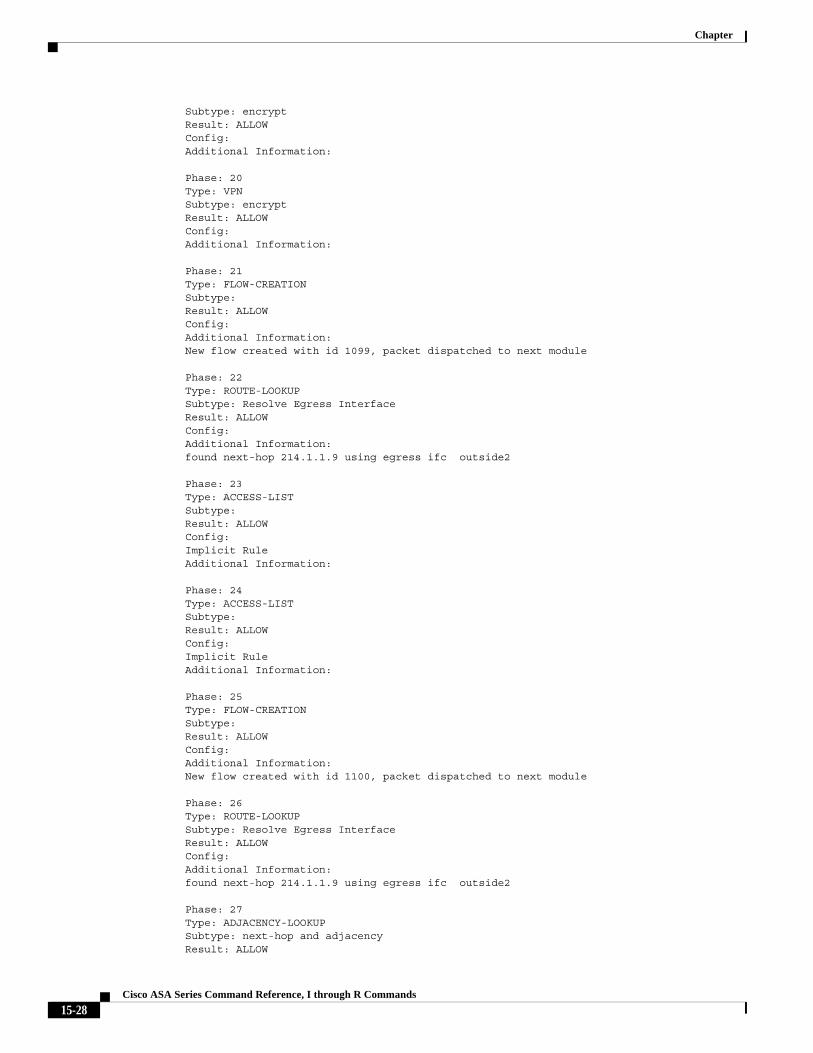
Phase: 21 Type: FLOW-CREATION Subtype: Result: ALLOW Config: Additional Information: New flow created with id 1099, packet dispatched to next module
Phase: 22 Type: ROUTE-LOOKUP Subtype: Resolve Egress Interface Result: ALLOW Config: Additional Information: found next-hop 214.1.1.9 using egress ifc outside2
Phase: 23 Type: ACCESS-LIST Subtype: Result: ALLOW Config: Implicit Rule Additional Information:
Phase: 24 Type: ACCESS-LIST Subtype: Result: ALLOW Config: Implicit Rule Additional Information:
Phase: 25 Type: FLOW-CREATION Subtype: Result: ALLOW Config: Additional Information: New flow created with id 1100, packet dispatched to next module
Phase: 26 Type: ROUTE-LOOKUP Subtype: Resolve Egress Interface Result: ALLOW Config: Additional Information: found next-hop 214.1.1.9 using egress ifc outside2
Phase: 27 Type: ADJACENCY-LOOKUP Subtype: next-hop and adjacency Result: ALLOW
15-28Cisco ASA Series Command Reference, I through R Commands
Chapter
Config: Additional Information: adjacency Active next-hop mac address 4403.a74a.9a32 hits 99 reference 2
Result: input-interface: outside input-status: up input-line-status: up output-interface: outside2 output-status: up output-line-status: up Action: allow
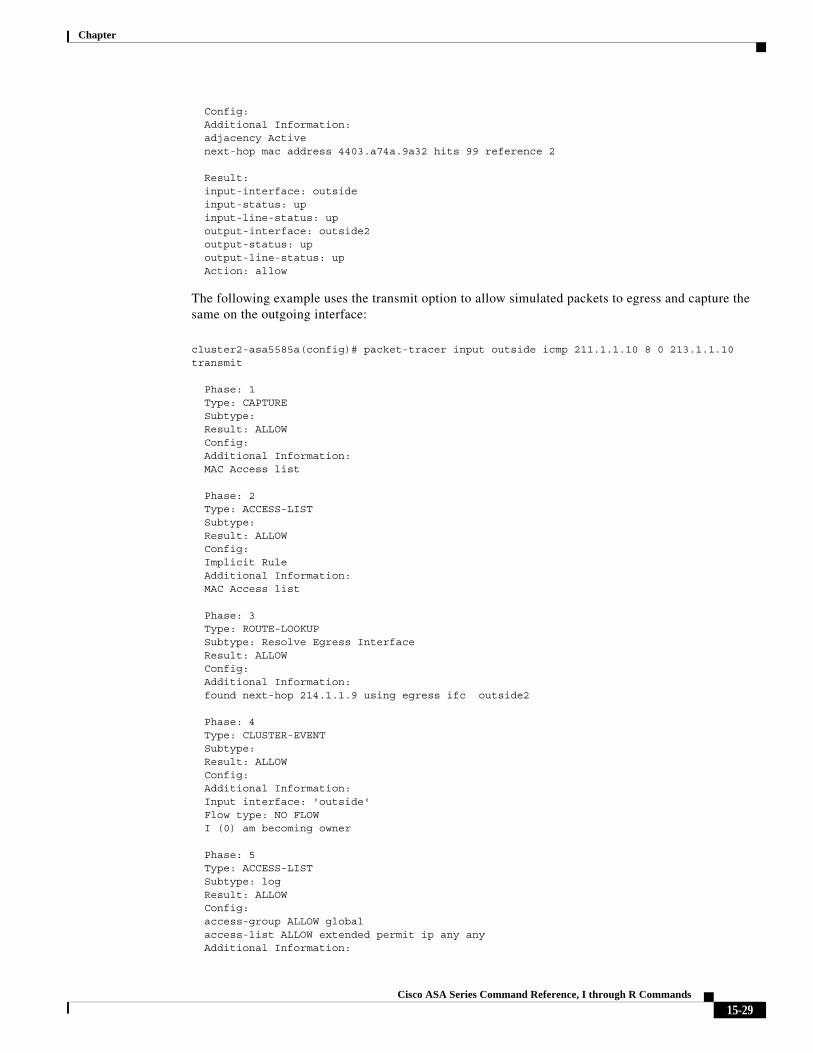
The following example uses the transmit option to allow simulated packets to egress and capture the same on the outgoing interface:
cluster2-asa5585a(config)# packet-tracer input outside icmp 211.1.1.10 8 0 213.1.1.10 transmit
Phase: 1 Type: CAPTURE Subtype: Result: ALLOW Config: Additional Information: MAC Access list
Phase: 2 Type: ACCESS-LIST Subtype: Result: ALLOW Config: Implicit Rule Additional Information: MAC Access list
Phase: 3 Type: ROUTE-LOOKUP Subtype: Resolve Egress Interface Result: ALLOW Config: Additional Information: found next-hop 214.1.1.9 using egress ifc outside2 Phase: 4 Type: CLUSTER-EVENT Subtype: Result: ALLOW Config: Additional Information: Input interface: 'outside' Flow type: NO FLOW I (0) am becoming owner
Phase: 5 Type: ACCESS-LIST Subtype: log Result: ALLOW Config: access-group ALLOW global access-list ALLOW extended permit ip any any Additional Information:
15-29Cisco ASA Series Command Reference, I through R Commands
Chapter
Phase: 6 Type: NAT Subtype: per-session Result: ALLOW Config: Additional Information:
Phase: 7 Type: IP-OPTIONS Subtype: Result: ALLOW Config: Additional Information:
Phase: 8 Type: Subtype: Result: ALLOW Config: Additional Information:
Phase: 9 Type: INSPECT Subtype: np-inspect Result: ALLOW Config: Additional Information:
Phase: 10 Type: VPN Subtype: ipsec-tunnel-flow Result: ALLOW Config: Additional Information:
Phase: 11 Type: INSPECT Subtype: np-inspect Result: ALLOW Config: Additional Information:
Phase: 12 Type: VPN Subtype: ipsec-tunnel-flow Result: ALLOW Config: Additional Information:
Phase: 13 Type: Subtype: Result: ALLOW Config: Additional Information:
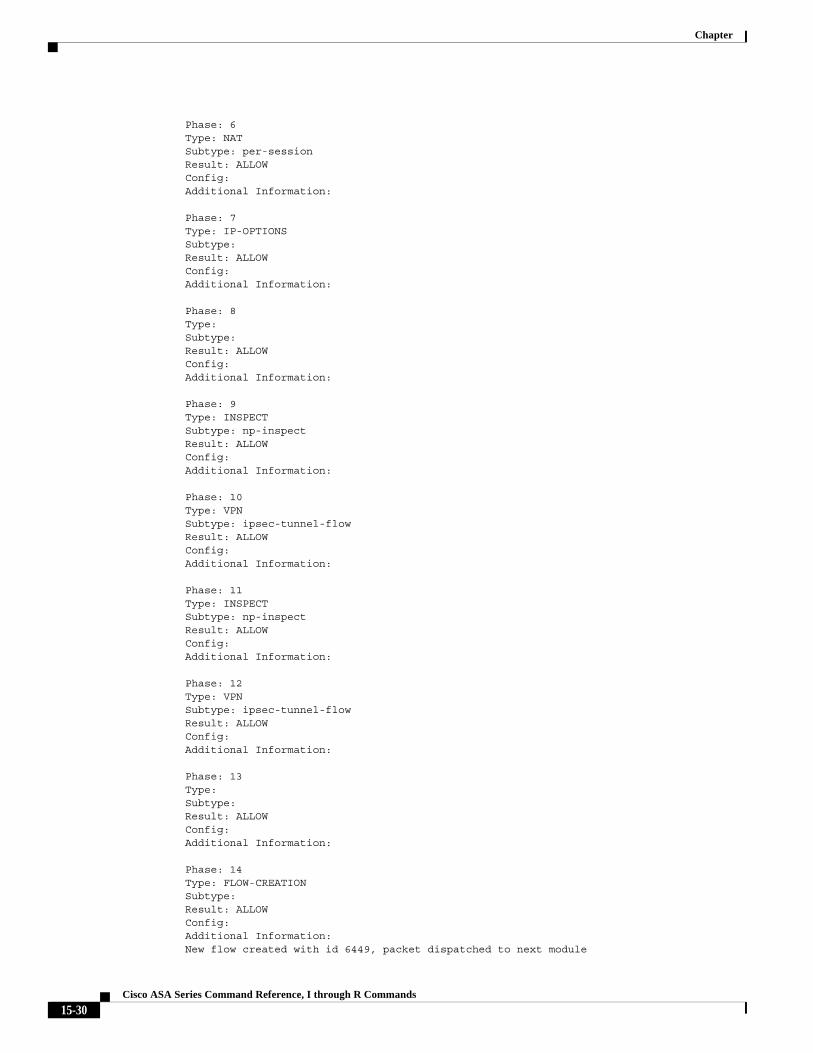
Phase: 14 Type: FLOW-CREATION Subtype: Result: ALLOW Config: Additional Information: New flow created with id 6449, packet dispatched to next module
15-30Cisco ASA Series Command Reference, I through R Commands
Chapter
Phase: 15 Type: ACCESS-LIST Subtype: log Result: ALLOW Config: access-group ALLOW global access-list ALLOW extended permit ip any any Additional Information:
Phase: 16 Type: NAT Subtype: per-session Result: ALLOW Config: Additional Information:
Phase: 17 Type: IP-OPTIONS Subtype: Result: ALLOW Config: Additional Information:
Phase: 18 Type: ROUTE-LOOKUP Subtype: Resolve Egress Interface Result: ALLOW Config: Additional Information: found next-hop 214.1.1.9 using egress ifc outside2
Phase: 19 Type: ADJACENCY-LOOKUP Subtype: next-hop and adjacency Result: ALLOW Config: Additional Information: adjacency Active next-hop mac address 4403.a74a.9a32 hits 15 reference 1
Result: input-interface: outside input-status: up input-line-status: up output-interface: outside2 output-status: up output-line-status: up Action: allow
cluster2-asa5585a(config)#
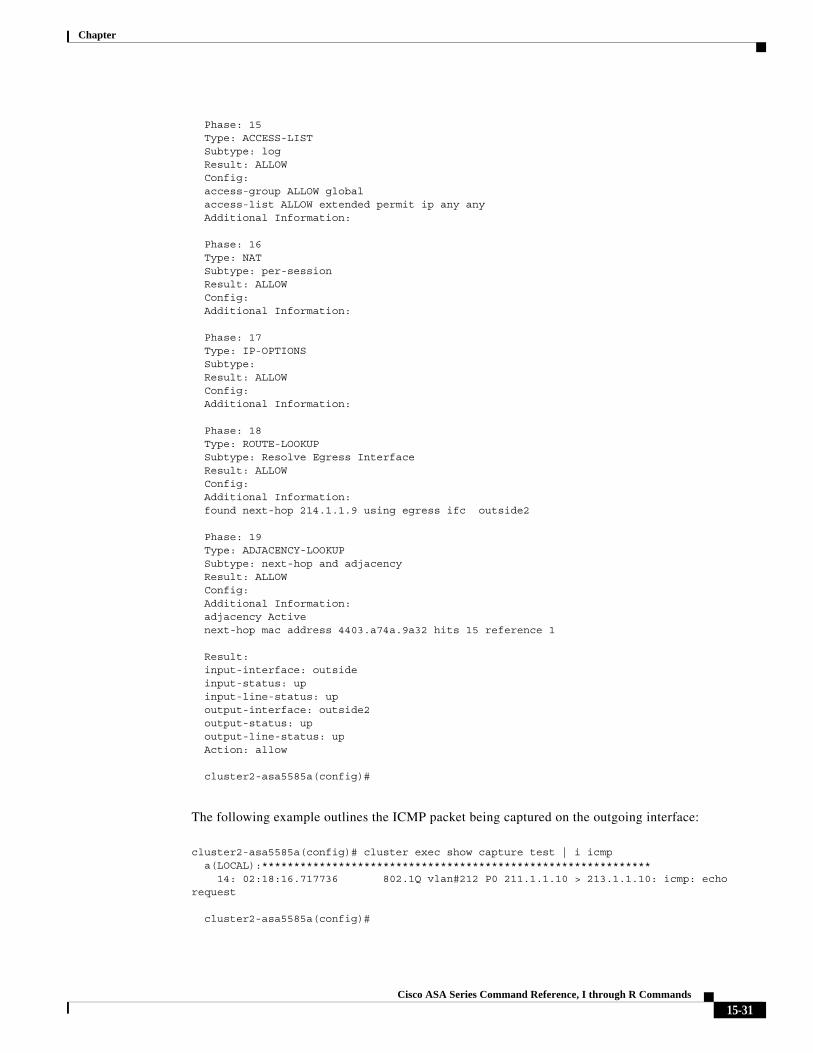
The following example outlines the ICMP packet being captured on the outgoing interface:
cluster2-asa5585a(config)# cluster exec show capture test | i icmp a(LOCAL):************************************************************* 14: 02:18:16.717736 802.1Q vlan#212 P0 211.1.1.10 > 213.1.1.10: icmp: echo request
cluster2-asa5585a(config)#
15-31Cisco ASA Series Command Reference, I through R Commands

Chapter
The examples for the bypass-checks option for packet-tracer is outlined through the following phases as listed. Specific examples are provided for each scenario:
– When the IPSec tunnel between spoke and hub is not created.
– The IPSec tunnel between two boxes must be negotiated and the initial packet triggers tunnel establishment.
– The IPSec negotiation is complete and the tunnel comes up.
– Once the tunnel is up, the packets injected will be sent through the tunnel. The security checks (ACLs, VPN filtering..) that is available along with the packet path will be bypassed or skipped.
The IPSec tunnel is not created:
cluster2-asa5585a(config)# sh crypto ipsec sa
There are no ipsec sas cluster2-asa5585a(config)#
The tunnel negotiation process commences:
cluster2-asa5585a(config)# packet-tracer input outside tcp 211.1.1.1 5050 213.1.1.2 21 bypass-checks
Phase: 1 Type: CAPTURE Subtype: Result: ALLOW Config: Additional Information: MAC Access list
Phase: 2 Type: ACCESS-LIST Subtype: Result: ALLOW Config: Implicit Rule Additional Information: MAC Access list
Phase: 3 Type: ROUTE-LOOKUP Subtype: Resolve Egress Interface Result: ALLOW Config: Additional Information: found next-hop 214.1.1.9 using egress ifc outside2 Phase: 4 Type: CLUSTER-EVENT Subtype: Result: ALLOW Config: Additional Information: Input interface: 'outside' Flow type: NO FLOW I (0) got initial, attempting ownership.
15-32Cisco ASA Series Command Reference, I through R Commands
Chapter
Phase: 5 Type: CLUSTER-EVENT Subtype: Result: ALLOW Config: Additional Information: Input interface: 'outside' Flow type: NO FLOW I (0) am becoming owner
Phase: 6 Type: ACCESS-LIST Subtype: log Result: ALLOW Config: access-group ALLOW global access-list ALLOW extended permit ip any any Additional Information:
Phase: 7 Type: NAT Subtype: per-session Result: ALLOW Config: Additional Information:
Phase: 8 Type: IP-OPTIONS Subtype: Result: ALLOW Config: Additional Information:
Phase: 9 Type: INSPECT Subtype: inspect-ftp Result: ALLOW Config: class-map inspection_default match default-inspection-traffic policy-map global_policy class inspection_default inspect ftp service-policy global_policy global Additional Information:
Phase: 10 Type: VPN Subtype: ipsec-tunnel-flow Result: ALLOW Config: Additional Information:
Phase: 11 Type: INSPECT Subtype: inspect-ftp Result: ALLOW Config: class-map inspection_default match default-inspection-traffic policy-map global_policy class inspection_default inspect ftp service-policy global_policy global
15-33Cisco ASA Series Command Reference, I through R Commands

Chapter
Additional Information:
Phase: 12 Type: VPN Subtype: ipsec-tunnel-flow Result: ALLOW Config: Additional Information:
Phase: 13 Type: VPN Subtype: encrypt Result: DROP Config: Additional Information:
Result: input-interface: outside input-status: up input-line-status: up output-interface: outside2 output-status: up output-line-status: up Action: drop Drop-reason: (acl-drop) Flow is denied by configured rule
cluster2-asa5585a(config)#
Once the IPSec tunnel is negotiated and the tunnel comes up:
cluster2-asa5585a#
cluster2-asa5585a(config)# sh crypto ipsec sa interface: outside2 Crypto map tag: crypto-map-peer4, seq num: 1, local addr: 214.1.1.10
access-list toPeer4 extended permit ip host 211.1.1.1 host 213.1.1.2 local ident (addr/mask/prot/port): (211.1.1.1/255.255.255.255/0/0) remote ident (addr/mask/prot/port): (213.1.1.2/255.255.255.255/0/0) current_peer: 214.1.1.9
#pkts encaps: 0, #pkts encrypt: 0, #pkts digest: 0 #pkts decaps: 0, #pkts decrypt: 0, #pkts verify: 0 #pkts compressed: 0, #pkts decompressed: 0 #pkts not compressed: 0, #pkts comp failed: 0, #pkts decomp failed: 0 #pre-frag successes: 0, #pre-frag failures: 0, #fragments created: 0 #PMTUs sent: 0, #PMTUs rcvd: 0, #decapsulated frgs needing reassembly: 0 #TFC rcvd: 0, #TFC sent: 0 #Valid ICMP Errors rcvd: 0, #Invalid ICMP Errors rcvd: 0 #send errors: 0, #recv errors: 0
local crypto endpt.: 214.1.1.10/500, remote crypto endpt.: 214.1.1.9/500 path mtu 1500, ipsec overhead 74(44), media mtu 1500 PMTU time remaining (sec): 0, DF policy: copy-df ICMP error validation: disabled, TFC packets: disabled current outbound spi: A642726D current inbound spi : CF1E8F90 inbound esp sas: spi: 0xCF1E8F90 (3474886544) SA State: active transform: esp-aes-256 esp-sha-hmac no compression
15-34Cisco ASA Series Command Reference, I through R Commands

Chapter
in use settings ={L2L, Tunnel, IKEv2, } slot: 0, conn_id: 2, crypto-map: crypto-map-peer4 sa timing: remaining key lifetime (kB/sec): (4285440/28744) IV size: 16 bytes replay detection support: Y Anti replay bitmap: 0x00000000 0x00000001 outbound esp sas: spi: 0xA642726D (2789372525) SA State: active transform: esp-aes-256 esp-sha-hmac no compression in use settings ={L2L, Tunnel, IKEv2, } slot: 0, conn_id: 2, crypto-map: crypto-map-peer4 sa timing: remaining key lifetime (kB/sec): (4239360/28744) IV size: 16 bytes replay detection support: Y Anti replay bitmap: 0x00000000 0x00000001
cluster2-asa5585a(config)#
The packet is allowed to pass through once the tunnel is up and since the bypass-checks option is applied, the security checks are skipped:
cluster2-asa5585a# packet-tracer input outside tcp 211.1.1.1 5050 213.1.1.2 21 bypass-checks
Phase: 1 Type: ROUTE-LOOKUP Subtype: Resolve Egress Interface Result: ALLOW Config: Additional Information: found next-hop 214.1.1.9 using egress ifc outside2
Phase: 2 Type: CLUSTER-EVENT Subtype: Result: ALLOW Config: Additional Information: Input interface: 'outside' Flow type: NO FLOW I (0) got initial, attempting ownership.
Phase: 3 Type: CLUSTER-EVENT Subtype: Result: ALLOW Config: Additional Information: Input interface: 'outside' Flow type: NO FLOW I (0) am becoming owner
Phase: 4 Type: ACCESS-LIST Subtype: log Result: ALLOW Config: access-group ALLOW global access-list ALLOW extended permit ip any any Additional Information:
15-35Cisco ASA Series Command Reference, I through R Commands
Chapter
Phase: 5 Type: NAT Subtype: per-session Result: ALLOW Config: Additional Information:
Phase: 6 Type: IP-OPTIONS Subtype: Result: ALLOW Config: Additional Information:
Phase: 7 Type: INSPECT Subtype: inspect-ftp Result: ALLOW Config: class-map inspection_default match default-inspection-traffic policy-map global_policy class inspection_default inspect ftp service-policy global_policy global Additional Information:
Phase: 8 Type: VPN Subtype: ipsec-tunnel-flow Result: ALLOW Config: Additional Information:
Phase: 9 Type: INSPECT Subtype: inspect-ftp Result: ALLOW Config: class-map inspection_default match default-inspection-traffic policy-map global_policy class inspection_default inspect ftp service-policy global_policy global Additional Information:
Phase: 10 Type: VPN Subtype: ipsec-tunnel-flow Result: ALLOW Config: Additional Information:
Phase: 11 Type: VPN Subtype: encrypt Result: ALLOW Config: Additional Information:
Phase: 12 Type: VPN
15-36Cisco ASA Series Command Reference, I through R Commands

Chapter
Subtype: encrypt Result: ALLOW Config: Additional Information:
Phase: 13 Type: VPN Subtype: ipsec-tunnel-flow Result: ALLOW Config: Additional Information:
Phase: 14 Type: NAT Subtype: per-session Result: ALLOW Config: Additional Information:
Phase: 15 Type: IP-OPTIONS Subtype: Result: ALLOW Config: Additional Information:
Phase: 16 Type: VPN Subtype: ipsec-tunnel-flow Result: ALLOW Config: Additional Information:
Phase: 17 Type: NAT Subtype: per-session Result: ALLOW Config: Additional Information:
Phase: 18 Type: IP-OPTIONS Subtype: Result: ALLOW Config: Additional Information:
Phase: 19 Type: VPN Subtype: encrypt Result: ALLOW Config: Additional Information:
Phase: 20 Type: VPN Subtype: encrypt Result: ALLOW Config: Additional Information:
Phase: 21 Type: FLOW-CREATION Subtype:
15-37Cisco ASA Series Command Reference, I through R Commands
Chapter
Result: ALLOW Config: Additional Information: New flow created with id 1099, packet dispatched to next module
Phase: 22 Type: ROUTE-LOOKUP Subtype: Resolve Egress Interface Result: ALLOW Config: Additional Information: found next-hop 214.1.1.9 using egress ifc outside2
Phase: 23 Type: ACCESS-LIST Subtype: Result: ALLOW Config: Implicit Rule Additional Information:
Phase: 24 Type: ACCESS-LIST Subtype: Result: ALLOW Config: Implicit Rule Additional Information:
Phase: 25 Type: FLOW-CREATION Subtype: Result: ALLOW Config: Additional Information: New flow created with id 1100, packet dispatched to next module
Phase: 26 Type: ROUTE-LOOKUP Subtype: Resolve Egress Interface Result: ALLOW Config: Additional Information: found next-hop 214.1.1.9 using egress ifc outside2
Phase: 27 Type: ADJACENCY-LOOKUP Subtype: next-hop and adjacency Result: ALLOW Config: Additional Information: adjacency Active next-hop mac address 4403.a74a.9a32 hits 99 reference 2
Result: input-interface: outside input-status: up input-line-status: up output-interface: outside2 output-status: up output-line-status: up Action: allow
15-38Cisco ASA Series Command Reference, I through R Commands
Chapter
Related Commands
pagerTo set the default number of lines on a page before the “---More---” prompt appears for Telnet sessions, use the pager command in global configuration mode.
pager [lines] lines
Syntax Description
Defaults The default is 24 lines.
Command Modes The following table shows the modes in which you can enter the command:
Command History
Usage Guidelines This command changes the default pager line setting for Telnet sessions. If you want to temporarily change the setting only for the current session, use the terminal pager command.
If you Telnet to the admin context, then the pager line setting follows your session when you change to other contexts, even if the pager command in a given context has a different setting. To change the current pager setting, enter the terminal pager command with a new setting, or you can enter the pager command in the current context. In addition to saving a new pager setting to the context configuration, the pager command applies the new setting to the current Telnet session.
Examples The following example changes the number of lines displayed to 20:
ciscoasa(config)# pager 20
Command Description
capture Captures packet information, including trace packets.
show capture Displays the capture configuration when no options are specified.
[lines] lines Sets the number of lines on a page before the “---More---” prompt appears. The default is 24 lines; 0 means no page limit. The range is 0 through 2147483647 lines. The lines keyword is optional and the command is the same with or without it.
Command Mode
Firewall Mode Security Context
RoutedTransparent Single
Multiple
Context System
Global configuration • Yes • Yes • Yes • Yes • Yes
Release Modification
7.0(1) This command was changed from a privileged EXEC mode command to a global configuration mode command. The terminal pager command was added as the privileged EXEC mode command.
15-39Cisco ASA Series Command Reference, I through R Commands

Chapter
15-40Cisco ASA Series Command Reference, I through R Commands

Chapter
Related Commands Command Description
clear configure terminal Clears the terminal display width setting.
show running-config terminal Displays the current terminal settings.
terminal Allows system log messages to display on the Telnet session.
terminal pager Sets the number of lines to display in a Telnet session before the “---more---” prompt. This command is not saved to the configuration.
terminal width Sets the terminal display width in global configuration mode.
15-41Cisco ASA Series Command Reference, I through R Commands

Chapter
page styleTo customize the WebVPN page displayed to WebVPN users when they connect to the security appliance, use the page style command in webvpn customization configuration mode. To remove the command from the configuration and cause the value to be inherited, use the no form of this command.
page style value
[no] page style value
Syntax Description
Defaults The default page style is background-color:white;font-family:Arial,Helv,sans-serif
Command Modes The following table shows the modes in which you can enter the command:
Command History
Usage Guidelines The style option is expressed as any valid Cascading Style Sheet (CSS) parameters. Describing these parameters is beyond the scope of this document. For more information about CSS parameters, consult CSS specifications at the World Wide Web Consortium (W3C) website at www.w3.org. Appendix F of the CSS 2.1 Specification contains a convenient list of CSS parameters, and is available at www.w3.org/TR/CSS21/propidx.html.
Here are some tips for making the most common changes to the WebVPN pages—the page colors:
• You can use a comma-separated RGB value, an HTML color value, or the name of the color if recognized in HTML.
• RGB format is 0,0,0, a range of decimal numbers from 0 to 255 for each color (red, green, blue); the comma separated entry indicates the level of intensity of each color to combine with the others.
• HTML format is #000000, six digits in hexadecimal format; the first and second represent red, the third and fourth green, and the fifth and sixth represent blue.
Note To easily customize the WebVPN pages, we recommend that you use ASDM, which has convenient features for configuring style elements, including color swatches and preview capabilities.
value Cascading Style Sheet (CSS) parameters (maximum 256 characters).
Command Mode
Firewall Mode Security Context
RoutedTransparent Single
Multiple
Context System
Webvpn customization configuration
• Yes — • Yes — —
Release Modification
7.1(1) This command was added.
15-42Cisco ASA Series Command Reference, I through R Commands

Chapter
Examples The following example customizes the page style to large:
ciscoasa(config)# webvpnciscoasa(config-webvpn)# customization ciscociscoasa(config-webvpn-custom)# page style font-size:large
Related Commands Command Description
logo Customizes the logo on the WebVPN page.
title Customizes the title of the WebVPN page
15-43Cisco ASA Series Command Reference, I through R Commands
Chapter
parametersTo enter parameters configuration mode to set parameters for an inspection policy map, use the parameters command in policy-map configuration mode.
parameters
Syntax Description This command has no arguments or keywords.
Defaults No default behaviors or values.
Command Modes The following table shows the modes in which you can enter the command:
Command History
Usage Guidelines Modular Policy Framework lets you configure special actions for many application inspections. When you enable an inspection engine using the inspect command in the Layer 3/4 policy map (the policy-map command), you can also optionally enable actions as defined in an inspection policy map created by the policy-map type inspect command. For example, enter the inspect dns dns_policy_map command where dns_policy_map is the name of the inspection policy map.
An inspection policy map may support one or more parameters commands. Parameters affect the behavior of the inspection engine. The commands available in parameters configuration mode depend on the application.
Command Mode
Firewall Mode Security Context
RoutedTransparent Single
Multiple
Context System
Policy-map configuration • Yes • Yes • Yes • Yes —
Release Modification
7.2(1) This command was added.
15-44Cisco ASA Series Command Reference, I through R Commands
Chapter
Examples The following example shows how to set the maximum message length for DNS packets in the default inspection policy map:
ciscoasa(config)# policy-map type inspect dns preset_dns_mapciscoasa(config-pmap)# parametersciscoasa(config-pmap-p)# message-length maximum 512
Related Commands Command Description
class Identifies a class map name in the policy map.
class-map type inspect
Creates an inspection class map to match traffic specific to an application.
policy-map Creates a Layer 3/4 policy map.
show running-config policy-map
Display all current policy map configurations.
15-45Cisco ASA Series Command Reference, I through R Commands

Chapter
participateTo force the device to participate in the virtual load-balancing cluster, use the participate command in VPN load-balancing configuration mode. To remove a device from participation in the cluster, use the no form of this command.
participate
no participate
Syntax Description This command has no arguments or keywords.
Defaults The default behavior is that the device does not participate in the vpn load-balancing cluster.
Command Modes The following table shows the modes in which you can enter the command:
Command History
Usage Guidelines You must first configure the interface using the interface and nameif commands, and use the vpn load-balancing command to enter VPN load-balancing mode. You must also have previously configured the cluster IP address using the cluster ip command and configured the interface to which the virtual cluster IP address refers.
This command forces this device to participate in the virtual load-balancing cluster. You must explicitly issue this command to enable participation for a device.
All devices that participate in a cluster must share the same cluster-specific values: ip address, encryption settings, encryption key, and port.
Note When using encryption, you must have previously configured the command isakmp enable inside, where inside designates the load-balancing inside interface. If isakmp is not enabled on the load-balancing inside interface, you get an error message when you try to configure cluster encryption.
If isakmp was enabled when you configured the cluster encryption command, but was disabled before you configured the participate command, you get an error message when you enter the participate command, and the local device will not participate in the cluster.
Command Mode
Firewall Mode Security Context
RoutedTransparent Single
Multiple
Context System
VPN load-balancing configuration
• Yes — • Yes — —
Release Modification
7.0(1) This command was added.
15-46Cisco ASA Series Command Reference, I through R Commands
Chapter
Examples The following is an example of a VPN load-balancing command sequence that includes a participate command that enables the current device to participate in the vpn load-balancing cluster:
ciscoasa(config)# interface GigabitEthernet 0/1ciscoasa(config-if)# ip address 209.165.202.159 255.255.255.0ciscoasa(config)# nameif testciscoasa(config)# interface GigabitEthernet 0/2ciscoasa(config-if)# ip address 209.165.201.30 255.255.255.0ciscoasa(config)# nameif foociscoasa(config)# vpn load-balancingciscoasa(config-load-balancing)# interface lbpublic testciscoasa(config-load-balancing)# interface lbprivate foociscoasa(config-load-balancing)# cluster ip address 209.165.202.224ciscoasa(config-load-balancing)# participate
Related Commands Command Description
vpn load-balancing Enter VPN load-balancing mode.
15-47Cisco ASA Series Command Reference, I through R Commands
Chapter
passive-interface (ipv6 router ospf)To suppress the sending and receiving of routing updates on an interface or across all interfaces that are using an OSPFv3 process, use the passive-interface command in ipv6 router ospf configuration mode. To reenable routing updates on an interface or across all intterfaces that are using an OSPFv3 process, use the no form of this command.
passive-interface [interface_name]
no passive-interface [interface_name]
Syntax Description
Defaults No default behavior or values.
Command Modes The following table shows the modes in which you can enter the command:
Command History
Usage Guidelines This command enables passive routing on an interface.
Examples The following example suppresses the sending and receiving of routing updates on the inside interface.
ciscoasa(config)# ipv6 router ospf 10ciscoasa(config-rtr)# passive-interface interfaceciscoasa(config-rtr)#
Related Commands
interface_name (Optional) Specifies the interface name on which the OSPFv3 process is running.
Command Mode
Firewall Mode Security Context
RoutedTransparent Single
Multiple
Context System
Ipv6 router ospf configuration • Yes — • Yes — —
Release Modification
9.0(1) This command was added.
Command Description
show running-config router
Displays the router configuration commands in the running configuration.
15-48Cisco ASA Series Command Reference, I through R Commands

Chapter
passive-interface (isis)To select ISIS hello packets and routing updates on interfaces while still including the interface addresses in the topology database, use the passive-interface command in router isis configuration mode. To reenable outgoing hello packets and routing updates, use the no form of this command.
passive-interface [default | inside | management | management2]
no passive-interface [default | inside | management | management2]
Syntax Description
Defaults The default is to suppress routing updates on all interfaces.
Command Modes The following table shows the modes in which you can enter the command:
Command History
Usage Guidelines This command enables passive routing on an interface.
Examples The following example suppresses the sending and receiving of routing updates on the inside interface.
ciscoasa(config)# router isisciscoasa(config-router)# passive-interface inside
Related Commands
default Suppresses routing updates on all interfaces.
inside The name of interface GigabithEthernet0/0.
management The name of interface Management0/0.
management2 The name of interface Management0/1.
Command Mode
Firewall Mode Security Context
RoutedTransparent Single
Multiple
Context System
Router isis configuration • Yes — • Yes • Yes —
Release Modification
9.6(1) This command was added.
15-49Cisco ASA Series Command Reference, I through R Commands
Chapter
passive-interface (router eigrp)To disable the sending and receiving of EIGRP routing updates on an interface, use the passive-interface command in router eigrp configuration mode. To reenable routing updates on an interface, use the no form of this command.
passive-interface {default | if_name}
no passive-interface {default | if_name}
Syntax Description
Defaults All interfaces are enabled for active routing (sending and receiving routing updates) when routing is enabled for that interface.
Command Modes The following table shows the modes in which you can enter the command:
Command History
Usage Guidelines Enables passive routing on the interface. For EIGRP, this disables the transmission and reception of routing updates on that interface.
You can have more than one passive-interface command in the EIGRP configuration. You can use the passive-interface default command to disable EIGRP routing on all interfaces, and then use the no passive-interface command to enable EIGRP routing on specific interfaces.
default (Optional) Set all interfaces to passive mode.
if_name (Optional) The name of the interface, as specified by the nameif command, to passive mode.
Command Mode
Firewall Mode Security Context
RoutedTransparent Single
Multiple
Context System
Router eigrp configuration • Yes — • Yes — —
Release Modification
7.2(1) This command was added.
8.0(2) Support for EIGRP routing was added.
15-50Cisco ASA Series Command Reference, I through R Commands
Chapter
Examples The following example sets the outside interface to passive EIGRP. The other interfaces on the security appliance send and receive EIGRP updates.
ciscoasa(config)# router eigrp 100ciscoasa(config-router)# network 10.0.0.0ciscoasa(config-router)# passive-interface outside
The following example sets all interfaces except the inside interface to passive EIGRP. Only the inside interface will send and receive EIGRP updates.
ciscoasa(config)# router eigrp 100ciscoasa(config-router)# network 10.0.0.0ciscoasa(config-router)# passive-interface defaultciscoasa(config-router)# no passive-interface inside
Related Commands Command Description
show running-config router
Displays the router configuration commands in the running configuration.
15-51Cisco ASA Series Command Reference, I through R Commands

Chapter
passive-interface (router rip)To disable the transmission of RIP routing updates on an interface, use the passive-interface command in router rip configuration mode. To reenable RIP routing updates on an interface, use the no form of this command.
passive-interface {default | if_name}
no passive-interface {default | if_name}
Syntax Description
Defaults All interfaces are enabled for active RIP when RIP is enabled.
If an interface or the default keyword is not specified, the commands defaults to default and appears in the configuration as passive-interface default.
Command Modes The following table shows the modes in which you can enter the command:
Command History
Usage Guidelines Enables passive RIP on the interface. The interface listens for RIP routing broadcasts and uses that information to populate the routing tables, but does not broadcast routing updates.
default (Optional) Set all interfaces to passive mode.
if_name (Optional) Sets the specified interface to passive mode.
Command Mode
Firewall Mode Security Context
RoutedTransparent Single
Multiple
Context System
Router rip configuration • Yes — • Yes • Yes —
Release Modification
7.2(1) This command was added.
9.0(1) Support for multiple context mode was added.
15-52Cisco ASA Series Command Reference, I through R Commands

Chapter
Examples The following example sets the outside interface to passive RIP. The other interfaces on the security appliance send and receive RIP updates.
ciscoasa(config)# router ripciscoasa(config-router)# network 10.0.0.0ciscoasa(config-router)# passive-interface outside
Related Commands Command Description
clear configure rip Clears all RIP commands from the running configuration.
router rip Enables the RIP routing process and enters rip router configuration mode.
show running-config rip
Displays the RIP commands in the running configuration.
15-53Cisco ASA Series Command Reference, I through R Commands
Chapter
passwd, passwordTo set the login password for Telnet, use the passwd or password command in global configuration mode. To reset the password, use the no form of this command.
{passwd | password} password [encrypted]
no {passwd | password} password
Syntax Description
Defaults 9.1(1): The default password is “cisco.”
9.1(2): No default behavior or values.
Command Modes The following table shows the modes in which you can enter the command:
Command History
Usage Guidelines When you enable Telnet with the telnet command, you can log in with the password set by the passwd comamnd. After you enter the login password, you are in user EXEC mode. If you configure CLI authentication per user for Telnet using the aaa authentication telnet console command, then this password is not used.
encrypted (Optional) Specifies that the password is in encrypted form. The password is saved in the configuration in encrypted form, so you cannot view the original password after you enter it. If for some reason you need to copy the password to another ASA but do not know the original password, you can enter the passwd command with the encrypted password and this keyword. Normally, you only see this keyword when you enter the show running-config passwd command.
passwd | password You can enter either command; they are aliased to each other.
password Sets the password as a case-sensitive string of up to 80 characters. The password must not contains spaces.
Command Mode
Firewall Mode Security Context
RoutedTransparent Single
Multiple
Context System
Global configuration • Yes • Yes • Yes • Yes —
Release Modification
7.0(1) This command was added.
8.4(2) The SSH default username is no longer supported; you can no longer connect to the ASA using SSH with the pix or asa username and the login password.
9.0(2), 9.1(2) The default password, “cisco,” has been removed; you must actively set a login password. Using the no passwd or clear configure passwd command removes the password; formerly, it reset it to the default of “cisco.”
15-54Cisco ASA Series Command Reference, I through R Commands

Chapter
This password is also used for Telnet sessions from the switch to the ASASM (see the session command).
Examples The following example sets the password to Pa$$w0rd:
ciscoasa(config)# passwd Pa$$w0rd
The following example sets the password to an encrypted password that you copied from another ASA:
ciscoasa(config)# passwd jMorNbK0514fadBh encrypted
Related Commands Command Description
clear configure passwd Clears the login password.
enable Enters privileged EXEC mode.
enable password Sets the enable password.
show curpriv Shows the currently logged in username and the user privilege level.
show running-config passwd
Shows the login password in encrypted form.
15-55Cisco ASA Series Command Reference, I through R Commands
Chapter
password (crypto ca trustpoint)To specify a challenge phrase that is registered with the CA during enrollment, use the password command in crypto ca trustpoint configuration mode. To restore the default setting, use the no form of this command.
password string
no password
Syntax Description
Defaults The default setting is to not include a password.
Command Modes The following table shows the modes in which you can enter the command:
Command History
Usage Guidelines This command lets you specify the revocation password for the certificate before actual certificate enrollment begins. The specified password is encrypted when the updated configuration is written to NVRAM by the ASA.
The CA typically uses a challenge phrase to authenticate a subsequent revocation request.
If this command is enabled, you will not be prompted for a password during certificate enrollment.
Examples The following example enters crypto ca trustpoint configuration mode for trustpoint central, and includes a challenge phrase registered with the CA in the enrollment request for trustpoint central:
ciscoasa(config)# crypto ca trustpoint centralciscoasa(ca-trustpoint)# password zzxxyy
string Specifies the name of the password as a character string. The first character cannot be a number. The string can contain any alphanumeric characters, including spaces, up to 80 characters. You cannot specify the password in the format number-space-anything. The space after the number causes problems. For example, “hello 21” is a legal password, but “21 hello” is not. The password checking is case sensitive. For example, the password “Secret” is different from the password “secret”.
Command Mode
Firewall Mode Security Context
RoutedTransparent Single
Multiple
Context System
Crypto ca trustpoint configuration
• Yes • Yes • Yes • Yes • Yes
Release Modification
7.0(1) This command was added.
15-56Cisco ASA Series Command Reference, I through R Commands

Chapter
Related Commands Command Description
crypto ca trustpoint Enters trustpoint configuration mode.
default enrollment Returns enrollment parameters to their defaults.
15-57Cisco ASA Series Command Reference, I through R Commands

Chapter
password encryption aesTo enable password encryption using a master passphrase, use the password encryption aes command in global configuration mode. To disable password encryption, use the no form of this command.
password encryption aes
no password encryption aes
Syntax Description This command has no arguments or keywords.
Defaults No default behaviors or values.
Command Modes The following table shows the modes in which you can enter the command:
Command History
Usage Guidelines You must enter both the key config-key password-encrypt command and the password encryption aes command in any order to trigger password encryption. Enter write memory to save the encrypted passwords to the startup configuration. Otherwise, passwords in the startup configuration may still be visible. In multiple context mode, use write memory all in the system execution space to save all context configurations. If you later disable password encryption using the no password encryption aes command, all existing encrypted passwords are left unchanged, and as long as the master passphrase exists, the encrypted passwords will be decrypted, as required by the application.
This command will only be accepted in a secure session, for example by console, SSH, or ASDM via HTTPS.
Enabling or changing password encryption in Active/Standby failover causes a write standby, which replicates the active configuration to the standby unit. Without this replication, the encrypted passwords on the standby unit will differ even though they use the same passphrase; configuration replication ensures that the configurations are the same. For Active/Active failover, you must manually enter write standby. A write standby can cause traffic interruption in Active/Active mode, because the configuration is cleared on the secondary unit before the new configuration is synced. You should make all contexts active on the primary ASA using the failover active group 1 and failover active group 2 commands, enter write standby, and then restore the group 2 contexts to the secondary unit using the no failover active group 2 command.
Command Mode
Firewall Mode Security Context
RoutedTransparent Single
Multiple
Context System
Global configuration • Yes • Yes • Yes — • Yes
Release Modification
8.3(1) This command was added.
15-58Cisco ASA Series Command Reference, I through R Commands

Chapter
The write erase command when followed by the reload command will remove the master passphrase and all configuration if it is lost.
Examples The following example sets the passphrase used for generating the encryption key, and enables password encryption:
ciscoasa(config)# key config-key password-encryptionOld key: bumblebeeNew key: haverfordConfirm key: haverford
ciscoasa(config)# password encryption aesciscoasa(config)# write memory
Related Commands Command Description
key config-key password-encryption Sets the passphrase used for generating the encryption key.
write erase Removes the master passphrase if it is lost when followed by the reload command.
15-59Cisco ASA Series Command Reference, I through R Commands

Chapter
password-historyThis command appears in the configuration for the username attributes command when you enable the password-policy reuse-interval command and is not user-configurable. It stores previous passwords in an encrypted form.
password-history hash1,hash2,hash3 ...
Syntax Description
Command Default No default behavior or values.
Command Modes The following table shows the modes in which you can enter the command:
Command History
Usage Guidelines This command is not user-configurable, and only shows in show output when you enable the password-policy reuse-interval command.
Examples The following example changes a password two times, and then shows the previous hashed passwords:
ciscoasa(config)# username test password pw1ciscoasa(config)# show running-config username testusername test password $sha512$5000$4tAPQTnL3WG1aa4xrfGMjA==$wbi1ks6eo381Km1qOiwqnQ== pbkdf2ciscoasa(config)# username test password pw2ciscoasa(config)# show running-config username testusername test password $sha512$5000$d8ebNCK2oTyzSiHjSh2T6w==$urDQ/+9sOPwi4IUftWFMcw== pbkdf2username test attributes
password-history $sha512$5000$4tAPQTnL3WG1aa4xrfGMjA==$wbi1ks6eo381Km1qOiwqnQ==ciscoasa(config)# username test password pw3ciscoasa(config)# show running-config username testusername test password $sha512$5000$o8WLa1qnLdp2Js4OlW+NdQ==$4Be4eHtPmOxdpfH6j+F4qQ== pbkdf2username test attributes
hash1,hash2,hash3, ... Shows previous passwords that have been hashed using PBKDF2 (Password-Based Key Derivation Function 2).
Command Mode
Firewall Mode Security Context
RoutedTransparent Single
Multiple
Context System
Username attributes configuration
• Yes • Yes • Yes • Yes —
Release Modification
9.8(1) We introduced this command.
15-60Cisco ASA Series Command Reference, I through R Commands

Chapter
password-history $sha512$5000$d8ebNCK2oTyzSiHjSh2T6w==$urDQ/+9sOPwi4IUftWFMcw==,$sha512$5000$4tAPQTnL3WG1aa4xrfGMjA==$wbi1ks6eo381Km1qOiwqnQ==ciscoasa(config)#
Related Commands Command Description
aaa authentication login-history
Saves the local username login history.
password-policy reuse-interval
Prohibits the reuse of a username password.
password-policy username-check
Prohibits a password that matches a username name.
show aaa login-history Shows the local username login history.
username Configures a local user.
15-61Cisco ASA Series Command Reference, I through R Commands

Chapter
password-managementTo enable password management, use the password-management command in tunnel-group general-attributes configuration mode. To disable password management, use the no form of this command. To reset the number of days to the default value, use the no form of the command with the password-expire-in-days keyword specified.
password-management [password-expire-in-days days]
no password-management
no password-management password-expire-in-days [days]
Syntax Description
Defaults The default is no password management. If you do not specify the password-expire-in-days keyword for an LDAP server, the default length of time to start warning before the current password expires is 14 days.
Command Modes The following table shows the modes in which you can enter the command:
Command History
Usage Guidelines The ASA supports password management for the RADIUS and LDAP protocols. It supports the “password-expire-in-days” option for LDAP only.
You can configure password management for IPsec remote access and SSL VPN tunnel-groups.
days Specifies the number of days (0 through 180) before the current password expires. This parameter is required if you specify the password-expire-in-days keyword.
password-expire-in-days
(Optional) Indicates that the immediately following parameter specifies the number of days before the current password expires that the ASA starts warning the user about the pending expiration. This option is valid only for LDAP servers. See the Usage Notes section for more information.
Command Mode
Firewall Mode Security Context
RoutedTransparent Single
Multiple
Context System
Tunnel-group general-attributes configuration
• Yes — • Yes — —
Release Modification
7.1(1) This command was added.
15-62Cisco ASA Series Command Reference, I through R Commands
Chapter
When you configure the password-management command, the ASA notifies the remote user at login that the user’s current password is about to expire or has expired. The ASA then offers the user the opportunity to change the password. If the current password has not yet expired, the user can still log in using that password.
This command is valid for AAA servers that support such notification; that is, natively to LDAP servers and RADIUS proxied to an NT 4.0 or Active Directory server. The ASA ignores this command if RADIUS or LDAP authentication has not been configured.
Note Some RADIUS servers that support MSCHAP currently do not support MSCHAPv2. This command requires MSCHAPv2 so please check with your vendor.
The ASA, releases 7.1 and later, generally supports password management for the following connection types when authenticating with LDAP or with any RADIUS configuration that supports MS-CHAPv2:
• AnyConnect VPN Client (ASA software version 8.0 and higher)
• IPsec VPN Client
• Clientless SSL VPN (ASA software version 8.0 and higher) WebVPN (ASA software versions 7.1 through 7.2.x)
• SSL VPN Client full tunneling client
These RADIUS configurations include RADIUS with LOCAL authentication, RADIUS with Active Directory/Kerberos Windows DC, RADIUS with NT/4.0 Domain, and RADIUS with LDAP.
Password management is not supported for any of these connection types for Kerberos/Active Directory (Windows password) or NT 4.0 Domain. The RADIUS server (for example, Cisco ACS) could proxy the authentication request to another authentication server. However, from the ASA perspective, it is talking only to a RADIUS server.
Note For LDAP, the method to change a password is proprietary for the different LDAP servers on the market. Currently, the ASA implements the proprietary password management logic only for Microsoft Active Directory and Sun LDAP servers.
Native LDAP requires an SSL connection. You must enable LDAP over SSL before attempting to do password management for LDAP. By default, LDAP uses port 636.
Note that this command does not change the number of days before the password expires, but rather, the number of days ahead of expiration that the ASA starts warning the user that the password is about to expire.
If you do specify the password-expire-in-days keyword, you must also specify the number of days.
Specifying this command with the number of days set to 0 disables this command. The ASA does not notify the user of the pending expiration, but the user can change the password after it expires.
Note Radius does not provide a password change, or provide a password change prompt.
Examples The following example sets the days before password expiration to begin warning the user of the pending expiration to 90 for the WebVPN tunnel group “testgroup”:
ciscoasa(config)# tunnel-group testgroup type webvpnciscoasa(config)# tunnel-group testgroup general-attributesciscoasa(config-tunnel-general)# password-management password-expire-in-days 90ciscoasa(config-tunnel-general)#
15-63Cisco ASA Series Command Reference, I through R Commands

Chapter
The following example uses the default value of 14 days before password expiration to begin warning the user of the pending expiration for the IPsec remote access tunnel group “QAgroup”:
ciscoasa(config)# tunnel-group QAgroup type ipsec-raciscoasa(config)# tunnel-group QAgroup general-attributesciscoasa(config-tunnel-general)# password-managementciscoasa(config-tunnel-general)#
Related Commands Command Description
clear configure passwd Clears the login password.
passwd Sets the login password.
radius-with-expiry Enables negotiation of password update during RADIUS authentication (Deprecated).
show running-config passwd
Shows the login password in encrypted form.
tunnel-group general-attributes
Configures the tunnel-group general-attributes values.
15-64Cisco ASA Series Command Reference, I through R Commands

Chapter
password-parameterTo specify the name of the HTTP POST request parameter in which a user password must be submitted for SSO authentication, use the password-parameter command in aaa-server-host configuration mode. This is an SSO with the HTTP Forms command.
password-parameter string
Note To configure SSO with HTTP correctly, you must have a thorough working knowledge of authentication and HTTP exchanges.
Syntax Description
Defaults No default value or behavior.
Command Modes The following table shows the modes in which you can enter the command:
Command History
Usage Guidelines The WebVPN server of the ASA uses an HTTP POST request to submit a single sign-on authentication request to an authenticating web server. The required command password-parameter specifies that the POST request must include a user password parameter for SSO authentication.
Note At login, the user enters the actual password value, which is entered into the POST request and passed on to the authenticating web server.
Examples The following example, entered in aaa-server-host configuration mode, specifies a password parameter named user_password:
ciscoasa(config)# aaa-server testgrp1 host example.comciscoasa(config-aaa-server-host)# password-parameter user_password
string The name of the password parameter included in the HTTP POST request. The maximum password length is 128 characters.
Command Mode
Firewall Mode Security Context
RoutedTransparent Single
Multiple
Context System
Aaa-server-host configuration • Yes — • Yes — —
Release Modification
7.1(1) This command was added.
15-65Cisco ASA Series Command Reference, I through R Commands

Chapter
Related Commands Command Description
action-uri Specifies a web server URI to receive a username and password for single sign-on authentication.
auth-cookie-name Specifies a name for the authentication cookie.
hidden-parameter Creates hidden parameters for exchange with the authenticating web server.
start-url Specifies the URL at which to retrieve a pre-login cookie.
user-parameter Specifies the name of the HTTP POST request parameter in which a username must be submitted for SSO authentication.
15-66Cisco ASA Series Command Reference, I through R Commands
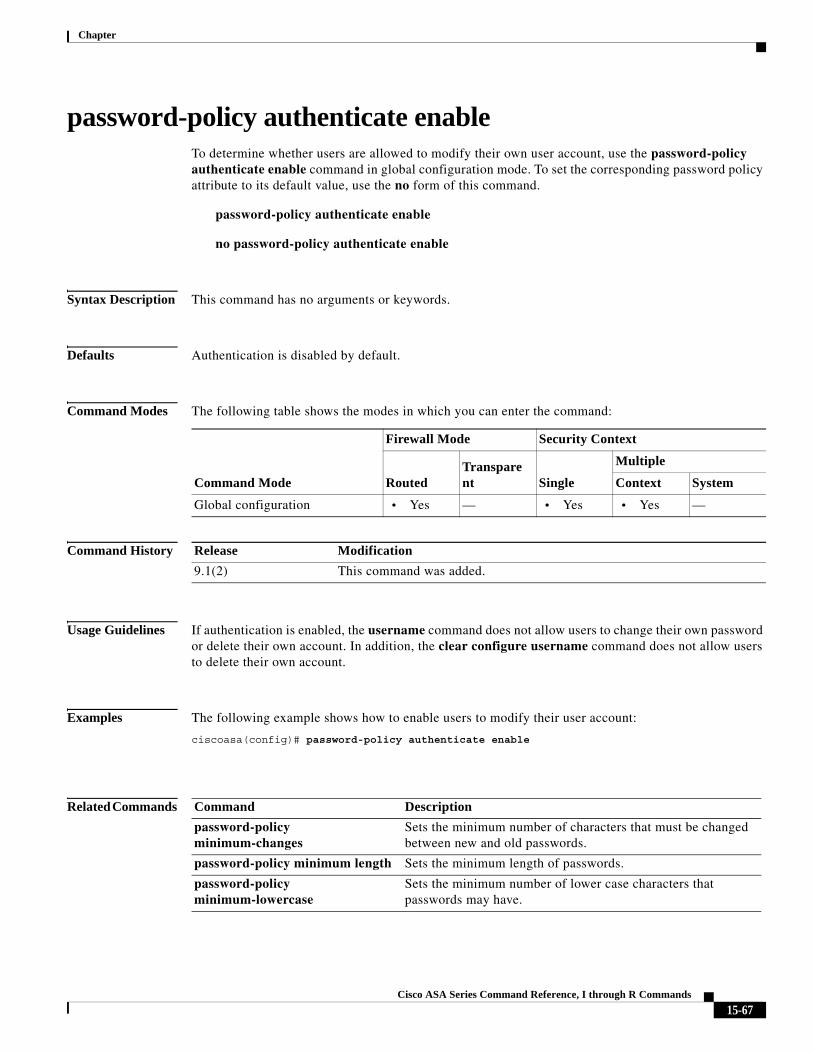
Chapter
password-policy authenticate enableTo determine whether users are allowed to modify their own user account, use the password-policy authenticate enable command in global configuration mode. To set the corresponding password policy attribute to its default value, use the no form of this command.
password-policy authenticate enable
no password-policy authenticate enable
Syntax Description This command has no arguments or keywords.
Defaults Authentication is disabled by default.
Command Modes The following table shows the modes in which you can enter the command:
Command History
Usage Guidelines If authentication is enabled, the username command does not allow users to change their own password or delete their own account. In addition, the clear configure username command does not allow users to delete their own account.
Examples The following example shows how to enable users to modify their user account:
ciscoasa(config)# password-policy authenticate enable
Related Commands
Command Mode
Firewall Mode Security Context
RoutedTransparent Single
Multiple
Context System
Global configuration • Yes — • Yes • Yes —
Release Modification
9.1(2) This command was added.
Command Description
password-policy minimum-changes
Sets the minimum number of characters that must be changed between new and old passwords.
password-policy minimum length Sets the minimum length of passwords.
password-policy minimum-lowercase
Sets the minimum number of lower case characters that passwords may have.
15-67Cisco ASA Series Command Reference, I through R Commands
Chapter
password-policy lifetimeTo set password policy for the current context and the interval in days after which passwords expire, use the password-policy lifetime command in global configuration mode. To set the corresponding password policy attribute to its default value, use the no form of this command.
password-policy lifetime value
no password-policy lifetime value
Syntax Description
Defaults The default lifetime value is 0 days.
Command Modes The following table shows the modes in which you can enter the command:
Command History
Usage Guidelines Passwords have a specified maximum lifetime. A lifetime interval of 0 days specifies that local user passwords never expire. Note that passwords expire at 12:00 a.m. of the day following lifetime expiration.
Examples The following example specifies a password lifetime value of 10 days:
ciscoasa(config)# password-policy lifetime 10
Related Commands
value Specifies the password lifetime. Valid values range from 0 to 65535 days.
Command Mode
Firewall Mode Security Context
RoutedTransparent Single
Multiple
Context System
Global configuration • Yes — • Yes • Yes —
Release Modification
9.1(2) This command was added.
Command Description
password-policy minimum-changes
Sets the minimum number of characters that must be changed between new and old passwords.
password-policy minimum length Sets the minimum length of passwords.
password-policy minimum-lowercase
Sets the minimum number of lower case characters that passwords may have.
15-68Cisco ASA Series Command Reference, I through R Commands
Chapter
password-policy minimum-changesTo set the minimum number of characters that must be changed between new and old passwords, use the password-policy minimum-changes command in global configuration mode. To set the corresponding password policy attribute to its default value, use the no form of this command.
password-policy minimum-changes value
no password-policy minimum-changes value
Syntax Description
Defaults The default number of changed characters is 0.
Command Modes The following table shows the modes in which you can enter the command:
Command History
Usage Guidelines New passwords must include a minimum of 4 character changes from the current password and are considered changed only if they do not appear anywhere in the current password.
Examples The following example specifies a minimum number of character changes between old and new passwords of 6 characters:
ciscoasa(config)# password-policy minimum-changes 6
Related Commands
value Specifies the number of characters that must be changed between new and old passwords. Valid values range from 0 to 64 characters.
Command Mode
Firewall Mode Security Context
RoutedTransparent Single
Multiple
Context System
Global configuration • Yes — • Yes • Yes —
Release Modification
9.1(2) This command was added.
Command Description
password-policy lifetime Sets the password lifetime in days after which passwords expire.
password-policy minimum-length Sets the minimum length of passwords.
password-policy minimum-lowercase
Sets the minimum number of lowercase characters that passwords may have.
15-69Cisco ASA Series Command Reference, I through R Commands
Chapter
password-policy minimum-lengthTo set the minimum length of passwords, use the password-policy minimum-length command in global configuration mode. To set the corresponding password policy attribute to its default value, use the no form of this command.
password-policy minimum-length value
no password-policy minimum-length value
Syntax Description
Defaults The default minimum length is 3.
Command Modes The following table shows the modes in which you can enter the command:
Command History
Usage Guidelines If the minimum length is less than any of the other minimum attributes (changes, lower case, upper case, numeric, and special), an error message appears and the minimum length is not changed. The recommended password length is 8 characters.
Examples The following example specifies a minimum number of characters for passwords as 8:
ciscoasa(config)# password-policy minimum-length 8
Related Commands
value Specifies the minimum length for passwords. Valid values range from 3 to 32 characters.
Command Mode
Firewall Mode Security Context
RoutedTransparent Single
Multiple
Context System
Global configuration • Yes — • Yes • Yes —
Release Modification
9.1(2) This command was added.
Command Description
password-policy lifetime Sets the password lifetime value in days after which passwords expire.
password-policy minimum-changes
Sets the minimum number of changed characters allowed between old and new passwords.
password-policy minimum-lowercase
Sets the minimum number of lower case characters that passwords may have.
15-70Cisco ASA Series Command Reference, I through R Commands
Chapter
password-policy minimum-lowercaseTo set the minimum number of lower case characters that passwords may have, use the password-policy minimum-lowercase command in global configuration mode. To set the corresponding password policy attribute to its default value, use the no form of this command.
password-policy minimum-lowercase value
no password-policy minimum-lowercase value
Syntax Description
Defaults The default number of minimum lower case characters is 0, which means there is no minimum.
Command Modes The following table shows the modes in which you can enter the command:
Command History
Usage Guidelines This command sets the minimum number of lower case characters that passwords may have. Valid values range from 0 to 64 characters.
Examples The following example specifies the minimum number of lower case characters that passwords may have as 6:
ciscoasa(config)# password-policy minimum-lowercase 6
Related Commands
value Specifies the minimum number of lower case characters for passwords. Valid values range from 0 to 64 characters.
Command Mode
Firewall Mode Security Context
RoutedTransparent Single
Multiple
Context System
Global configuration • Yes — • Yes • Yes —
Release Modification
9.1(2) This command was added.
Command Description
password-policy lifetime Sets the password lifetime value in days after which passwords expire.
password-policy minimum-changes
Sets the minimum number of characters that must be changed between new and old passwords.
password-policy minimum-length Sets the minimum length of passwords.
15-71Cisco ASA Series Command Reference, I through R Commands
Chapter
password-policy minimum-numericTo set the minimum number of numeric characters that passwords may have, use the password-policy minimum-numeric command in global configuration mode. To set the corresponding password policy attribute to its default value, use the no form of this command.
password-policy minimum-numeric value
no password-policy minimum-numeric value
Syntax Description
Defaults The default number of minimum numeric characters is 0, which means there is no minimum.
Command Modes The following table shows the modes in which you can enter the command:
Command History
Usage Guidelines This command sets the minimum number of numeric characters that passwords may have. Valid values range from 0 to 64 characters.
Examples The following example specifies the minimum number of numeric characters that passwords may have as 8:
ciscoasa(config)# password-policy minimum-numeric 8
Related Commands
value Specifies the minimum number of numeric characters for passwords. Valid values range from 0 to 64 characters.
Command Mode
Firewall Mode Security Context
RoutedTransparent Single
Multiple
Context System
Global configuration • Yes — • Yes • Yes —
Release Modification
9.1(2) This command was added.
Command Description
password-policy lifetime Sets the password lifetime value in days after which passwords expire.
password-policy minimum-changes
Sets the minimum number of characters that must be changed between new and old passwords.
password-policy minimum-length Sets the minimum length of passwords.
15-72Cisco ASA Series Command Reference, I through R Commands

Chapter
password-policy minimum-specialTo set the minimum number of special characters that passwords may have, use the password-policy minimum-special command in global configuration mode. To set the corresponding password policy attribute to its default value, use the no form of this command.
password-policy minimum-special value
no password-policy minimum-special value
Syntax Description
Defaults The default number of minimum special characters is 0, which means there is no minimum.
Command Modes The following table shows the modes in which you can enter the command:
Command History
Usage Guidelines This command sets the minimum number of special characters that passwords may have. Special characters include the following: !, @, #, $, %, ^, &, *, '(‘ and ‘)’.
Examples The following example specifies the minimum number of special characters that passwords may have as 2:
ciscoasa(config)# password-policy minimum-special 2
Related Commands
value Specifies the minimum number of special characters for passwords. Valid values range from 0 to 64 characters.
Command Mode
Firewall Mode Security Context
RoutedTransparent Single
Multiple
Context System
Global configuration • Yes — • Yes • Yes —
Release Modification
9.1(2) This command was added.
Command Description
password-policy lifetime Sets the password lifetime value in days after which passwords expire.
password-policy minimum-changes
Sets the minimum number of characters that must be changed between new and old passwords.
password-policy minimum-length Sets the minimum length of passwords.
15-73Cisco ASA Series Command Reference, I through R Commands
Chapter
password-policy minimum-uppercaseTo set the minimum number of upper case characters that passwords may have, use the password-policy minimum-uppercase command in global configuration mode. To set the corresponding password policy attribute to its default value, use the no form of this command.
password-policy minimum-uppercase value
no password-policy minimum-uppercase value
Syntax Description
Defaults The default number of minimum upper case characters is 0, which means there is no minimum.
Command Modes The following table shows the modes in which you can enter the command:
Command History
Usage Guidelines This command sets the minimum number of upper case characters that passwords may have. Valid values range from 0 to 64 characters.
Examples The following example specifies the minimum number of upper case characters that passwords may have as 4:
ciscoasa(config)# password-policy minimum-uppercase 4
Related Commands
value Specifies the minimum number of upper case characters for passwords. Valid values range from 0 to 64 characters.
Command Mode
Firewall Mode Security Context
RoutedTransparent Single
Multiple
Context System
Global configuration • Yes — • Yes • Yes —
Release Modification
9.1(2) This command was added.
Command Description
password-policy lifetime Sets the password lifetime value in days after which passwords expire.
password-policy minimum-changes
Sets the minimum number of characters that must be changed between new and old passwords.
password-policy minimum-length Sets the minimum length of passwords.
15-74Cisco ASA Series Command Reference, I through R Commands
Chapter
password-policy reuse-intervalTo prohibit the reuse of a password for a local username, use the password-policy reuse-interval command in global configuration mode. To remove this restriction, use the no form of this command.
password-policy reuse-interval value
no password-policy reuse-interval [value]
Syntax Description
Command Default This command is disabled by default.
Command Modes The following table shows the modes in which you can enter the command:
Command History
Usage Guidelines You can prohibit the reuse of a password that matches previously used passwords. The previous passwords are stored in the configuration under each username in encrypted form using the password-history command; this command is not user-configurable.
Examples The following example sets the password resuse interval to 5:
ciscoasa(config)# password-policy reuse-interval 5
Related Commands
value Sets the number of previous passwords that you cannot use when creating a new password, between 2 and 7.
Command Mode
Firewall Mode Security Context
RoutedTransparent Single
Multiple
Context System
Global configuration • Yes • Yes • Yes • Yes —
Release Modification
9.8(1) We introduced this command.
Command Description
aaa authentication login-history
Saves the local username login history.
password-history Stores previous username passwords. This command is not user-configurable.
password-policy username-check
Prohibits a password that matches a username name.
15-75Cisco ASA Series Command Reference, I through R Commands
Chapter
show aaa login-history Shows the local username login history.
username Configures a local user.
Command Description
15-76Cisco ASA Series Command Reference, I through R Commands
Chapter
password-policy username-checkTo prohibit a password that matches a username, use the password-policy username-check command in global configuration mode. To remove this restriction, use the no form of this command.
password-policy username-check
no password-policy username-check
Syntax Description This command has no arguments or keywords.
Command Default This command is disabled by default.
Command Modes The following table shows the modes in which you can enter the command:
Command History
Usage Guidelines You can prohibit a password that matches the name in a username command.
Examples The following example restricts the password from matching the username john_crichton:
ciscoasa(config)# password-policy username-checkciscoasa(config)# username john_crichton password moya privilege 15ciscoasa(config)# username aeryn_sun password john_crichton privilege 15ERROR: Password must contain:ERROR: a value that complies with the password policyERROR: Username addition failed.ciscoasa(config)#
Related Commands
Command Mode
Firewall Mode Security Context
RoutedTransparent Single
Multiple
Context System
Global configuration • Yes • Yes • Yes • Yes —
Release Modification
9.8(1) We introduced this command.
Command Description
aaa authentication login-history
Saves the local username login history.
password-history Stores previous username passwords. This command is not user-configurable.
15-77Cisco ASA Series Command Reference, I through R Commands

Chapter
password-policy reuse-interval
Prohibits the reuse of a username password.
show aaa login-history Shows the local username login history.
username Configures a local user.
Command Description
15-78Cisco ASA Series Command Reference, I through R Commands

Chapter
password-promptTo customize the password prompt of the WebVPN page login box that is displayed to WebVPN users when they connect to the security appliance, use the password-prompt command from webvpn customization mode:
password-prompt {text | style} value
[no] password-prompt {text | style} value
To remove the command from the configuration and cause the value to be inherited, use the no form of the command.
Syntax Description
Defaults The default text of the password prompt is “PASSWORD:”.
The default style of the password prompt is color:black;font-weight:bold;text-align:right.
Command Modes The following table shows the modes in which you can enter the command:
Command History
Usage Guidelines The style option is expressed as any valid Cascading Style Sheet (CSS) parameters. Describing these parameters is beyond the scope of this document. For more information about CSS parameters, consult CSS specifications at the World Wide Web Consortium (W3C) website at www.w3.org. Appendix F of the CSS 2.1 Specification contains a convenient list of CSS parameters, and is available at www.w3.org/TR/CSS21/propidx.html.
Here are some tips for making the most common changes to the WebVPN pages—the page colors:
• You can use a comma-separated RGB value, an HTML color value, or the name of the color if recognized in HTML.
• RGB format is 0,0,0, a range of decimal numbers from 0 to 255 for each color (red, green, blue); the comma separated entry indicates the level of intensity of each color to combine with the others.
text Specifies you are changing the text.
style Specifies you are changing the style.
value The actual text to display (maximum 256 characters), or Cascading Style Sheet (CSS) parameters (maximum 256 characters).
Command Mode
Firewall Mode Security Context
RoutedTransparent Single
Multiple
Context System
Webvpn customization • Yes — • Yes — —
Release Modification
7.1(1) This command was added.
15-79Cisco ASA Series Command Reference, I through R Commands

Chapter
• HTML format is #000000, six digits in hexadecimal format; the first and second represent red, the third and fourth green, and the fifth and sixth represent blue.
Note To easily customize the WebVPN pages, we recommend that you use ASDM, which has convenient features for configuring style elements, including color swatches and preview capabilities.
Examples In the following example, the text is changed to “Corporate Password:”, and the default style is changed with the font weight increased to bolder:
ciscoasa(config)# webvpnciscoasa(config-webvpn)# customization ciscociscoasa(config-webvpn-custom)# password-prompt text Corporate Username:ciscoasa(config-webvpn-custom)# password-prompt style font-weight:bolder
Related Commands Command Description
group-prompt Customizes the group prompt of the WebVPN page
username-prompt Customizes the username prompt of the WebVPN page
15-80Cisco ASA Series Command Reference, I through R Commands
Chapter
password-storageTo let users store their login passwords on the client system, use the password-storage enable command in group-policy configuration mode or username configuration mode. To disable password storage, use the password-storage disable command.
To remove the password-storage attribute from the running configuration, use the no form of this command. This enables inheritance of a value for password-storage from another group policy.
password-storage {enable | disable}
no password-storage
Syntax Description
Defaults Password storage is disabled.
Command Modes The following table shows the modes in which you can enter the command:
Command History
Usage Guidelines Enable password storage only on systems that you know to be in secure sites.
This command has no bearing on interactive hardware client authentication or individual user authentication for hardware clients.
Examples The following example shows how to enable password storage for the group policy named FirstGroup:
ciscoasa(config)# group-policy FirstGroup attributesciscoasa(config-group-policy)# password-storage enable
disable Disables password storage.
enable Enables password storage.
Command Mode
Firewall Mode Security Context
RoutedTransparent Single
Multiple
Context System
Group-policy configuration • Yes — • Yes — —
Username configuration • Yes — • Yes — —
Release Modification
7.0(1) This command was added.
15-81Cisco ASA Series Command Reference, I through R Commands
Chapter
peer-id-validateTo specify whether to validate the identity of the peer using the peer’s certificate, use the peer-id-validate command in tunnel-group ipsec-attributes mode. To return to the default value, use the no form of this command.
peer-id-validate option
no peer-id-validate
Syntax Description
Defaults The default setting for this command is req.
Command Modes The following table shows the modes in which you can enter the command:
Command History
Usage Guidelines You can apply this attribute to all IPsec tunnel-group types.
Examples The following example entered in config-ipsec configuration mode, requires validating the peer using the identity of the peer’s certificate for the IPsec LAN-to-LAN tunnel group named 209.165.200.225:
ciscoasa(config)# tunnel-group 209.165.200.225 type IPsec_L2Lciscoasa(config)# tunnel-group 209.165.200.225 ipsec-attributesciscoasa(config-tunnel-ipsec)# peer-id-validate reqciscoasa(config-tunnel-ipsec)#
option Specifies one of the following options:
• req: required
• cert: if supported by certificate
• nocheck: do not check
Command Mode
Firewall Mode Security Context
RoutedTransparent Single
Multiple
Context System
Tunnel-group ipsec attributes • Yes — • Yes — —
Release Modification
7.0(1) This command was added.
15-82Cisco ASA Series Command Reference, I through R Commands

Chapter
Related Commands Command Description
clear-configure tunnel-group
Clears all configured tunnel groups.
show running-config tunnel-group
Shows the tunnel group configuration for all tunnel groups or for a particular tunnel group.
tunnel-group ipsec-attributes
Configures the tunnel-group ipsec-attributes for this group.
15-83Cisco ASA Series Command Reference, I through R Commands
Chapter
peer ipTo manually specify the peer VXLAN tunnel endpoint (VTEP) IP address, use the peer ip command in nve configuration mode. To remove the peer address, use the no form of this command.
peer ip ip_address
no peer ip
Syntax Description
Defaults No default behavior or values.
Command Modes The following table shows the modes in which you can enter the command:
Command History
Usage Guidelines If you specify the peer IP address, you cannot use multicast group discovery. Multicast is not supported in multiple context mode, so manual configuration is the only option. You can only specify one peer for the VTEP.
Examples The following example configures the GigabitEthernet 1/1 interface as the VTEP source interface, and specifies a peer IP address of 10.1.1.2:
ciscoasa(config)# interface gigabitethernet 1/1ciscoasa(config-if)# nameif outsideciscoasa(config-if)# ip address 10.1.1.1 255.255.255.0ciscoasa(config-if)# nve 1ciscoasa(cfg-nve)# source-interface outsideciscoasa(cfg-nve)# peer ip 10.1.1.2
Related Commands
ip_address Sets the peer VTEP IP address.
Command Mode
Firewall Mode Security Context
RoutedTransparent Single
Multiple
Context System
Nve configuration • Yes • Yes • Yes • Yes —
Release Modification
9.4(1) This command was added.
Command Description
debug vxlan Debugs VXLAN traffic.
15-84Cisco ASA Series Command Reference, I through R Commands

Chapter
default-mcast-group Specifies a default multicast group for all VNI interfaces associated with the VTEP source interface.
encapsulation vxlan Sets the NVE instance to VXLAN encapsulation.
inspect vxlan Enforces compliance with the standard VXLAN header format.
interface vni Creates the VNI interface for VXLAN tagging.
mcast-group Sets the multicast group address for the VNI interface.
nve Specifies the Network Virtualization Endpoint instance.
nve-only Specifies that the VXLAN source interface is NVE-only.
segment-id Specifies the VXLAN segment ID for a VNI interface.
show arp vtep-mapping
Displays MAC addresses cached on the VNI interface for IP addresses located in the remote segment domain and the remote VTEP IP addresses.
show interface vni Shows the parameters, status and statistics of a VNI interface, status of its bridged interface (if configured), and NVE interface it is associated with.
show mac-address-table vtep-mapping
Displays the Layer 2 forwarding table (MAC address table) on the VNI interface with the remote VTEP IP addresses.
show nve Shows the parameters, status and statistics of a NVE interface, status of its carrier interface (source interface), IP address of the carrier interface, VNIs that use this NVE as the VXLAN VTEP, and peer VTEP IP addresses associated with this NVE interface.
show vni vlan-mapping
Shows the mapping between VNI segment IDs and VLAN interfaces or physical interfaces in transparent mode.
source-interface Specifies the VTEP source interface.
vtep-nve Associates a VNI interface with the VTEP source interface.
vxlan port Sets the VXLAN UDP port. By default, the VTEP source interface accepts VXLAN traffic to UDP port 4789.
Command Description
15-85Cisco ASA Series Command Reference, I through R Commands
Chapter
perfmonTo display performance information, use the perfmon command in privileged EXEC mode.
perfmon {verbose | interval seconds | quiet | settings} [detail]
Syntax Description
Defaults The seconds is 120 seconds.
Command Modes The following table shows the modes in which you can enter the command:
Command History
Usage Guidelines The perfmon command allows you to monitor the performance of the ASA. Use the show perfmon command to display the information immediately. Use the perfmon verbose command to display the information every 2 minutes continuously. Use the perfmon interval seconds command with the perfmon verbose command to display the information continuously every number of seconds that you specify.
An example of the performance information is displayed as follows:
verbose Displays performance monitor information at the ASA console.
interval seconds Specifies the number of seconds before the performance display is refreshed on the console.
quiet Disables the performance monitor displays.
settings Displays the interval and whether it is quiet or verbose.
detail Displays detailed information about performance.
Command Mode
Firewall Mode Security Context
RoutedTransparent Single
Multiple
Context System
Privileged EXEC • Yes • Yes • Yes • Yes —
Release Modification
7.0 Support for this command was added on the ASA.
7.2(1) Support for the detail keyword was added.
PERFMON STATS: Current Average
Xlates 33/s 20/s
Connections 110/s 10/s
TCP Conns 50/s 42/s
WebSns Req 4/s 2/s
TCP Fixup 20/s 15/s
HTTP Fixup 5/s 5/s
15-86Cisco ASA Series Command Reference, I through R Commands
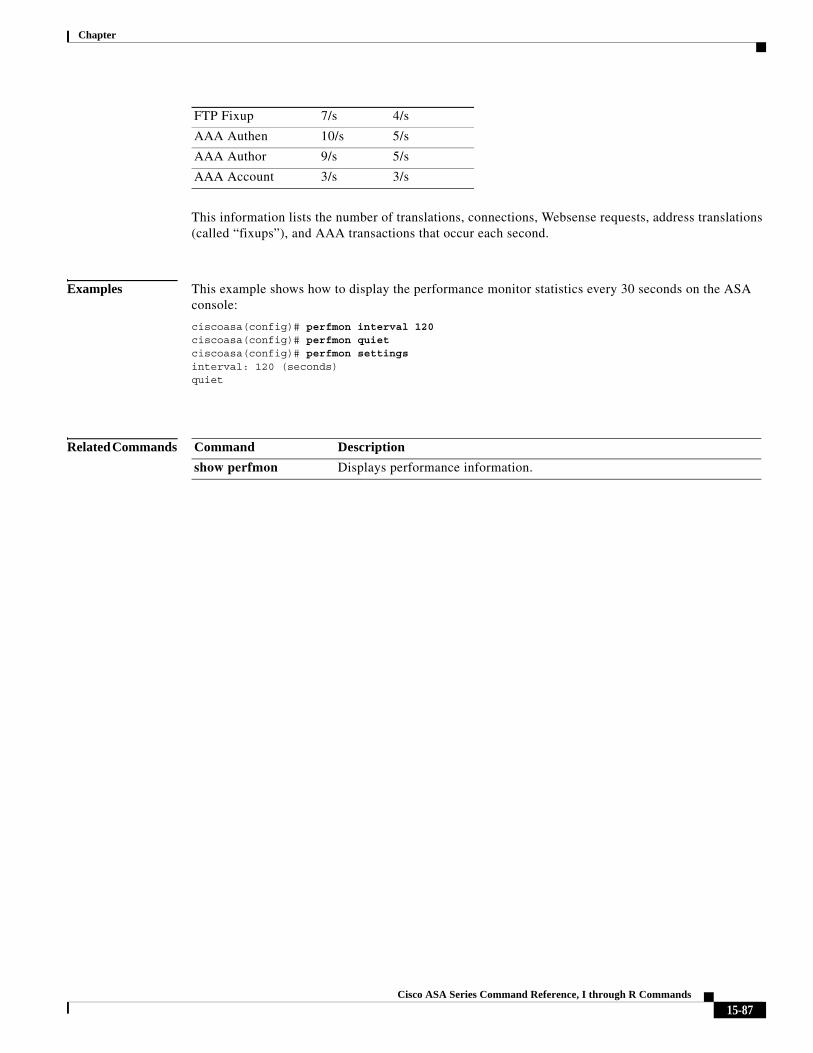
Chapter
This information lists the number of translations, connections, Websense requests, address translations (called “fixups”), and AAA transactions that occur each second.
Examples This example shows how to display the performance monitor statistics every 30 seconds on the ASA console:
ciscoasa(config)# perfmon interval 120ciscoasa(config)# perfmon quietciscoasa(config)# perfmon settingsinterval: 120 (seconds)quiet
Related Commands
FTP Fixup 7/s 4/s
AAA Authen 10/s 5/s
AAA Author 9/s 5/s
AAA Account 3/s 3/s
Command Description
show perfmon Displays performance information.
15-87Cisco ASA Series Command Reference, I through R Commands
Chapter
periodicTo specify a recurring (weekly) time range for functions that support the time-range feature, use the periodic command in time-range configuration mode. To disable, use the no form of this command.
periodic days-of-the-week time to [days-of-the-week] time
no periodic days-of-the-week time to [days-of-the-week] time
Syntax Description
Defaults If a value is not entered with the periodic command, access to the ASA as defined with the time-range command is in effect immediately and always on.
Command Modes The following table shows the modes in which you can enter the command:
Command History
Usage Guidelines To implement a time-based ACL, use the time-range command to define specific times of the day and week. Then use the with the access-list extended time-range command to bind the time range to an ACL.
days-of-the-week (Optional) The first occurrence of this argument is the starting day or day of the week that the associated time range is in effect. The second occurrence is the ending day or day of the week the associated statement is in effect.
This argument is any single day or combinations of days: Monday, Tuesday, Wednesday, Thursday, Friday, Saturday, and Sunday. Other possible values are:
• daily—Monday through Sunday
• weekdays—Monday through Friday
• weekend—Saturday and Sunday
If the ending days of the week are the same as the starting days of the week, you can omit them.
time Specifies the time in the format HH:MM. For example, 8:00 is 8:00 a.m. and 20:00 is 8:00 p.m.
to Entry of the to keyword is required to complete the range “from start-time to end-time.”
Command Mode
Firewall Mode Security Context
RoutedTransparent Single
Multiple
Context System
Time-range configuration • Yes • Yes • Yes • Yes —
Release Modification
7.0(1) This command was added.
15-88Cisco ASA Series Command Reference, I through R Commands

Chapter
The periodic command is one way to specify when a time range is in effect. Another way is to specify an absolute time period with the absolute command. Use either of these commands after the time-range global configuration command, which specifies the name of the time range. Multiple periodic entries are allowed per time-range command.
If the end days-of-the-week value is the same as the start value, you can omit them.
If a time-range command has both absolute and periodic values specified, then the periodic commands are evaluated only after the absolute start time is reached, and are not further evaluated after the absolute end time is reached.
The time-range feature relies on the system clock of the ASA; however, the feature works best with NTP synchronization.
Examples Some examples follow:
The following example shows how to allow access to the ASA on Monday through Friday, 8:00 a.m. to 6:00 p.m. only:
ciscoasa(config-time-range)# periodic weekdays 8:00 to 18:00ciscoasa(config-time-range)#
The following example shows how to allow access to the ASA on specific days (Monday, Tuesday, and Friday), 10:30 a.m. to 12:30 p.m.:
ciscoasa(config-time-range)# periodic Monday Tuesday Friday 10:30 to 12:30ciscoasa(config-time-range)#
Related Commands
If you want: Enter this:
Monday through Friday, 8:00 a.m. to 6:00 p.m. only periodic weekdays 8:00 to 18:00
Every day of the week, from 8:00 a.m. to 6:00 p.m. only periodic daily 8:00 to 18:00
Every minute from Monday 8:00 a.m. to Friday 8:00 p.m. periodic monday 8:00 to friday 20:00
All weekend, from Saturday morning through Sunday night periodic weekend 00:00 to 23:59
Saturdays and Sundays, from noon to midnight periodic weekend 12:00 to 23:59
Command Description
absolute Defines an absolute time when a time range is in effect.
access-list extended Configures a policy for permitting or denying IP traffic through the ASA.
default Restores default settings for the time-range command absolute and periodic keywords.
time-range Defines access control to the ASA based on time.
15-89Cisco ASA Series Command Reference, I through R Commands
Chapter
periodic-authentication certificateTo enable periodic certificate verification, use the periodic-authentication certificate command. To inherit the settings from the default group policy, use the no form of this command.
periodic-authentication certificate <time in hours> | none
[no] periodic-authentication certificate <time in hours> | none
Syntax Description
Defaults The periodic certificate verification is disabled by default.
Command Modes The following table shows the modes in which you can enter the command:
Command History
Usage Guidelines The command by default will be periodic-authentication certificate none for the default group-policy. Other groups policies inherit the setting from the default policy unless changed.
Examples 100(config-group-policy)# periodic-authentication ?
group-policy mode commands/options: certificate Configure periodic certificate authentication
100(config-group-policy)# periodic-authentication certificate ?
group-policy mode commands/options: <1-168> Enter periodic authentication interval in hours none Disable periodic authentication100(config-group-policy)# periodic-authentication certificate ?
group-policy mode commands/options:
time in hours Sets the interval between 1 and 168 hours.
none Disables periodic authentication.
Command Mode
Firewall Mode Security Context
RoutedTransparent Single
Multiple
Context System
Default group-policy configuration
• Yes • Yes • Yes • Yes —
Release Modification
9.4(1) This command was added.
15-90Cisco ASA Series Command Reference, I through R Commands

Chapter
<1-168> Enter periodic authentication interval in hours none Disable periodic authentication
100(config-group-policy)# help periodic-authentication
15-91Cisco ASA Series Command Reference, I through R Commands
Chapter
permit-errorsTo allow invalid GTP packets or packets that otherwise would fail parsing and be dropped, use the permit-errors command in policy map parameters configuration mode. To return to the default behavior, where all invalid packets or packets that failed parsing are dropped. use the no form of this command.
permit-errors
no permit-errors
Syntax Description This command has no arguments or keywords.
Defaults By default, all invalid packets or packets that failed parsing are dropped.
Command Modes The following table shows the modes in which you can enter the command:
Command History
Usage Guidelines Use the permit-errors command in a GTP inspection policy map parameters to allow any packets that are invalid or encountered an error during inspection of the message to be sent through the ASA instead of being dropped.
Examples The following example permits traffic containing invalid packets or packets that failed parsing:
ciscoasa(config)# policy-map type inspect gtp gtp-policyciscoasa(config-pmap)# parametersciscoasa(config-pmap-p)# permit-errors
Related Commands
Command Mode
Firewall Mode Security Context
RoutedTransparent Single
Multiple
Context System
Parameters configuration • Yes • Yes • Yes • Yes —
Release Modification
7.0(1) This command was added.
Commands Description
policy-map type inspect gtp
Defines a GTP inspection policy map.
inspect gtp Applies a specific GTP map to use for application inspection.
15-92Cisco ASA Series Command Reference, I through R Commands

Chapter
permit-responseTo configure GSN or PGW pooling, use the permit-response command in policy map parameters configuration mode. Use the no form of this command remove the pooling relationship.
permit-response to-object-group to_obj_group_id from-object-group from_obj_group_id
no permit-response to-object-group to_obj_group_id from-object-group from_obj_group_id
Syntax Description
Defaults The ASA drops GTP responses from GSNs or PGWs that were not specified in the GTP request.
Command Modes The following table shows the modes in which you can enter the command:
Command History
Usage Guidelines When the ASA performs GTP inspection, by default the ASA drops GTP responses from GSNs or PGWs that were not specified in the GTP request. This situation occurs when you use load-balancing among a pool of GSNs or PGWs to provide efficiency and scalability of GPRS.
To configure GSN/PGW pooling and thus support load balancing, create a network object group that specifies the GSN/PGW endpoints and specify this on the from-object-group parameter. Likewise, create a network object group for the SGSN/SGW and select it on the to-object-group parameter. If the
from-object-group from_obj_group_id
The network object group that identifies the GSN/PGW endpoints. This must be an object group (object-group command). These endpoints are allowed to send requests to and receive responses from the to-object-group.
Starting with release 9.5(1), the object group can contain IPv6 addresses, not just IPv4.
to-object-group to_obj_group_id
The network object group that identifies the SGSN/SGW. This must be an object group (object-group command). These addresses are allowed to receive responses from the set of endpoints identified in the from-object-group.
Starting with release 9.5(1), the object group can contain IPv6 addresses, not just IPv4.
Command Mode
Firewall Mode Security Context
RoutedTransparent Single
Multiple
Context System
Parameters configuration mode. • Yes • Yes • Yes • Yes —
Release Modification
7.0(4) This command was added. GTP inspection supports IPv4 addresses only.
9.5(1) Support for IPv6 addresses was added.
15-93Cisco ASA Series Command Reference, I through R Commands

Chapter
GSN/PGW responding belongs to the same object group as the GSN/PGW that the GTP request was sent to and if the SGSN/SGW is in an object group that the responding GSN/PGW is permitted to send a GTP response to, the ASA permits the response.
The network object group can identify the endpoints by host address or by the subnet that contains them.
Examples The following example permits GTP responses from any host on the 192.168.32.0 network to the host with the IP address 192.168.112.57:
ciscoasa(config)# object-group network gsnpool32ciscoasa(config-network)# network-object 192.168.32.0 255.255.255.0ciscoasa(config)# object-group network sgsn1 ciscoasa(config-network)# network-object host 192.168.112.57ciscoasa(config-network)# exit ciscoasa(config)# policy-map type inspect gtp gtp-policy ciscoasa(config-pmap)# parameters ciscoasa(config-pmap-p)# permit-response to-object-group sgsn1 from-object-group gsnpool32
Related Commands Commands Description
policy-map type inspect gtp
Defines a GTP inspection policy map.
inspect gtp Applies a specific GTP map to use for application inspection.
show service-policy inspect gtp
Displays the GTP configuration.
15-94Cisco ASA Series Command Reference, I through R Commands
Chapter
pfsTo enable PFS, use the pfs enable command in group-policy configuration mode. To disable PFS, use the pfs disable command. To remove the PFS attribute from the running configuration, use the no form of this command.
pfs {enable | disable}
no pfs
Syntax Description
Defaults PFS is disabled.
Command Modes The following table shows the modes in which you can enter the command:
Command History
Usage Guidelines The PFS setting on the VPN Client and the ASA must match.
Use the no form of this command to allow the inheritance of a value for PFS from another group policy.
In IPsec negotiations, PFS ensures that each new cryptographic key is unrelated to any previous key.
Examples The following example shows how to set PFS for the group policy named FirstGroup:
ciscoasa(config)# group-policy FirstGroup attributesciscoasa(config-group-policy)# pfs enable
disable Disables PFS.
enable Enables PFS.
Command Mode
Firewall Mode Security Context
RoutedTransparent Single
Multiple
Context System
Group-policy configuration • Yes — • Yes — —
Release Modification
7.0(1) This command was added.
15-95Cisco ASA Series Command Reference, I through R Commands

Chapter
phone-proxy (Deprecated)To configure the Phone Proxy instance, use the phone-proxy command in global configuration mode.
To remove the Phone Proxy instance, use the no form of this command.
phone-proxy phone_proxy_name
no phone-proxy phone_proxy_name
Syntax Description
Defaults No default behavior or values.
Command Modes The following table shows the modes in which you can enter the command:
Command History
Usage Guidelines Only one Phone Proxy instance can be configured on the ASA.
If NAT is configured for the HTTP proxy server, the global or mapped IP address of the HTTP proxy server with respect to the IP phones is written to the Phone Proxy configuration file.
Examples The following example shows the use of the phone-proxy command to configure the Phone Proxy instance:
ciscoasa(config)# phone-proxy asa_phone_proxyciscoasa(config-phone-proxy)# tftp-server address 128.106.254.8 interface outsideciscoasa(config-phone-proxy)# media-termination address 192.0.2.25 interface insideciscoasa(config-phone-proxy)# media-termination address 128.106.254.3 interface outsideciscoasa(config-phone-proxy)# tls-proxy asa_tlspciscoasa(config-phone-proxy)# ctl-file asactlciscoasa(config-phone-proxy)# cluster-mode nonsecureciscoasa(config-phone-proxy)# timeout secure-phones 00:05:00ciscoasa(config-phone-proxy)# disable service-settings
phone_proxy_name Specifies the name of the Phone Proxy instance.
Command Mode
Firewall Mode Security Context
RoutedTransparent Single
Multiple
Context System
Global configuration • Yes — • Yes — —
Release Modification
8.0(4) The command was added.
9.4(1) This command was deprecated.
15-96Cisco ASA Series Command Reference, I through R Commands

Chapter
Related Commands Command Description
ctl-file (global) Specifies the CTL file to create for Phone Proxy configuration or the CTL file to parse from Flash memory.
ctl-file (phone-proxy)
Specifies the CTL file to use for Phone Proxy configuration.
tls-proxy Configures the TLS proxy instance.
15-97Cisco ASA Series Command Reference, I through R Commands
Chapter
pimTo re-enable PIM on an interface, use the pim command in interface configuration mode. To disable PIM, use the no form of this command.
pim
no pim
Syntax Description This command has no arguments or keywords.
Defaults The multicast-routing command enables PIM on all interfaces by default.
Command Modes The following table shows the modes in which you can enter the command:
Command History
Usage Guidelines The multicast-routing command enables PIM on all interfaces by default. Only the no form of the pim command is saved in the configuration.
Note PIM is not supported with PAT. The PIM protocol does not use ports and PAT only works with protocols that use ports.
Examples The following example disables PIM on the selected interface:
ciscoasa(config-if)# no pim
Related Commands
Command Mode
Firewall Mode Security Context
RoutedTransparent Single
Multiple
Context System
Interface configuration • Yes — • Yes — —
Release Modification
7.0(1) This command was added.
Command Description
multicast-routing Enables multicast routing on the ASA.
15-98Cisco ASA Series Command Reference, I through R Commands
Chapter
pim accept-registerTo configure the ASA to filter PIM register messages, use the pim accept-register command in global configuration mode. To remove the filtering, use the no form of this command.
pim accept-register {list acl | route-map map-name}
no pim accept-register
Syntax Description
Defaults No default behavior or values.
Command Modes The following table shows the modes in which you can enter the command:
Command History
Usage Guidelines This command is used to prevent unauthorized sources from registering with the RP. If an unauthorized source sends a register message to the RP, the ASA will immediately send back a register-stop message.
Examples The following example restricts PIM register messages to those from sources defined in the access list named “no-ssm-range”:
ciscoasa(config)# pim accept-register list no-ssm-range
Related Commands
list acl Specifies an access list name or number. Use only extended host ACLs with this command.
route-map map-name Specifies a route-map name. Use extended host ACLs in the referenced route-map.
Command Mode
Firewall Mode Security Context
RoutedTransparent Single
Multiple
Context System
Global configuration • Yes — • Yes — —
Release Modification
7.0(1) This command was added.
Command Description
multicast-routing Enables multicast routing on the ASA.
15-99Cisco ASA Series Command Reference, I through R Commands
Chapter
pim bidir-neighbor-filterTo control which bidir-capable neighbors can participate in the DF election, use the pim bidir-neighbor-filter command in interface configuration mode. To remove the filtering, use the no form of this command.
pim bidir-neighbor-filter acl
no pim bidir-neighbor-filter acl
Syntax Description
Defaults All routers are considered to be bidir capable.
Command Modes The following table shows the modes in which you can enter the command:
Command History
Usage Guidelines Bidirectional PIM allows multicast routers to keep reduced state information. All of the multicast routers in a segment must be bidirectionally enabled for bidir to elect a DF.
The pim bidir-neighbor-filter command enables the transition from a sparse-mode-only network to a bidir network by letting you specify the routers that should participate in DF election while still allowing all routers to participate in the sparse-mode domain. The bidir-enabled routers can elect a DF from among themselves, even when there are non-bidir routers on the segment. Multicast boundaries on the non-bidir routers prevent PIM messages and data from the bidir groups from leaking in or out of the bidir subset cloud.
When the pim bidir-neighbor-filter command is enabled, the routers that are permitted by the ACL are considered to be bidir-capable. Therefore:
• If a permitted neighbor does not support bidir, the DF election does not occur.
• If a denied neighbor supports bidir, then DF election does not occur.
• If a denied neighbor does not support bidir, the DF election can occur.
acl Specifies an access list name or number. The access list defines the neighbors that can participate in bidir DF elections. Use only standard ACLs with this command; extended ACLs are not supported.
Command Mode
Firewall Mode Security Context
RoutedTransparent Single
Multiple
Context System
Interface configuration • Yes — • Yes — —
Release Modification
7.2(1) This command was added.
15-100Cisco ASA Series Command Reference, I through R Commands
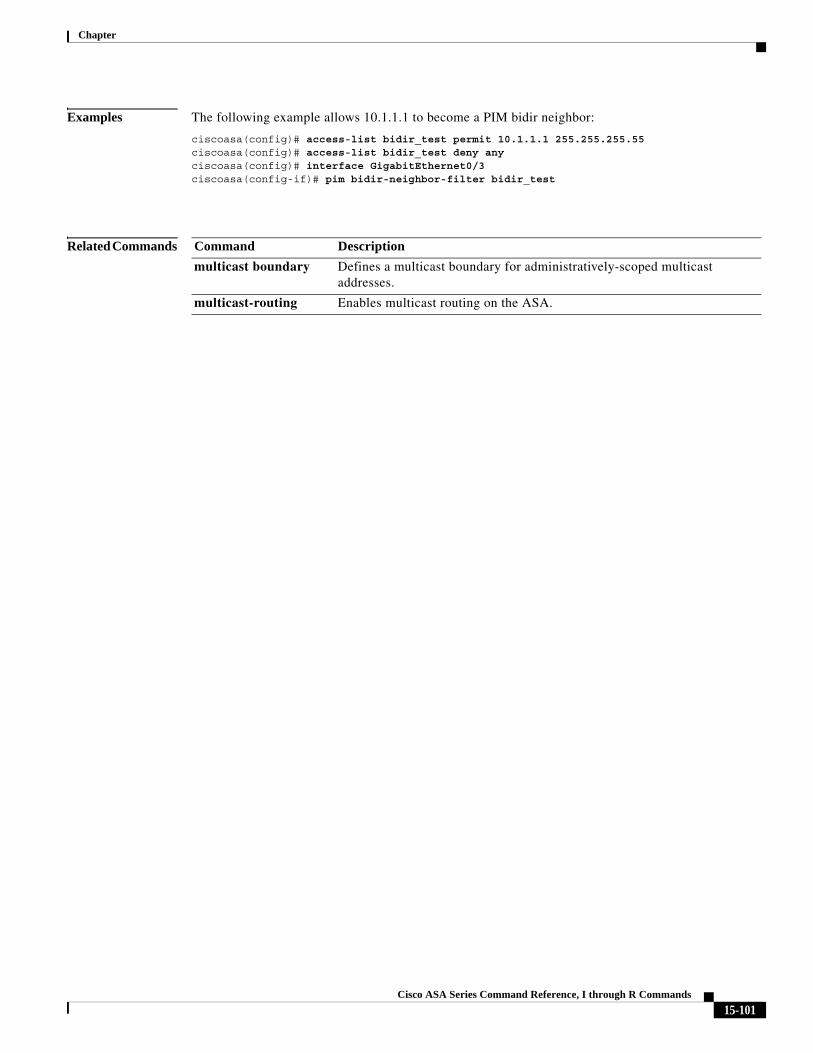
Chapter
Examples The following example allows 10.1.1.1 to become a PIM bidir neighbor:
ciscoasa(config)# access-list bidir_test permit 10.1.1.1 255.255.255.55ciscoasa(config)# access-list bidir_test deny anyciscoasa(config)# interface GigabitEthernet0/3ciscoasa(config-if)# pim bidir-neighbor-filter bidir_test
Related Commands Command Description
multicast boundary Defines a multicast boundary for administratively-scoped multicast addresses.
multicast-routing Enables multicast routing on the ASA.
15-101Cisco ASA Series Command Reference, I through R Commands
Chapter
pim bsr-borderTo prevent bootstrap router (BSR) messages from being sent or received through an interface, use the pim bsr-border command in interface configuration mode.
Note A border interface in a PIM sparse mode (PIM-SM) domain requires special precautions to avoid exchange of certain traffic with a neighboring domain reachable through that interface, especially if that domain is also running PIM-SM.
pim bsr-border
no pim bsr-border
Syntax Description This command has no arguments or keywords.
Defaults The command is disabled by default.
Command Modes The following table shows the modes in which you can enter the command:
Command History
Usage Guidelines When this command is configured on an interface, no PIM Version 2 BSR messages will be sent or received through the interface. Configure an interface bordering another PIM domain with this command to avoid BSR messages from being exchanged between the two domains. BSR messages should not be exchanged between different domains, because routers in one domain may elect rendezvous points (RPs) in the other domain, resulting in protocol malfunction or loss of isolation between the domains.
Note This command does not set up multicast boundaries. It only sets up a PIM domain BSR message border.
Examples The following example configures the interface to be PIM domain border:
ciscoasa(config)# interface gigabit 0/0ciscoasa(config-if)# pim bsr-borderciscoasa(config)# show runn interface gigabitEthernet 0/0!
Command Mode
Firewall Mode Security Context
RoutedTransparent Single
Multiple
Context System
Interface configuration • Yes — • Yes — —
Release Modification
9.5(2) This command was added.
15-102Cisco ASA Series Command Reference, I through R Commands

Chapter
interface GigabitEthernet0/0 nameif outsideA security-level 0 ip address 2.2.2.2 255.255.255.0 pim bsr-border
Related Commands Command Description
multicast-routing Enables multicast routing on the ASA.
pim bsr-candidate Configures ASA as candidate BSR
15-103Cisco ASA Series Command Reference, I through R Commands
Chapter
pim bsr-candidateTo configure the router to announce its candidacy as a bootstrap router (BSR), use the pim bsr-candidate command in global configuration mode. To remove this router as a candidate for being a bootstrap router, use the no form of this command.
pim bsr-candidate interface-name [hash-mask-length [priority]]
no pim bsr-candidate
Syntax Description
Defaults The command is disabled by default.
When a device is configured as a bsr-candidate without hash-length and priority, it assumes a default hash length of 0 and priority as 0.
Command Modes The following table shows the modes in which you can enter the command:
Command History
interface-name Interface name on this router from which the BSR address is derived. This address is sent in BSR messages.
hash-mask-length (Optional) Length of a mask (32 bits maximum) that is to be ANDed with the group address before the PIMv2 hash function is called. All groups with the same seed hash correspond to the same rendezvous point (RP).
For example, if this value is 24, only the first 24 bits of the group addresses matter. The hash mask length allows one RP to be used for multiple groups.
The default hash mask length is 0.
priority (Optional) Priority of the candidate BSR (C-BSR). The range is from 0 to 255. The C-BSR with the highest priority value is preferred. If the priority values are the same, the router with the larger IP address is the BSR.
The default priority is 0.
Command Mode
Firewall Mode Security Context
RoutedTransparent Single
Multiple
Context System
Global configuration • Yes — • Yes — —
Release Modification
9.5(2) This command was added.
15-104Cisco ASA Series Command Reference, I through R Commands

Chapter
Usage Guidelines This command causes the ASA to send bootstrap messages to all its PIM neighbors, with the address of the designated interface as the BSR address. Each neighbor compares the BSR address with the address it had from previous bootstrap messages (not necessarily received on the same interface). If the current address is the same or higher address, it caches the current address and forwards the bootstrap message. Otherwise, it drops the bootstrap message.
This ASA continues to be the BSR until it receives a bootstrap message from another candidate BSR saying that it has a higher priority (or if the same priority, a higher IP address).
Examples The following example configures the ASA as a candidate boot strap router (C-BSR) on the inside interface, with a hash length of 30 and a priority of 10:
ciscoasa(config)# pim bsr-candidate inside 30 10ciscoasa(config)# sh runn pimpim bsr-candidate inside 30 10
Related Commands Command Description
multicast-routing Enables multicast routing on the ASA.
pim bsr-border Configures ASA as border BSR
15-105Cisco ASA Series Command Reference, I through R Commands

Chapter
pim dr-priorityTo configure the neighbor priority on the ASA used for designated router election, use the pim dr-priority command in interface configuration mode. To restore the default priority, use the no form of this command.
pim dr-priority number
no pim dr-priority
Syntax Description
Defaults The default value is 1.
Command Modes The following table shows the modes in which you can enter the command:
Command History
Usage Guidelines The device with the largest priority value on an interface becomes the PIM designated router. If multiple devices have the same designated router priority, then the device with the highest IP address becomes the DR. If a device does not include the DR-Priority Option in hello messages, it is regarded as the highest-priority device and becomes the designated router. If multiple devices do not include this option in their hello messages, then the device with the highest IP address becomes the designated router.
Examples The following example sets the DR priority for the interface to 5:
ciscoasa(config-if)# pim dr-priority 5
Related Commands
number A number from 0 to 4294967294. This number is used to determine the priority of the device when determining the designated router. Specifying 0 prevents the ASA from becoming the designated router.
Command Mode
Firewall Mode Security Context
RoutedTransparent Single
Multiple
Context System
Interface configuration • Yes — • Yes — —
Release Modification
7.0(1) This command was added.
Command Description
multicast-routing Enables multicast routing on the ASA.
15-106Cisco ASA Series Command Reference, I through R Commands
Chapter
pim hello-intervalTo configure the frequency of the PIM hello messages, use the pim hello-interval command in interface configuration mode. To restore the hello-interval to the default value, use the no form of this command.
pim hello-interval seconds
no pim hello-interval [seconds]
Syntax Description
Defaults The interval default is 30 seconds.
Command Modes The following table shows the modes in which you can enter the command:
Command History
Examples The following example sets the PIM hello interval to 1 minute:
ciscoasa(config-if)# pim hello-interval 60
Related Commands
seconds The number of seconds that the ASA waits before sending a hello message. Valid values range from 1 to 3600 seconds. The default value is 30 seconds.
Command Mode
Firewall Mode Security Context
RoutedTransparent Single
Multiple
Context System
Interface configuration • Yes — • Yes — —
Release Modification
7.0(1) This command was added.
Command Description
multicast-routing Enables multicast routing on the ASA.
15-107Cisco ASA Series Command Reference, I through R Commands

Chapter
pim join-prune-intervalTo configure the PIM join/prune interval, use the pim join-prune-interval command in interface configuration mode. To restore the interval to the default value, use the no form of this command.
pim join-prune-interval seconds
no pim join-prune-interval [seconds]
Syntax Description
Defaults The default interval is 60 seconds
Command Modes The following table shows the modes in which you can enter the command:
Command History
Examples The following example sets the PIM join/prune interval to 2 minutes:
ciscoasa(config-if)# pim join-prune-interval 120
Related Commands
seconds The number of seconds that the ASA waits before sending a join/prune message. Valid values range from 10 to 600 seconds. 60 seconds is the default.
Command Mode
Firewall Mode Security Context
RoutedTransparent Single
Multiple
Context System
Interface configuration • Yes — • Yes — —
Release Modification
7.0(1) This command was added.
Command Description
multicast-routing Enables multicast routing on the ASA.
15-108Cisco ASA Series Command Reference, I through R Commands

Chapter
pim neighbor-filterTo control which neighbor routers can participate in PIM, use the pim neighbor-filter command in interface configuration mode. To remove the filtering, use the no form of this command.
pim neighbor-filter acl
no pim neighbor-filter acl
Syntax Description
Defaults No default behavior or values.
Command Modes The following table shows the modes in which you can enter the command:
Command History
Usage Guidelines This command defines which neighbor routers can participate in PIM. If this command is not present in the configuration then there are no restrictions.
Multicast routing and PIM must be enabled for this command to appear in the configuration. If you disable multicast routing, this command is removed from the configuration.
Examples The following example allows the router with the IP address 10.1.1.1 to become a PIM neighbor on interface GigabitEthernet 0/2:
ciscoasa(config)# access-list pim_filter permit 10.1.1.1 255.255.255.55ciscoasa(config)# access-list pim_filter deny anyciscoasa(config)# interface gigabitEthernet0/2ciscoasa(config-if)# pim neighbor-filter pim_filter
acl Specifies an access list name or number. Use only standard ACLs with this command; extended ACLs are not supported.
Command Mode
Firewall Mode Security Context
RoutedTransparent Single
Multiple
Context System
Interface configuration • Yes — • Yes — —
Release Modification
7.2(1) This command was added.
15-109Cisco ASA Series Command Reference, I through R Commands
Chapter
Related Commands Command Description
multicast-routing Enables multicast routing on the ASA.
15-110Cisco ASA Series Command Reference, I through R Commands
Chapter
pim old-register-checksumTo allow backward compatibility on a rendezvous point (RP) that uses old register checksum methodology, use the pim old-register-checksum command in global configuration mode. To generate PIM RFC-compliant registers, use the no form of this command.
pim old-register-checksum
no pim old-register-checksum
Syntax Description This command has no arguments or keywords.
Defaults The ASA generates PIM RFC-compliant registers.
Command Modes The following table shows the modes in which you can enter the command:
Command History
Usage Guidelines The ASA software accepts register messages with checksum on the PIM header and only the next 4 bytes rather than using the Cisco IOS method—accepting register messages with the entire PIM message for all PIM message types. The pim old-register-checksum command generates registers compatible with Cisco IOS software.
Examples The following example configures the ASA to use the old checksum calculations:
ciscoasa(config)# pim old-register-checksum
Related Commands
Command Mode
Firewall Mode Security Context
RoutedTransparent Single
Multiple
Context System
Global configuration • Yes — • Yes — —
Release Modification
7.0(1) This command was added.
Command Description
multicast-routing Enables multicast routing on the ASA.
15-111Cisco ASA Series Command Reference, I through R Commands
Chapter
pim rp-addressTo configure the address of a PIM rendezvous point (RP), use the pim rp-address command in global configuration mode. To remove an RP address, use the no form of this command.
pim rp-address ip_address [acl] [bidir]
no pim rp-address ip_address
Syntax Description
Defaults No PIM RP addresses are configured.
Command Modes The following table shows the modes in which you can enter the command:
Command History
Usage Guidelines All routers within a common PIM sparse mode (PIM-SM) or bidir domain require knowledge of the well-known PIM RP address. The address is statically configured using this command.
Note The ASA does not support Auto-RP; you must use the pim rp-address command to specify the RP address.
You can configure a single RP to serve more than one group. The group range specified in the access list determines the PIM RP group mapping. If the an access list is not specified, the RP for the group is applied to the entire IP multicast group range (224.0.0.0/4).
acl (Optional) The name or number of a standard access list that defines which multicast groups the RP should be used with. Do not use a host ACL with this command.
bidir (Optional) Indicates that the specified multicast groups are to operate in bidirectional mode. If the command is configured without this option, the specified groups operate in PIM sparse mode.
ip_address IP address of a router to be a PIM RP. This is a unicast IP address in four-part dotted-decimal notation.
Command Mode
Firewall Mode Security Context
RoutedTransparent Single
Multiple
Context System
Global configuration • Yes — • Yes — —
Release Modification
7.0(1) This command was added.
15-112Cisco ASA Series Command Reference, I through R Commands
Chapter
Note The ASA always advertises the bidir capability in the PIM hello messages regardless of the actual bidir configuration.
Examples The following example sets the PIM RP address to 10.0.0.1 for all multicast groups:
ciscoasa(config)# pim rp-address 10.0.0.1
Related Commands Command Description
pim accept-register Configures candidate RPs to filter PIM register messages.
15-113Cisco ASA Series Command Reference, I through R Commands

Chapter
pim spt-threshold infinityTo change the behavior of the last hop router to always use the shared tree and never perform a shortest-path tree (SPT) switchover, use the pim spt-threshold infinity command in global configuration mode. To restore the default value, use the no form of this command.
pim spt-threshold infinity [group-list acl]
no pim spt-threshold
Syntax Description
Defaults The last hop PIM router switches to the shortest-path source tree by default.
Command Modes The following table shows the modes in which you can enter the command:
Command History
Usage Guidelines If the group-list keyword is not used, this command applies to all multicast groups.
Examples The following example causes the last hop PIM router to always use the shared tree instead of switching to the shortest-path source tree:
ciscoasa(config)# pim spt-threshold infinity
Related Commands
group-list acl (Optional) Indicates the source groups restricted by the access list. The acl argument must specify a standard ACL; extended ACLs are not supported.
Command Mode
Firewall Mode Security Context
RoutedTransparent Single
Multiple
Context System
Global configuration • Yes — • Yes — —
Release Modification
7.0(1) This command was added.
Command Description
multicast-routing Enables multicast routing on the ASA.
15-114Cisco ASA Series Command Reference, I through R Commands
Chapter
pingTo test connectivity from a specified interface to an IP address, use the ping command in privileged EXEC mode. The parameters available differ for regular ICMP-based ping compared to TCP ping. Enter the command without parameters to be prompted for values, including characteristics not available as parameters.
ping [if_name] host [repeat count] [timeout seconds] [data pattern] [size bytes] [validate]
ping tcp [if_name] host port [repeat count] [timeout seconds] [source host port]
ping
Note The source and port options are only available with the tcp option; the data, size, and validate options are not available with the tcp option.
Syntax Description
Defaults No default behavior or values.
data pattern (Optional, ICMP only.) Specifies the 16-bit data pattern in hexadecimal format, from 0 to FFFF. The default is 0xabcd.
host Specifies the IPv4 address or name of the host to ping. For ICMP pings, you can specify an IPv6 address (which is not supported for TCP pings).
When using host names, the name can be a DNS name or a name assigned with the name command. The maximum number of characters for DNS names is 128, and the maximum number of characters for names created with the name command is 63. You must configure a DNS server to use DNS names.
if_name (Optional) For ICMP, this is the interface name, as configured by the nameif command, by which the host is accessible. If not supplied, then the host is resolved to an IP address and the routing table is consulted to determine the destination interface. For TCP, this is the input interface through which the source sends SYN packets.
port (TCP only.) Specifies the TCP port number for the host you are pinging, 1-65535.
repeat count (Optional) Specifies the number of times to repeat the ping request. The default is 5.
size bytes (Optional, ICMP only.) Specifies the datagram size in bytes. The default is 100.
source host port (Optional, TCP only.) Specifies a certain IP address and port to send the ping from (Use port = 0 for a random port).
tcp (Optional) Tests a connection over TCP (the default is ICMP). A TCP ping sends SYN packets and considers the ping successful if the destination sends a SYN-ACK packet. You can also have at most 2 concurrent TCP pings running at a time.
timeout seconds (Optional) Specifies the number of seconds of the timeout interval. The default is 2 seconds.
validate (Optional, ICMP only.) Validates reply data.
15-115Cisco ASA Series Command Reference, I through R Commands

Chapter
Command Modes The following table shows the modes in which you can enter the command:
Command History
Usage Guidelines The ping command allows you to determine if the ASA has connectivity or if a host is available on the network.
When using regular ICMP-based ping, ensure that you do not have icmp rules that prohibit these packets (if you do not use ICMP rules, all ICMP traffic is allowed). If you want internal hosts to ping external hosts over ICMP, you must do one of the following:
• Create an ICMP access-list command for an echo reply; for example, to give ping access to all hosts, use the access-list acl_grp permit icmp any any command and bind the access-list command to the interface that you want to test using the access-group command.
• Configure the ICMP inspection engine using the inspect icmp command. For example, adding the inspect icmp command to the class default_inspection class for the global service policy allows echo replies through the ASA for echo requests initiated by internal hosts.
When using TCP ping, you must ensure that access policies allow TCP traffic on the ports you specify.
This configuration is required to allow the ASA to respond and accept messages generated from the ping command. The ping command output shows if the response was received. If a host is not responding after you enter the ping command, a message similar to the following appears:
ciscoasa(config)# ping 10.1.1.1 Sending 5, 100-byte ICMP Echos to 10.1.1.1, timeout is 2 seconds:?????Success rate is 0 percent (0/5)
Use the show interface command to ensure that the ASA is connected to the network and is passing traffic. The address of the specified if_name is used as the source address of the ping.
You can also perform an extended ping by entering ping without parameters. You are prompted for the parameters, including some characteristics not available as keywords.
Examples The following example shows how to determine if other IP addresses are visible from the ASA:
ciscoasa# ping 171.69.38.1Sending 5, 100-byte ICMP Echos to 171.69.38.1, timeout is 2 seconds:!!!!!Success rate is 100 percent (5/5), round-trip min/avg/max = 1/2/10 ms
Command Mode
Firewall Mode Security Context
RoutedTransparent Single
Multiple
Context System
Privileged EXEC • Yes • Yes • Yes • Yes • Yes
Release Modification
7.0(1) This command was added.
7.2(1) Support for DNS names was added.
8.4(1) The tcp option was added.
15-116Cisco ASA Series Command Reference, I through R Commands

Chapter
The following example specifies a host using a DNS name:
ciscoasa# ping www.example.comSending 5, 100-byte ICMP Echos to www.example.com, timeout is 2 seconds:!!!!!Success rate is 100 percent (5/5), round-trip min/avg/max = 1/2/10 ms
The following is an example of an extended ping:
ciscoasa# pingTCP [n]: Interface: outsideTarget IP address: 171.69.38.1Repeat count: [5]Datagram size: [100]Timeout in seconds: [2]Extended commands [n]:Sweep range of sizes [n]:Sending 5, 100-byte ICMP Echos to 171.69.38.1, timeout is 2 seconds:!!!!!Success rate is 100 percent (5/5), round-trip min/avg/max = 1/2/10 ms
The following are examples of the ping tcp command:ciscoasa# pingTCP [n]: yesInterface: dmzTarget IP address: 10.0.0.1Target IP port: 21Specify source? [n]: ySource IP address: 192.168.2.7 Source IP port: [0] 465 Repeat count: [5]Timeout in seconds: [2] 5 Type escape sequence to abort.Sending 5 TCP SYN requests to 10.0.0.1 port 21from 192.168.2.7 starting port 465, timeout is 5 seconds:!!!!!Success rate is 100 percent (5/5), round-trip min/avg/max = 1/1/1 ms
ciscoasa# ping tcp 10.0.0.1 21Type escape sequence to abort.No source specified. Pinging from identity interface.Sending 5 TCP SYN requests to 10.0.0.1 port 21 from 10.0.0.10, timeout is 2 seconds:!!!!!Success rate is 100 percent (5/5), round-trip min/avg/max = 1/1/1 ms
ciscoasa# ping tcp 10.0.0.1 21 source 192.168.1.1 2002 repeat 10Type escape sequence to abort.Sending 10 TCP SYN requests to 10.0.0.1 port 21from 192.168.1.1 starting port 2002, timeout is 2 seconds:!!!!!!!!!!Success rate is 100 percent (10/10), round-trip min/avg/max = 1/2/2 ms
ciscoasa(config)# ping tcp www.example.com 80Type escape sequence to abort.No source specified. Pinging from identity interface.Sending 5 TCP SYN requests to 74.125.19.103 port 80 from 171.63.230.107, timeout is 2 seconds:!!!!!Success rate is 100 percent (5/5), round-trip min/avg/max = 3/4/4 ms
ciscoasa# ping tcp 192.168.1.7 23 source 192.168.2.7 24966
15-117Cisco ASA Series Command Reference, I through R Commands
Chapter
Type escape sequence to abort.Source port 24966 in use! Using port 24967 instead.Sending 5 TCP SYN requests to 192.168.1.7 port 23from 192.168.2.7 starting port 24967, timeout is 2 seconds:!!!!!Success rate is 100 percent (5/5), round-trip min/avg/max = 1/1/1 ms
Related Commands Command Description
icmp Configures access rules for ICMP traffic that terminates at an interface.
show interface Displays information about the VLAN configuration.
15-118Cisco ASA Series Command Reference, I through R Commands