partner gateway install the velocloud - vmware · 1 create vcg on vco and make a note of the...
TRANSCRIPT

Install the VeloCloud Partner Gateway
VMware SD-WAN by VeloCloud 3.3

You can find the most up-to-date technical documentation on the VMware website at:
https://docs.vmware.com/
If you have comments about this documentation, submit your feedback to
VMware, Inc.3401 Hillview Ave.Palo Alto, CA 94304www.vmware.com
Copyright © 2020 VMware, Inc. All rights reserved. Copyright and trademark information.
Install the VeloCloud Partner Gateway
VMware, Inc. 2

Contents
1 Install the VeloCloud Partner Gateway 4Installation Overview 4
Hypervisor Minimum Hardware Requirements 5
VeloCloud Gateway Installation Procedures 6
Pre-Installation Considerations 7
Install VeloCloud Gateway 16
Post-Installation Tasks 26
Upgrade VeloCloud Gateway 30
Custom Configurations 30
NTP Configuration 30
Userdata 31
OAM Interface and Static Routes 32
OAM - SR-IOV with vmxnet3 or SR-IOV with VIRTIO 34
Special Consideration When Using 802.1ad Encapsulation 36
SNMP Integration 37
Custom Firewall Rules 38
Enable SR-IOV 38
Enable SR-IOV on VMware (Optional) 39
Enable SR-IOV on KVM 40
VMware, Inc. 3

Install the VeloCloud Partner Gateway 1This document describes the steps needed to install and deploy VeloCloud Gateway (VCG) as a Partner Gateway. It also covers how to configure the VRF/VLAN and BGP configuration necessary on the VeloCloud Orchestrator (VCO).
This chapter includes the following topics:
n Installation Overview
n Hypervisor Minimum Hardware Requirements
n VeloCloud Gateway Installation Procedures
n Post-Installation Tasks
n Upgrade VeloCloud Gateway
n Custom Configurations
n SNMP Integration
n Custom Firewall Rules
n Enable SR-IOV
Installation OverviewThis section provides an overview of VeloCloud Partner Gateway installation.
About Partner GatewaysPartner Gateways are Gateways tailored to an on-premise operation in which the Gateway is installed and deployed with two interfaces.
n One interface is facing the private and/or public WAN network and is dedicated to receiving VCMP encapsulated traffic from the remote edges, as well as standard IPsec traffic from non-VeloCloud sites.
n Another interface is facing the datacenter and provides access to resources or networks attached to a PE router, which the Partner Gateway is connected to. The PE router typically affords access to shared managed services that are extended to the branches, or access to a private (MPLS / IP-VPN) core network in which individual customers are segregated.
VMware, Inc. 4

What's Provided?The following distributions are provided:
Provided Description Example
VMware Gateway OVA package. velocloud-vcg-2.4.0-R24-20170428-GA.ova
KVM Gateway qcow2 disk image. velocloud-vcg-2.4.0-R24-20170428-GA.qcow2
Hypervisor Minimum Hardware RequirementsThe VeloCloud Gateway runs on a standard hypervisor (KVM or VMware ESXi).
Minimum Server RequirementsTo run the hypervisor:
n 10 Intel CPU's at 2.0 Ghz or higher. The CPU must support the AES-NI, SSSE3, SSE4 and RDTSC instruction sets.
n 20+ GB (16 GB is required for VC Gateway VM memory)
n 100 GB magnetic or SSD based, persistent disk volume
n 2 x 1 Gbps (or higher) network interface. The physical NIC card should use the Intel 82599/82599ES chipset (for SR-IOV & DPDK support).
Reference Hardware Specifications:
Hardware Specification
HP DL380G9 http://www.hp.com/hpinfo/newsroom/press_kits/2014/ComputeEra/HP_ProLiantDL380_DataSheet.pdf
NIC card with 82599/82599ES chipset https://www.hpe.com/h20195/v2/GetPDF.aspx/c04111506.pdf
Supported Hypervisor Versions
Hypervisor Supported Versions
VMware ESXi 5.5U3 or later. In order to use SR-IOV, the vCenter and the vSphere Enterprise Plus license are required.
KVM Ubuntu 14.04 LTS and 16.04 LTS
VCG Virtual Hardware SpecificationFor VMware, the OVA already specifies the minimum virtual hardware specification. For KVM, an example XML file will be provided. The minimum virtual hardware specifications are:
n 8 vCPUs
n 8 GB of memory
Install the VeloCloud Partner Gateway
VMware, Inc. 5

n Minimum of 2 vNICs:
n One vNIC is the public (outside) interface, which must be an untagged interface.
n One vNIC is the private (inside) interface that must be tagged. This is the interface facing the PE router or L3 switch.
n Optional vNIC (if a separate management/OAM interface is required)
n 32 GB of virtual disk
Firewall/NAT Requirements
Note These requirements apply if the VeloCloud Gateway is deployed behind a Firewall and/or NAT device.
n The firewall needs to allow outbound traffic from the VeloCloud Gateway to TCP/443 (for communication with VeloCloud Orchestrator).
n The firewall needs to allow inbound traffic from the Internet to UDP/2426 (VCMP), UDP/4500, and UDP/500. If NAT is not used, then the firewall needs to also allow IP/50 (ESP).
n If NAT is used, the above ports must be translated to an externally reachable IP address. Both the 1:1 NAT and port translations are supported.
Git Repository with Templates and SamplesThe following Git repository contains templates and samples.
git clone https://bitbucket.org/velocloud/deployment.git
VeloCloud Gateway Installation ProceduresThis section describes the VeloCloud Gateway installation procedures.
In general, installing the VCG involves the following steps:
1 Create VCG on VCO and make a note of the activation key.
2 Configure VCG on VCO.
3 Create the cloud-init file.
4 Create the VM in VMware or KVM.
5 Boot the VCG VM and ensure the VCG cloud-init initializes properly. At this stage, the VCG should already activate itself against the VCO.
6 Verify connectivity and disable cloud-init.
Important VCG supports both the virtual switch and SR-IOV. This guide specifies the SR-IOV as an optional configuration step. If SR-IOV is used, DPDK must be enabled for the partner handoff to work.
Install the VeloCloud Partner Gateway
VMware, Inc. 6

Pre-Installation ConsiderationsThe VeloCloud Partner Gateway provides different configuration options. The worksheet below should be prepared before the installation of the Gateway.
This section explains this worksheet.
Worksheet
VCG
Version
OVA/QCOW2 file location
Activation Key
VCO (IP ADDRESS/vco-fqdn-hostname)
Hostname
Hypervisor address/cluster name
Storage
Root volume datastore (>40GB recommended)
CPU Allocation
CPU Allocation for KVM/VMware.
Installation Selections
DPDK (YES/NO)
OAM Network ( Optional See Custom Configurations)
DHCP?
OAM IPv4 Address
OAM IPv4 Netmask
DNS server - primary
DNS server - secondary
Static Routes
Install the VeloCloud Partner Gateway
VMware, Inc. 7

ETH0 – Internet Facing Network
IPv4 Address
IPv4 Netmask
IPv4 Default gateway
DNS server - primary
DNS server - secondary
Handoff (ETH1) - Network
MGMT VRF IPv4 Address
MGMT VRF IPv4 Netmask
MGMT VRF IPv4 Default gateway
DNS server - primary
DNS server - secondary
Handoff ( QinQ (0x8100), QinQ (0x9100), none, 802.1Q, 802.1ad)
C-TAG
S-TAG
Console access
Console_Password
SSH
Enabled (yes/no)
SSH public key
NTP ( Optional see Custom Configuration Section)
Public NTP serve 0.ubuntu.pool.ntp.org
server 1.ubuntu.pool.ntp.org
server 2.ubuntu.pool.ntp.org
server 3.ubuntu.pool.ntp.org
Internal NTP server - 1
Internal NTP server - 2
Install the VeloCloud Partner Gateway
VMware, Inc. 8

VCG SectionMost of the VCG section is self-explanatory.
VCG
Version Should be same or lower than VCO
OVA/QCOW2 file location Plan ahead the file location and disk allocation
Activation Key Instructions below
VCO (IP ADDRESS/vco-fqdn-hostname)
Hostname Valid Linux Hostname “RFC 1123”
Creating a Gateway and Getting the Activation Key1 Go to Operator > Gateway Pool and create a new VeloCloud Gateway pool. For running VeloCloud
Gateway in the Service Provider network, check the Allow Partner Gateway checkbox. This will enable the option to include the partner gateway in this gateway pool.
2 Go to Operator > Gateway and create a new gateway and assign it to the pool. The IP address of the gateway entered here must match the public IP address of the gateway. If unsure, you can run curl ipinfo.io/ip from the VCG which will return the public IP of the VCG.
Install the VeloCloud Partner Gateway
VMware, Inc. 9

3 Make a note of the activation key and add it to the worksheet.
Enable Partner Gateway Mode1 Go to Operator > Gateways and select the VeloCloud Gateway. Check the Partner Gateway
checkbox to enable the Partner Gateway.
There are additional parameters that can be configured. The most common are the following:
Advertise 0.0.0.0/0 with no encrypt
Install the VeloCloud Partner Gateway
VMware, Inc. 10

This option will enable the Partner Gateway to advertise a path to Cloud traffic for the SAAS Application. Since the Encrypt Flag is off, it will be up to the customer configuration on the business policy to use this path or not.
The second recommend option is to advertise the VCO IP as a /32 with encrypt
This will force the traffic that is sent from the Edge to the VCO to take the Gateway Path. This is recommended since it introduces predictability to the behavior that the VCE takes to reach the VCO.
Installation Selection
Installation Selections
DPDK (YES/NO)
DPDK is optional but necessary for higher throughput. To Enable DPDK, you need to have SR-IOV support. Before starting your installation, decide if you are planning to enable DPDK.
Networking
Important The following procedure and screenshots focus on the most common deployment, which is the 2-ARM installation for the Gateway. The addition of an OAM network is considered in the section titled, OAM Interface and Static Routes.
Install the VeloCloud Partner Gateway
VMware, Inc. 11

The diagram above is a representation of the VeloCloud Gateway in a 2-ARM deployment. In this example, we assume eth0 is the interface facing the public network (Internet) and eth1 is the interface facing the internal network (handoff or VRF interface).
Note A Management VRF is created on the VCG and is used to send a periodic ARP refresh to the default gateway IP to check that the handoff interface is physically up and speed ups the failover time. It is recommended that a dedicated VRF is set up on the PE router for this purpose. Optionally, the same management VRF can also be used by the PE router to send an IP SLA probe to the VCG to check for VCG status (VCG has a stateful ICMP responder that will respond to ping only when its service is up).If a dedicated Management VRF is not set up, then you can use one of the customer VRFs as a Management VRF, although this is not recommended.
For the Internet Facing network, you only need the basic network configuration.
ETH0 – Internet Facing Network
IPv4_Address
IPv4_Netmask
IPv4_Default_gateway
DNS_server_primary
DNS_server_secondary
For the Handoff interface, you must know which type of handoff you want to configure and the Handoff configuration for the Management VRF.
Install the VeloCloud Partner Gateway
VMware, Inc. 12

ETH1 – HANDOFF Network
MGMT_IPv4_Address
MGMT_IPv4_Netmask
MGMT_IPv4_Default gateway
DNS_Server_Primary
DNS_Server_Secondary
Handoff (QinQ (0x8100), QinQ (0x9100), none, 802.1Q, 802.1ad)
C_TAG_FOR_MGMT_VRF
S_TAG_FOR_MGMT_VFR
Console Access
Console access
Console_Password
SSH Enabled (yes/no)
SSH public key
In order to access the Gateway, a console password and/or a SSH public key must be created.
Cloud-Init CreationThe configuration options for the gateway that we defined in the worksheet are used in the cloud-init configuration. The cloud-init config is composed of two main configuration files, the metadata file and the user-data file. The meta-data contains the network configuration for the Gateway, and the user-data contains the Gateway Software configuration. This file provides information that identifies the instance of the VeloCloud Gateway being installed.
Below are the templates for both Meta_data and User_data files.
Install the VeloCloud Partner Gateway
VMware, Inc. 13

Fill the templates with the information in the worksheet. All #_VARIABLE_# need to be replaced, also check any #ACTION#
Important The template assumes you are using static configuration for the interfaces. It also assumes that you are either using SR-IOV for all interfaces or none. See section titled, OAM - SR-IOV with vmxnet3 or SR-IOV with VIRTIO for this. The templates are also available in the git repository at: git clone https://bitbucket.org/velocloud/deployment.git It is recommended that you get the templates from repository instead of copying and pasting from this document. https://bitbucket.org/velocloud/deployment
meta-data (git ./vcg/samples/VCG_2ARM/meta-data)
instance-id: #_Hostname_#
local-hostname: #_Hostname_#
network-interfaces: |
auto eth0
iface eth0 inet static
address #_IPv4_Address_#
netmask #_IPv4_Netmask_#
gateway #_IPv4_Gateway_#
dns-nameservers #_DNS_server_primary_# #_DNS_server_secondary_#
auto eth1
iface eth1 inet static
metric '13'
address #_MGMT_IPv4_Address_#
netmask #_MGMT_IPv4_Netmask_#
gateway #_MGMT_IPv4_Gateway_#
dns-nameservers #_DNS_server_primary_# #_DNS_server_secondary_#
user-data (Git /deployment/vcg/samples/VCG_2ARM/user-data)
#cloud-config
hostname: #_Hostname_#
password: #_Console_Password_#
chpasswd: {expire: False}
ssh_pwauth: True
ssh_authorized_keys:
- #_SSH_public_Key_#
Install the VeloCloud Partner Gateway
VMware, Inc. 14

runcmd:
- 'echo "[]" > /opt/vc/etc/vc_blocked_subnets.json'
- 'sed -iorig "s/wan=\".*/wan=\"eth0 eth1\"/" /etc/config/gatewayd-tunnel'
- '/var/lib/cloud/scripts/per-boot/config_gateway'
- 'sleep 10'
- '/opt/vc/bin/vc_procmon restart'
write_files:
- path: "/var/lib/cloud/scripts/per-boot/config_gateway"
permissions: "0755"
content: |
#!/usr/bin/python
import json
import commands
is_activated = commands.getoutput("/opt/vc/bin/is_activated.py")
if "True" in str(is_activated):
print "Gateway already activated"
exit
commands.getoutput("/opt/vc/bin/activate.py -s #_VCO_# -i #_Activation_Key_# ")
### EDIT GATEWAYD ###
with open("/etc/config/gatewayd", "r") as jsonFile:
data = json.load(jsonFile)
data["global"]["vcmp.interfaces"] = ["eth0"]
data["global"]["wan"] = ["eth1"]
# NOTE FOR HAND OFF IT CAN BE "QinQ (0x8100)" "QinQ (0x9100)" "none" "802.1Q" "802.1ad”
data["vrf_vlan"]["tag_info"][0]["mode"] = "#_Handoff_"
data["vrf_vlan"]["tag_info"][0]["interface"] = "eth1"
data["vrf_vlan"]["tag_info"][0]["c_tag"] = "#_C_TAG_FOR_MGMT_VRF_#"
data["vrf_vlan"]["tag_info"][0]["s_tag"] = "#_S_TAG_FOR_MGMT_VRF_"
with open("/etc/config/gatewayd", "w") as jsonFile:
jsonFile.write(json.dumps(data,sort_keys=True,indent=4, separators=(",", ": ")))
### EDIT DPDK ###
with open("/opt/vc/etc/dpdk.json", "r") as jsonFile:
Install the VeloCloud Partner Gateway
VMware, Inc. 15

data = json.load(jsonFile)
#SET 0 or 1 for enabled or DISABLED example data["dpdk_enabled"] = 0
data["dpdk_enabled"] = #_DKDP_ENABLED_(1)_OR_DISABLED_(0)_#
with open("/opt/vc/etc/dpdk.json", "w") as jsonFile:
jsonFile.write(json.dumps(data,sort_keys=True,indent=4, separators=(",", ": ")))
final_message: "==== Cloud-init completed ===="
power_state:
delay: "+1"
mode: reboot
message: Bye Bye
timeout: 30
condition: True
Important - Always validate user-data and metadata, using http://www.yamllint.com/ for example. - The metadata should also be a valid network configuration under the network-interface section, this section will be the /etc/network/interfaces once the cloud-init completes. - Sometimes when working with the Windows/Mac copy paste feature, there is a danger of introducing Smart Quotes which can corrupt the files. Run this to make sure you are smart quote free
sed s/[”“]/'"'/g /tmp/user-data > /tmp/user-data_new
Create ISO FileOnce you have completed your files, they need to be packaged into an ISO image. This ISO image is used as a virtual configuration CD with the virtual machine. This ISO image, called vcg01-cidata.iso, is created with the following command on a Linux system:
genisoimage -output vcg01-cidata.iso -volid cidata -joliet -rock user-data meta-data
If you are on a MAC OSX, use the command below instead:
mkisofs -output vcg01-cidata.iso -volid cidata -joliet -rock {user-data,meta-data}
This iso file which we will call #CLOUD_INIT_ISO_FILE# is going to be used in both OVA and VMware installations.
Install VeloCloud GatewayThis section describes how to install VeloCloud Gateway on VMware and KVM.
Install the VeloCloud Partner Gateway
VMware, Inc. 16

Install VeloCloud Gateway on VMwareThis section describes how to install the VCG OVA on VMware.
Important When you are done with the OVA installation, DO NOT start the VM until you have the cloud-init iso file and mount as CD-ROM to the VCG VM. Otherwise, you will need to re-deploy the VM again.
To install the VCG OVA on VMware:
1 Select the ESXi host, go to Actions, and then Deploy OVF Template. Select the VCG OVA file provided by VeloCloud and click Next.
Review the template details in Step 4 (Review details) of the Deploy OVA/OVF Template wizard as shown in the image below.
2 For the Select networks step, the OVA comes with two pre-defined networks (vNICs).
vNIC Description
Inside This is the vNIC facing the PE router and is used for handoff traffic to the MPLS PE or L3 switch. This vNIC is normally bound to a portgroup that does a VLAN pass-through (VLAN=4095 in vswitch configuration).
Outside This is the vNIC facing the Internet. This vNIC expects a non-tagged L2 frame and is normally bound to a different portgroup from the Inside vNIC.
Install the VeloCloud Partner Gateway
VMware, Inc. 17

3 For the Customize template step, do not change anything. This is when you use vApp to configure the VM. We will not use vApp in this example. Click Next to continue with deploying the OVA.
4 Once the VM is successfully deployed, return to the VM and click Edit Settings . Two vNICs are created with adapter type = vmxnet3.
5 (Optional for SR-IOV) This step is required only if you plan to use SR-IOV. Because the OVA by default creates the two vNICs as vmxnet3, we will need to remove the two vNICs and re-add them as SR-IOV.
Install the VeloCloud Partner Gateway
VMware, Inc. 18

When adding the two new SR-IOV vNICs, use the same portgroup as the original two vmxnet3 vNICs. Make sure the Adapter Type is SR-IOV passthrough. Select the correct physical port to use and set the Guest OS MTU Change to Allow. After you add the two vNICs, click OK.
6 Because VCG is a real-time application, you need to configure the Latency Sensitivity to High. For more information about how to configure the VM for real-time application, see https://www.vmware.com/content/dam/digitalmarketing/vmware/en/pdf/techpaper/latency-sensitive-perf-vsphere55-white-paper.pdf.
Install the VeloCloud Partner Gateway
VMware, Inc. 19

7 Refer to Cloud-init Creation. The Cloud-init file is packaged as a CD-ROM (iso) file. You need to mount this file as a CD-ROM.
Note You must upload this file to the datastore.
8 Start the VM.
Install VeloCloud Gateway on KVMThis section describes how to install the VCG qcow on KVM.
Pre-Installation Considerations
KVM provides multiple ways to provide networking to virtual machines. The networking in libvirt should be provisioned before the VM configuration. There are multiple ways to configure networking in KVM. For a full configuration of options on how to configure Networks on libvirt, please see the following link:
Install the VeloCloud Partner Gateway
VMware, Inc. 20

https://libvirt.org/formatnetwork.html
From the full list of options, the following are recommended by VeloCloud:
n SR-IOV (This mode is required for the VCG to deliver the maximum throughput specified by VeloCloud)
n OpenVSwitch Bridge
Validating SR-IOV (Optional)
If you decided to use SR-IOV, you can quickly verify if your host machine has it enabled.
You can verify this by typing:
lspci | grep -i Ethernet
Verify that you have Virtual Functions:
01:10.0 Ethernet controller: Intel Corporation 82599 Ethernet Controller Virtual Function
(rev 01)
To enable SR-IOV, please see Enable SR-IOV of this document.
Installation Steps
1 Copy the QCOW and the Cloud-init files created in the Cloud-Init Creation section to a new empty directory.
2 Create the Network pools that you are going to use for the device. Provided below is a sample of a pool using SR-IOV and a sample of a pool using OpenVswitch.
Using SR-IOV
git ./vcg/templates/KVM_NETWORKING_SAMPLES/template_outside_sriov.xml
<network>
<name>public_interface</name> <!--This is the network name-->
<forward mode='hostdev' managed='yes'>
<pf dev='eth1'/> <!--Use the netdev name of your SR-IOV devices PF here→ <address type='pci' domain='0x0000' bus='0x06' slot='0x12' function='0x6'/>
<address type='pci' domain='0x0000' bus='0x06' slot='0x13' function='0x0'/>
<address type='pci' domain='0x0000' bus='0x06' slot='0x13' function='0x2'/>
</forward>
</network>
Install the VeloCloud Partner Gateway
VMware, Inc. 21

Create a network for inside_interface.
git ./vcg/templates/KVM_NETWORKING_SAMPLES/template_inside_sriov.xml
<network>
<name>inside_interface</name> <!--This is the network name-->
<forward mode='hostdev' managed='yes'>
<pf dev='eth2'/> <!--Use the netdev name of your SR-IOV devices PF here→ <address type='pci' domain='0x0000' bus='0x06' slot='0x12' function='0x0'/>
<address type='pci' domain='0x0000' bus='0x06' slot='0x12' function='0x2'/>
<address type='pci' domain='0x0000' bus='0x06' slot='0x12' function='0x4'/>
</forward>
</network>
Using OpenVSwitch
git ./vcg/templates/KVM_NETWORKING_SAMPLES/template_outside_openvswitch.xml
<?xml version="1.0" encoding="UTF-8"?>
<network>
<name>public_interface</name>
<!--This is the network name-->
<model type="virtio" />
<forward mode="bridge" />
<bridge name="publicinterface" />
<virtualport type="openvswitch" />
<vlan trunk="yes">
<tag id="50" />
<!--Define all the VLANS for this Bridge -->
Install the VeloCloud Partner Gateway
VMware, Inc. 22

<tag id="51" />
<!--Define all the VLANS for this Bridge -->
</vlan>
</network>
Create a network for inside_interface:
git ./vcg/templates/KVM_NETWORKING_SAMPLES/template_inside_openvswitch.xml
<network>
<name>inside_interface</name> <!--This is the network name-->
<model type='virtio'/>
<forward mode="bridge"/>
<bridge name="insideinterface"/>
<virtualport type='openvswitch'></virtualport>
<vlan trunk='yes'></vlan>
<tag id='200'/> <!—Define all the VLANS for this Bridge -->
<tag id='201'/> <!—Define all the VLANS for this Bridge -->
<tag id='202'/> <!—Define all the VLANS for this Bridge -->
</network>
3 Edit the VM XML. There are multiple ways to create a Virtual Machine in KVM. We are going to use the traditional way where we define the VM in an XML file and create it using libvirt. Below is a template that you can use for the XML file. You can create the XML file using:
vi my_vm.xml
Copy the template below and replace the sections in bold.
<?xml version="1.0" encoding="UTF-8"?>
<domain type="kvm">
<name>#domain_name#</name>
<memory unit="KiB">8388608</memory>
<currentMemory unit="KiB">8388608</currentMemory>
<vcpu>8</vcpu>
<cputune>
<vcpupin vcpu="0" cpuset=" 0" />
Install the VeloCloud Partner Gateway
VMware, Inc. 23

<vcpupin vcpu="1" cpuset=" 1" />
<vcpupin vcpu="2" cpuset=" 2" />
<vcpupin vcpu="3" cpuset=" 3" />
<vcpupin vcpu="4" cpuset=" 4" />
<vcpupin vcpu="5" cpuset=" 5" />
<vcpupin vcpu="6" cpuset=" 6" />
<vcpupin vcpu="7" cpuset=" 7" />
</cputune>
<resource>
<partition>/machine</partition>
</resource>
<os>
<type>hvm</type>
</os>
<features>
<acpi />
<apic />
<pae />
</features>
<cpu mode="host-passthrough" />
<clock offset="utc" />
<on_poweroff>destroy</on_poweroff>
<on_reboot>restart</on_reboot>
<on_crash>restart</on_crash>
<devices>
<emulator>/usr/bin/kvm-spice</emulator>
<disk type="file" device="disk">
<driver name="qemu" type="qcow2" />
<source file=" #folder#/#qcow_root#" />
<target dev="hda" bus="ide" />
<alias name="ide0-0-0" />
<address type="drive" controller="0" bus="0" target="0" unit="0" />
</disk>
<disk type="file" device="cdrom">
<driver name="qemu" type="raw" />
<source file=" #folder#/#Cloud_ INIT_ ISO#" />
<target dev="sdb" bus="sata" />
<readonly />
<alias name="sata1-0-0" />
<address type="drive" controller="1" bus="0" target="0" unit="0" />
</disk>
<controller type="usb" index="0">
<alias name="usb0" />
<address type="pci" domain="0x0000" bus="0x00" slot="0x01" function="0x2" />
</controller>
<controller type="pci" index="0" model="pci-root">
<alias name="pci.0" />
</controller>
<controller type="ide" index="0">
<alias name="ide0" />
<address type="pci" domain="0x0000" bus="0x00" slot="0x01" function="0x1" />
</controller>
<interface type="network">
<source network=" public_interface" />
<vlan>
Install the VeloCloud Partner Gateway
VMware, Inc. 24

<tag id=" #public_vlan#" />
</vlan>
<alias name="hostdev1" />
<address type="pci" domain="0x0000" bus="0x00" slot="0x11" function="0x0" />
</interface>
<interface type="network">
<source network="inside_interface" />
<alias name="hostdev2" />
<address type="pci" domain="0x0000" bus="0x00" slot="0x12" function="0x0" />
</interface>
<serial type="pty">
<source path="/dev/pts/3" />
<target port="0" />
<alias name="serial0" />
</serial>
<console type="pty" tty="/dev/pts/3">
<source path="/dev/pts/3" />
<target type="serial" port="0" />
<alias name="serial0" />
</console>
<memballoon model="none" />
</devices>
<seclabel type="none" />
</domain>
4 Launch the VM.
a Verify the basic networks are created and active.
Main Files
n vcg-root (qcow file)
n vcg-test.iso (cloud-init)
n test_vcg.xml (XML file that defines the VM)
Install the VeloCloud Partner Gateway
VMware, Inc. 25

Define VM
velocloud@KVMperf2:/tmp/VeloCloudGateway$ virsh define test_vcg.xml
Domain test_vcg defined from test_vcg.xml
Set VM to autostart
velocloud@KVMperf2:/tmp/VeloCloudGateway$ virsh define test_vcg.xml
Domain test_vcg defined from test_vcg.xml
Start VM
velocloud@KVMperf2:/tmp/VeloCloudGateway$ virsh define test_vcg.xml
Domain test_vcg defined from test_vcg.xml
5 Console into the VM.
virsh list
Id Name State
----------------------------------------------------
25 test_vcg running
velocloud@KVMperf2$ virsh console 25
Connected to domain test_vcg
Escape character is ^]
Special Consideration for KVM Host
n Disable GRO (Generic Receive Offload) on physical interfaces (to avoid unnecessary re-fragmentation in VCG).
ethtool –K <interface> gro off tx off
n Disable CPU C-states (power states affect real-time performance). Typically, this can be done as part of kernel boot options by appending processor.max_cstate=1 or just disable in the BIOS. For more information, see https://docs.fedoraproject.org/en-US/Fedora/13/html/Virtualization_Guide/chap-Virtualization-KVM_guest_timing_management.html.
n For production deployment, vCPUs must be pinned to the instance. No oversubscription on the cores should be allowed to take place. For more information, see https://docs.fedoraproject.org/en-US/Fedora/13/html/Virtualization_Guide/ch25s06.html.
Post-Installation TasksThis section describes post-installation and installation verification steps.
If everything worked as expected in the installation, you can now login to the VM.
1 If everything works as expected, you should see the login prompt on the console. You should see the prompt name as specified in cloud-init.
Install the VeloCloud Partner Gateway
VMware, Inc. 26

2 You can also take a look at /var/log/cloud-init.log. If you see the message below, it is likely that the cloud init runs successfully.
3 Verify that the VeloCloud Gateway is registered with VCO.
4 Verify Outside Connectivity.
5 Verify that the MGMT VRF is responding to ARPs.
Install the VeloCloud Partner Gateway
VMware, Inc. 27

6 Remove cloud-init so it doesn’t run again.
apt-get purge cloud-init
7 Associate the new gateway pool, (created in the section titled, “ Creating a Gateway and getting the Activation Key”) with the customer.
8 Associate the Gateway with an Edge.
Install the VeloCloud Partner Gateway
VMware, Inc. 28

9 Verify that the Edge is able to establish a tunnel with the Gateway on the Internet side. From the VMware SD-WAN Orchestrator, go to Monitor > Edges > Overview.
From the VMware SD-WAN Orchestrator, go to Test & Troubleshoot > Remote Diagnostics > [Edge] > List Paths, and click Run to view the list of active paths.
10 Configure the Handoff interface.
Install the VeloCloud Partner Gateway
VMware, Inc. 29

11 Verify that the BGP session is up.
Upgrade VeloCloud GatewayThis section describes how to upgrade a VeloCloud Gateway installation.
To upgrade a VeloCloud Gateway installation:
1 Download the VeloCloud Gateway Update package.
2 Upload the image to the VeloCloud Gateway system (using, for example, the scp command). Copy the image to the following location on the system: /var/lib/velocloud/software_update/vcg_update.tar.
3 Connect to the VeloCloud Gateway console and run:
sudo /opt/vc/bin/vcg_software_update
Custom ConfigurationsThis section describes custom configurations.
NTP ConfigurationNTP configuration involves editing the /etc/ntpd.conf file.
Install the VeloCloud Partner Gateway
VMware, Inc. 30

UserdataThis section describes userdata.
#cloud-config
hostname: #_Hostname_#
password: #_Console_Password_#
chpasswd: {expire: False}
ssh_pwauth: True
ssh_authorized_keys:
- #_SSH_public_Key_#
runcmd:
- 'echo "[]" > /opt/vc/etc/vc_blocked_subnets.json'
- 'sed -iorig "s/wan=\".*/wan=\"eth0 eth1\"/" /etc/config/gatewayd-tunnel'
- '/var/lib/cloud/scripts/per-boot/config_gateway'
- 'sleep 10'
- '/opt/vc/bin/vc_procmon restart'
write_files:
- path: "/etc/ntp.conf"
permissions: '0644'
content: |
# Use servers from the NTP Pool Project. Approved by Ubuntu Technical Board
# on 2011-02-08 (LP: #104525). See http://www.pool.ntp.org/join.html for
# more information.
server #_NTP_SERVER_1_#
server #_NTP_SERVER_2_#
server 1.ubuntu.pool.ntp.org iburst
server 2.ubuntu.pool.ntp.org iburst
server 3.ubuntu.pool.ntp.org iburst
- path: "/var/lib/cloud/scripts/per-boot/config_gateway"
permissions: '0777'
content: |
#!/usr/bin/python
import json
import commands
is_activated = commands.getoutput("/opt/vc/bin/is_activated.py")
if "True" in str(is_activated):
print "Gateway already activated"
exit
commands.getoutput("/opt/vc/bin/activate.py -s #_VCO_# -i #_Activation_Key_# ")
### EDIT GATEWAYD ###
with open("/etc/config/gatewayd", "r") as jsonFile:
data = json.load(jsonFile)
data["global"]["vcmp.interfaces"] = ["eth0"]
data["global"]["wan"] = ["eth1"]
# NOTE FOR HAND OFF IT CAN BE "QinQ (0x8100)" "QinQ (0x9100)" "none" "802.1Q" "802.1ad"
data["vrf_vlan"]["tag_info"][0]["mode"] = "#_Handoff_"
data["vrf_vlan"]["tag_info"][0]["interface"] = "eth1"
data["vrf_vlan"]["tag_info"][0]["c_tag"] = "#_C_TAG_FOR_MGMT_VRF_#"
data["vrf_vlan"]["tag_info"][0]["s_tag"] = "#_S_TAG_FOR_MGMT_VRF_"
with open("/etc/config/gatewayd", "w") as jsonFile:
jsonFile.write(json.dumps(data,sort_keys=True,indent=4, separators=(",", ": ")))
### EDIT DPDK ###
with open("/opt/vc/etc/dpdk.json", "r") as jsonFile:
data = json.load(jsonFile)
Install the VeloCloud Partner Gateway
VMware, Inc. 31

#SET 0 or 1 for enabled or DISABLED example data["dpdk_enabled"] = 0
data["dpdk_enabled"] = #_DKDP_ENABLED_OR_DISABLED_#
with open("/opt/vc/etc/dpdk.json", "w") as jsonFile:
jsonFile.write(json.dumps(data,sort_keys=True,indent=4, separators=(",", ": ")))
final_message: "==== Cloud-init completed ===="
power_state:
delay: "+1"
mode: reboot
message: Bye Bye
timeout: 30
condition: True
OAM Interface and Static RoutesIf Gateways are to be deployed with an OAM interface, complete the following steps.
1 Add an additional interface to the VM (ETH2).
VMware
If a dedicated VNIC for Management/OAM is desired, add another vNIC of type vmxnet3. You must repeat the previous step, which is to click OK and then Edit Settings again so you can make a note of the vNIC MAC address.
KVM
If a dedicated VNIC for Management/OAM is desired, make sure you have a libvirt network named oam-network. Then add the following lines to your XML VM structure:
…..
</controller>
<interface type='network'>
Install the VeloCloud Partner Gateway
VMware, Inc. 32

<source network='public_interface'/>
<vlan><tag id='#public_vlan#'/></vlan>
<alias name='hostdev1'/>
<address type='pci' domain='0x0000' bus='0x00' slot='0x11' function='0x0'/>
</interface>
<interface type='network'>
<source network='inside_interface'/>
<alias name='hostdev2'/>
<address type='pci' domain='0x0000' bus='0x00' slot='0x12' function='0x0'/>
</interface>
<interface type='network'>
<source network='oam_interface'/>
<vlan><tag id='#oam_vlan#'/></vlan>
<alias name='hostdev2'/>
<address type='pci' domain='0x0000' bus='0x00' slot='0x13' function='0x0'/>
</interface>
<serial type='pty'>
<source path='/dev/pts/3'/>
<target port='0'/>
<alias name='serial0'/>
</serial>
2 Configure the meta-data file with the additional interface.
instance-id: #_Hostname_#
local-hostname: #_Hostname_#
network-interfaces: |
auto eth0
iface eth0 inet static
address #_IPv4_Address_#
netmask #_IPv4_Netmask_#
gateway #_IPv4_Gateway_#
dns-nameservers #_DNS_server_primary_# #_DNS_server_secondary_#
auto eth1
iface eth1 inet static
metric '13'
address #_MGMT_IPv4_Address_#
netmask #_MGMT_IPv4_Netmask_#
gateway #_MGMT_IPv4_Gateway_#
dns-nameservers #_DNS_server_primary_# #_DNS_server_secondary_#
auto eth2
iface eth2 inet static
address #_OAM_IPv4_Address_#
netmask #_OAM_IPv4_Netmask_#
up route add -net 10.0.0.0 netmask 255.0.0.0 gw #_OAM_IPv4_Gateway_#
up route add -net 192.168.0.0 netmask 255.255.0.0 gw #_OAM_IPv4_Gateway_#
dns-nameservers # _DNS_server_primary_# #_DNS_server_secondary_#
Install the VeloCloud Partner Gateway
VMware, Inc. 33

OAM - SR-IOV with vmxnet3 or SR-IOV with VIRTIOIt is possible in some installations to mix and match and provide different interface types for the Gateway. This generally happens if you have an OAM without SR-IOV. This custom configuration requires additional steps since this causes the interfaces to come up out of order.
1 Record the MAC address of each interface.
VMWare
After creating the machine, go to Edit Settings and copy the Mac address.
KVM
After defining the VM, perform the following command:
2 Edit the user-data and lock the mac address to the interface order. This is done by adding the additional lines in bold:
Userdata
#cloud-config
hostname: #_Hostname_#
password: #_Console_Password_#
chpasswd: {expire: False}
ssh_pwauth: True
ssh_authorized_keys:
Install the VeloCloud Partner Gateway
VMware, Inc. 34

- #_SSH_public_Key_#
runcmd:
- 'echo "[]" > /opt/vc/etc/vc_blocked_subnets.json'
- 'sed -iorig "s/wan=\".*/wan=\"eth0 eth1\"/" /etc/config/gatewayd-tunnel'
- '/var/lib/cloud/scripts/per-boot/config_gateway'
- 'sleep 10'
- '/opt/vc/bin/vc_procmon restart'
write_files:
- path: "/etc/udev/rules.d/70-persistent-net.rules"
permissions: '0644'
content: |
SUBSYSTEM=="net", ACTION=="add", DRIVERS=="?*", ATTR{address}=="#_ETH0_MAC_ADDRESS_#",
ATTR{type}=="1", KERNEL=="eth*", NAME="eth0"
SUBSYSTEM=="net", ACTION=="add", DRIVERS=="?*", ATTR{address}=="#_ETH1_MAC_ADDRESS_#",
ATTR{type}=="1", KERNEL=="eth*", NAME="eth1"
# NOTE ETH2 IS OAM IF NO OAM PRESENT THEM REMOVE
SUBSYSTEM=="net", ACTION=="add", DRIVERS=="?*", ATTR{address}=="#_ETH2_MAC_ADDRESS_#",
ATTR{type}=="1", KERNEL=="eth*", NAME="eth2"
- path: "/var/lib/cloud/scripts/per-boot/config_gateway"
permissions: "0777"
content: |
#!/usr/bin/python
import json
import commands
is_activated = commands.getoutput("/opt/vc/bin/is_activated.py")
if "True" in str(is_activated):
print "Gateway already activated"
exit
commands.getoutput("/opt/vc/bin/activate.py -s #_VCO_# -i #_Activation_Key_# ")
### EDIT GATEWAYD ###
with open("/etc/config/gatewayd", "r") as jsonFile:
data = json.load(jsonFile)
data["global"]["vcmp.interfaces"] = ["eth0"]
data["global"]["wan"] = ["eth1"]
# NOTE FOR HAND OFF IT CAN BE "QinQ (0x8100)" "QinQ (0x9100)" "none" "802.1Q" "802.1ad"
data["vrf_vlan"]["tag_info"][0]["mode"] = "#_Handoff_"
data["vrf_vlan"]["tag_info"][0]["interface"] = "eth1"
data["vrf_vlan"]["tag_info"][0]["c_tag"] = "#_C_TAG_FOR_MGMT_VRF_#"
data["vrf_vlan"]["tag_info"][0]["s_tag"] = "#_S_TAG_FOR_MGMT_VRF_"
with open("/etc/config/gatewayd", "w") as jsonFile:
jsonFile.write(json.dumps(data,sort_keys=True,indent=4, separators=(",", ": ")))
### EDIT DPDK ###
with open("/opt/vc/etc/dpdk.json", "r") as jsonFile:
data = json.load(jsonFile)
#SET 0 or 1 for enabled or DISABLED example data["dpdk_enabled"] = 0
data["dpdk_enabled"] = #_DKDP_ENABLED_OR_DISABLED_#
with open("/opt/vc/etc/dpdk.json", "w") as jsonFile:
jsonFile.write(json.dumps(data,sort_keys=True,indent=4, separators=(",", ": ")))
final_message: "==== Cloud-init completed ===="
power_state:
delay: "+1"
Install the VeloCloud Partner Gateway
VMware, Inc. 35

mode: reboot
message: Bye Bye
timeout: 30
condition: True
Special Consideration When Using 802.1ad EncapsulationIt seems certain that 802.1ad devices do not populate the outer tag EtherType with 0x88A8. Special change is required in user data to interoperate with these devices.
Assuming a Management VRF is configured with S-Tag: 20 and C-Tag: 100, edit the vrf_vlan section in / etc/ config/ gatewayd as follows. Also, define resp_mode to 1 so that the VCG will relax its check to allow Ethernet frames that have incorrect EtherType of 0x8100 in the outer header.
#cloud-config
hostname: #_Hostname_#
password: #_Console_Password_#
chpasswd: {expire: False}
ssh_pwauth: True
ssh_authorized_keys:
- #_SSH_public_Key_#
runcmd:
- 'echo "[]" > /opt/vc/etc/vc_blocked_subnets.json'
- 'sed -iorig "s/wan=\".*/wan=\"eth0 eth1\"/" /etc/config/gatewayd-tunnel'
- '/var/lib/cloud/scripts/per-boot/config_gateway'
- 'sleep 10'
- '/opt/vc/bin/vc_procmon restart'
write_files:
- path: "/var/lib/cloud/scripts/per-boot/config_gateway"
permissions: '0777'
content: |
#!/usr/bin/python
import json
import commands
is_activated = commands.getoutput("/opt/vc/bin/is_activated.py")
if "True" in str(is_activated):
print "Gateway already activated"
exit
commands.getoutput("/opt/vc/bin/activate.py -s #_VCO_# -i #_Activation_Key_# ")
### EDIT GATEWAYD ###
with open("/etc/config/gatewayd", "r") as jsonFile:
data = json.load(jsonFile)
data["global"]["vcmp.interfaces"] = ["eth0"]
data["global"]["wan"] = ["eth1"]
# NOTE FOR HAND OFF IT CAN BE “QinQ (0x8100)” “QinQ (0x9100)” “none” “802.1Q” “802.1ad”
data["vrf_vlan"]["tag_info"][0]["resp_mode"] = "1"
data["vrf_vlan"]["tag_info"][0]["mode"] = "#_Handoff_"
data["vrf_vlan"]["tag_info"][0]["interface"] = "eth1"
data["vrf_vlan"]["tag_info"][0]["c_tag"] = "#_C_TAG_FOR_MGMT_VRF_#"
data["vrf_vlan"]["tag_info"][0]["s_tag"] = "#_S_TAG_FOR_MGMT_VRF_"
with open("/etc/config/gatewayd", "w") as jsonFile:
jsonFile.write(json.dumps(data,sort_keys=True,indent=4, separators=(",", ": ")))
Install the VeloCloud Partner Gateway
VMware, Inc. 36

### EDIT DPDK ###
with open("/opt/vc/etc/dpdk.json", "r") as jsonFile:
data = json.load(jsonFile)
#SET 0 or 1 for enabled or DISABLED example data["dpdk_enabled"] = 0
data["dpdk_enabled"] = #_DKDP_ENABLED_OR_DISABLED_#
with open("/opt/vc/etc/dpdk.json", "w") as jsonFile:
jsonFile.write(json.dumps(data,sort_keys=True,indent=4, separators=(",", ": ")))
final_message: "==== Cloud-init completed ===="
power_state:
delay: "+1"
mode: reboot
message: Bye Bye
timeout: 30
condition: True
SNMP IntegrationThis section describes how to configure SNMP integration.
To configure SNMP integration:
1 Edit /etc/snmp/snmpd.conf. Add the following lines to the config with source IP of the systems that will be connecting to SNMP service.
The following example will configure access to all counters from localhost via community string vc-vcg and from 10.0.0.0/8 with community string myentprisecommunity using SNMPv2c version. For more information, see the Net-SNMP documentation.
agentAddress udp:161
# com2sec sec.name source community
com2sec local localhost vc-vcg
com2sec myenterprise 10.0.0.0/8 myentprisecommunity# group access.name sec.model sec.name
group rogroup v2c local
group rogroup v2c myenterpriseview all included .1 80
# access access.name context sec.model sec.level match read write notif
access rogroup "" any noauth exact all none none#sysLocation Sitting on the Dock of the Bay
#sysContact Me <[email protected]>sysServices 72master agentx#
# Process Monitoring
## At least one 'gwd' process
proc gwd
# At least one 'mgd' process
proc mgd#
# Disk Monitoring
#
# 100MBs required on root disk, 5% free on /var, 10% free on all other disks
disk / 100000
disk /var 5%
includeAllDisks 10%#
# System Load
#
# Unacceptable 1-, 5-, and 15-minute load averages
load 12 10 5
Install the VeloCloud Partner Gateway
VMware, Inc. 37
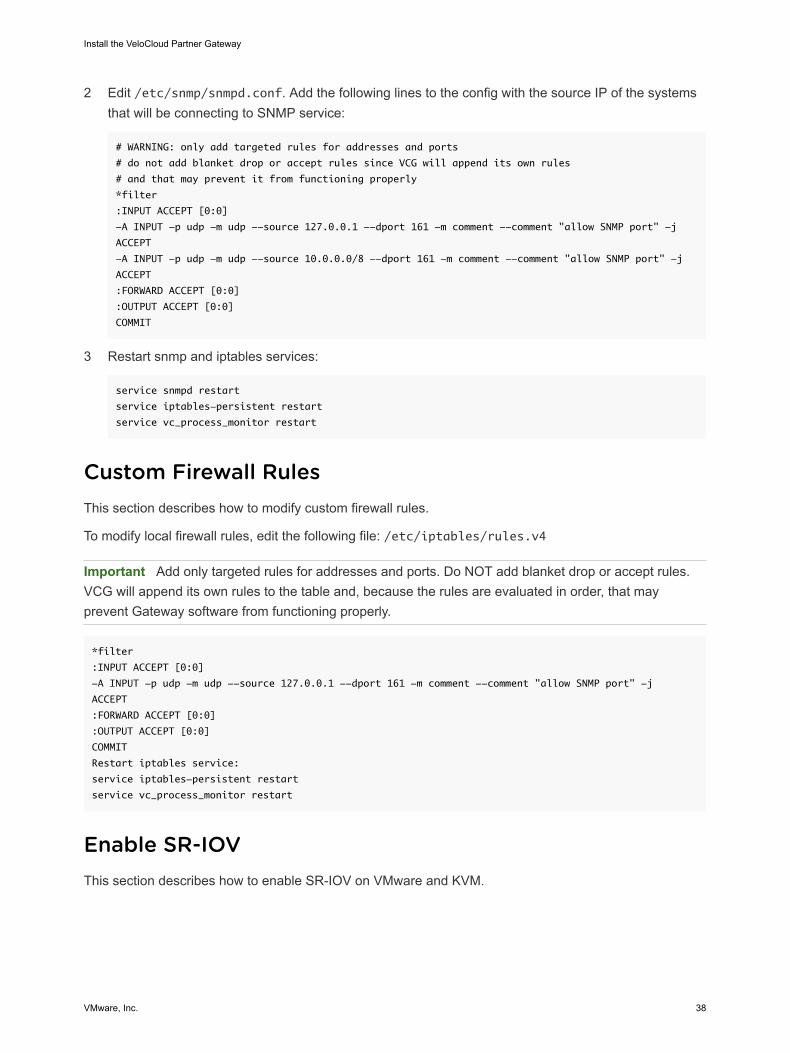
2 Edit /etc/snmp/snmpd.conf. Add the following lines to the config with the source IP of the systems that will be connecting to SNMP service:
# WARNING: only add targeted rules for addresses and ports
# do not add blanket drop or accept rules since VCG will append its own rules
# and that may prevent it from functioning properly
*filter
:INPUT ACCEPT [0:0]
-A INPUT -p udp -m udp --source 127.0.0.1 --dport 161 -m comment --comment "allow SNMP port" -j
ACCEPT
-A INPUT -p udp -m udp --source 10.0.0.0/8 --dport 161 -m comment --comment "allow SNMP port" -j
ACCEPT
:FORWARD ACCEPT [0:0]
:OUTPUT ACCEPT [0:0]
COMMIT
3 Restart snmp and iptables services:
service snmpd restart
service iptables-persistent restart
service vc_process_monitor restart
Custom Firewall RulesThis section describes how to modify custom firewall rules.
To modify local firewall rules, edit the following file: /etc/iptables/rules.v4
Important Add only targeted rules for addresses and ports. Do NOT add blanket drop or accept rules. VCG will append its own rules to the table and, because the rules are evaluated in order, that may prevent Gateway software from functioning properly.
*filter
:INPUT ACCEPT [0:0]
-A INPUT -p udp -m udp --source 127.0.0.1 --dport 161 -m comment --comment "allow SNMP port" -j
ACCEPT
:FORWARD ACCEPT [0:0]
:OUTPUT ACCEPT [0:0]
COMMIT
Restart iptables service:
service iptables-persistent restart
service vc_process_monitor restart
Enable SR-IOVThis section describes how to enable SR-IOV on VMware and KVM.
Install the VeloCloud Partner Gateway
VMware, Inc. 38

Enable SR-IOV on VMware (Optional)This section describes how to enable SR-IOV on VMware. This step is optional, but it is necessary to realize the full benefit of DPDK to improve packet processing performance.
PrerequisitesThis requires a specific NIC card. As of today, only the following chipset is certified by VeloCloud to work with the VCG.
n Intel 82599/82599ES
n X550 (under experimenting as this requires the latest Intel ixgbevf driver on the VCG VM and Malicious Driver Detection disabled on the ESXi host ixgbe driver)
Instructions to Enable SR-IOVTo enable SR-IOV on VMware:
1 Make sure that your NIC card supports SR-IOV. Check the VMware Hardware Compatibility List (HCL) at https://www.vmware.com/resources/compatibility/search.php?deviceCategory=io
Brand Name: Intel
I/O Device Type: Network
Features: SR-IOV
The following VMware KB article provides details of how to enable SR-IOV on the supported NIC: https://kb.vmware.com/s/article/2038739
2 Once you have a support NIC card, go to the specific VMware host, select the Configure tab, and then choose Physical adapters.
Install the VeloCloud Partner Gateway
VMware, Inc. 39

3 Select Edit Settings. Change Status to Enabled and specify the number of virtual functions required. This number varies by the type of NIC card.
4 Reboot the hypervisor.
5 If SR-IOV is successfully enabled, the number of Virtual Functions (VFs) will show under the particular NIC after ESXi reboots.
Enable SR-IOV on KVMThis section describes how to enable the SR-IOV on KVM.
To enabling the SR-IOV on KVM:
1 Enable SR-IOV in BIOS. This will be dependent on your BIOS. Login to the BIOS console and look for SR-IOV Support/DMA. You can verify support on the prompt by checking that Intel has the correct cpu flag.
cat /proc/cpuinfo | grep vmx
2 Add the options on Bboot.
GRUB_CMDLINE_LINUX="intel_iommu=on"
(in /etc/default/grub)
a After this, use the Run command: update-grub and update-initramfs -u.
b Reboot
c Make sure iommu is enabled.
velocloud@KVMperf3:~$ dmesg | grep -i IOMMU
[ 0.000000] Command line: BOOT_IMAGE=/vmlinuz-3.13.0-107-generic root=/dev/mapper/qa--
multiboot--002--vg-root ro intel_iommu=on splash quiet vt.handoff=7
[ 0.000000] Kernel command line: BOOT_IMAGE=/vmlinuz-3.13.0-107-generic root=/dev/mapper/qa--
Install the VeloCloud Partner Gateway
VMware, Inc. 40

multiboot--002--vg-root ro intel_iommu=on splash quiet vt.handoff=7
[ 0.000000] Intel-IOMMU: enabled
….
velocloud@KVMperf3:~$
3 Add the ixgbe Driver in Linux.
https://downloadcenter.intel.com/download/14687/Intel-Network-Adapter-Driver-for-PCIe-Intel-10-Gigabit-Ethernet-Network-Connections-Under-Linux-
Download on left 5.2.1
a Download ixgbe from intel. Follow compile options.
b Configure ixgbe config (tar and sudo make install).
velocloud@KVMperf1:~$ cat /etc/modprobe.d/ixgbe.conf
c If the file doesn’t exist, create it.
options ixgbe max_vfs=32,32
options ixgbe allow_unsupported_sfp=1
options ixgbe MDD=0,0
blacklist ixgbevf
d Remember to do update-initramfs -u and reboot.
e Use modinfo to see if it is properly installed.
velocloud@KVMperf1:~$ modinfo ixgbe and ip link
filename: /lib/modules/4.4.0-62-generic/updates/drivers/net/ethernet/intel/ixgbe/ixgbe.ko
version: 5.0.4
license: GPL
description: Intel(R) 10GbE PCI Express Linux Network Driver
author: Intel Corporation, <[email protected]>
srcversion: BA7E024DFE57A92C4F1DC93
After rebooting, you should see the interfaces.
Install the VeloCloud Partner Gateway
VMware, Inc. 41