pinhead pincushion - generation q...
TRANSCRIPT
2 Generation Q Magazine Fall 2012 photo by Megan Dougherty
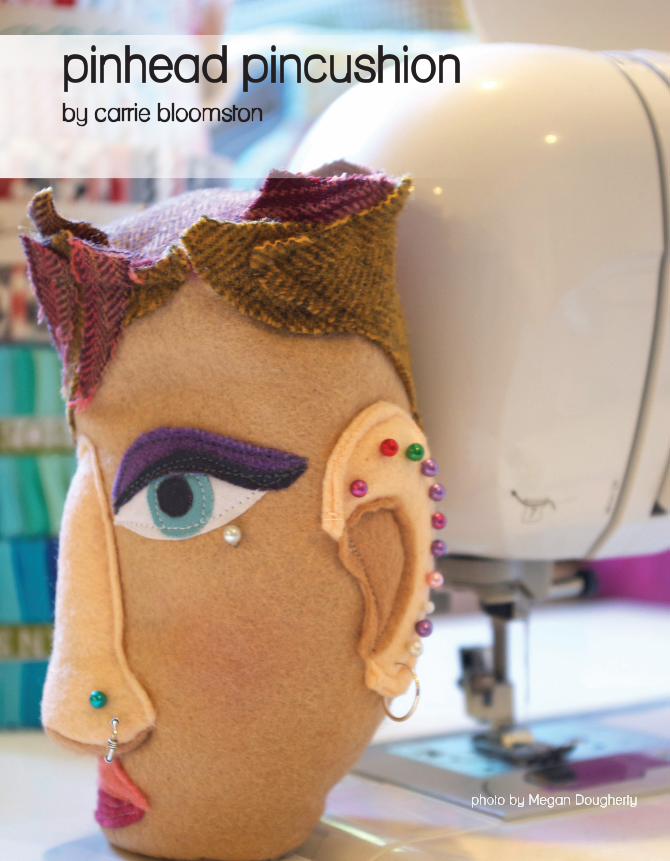
pinhead pincushionby carrie bloomston

Generation Q Magazine Fall 2012 3 photo by Megan Dougherty
designed and made by carrie bloomstonsuch-designs.com
skill level: you’re willing to play a little
overall dimensions: 6” x 4” x 4”
Oh sure, you’ve got one of those toma-toes with a strawberry dangling from it on your sewing table, and it does the
job, but who says a place for your pins has to be dull? Carrie Bloomston, the brains behind SUCH Designs, Phoenix, Arizona, took a look at her pins one day and immediately thought, “Piercings!” If tattoo culture can make its way into the sewing room (and oh, boy has it) then piercings have to come along too, right?
Carrie’s Pinhead Pincushion is her vi-sion of a punk rock girl with short, spiky hair and two different colored eyes á la David Bowie. She is filled with ground walnut shells, which you can find in craft shops or even in pet stores (look for it in the bird section as it is used to line the bottom of bird cages). The shells give the pincushion some heft and are great for sharpening needles. (Just like that old strawberry!)
Dig around in your jewelry box for hoops and other adornments or hit up that funky jew-elry shop. However you pierce her, your punk Pinhead will rock.
overall materials & tools:• felt and felted wool: - medium flesh: 13” x 9” piece - light flesh: 8” x 6” piece - darker flesh: 6” x 6” square - (2) shades of pink for lips: small scraps - various cotton scraps for the eyes and eye area including eye shadow color, mascara, pupils, irises, etc. - various wool or scraps for hair
• fusible web• thread in complimentary and contrasting colors• Poly-fil® or other polyester filling (to stuff ear, nose, + extra for top of head)• ground walnut shells to fill pincushion• colorful pins• extra piercings from a jewelry store-or your jewelry box (optional)• blush, as in make-up, for cheeks
cutting• medium flesh felt: cut out (1) face shape• light flesh felt: (2) ears, (1) nose• darker flesh felt: (1) inner ear, (1) under nose, (1) face bottom• light pink felt: (1) top lip• darker pink felt: (1) bottom lip• iron fusible web to cotton scraps for eyes, irises, pupils, eyelid, mascara and nostril, then cut out shapes from templates• reverse the templates for above and cut out other side of eyes, irises, pupil, etc.background.
Note: the pincushion has only one ear because it is meant to lie on its side.
putting it together1. Fold face shape in half lengthwise and find cen-terline, you will use this for applying other shapes.
2. Assemble the parts of the eye, fuse them in place according to the layout template. Edge stitch each piece with complimentary thread.
3. Place the top and bottom lips onto the face; holding them with your fingers, edge stitch in place with complimentary thread.
4. Apply nostrils to the under nose, fuse down and edge stitch with complimentary thread.

4 Generation Q Magazine Fall 2012
5. With RST and nostrils facing in, pin under nose to nose establishing a curve and sew using a 1/8” seam allowance. Be patient and take your time sewing slowly around the curve and backstitching at the beginning and ending. See illustration 1.
6. Turn inside out and finger press.
7. In the center of the face, pin the under nose to the face 1 ¾” from the bottom of the face, the nose will be standing straight up off of face. Sewing only the darker under nose felt, stitch the bottom of under nose to face. See illustration 2.
8. Using a topstitch, stitch up each side of nose leaving a 1” opening at bridge of nose for stuffing
Poly-fil into nose. Use a chopstick, knitting needle or finger to help stuff Poly-fil into small opening. Seal opening by topstitching closed. Bring threads to back and tie off. See illustration 3.
9. Make the puffy ear by stacking (2) ear sections on top of each other, RST, pin, and sew close to edge leaving a 1” opening for turning and back-stitching at beginning and end.
10. Turn right side out and stuff with small wad of stuffing.
11. Layer inner ear onto left side of ear, pin in place and pin to face where indicated on template.
12. Edge stitch in place with complimentary thread, this will close opening as well.
13. Making the hair: layer all hair bits where indi-cated on template and pin in place-some should be sticking over edge, it is meant to be messy; edge stitch in place with complimentary thread.
14. Fold the face in half lengthwise, RST with top and bottom aligned; stitch along the edge back-stitching at beginning and ending.
15. Face bottom: place the face bottom RST, on
pinhead pincushion, continued
13
2
Generation Q Magazine Fall 2012 5
bottom of face edge, pin in place and sew with a scant ¼” seam allowance and backstitching at be-ginning and ending. Turn right side out.
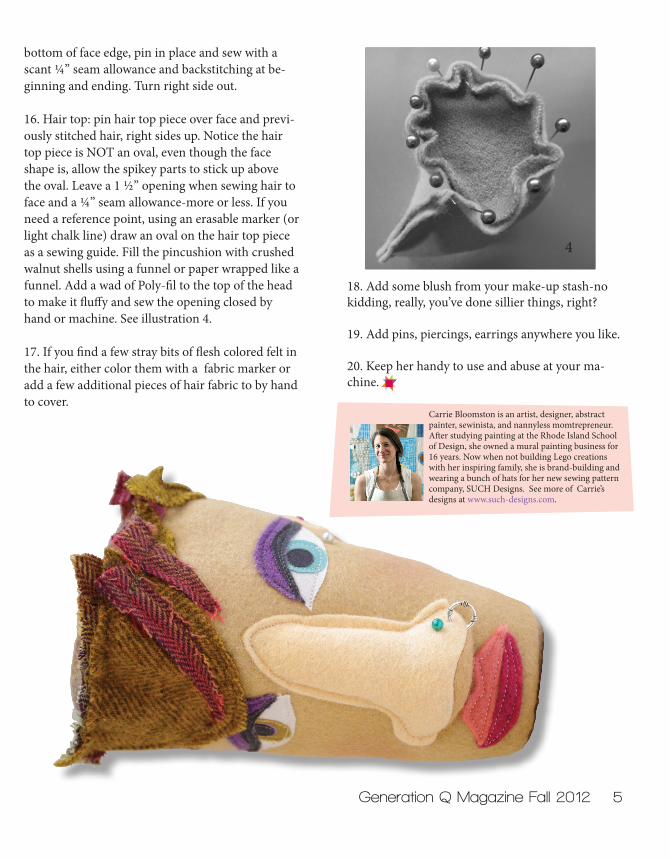
16. Hair top: pin hair top piece over face and previ-ously stitched hair, right sides up. Notice the hair top piece is NOT an oval, even though the face shape is, allow the spikey parts to stick up above the oval. Leave a 1 ½” opening when sewing hair to face and a ¼” seam allowance-more or less. If you need a reference point, using an erasable marker (or light chalk line) draw an oval on the hair top piece as a sewing guide. Fill the pincushion with crushed walnut shells using a funnel or paper wrapped like a funnel. Add a wad of Poly-fil to the top of the head to make it fluffy and sew the opening closed by hand or machine. See illustration 4.
17. If you find a few stray bits of flesh colored felt in the hair, either color them with a fabric marker or add a few additional pieces of hair fabric to by hand to cover.
Carrie Bloomston is an artist, designer, abstract painter, sewinista, and nannyless momtrepreneur. After studying painting at the Rhode Island School of Design, she owned a mural painting business for 16 years. Now when not building Lego creations with her inspiring family, she is brand-building and wearing a bunch of hats for her new sewing pattern company, SUCH Designs. See more of Carrie’s designs at www.such-designs.com.
18. Add some blush from your make-up stash-no kidding, really, you’ve done sillier things, right?
19. Add pins, piercings, earrings anywhere you like.
20. Keep her handy to use and abuse at your ma-chine.
4

6 Generation Q Magazine Fall 2012
Hair Topcut 1
Face Bottomcut 1
Earcut 2
Inner earcut 1
Top Lipcut 1
Bottom Lipcut 1
Pupil
IrisEye
Eyelid
Mascara
Nosecut 1
Under Nosecut 1
Nostrilscut 1 each
Back
Back
Punk Rock Pincushion Templates
(Cut two of each eye part, but reverse one of each to make the opposite eye.)
templates

Hair Topcut 1
Face Bottomcut 1
Earcut 2
Inner earcut 1
Top Lipcut 1
Bottom Lipcut 1
Pupil
IrisEye
Eyelid
Mascara
Nosecut 1
Under Nosecut 1
Nostrilscut 1 each
Back
Back
Punk Rock Pincushion Templates
(Cut two of each eye part, but reverse one of each to make the opposite eye.)

8 Generation Q Magazine Fall 2012
Hair Templates/ Face template/placement guide
1. Cut out the Face shape. The Face shape is indicated by the large form with the dashed line at the top.2. Cut each of the hair pieces from contrasting felts or woolens. They will slightly over and underlap each other, so adda bit extra so they can overlap. Notice that all of the hair pieces overlap the top edge of the Face shape, so that the Face stops at varying point roughly 1/4” below the top of the Hair.3. Us the facial features shown in he template as a placement guide while you are working.
Hair A Hair B Hair C Hair D
Hair E
Hair F
Hair G Hair H
Face

Generation Q Magazine Fall 2012 9
Hair Templates/ Face template/placement guide
1. Cut out the Face shape. The Face shape is indicated by the large form with the dashed line at the top.2. Cut each of the hair pieces from contrasting felts or woolens. They will slightly over and underlap each other, so adda bit extra so they can overlap. Notice that all of the hair pieces overlap the top edge of the Face shape, so that the Face stops at varying point roughly 1/4” below the top of the Hair.3. Us the facial features shown in he template as a placement guide while you are working.
Hair A Hair B Hair C Hair D
Hair E
Hair F
Hair G Hair H
Face