powerpoint slide show step -by -step slide show step -by ... you can choose the wizard tool, a...
TRANSCRIPT
Prepared by Linda D. Resch and Linda C. Joseph Instructional Information Services
1
PowerPoint Slide Show Step-By-Step
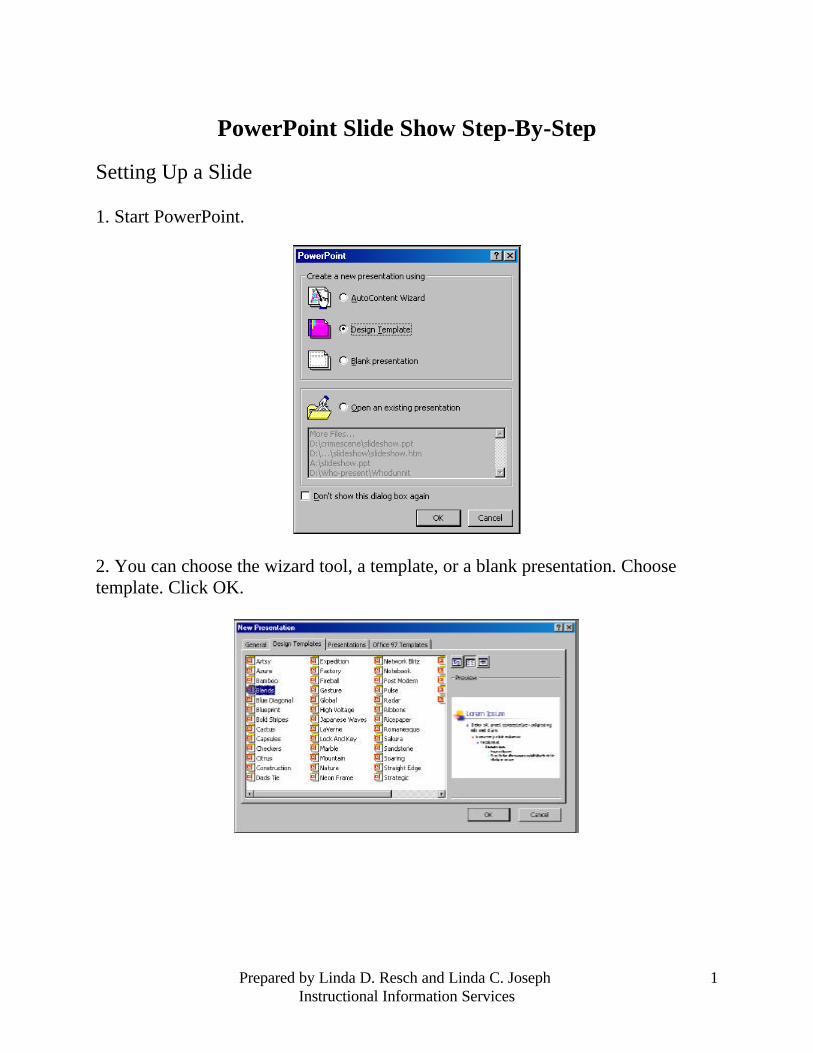
Setting Up a Slide 1. Start PowerPoint.
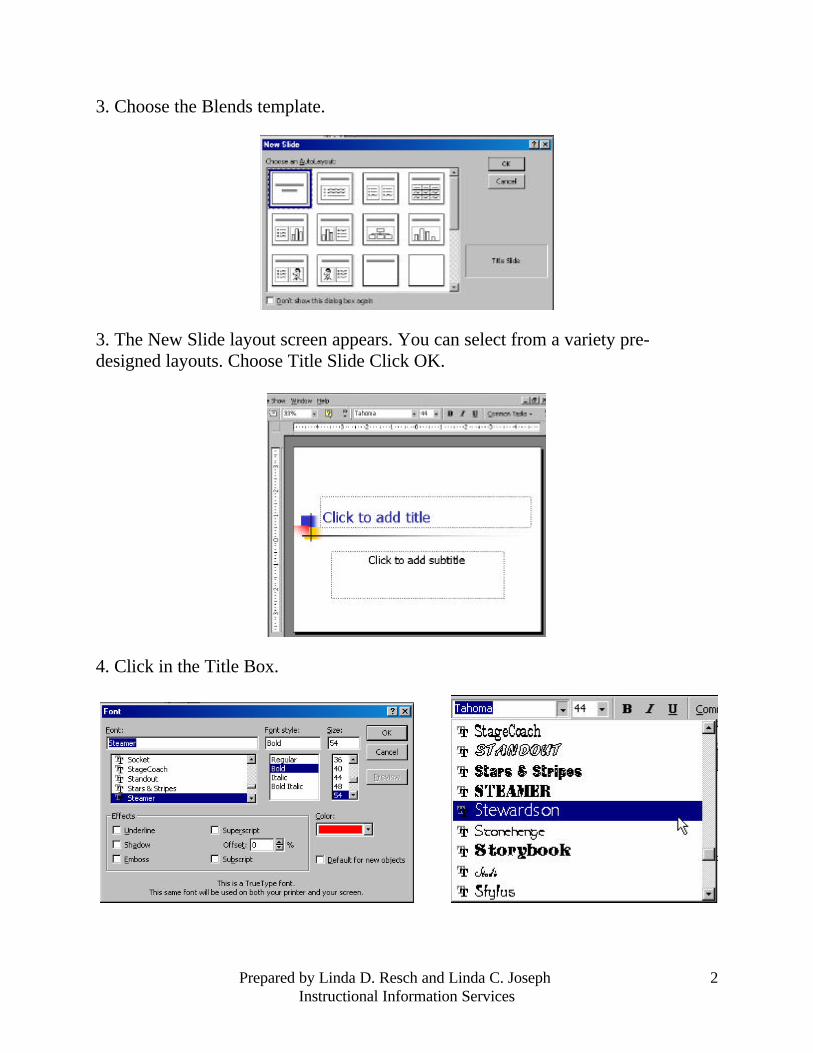
2. You can choose the wizard tool, a template, or a blank presentation. Choose template. Click OK.
Prepared by Linda D. Resch and Linda C. Joseph Instructional Information Services
2
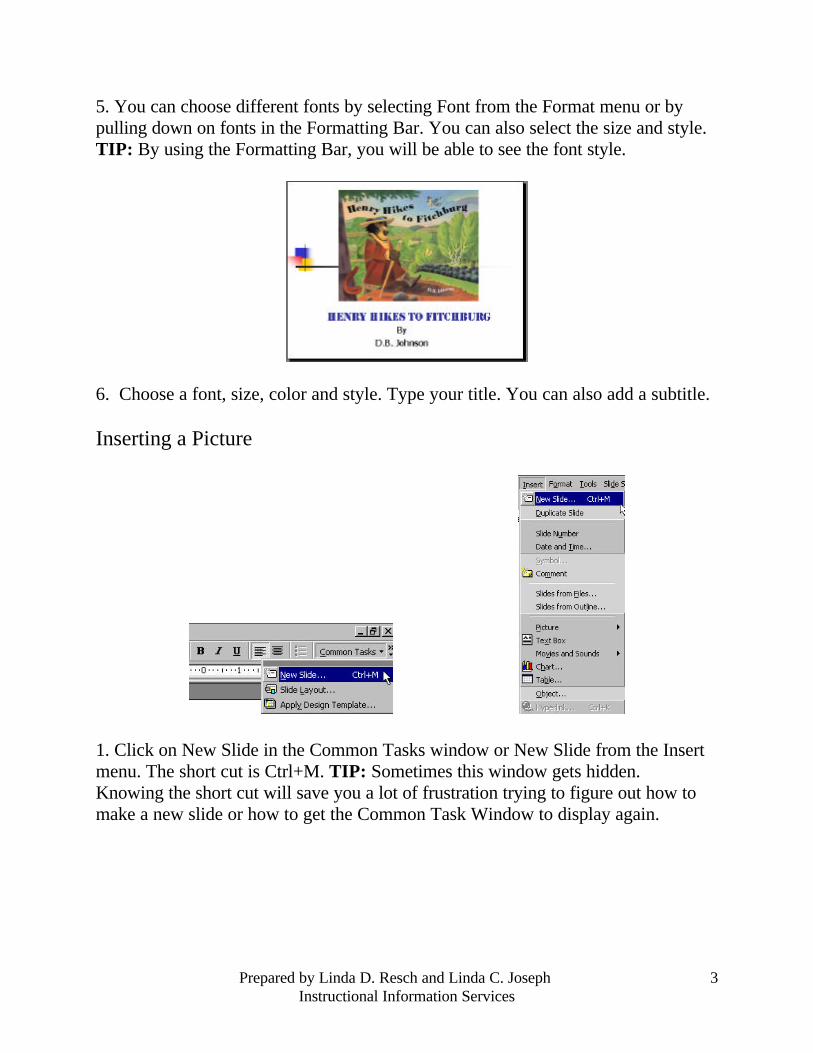
3. Choose the Blends template.
3. The New Slide layout screen appears. You can select from a variety pre-designed layouts. Choose Title Slide Click OK.
4. Click in the Title Box.
Prepared by Linda D. Resch and Linda C. Joseph Instructional Information Services
3
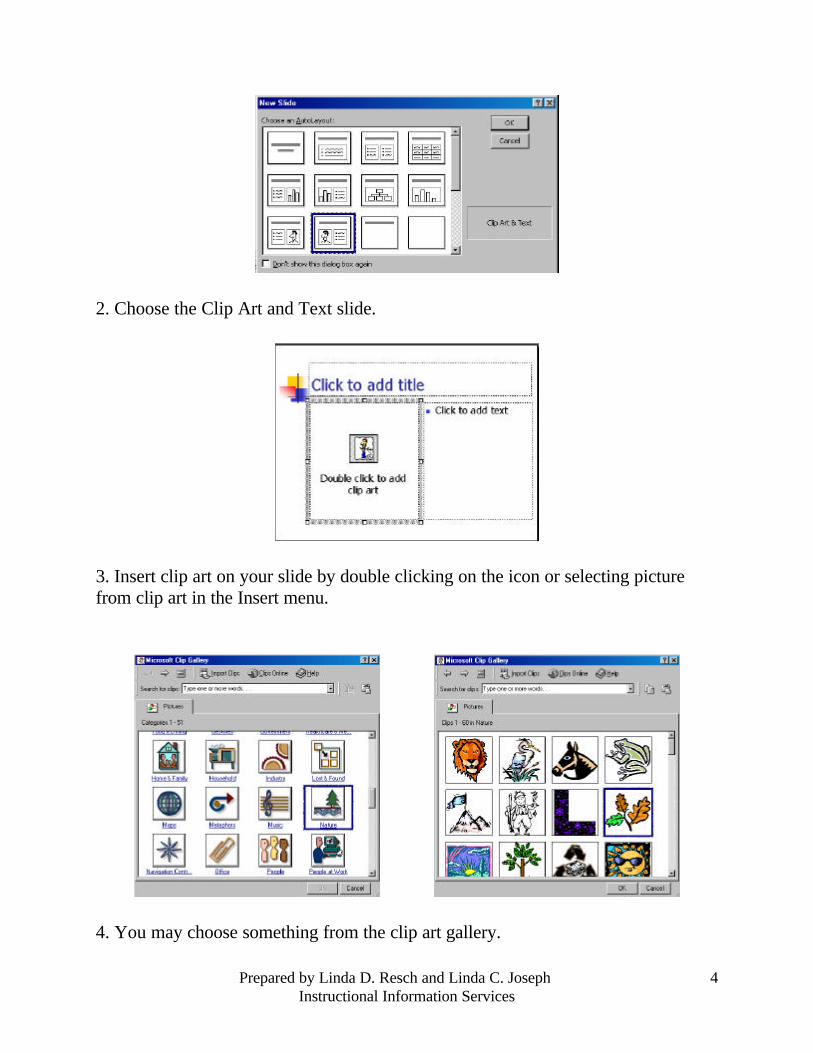
5. You can choose different fonts by selecting Font from the Format menu or by pulling down on fonts in the Formatting Bar. You can also select the size and style. TIP: By using the Formatting Bar, you will be able to see the font style.
6. Choose a font, size, color and style. Type your title. You can also add a subtitle. Inserting a Picture
1. Click on New Slide in the Common Tasks window or New Slide from the Insert menu. The short cut is Ctrl+M. TIP: Sometimes this window gets hidden. Knowing the short cut will save you a lot of frustration trying to figure out how to make a new slide or how to get the Common Task Window to display again.
Prepared by Linda D. Resch and Linda C. Joseph Instructional Information Services
4
2. Choose the Clip Art and Text slide.
3. Insert clip art on your slide by double clicking on the icon or selecting picture from clip art in the Insert menu.
4. You may choose something from the clip art gallery.

Prepared by Linda D. Resch and Linda C. Joseph Instructional Information Services
5
5. The clip art is automatically inserted in the box. Choose the font, size, and style. Then, type a title.
6. You can eliminate bullets or change bullet styles by clicking on the text box. Then, choose Bullets and Numbering from the Format menu. Click on your choice and click OK.
7. Type your information in the text box. Type a title.
Prepared by Linda D. Resch and Linda C. Joseph Instructional Information Services
6
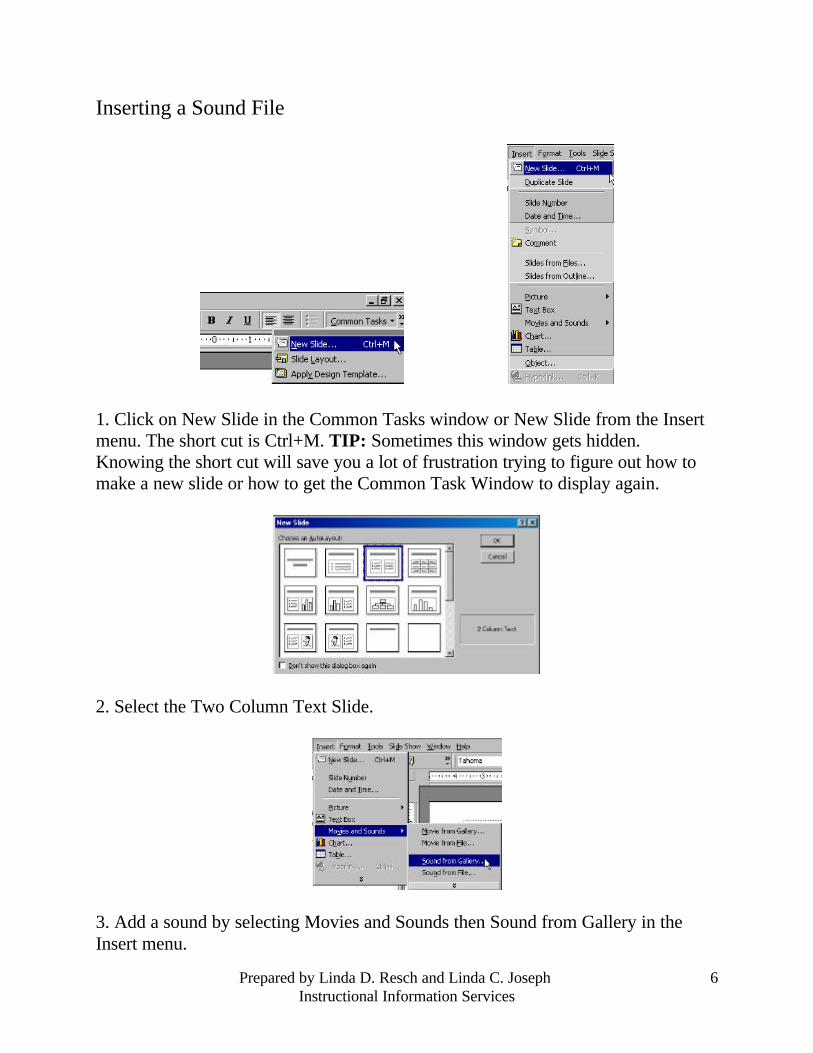
Inserting a Sound File
1. Click on New Slide in the Common Tasks window or New Slide from the Insert menu. The short cut is Ctrl+M. TIP: Sometimes this window gets hidden. Knowing the short cut will save you a lot of frustration trying to figure out how to make a new slide or how to get the Common Task Window to display again.
2. Select the Two Column Text Slide.
3. Add a sound by selecting Movies and Sounds then Sound from Gallery in the Insert menu.

Prepared by Linda D. Resch and Linda C. Joseph Instructional Information Services
7
4. Click on Music.
5. Right click on Fall_1 and select insert. Close the window.
6. Choose whether or not you want the sound to play automatically or when you click it. You can further customize the order in which objects are played or displayed on your slide by going to custom animation under the Slide Show Menu. You will learn more about custom animation when you insert a movie.
Prepared by Linda D. Resch and Linda C. Joseph Instructional Information Services
8
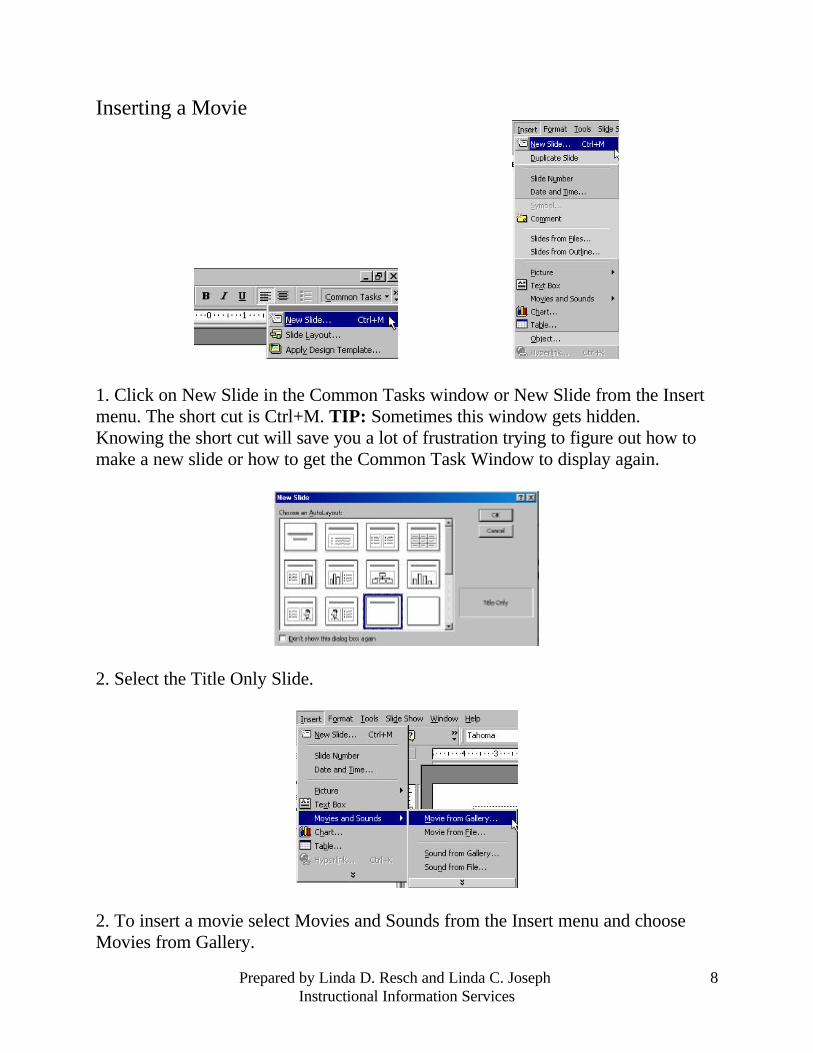
Inserting a Movie
1. Click on New Slide in the Common Tasks window or New Slide from the Insert menu. The short cut is Ctrl+M. TIP: Sometimes this window gets hidden. Knowing the short cut will save you a lot of frustration trying to figure out how to make a new slide or how to get the Common Task Window to display again.
2. Select the Title Only Slide.
2. To insert a movie select Movies and Sounds from the Insert menu and choose Movies from Gallery.

Prepared by Linda D. Resch and Linda C. Joseph Instructional Information Services
9
3. Right click on the image and select insert. Close the window and return to the slide show.
4. In order for the animation to play, you must set the controls for how it will be played. Highlight the movie. Select Custom Animation from the Slide Show menu. Check the box next to your movie object. Then, choose the effects you want the movie to exhibit such as flying in from the left before it is played. Finally, set the
Prepared by Linda D. Resch and Linda C. Joseph Instructional Information Services
10
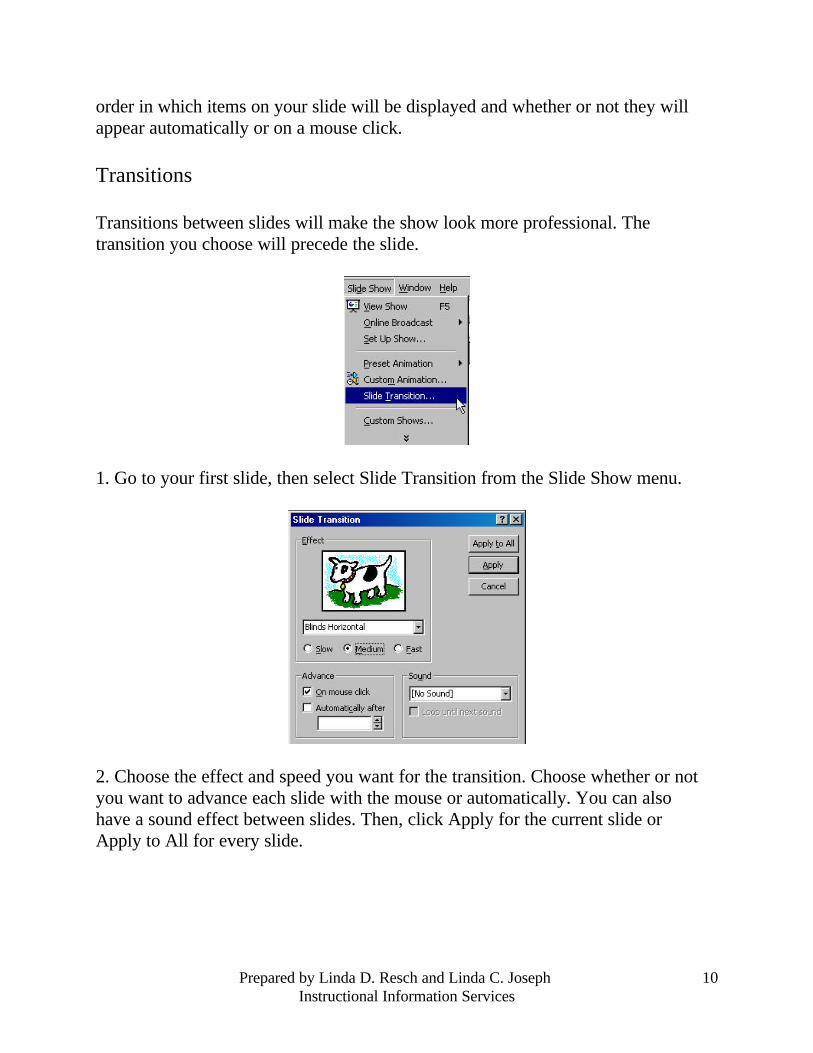
order in which items on your slide will be displayed and whether or not they will appear automatically or on a mouse click. Transitions Transitions between slides will make the show look more professional. The transition you choose will precede the slide.
1. Go to your first slide, then select Slide Transition from the Slide Show menu.
2. Choose the effect and speed you want for the transition. Choose whether or not you want to advance each slide with the mouse or automatically. You can also have a sound effect between slides. Then, click Apply for the current slide or Apply to All for every slide.
Prepared by Linda D. Resch and Linda C. Joseph Instructional Information Services
11
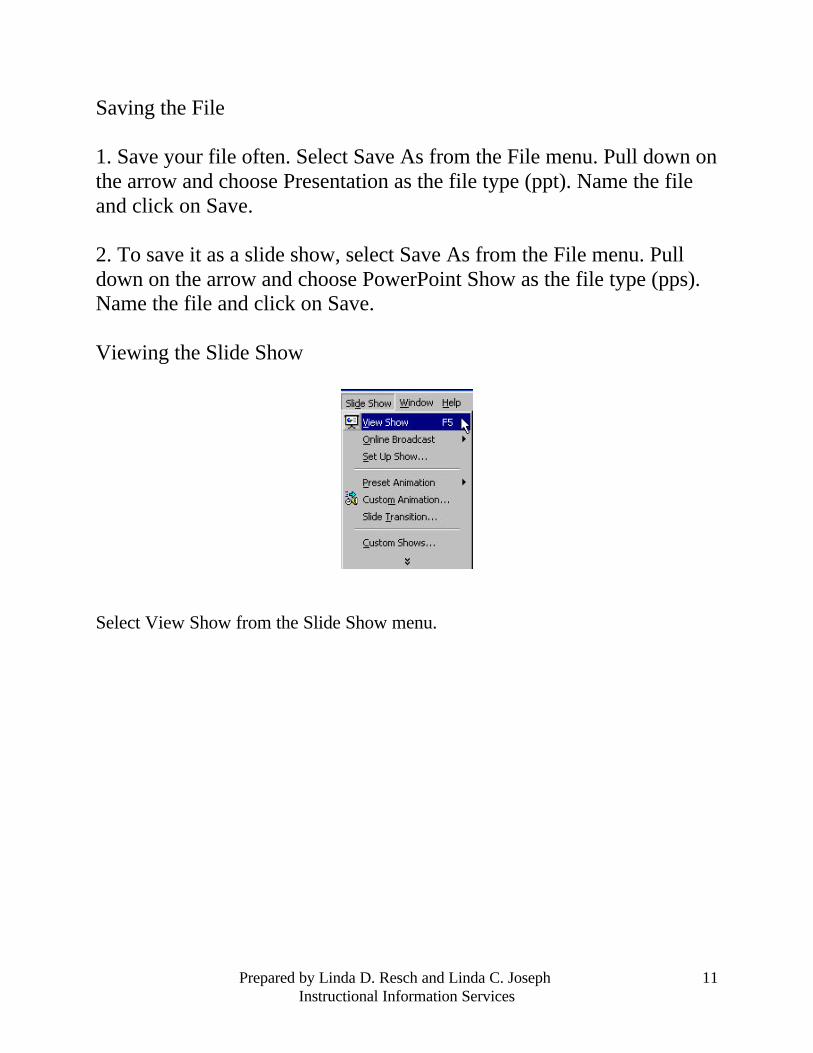
Saving the File 1. Save your file often. Select Save As from the File menu. Pull down on the arrow and choose Presentation as the file type (ppt). Name the file and click on Save. 2. To save it as a slide show, select Save As from the File menu. Pull down on the arrow and choose PowerPoint Show as the file type (pps). Name the file and click on Save. Viewing the Slide Show
Select View Show from the Slide Show menu.