profiling test qda - eyequestioncreate a questionnaire profiling test qda. 1. accesseyequestion •...
TRANSCRIPT

Create a Questionnaire
Profiling Test
QDA
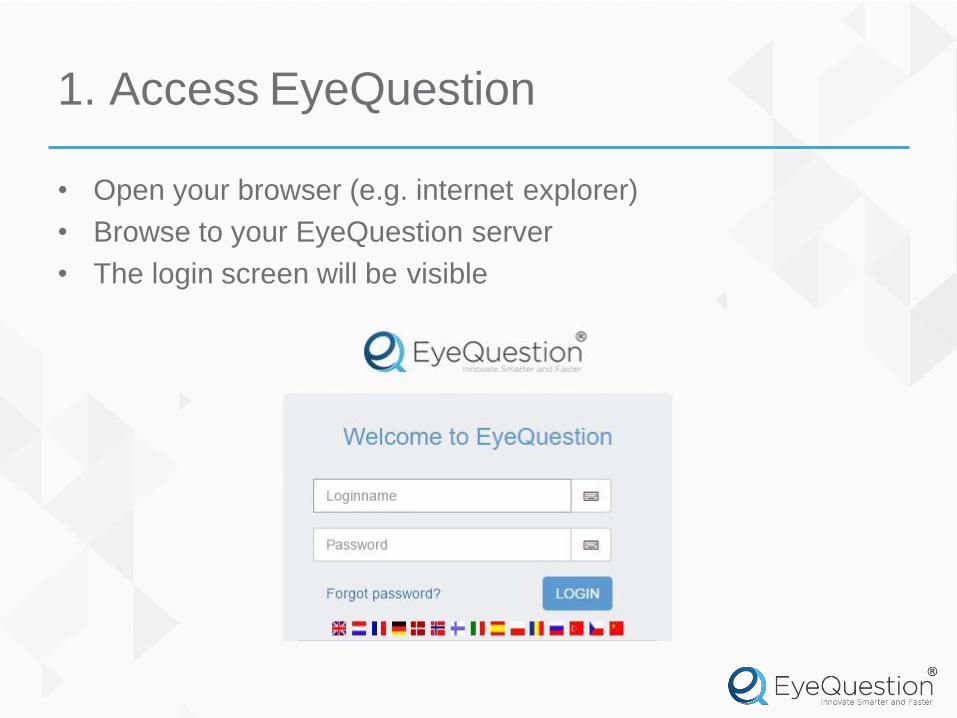
1. Access EyeQuestion
• Open your browser (e.g. internet explorer)
• Browse to your EyeQuestion server
• The login screen will be visible

2. Login
• Login with your credentials

3. Create a new project
• You are now in the main menu
• Select the option Create Project from the top menu
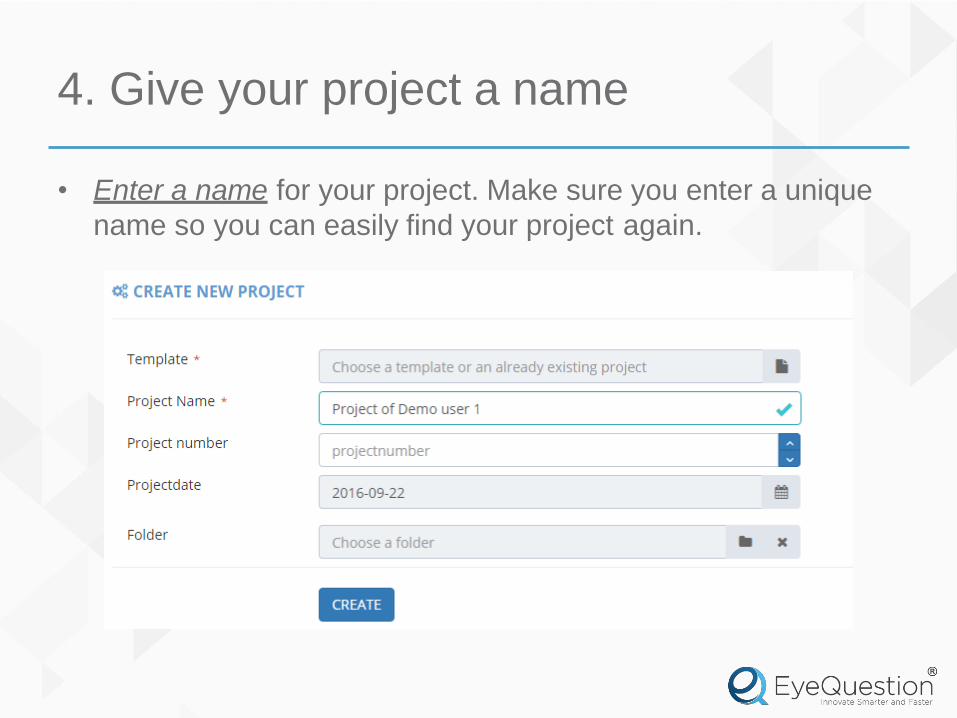
4. Give your project a name
• Enter a name for your project. Make sure you enter a unique
name so you can easily find your project again.

5. Select a Project Template
• In this excercise we will build a Profiling test.
• Click the Template Selector
• Click on the PROFILING 1 Design Section Standard template

6. Create your project
• Click the CREATE button, the questionnaire will open automatically
The Project number, Projectdate and folder are notmandatory
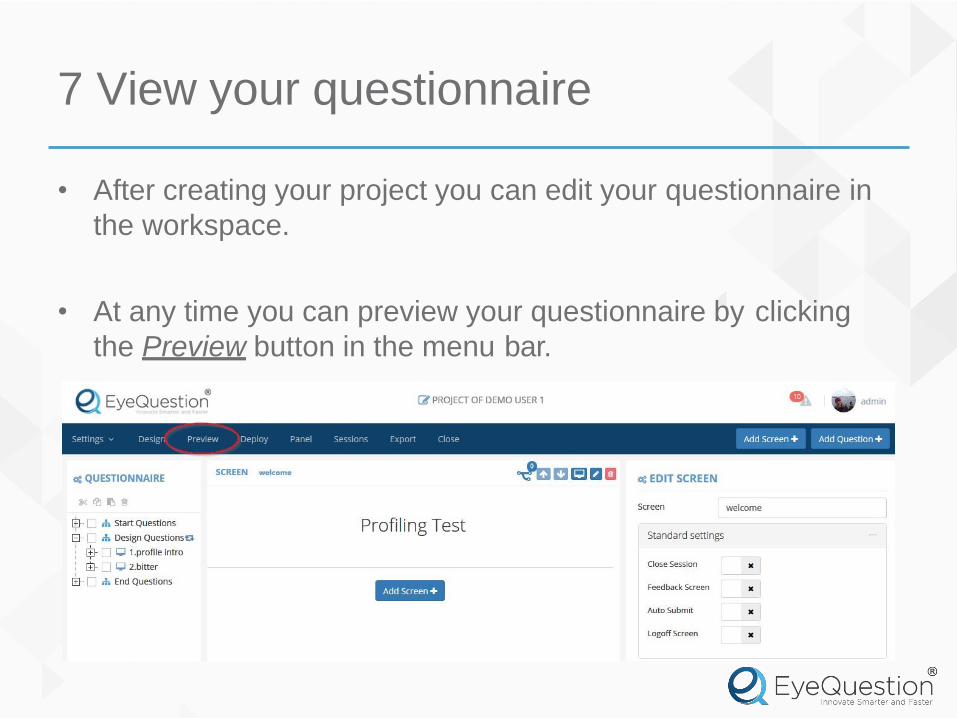
7 View your questionnaire
• After creating your project you can edit your questionnaire in
the workspace.
• At any time you can preview your questionnaire by clicking
the Preview button in the menu bar.
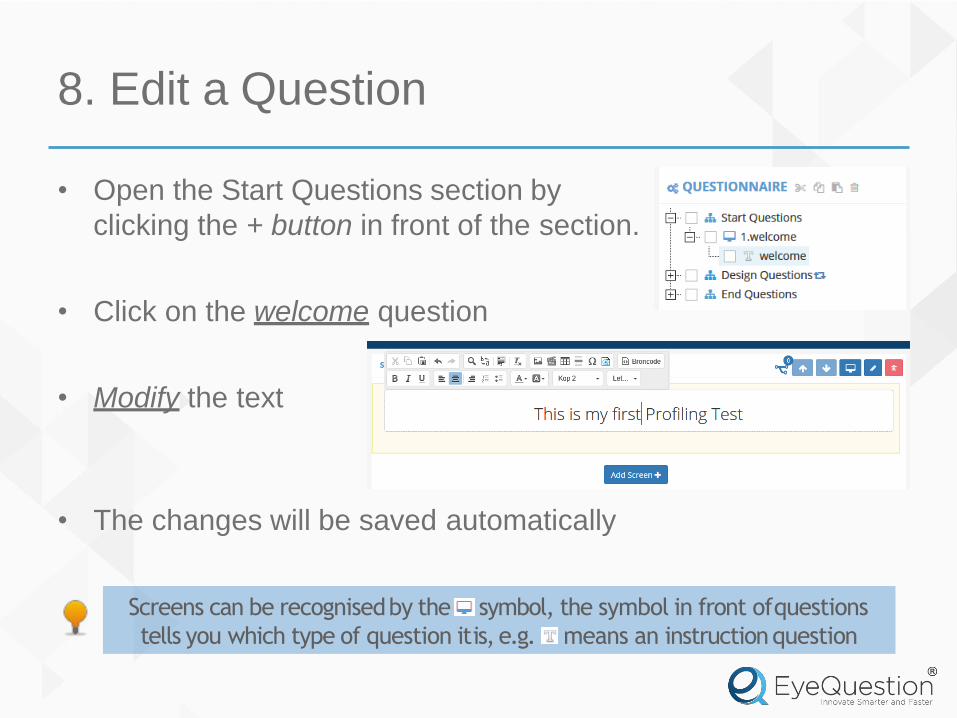
8. Edit a Question
• Open the Start Questions section by
clicking the + button in front of the section.
• Click on the welcome question
• Modify the text
• The changes will be saved automatically
Screens can be recognisedby the symbol, the symbol in front ofquestions
tells you which type of question itis, e.g. means an instructionquestion

9. Add an image
• When you edit the text in the Welcome question you can add formating and multi-media using the editor.
1. Click the image icon in the Editor menu
2. Click Browse Server button in the pop-up
3. Click the Upload button to upload images from your own computer.
4. After uploading, double click your image and click OK in thepop-up.

10. Add a question
• Click the Add Question button
• Open the folder General Questions
• Drag and drop the question
B. Category/Hedonic (One-Choice) below the instruction text.
Instead of dragging and dropping questions you can also simply clickon their name to add them to
the selectedscreen.

11. Edit the question text
• After adding the question you can modify the text and the
options.
• Type in the text “What is your gender?”

12. Edit the question
1. Give the question a name
2. Change the text of the first option to Male
3. Add a new option with the text Female.
Type in the text and click the enter button to add the option.

13. Remove a question
• Open the Design Questions and select the screen 2. bitter
• Click the remove icon

14. Add a screen
• Make sure you are on the page profile intro
• Click the Add screen button
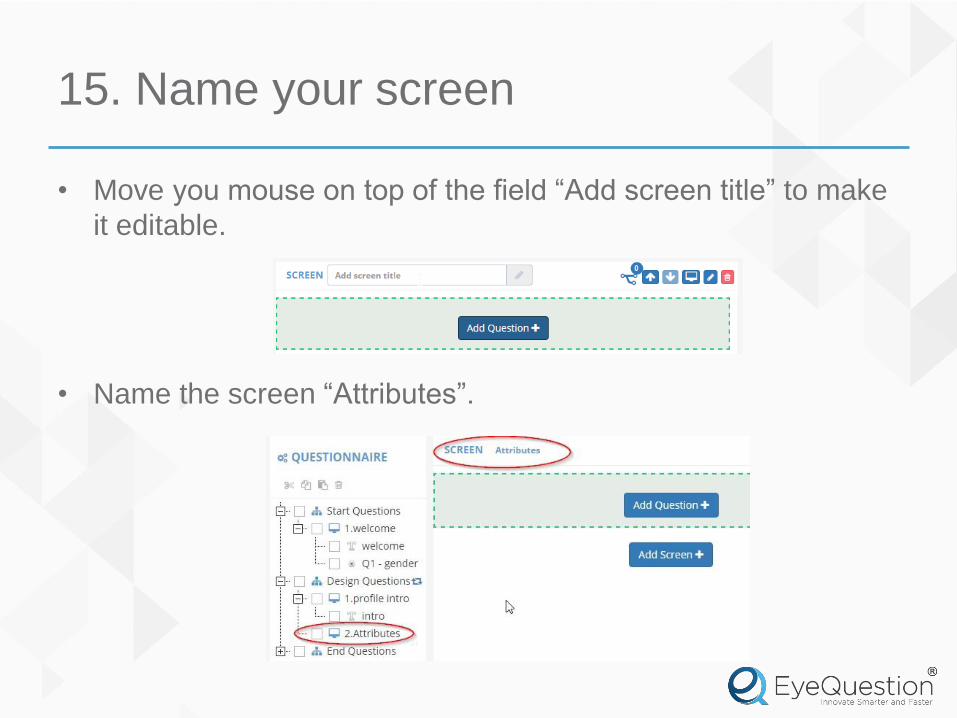
15. Name your screen
• Move you mouse on top of the field “Add screen title” to make
it editable.
• Name the screen “Attributes”.

16. Add a Linescale
• Click the Add Question button
• Click on E. Line Scale Standard from the folder
1. General Questions

17. Modify Linescale
1. Type in the question text
2. Give the question a name
3. Open the Advanced settings
4. A) Type in a name for the Marker/REF
B) Position the reference in the center of the scale by
changing the position of the Marker to 50

18. Add 2 other attributes
• Add 2 new linescales to the screen attributes by dragging and
dropping them on the screen.
• Give each question a proper name and add in some text.

Check
• Make sure you have 3 linescales before continuing with the
rest of the excercise.
• You can preview the screen by clicking on the icon.

19. The Experimental design
• Click the Design button to view your product rotation plan.

20. Generate a design
• Click the Generate Design button
• Change the number of products to 4
• Change the number of Sets to 12
• Click the Generate button

The Sample sets
• The sample sets show the serving order for each panellist
• Each set represents one panellist:
1. Panellist nr 1 will get Set 1
2. Set 1 has product nr 2 served first (this may be different
in your design)
3. Product 2 has blinding code 638
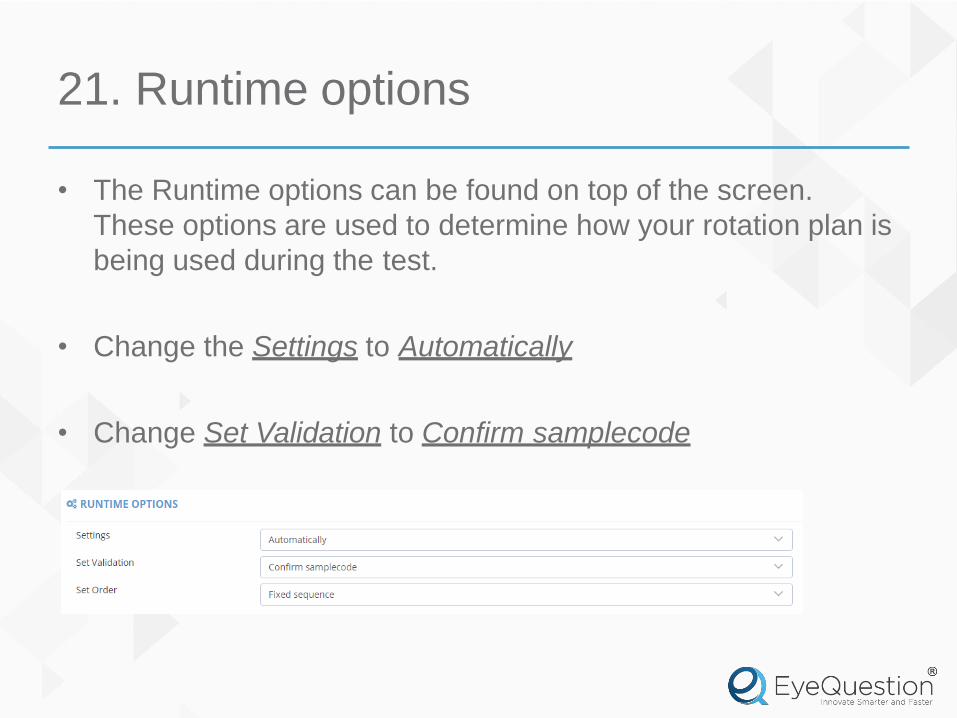
21. Runtime options
• The Runtime options can be found on top of the screen.
These options are used to determine how your rotation plan is
being used during the test.
• Change the Settings to Automatically
• Change Set Validation to Confirm samplecode

22. Edit products
• Open the list of Products
• Edit the product Description for each product
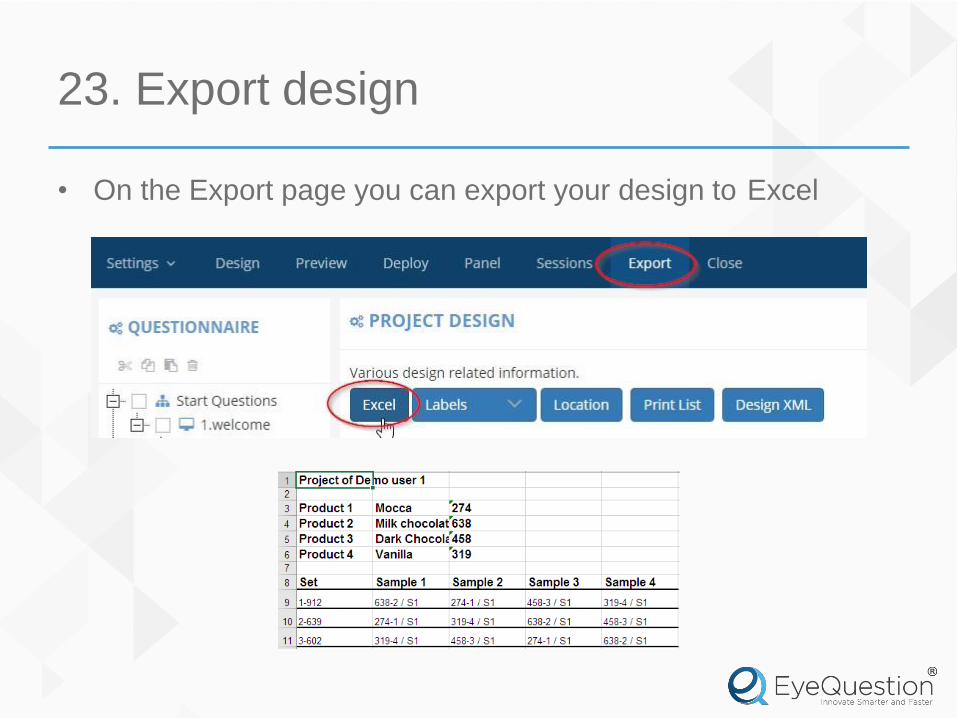
23. Export design
• On the Export page you can export your design to Excel

24. Preview questionnaire
• View your questionnaire by clicking the Preview button

25. Activate test
• Click the Deploy tab to open the Project Lifecycle screen
• Click the Deploy button to acivate your test.
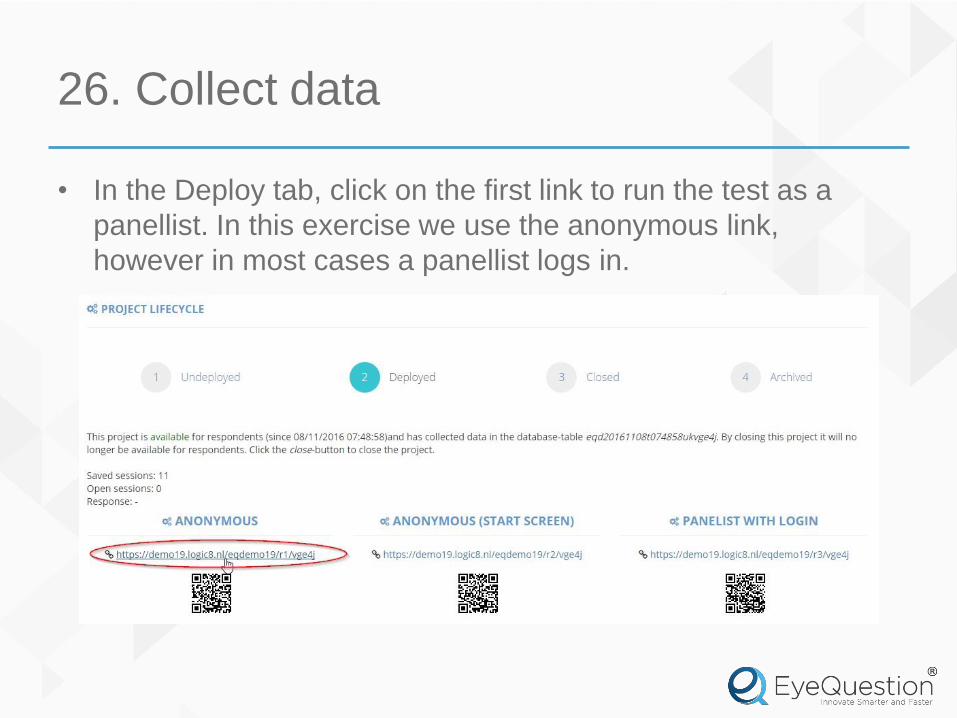
26. Collect data
• In the Deploy tab, click on the first link to run the test as a
panellist. In this exercise we use the anonymous link,
however in most cases a panellist logs in.
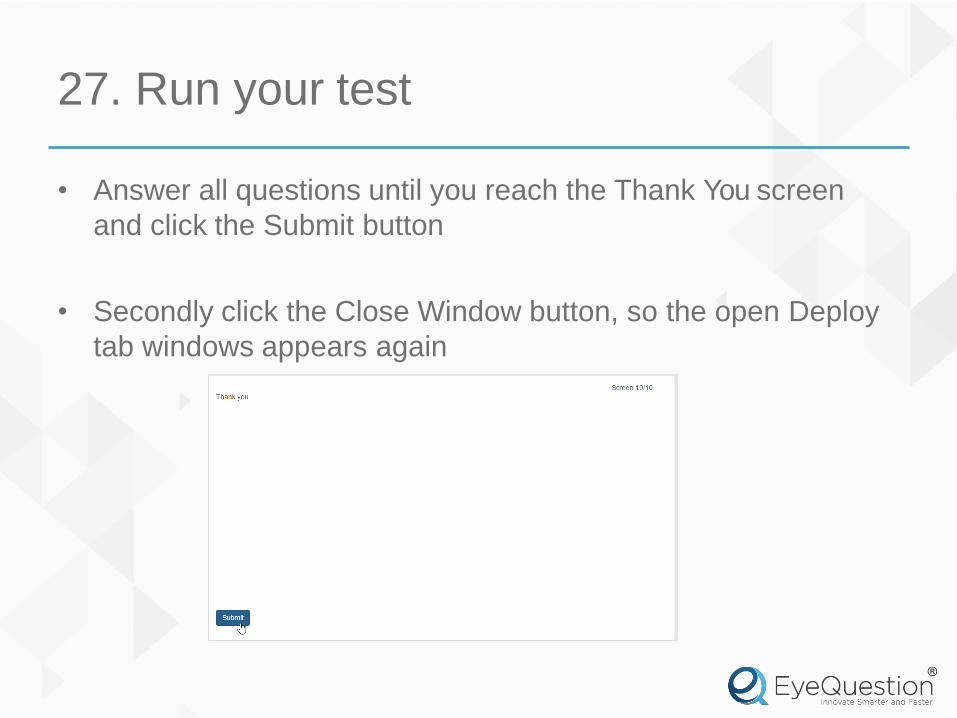
27. Run your test
• Answer all questions until you reach the Thank You screen
and click the Submit button
• Secondly click the Close Window button, so the open Deploy
tab windows appears again

28. Login again
• Since you started as a panelist, you are logged out of the
system
• Close your browser window
• Browse to your EyeQuestion URL and log in again
(see also step 1 and 2 of this excercise)
• You are now in the main menu, open your project again by
clicking it.
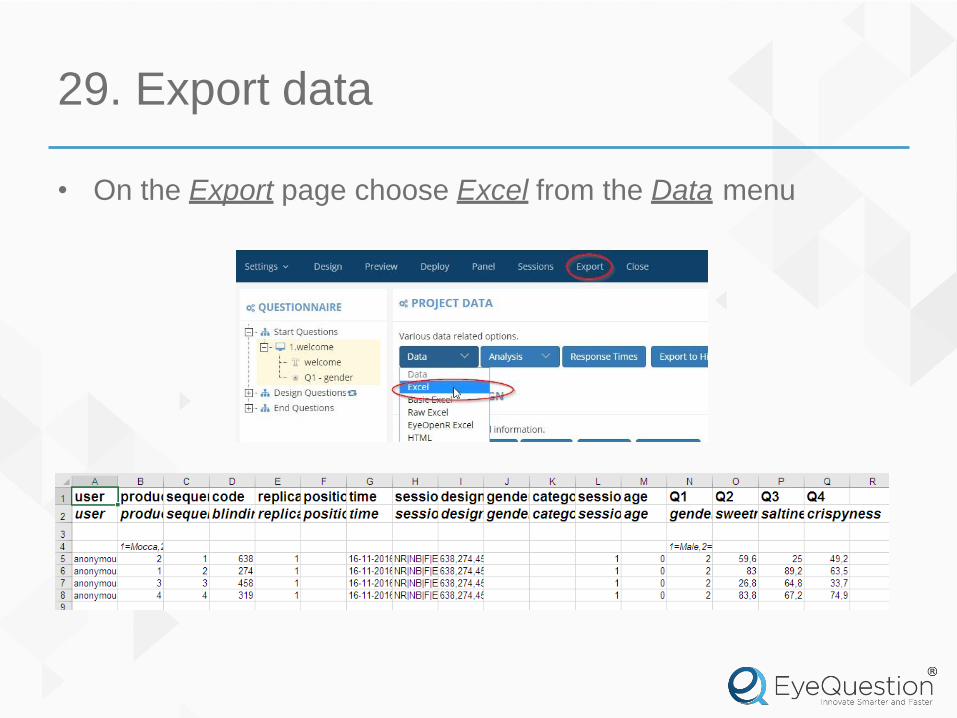
29. Export data
• On the Export page choose Excel from the Data menu